MS. MARVELOUS
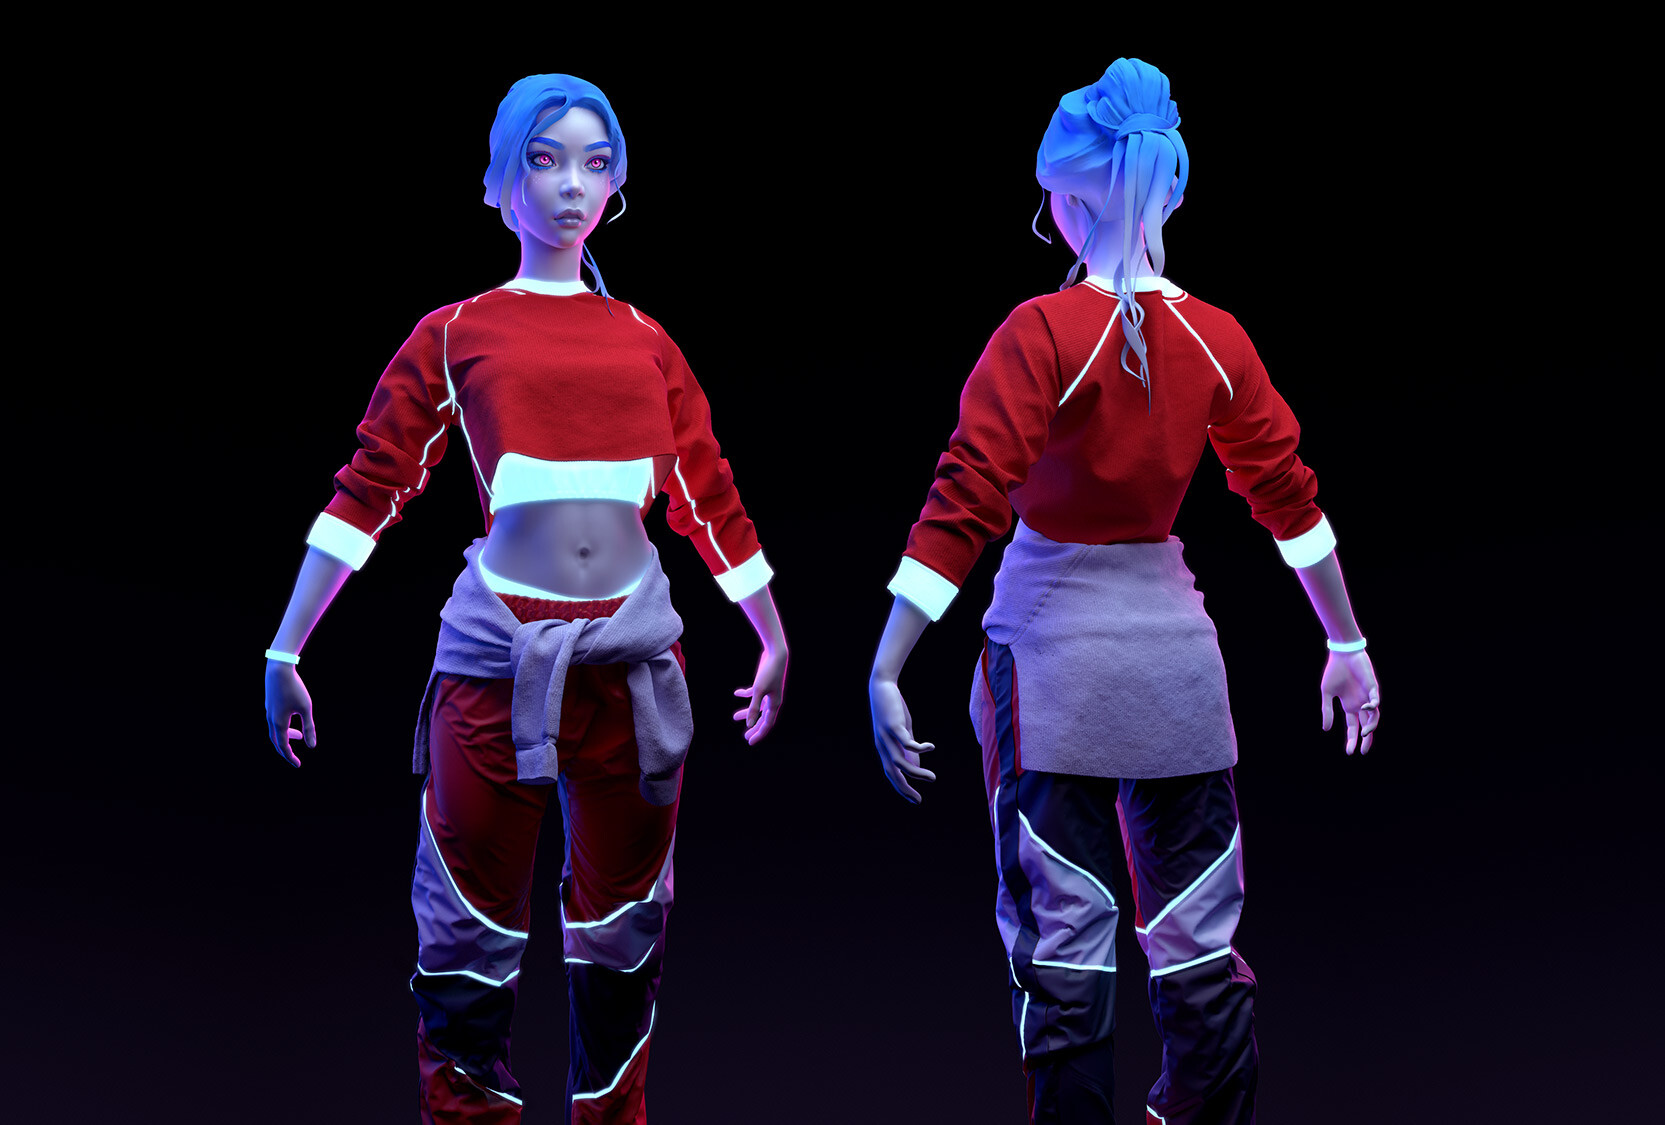
Morten Jaeger reveals his process of creating artwork, from conceptualization to final texturing.
Interview with Morten Jaeger| MS. MARVELOUS |
Co-Founders of FlippedNormals
1. Introduction
My name is Morten and I’m one of the Co-Founders of FlippedNormals. Flippednormals is a digital marketplace that curates digital assets and tutorials.
We strive for quality, and as a result, only provide our customers with the highest quality CG products on the market. Before starting our marketplace I worked in VFX where I had the opportunity to work in such films as Pacific Rim: Uprising, Guardians Of The Galaxy Vol. 2, Fantastic Beasts: The Crimes of Grindelwald and many more. There’s been a bit of a vacuum when it comes to Marvelous Designer training lately and having used it on multiple blockbusters throughout my career, I felt I could bring some valuable knowledge to the table.
2. Inspiration
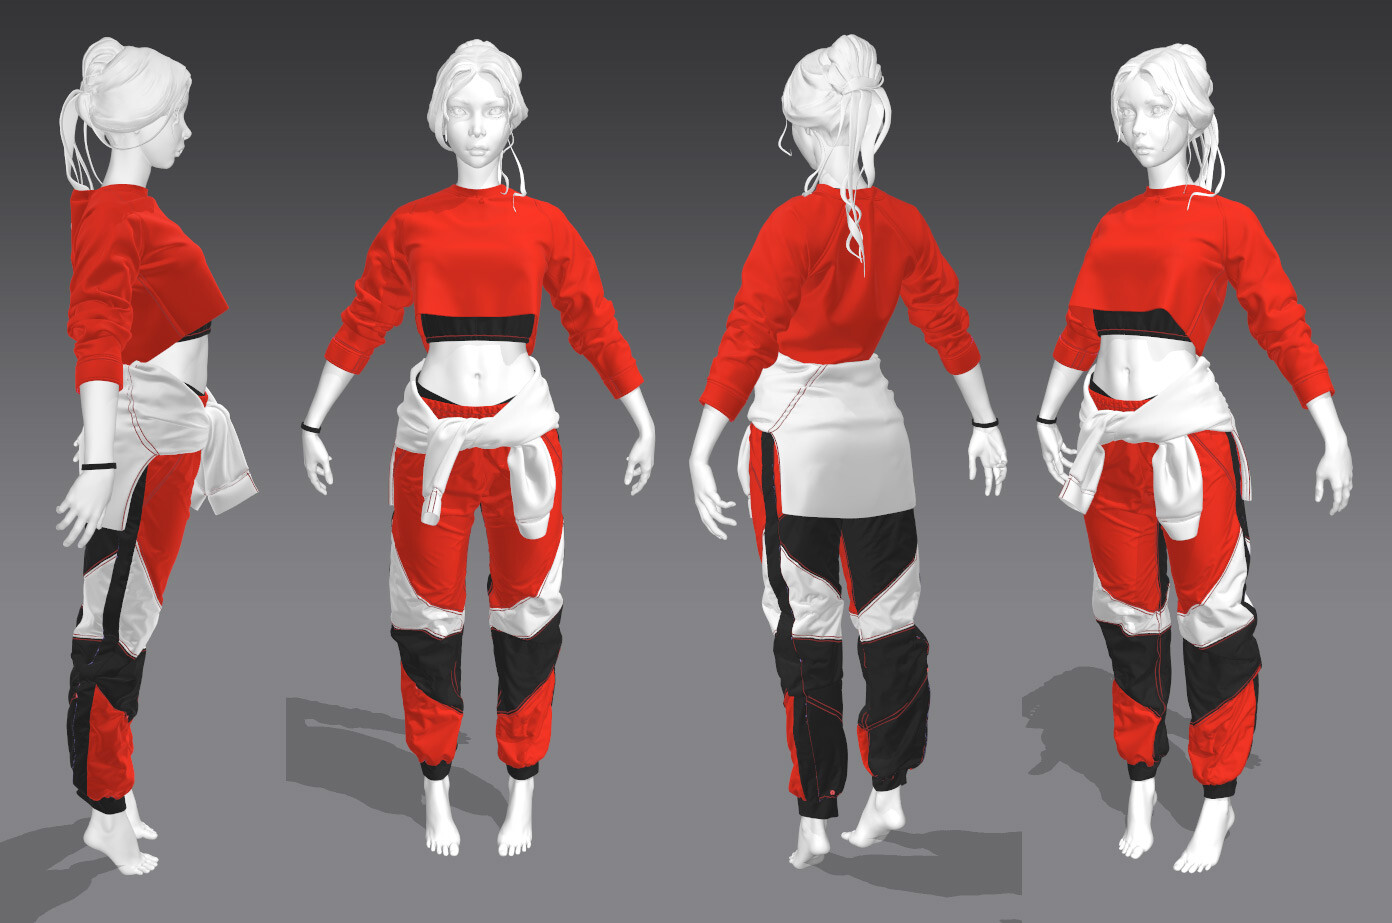
As with any project, I always go on a reference hunt. One thing that stood out to me was the style of clothing. Seeing as I wanted to create a costume for a woman, I noticed a trend of baggy pants with a crop top most of the time.
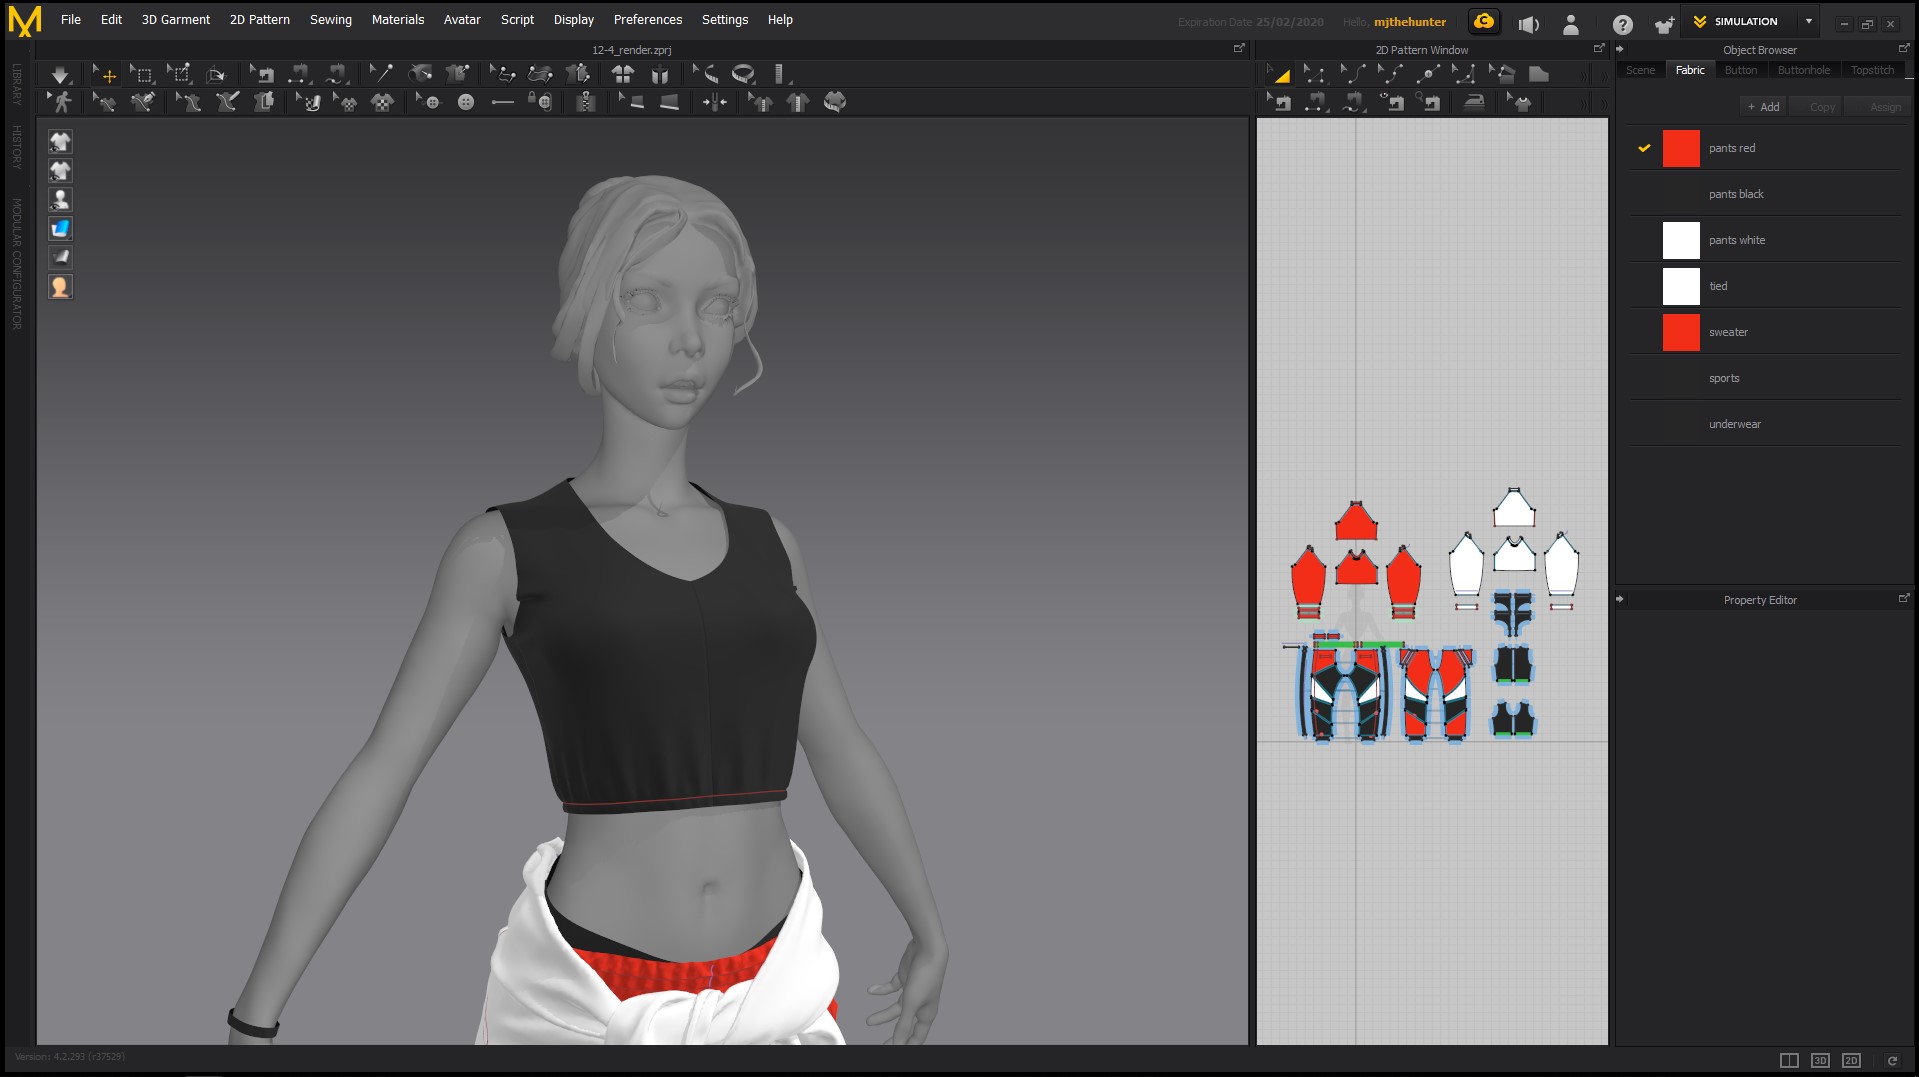
I wanted to spice it up a bit, so I decided to add a sports bra along with the tied sweater. I was very inspired by the K/DA - POP/STARS music video from Riot, as well as various hip hop dancers on Instagram. With that in mind, I wanted to create something appealing—not just in terms of clothing but also as a polished portfolio piece.
What they did in terms of the color palette for the K/DA music video was a big inspiration. I went through many different iterations before settling on the final colors. Though the color of the costume was established fairly early on, these came from my reference "I.AM.GIA Pants".
I did several attempts to get the look of these pants just right, and they ended up dictating the palette for the rest of the costume.
3. Creating the garment
I always start out very basic. No curves, no elaborate shapes.
This is the same approach I have whether I’m painting, sculpting, or making fabrics. It’s a lot easier to tweak your design before you add lots of detail and become too attached to your design. So I can’t stress the importance of this enough.
That, combined with the first step—collecting good references—will improve your designs and save you time in the long run.
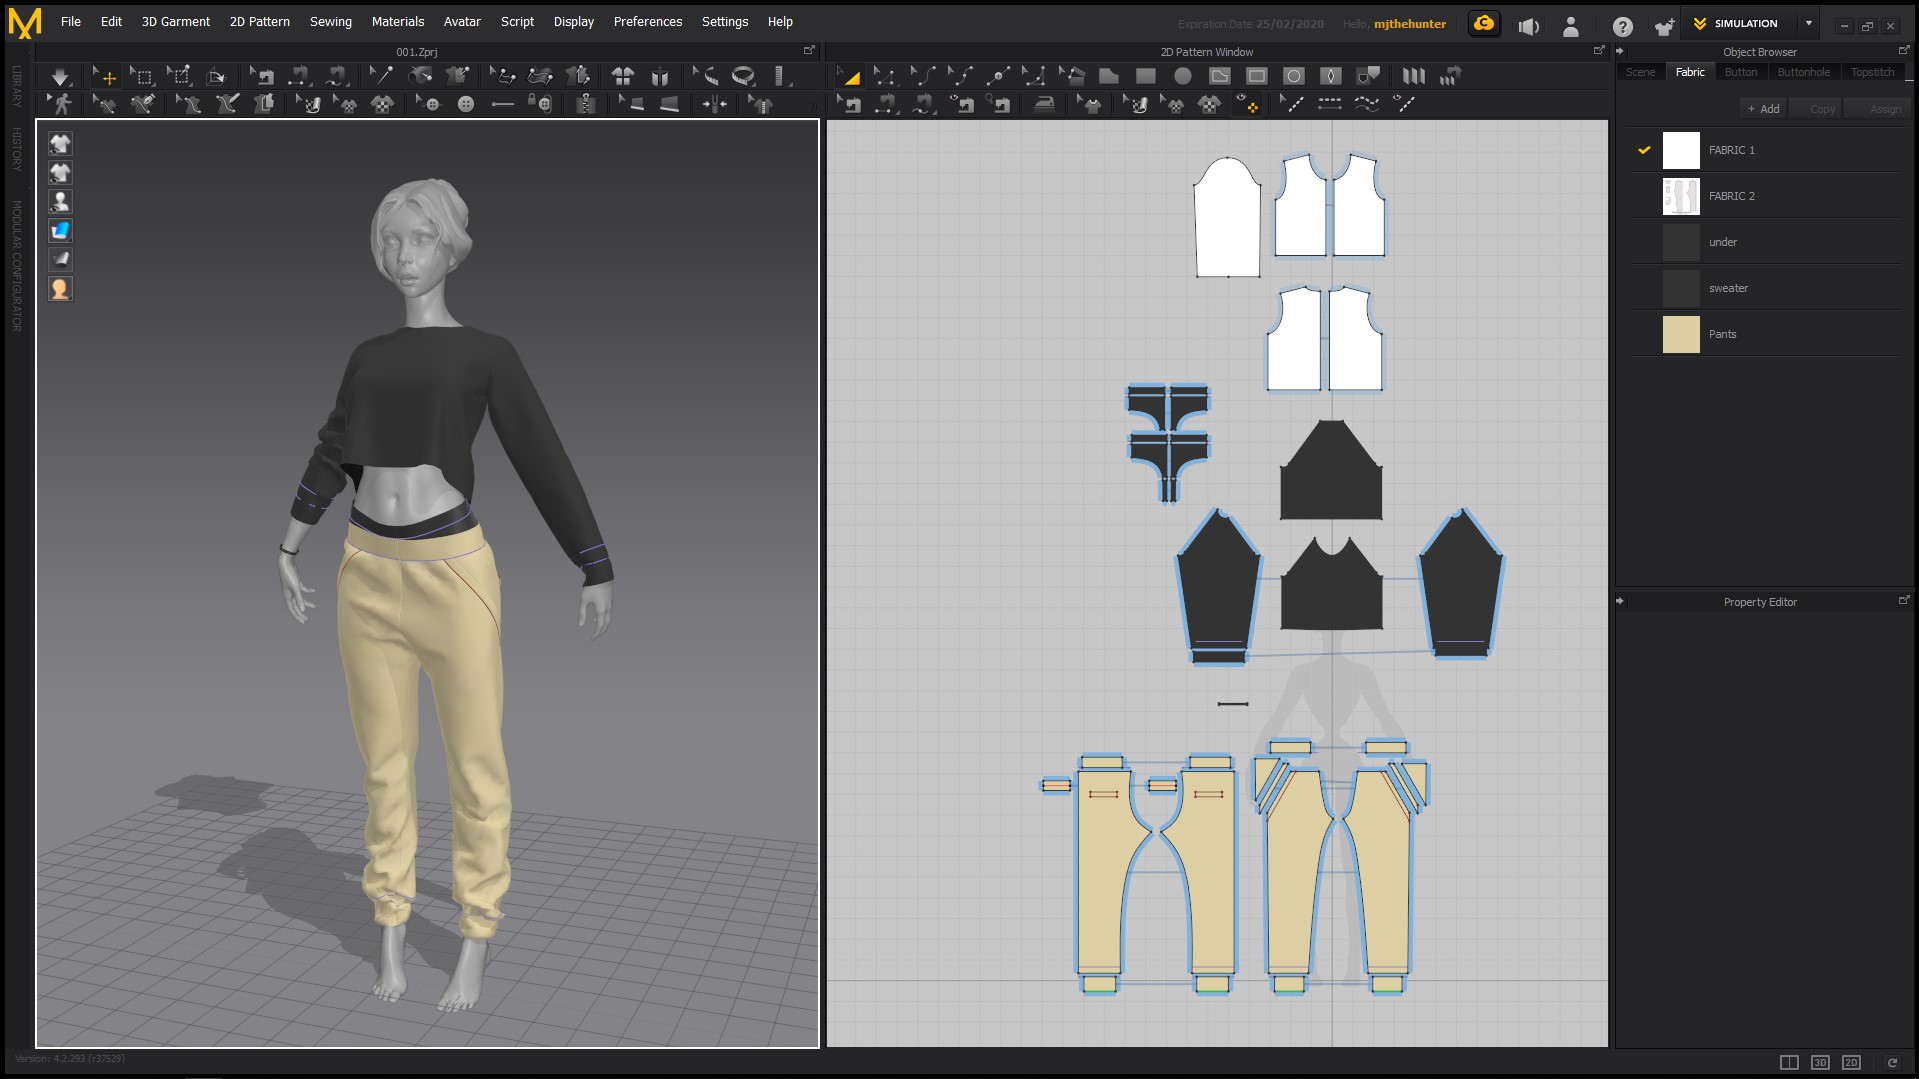
Throughout the process, I make great use of temporary pins. These allow me to suspend things in mid-air or on the model, with the benefit that I can easily clear them if I no longer need them.
It’s very similar to creating garments in real life. You won’t always have perfect measurements from the beginning, so having pins you can quickly add and remove really speeds up my workflow.
I try to stay basic until I have all areas of the garment nailed down, but I never focus too heavily on one area. This allows me to better evaluate the state of the costume, ensuring that no one part is too detailed compared to the rest.
I also believe that a good base mesh can do wonders for your costumes. It’s like having a good model to pose with your brand.
For this tutorial, I used a base mesh provided by Vail Peychev, who makes some amazing base meshes. The pose fit really well with what I was going for, and it helps set the stage for the mood of the piece as well.
There’s something about having a semi-posed model to show off your garments—it just makes it come more alive.
This obviously wouldn’t work if I was working on a production piece, as the pose isn’t very rigging-friendly. But in this instance, that didn’t really matter.
4. The Secret to Details
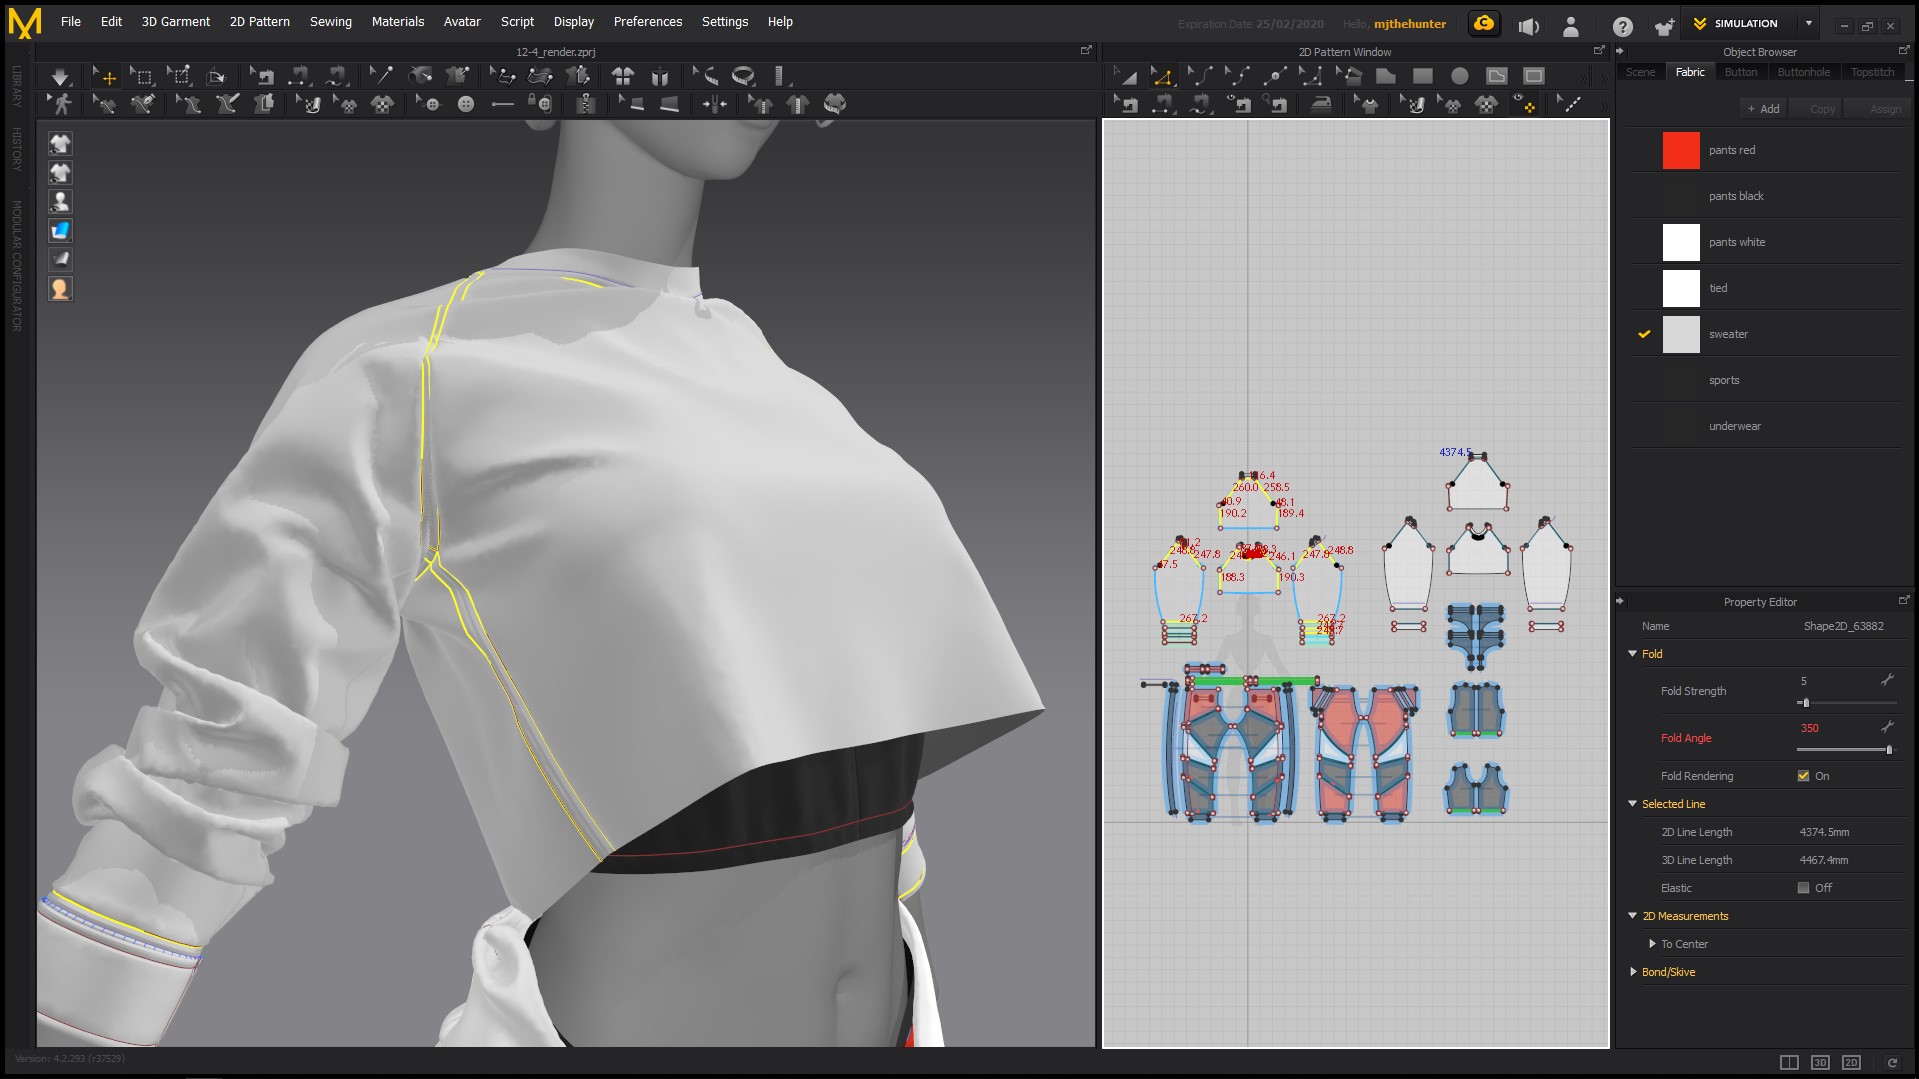
One of the best ways I know to add detail is by using internal lines. Internal lines with varying fold strengths can create the feel of seams and depressions in your fabric.
This is the very last step of my garment creation process, as by this point, you shouldn’t really change anything design-wise.
For thicker garments like the top sweater, I increased the fold strength significantly to give the impression of a heavier, thicker garment.
On the other hand, for the pants, I did the opposite. These were intended to be made of lightweight nylon, a very thin and light fabric.
In that case, it wouldn’t make sense to create too deep of a depression, as it would make the material appear thicker than it should be.
5. Tying the Knot
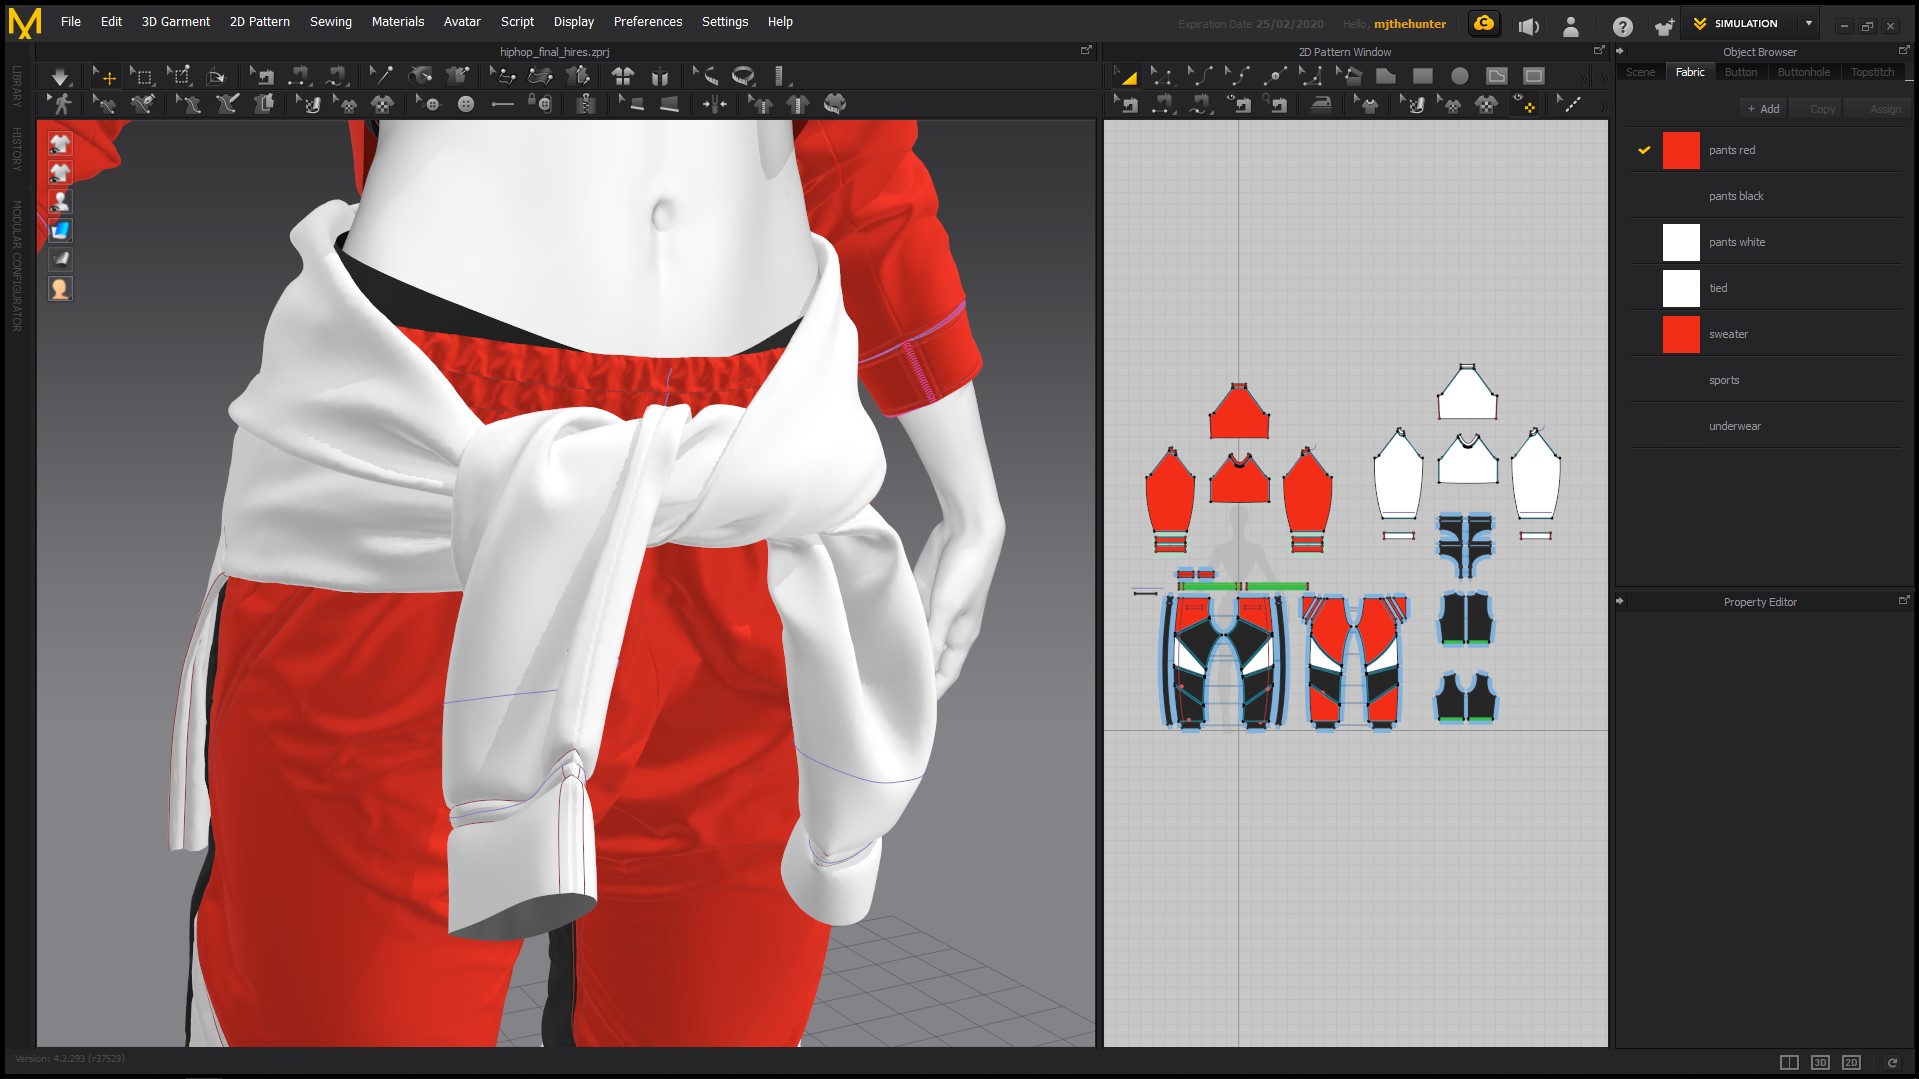
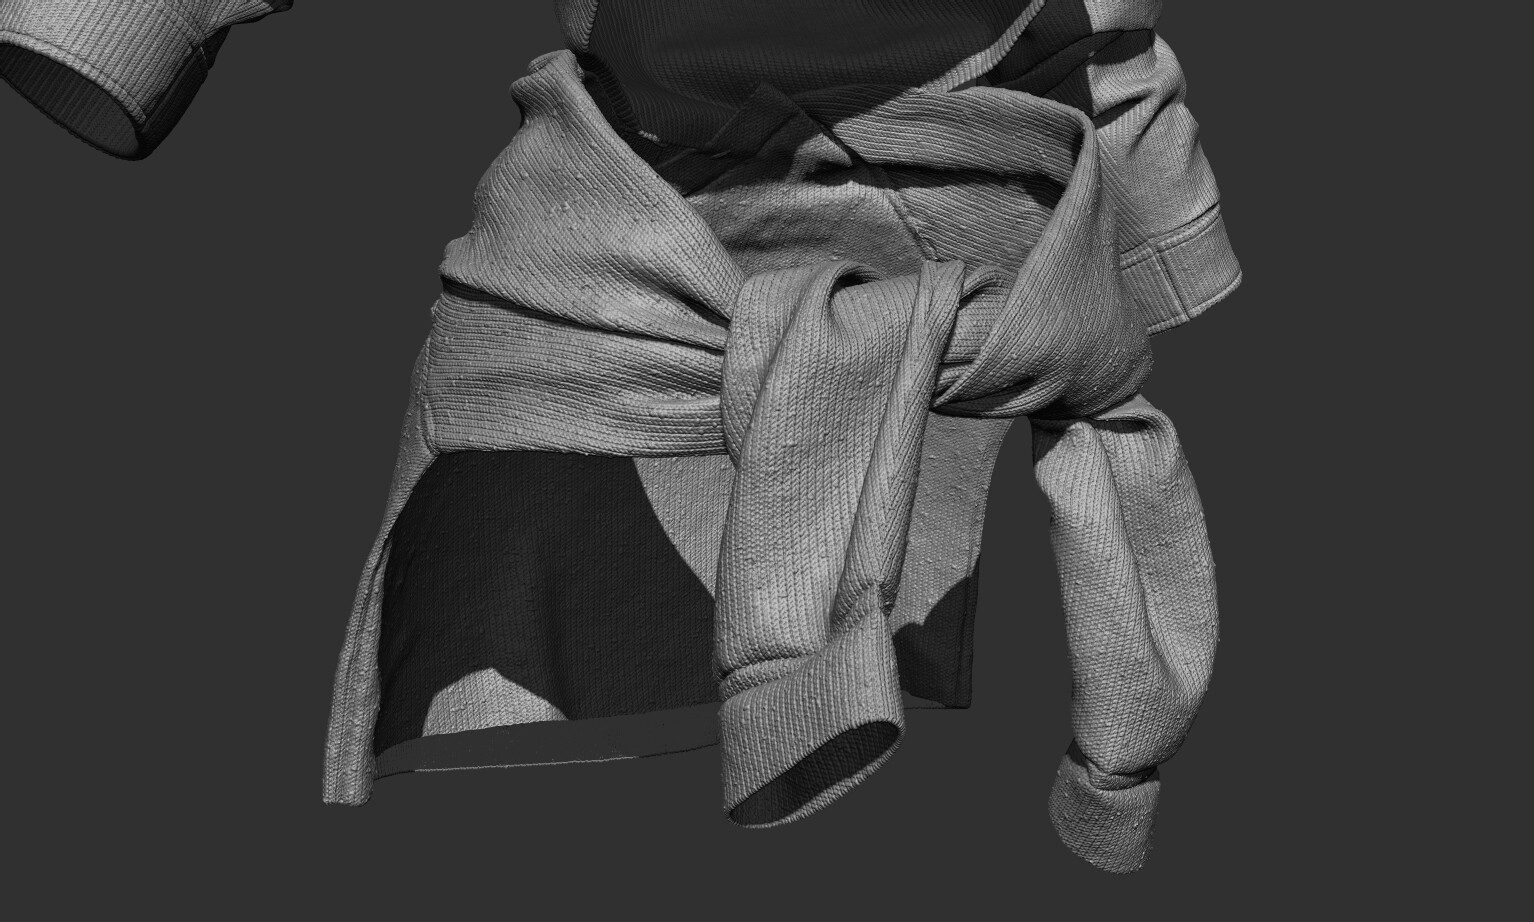
By far, the hardest part was tying the sweater around her waist. It wasn’t something I had seen done before, so I had to get creative to solve it.
Marvelous Designer is excellent at detecting surfaces and generally seems to understand what you want the fabric to do. However, things get a bit different when you compress and stretch the fabric a lot.
I used a combination of a really low Particle Distance to achieve a more accurate simulation and tweaked various friction parameters to ensure the fabric clung to itself.
The biggest challenge here was making Marvelous understand that I wanted the garment to twist, without allowing it to resolve into its default relaxed state.
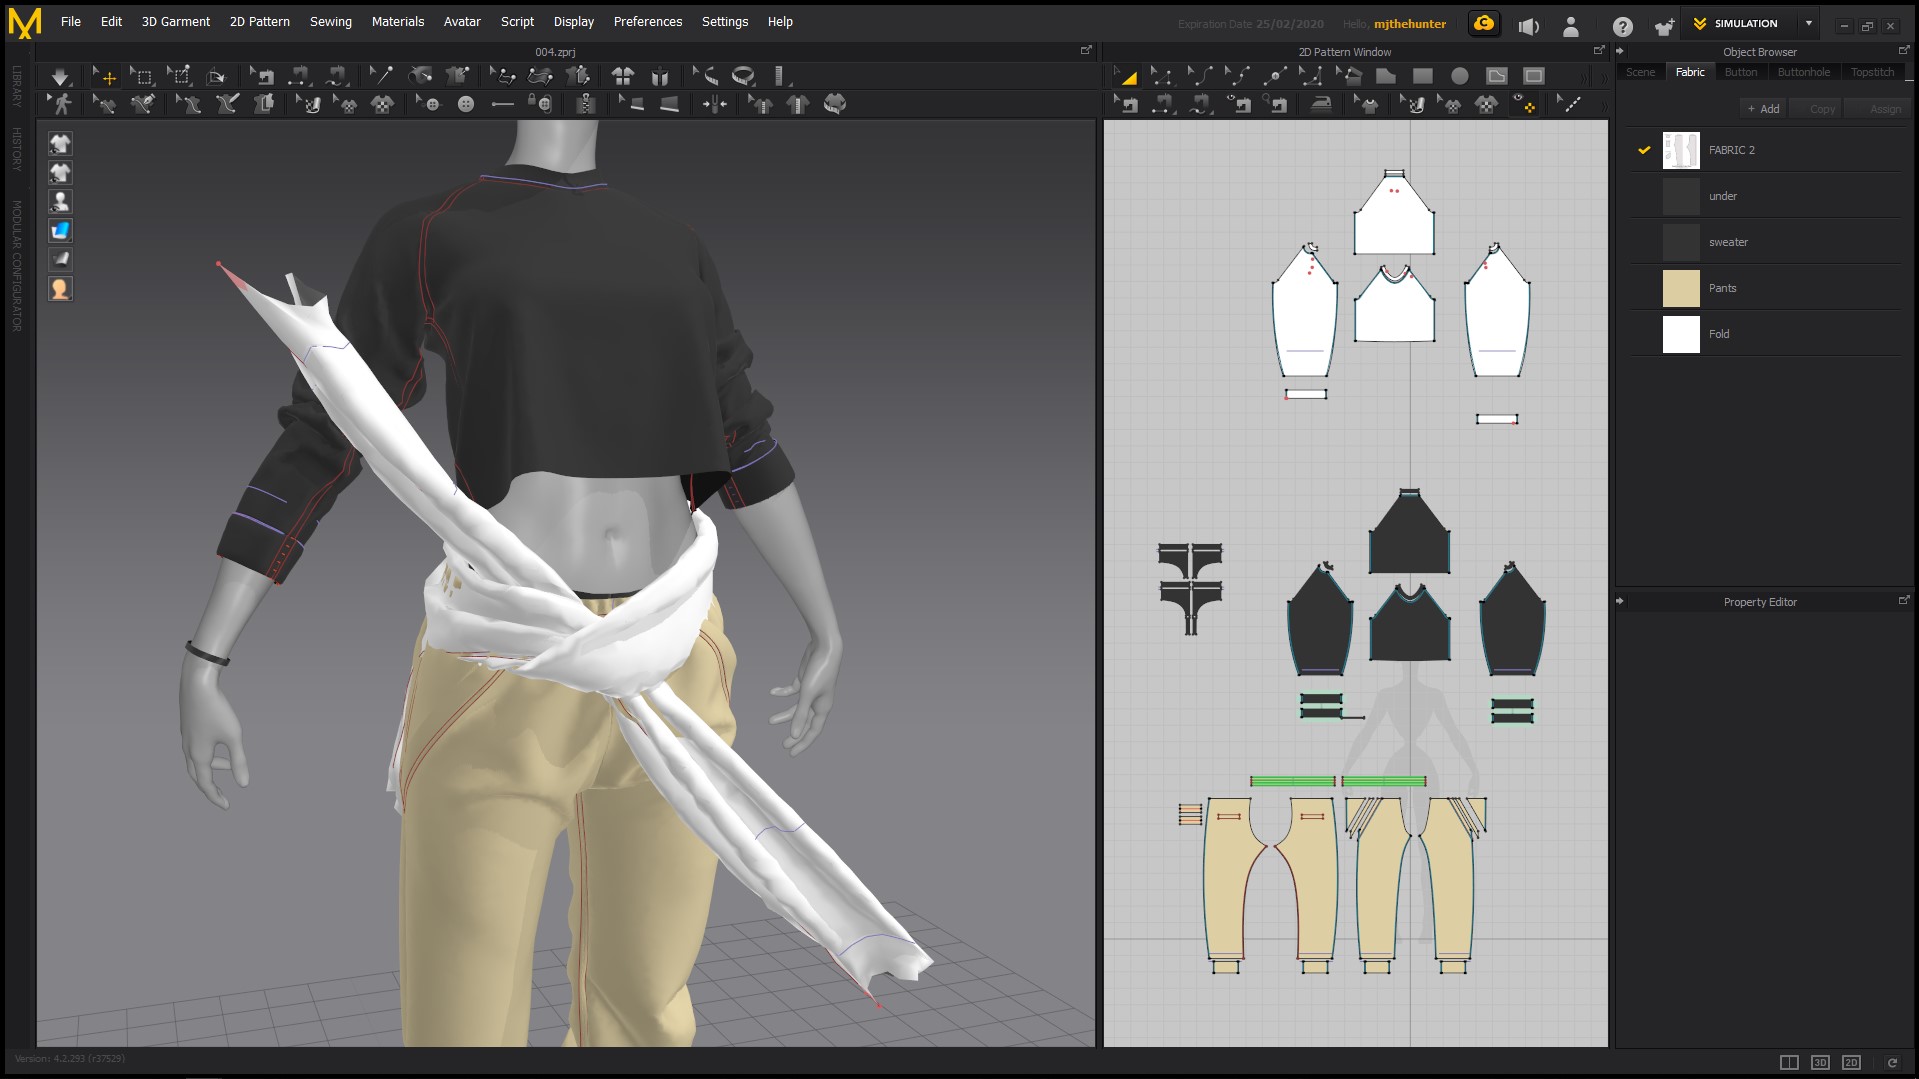
Using temporary pins, I pulled the sleeves of the sweater apart to tie it. Once I had a shape I was satisfied with, I adjusted the friction parameters to make it stay in place.
Otherwise, you run into the issue where Marvelous starts creating intersections, and your garment ends up looking like the beginnings of a black hole.
6. Painting with Substance
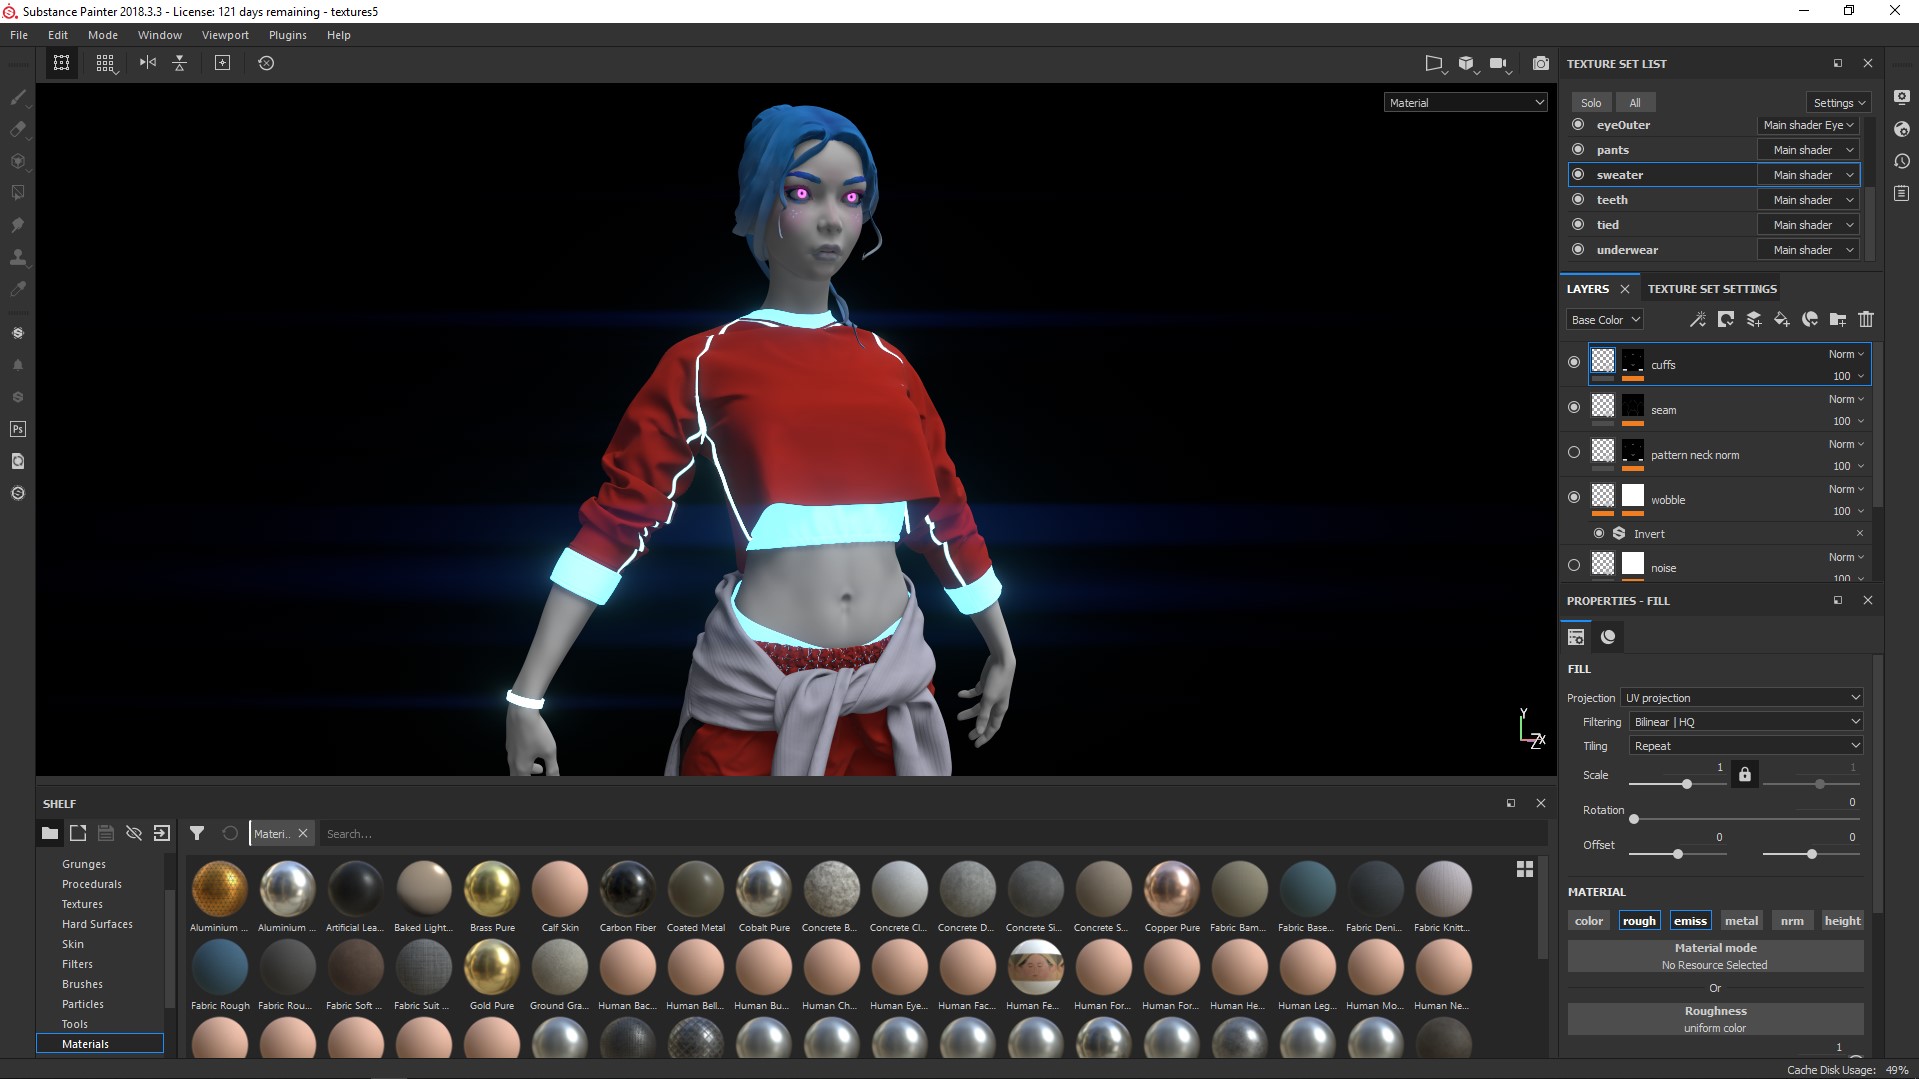
Before this project, I had never really used Substance Painter that much. So it was a perfect opportunity for me to get properly into the software.
Texturing was never really a big passion of mine, but after finishing this project and working with Painter, I’m a lot more excited about it.
The textures were kept pretty simple, mostly using fill layers to keep it as procedural as possible.
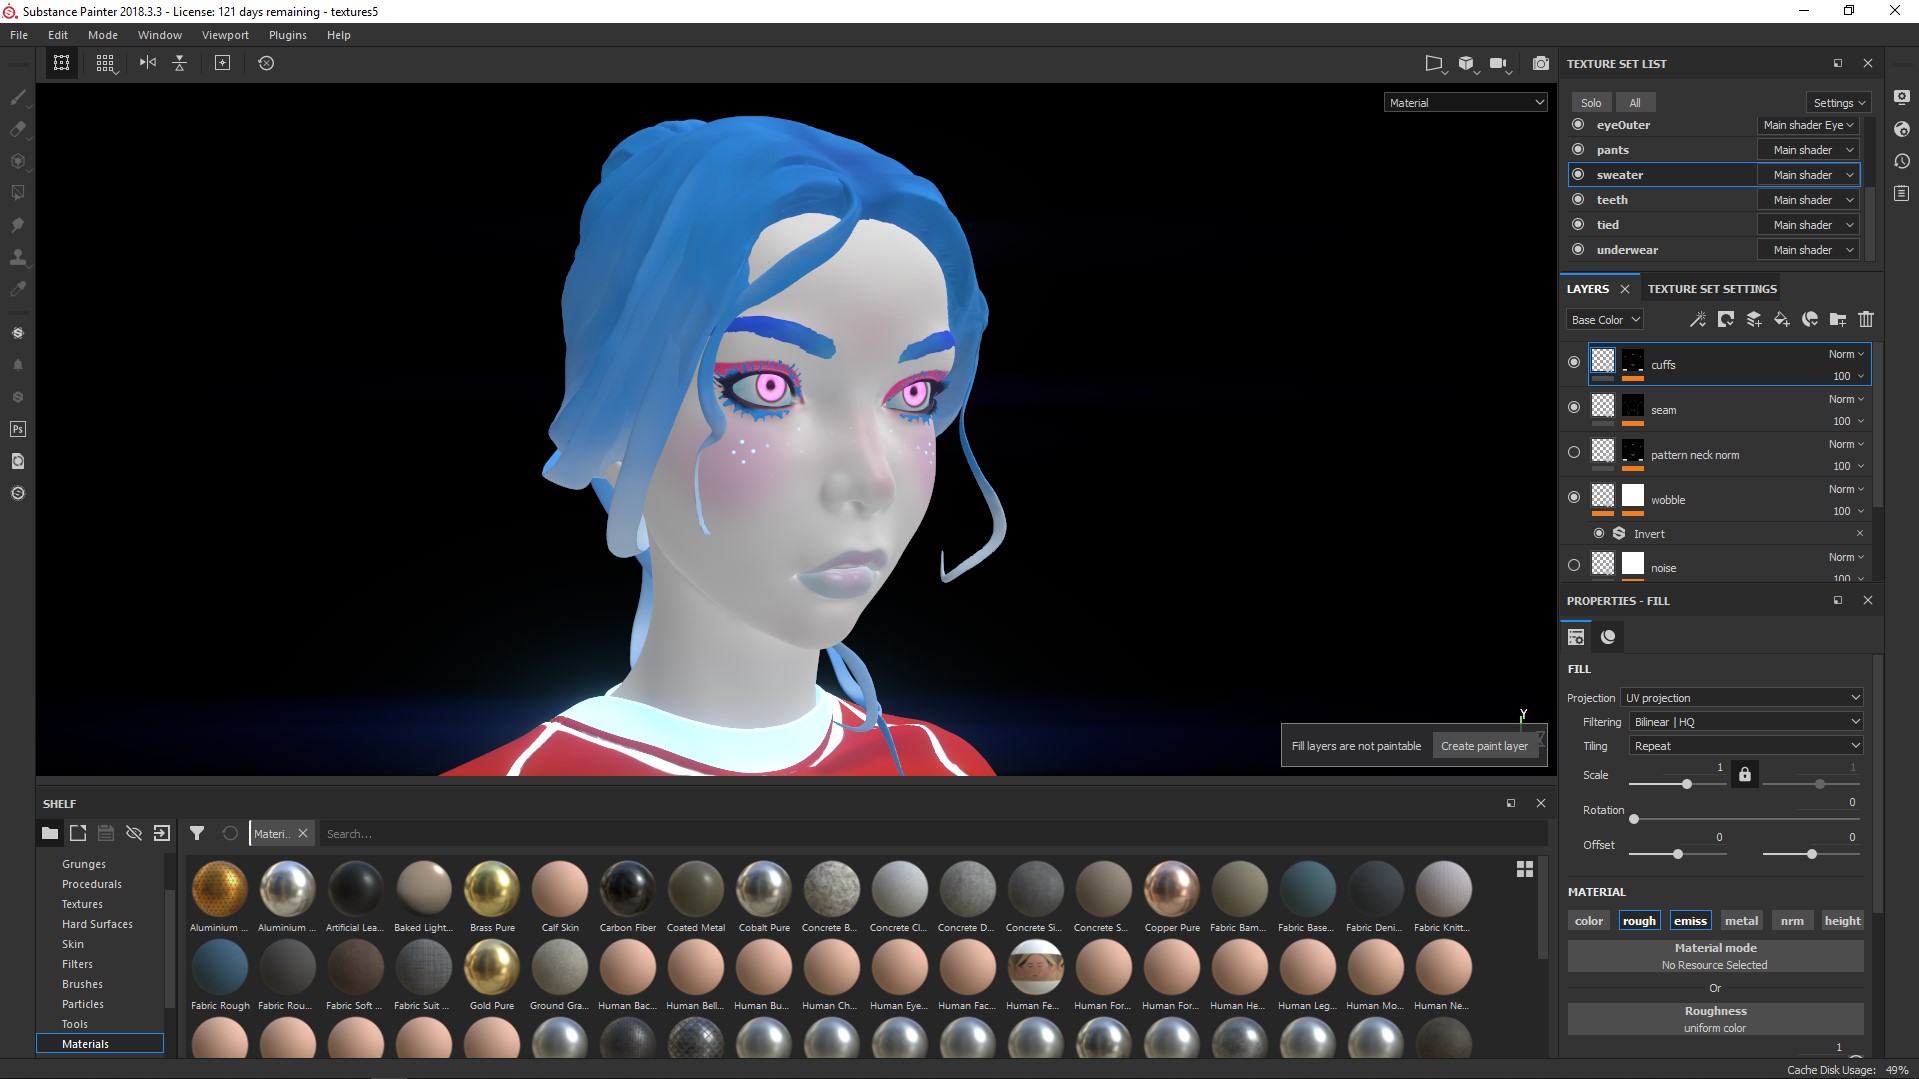
The only time I really used regular paint layers, were for the emissive masks and the makeup on the face.
The great thing about Painter is that I could upscale the resolution if I needed to. So I started fairly low-res with the procedural layers just to make my life easier.
7. Finishing Touches
For the final resolution, I set the particle distance to 3 for most objects. This was a bit heavy, but I needed the ultrafine details that Marvelous creates.
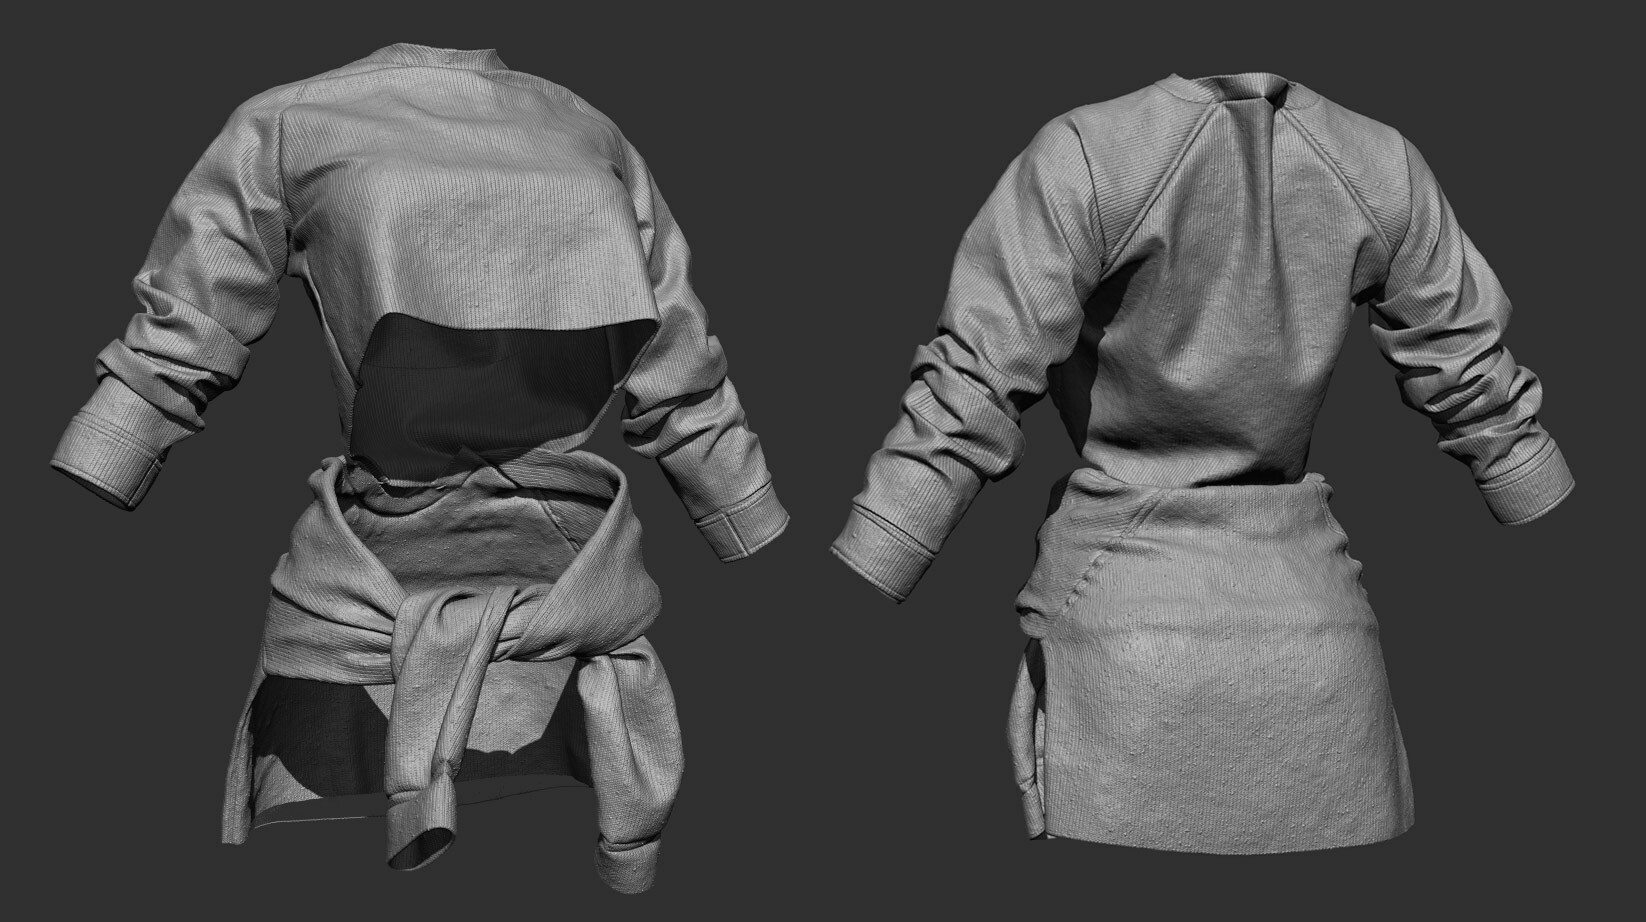
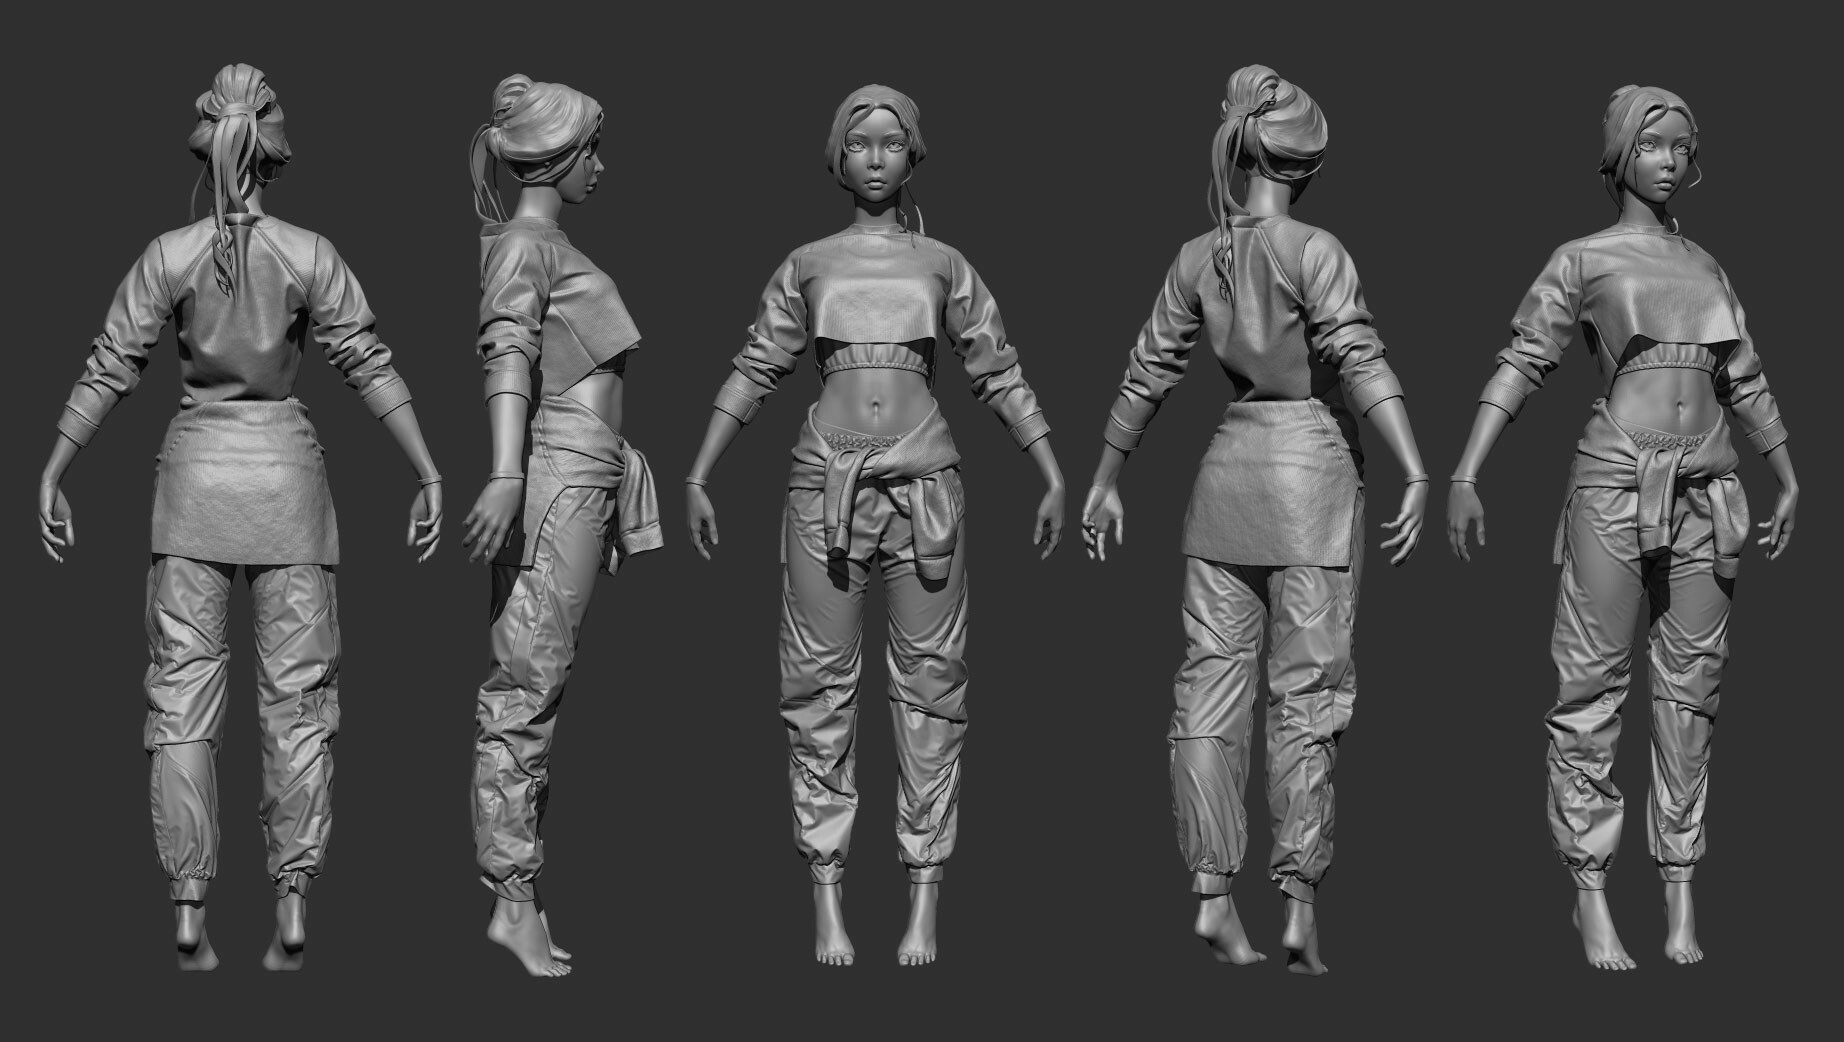
To finish everything off, I imported my completed garment into ZBrush and applied FlippedNormals Fabrics to add an extra layer of realism. This is exactly what they were designed for, and by combining them with NoiseMaker inside ZBrush, you can achieve some pretty cool results.
The default fabrics are quite clean, but that has the added benefit of making it easier to introduce imperfections and aging effects.
by Morten Jaeger – Co-Founders of FlippedNormals
Link to FlippedNormal
Link to Artstation
이 작업은 ZBrush, Maya, Substance, Pattern, Simulation, Texture 등의 기술로 제작되었습니다.
Marvelous Designer로 이와 같은 3D 의상·캐릭터 작업을 직접 만들어볼 수 있습니다.