Ranchero (Bounty Hunter)
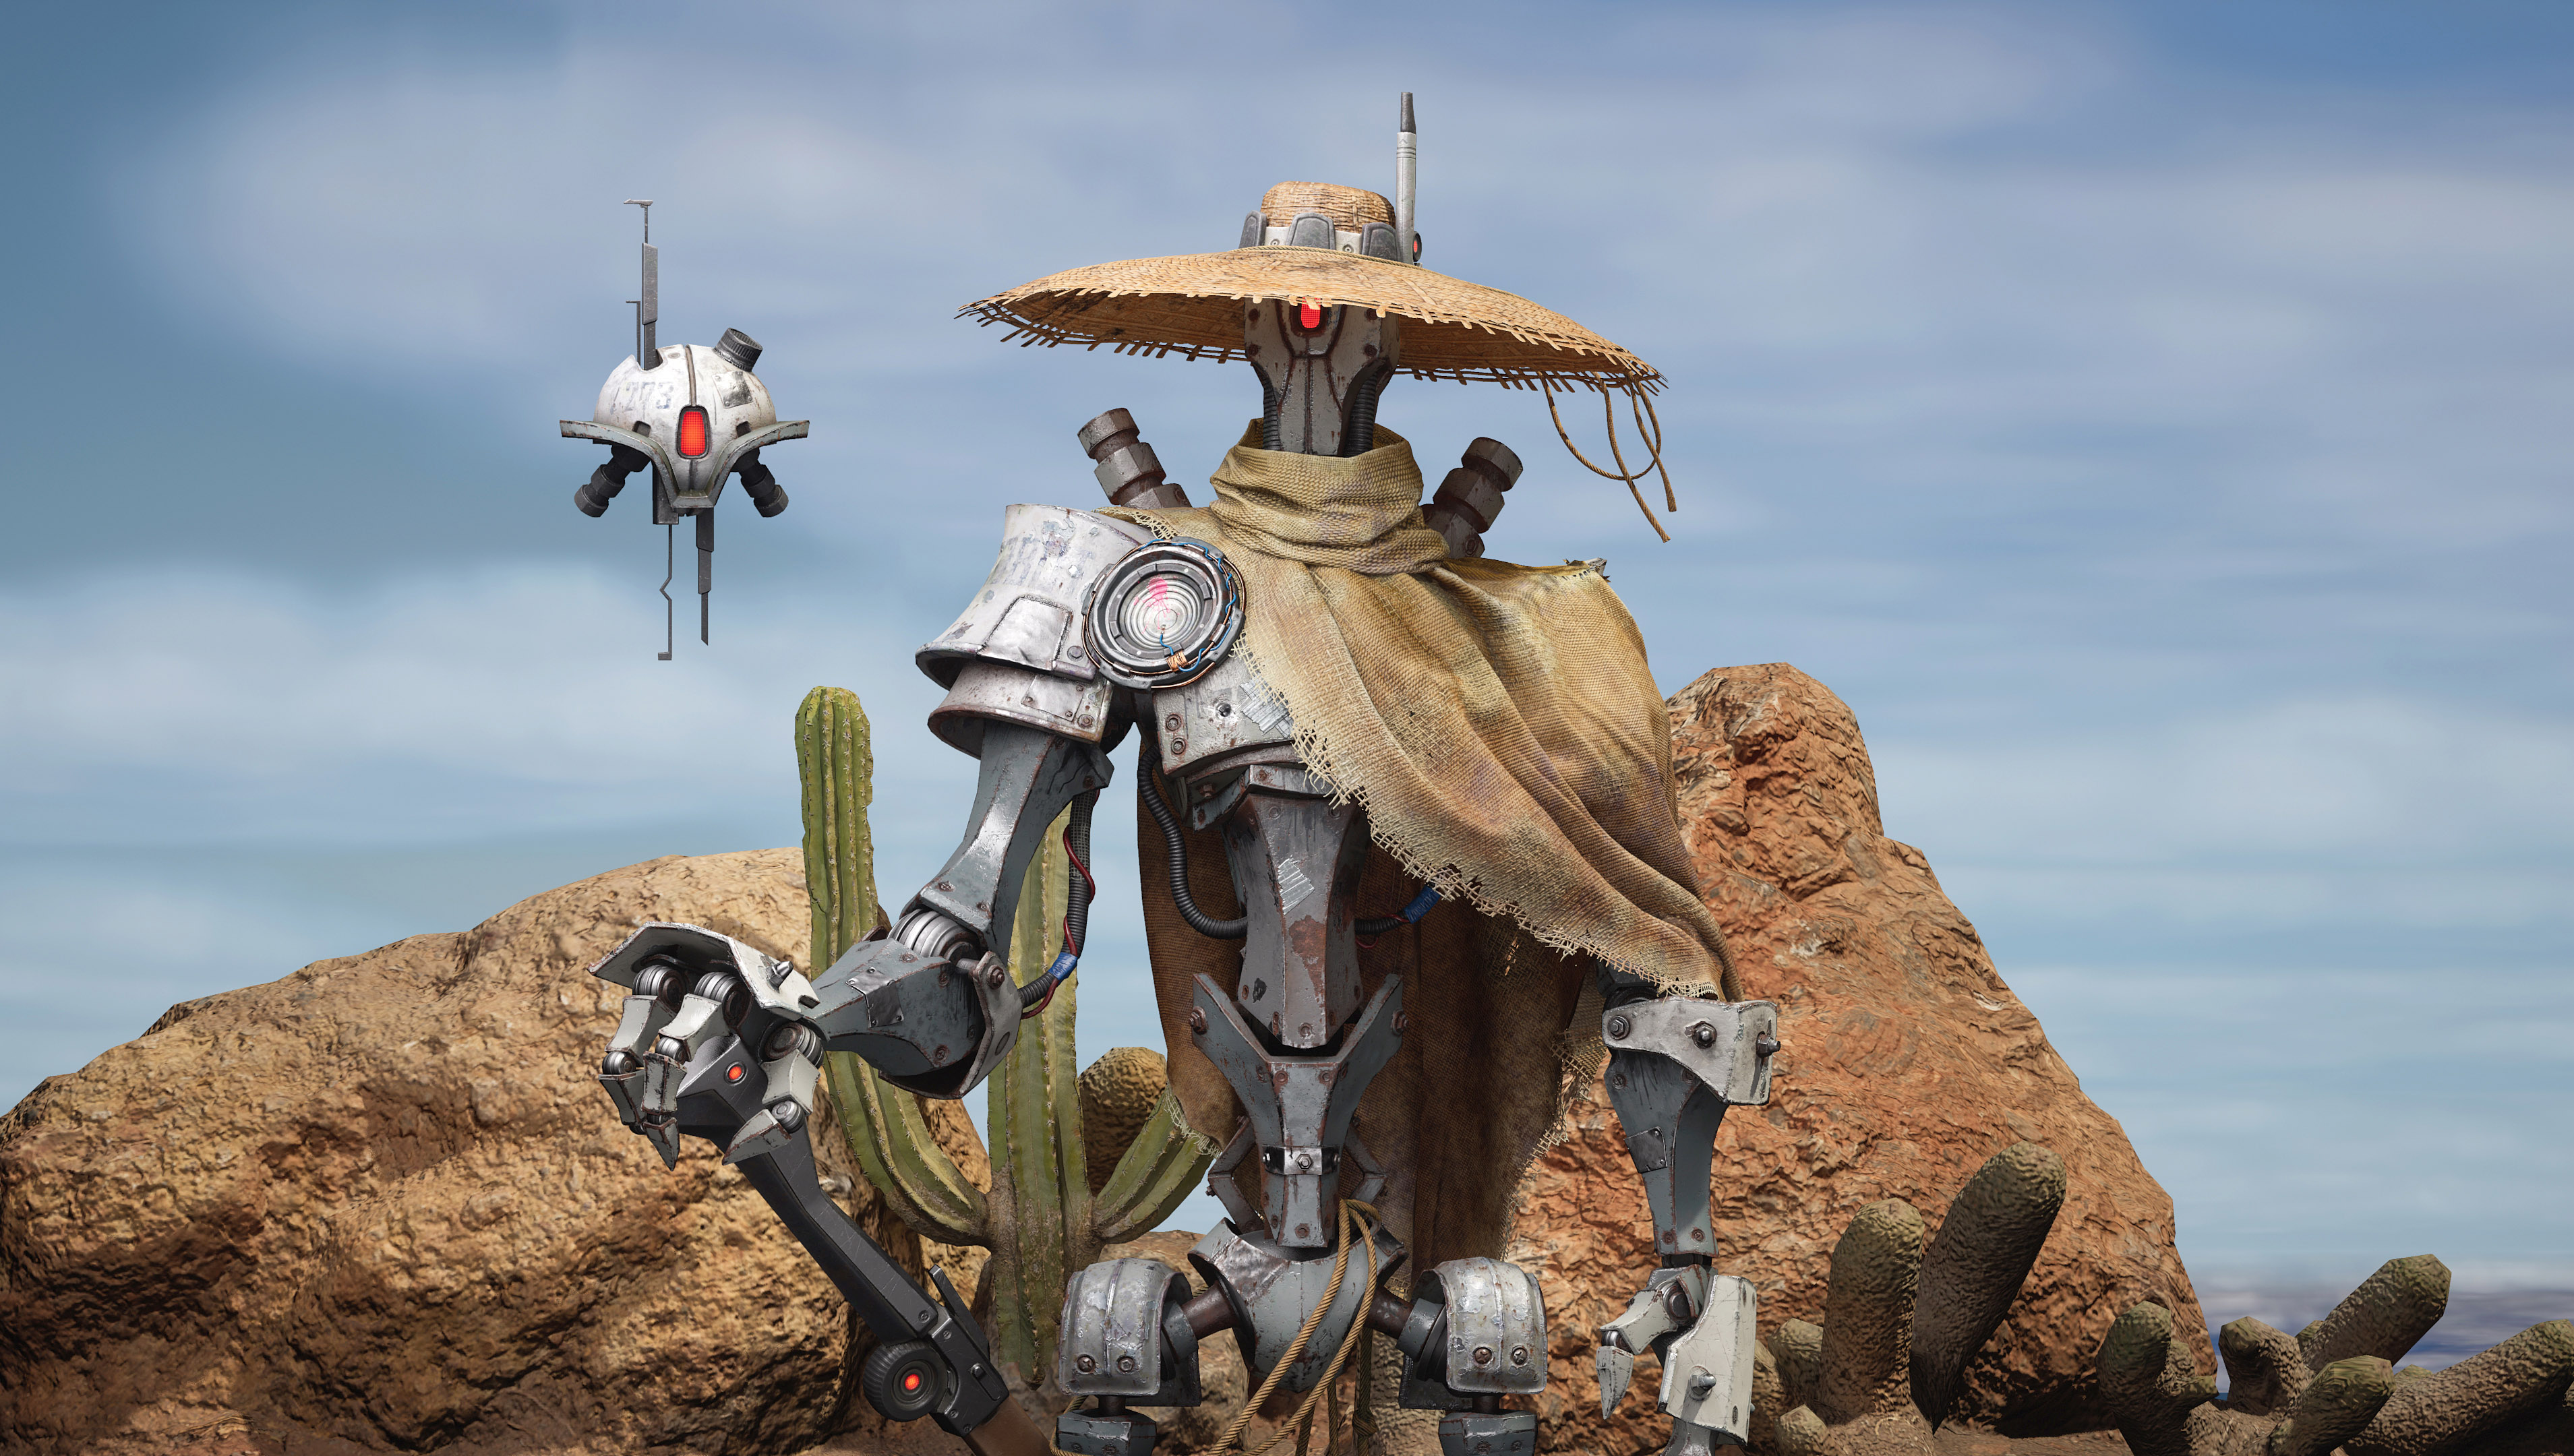
Alex Savelev's Ranchero (Bounty Hunter) project showcases his mastery in creating hyper-realistic fabric folds using Marvelous Designer. From intricate poncho folds to seamless fabric simulation, every detail brings the character to life.
Interview with Alex Savelev | Ranchero (Bounty Hunter) | 3D Character Artist
Could you please introduce yourself to the Marvelous Designer community members?
My name is Alex. I spent most of my career working in graphic design and advertising. My journey as a 3D artist began when I watched the cinematics of Death Stranding in 2018. I was so impressed that when the pandemic hit, I quit my job and moved to my country house. There, working alone for 12 hours a day, I managed to get a job as a character 3D artist after two years.
Tell us about the project. What inspired you? Is there a particular story or setting behind it?
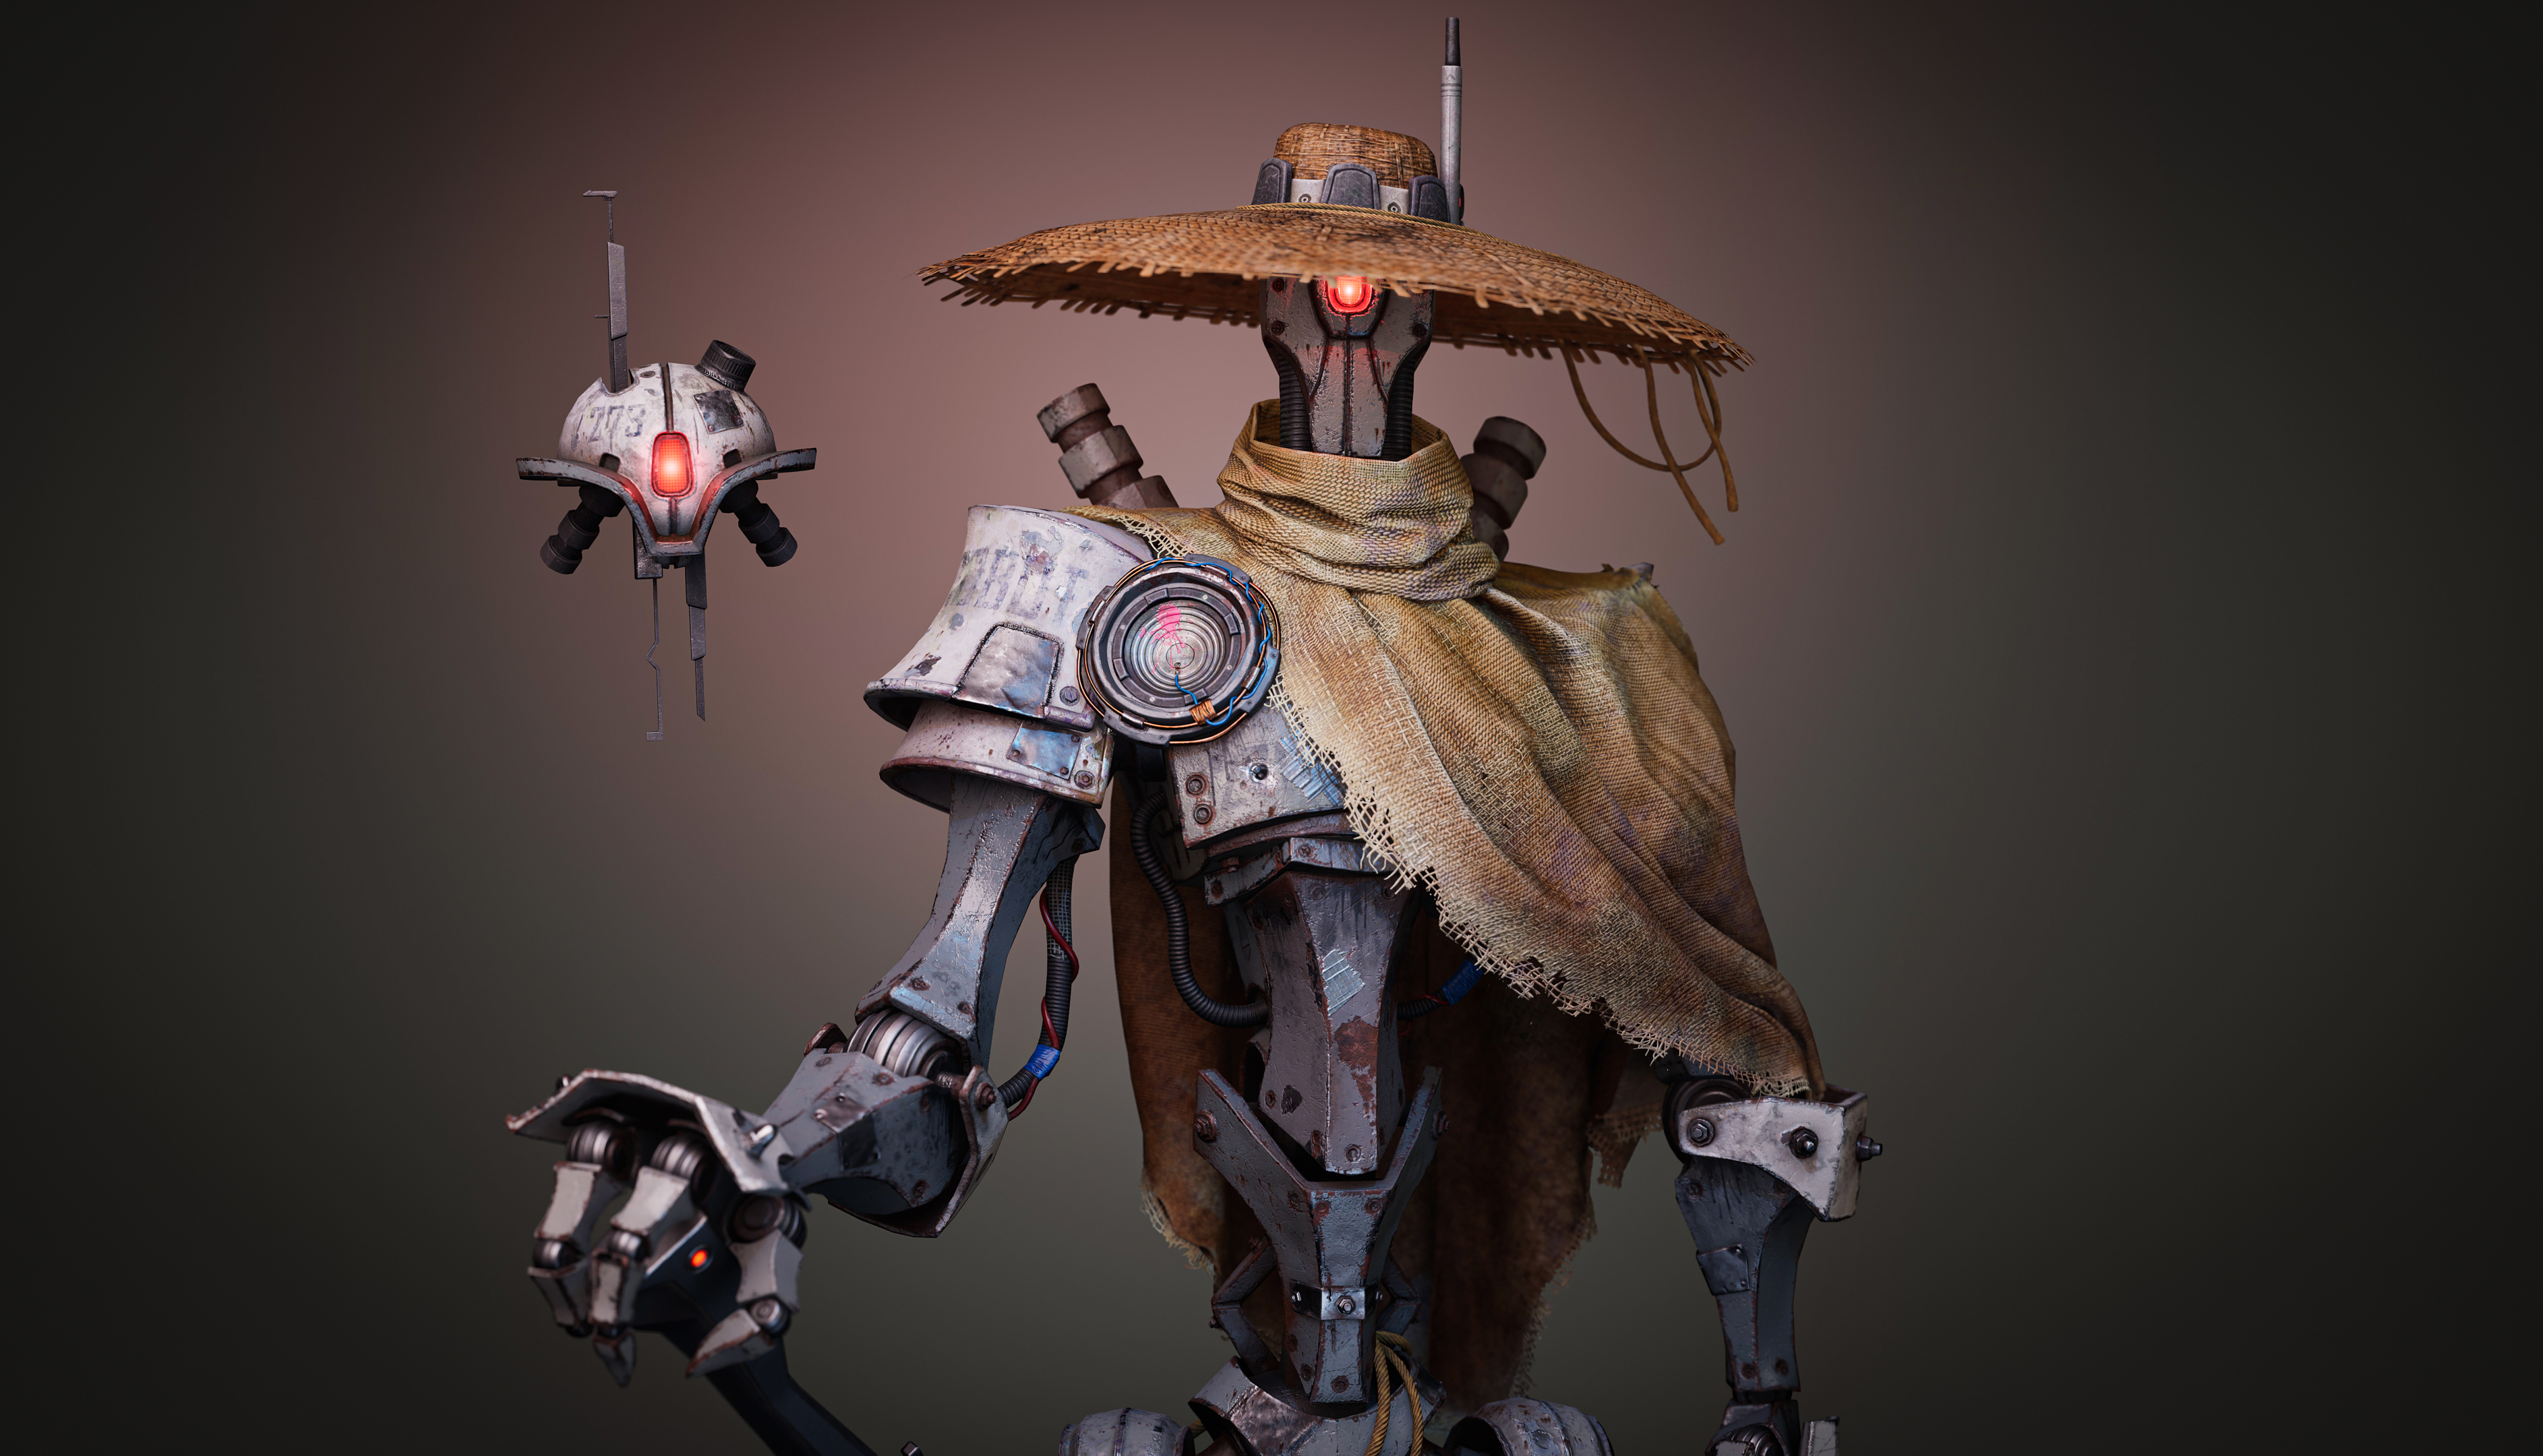
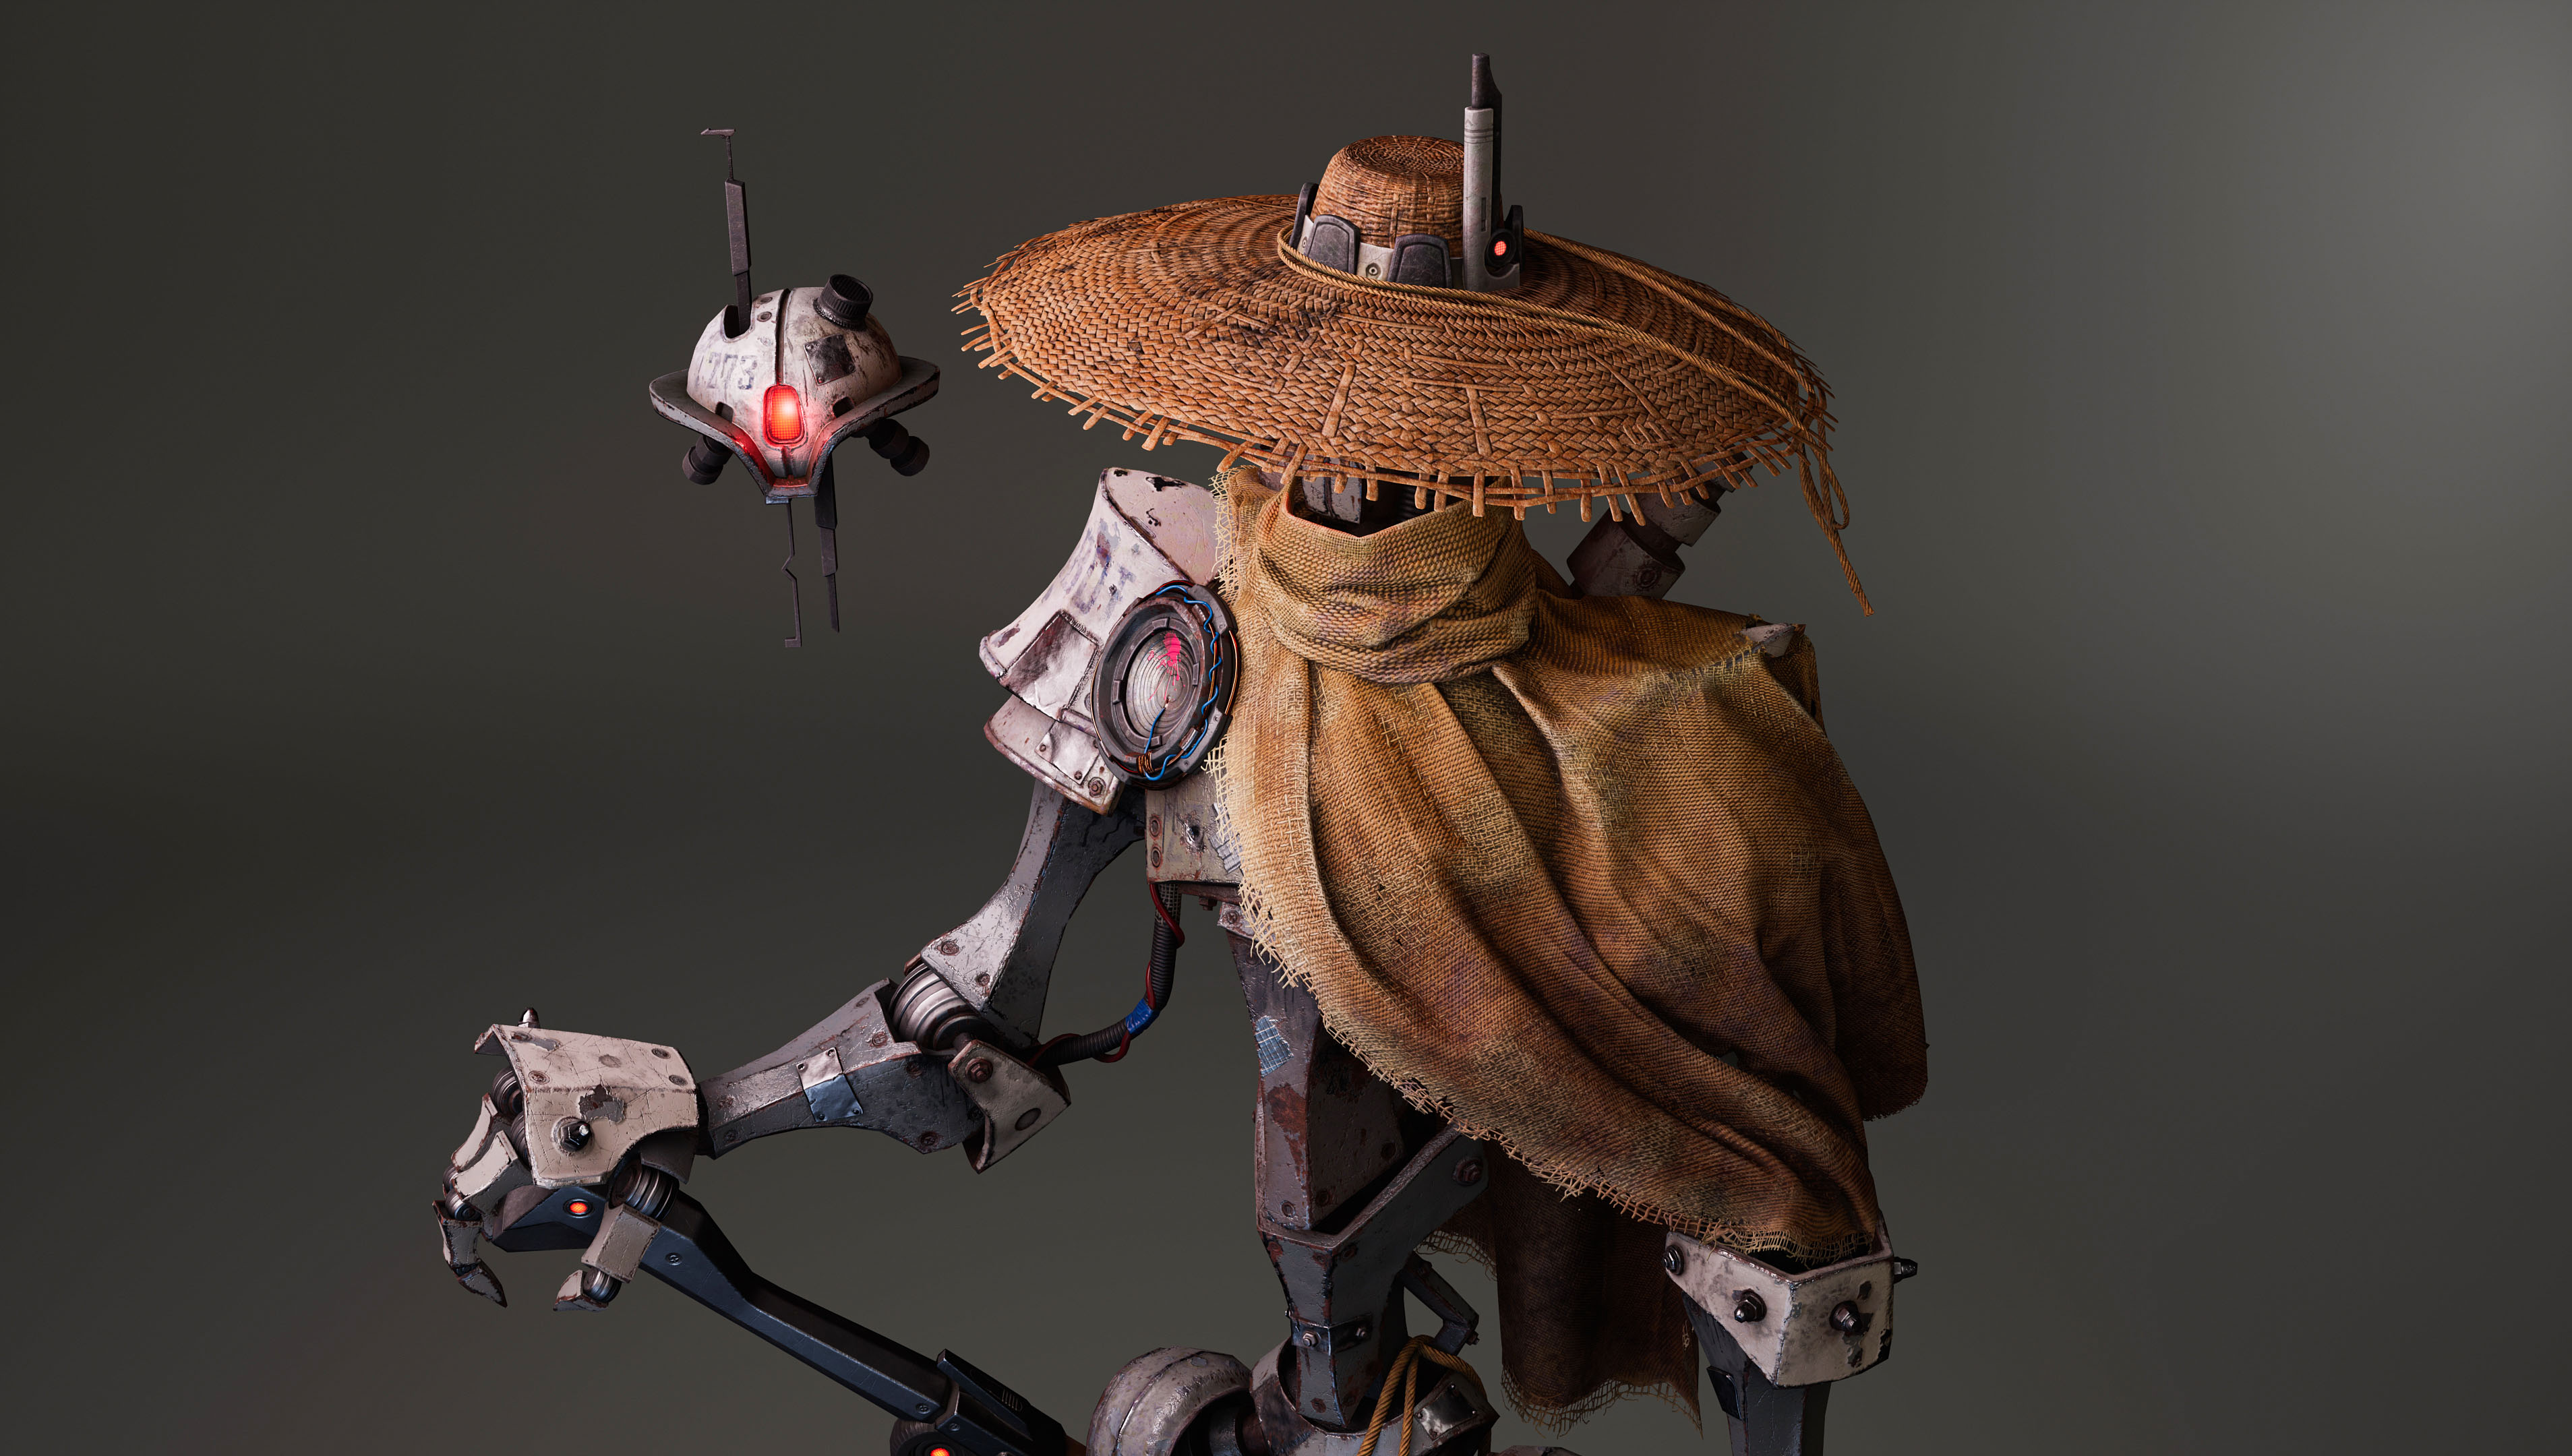
The robot creation project inspired me with the opportunity to combine soft, flexible materials like fabric and ropes with hard elements — rusty metal and plastic, which the robot itself is made of. This blend of textures, along with the fusion of Mexican Western and sci-fi themes, brought a unique vibe to the concept.
How did Marvelous Designer contribute to your creative process? Are there any particular processes you'd like to highlight for our community members?
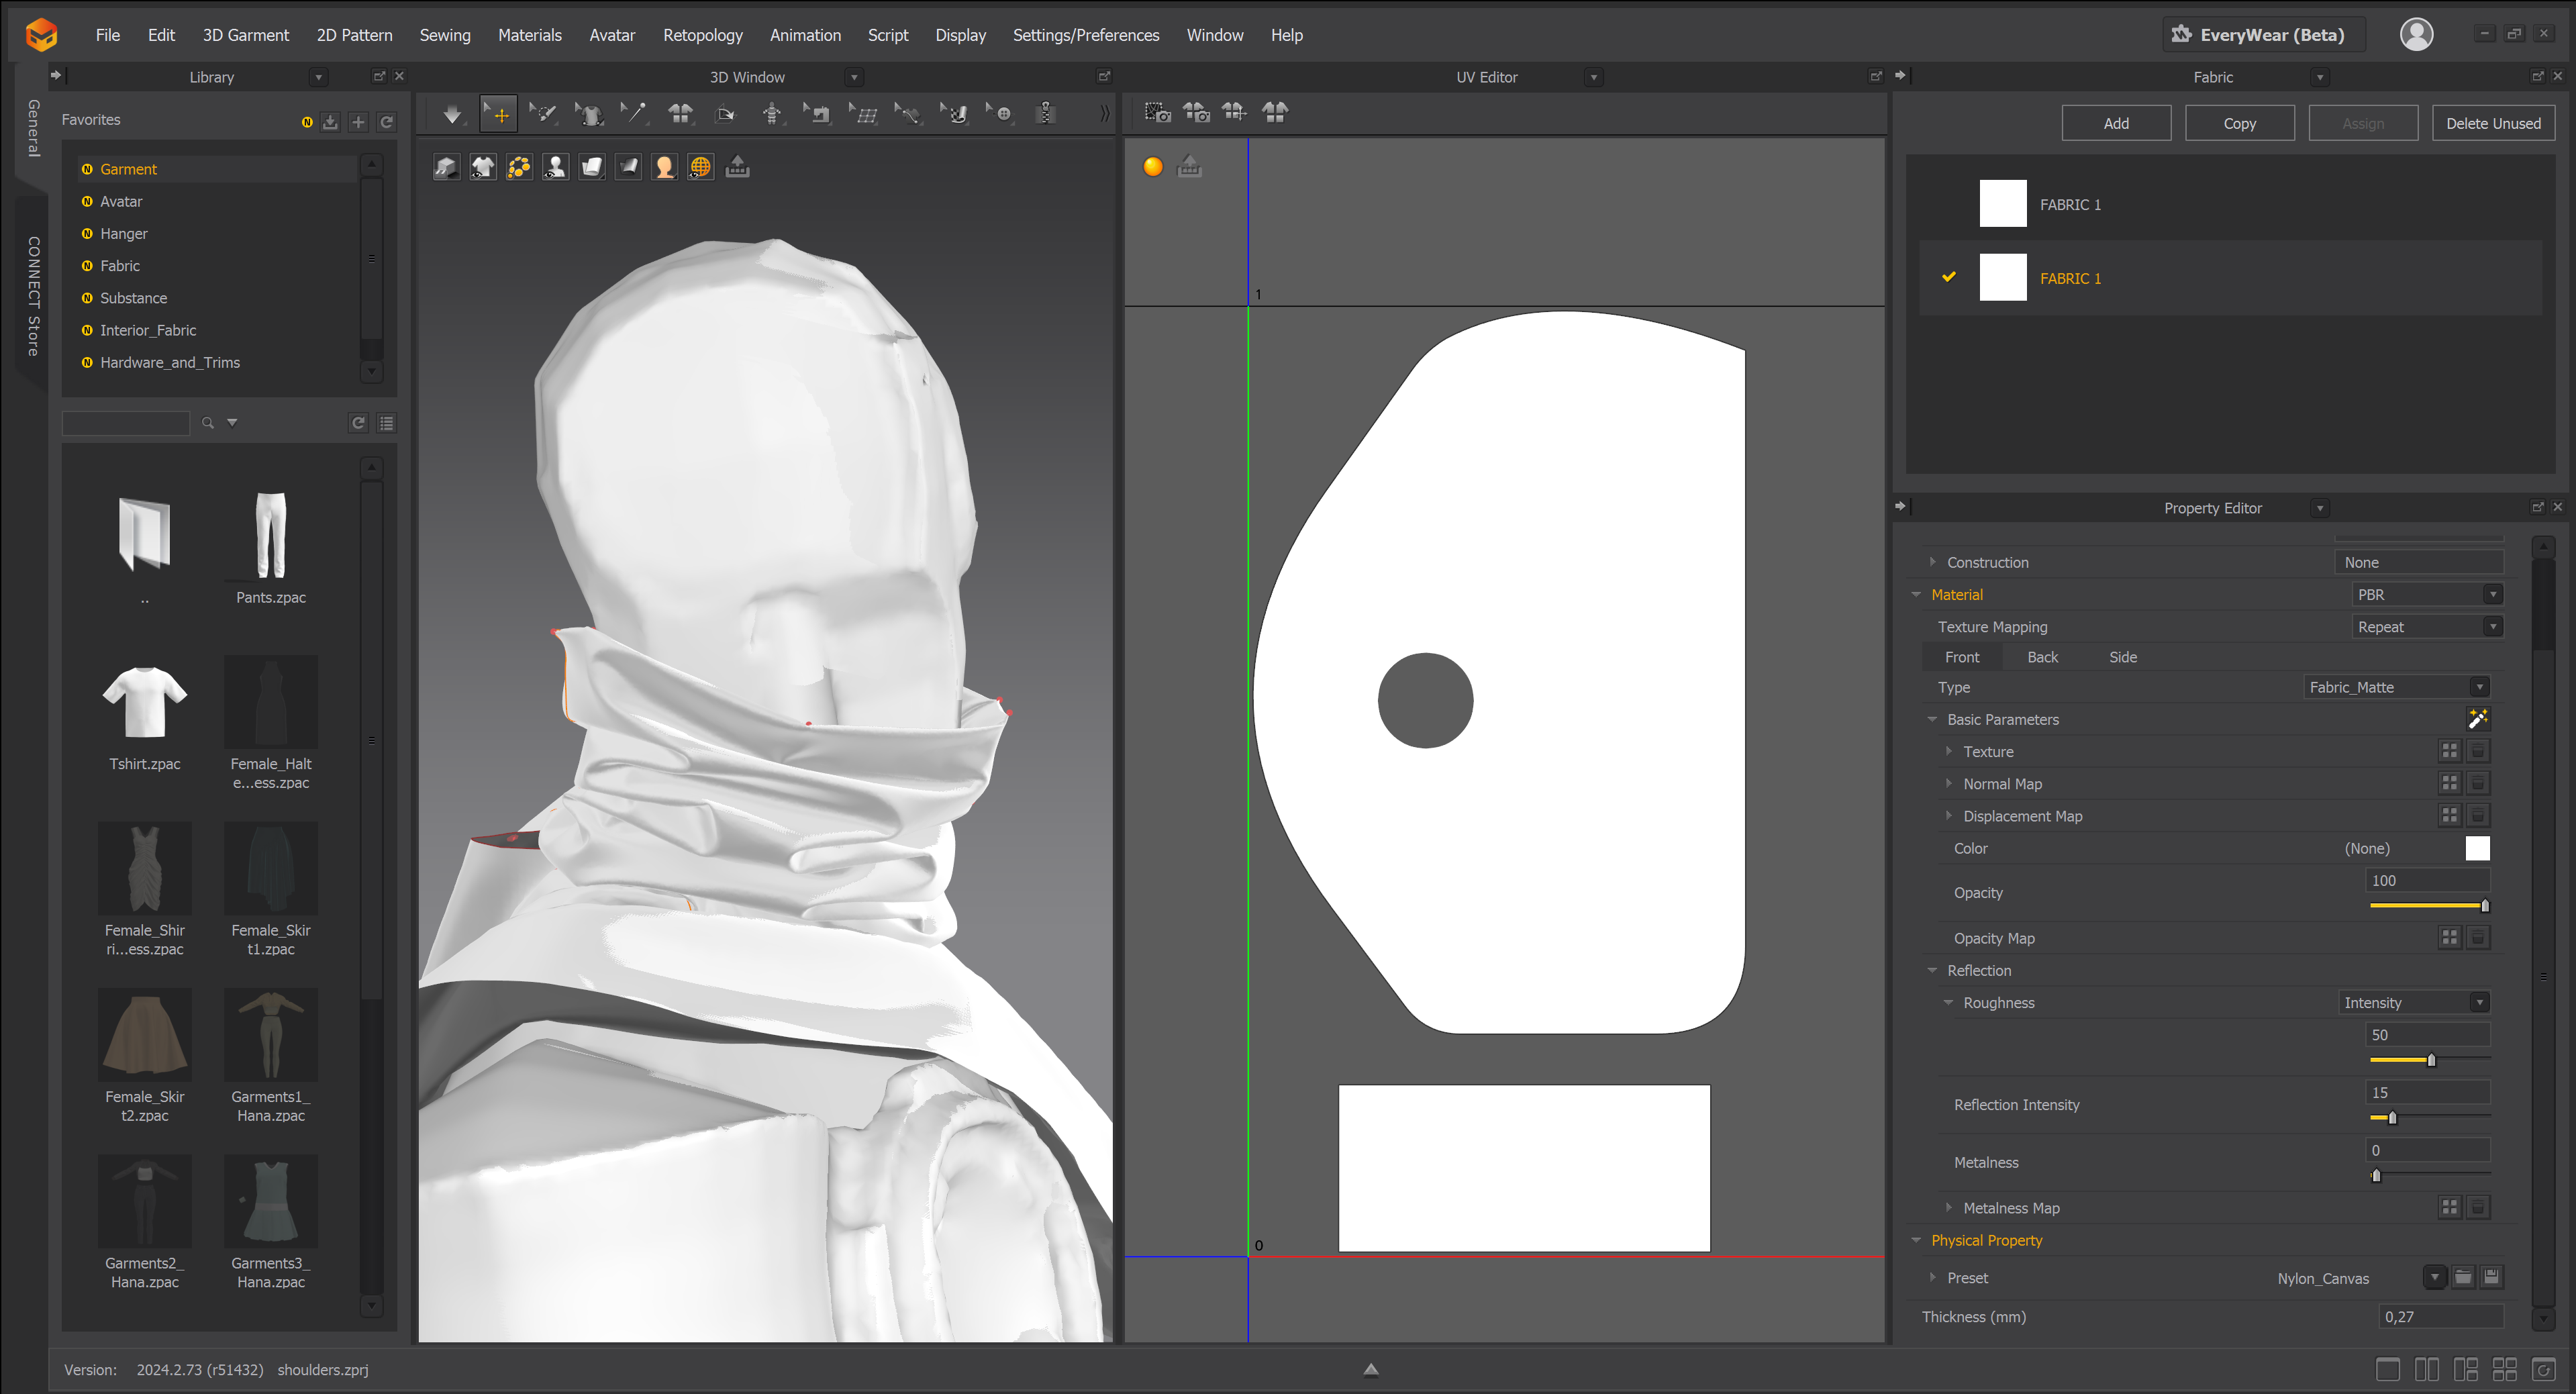
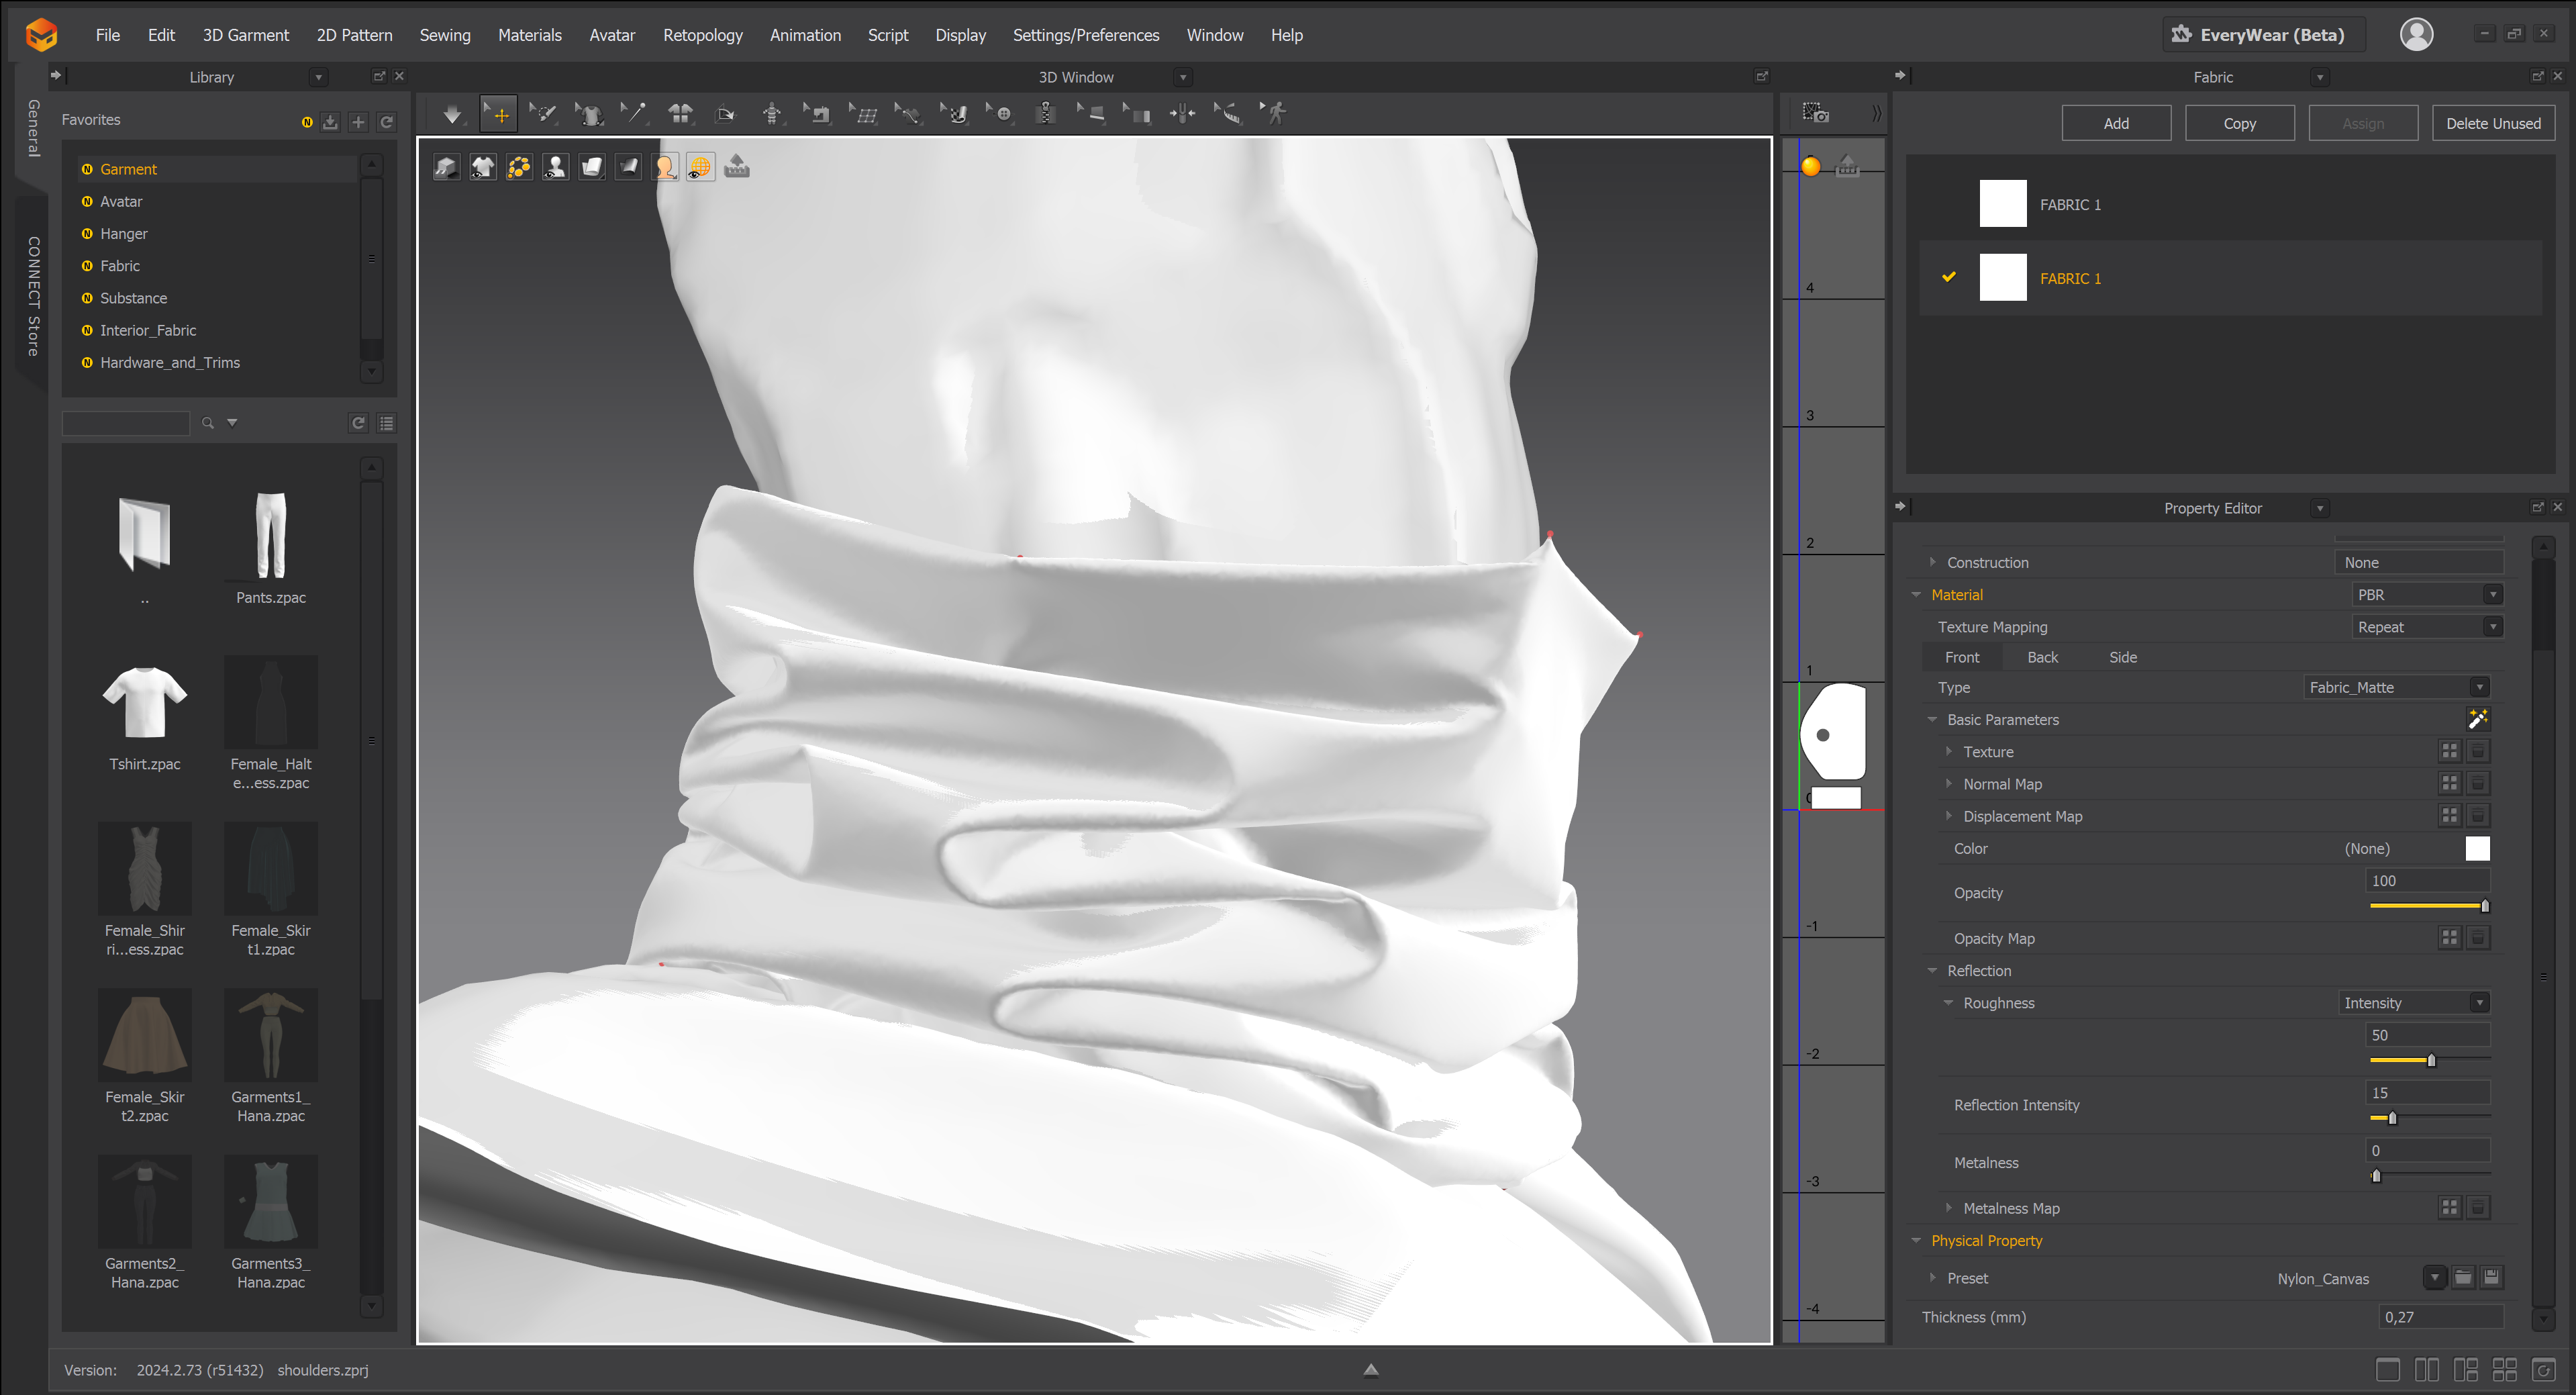
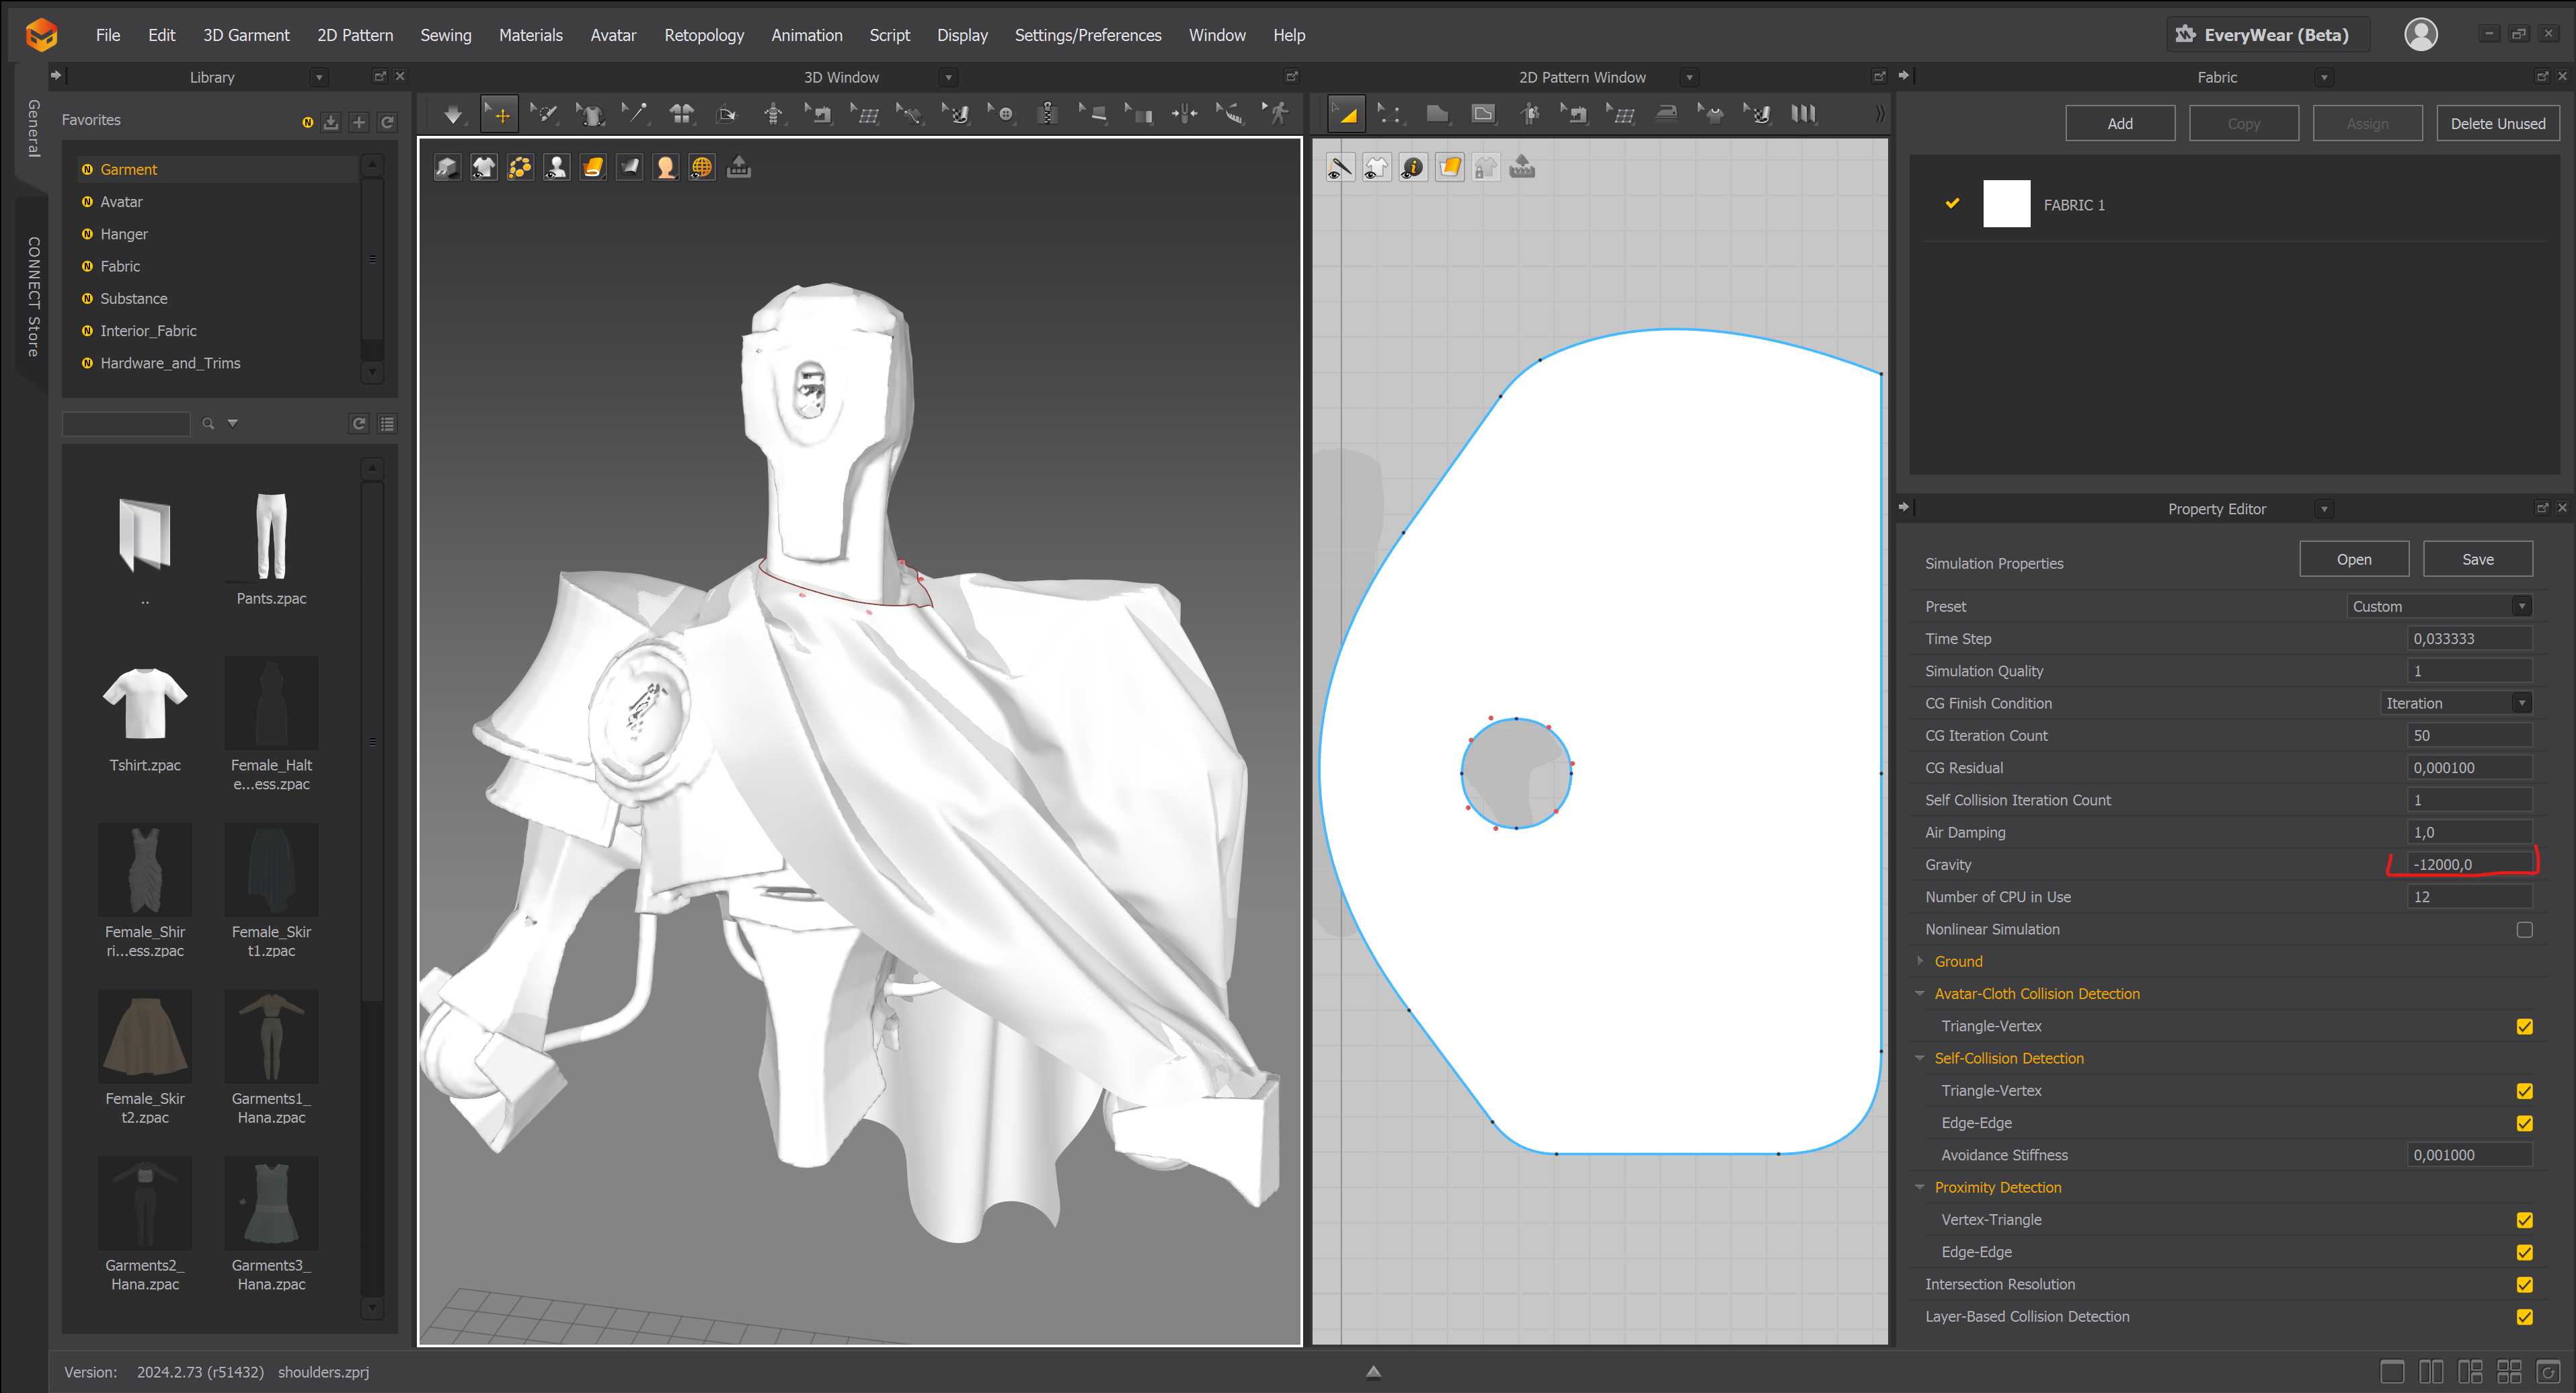
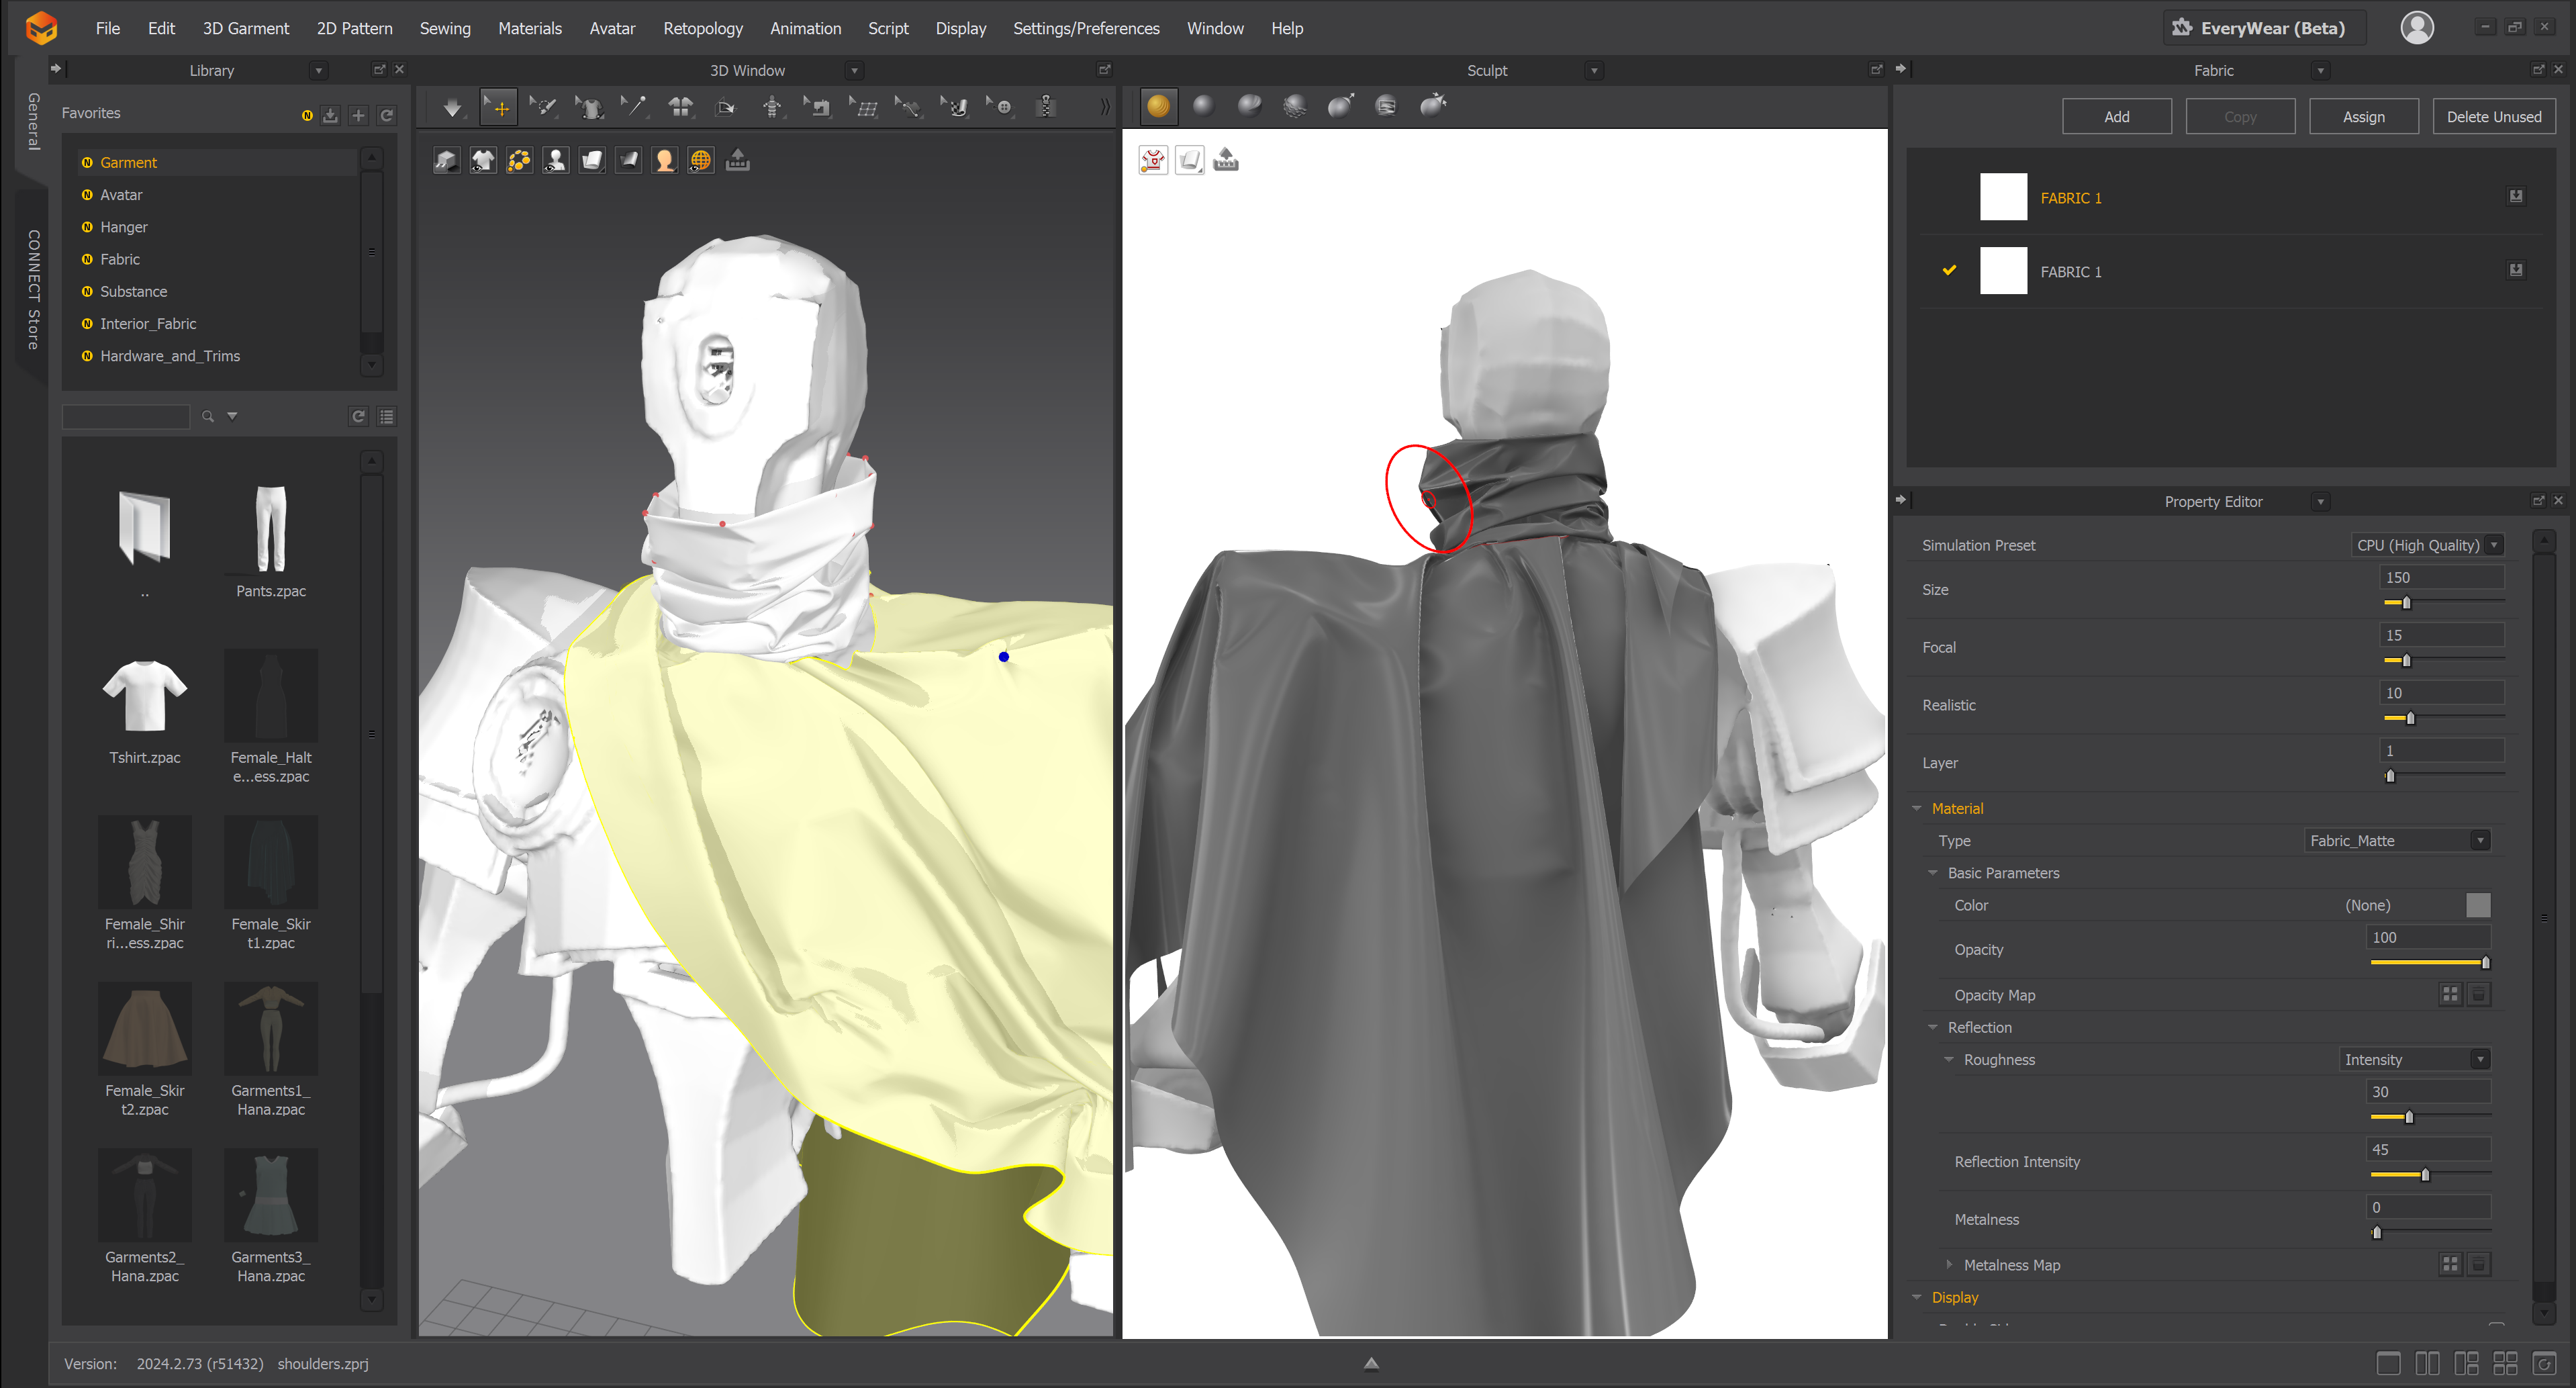
One of the key elements of the concept was the Mexican poncho. To make it realistic, I needed to create believable folds that would reflect the weight and density of the fabric, along with its worn look. Usually, I use Marvelous Designer for creating complex clothing patterns, but here the pattern was quite simple, so I focused on the folds. During the process, I used pins, adjusted gravity settings (which is very useful for simulating heavy fabrics), changed the fabric's friction settings, and tried out the sculpting tools for the first time, which were introduced relatively recently. After setting all the necessary parameters, I was able to achieve the desired result quickly. My advice is to set up all the parameters initially before starting the simulation.
The textures and details on the shawl are very intricate. How did you use Marvelous Designer to achieve such a worn, realistic look?
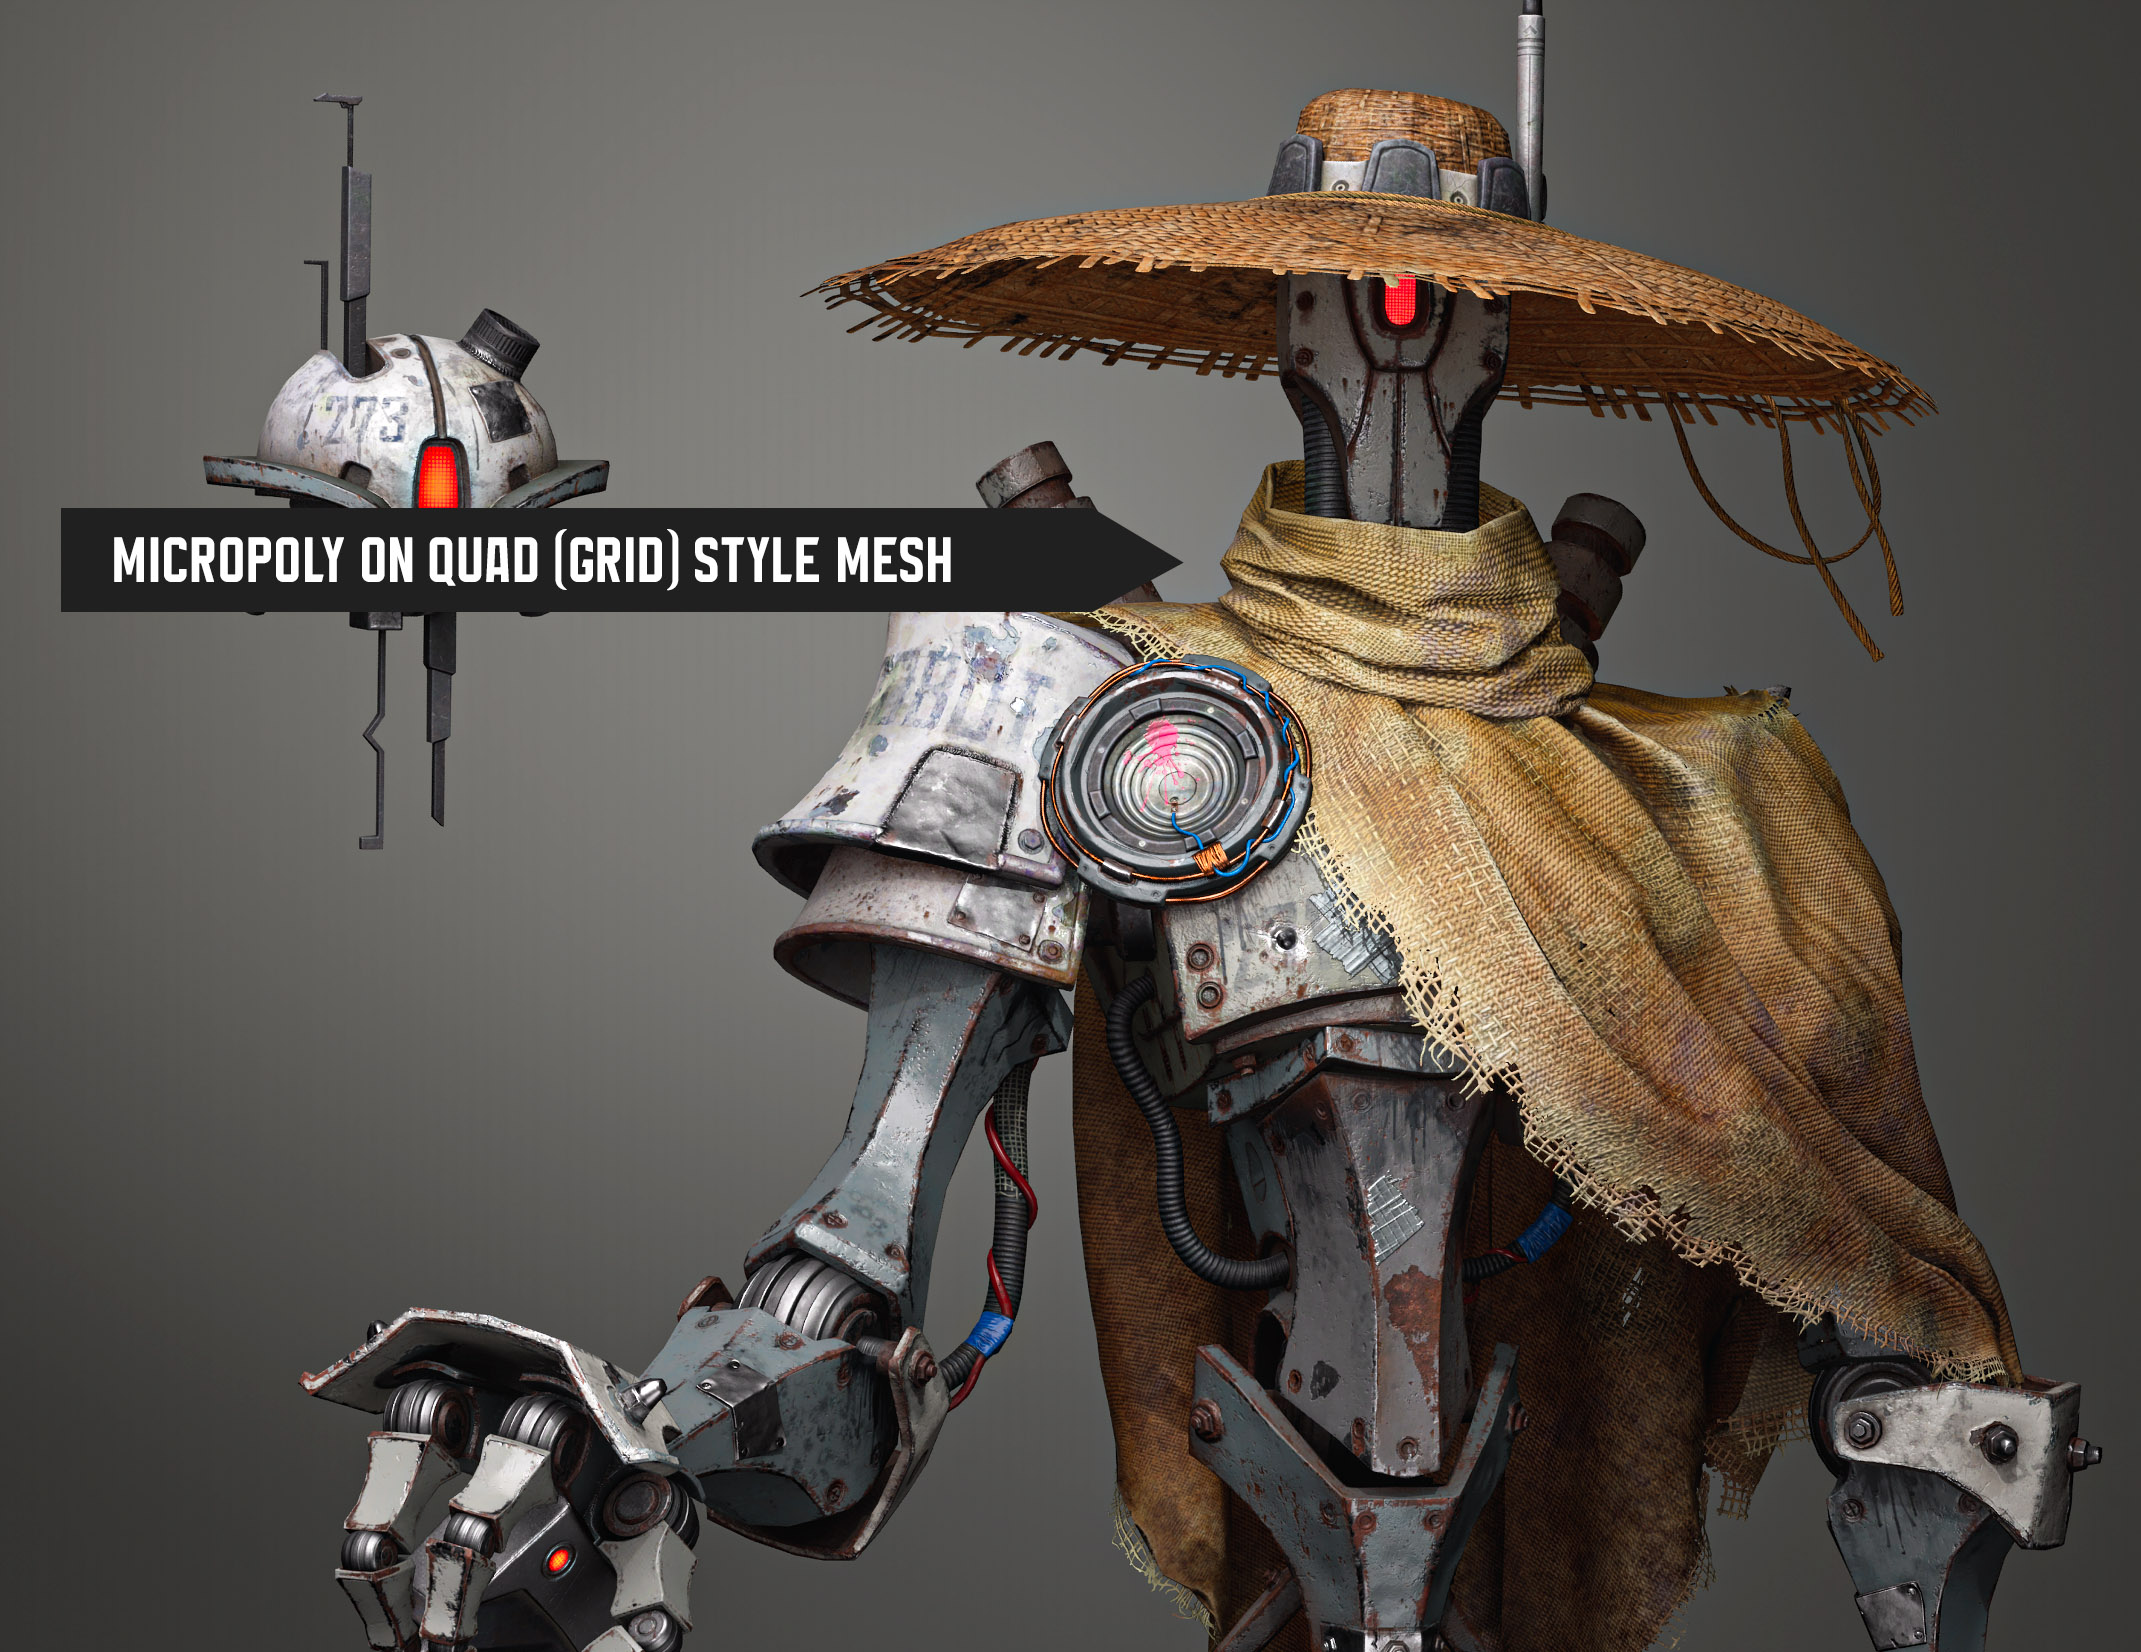
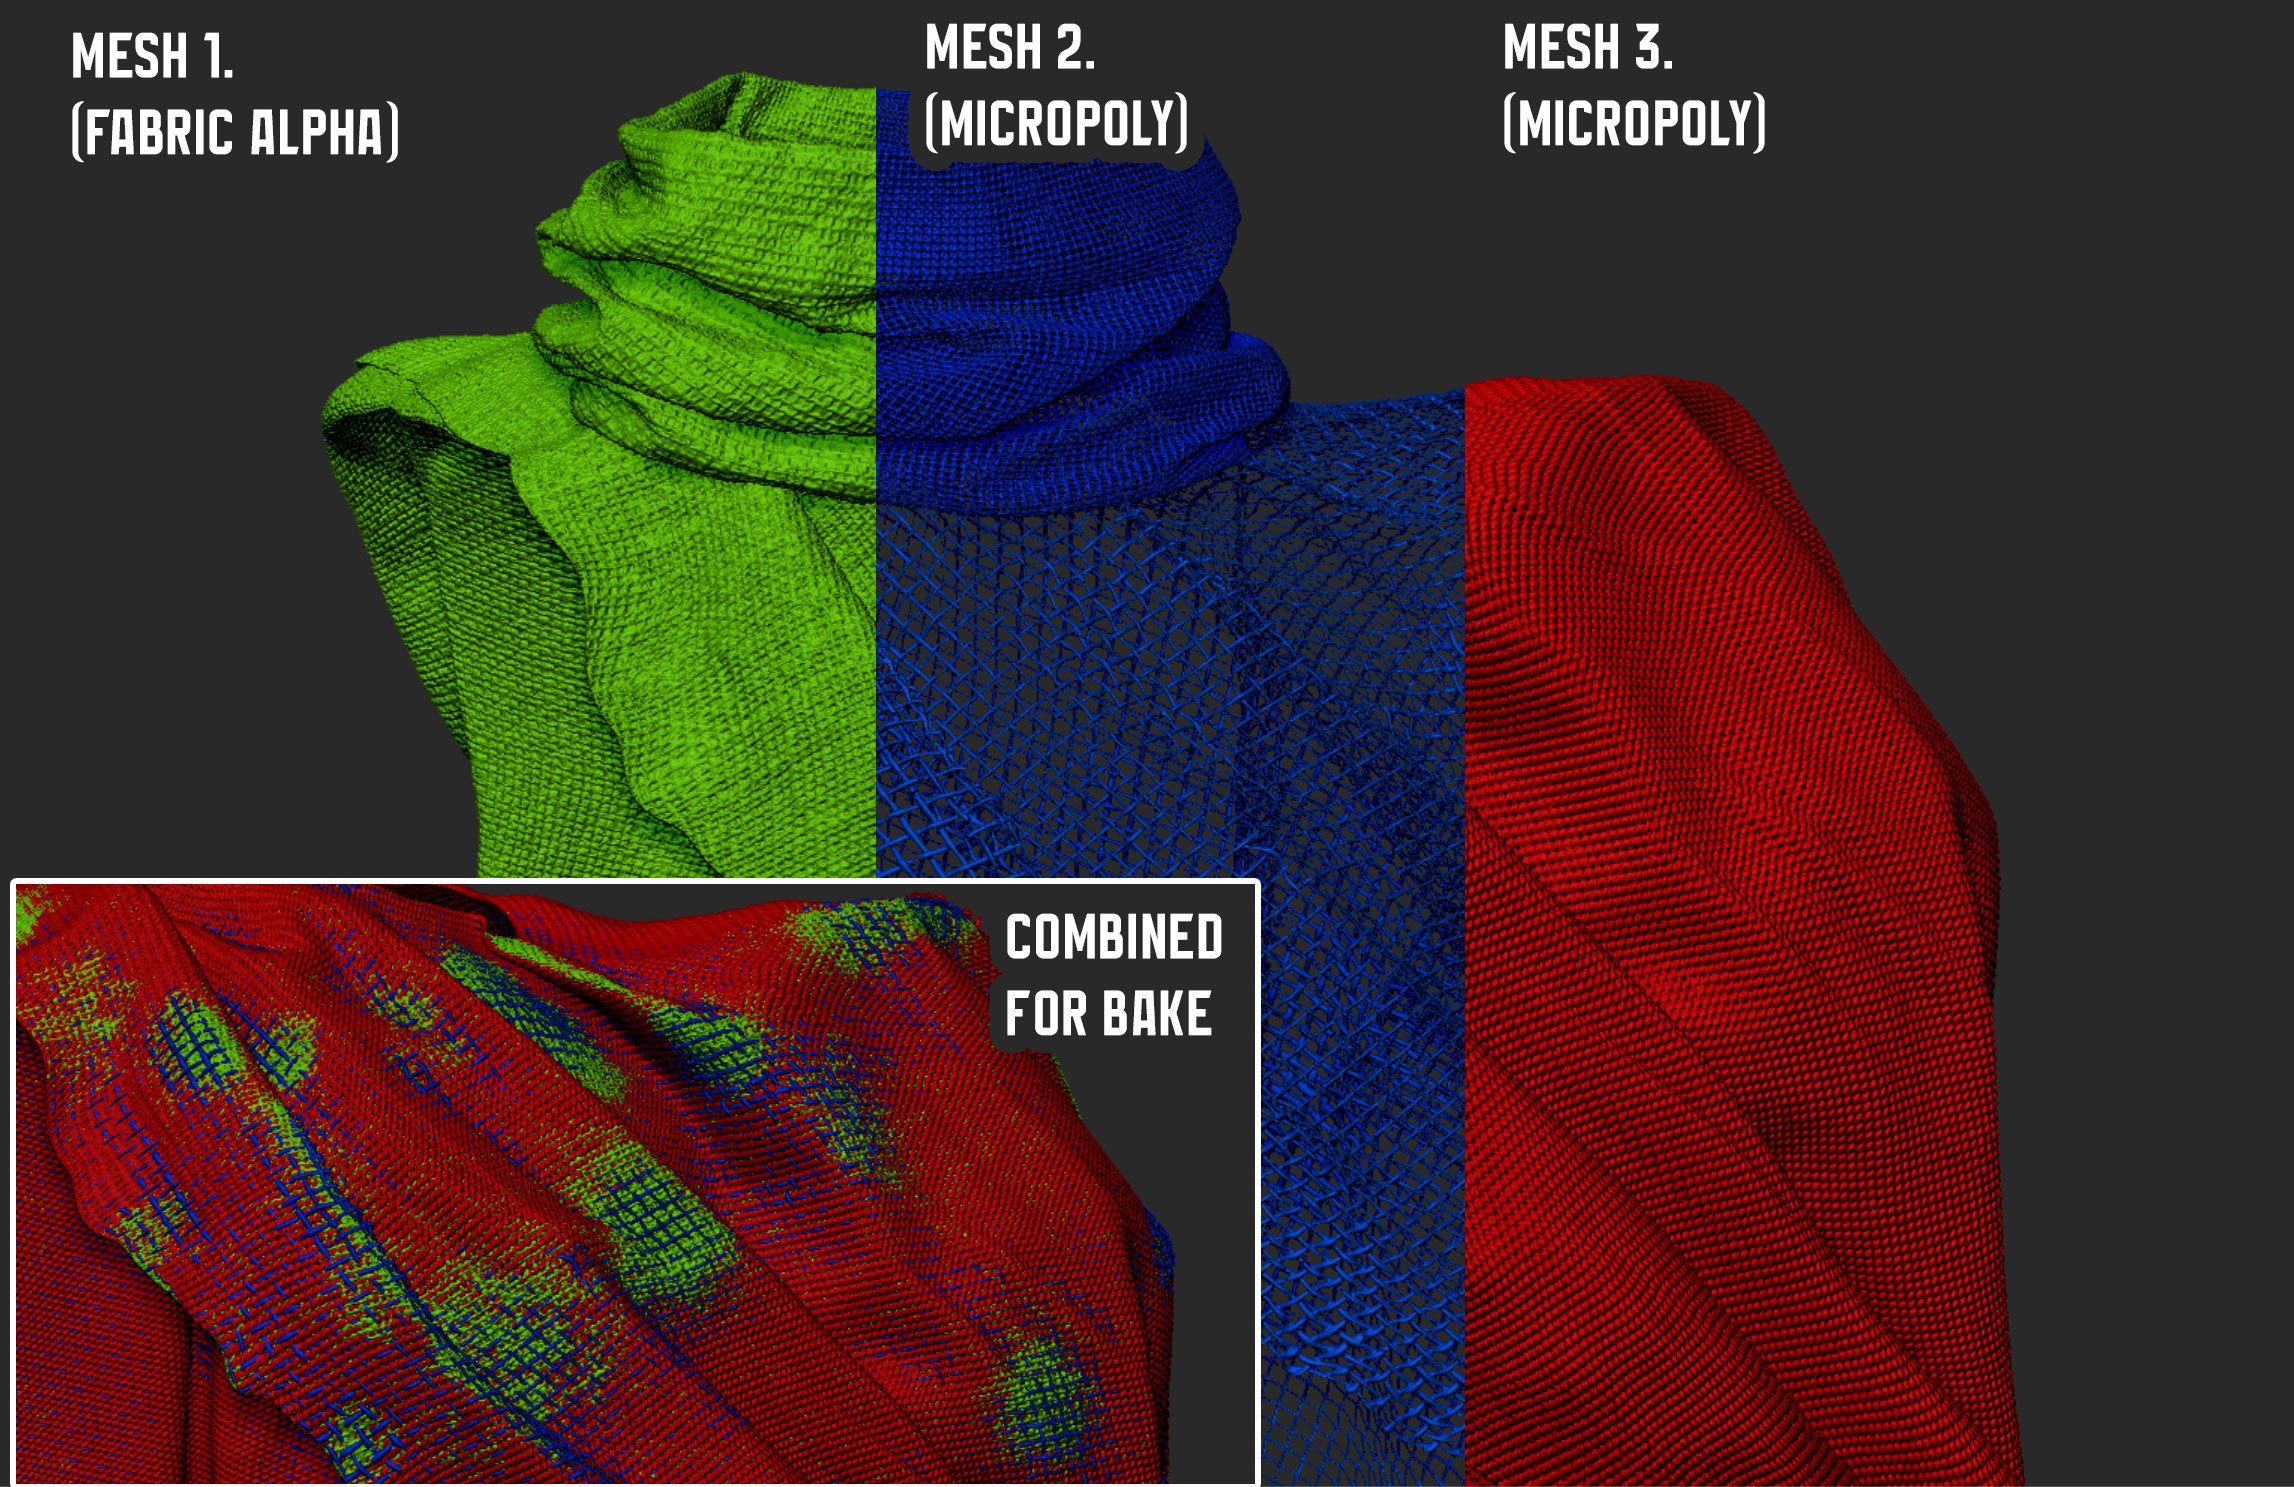
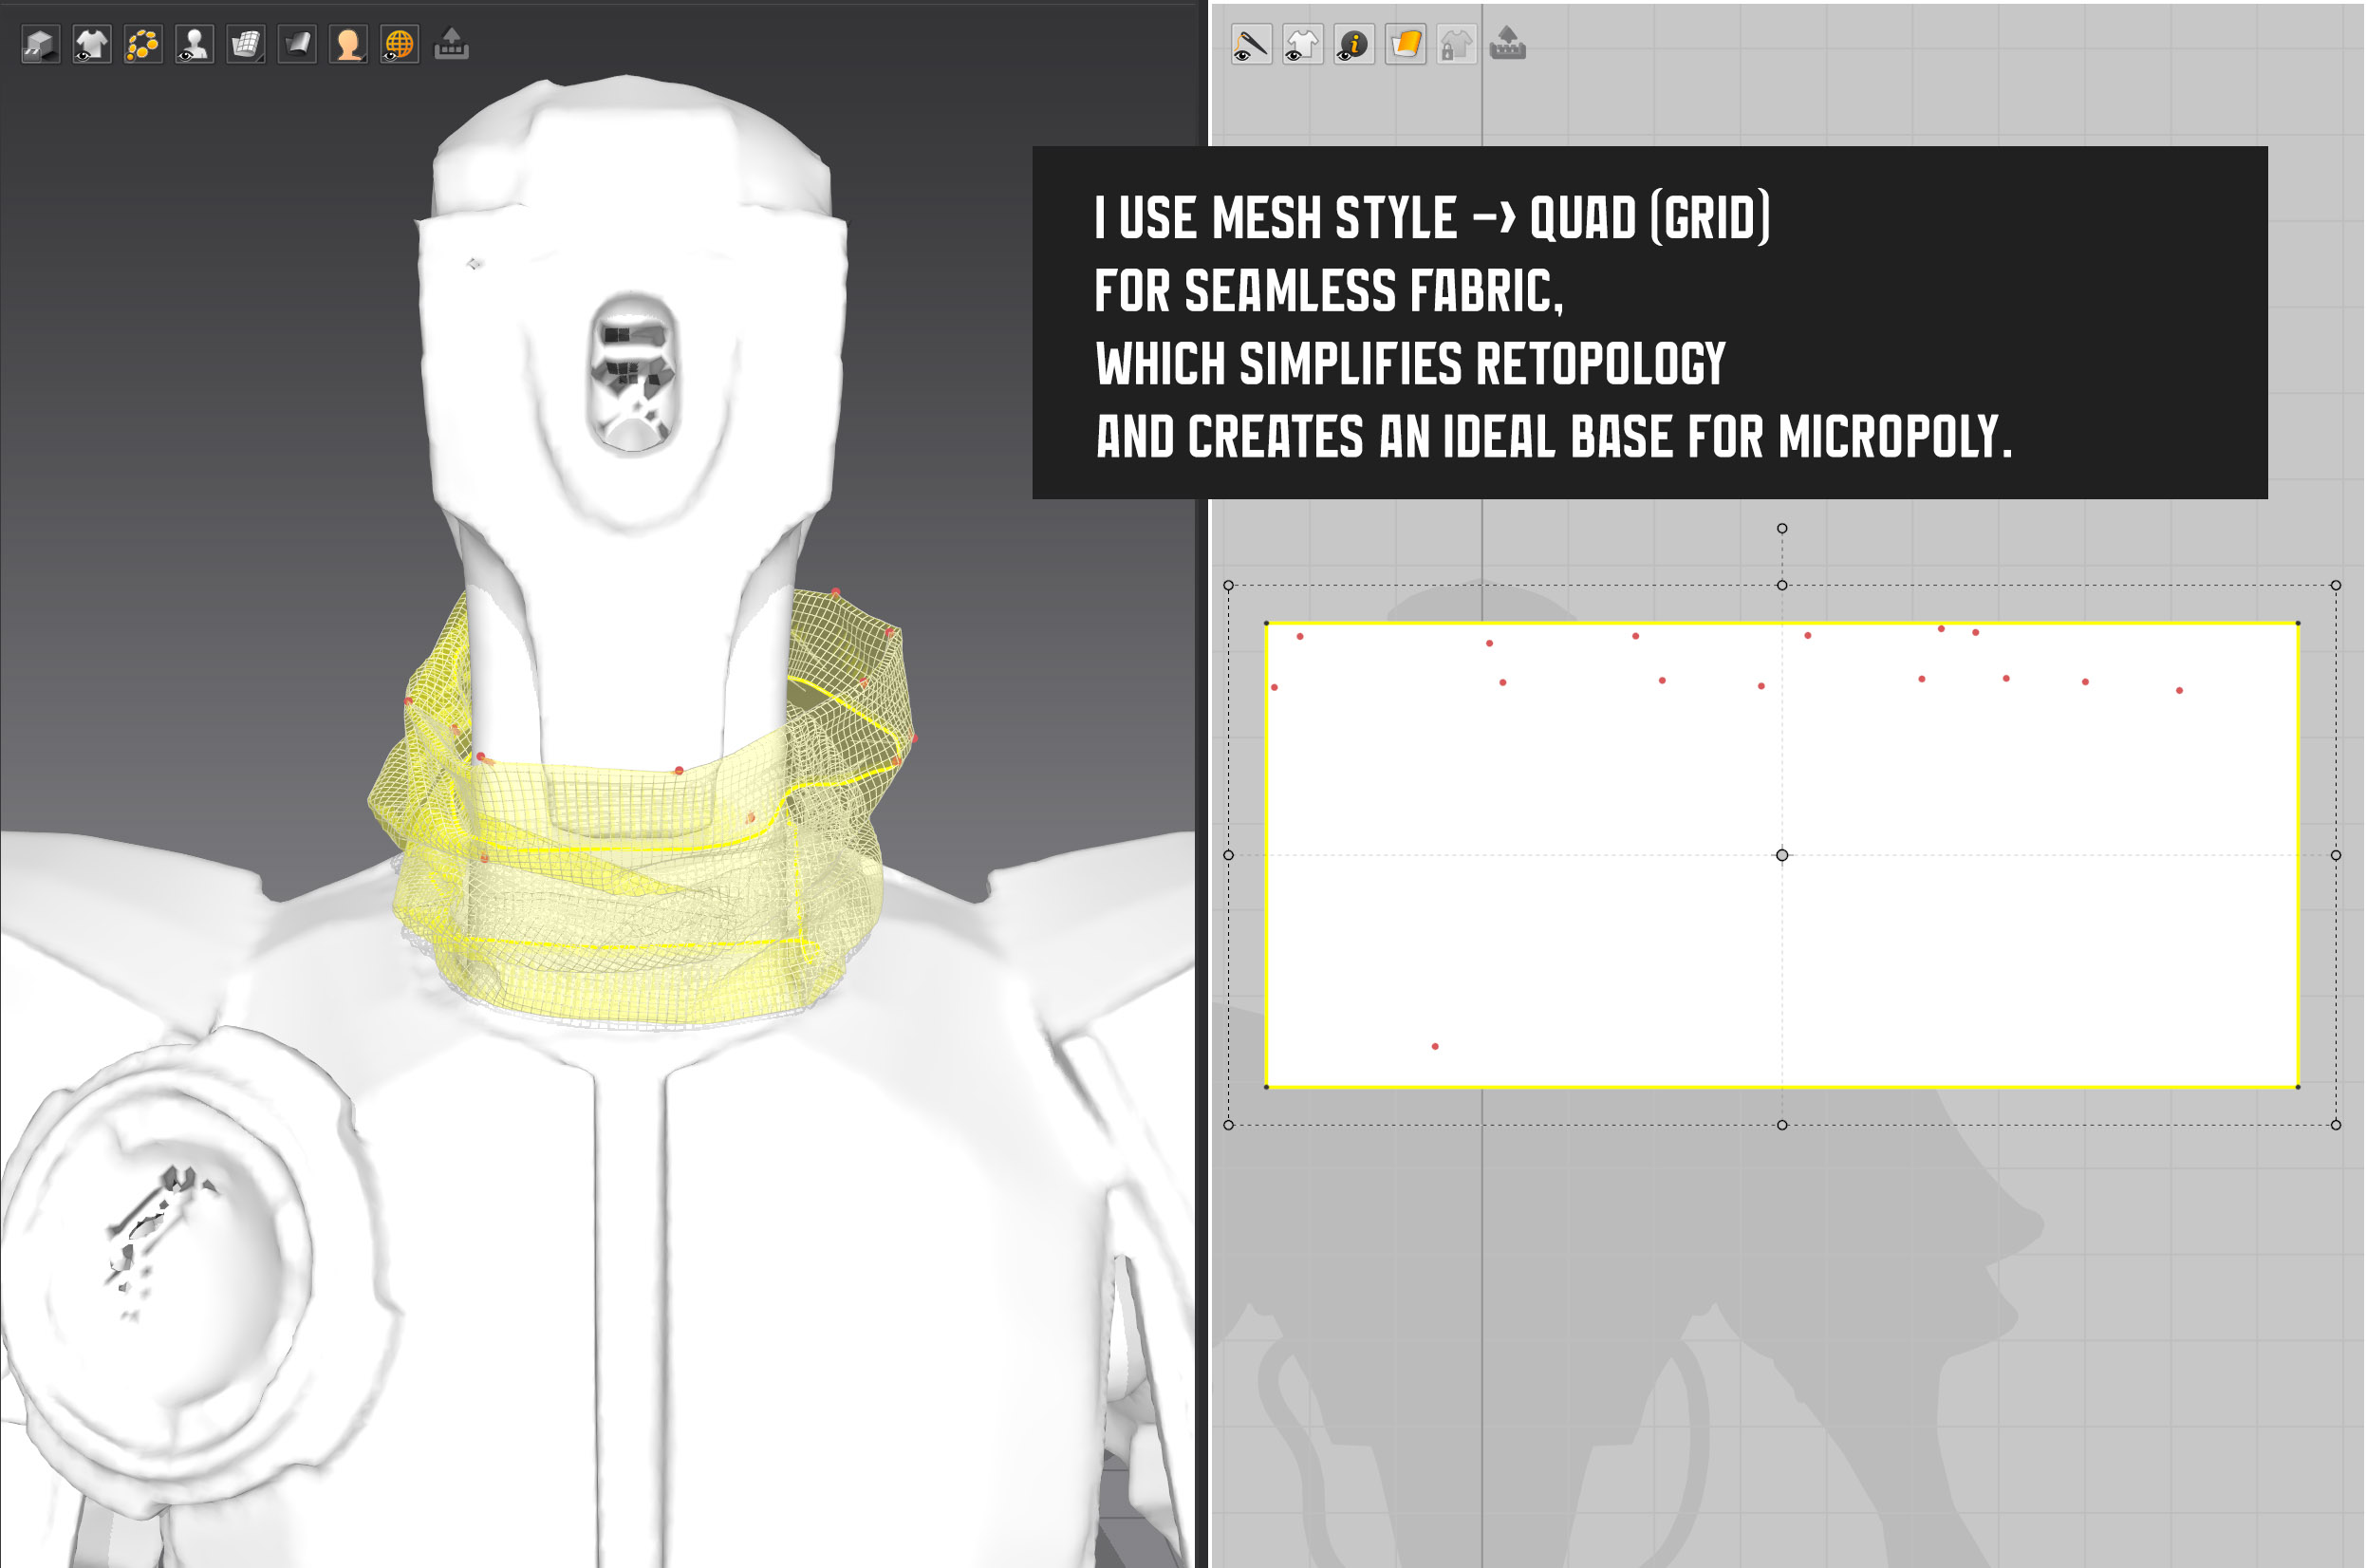
To achieve the worn effect, I created three fabric bases in Marvelous: one exported as a quad (grid) and the other as a triangle (which I then retopologized). I often use Quad (grid) if I plan to apply special effects in ZBrush, as the even polygons, aligned with the fabric, allow for creating stunning textures using the MicroPoly tool. This is how I created the thick threads that are clearly visible on the neck. Combined with compression folds, they look very realistic. I used the other fabric layer to create worn, damaged areas. This gave me three fabric layers with different textures, which I alternated to create the look of worn-out fabric or leave it intact.
Can you give us a quick overview of the different tools used in your pipeline?
In my work, I use the standard tools in Marvelous Designer and recently started using sculpting, which has been very satisfying. I often work with the "steamer" tool to get the exact folds I need. Additionally, I frequently use pins, manually crafting custom folds. Before running the simulation, I increase the mesh density and remove all the pins to avoid leaving any marks on the fabric. Although high-density mesh simulation runs slowly, this helps retain the original shape of my pinned folds.
What challenges did you face during the creation process, and how did you overcome them?
Sometimes, it's hard to stop when working on clothing simulation. I can spend hours on this process, creating increasingly expressive folds. The process is incredibly captivating, and it's essential to know when to stop. 😊
Are there any tips and tricks with Marvelous Designer that you want to share with the community?
As a 3D character artist, I appreciate Marvelous not only for its ability to create incredibly realistic fabrics but also for its help with retopology. I often use Mesh (Grid) to create a base for retopologizing objects, which saves a lot of time. This mesh type is also perfect for creating items like cloaks, where there are hardly any seams, eliminating the need to triangulate the mesh.
How would you describe your overall experience of the use of the Marvelous Designer?
I've been using Marvelous for four years now, and in that time, I've completed numerous personal and commercial projects. I've created a vast array of clothing models and love this tool for helping my characters look truly alive. Moreover, I've become a genuine fan of creating different types of folds — something I never imagined was possible!
by Alex Savelev
Artstation
이 작업은 Avatar 등의 기술로 제작되었습니다.
Marvelous Designer로 이와 같은 3D 의상·캐릭터 작업을 직접 만들어볼 수 있습니다.