Teacup Princess
Maria shared her workflow for creating Teacup Princess, using Marvelous Designer to shape a cinematic, stylized character — capturing elegance through delicate ribbons and intricate garments that infused the princess with charm and personality.
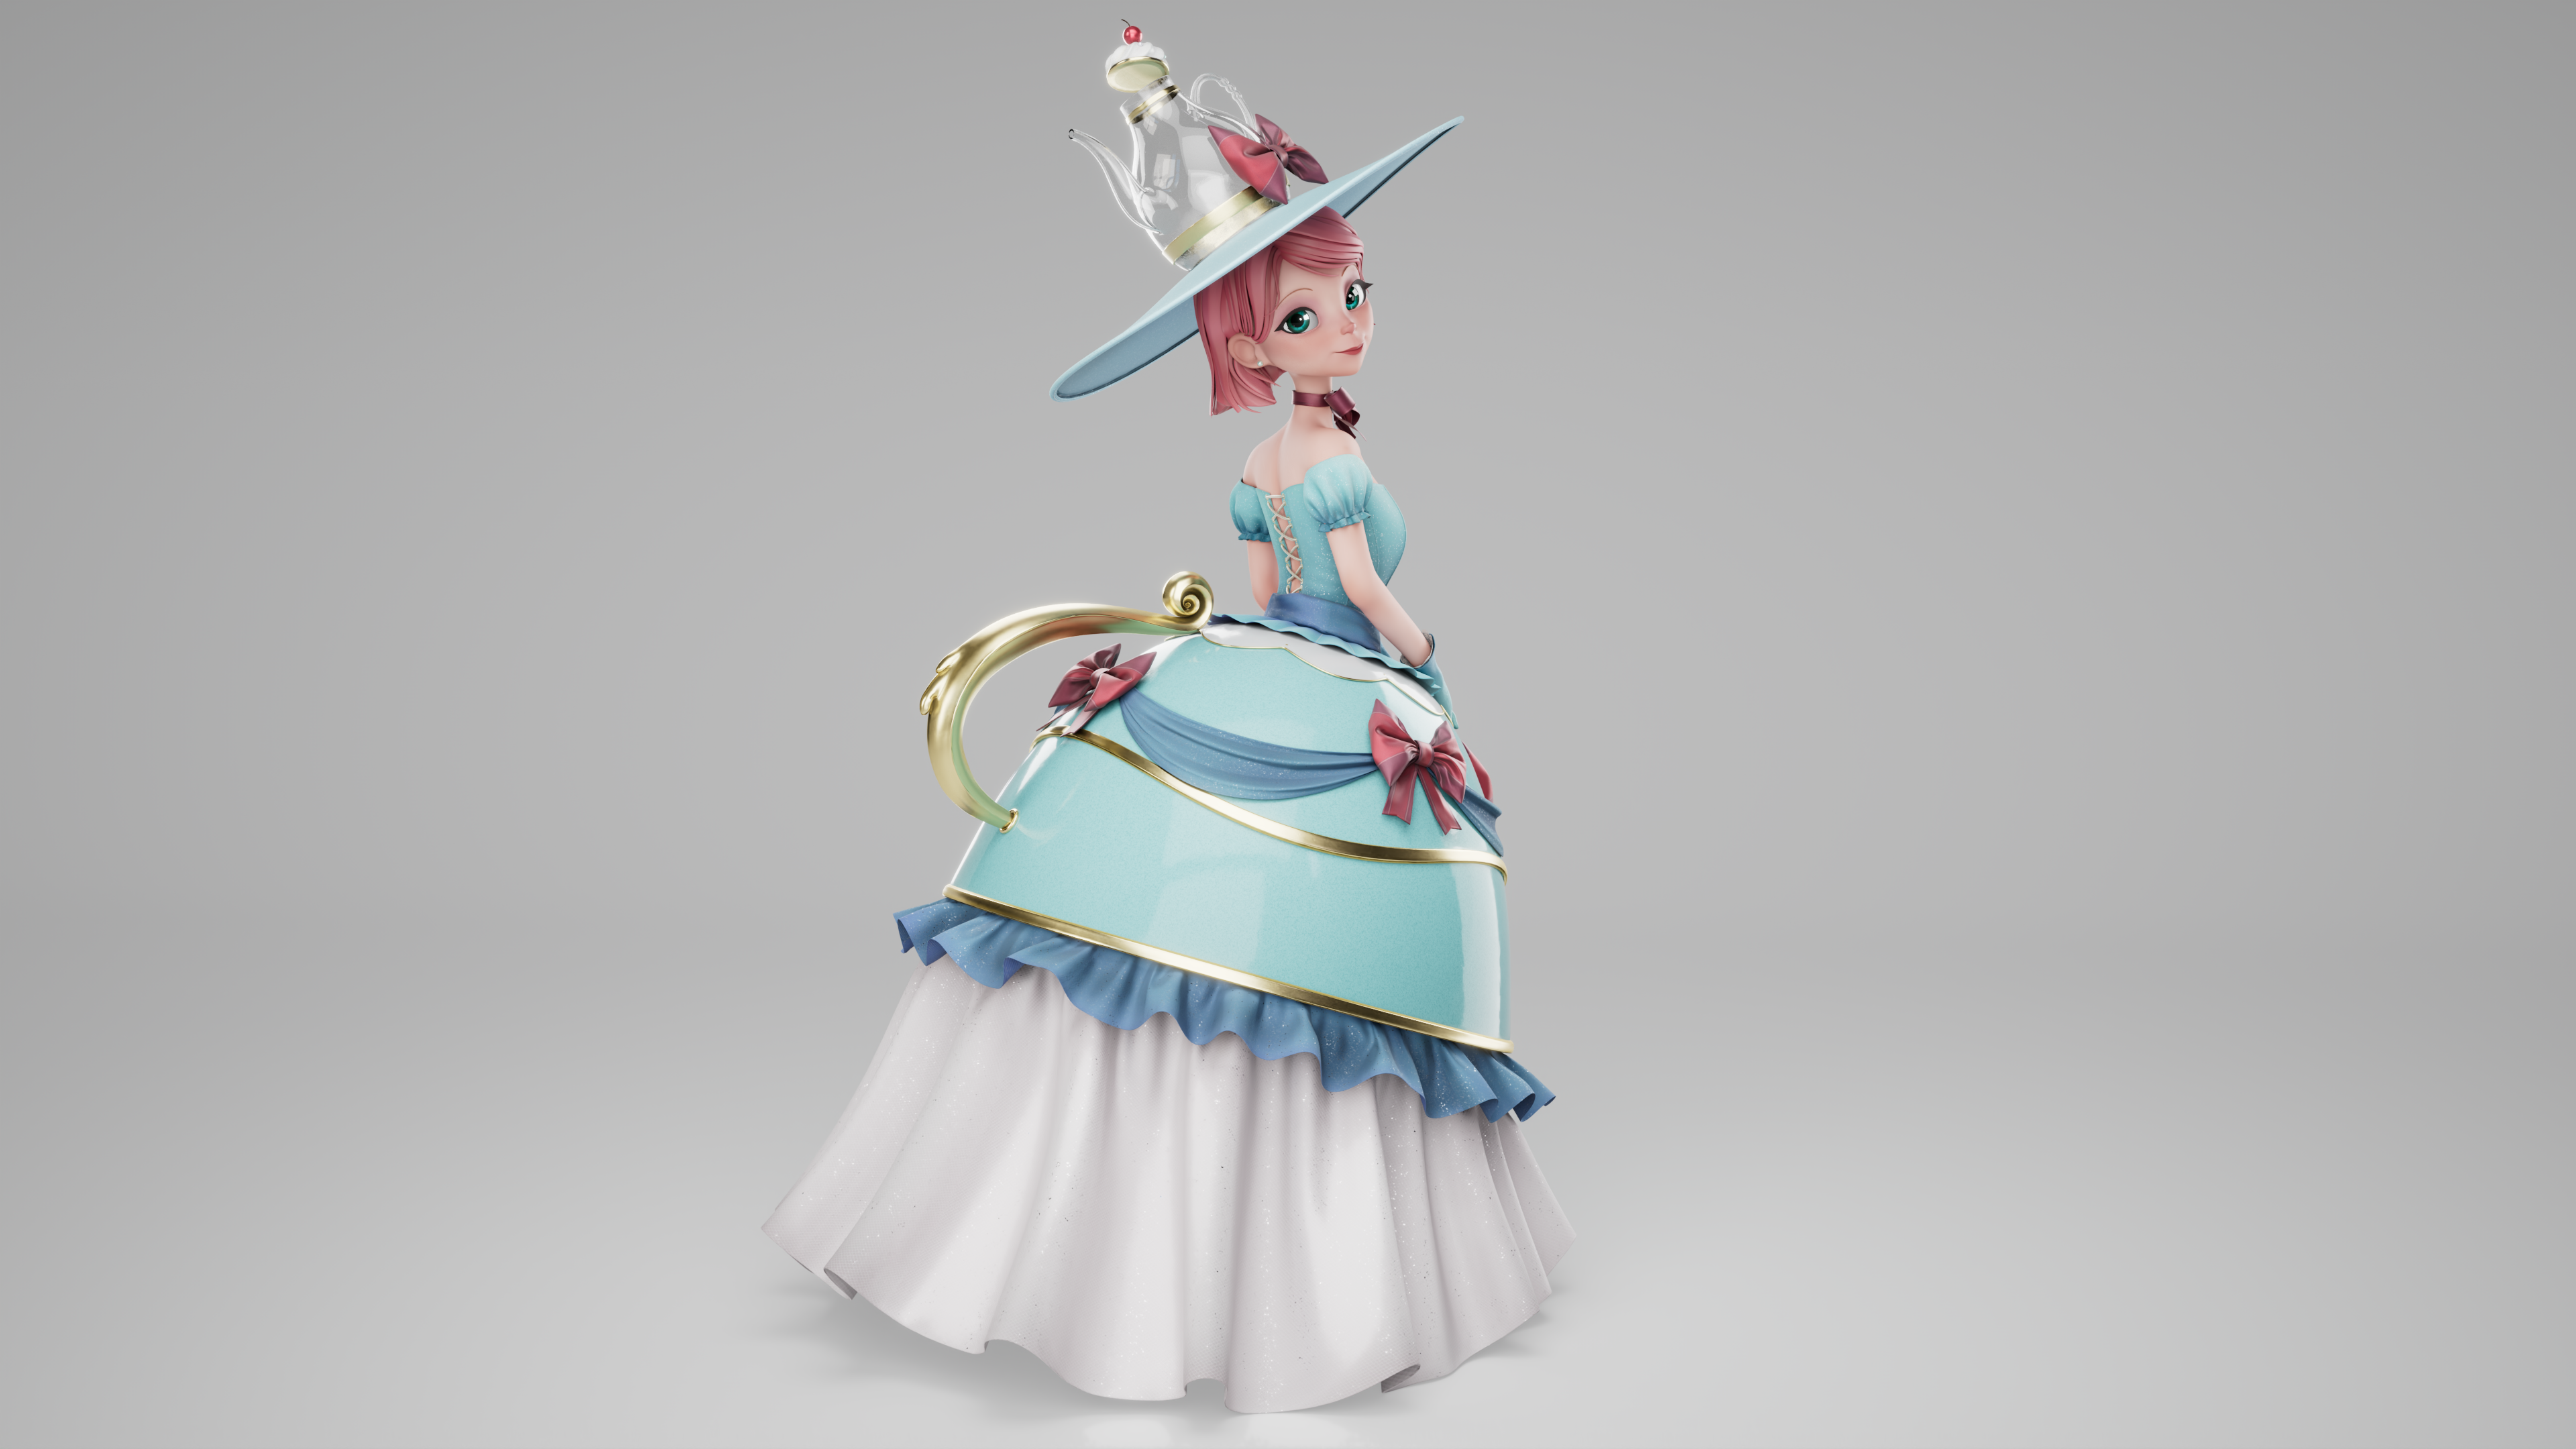
Interview with Maria Florencia Nespola Mangariello | 3D Character Artist
Can you introduce yourself and tell us what you’d like to showcase today?
Hi everyone! My name is Maria Florencia Nespola Mangariello, and I’m a 3D Character Artist from Argentina. My love for art started at a young age, I’ve always enjoyed drawing my favorite characters from films and video games. After high school, I decided to pursue a Bachelor's Degree in Computer Animation at Full Sail University in the United States, specializing in 3D Character Modeling, which I graduated from in December 2024.
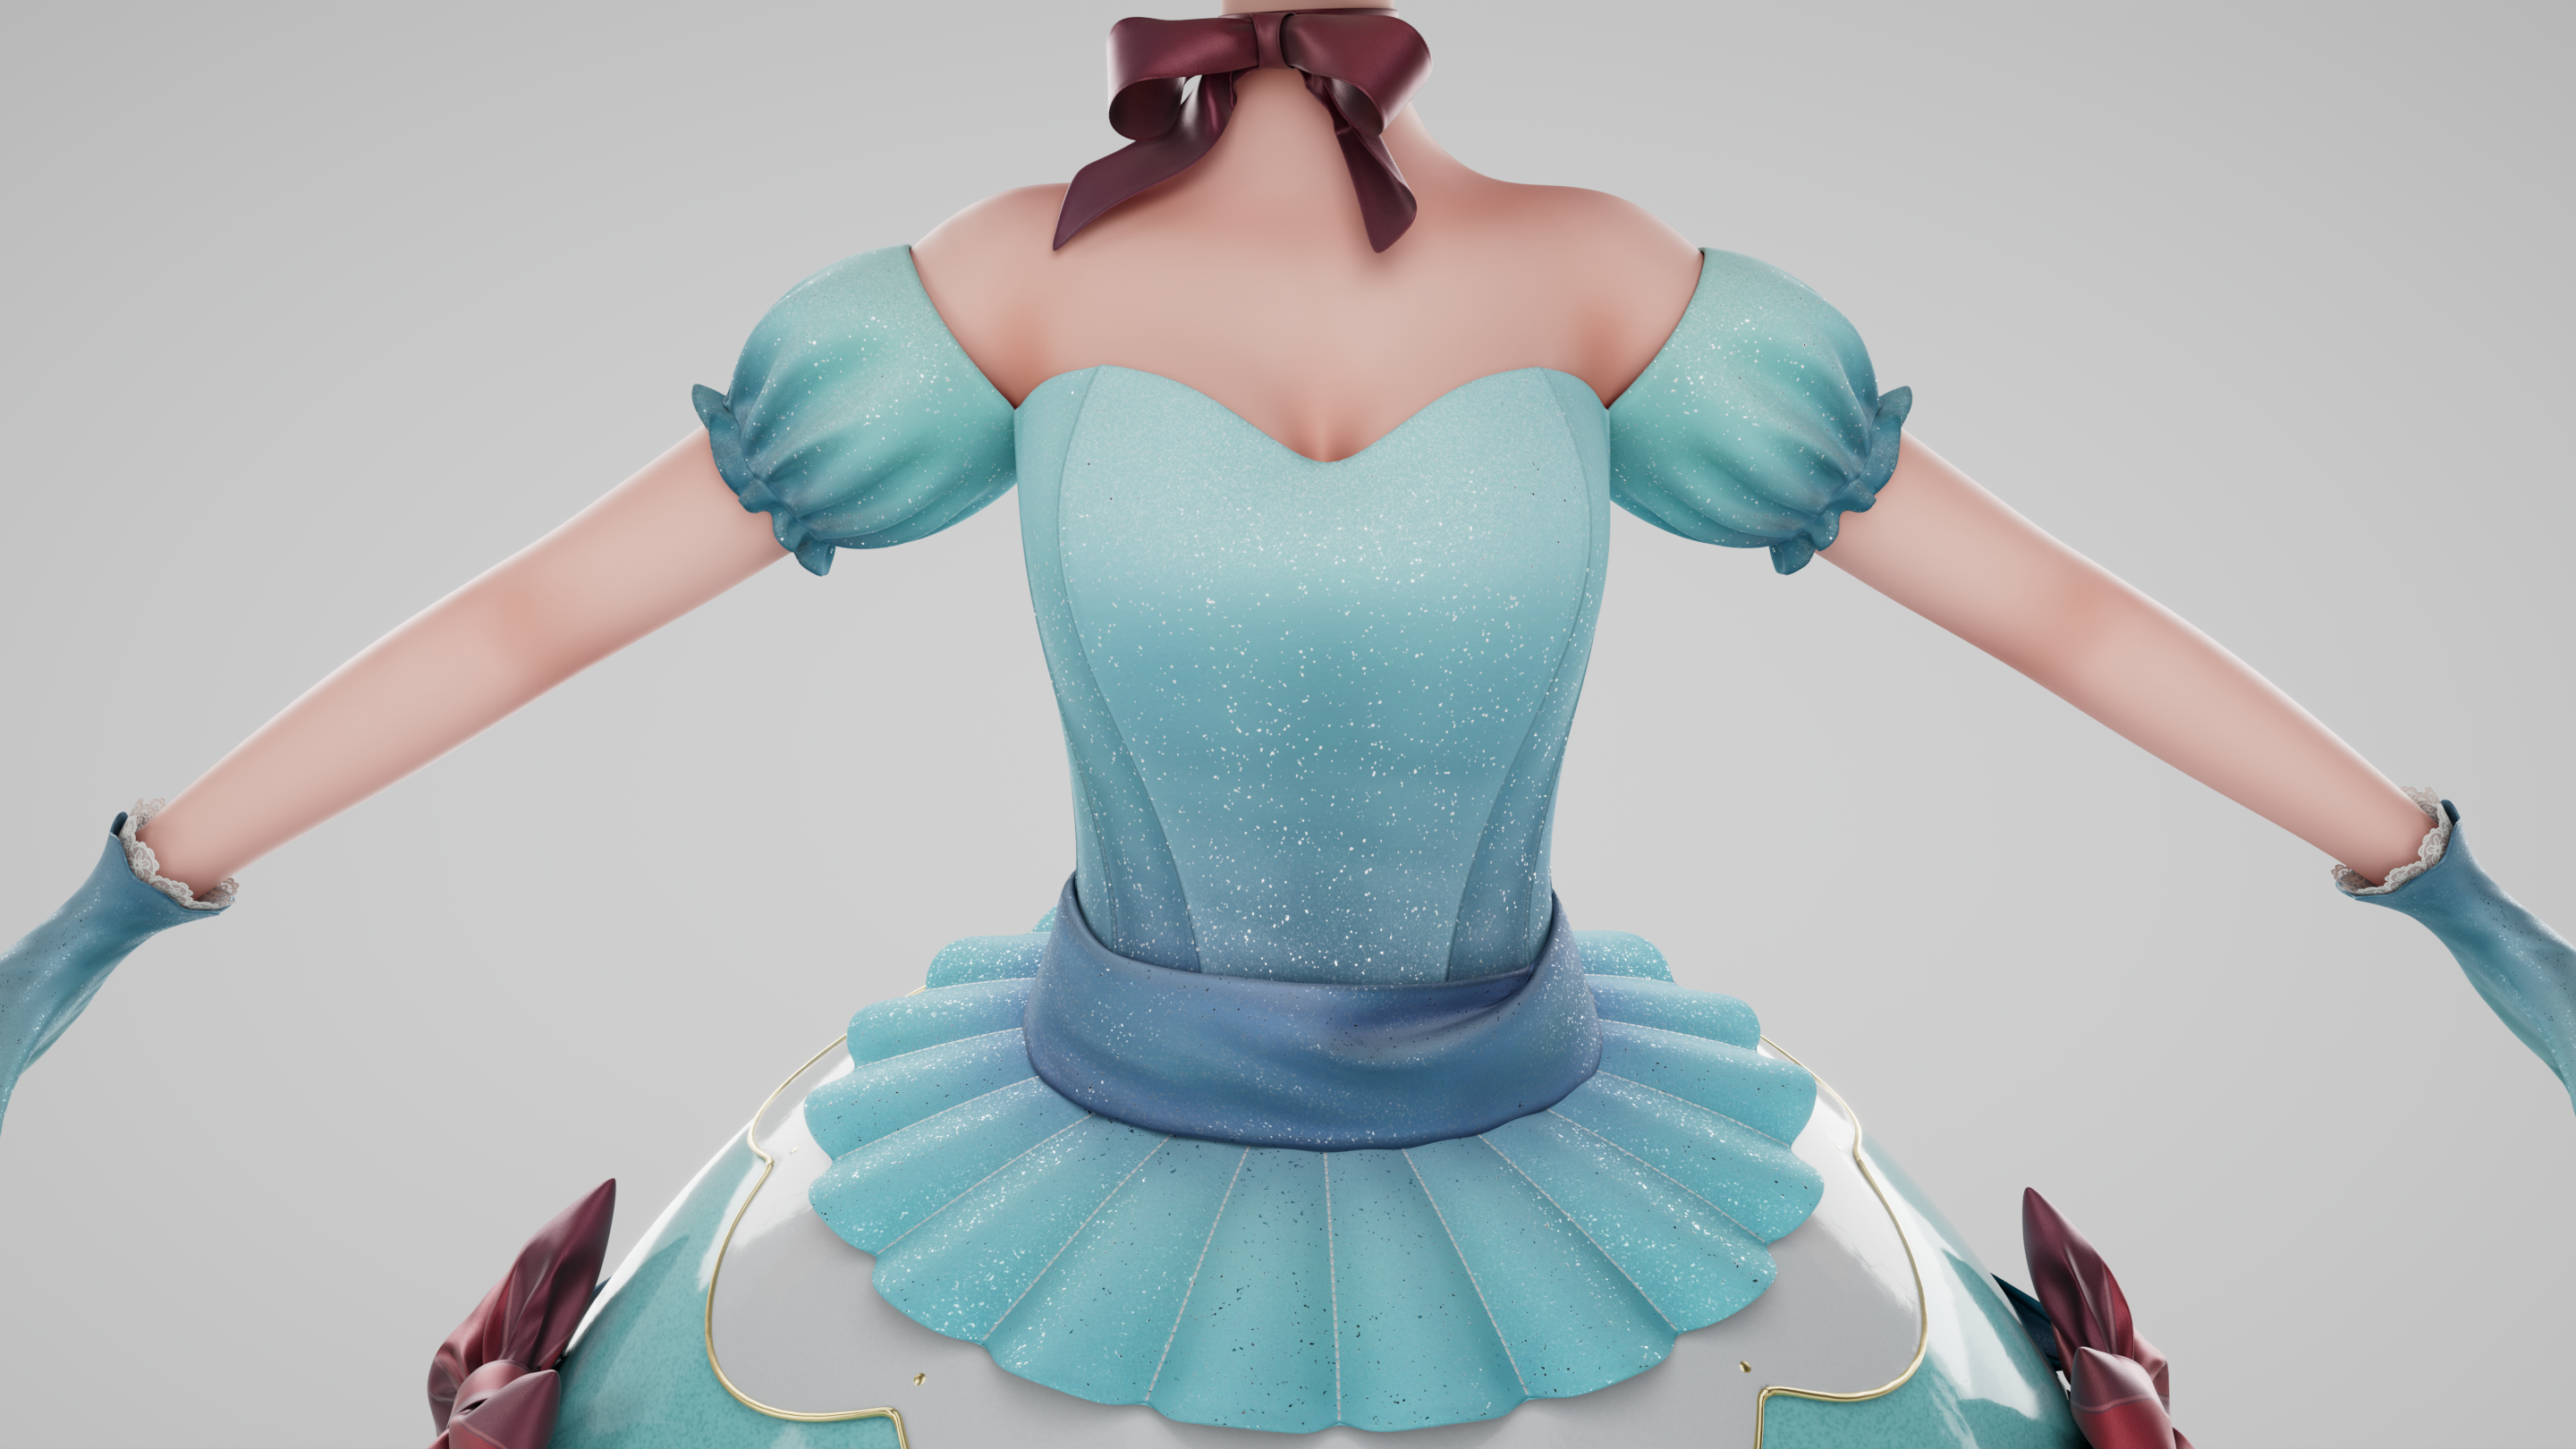
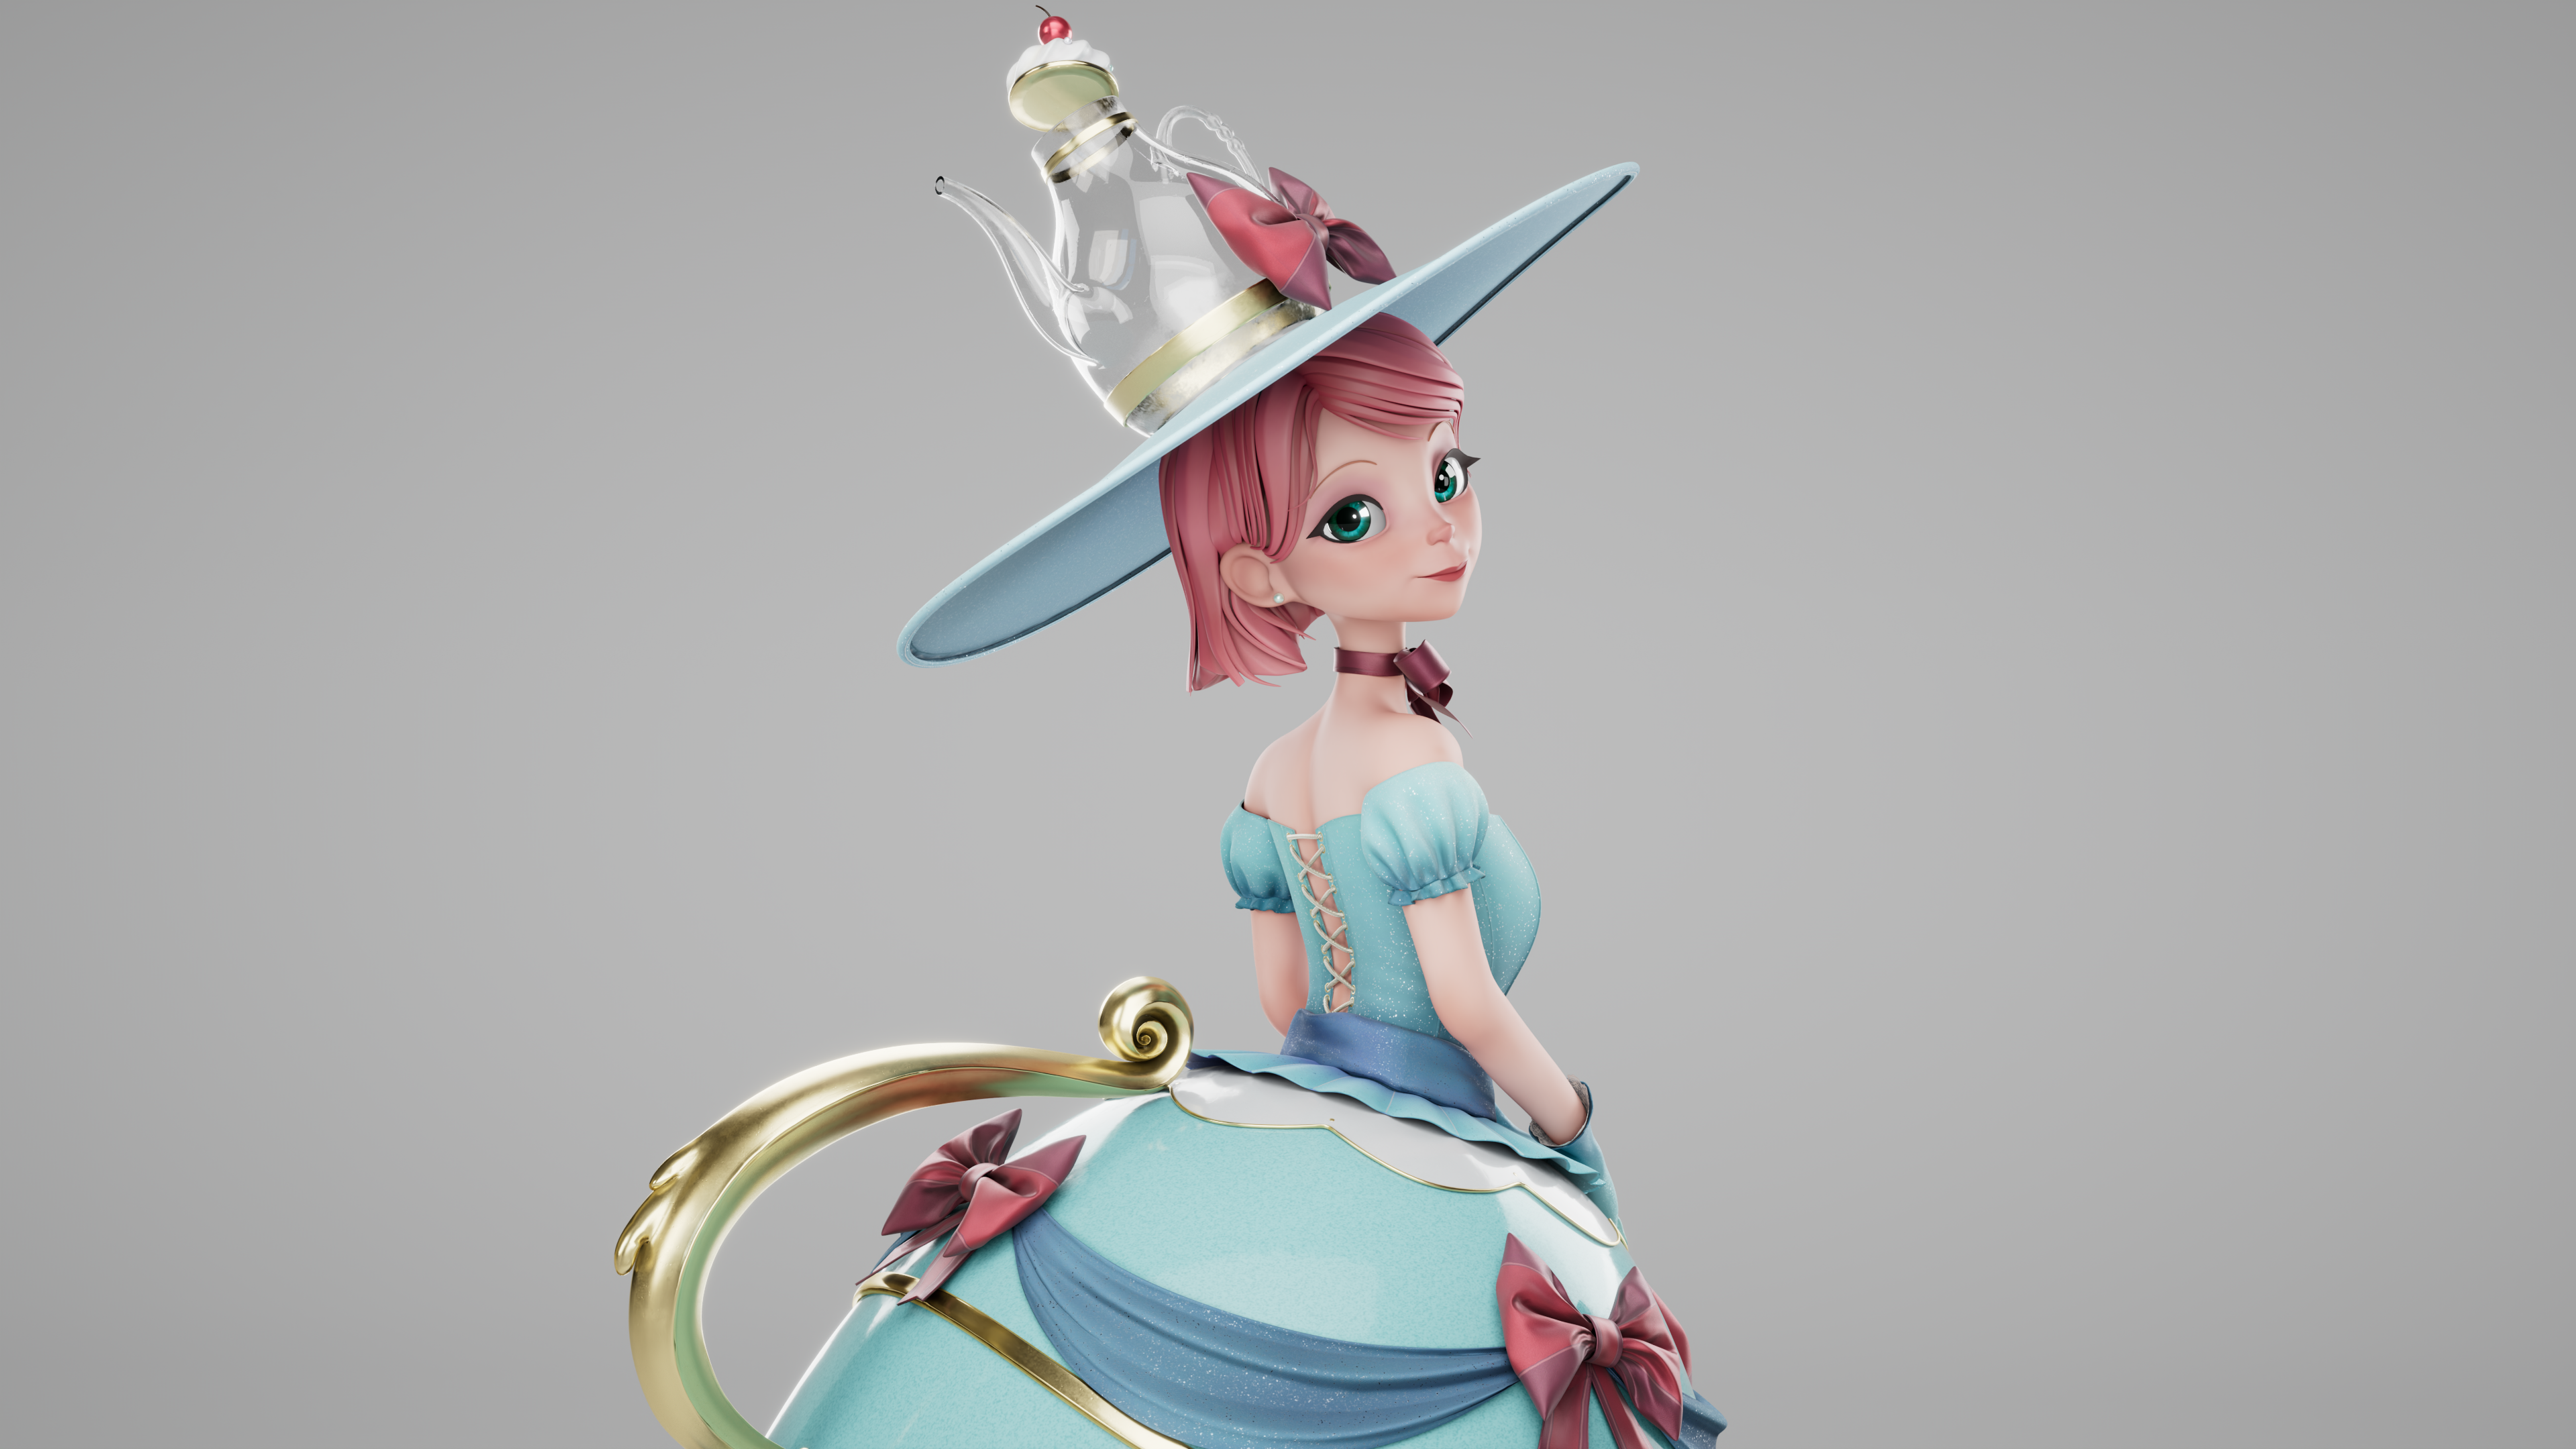
I’m particularly passionate about creating stylized characters based on concept art and bringing them to life through the entire process (high poly, low poly, texturing, lighting, and rendering). One project I’m excited to showcase today is my piece called Teacup Princess. My artwork is inspired by SkittyCat’s concept art, which immediately stood out to me because of the unique teacup design and the clothing. The concept is harmonious, with every element perfectly reflecting the teacup theme, and I was inspired to translate that into a 3D model that captures the character’s elegance through my own style.
Could you give us a brief overview of the tools and software you use in your pipeline?
Before starting any character, I gather reference images for the overall look and garments in PureRef. This helps me get a solid understanding of how cloth should be built in real life, which I can then apply to my patterns.
Once I have my references, I begin by doing a general block-out of the character in ZBrush, focusing on the proportions of both the character and the clothing. In this stage, I make sure the body is sculpted to a good point, ensuring I don't change the proportions too much later on.
I then export the body along with the teacup base block-out to Marvelous Designer to start creating the patterns from scratch.
Progress in Marvelous Designer:
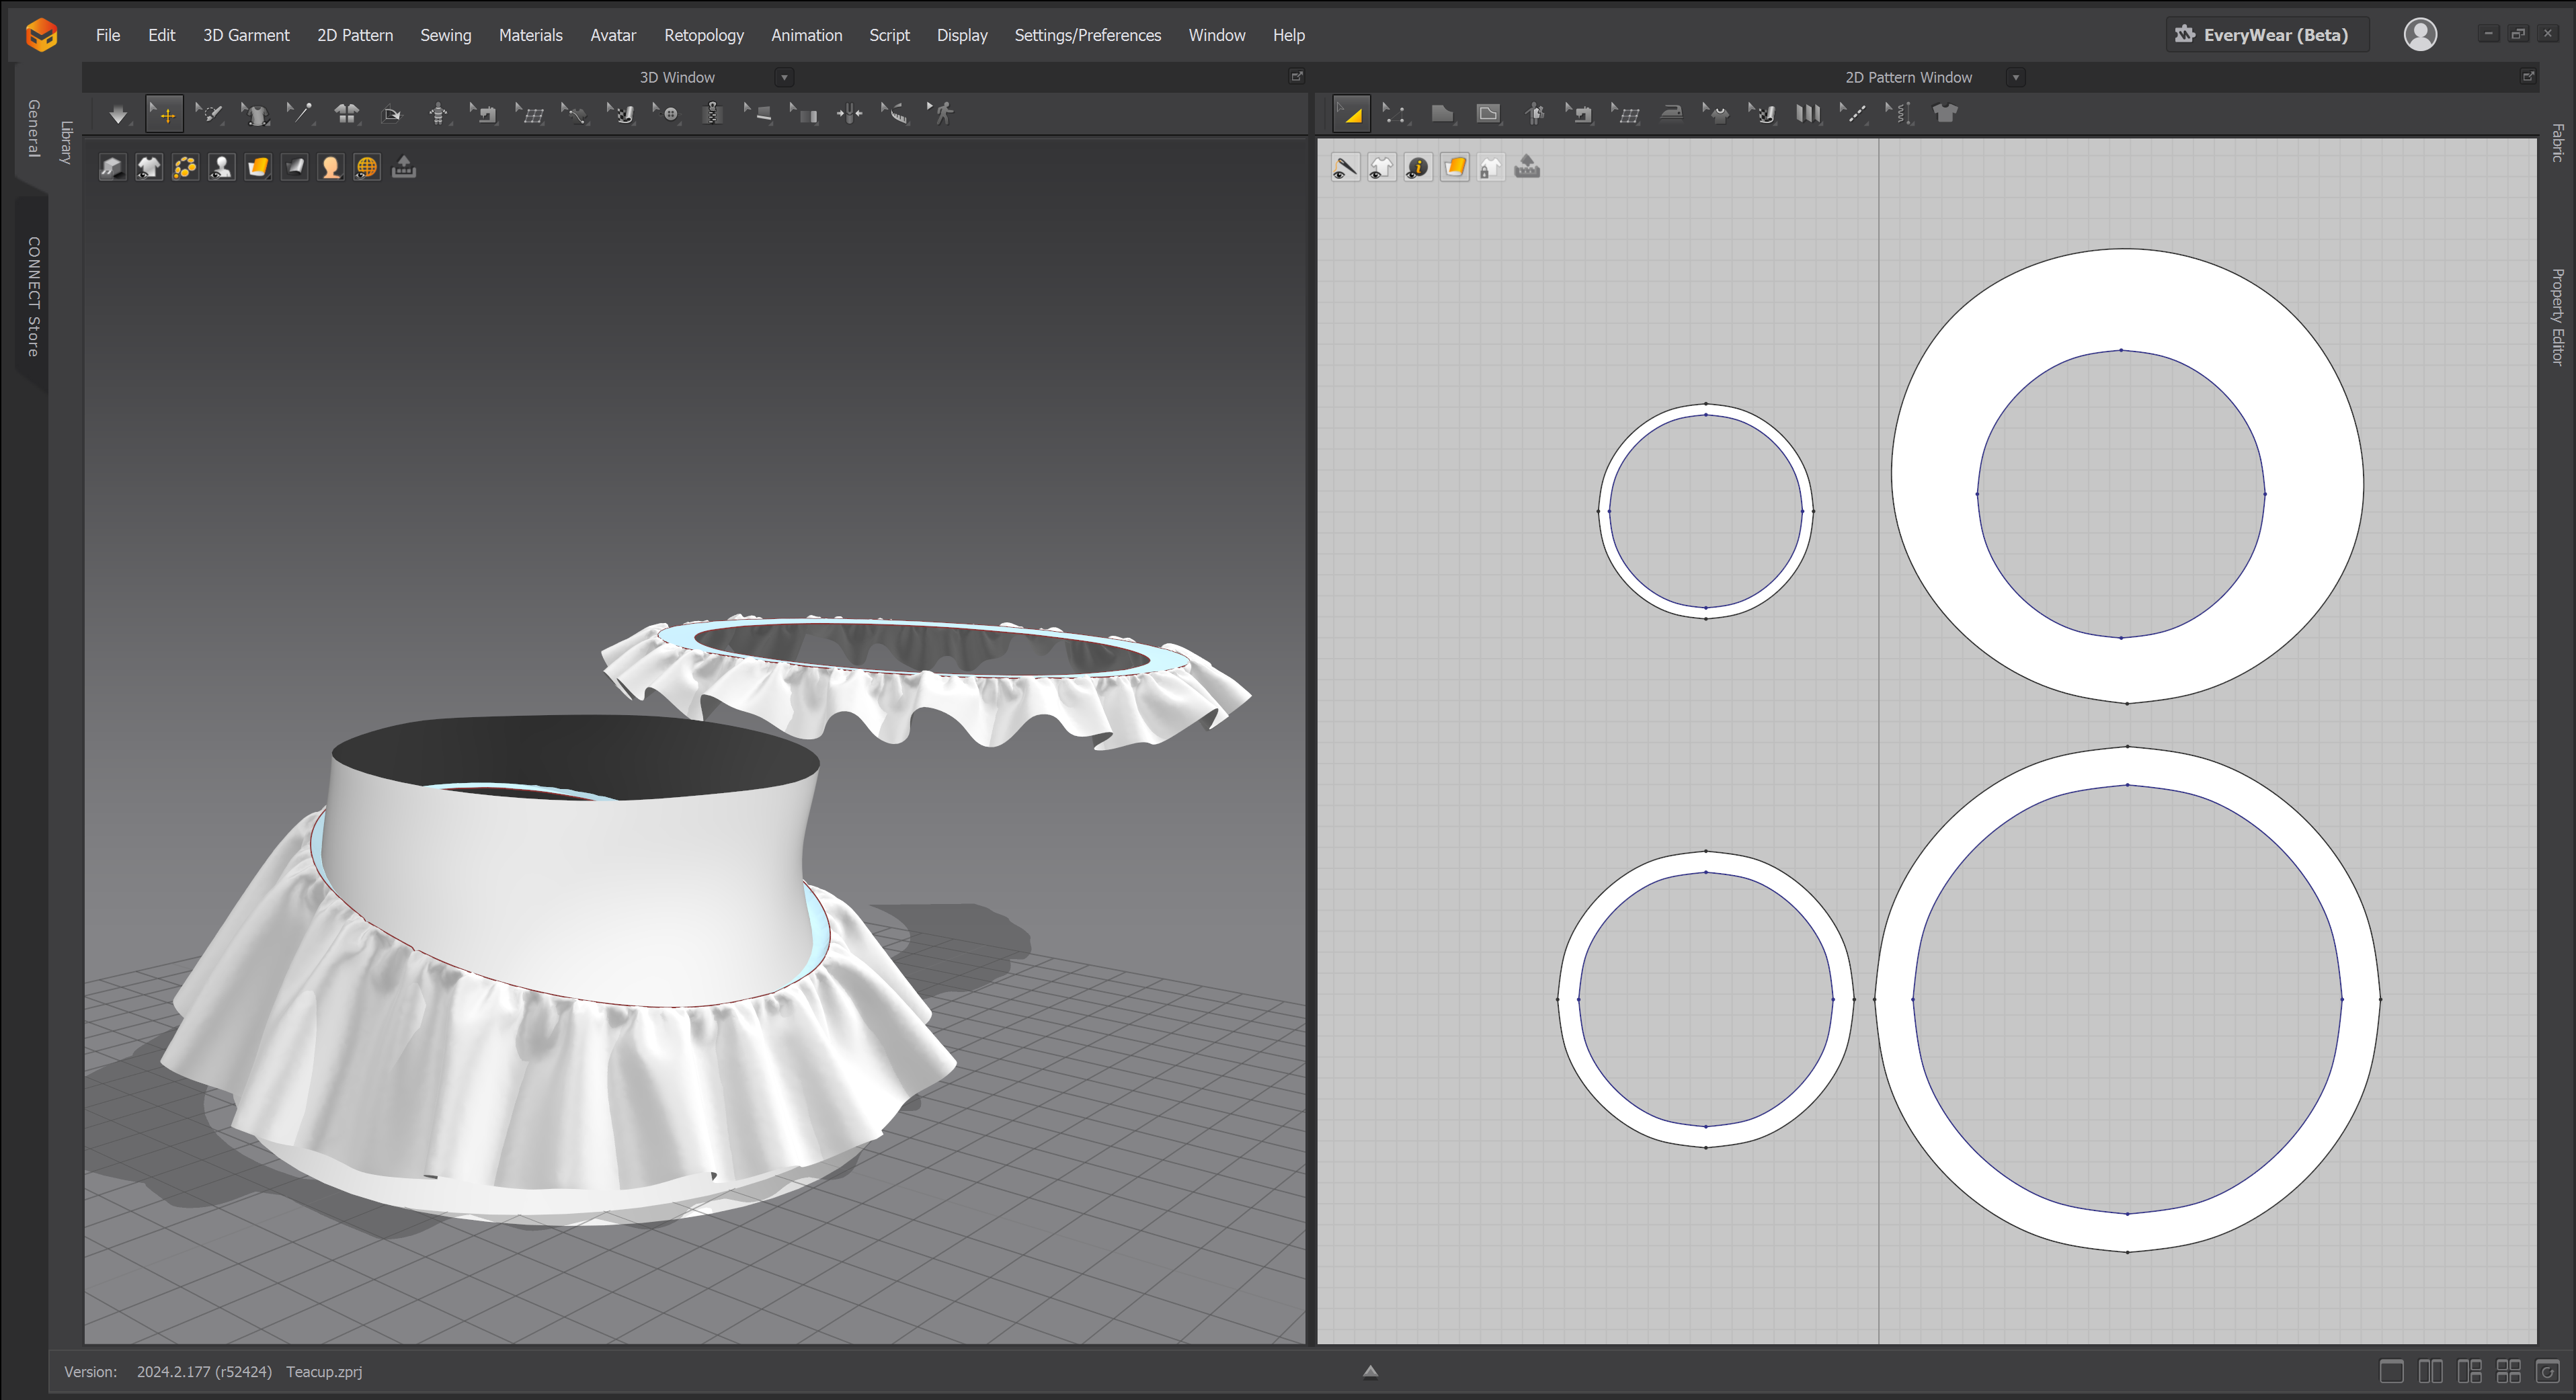
For the bottom fabric, I modeled a quick base in Maya to get the overall shape for the wrinkles seen in the concept art. I began by creating two spherical patterns and freezing them to sew the garment together. The Strengthening Tool was extremely helpful for stiffening the fabric and making it smoother.
 I used a similar method for the sleeves, adding two fabrics as holders, freezing them while simulating the middle part, and strengthening it.
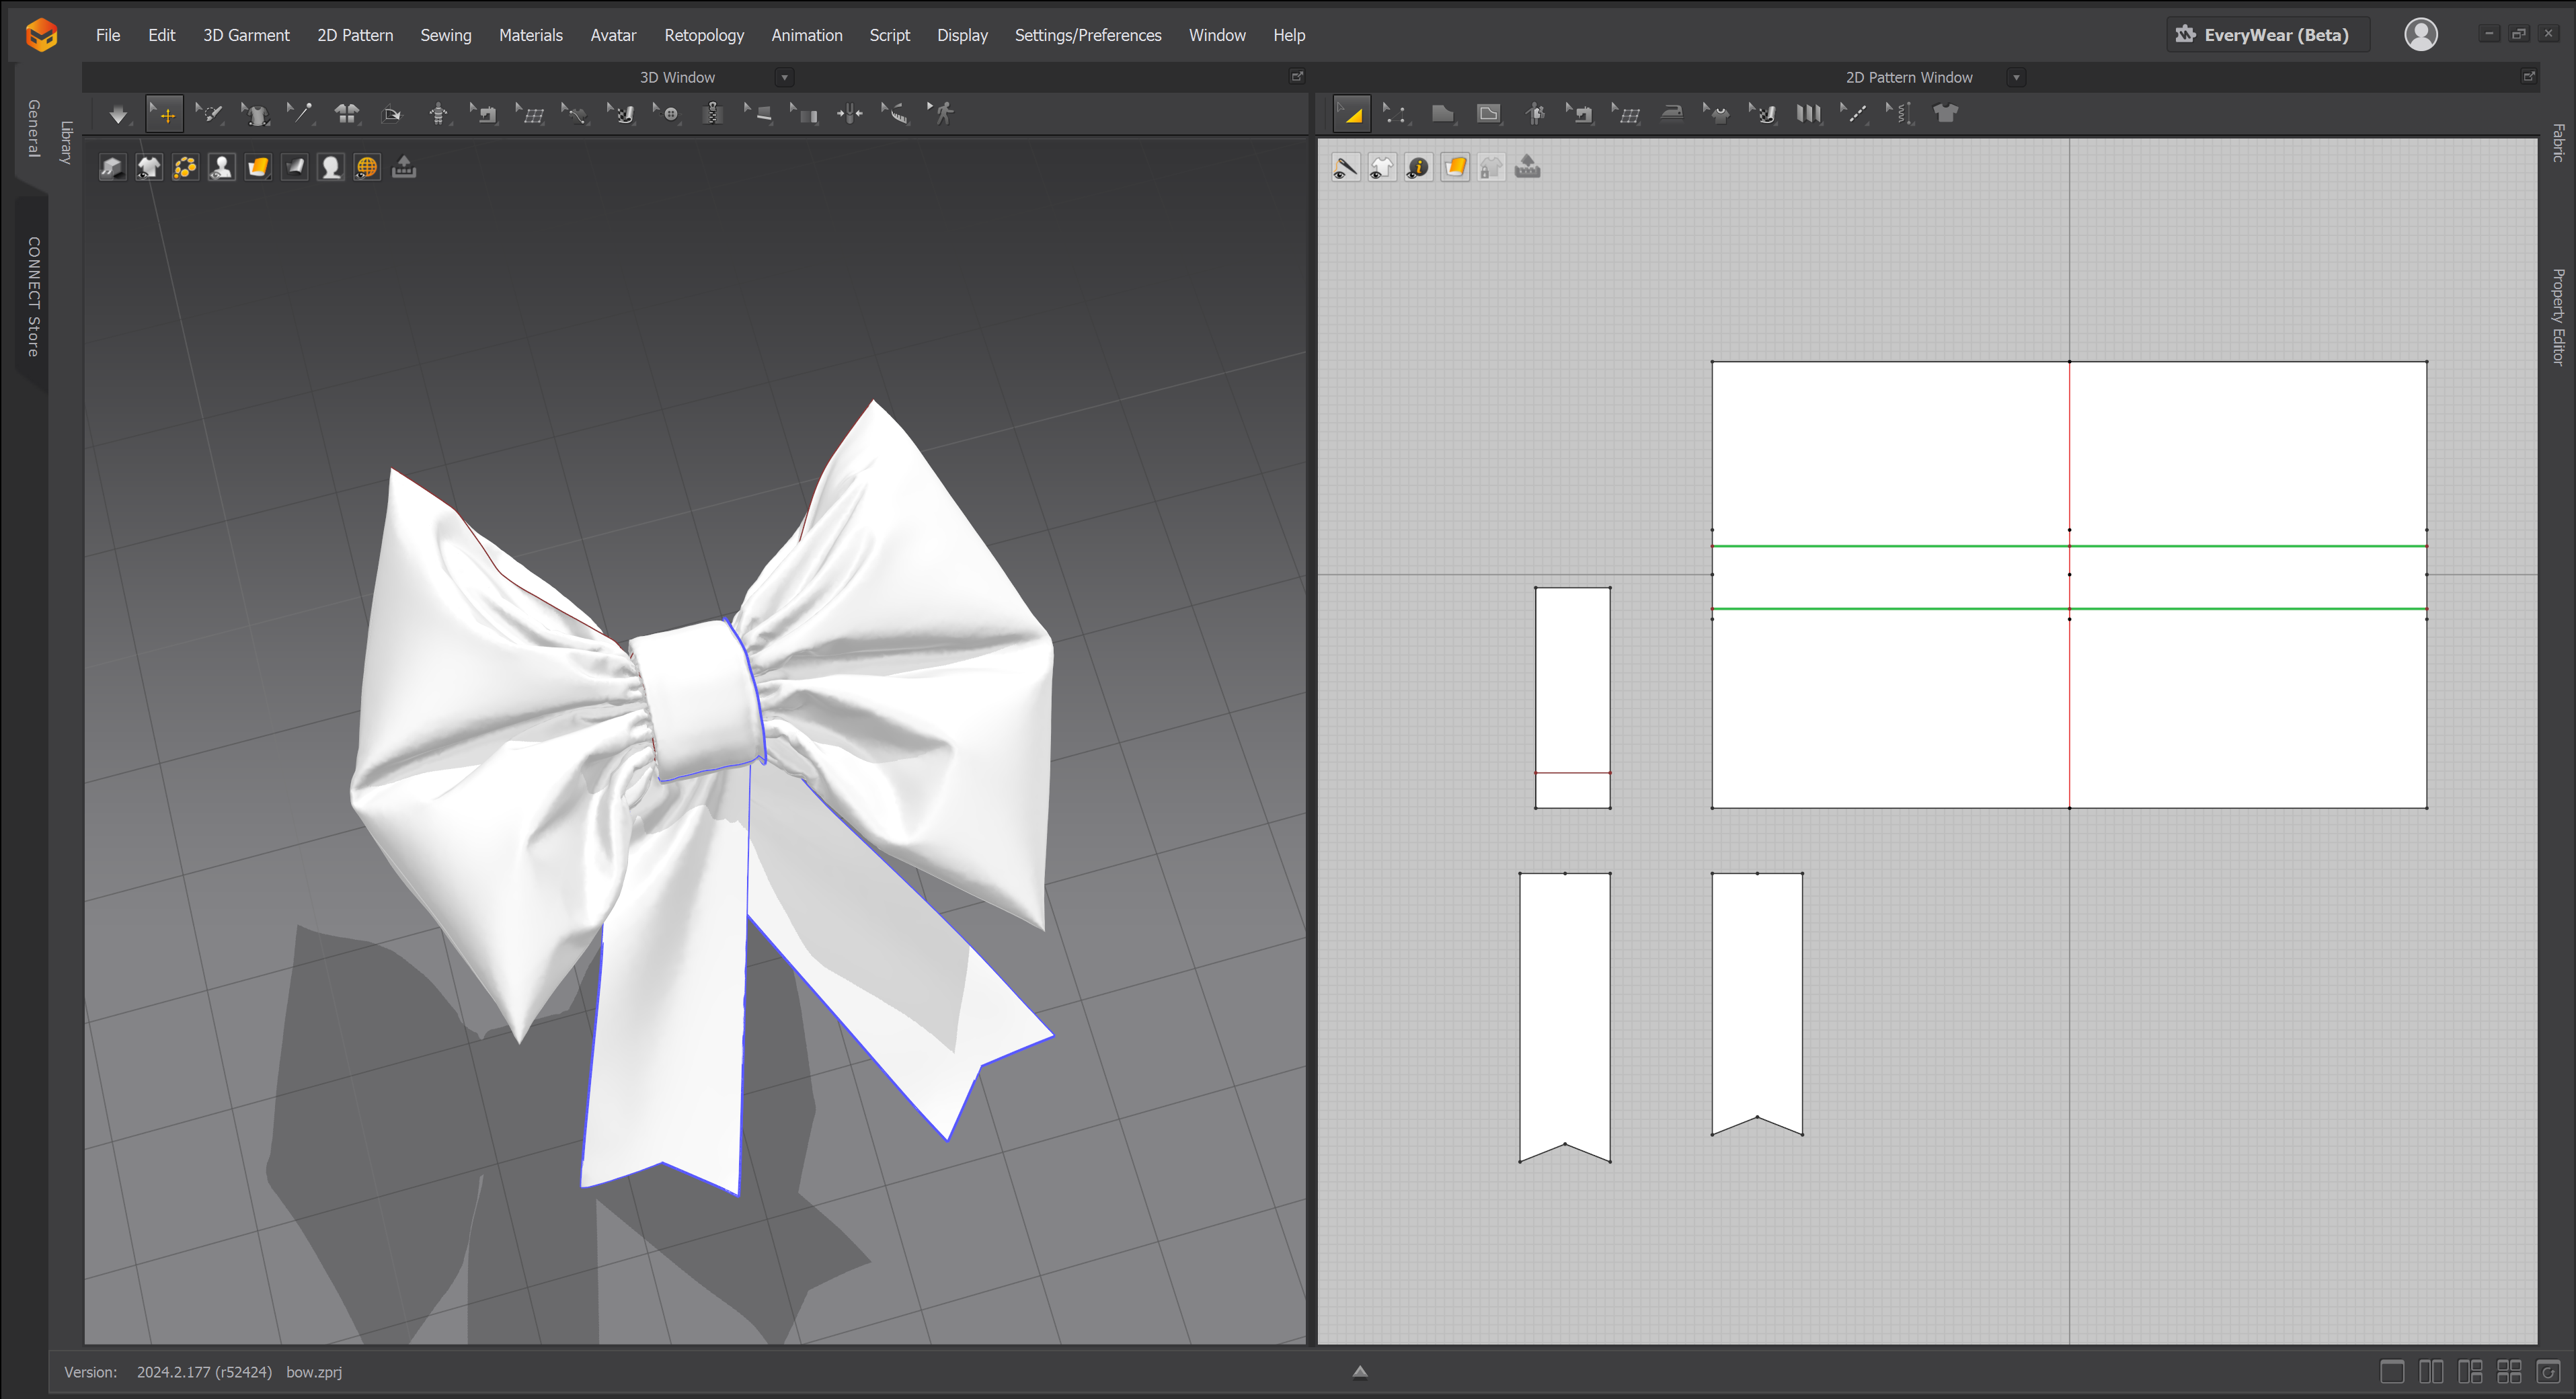
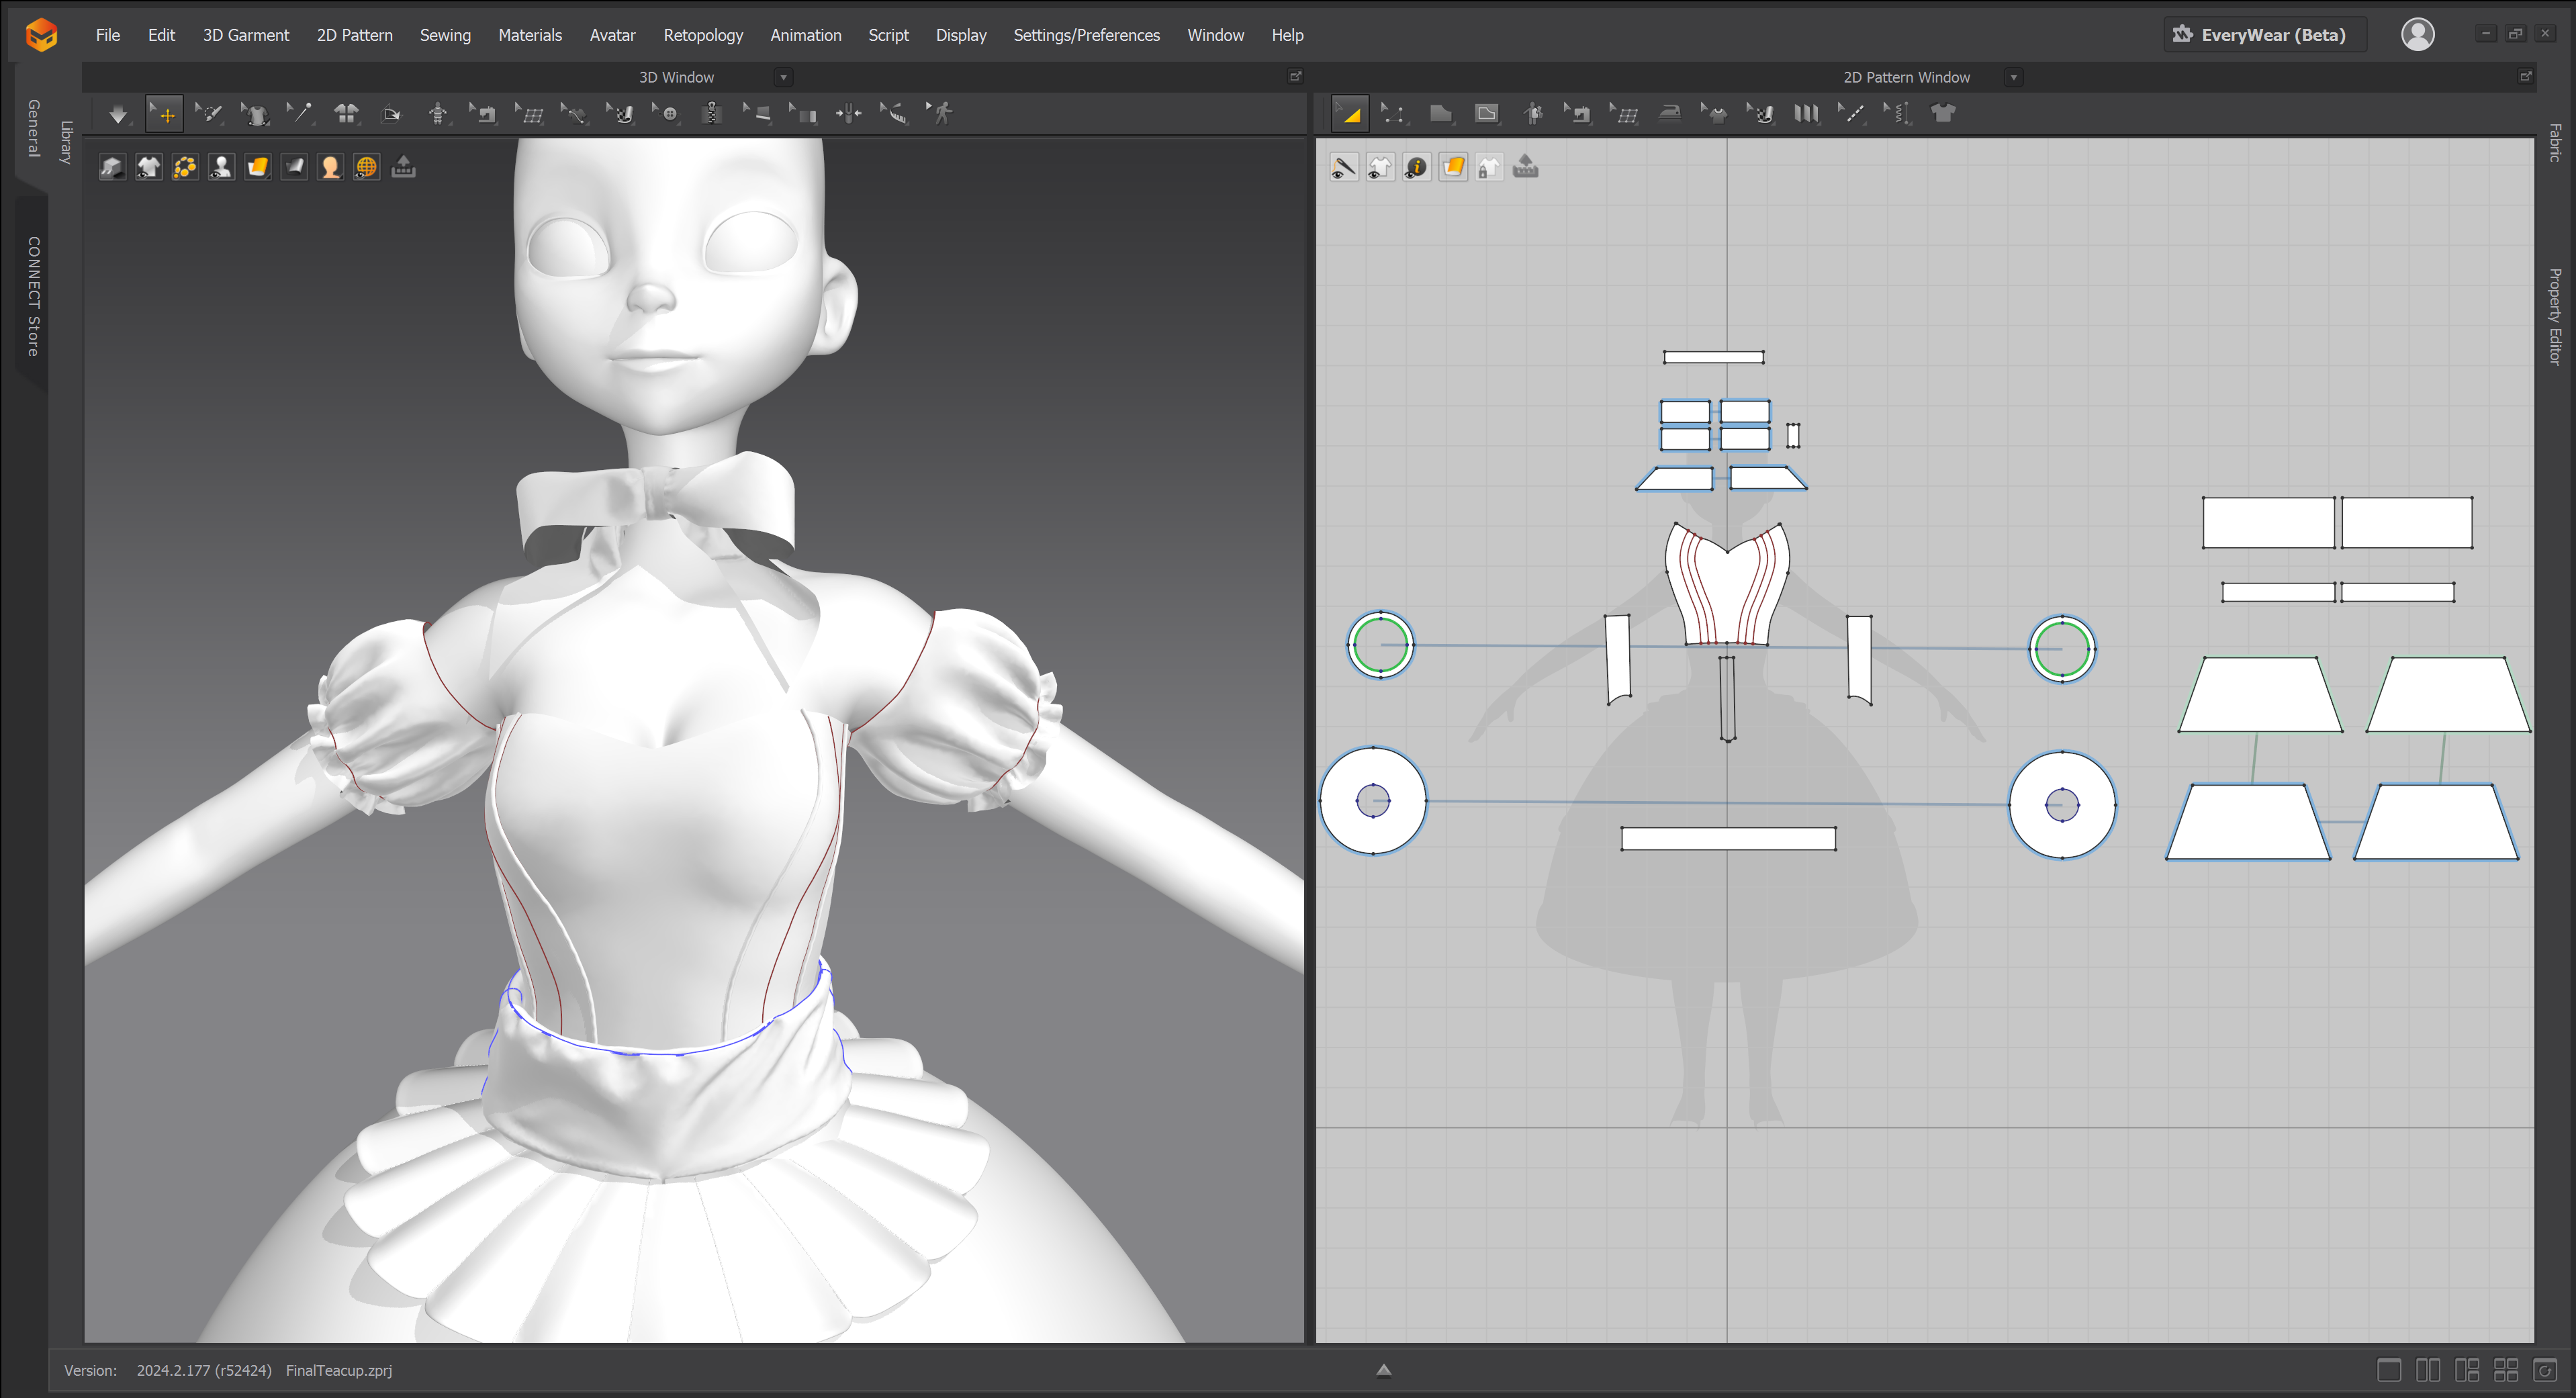 The ribbons were one of my favorite pieces to create. I constantly used the Tack Tool (one tack for each of the four corners), which helped me control everything better while simulating and getting the correct shape. For the larger ribbons, I added two vertical interior lines with elastic turned on and some pressure to achieve an inflated, puffy effect. I also changed the fabric preset to Cotton_Sateen.
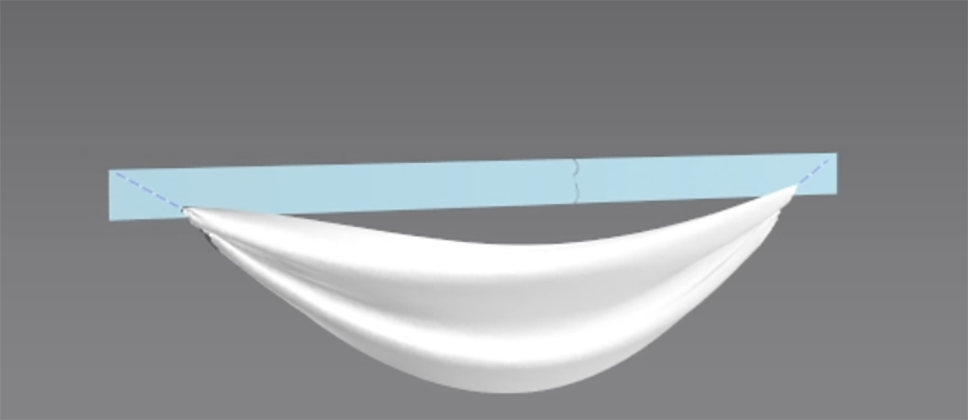
 For the middle cloth on top of the cup, I added a rectangular pattern as a base and placed two tacks (one at each corner), which I later used with a deformer in ZBrush.
Final Stages and ZBrush Workflow:
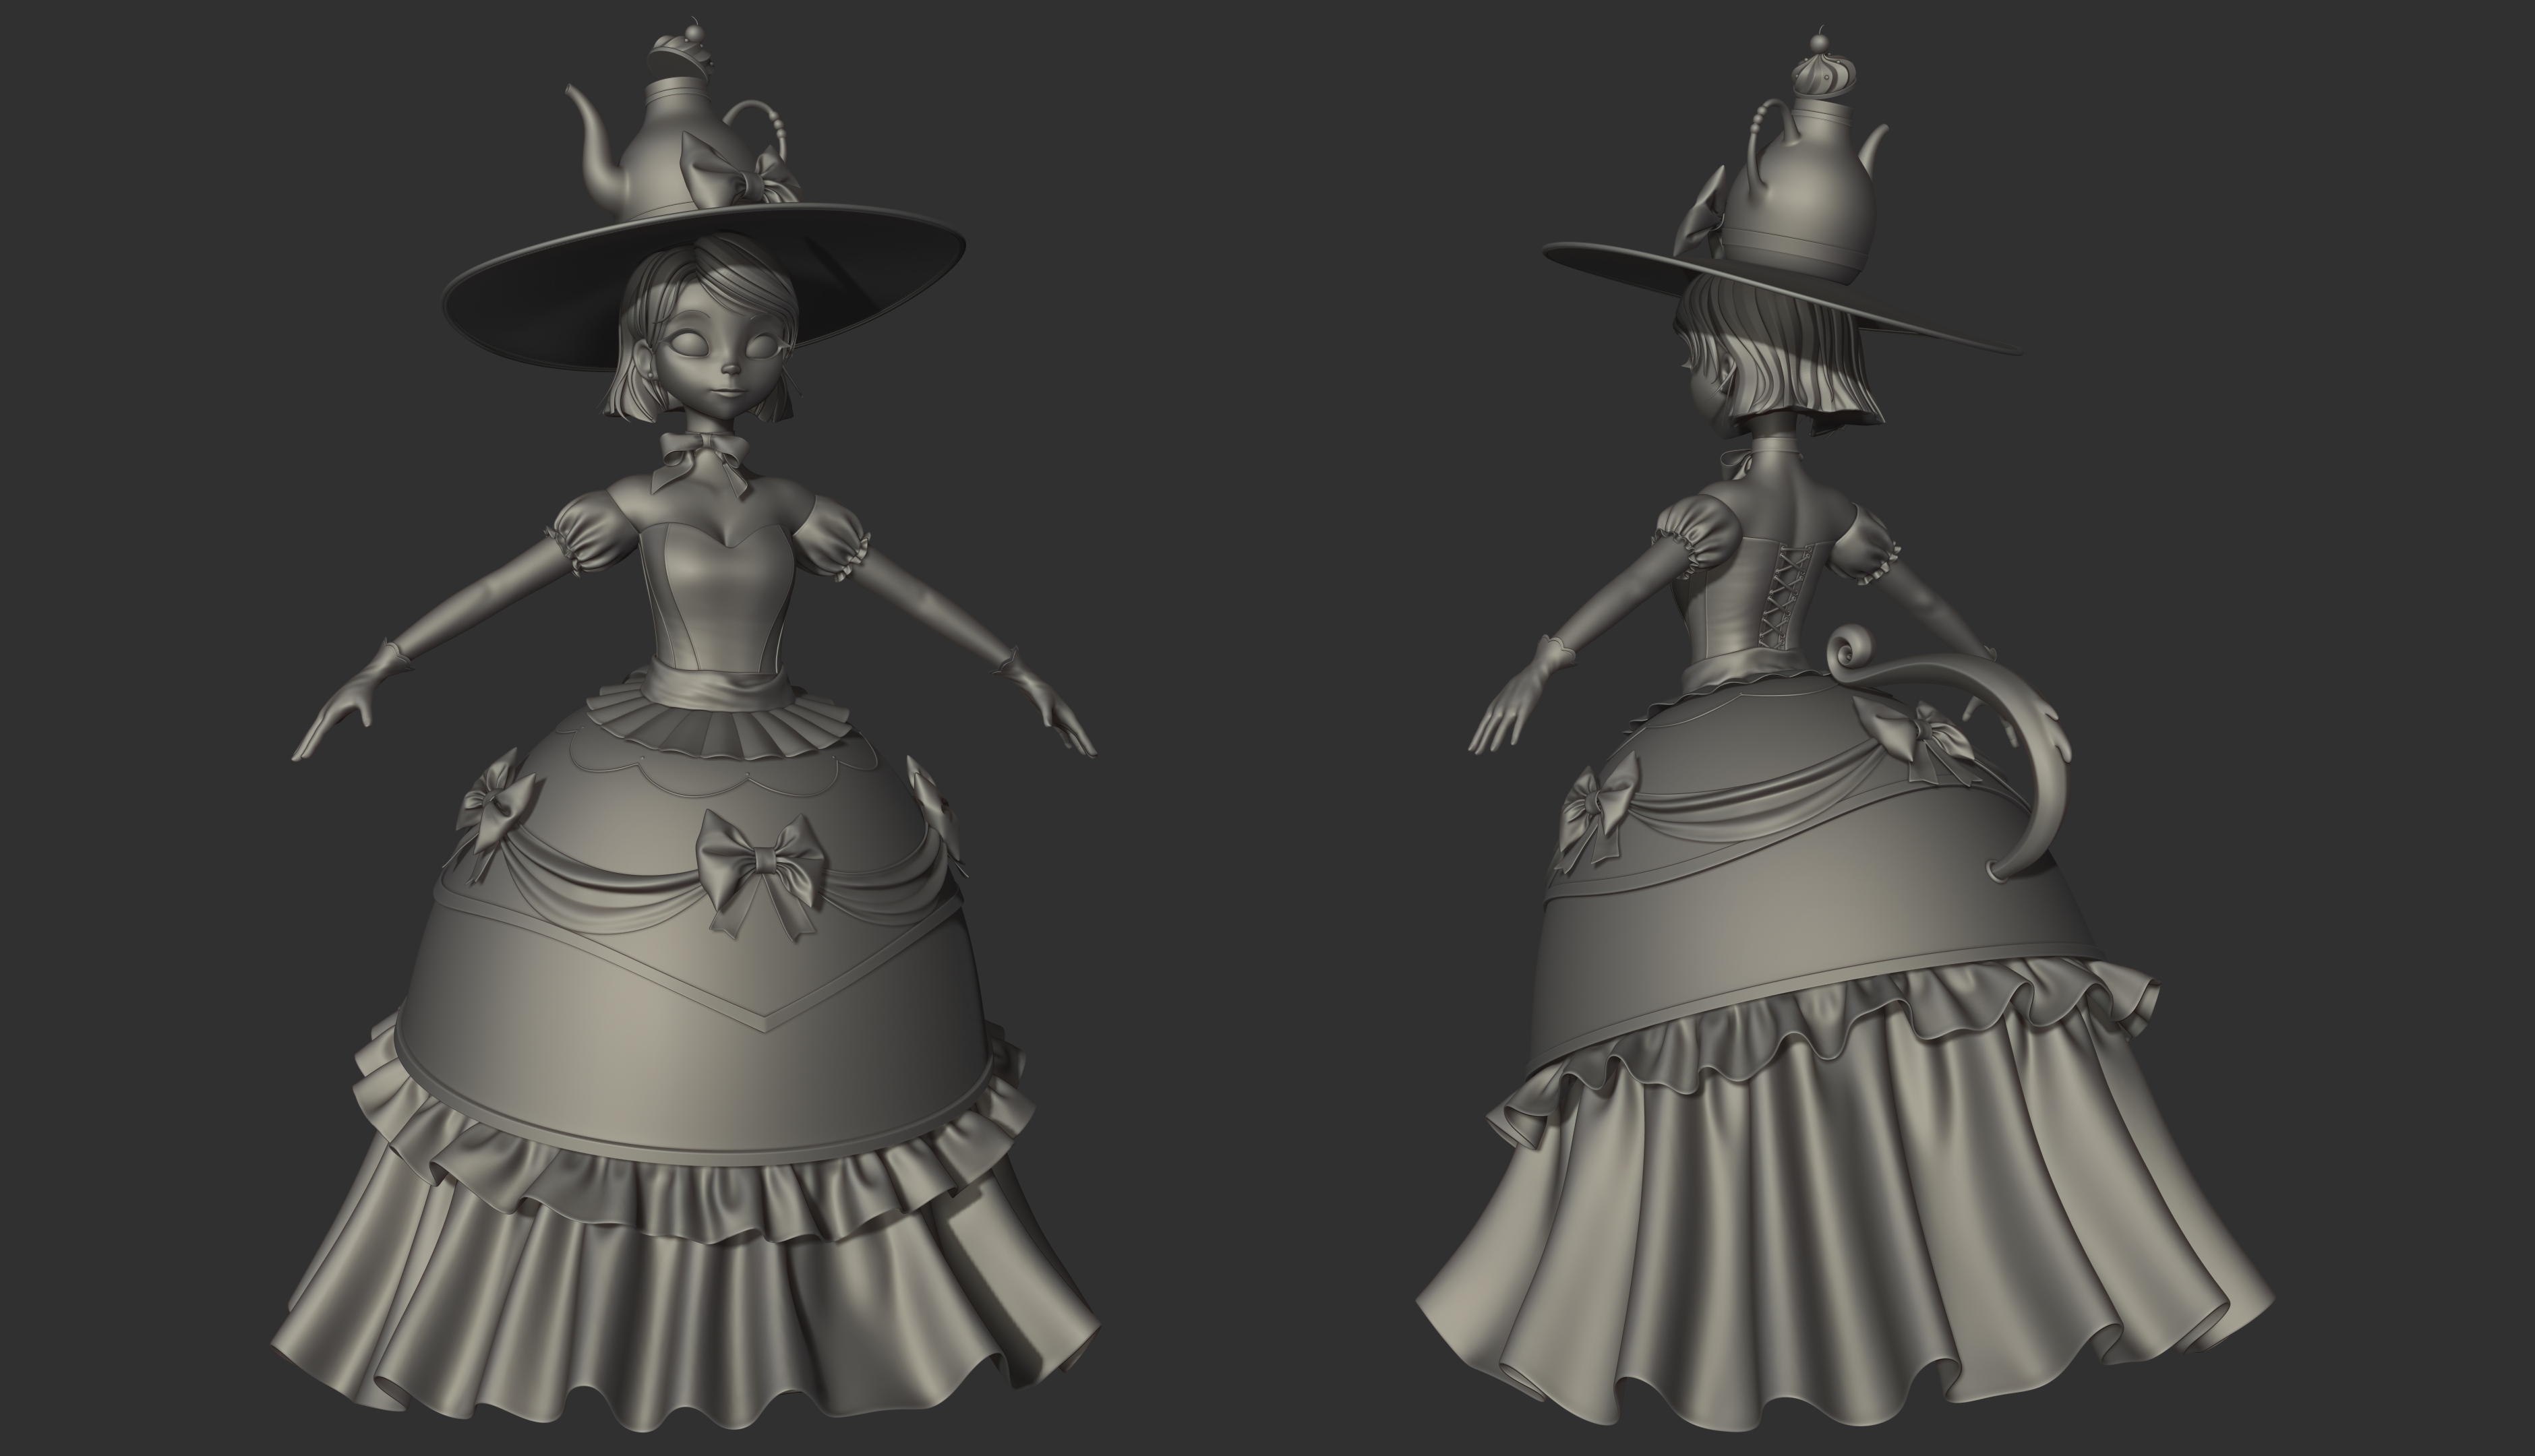
The final stages involved exporting everything and processing it in ZBrush. I used ZRemesher for all the pieces of cloth from Marvelous Designer, adding subdivisions, projecting details, adding thickness, and applying an inflated-polished border. I also did an overall pass to adjust proportions as well.
The rest of the pieces (hair, teacup/teapot, gloves, and hat) were modeled using a combination of Maya and ZBrush. Retopology and rigging to achieve the final pose were done in Maya.
 I textured the character in Substance Painter, aiming to achieve a glitter effect, which was quite challenging.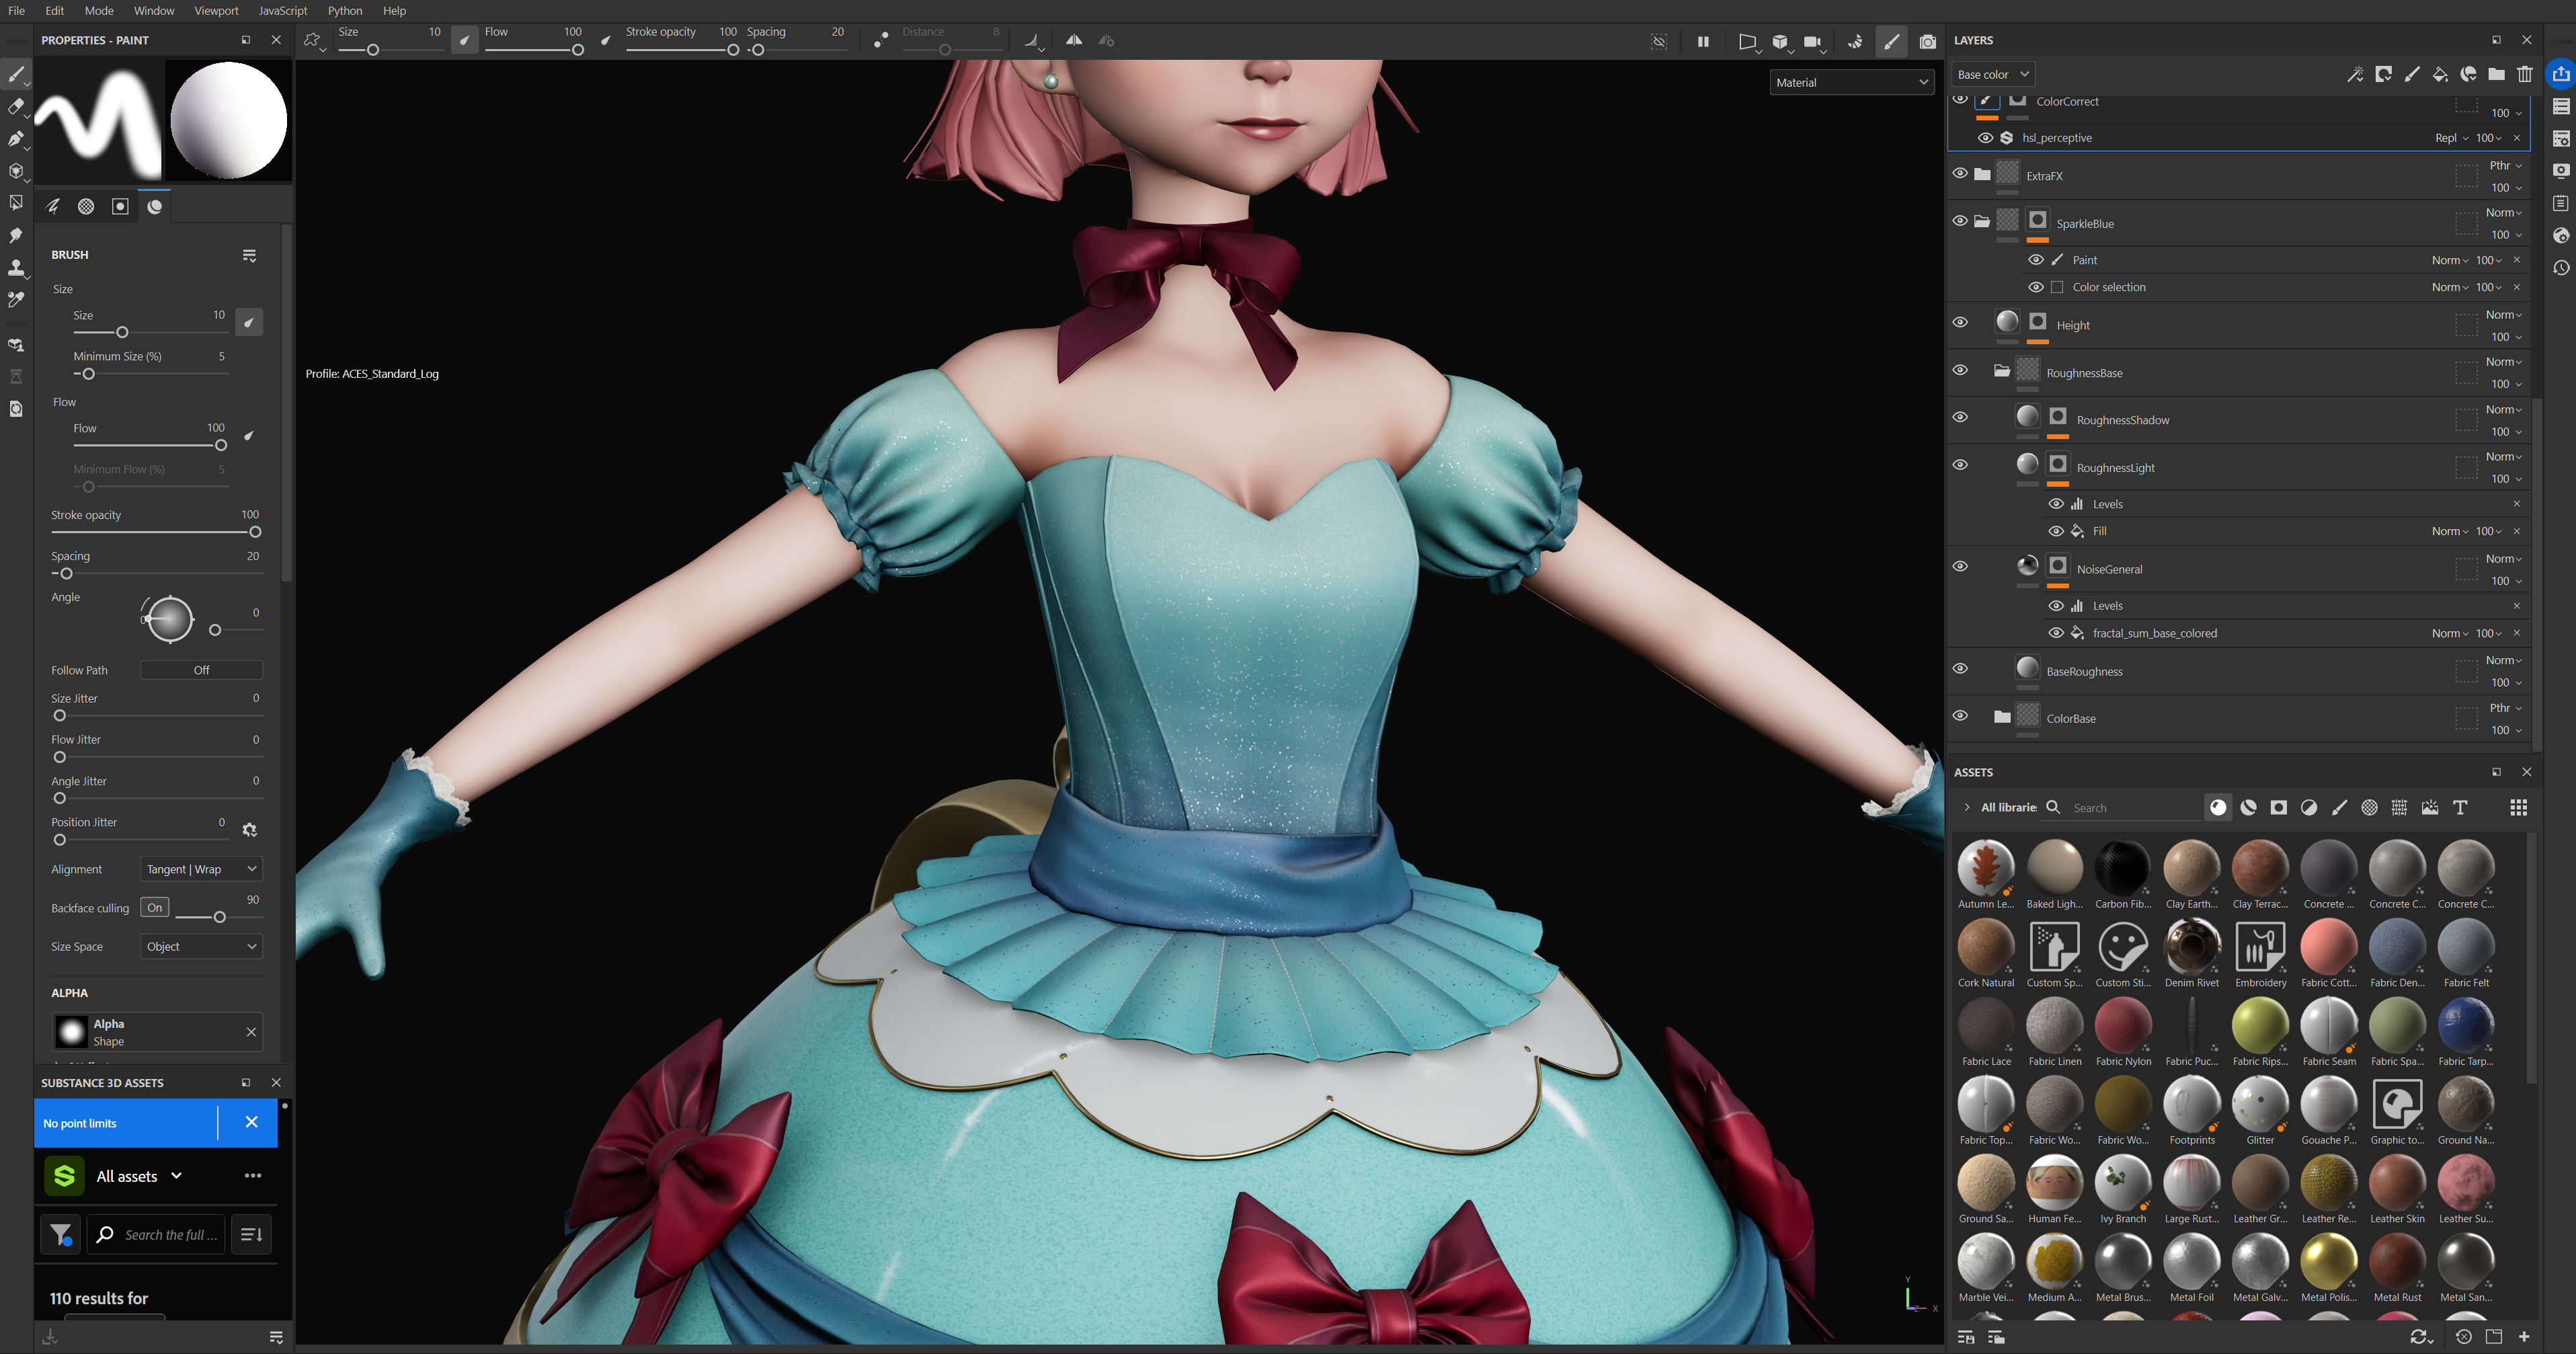
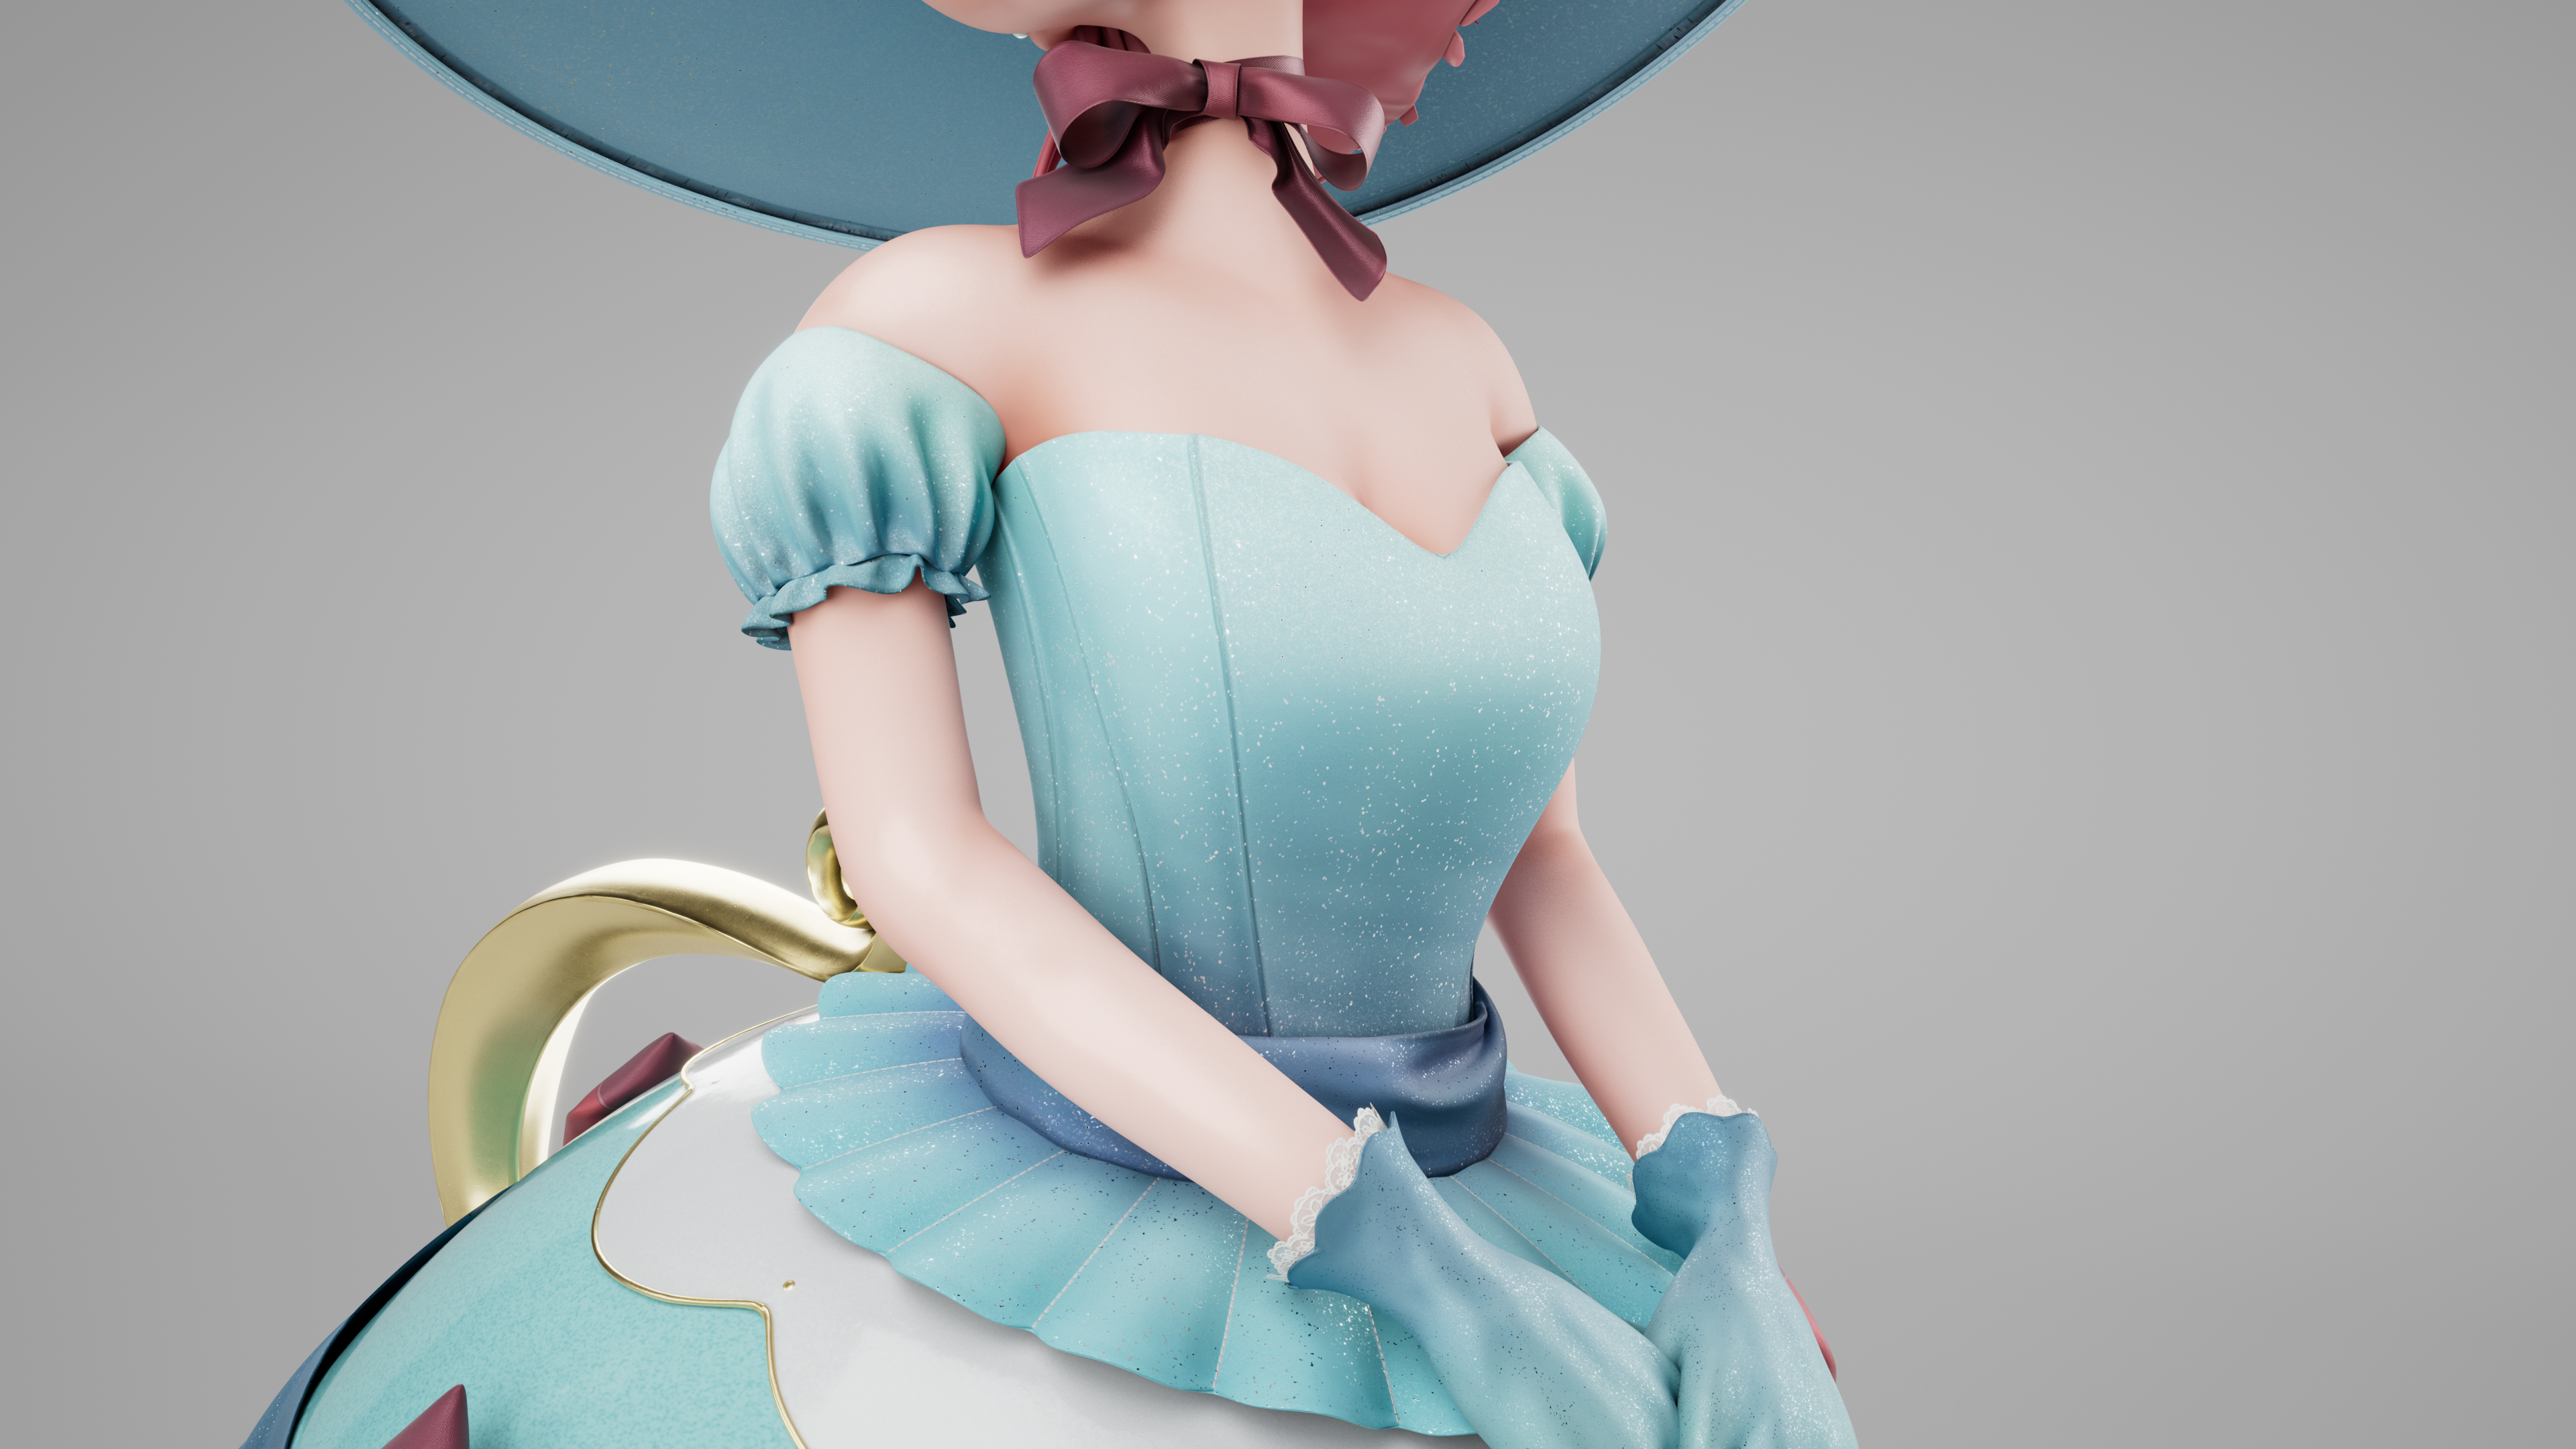 Finally, I created the final renders in Arnold using AiStandard Surface Materials and connecting all the textures. I put in some lights, creating a basic lighting setup (Rim, Key, and Fill lights), adjusting intensity and exposure to achieve the final render.
Can you share some examples of iconic scenes or characters where Marvelous Designer has been utilized?
Marvelous Designer has been used in numerous high-profile projects across films, helping to create realistic and stylized clothing for characters. One of my favorite characters, Elsa from Disney’s Frozen II, has always been an inspiration for my work. Marvelous Designer played a crucial role in creating the intricate and realistic clothing for the characters in this movie, especially Elsa’s iconic gown. The tool allowed the team to experiment with various cloth materials and create garments that would behave naturally while maintaining a stylized look that suited the movie's magical world.
How does Marvelous Designer specifically benefit the creation of stylized characters?
Marvelous Designer is an invaluable tool for creating cloth for stylized characters. Its real-time cloth simulation allows for quick iteration of unique garment shapes, exaggerated folds, and dynamic movements. One of the key benefits is that it lets artists manipulate folds and fabric behavior in creative ways, giving garments a more organic and flowing aesthetic that perfectly complements the character's style. The software’s pattern-based system makes it easy to design custom outfits, enabling a high level of creative freedom.
What I really appreciate about Marvelous Designer is how it allows for easy experimentation with various cloth shapes, fabrics, and patterns. This flexibility is essential when designing stylized characters, as it gives artists the freedom to experiment with both subtle and highly exaggerated garment designs. Whether it's simple or complex clothing, the software helps bring the character's personality and unique style to life.
Do you have any tips for artists looking to use Marvelous Designer for stylized artwork?
There’s always more to learn, but I can confidently say that Marvelous Designer is one of the best tools for creating clothing, even for stylized characters. For artists just starting out, I highly recommend using the Strengthen tool to achieve smoother wrinkles and enhance the overall look of the fabric. The Tack, Pin, and Freeze features are also incredibly useful for having better control over your fabric, allowing you to fine-tune its behavior and achieve the desired results.
For stylized work, my focus has always been on the primary and secondary details in the wrinkles rather than getting too caught up in tertiary details. This approach helps maintain the stylized look while still keeping the fabric dynamic and expressive. I also suggest experimenting with different fabric types and settings to see how they behave in the simulation. It can be a lot of trial and error, but it’s worth it to get that perfect balance between realism and stylization.
How would you describe your overall experience working with Marvelous Designer?
Incorporating Marvelous Designer into my workflow has been incredibly beneficial. One of the things I love most about the software is the freedom it offers to experiment with various clothing designs, allowing for endless possibilities. The flexibility it provides in shaping garments, along with its real-time cloth simulation, has saved me a significant amount of time, especially when trying to achieve dynamic results.
I have been using this tool for a couple of months, and it’s been a game-changer in streamlining my creative process. I’m currently working on a new character, and I’ll definitely be using Marvelous Designer again. I can confidently say that it’s a tool I’ll continue to rely on for future projects.
ArtStation
Linkedin
이 작업은 ZBrush, Maya, Substance, Arnold, Stylized, CharacterArt 등의 기술로 제작되었습니다.
Marvelous Designer로 이와 같은 3D 의상·캐릭터 작업을 직접 만들어볼 수 있습니다.