Balenciaga X-Pander Spring Shoe
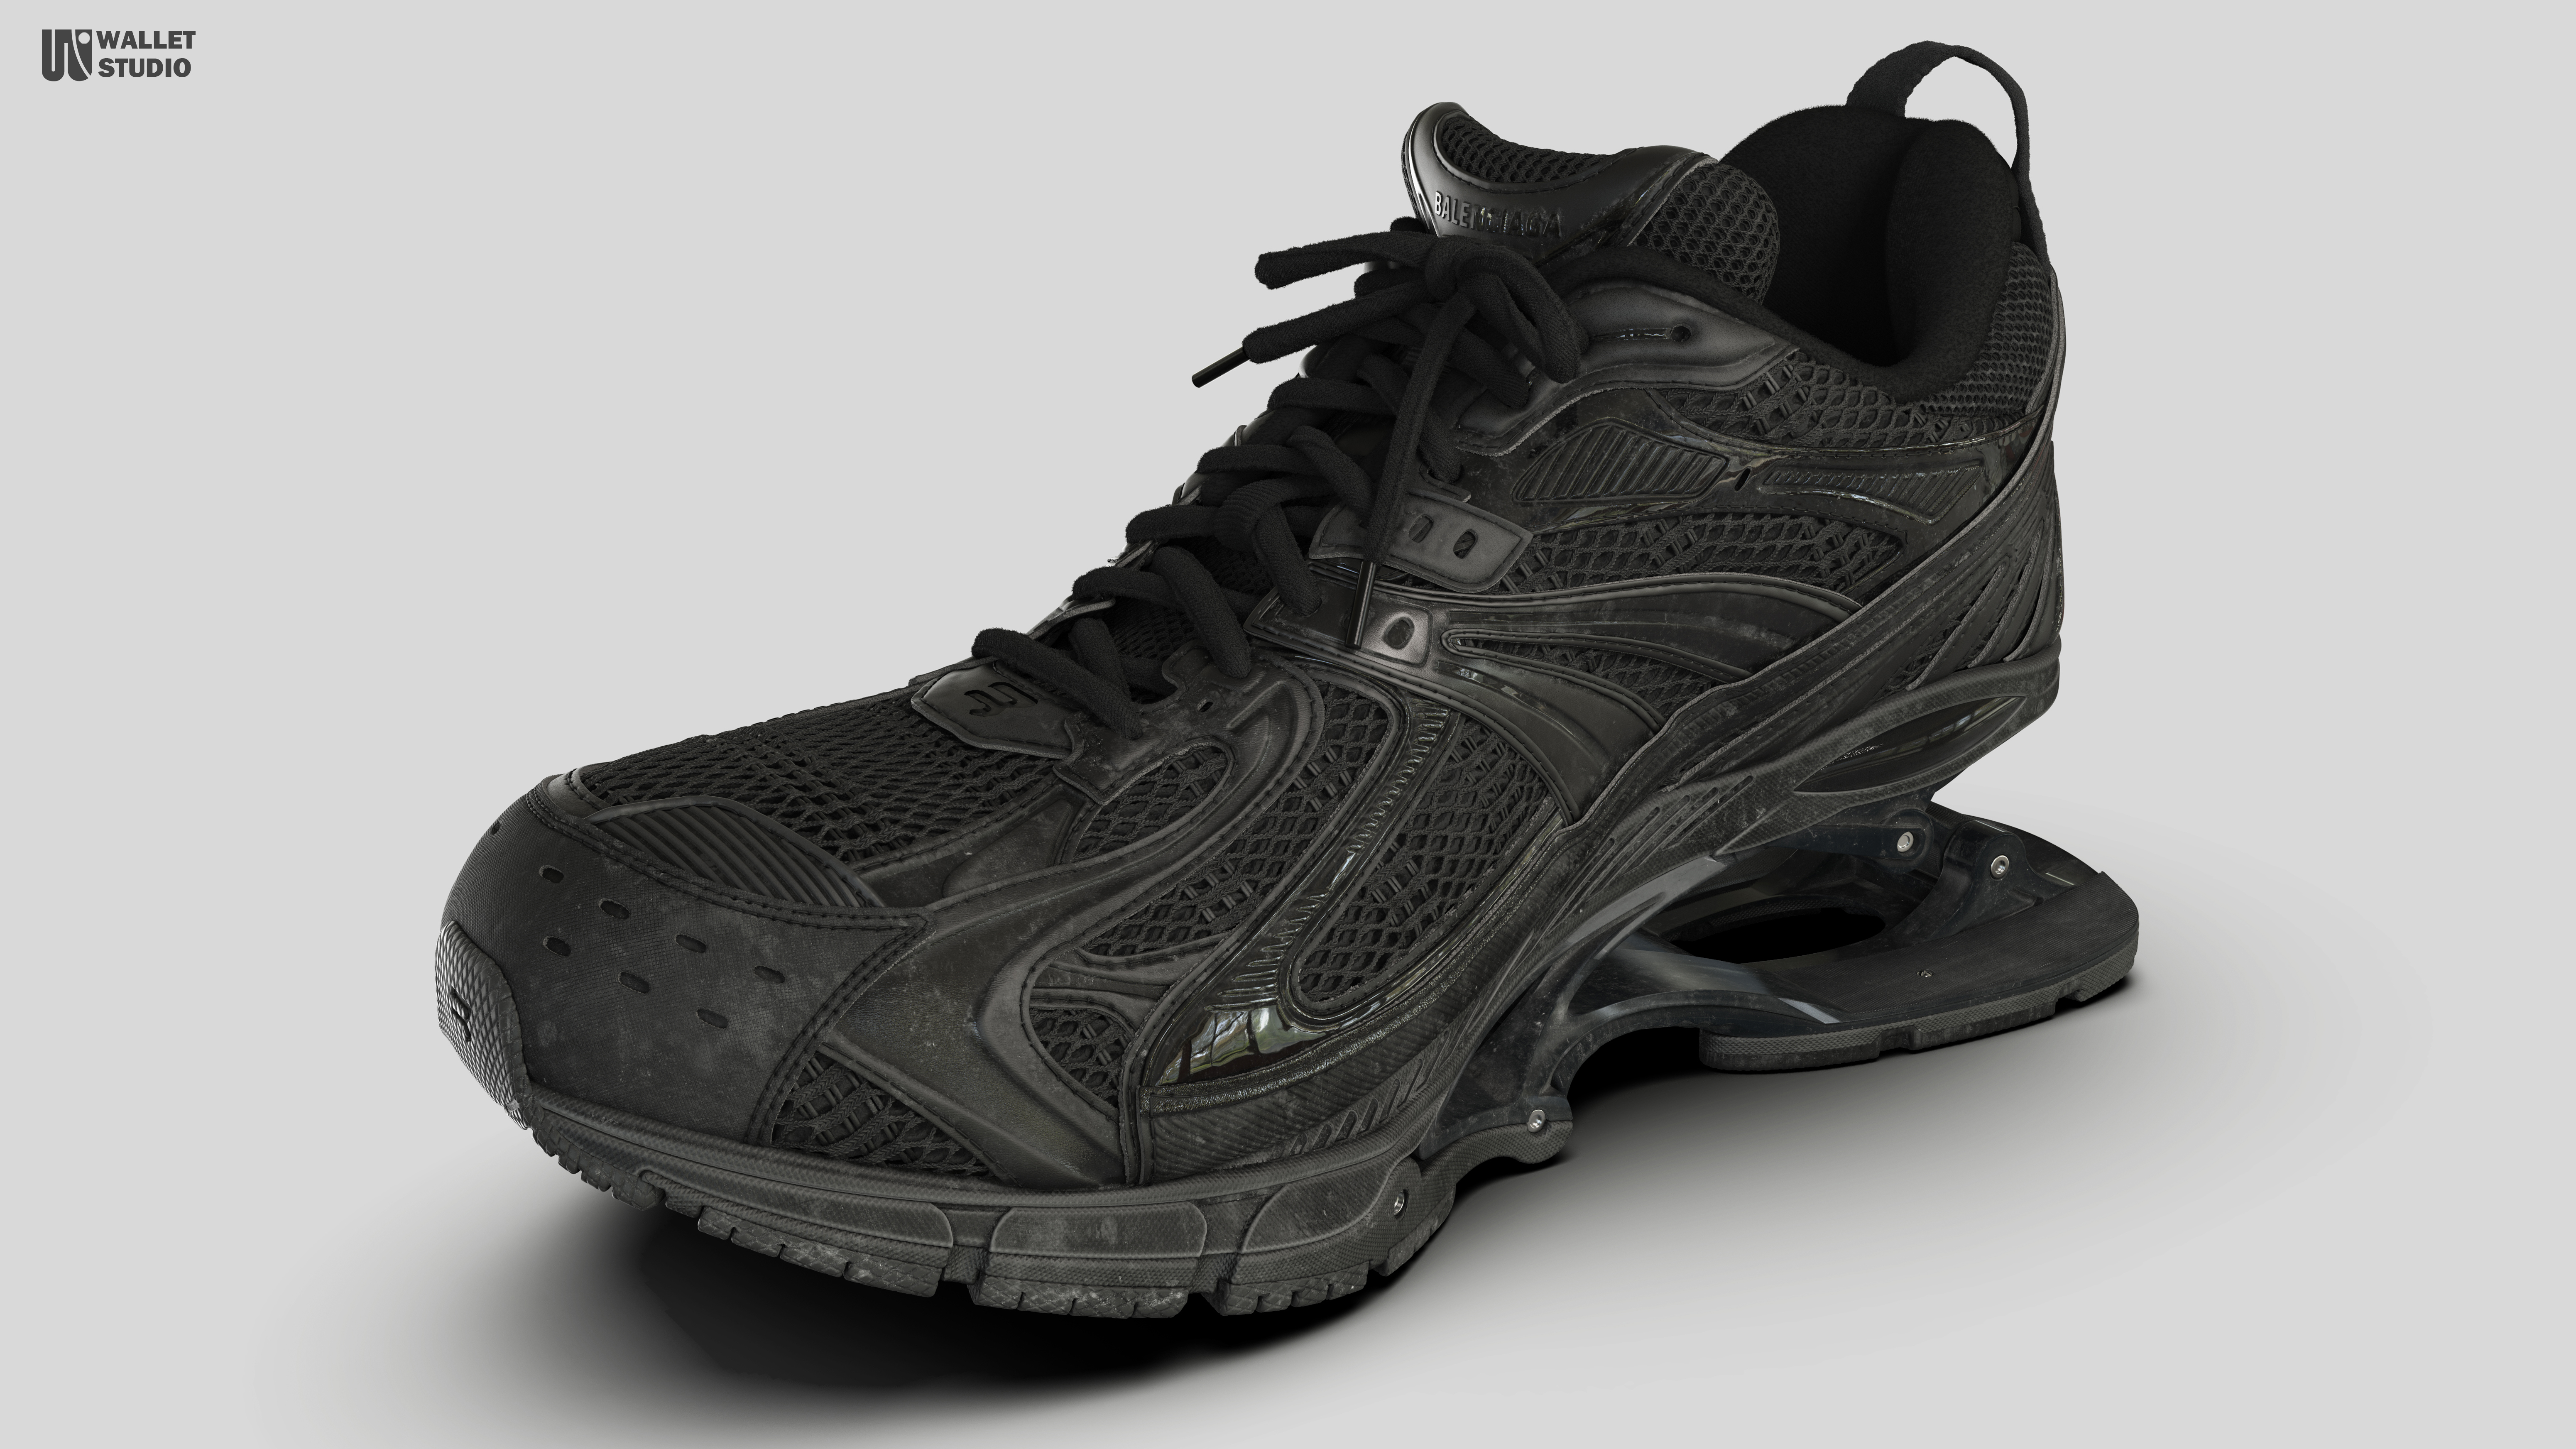
Explore the Balenciaga X-Pander Spring Shoe, a game-ready 3D fashion creation designed with Marvelous Designer, blending precision and futuristic aesthetics.
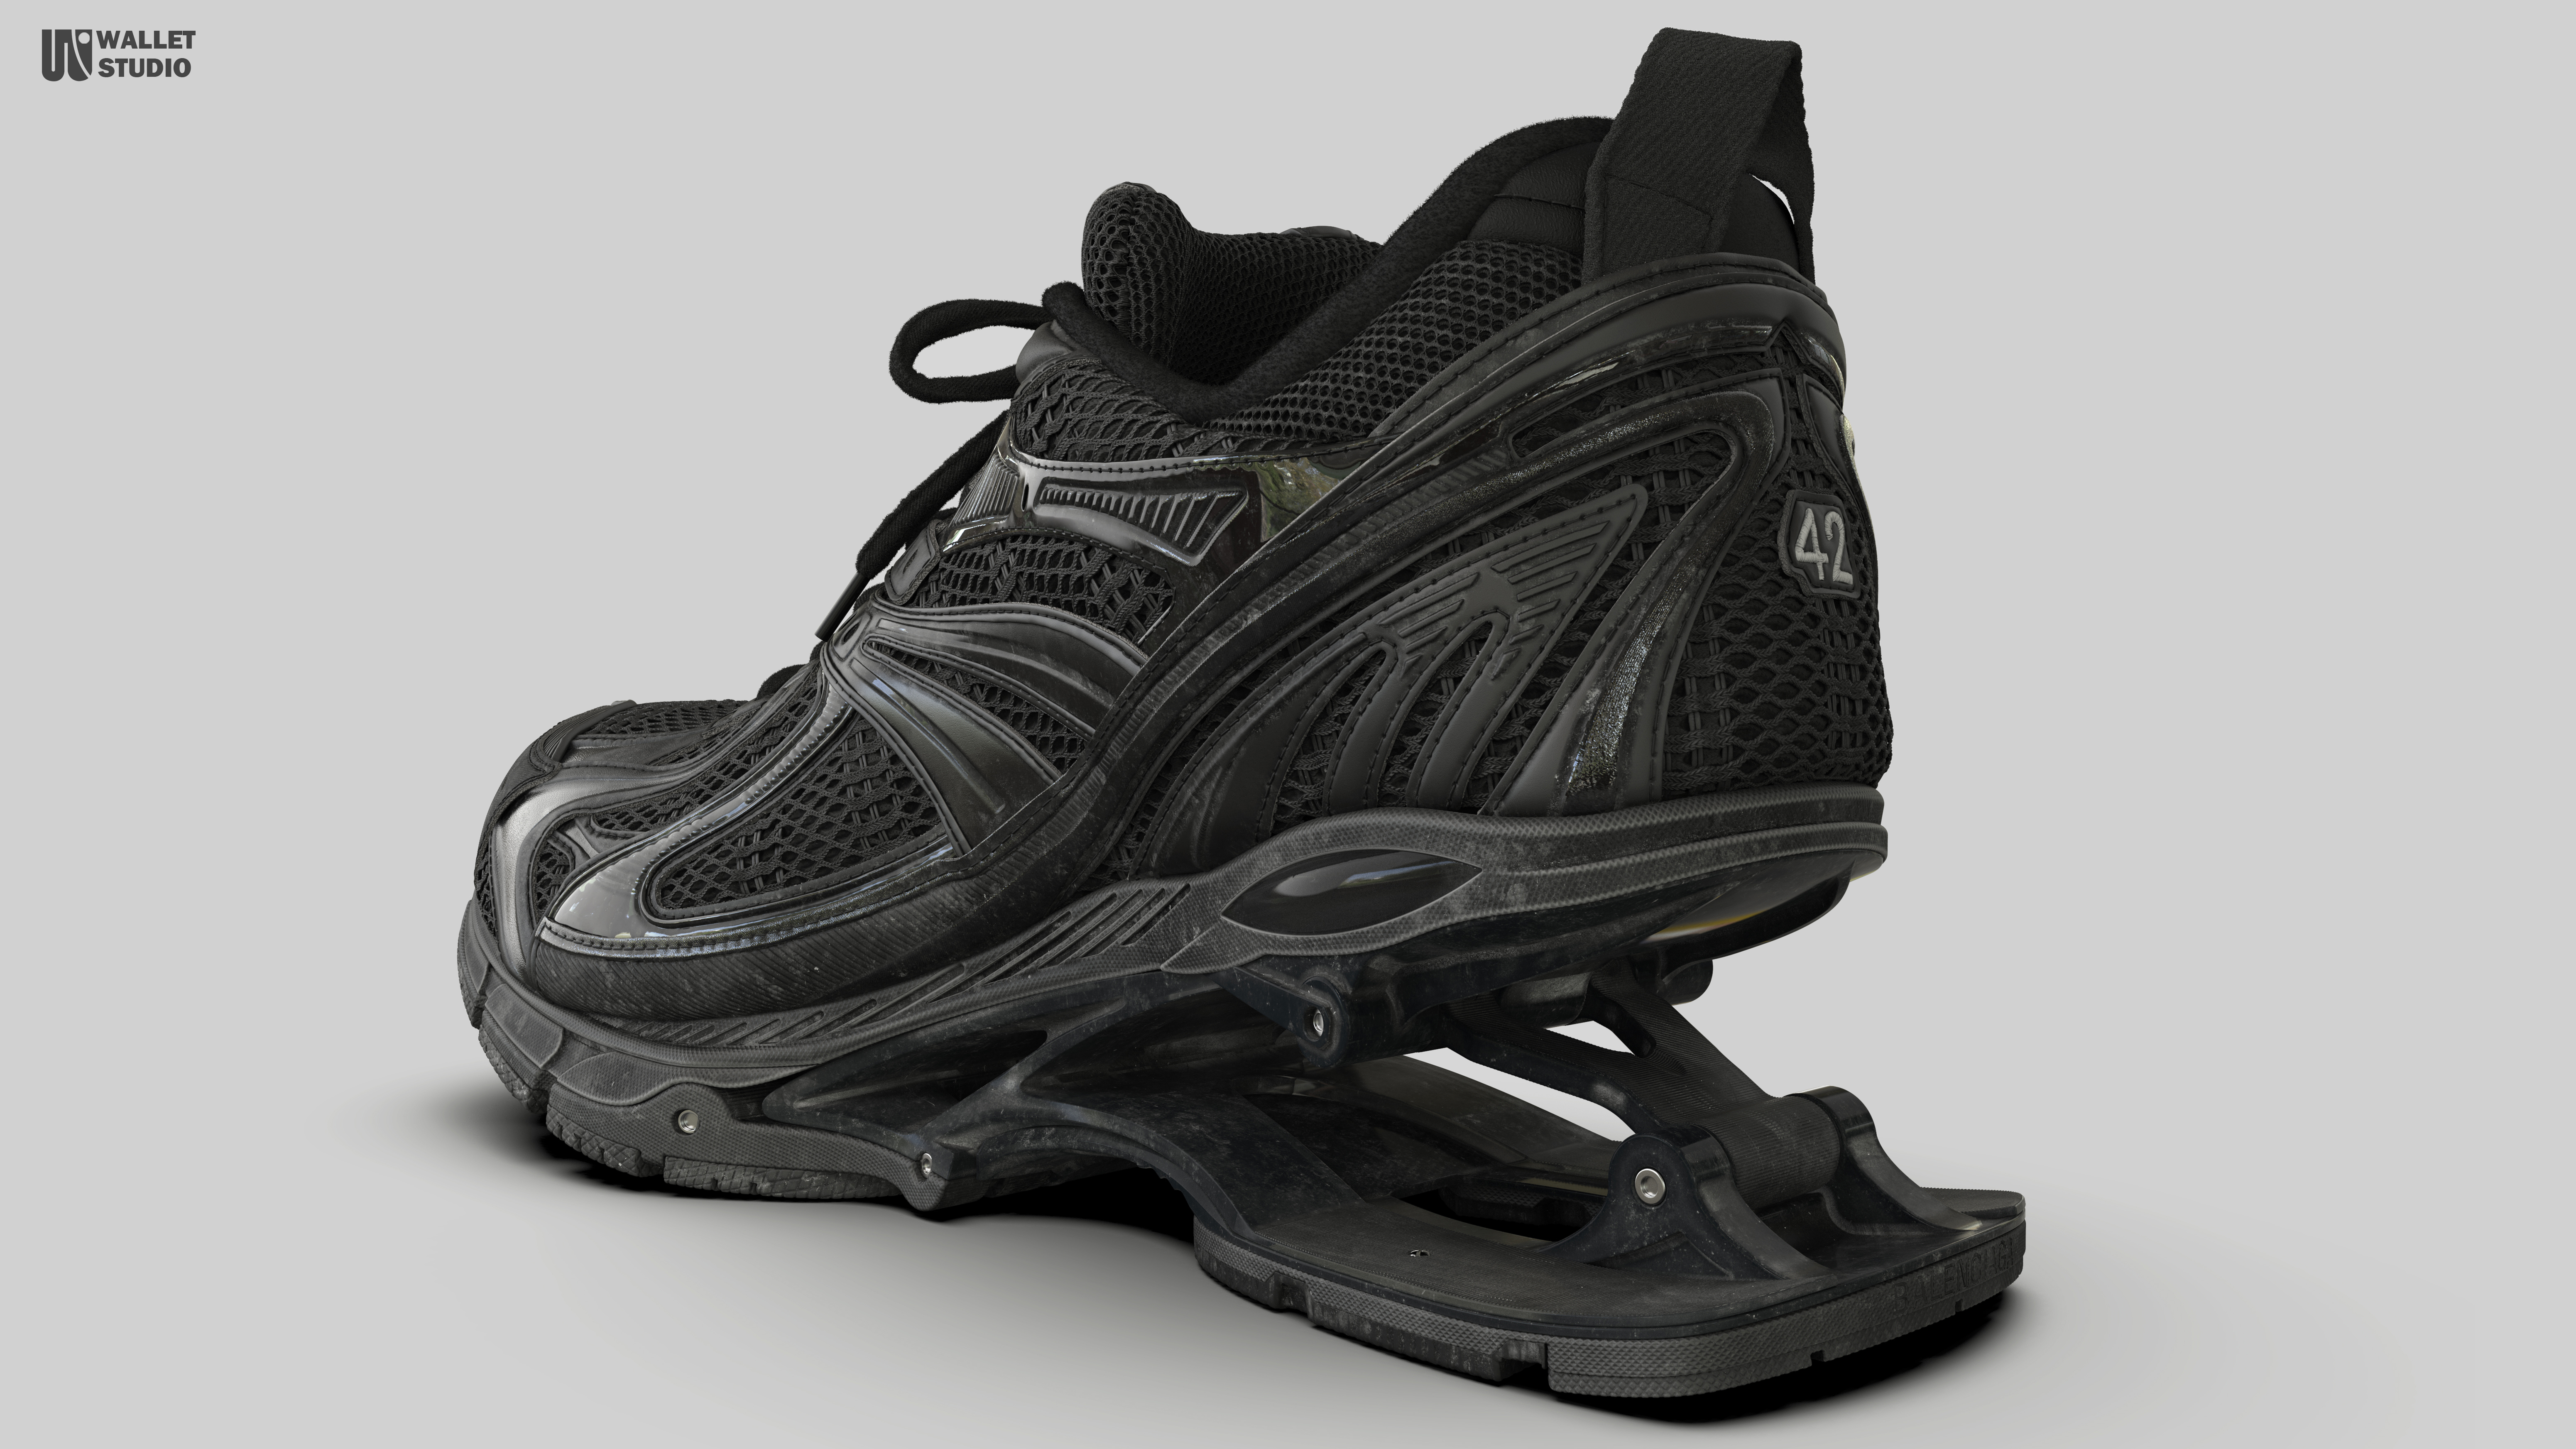
Interview with Wallet | Balenciaga X-Pander Spring Shoe | 3D Artist
Artist Introduction
Hello everyone, I'm Wallet (我是你的小钱包呀!). I am a former senior 3D character artist at Activision Blizzard, having participated in projects like Destiny 2, Call of Duty 17, and Call of Duty 18, with 11 years of experience in realistic game development. I specialize in creating realistic character models and excel in modeling characters, hard surfaces, and clothing, particularly in detailing. Currently, I work at Tencent TiMi Studio, focusing on the creation of trendy clothing.
Tell us about the project - Balenciaga X-Pander Spring Shoe
Production Opportunity
The Balenciaga X-Pander spring shoes were a game model created in collaboration with the official Balenciaga brand for our company's game project. I needed to achieve scanning-level precision for this model and completed the high-accuracy production in Marvelous Designer.
Material Collection
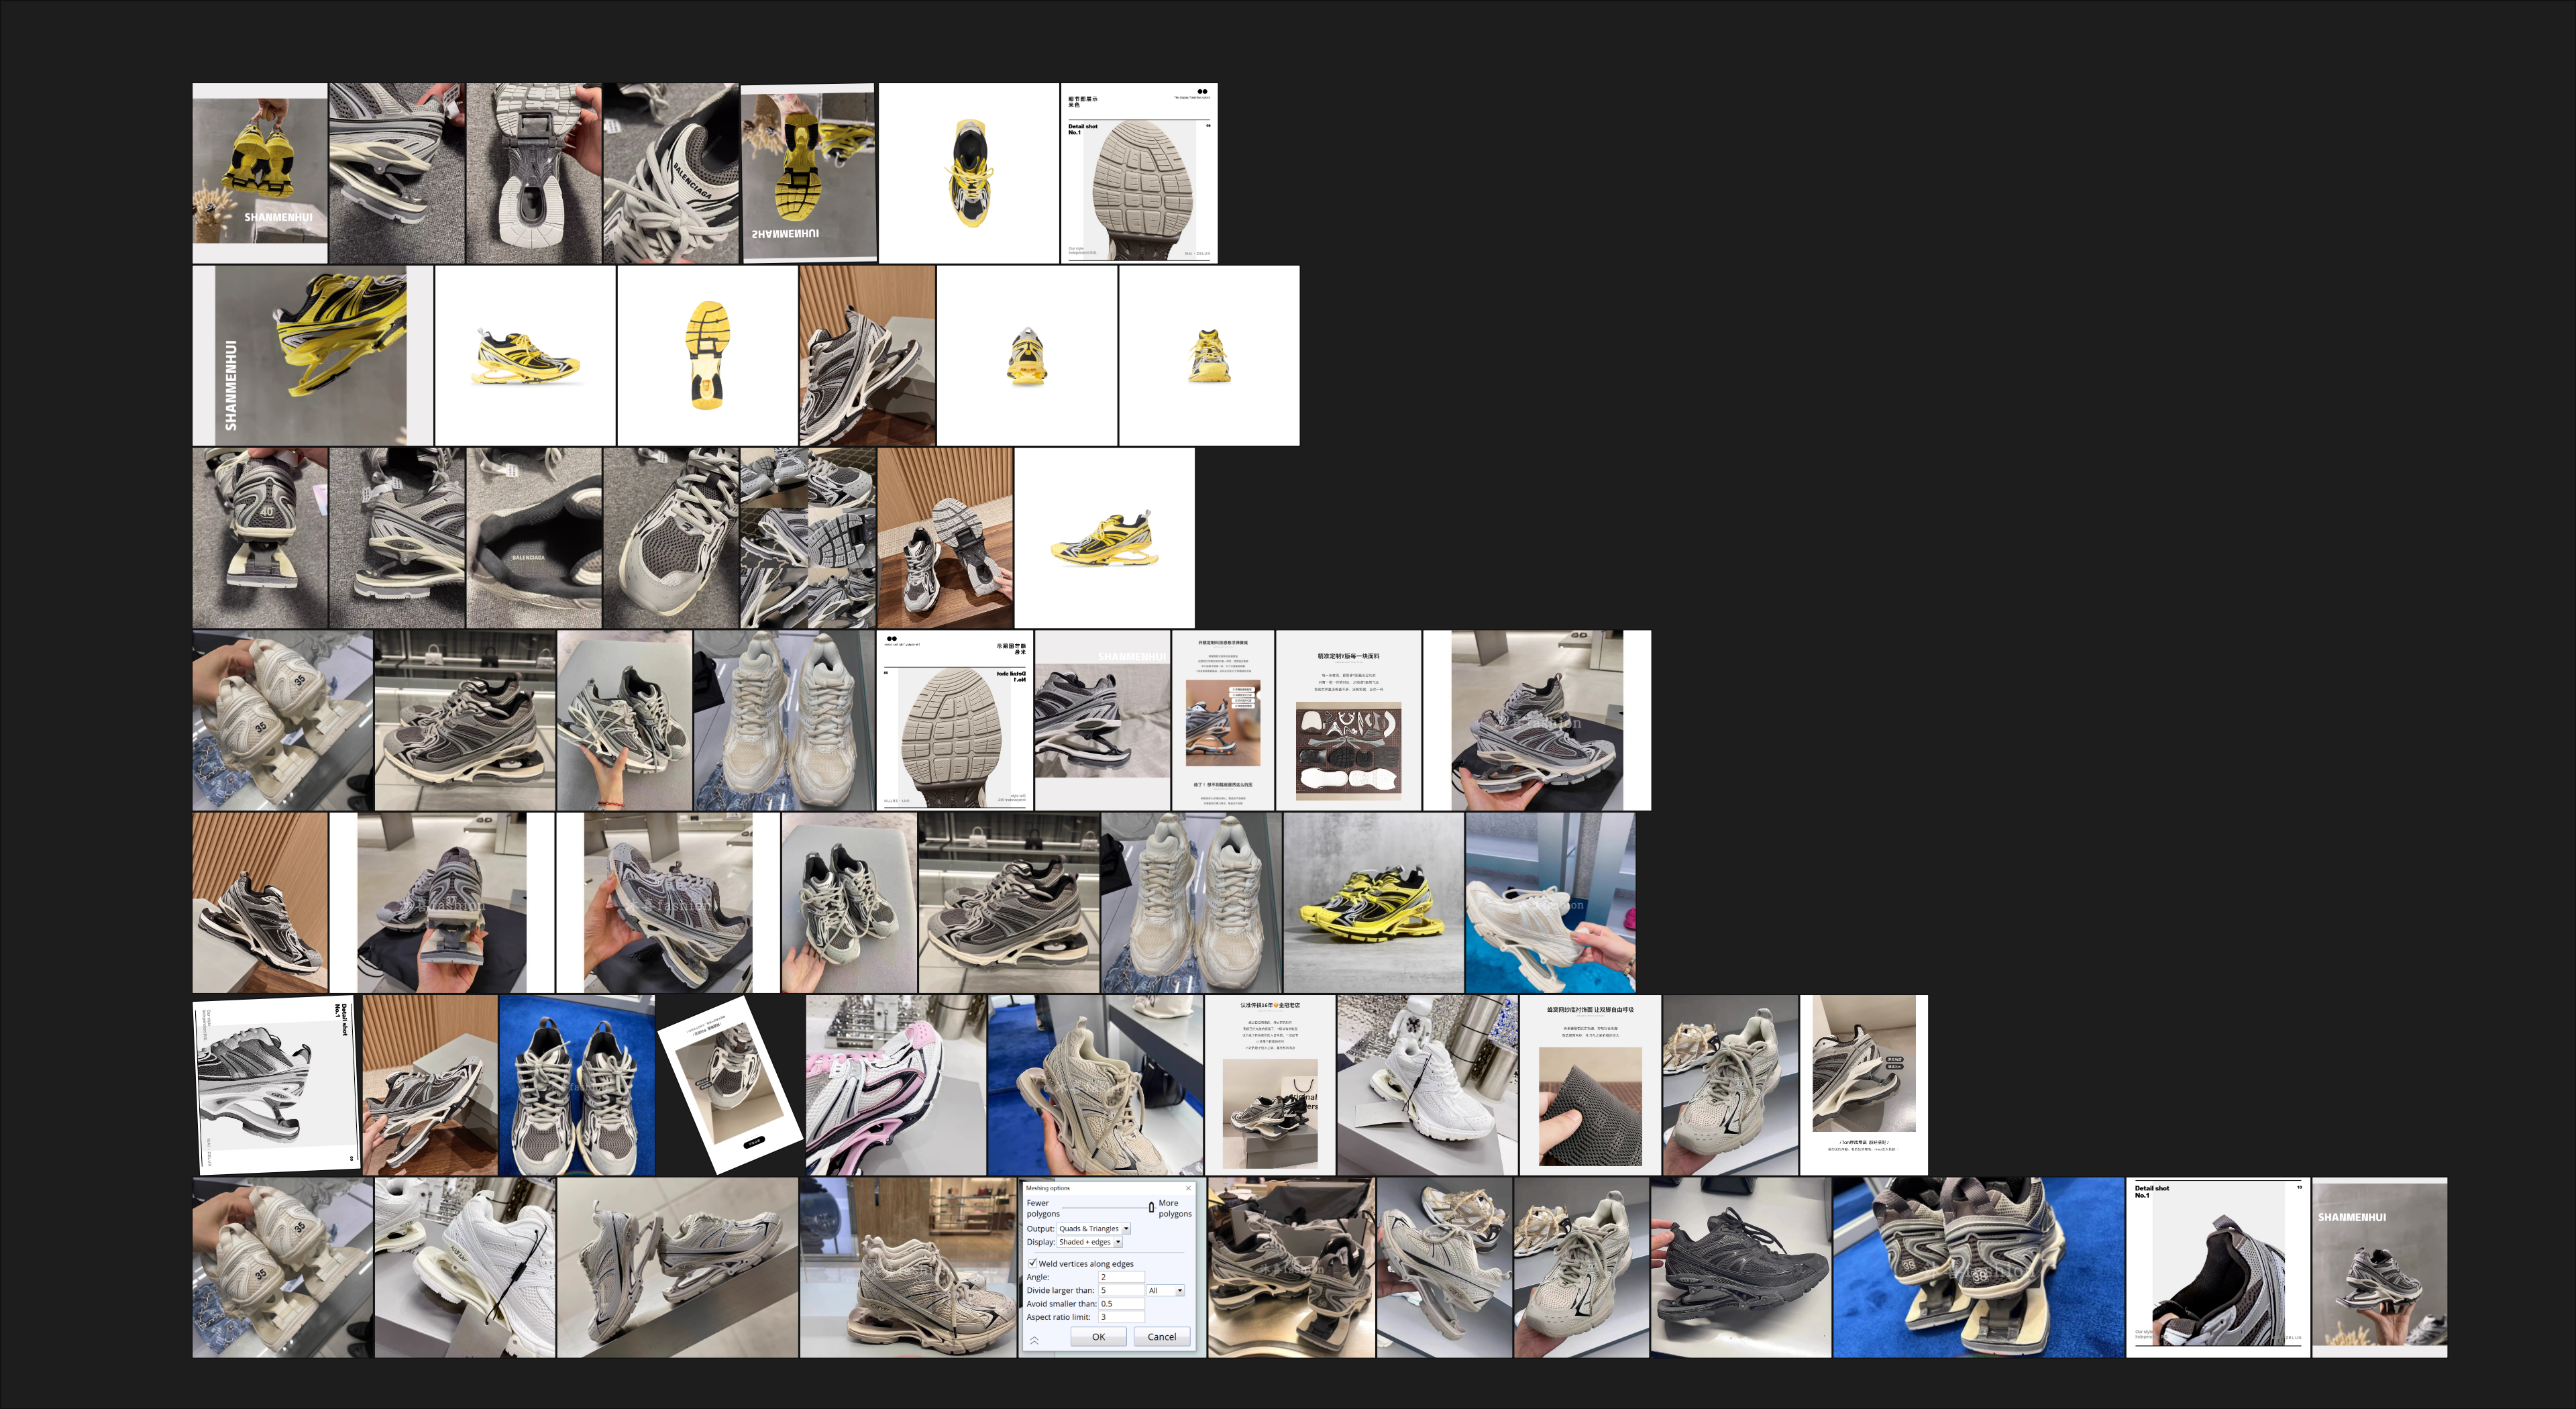
In the process of creating realistic models, I typically started by gathering a large amount of relevant materials, such as details from various aspects of the shoes, showcases of the shoe's shape, and resources that clearly displayed the structural details. Good reference materials significantly enhanced my production efficiency.
Creation of Sole and Last
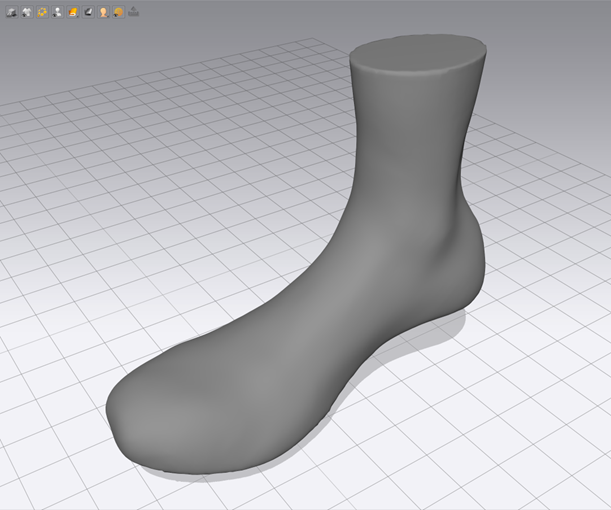
The approach to making shoes differed slightly from that of regular clothing. For typical clothing, I could start directly in Marvelous Designer, but for shoes, I first created the last and sole. The sole served to stabilize the base, while the last shaped the overall structure of the shoe. In ZBrush, I sculpted a simple last based on reference images.
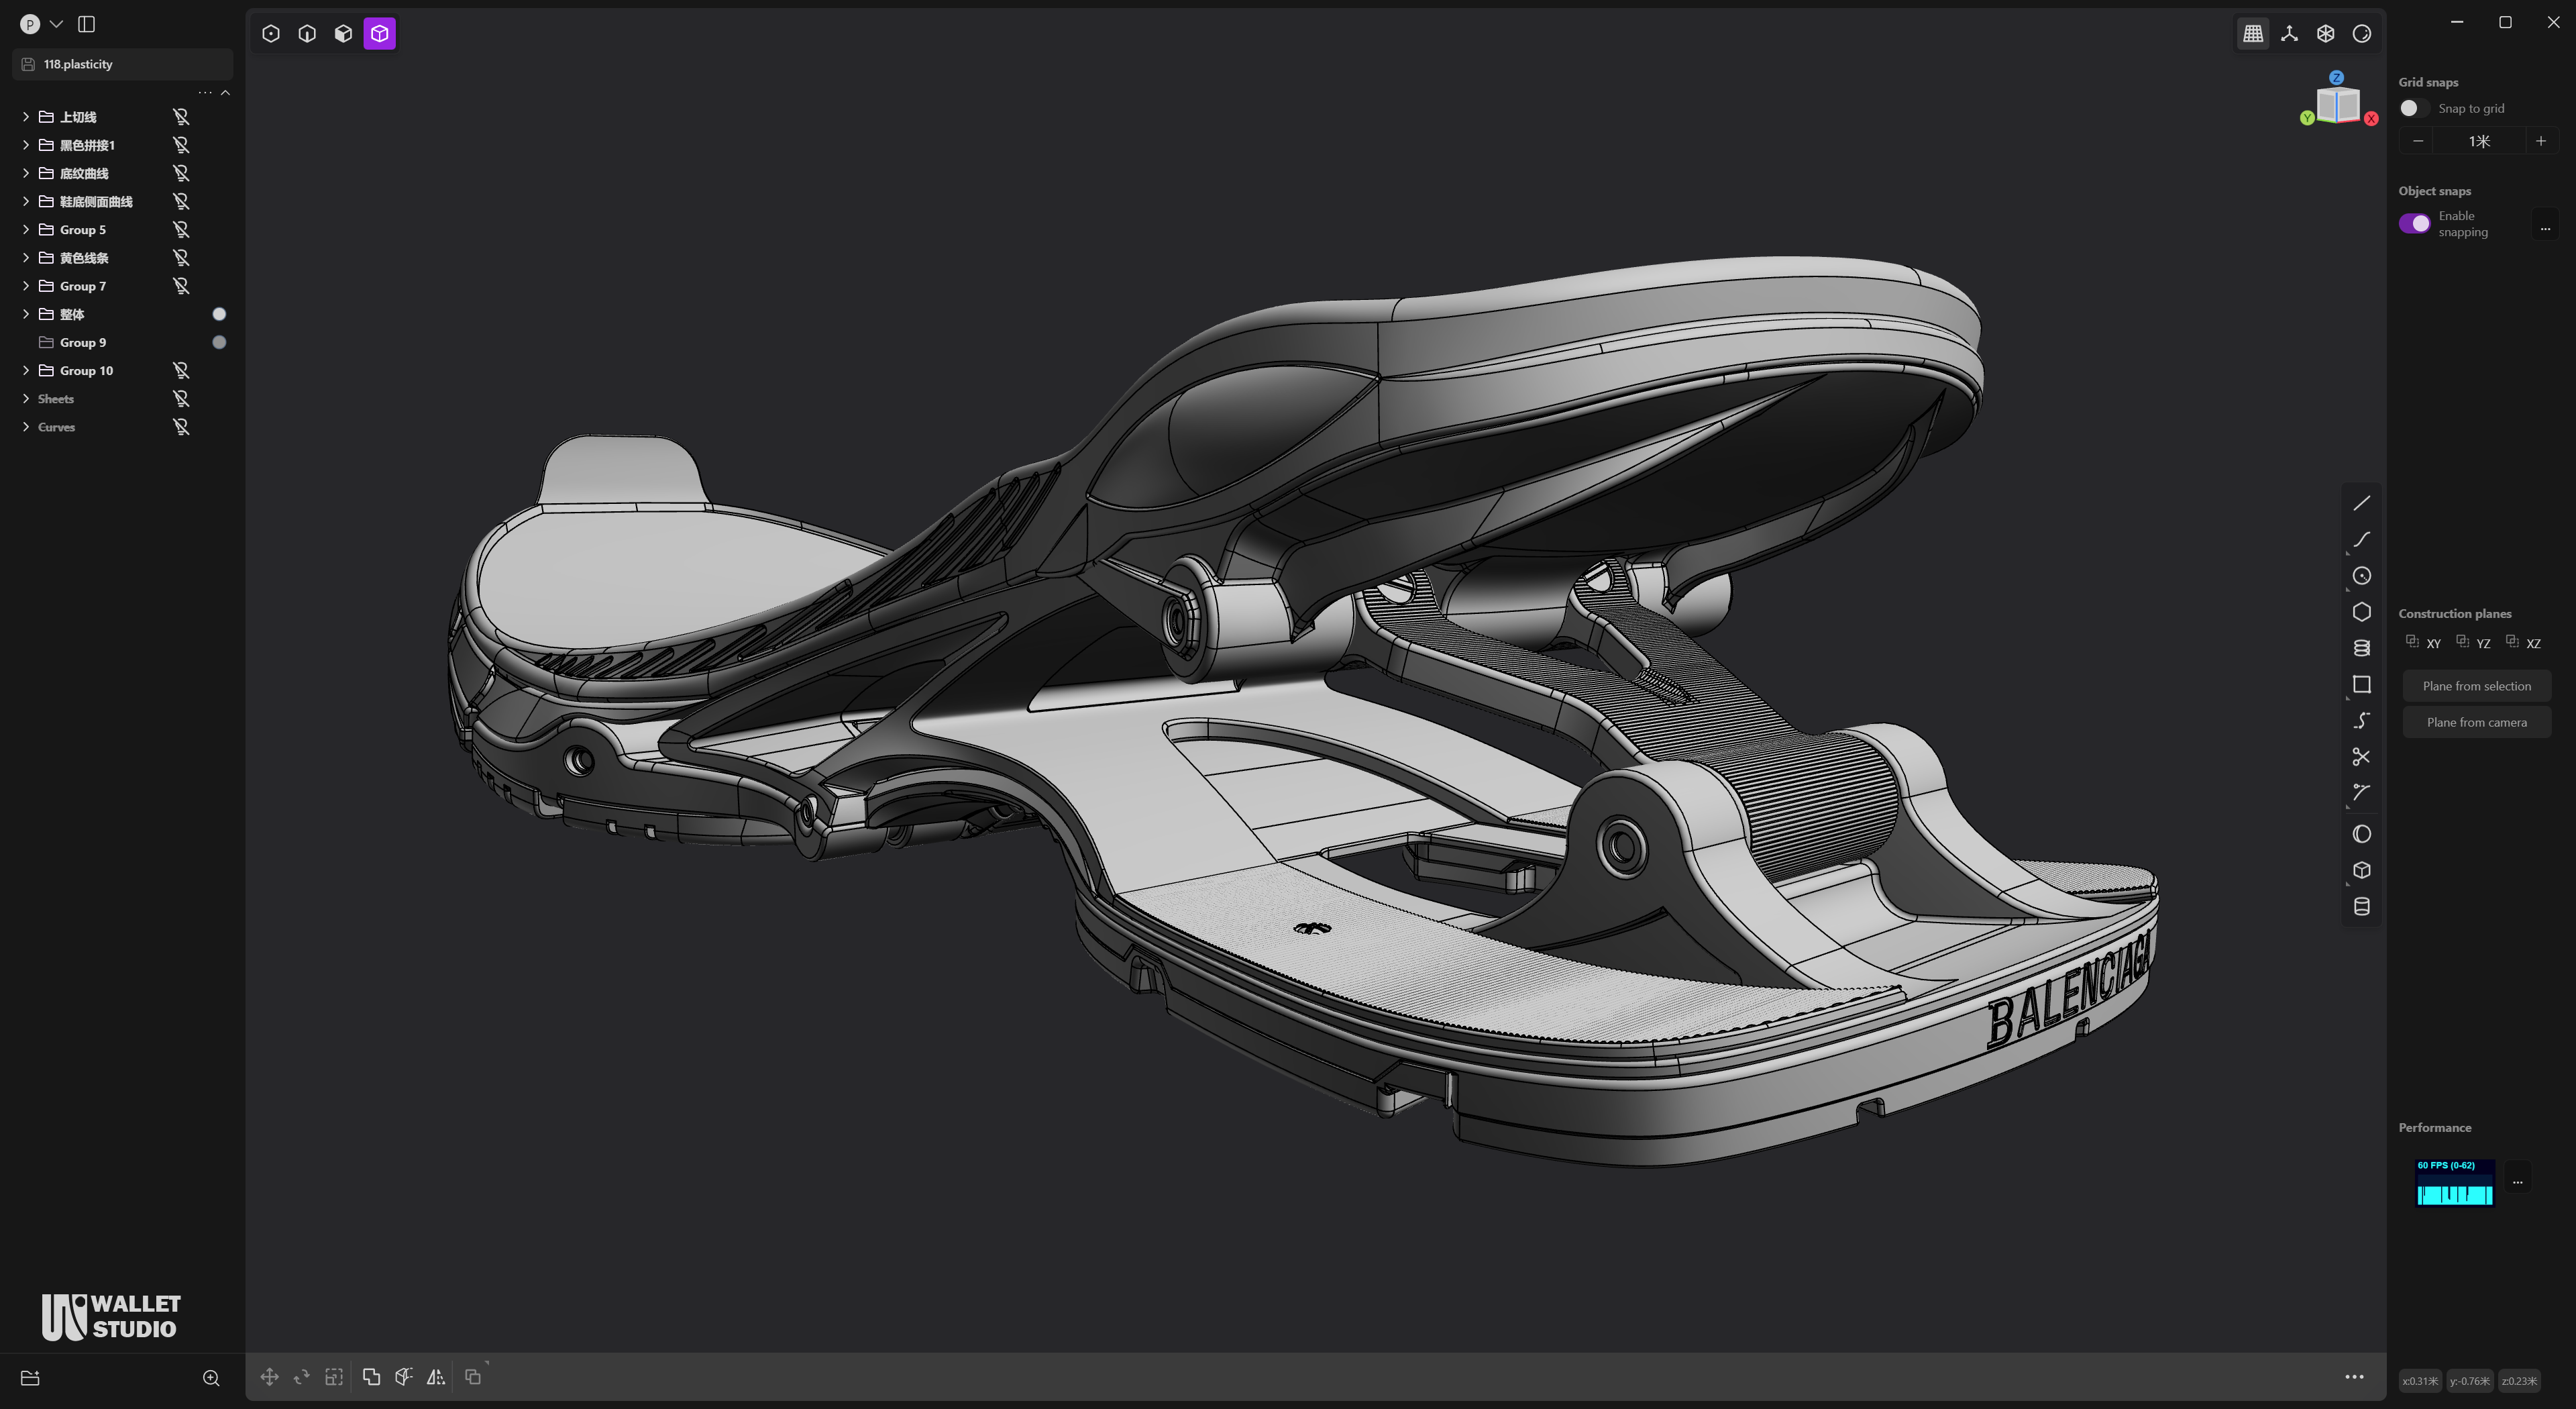
Next, I created the sole based on this last. The sole of this shoe was quite complex, so I used Plasticity for its creation. This software was the most convenient and suitable NURBS modeling tool for game modeling that I had used in recent years. Especially with the introduction of new CV modeling, it had become even easier to work with. I used an older version without CV modeling, relying on traditional curves and boolean operations for the modeling process.
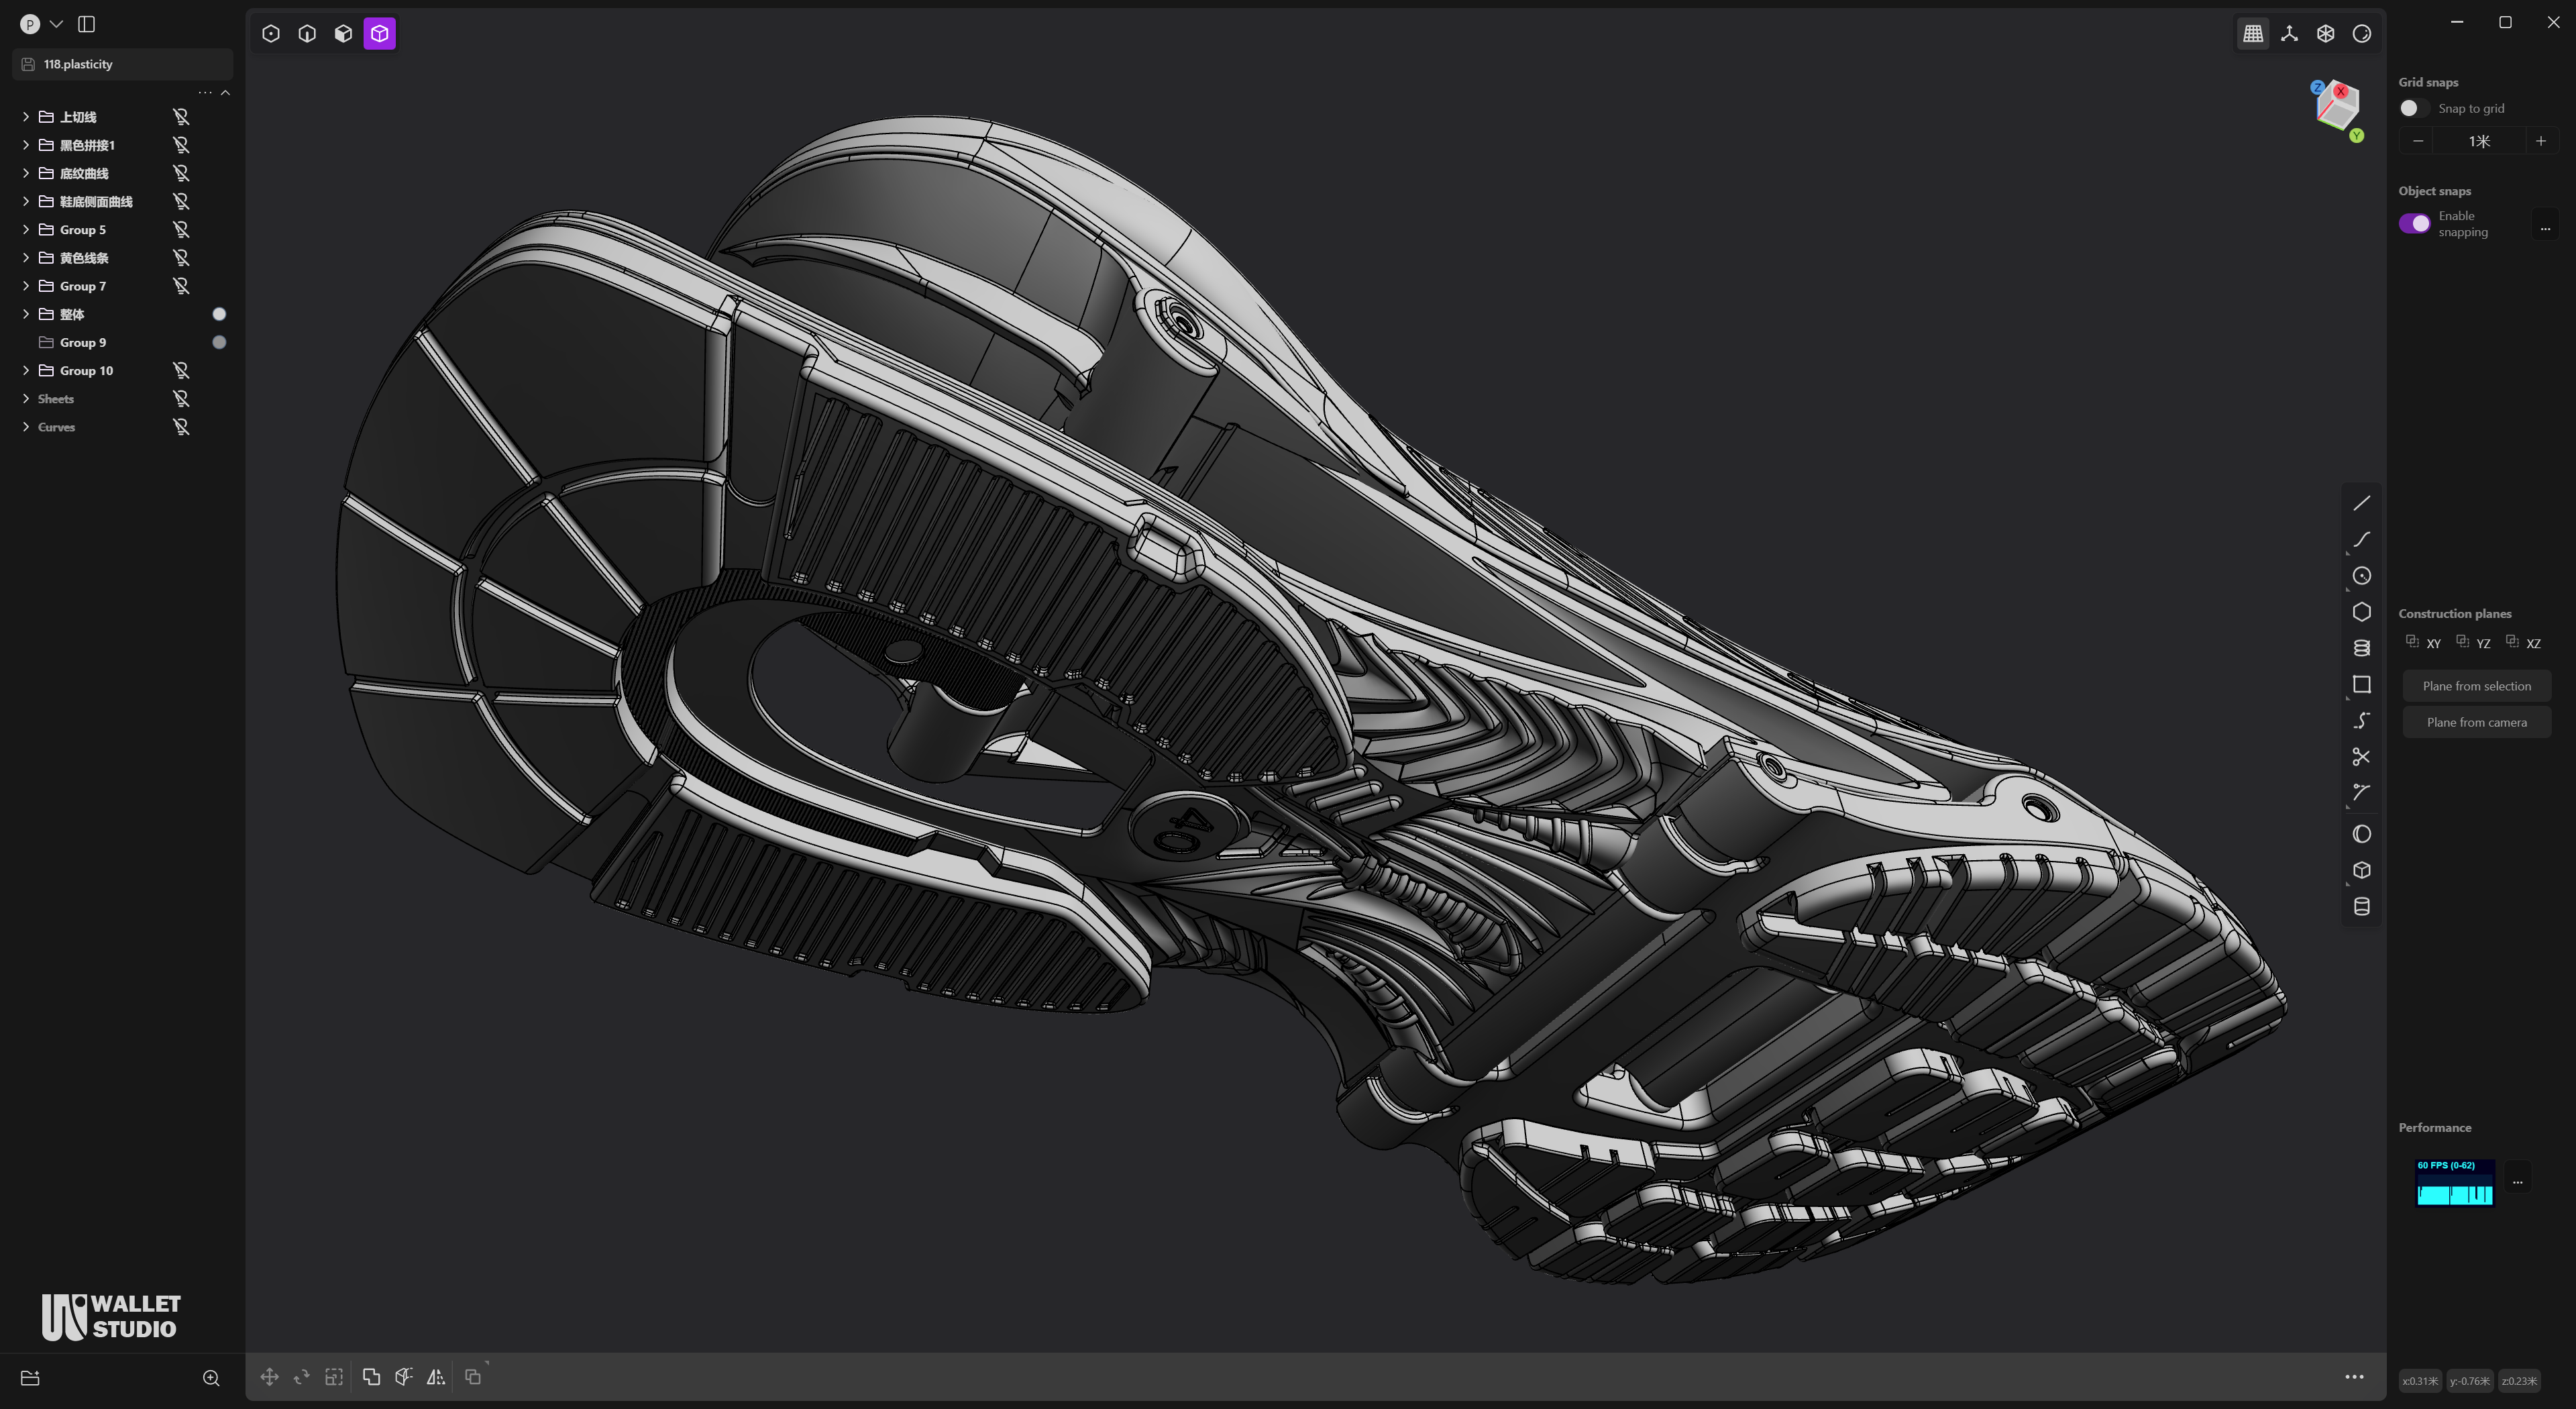
After completing the sole, I extracted the surfaces from it to use as the base pattern for the subsequent Marvelous Designer work. This pattern played a stabilizing role in Marvelous Designer.
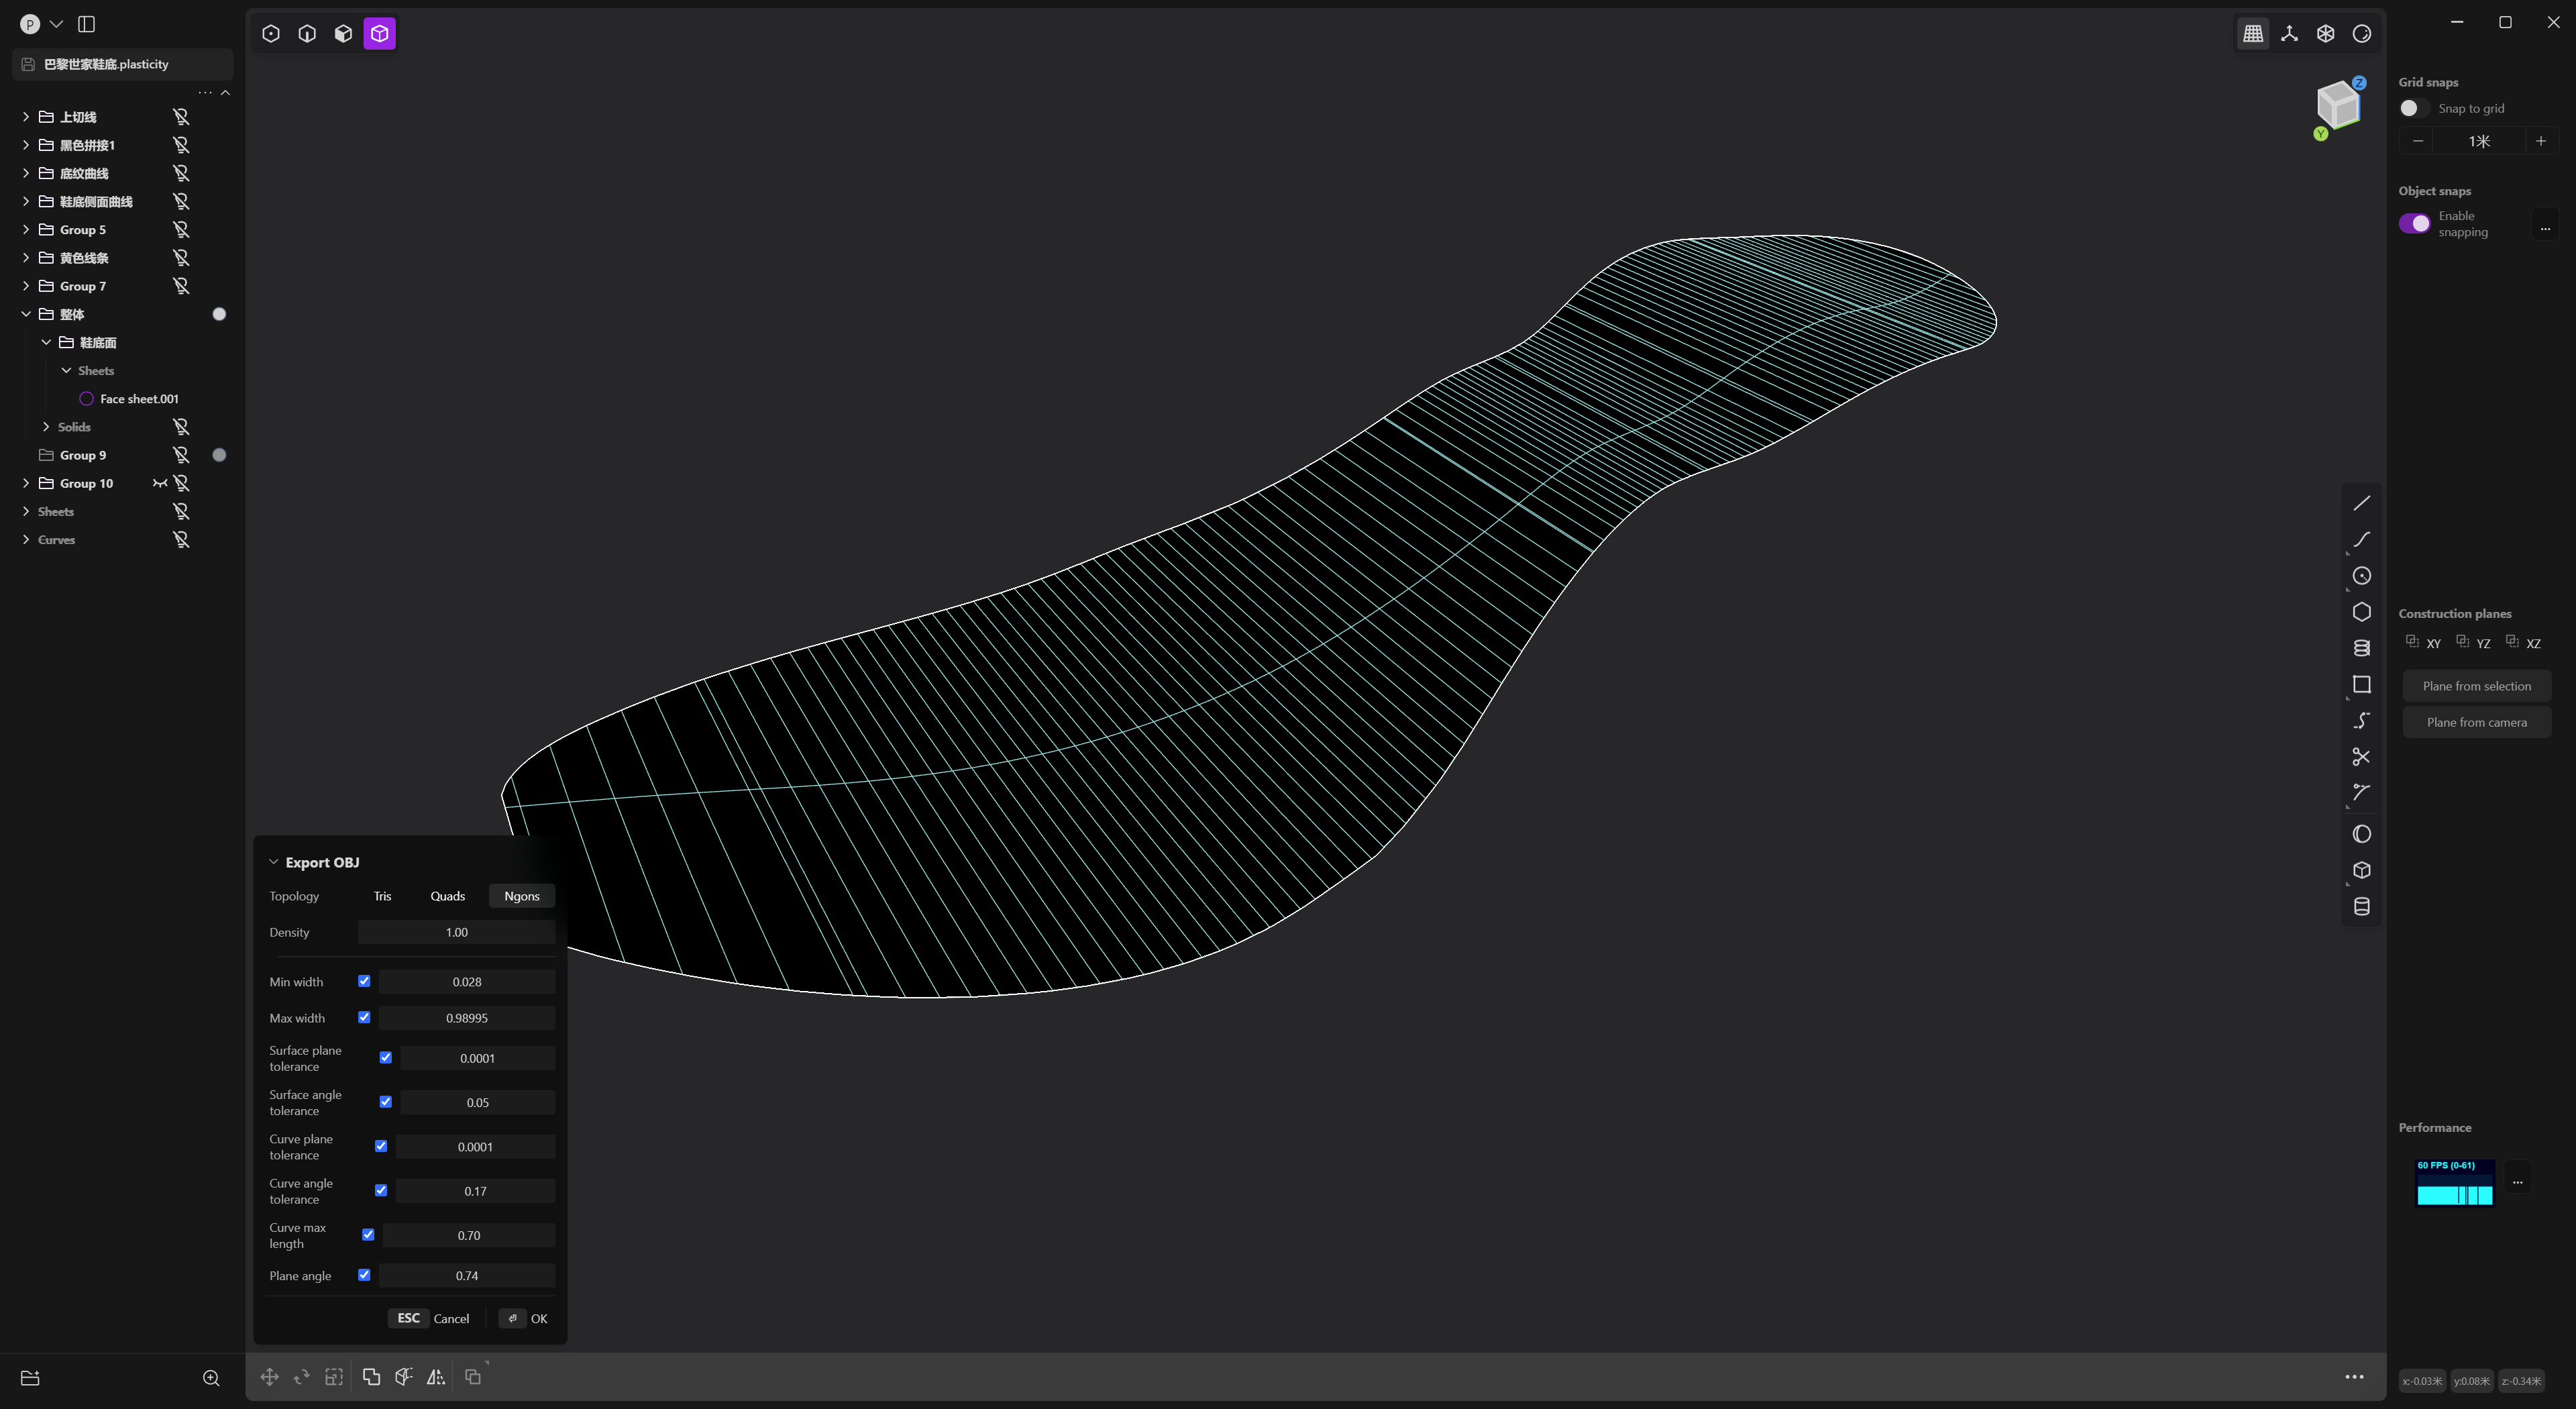
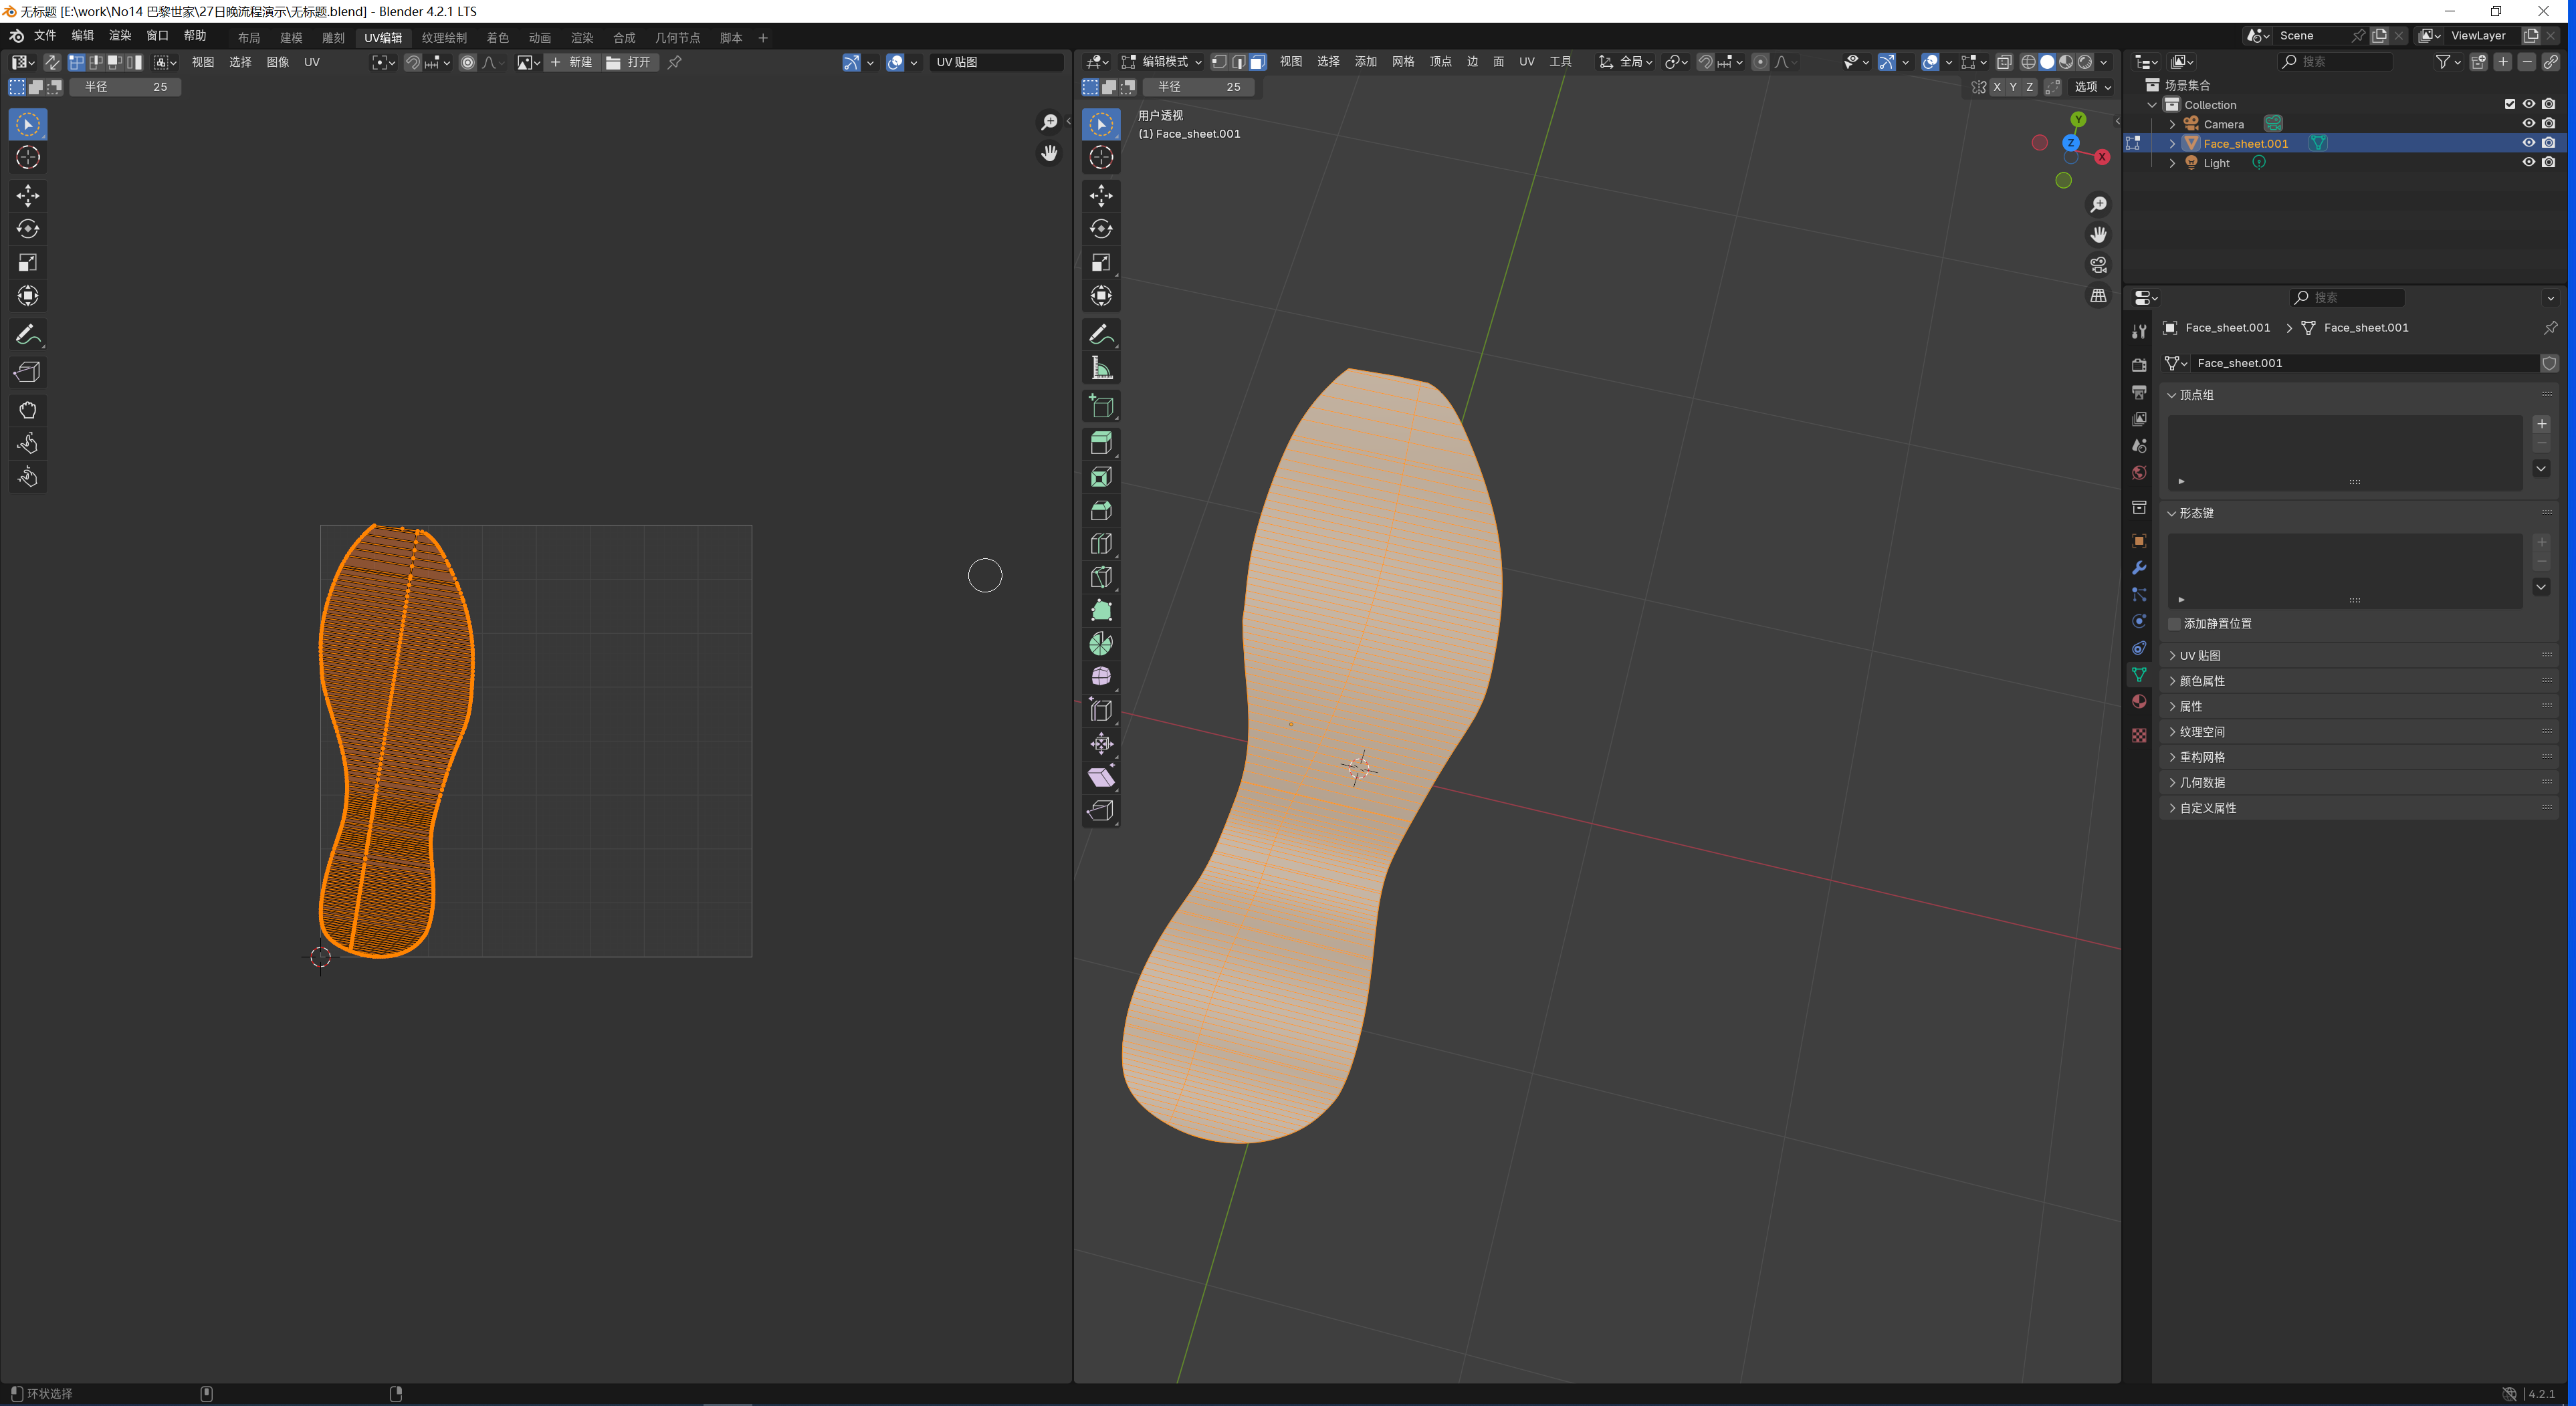
Since the pattern obtained from Plasticity did not have UVs, I also unwrapped the UVs in a 3D software.
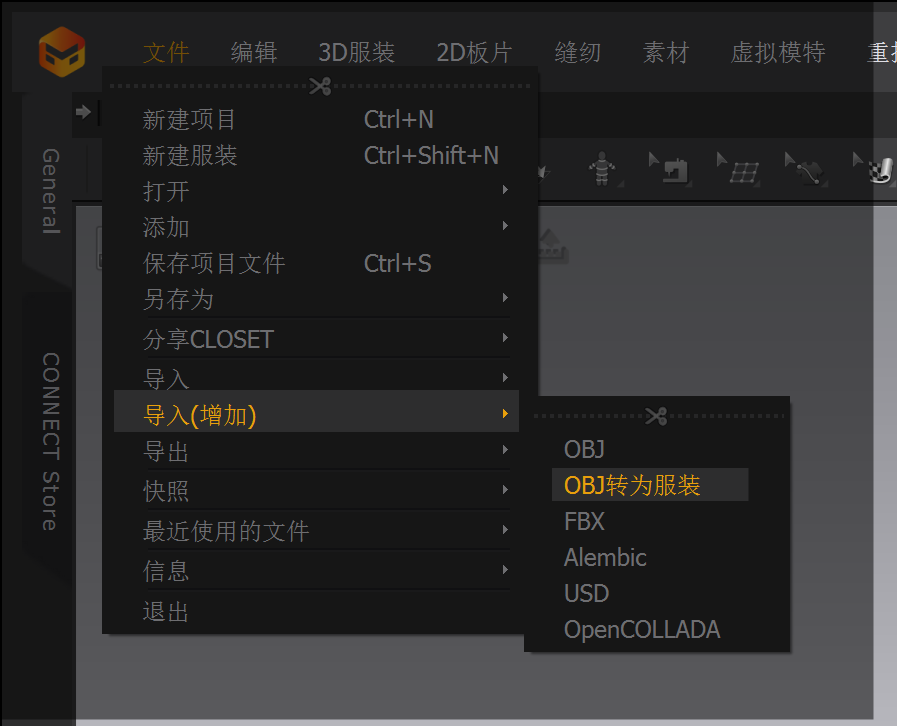
After obtaining the UVs, I imported them into Marvelous Designer by converting them for clothing use.
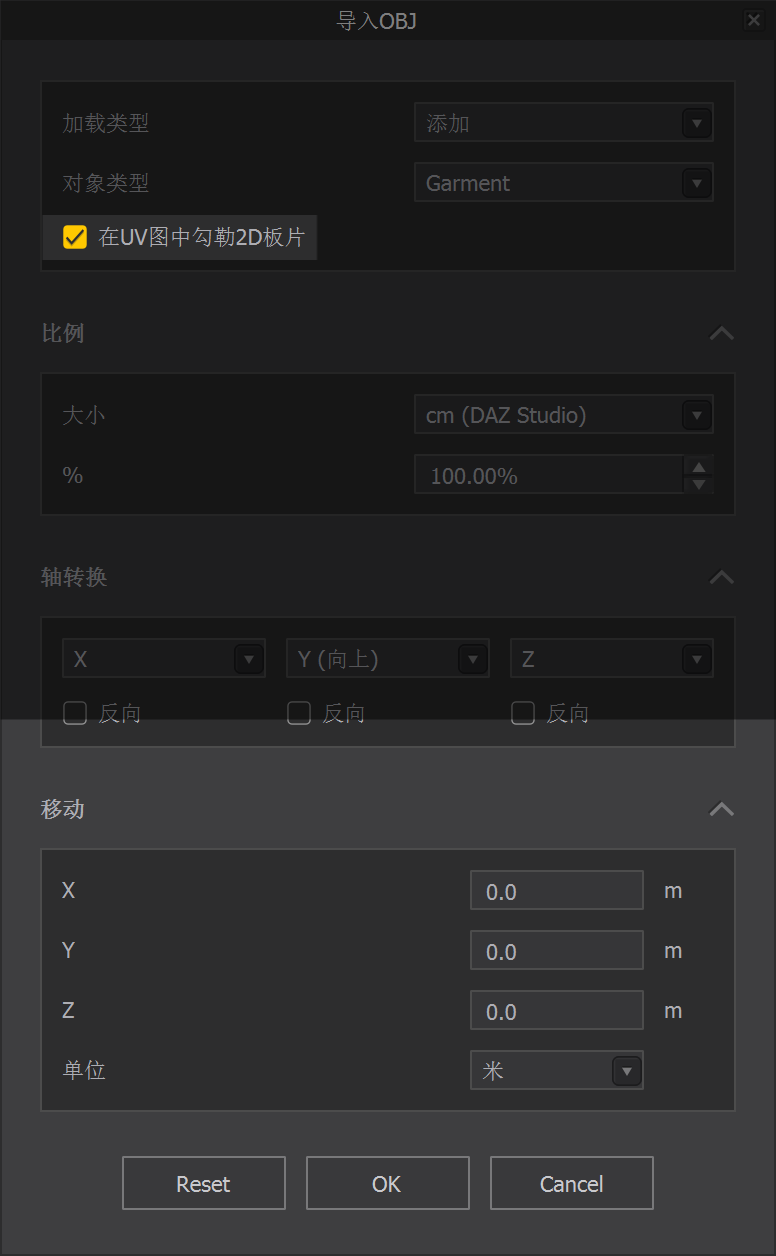
By selecting the 2D pattern on the UV map, I converted the model into a pattern piece.
Next, I will create the upper of the shoe based on this sole.
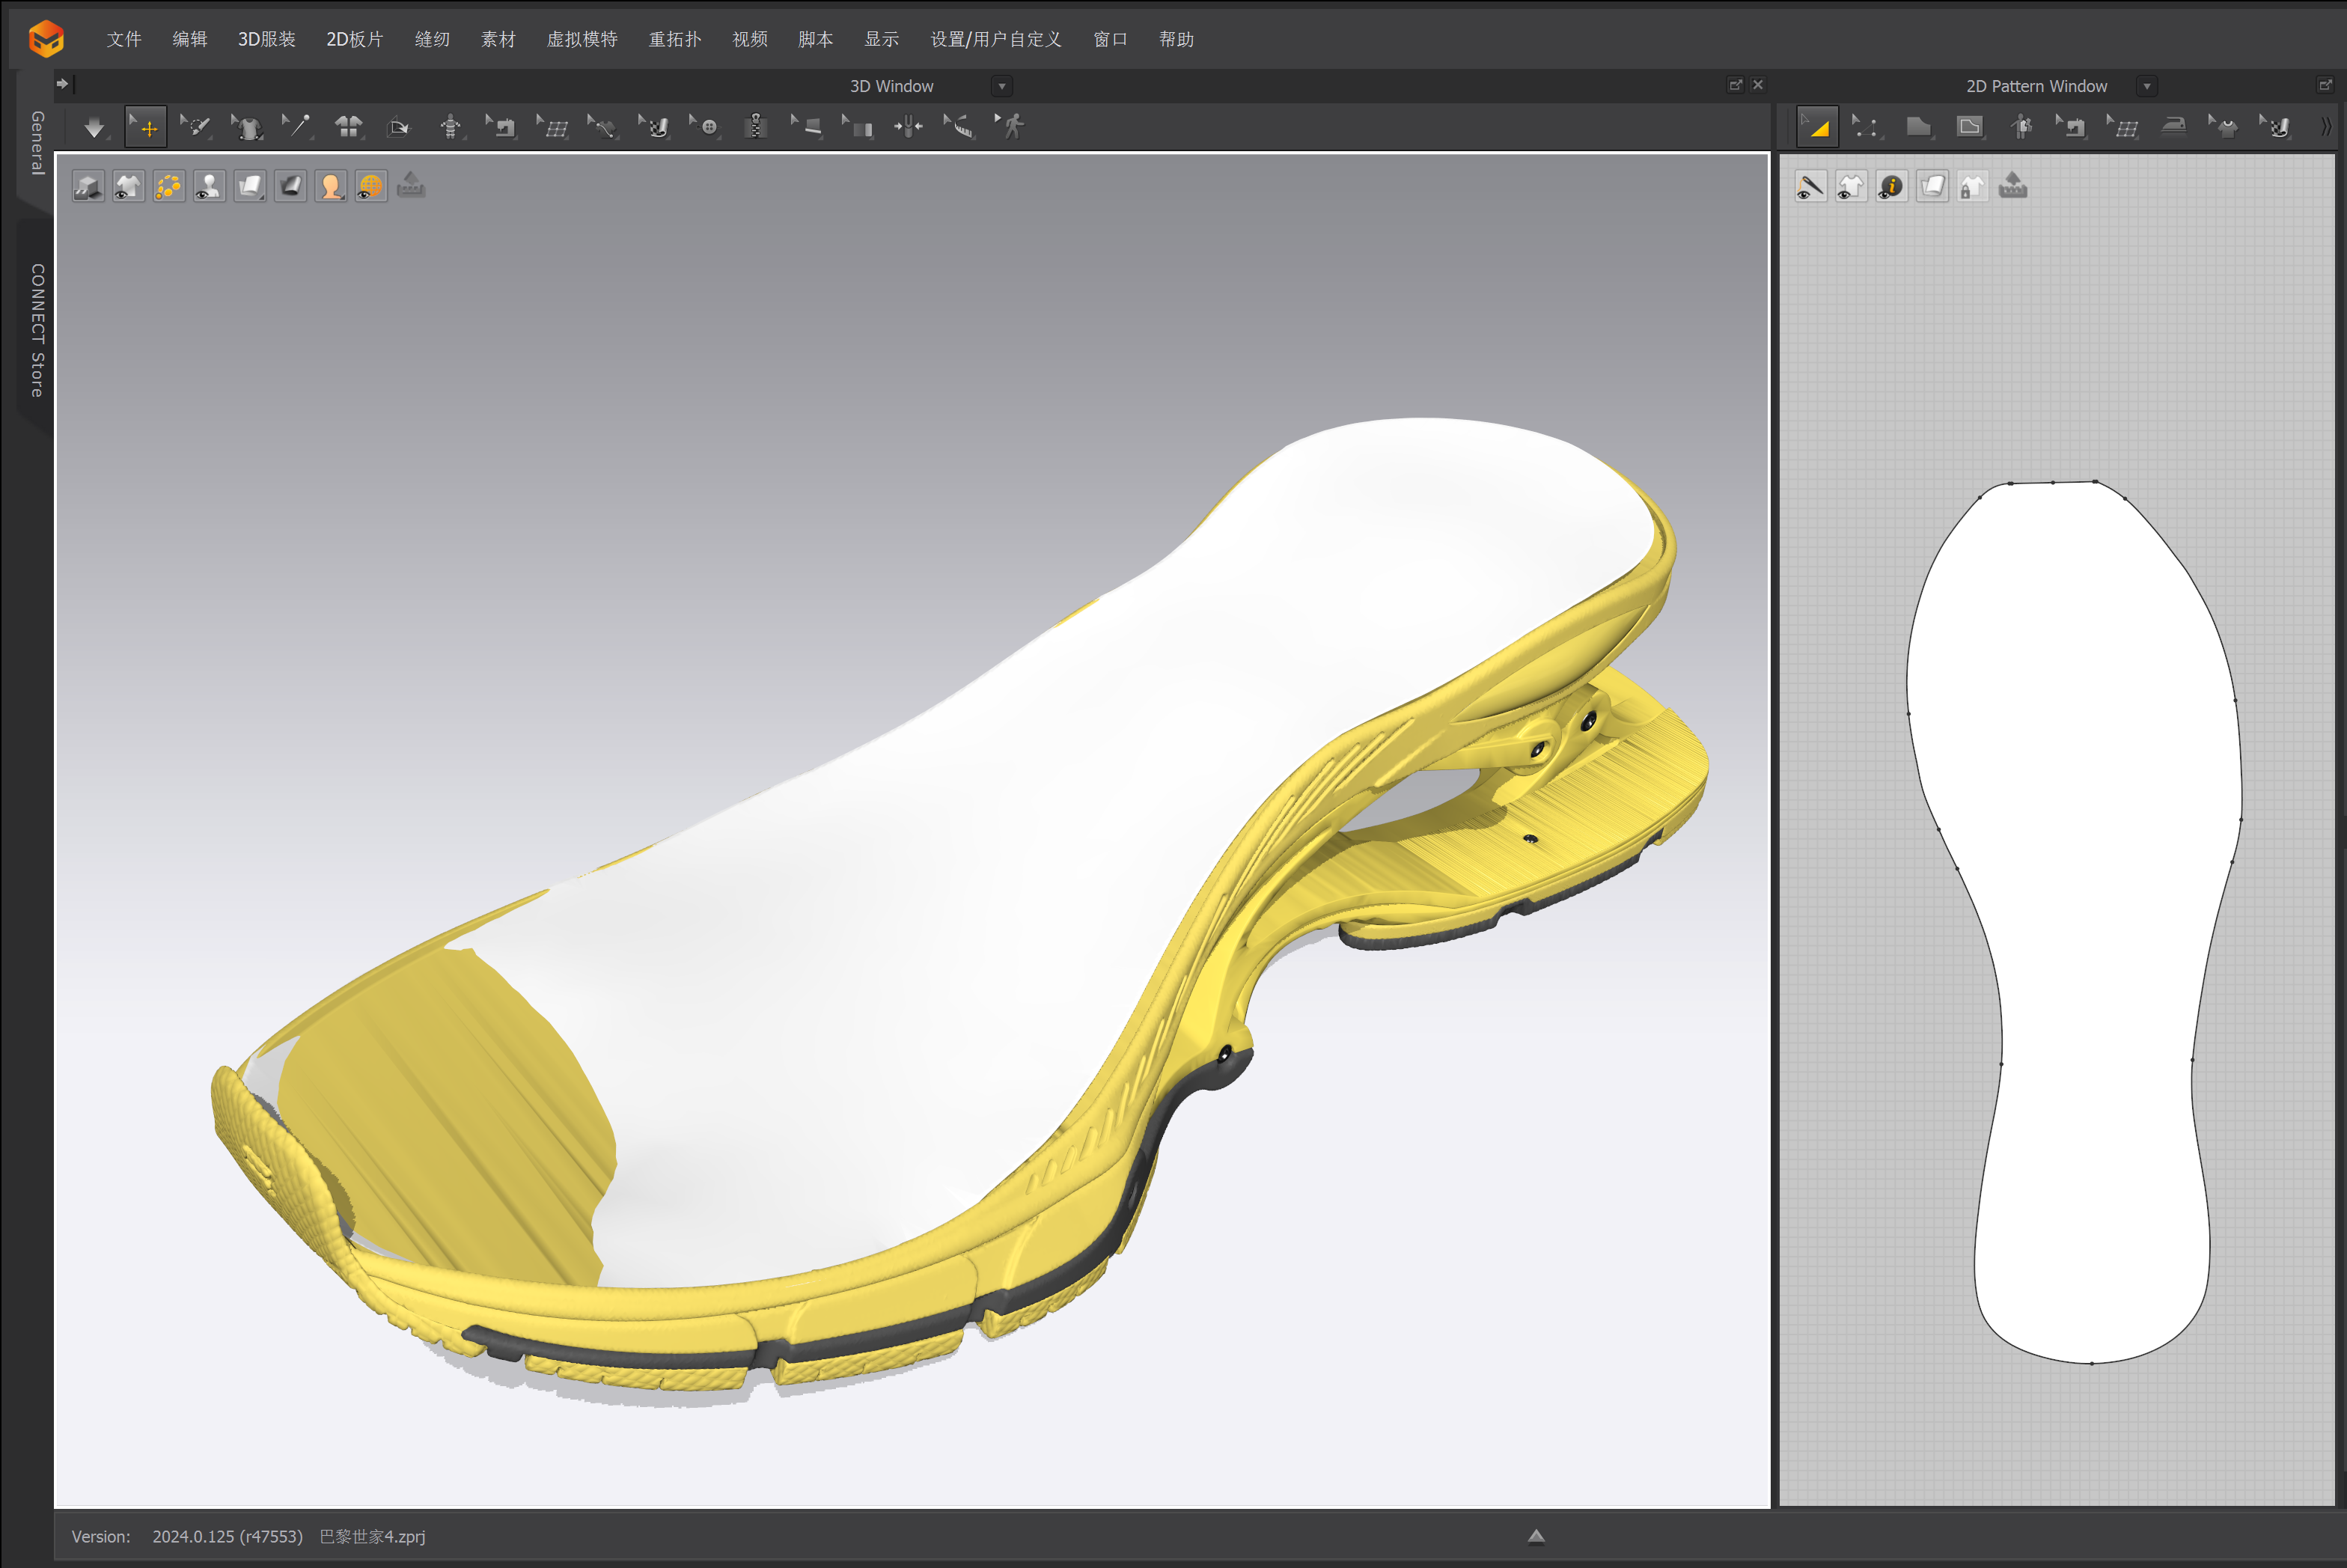
Marvelous Designer Pattern Making
Creating the Shoe Upper
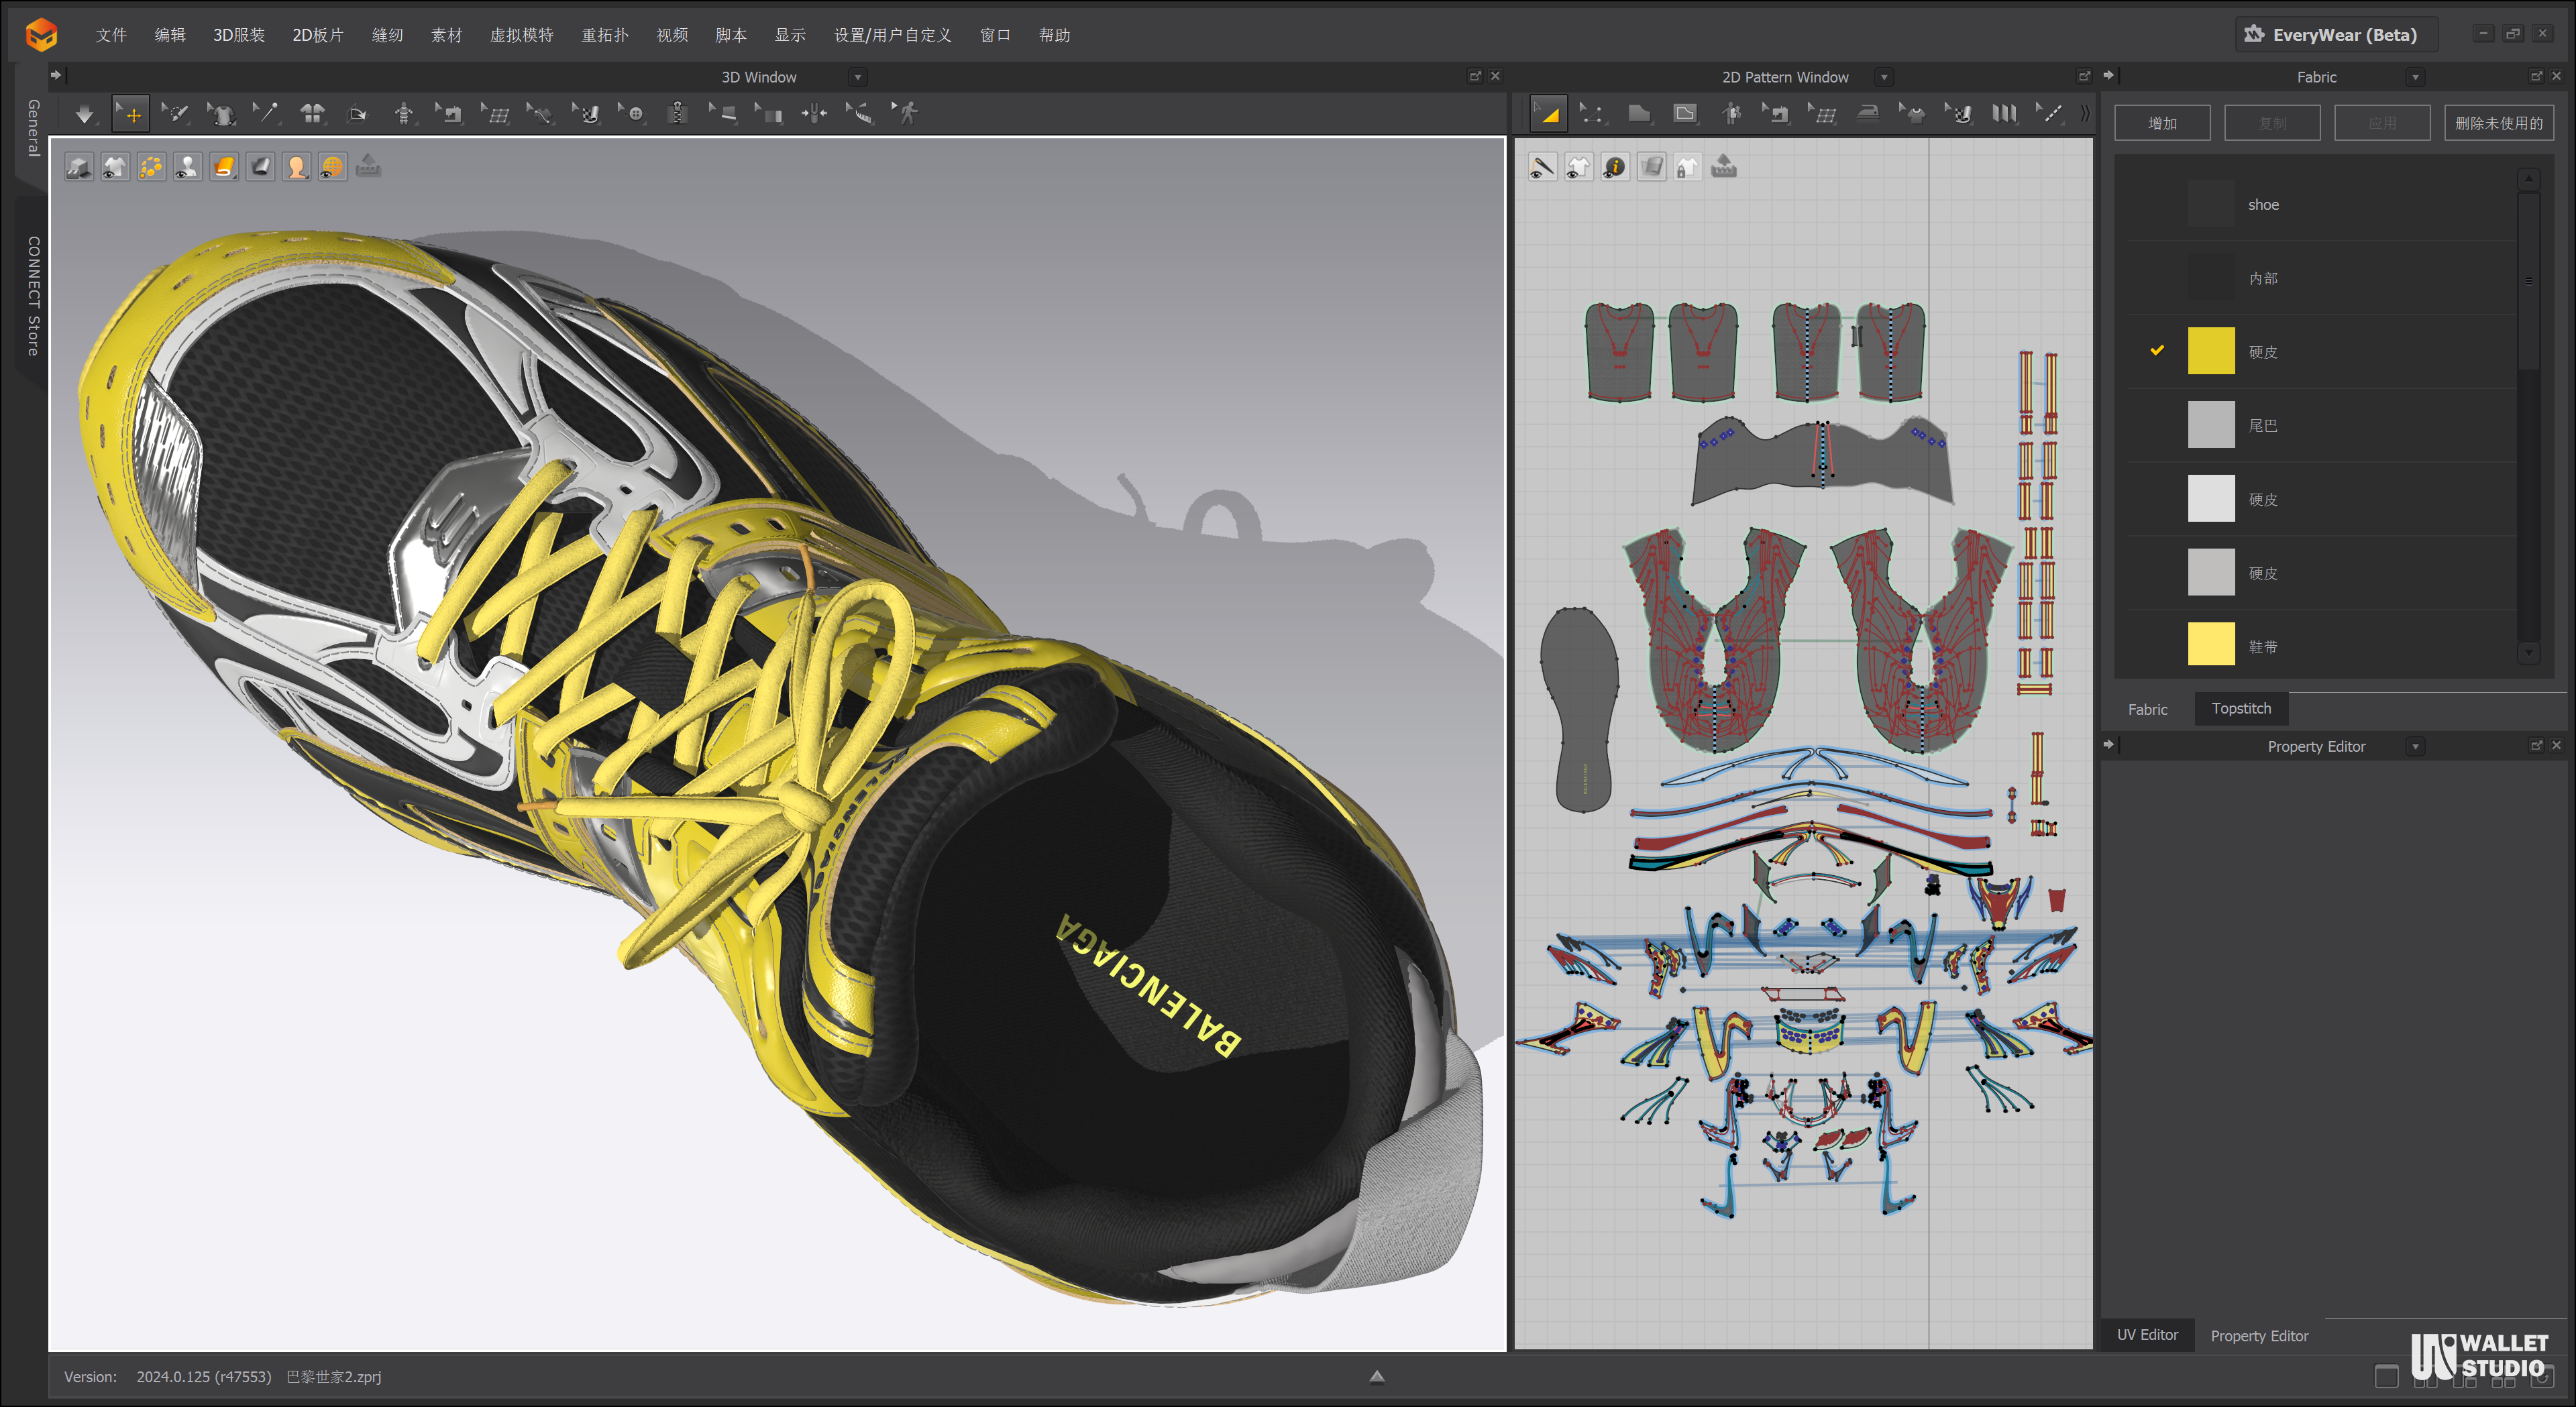
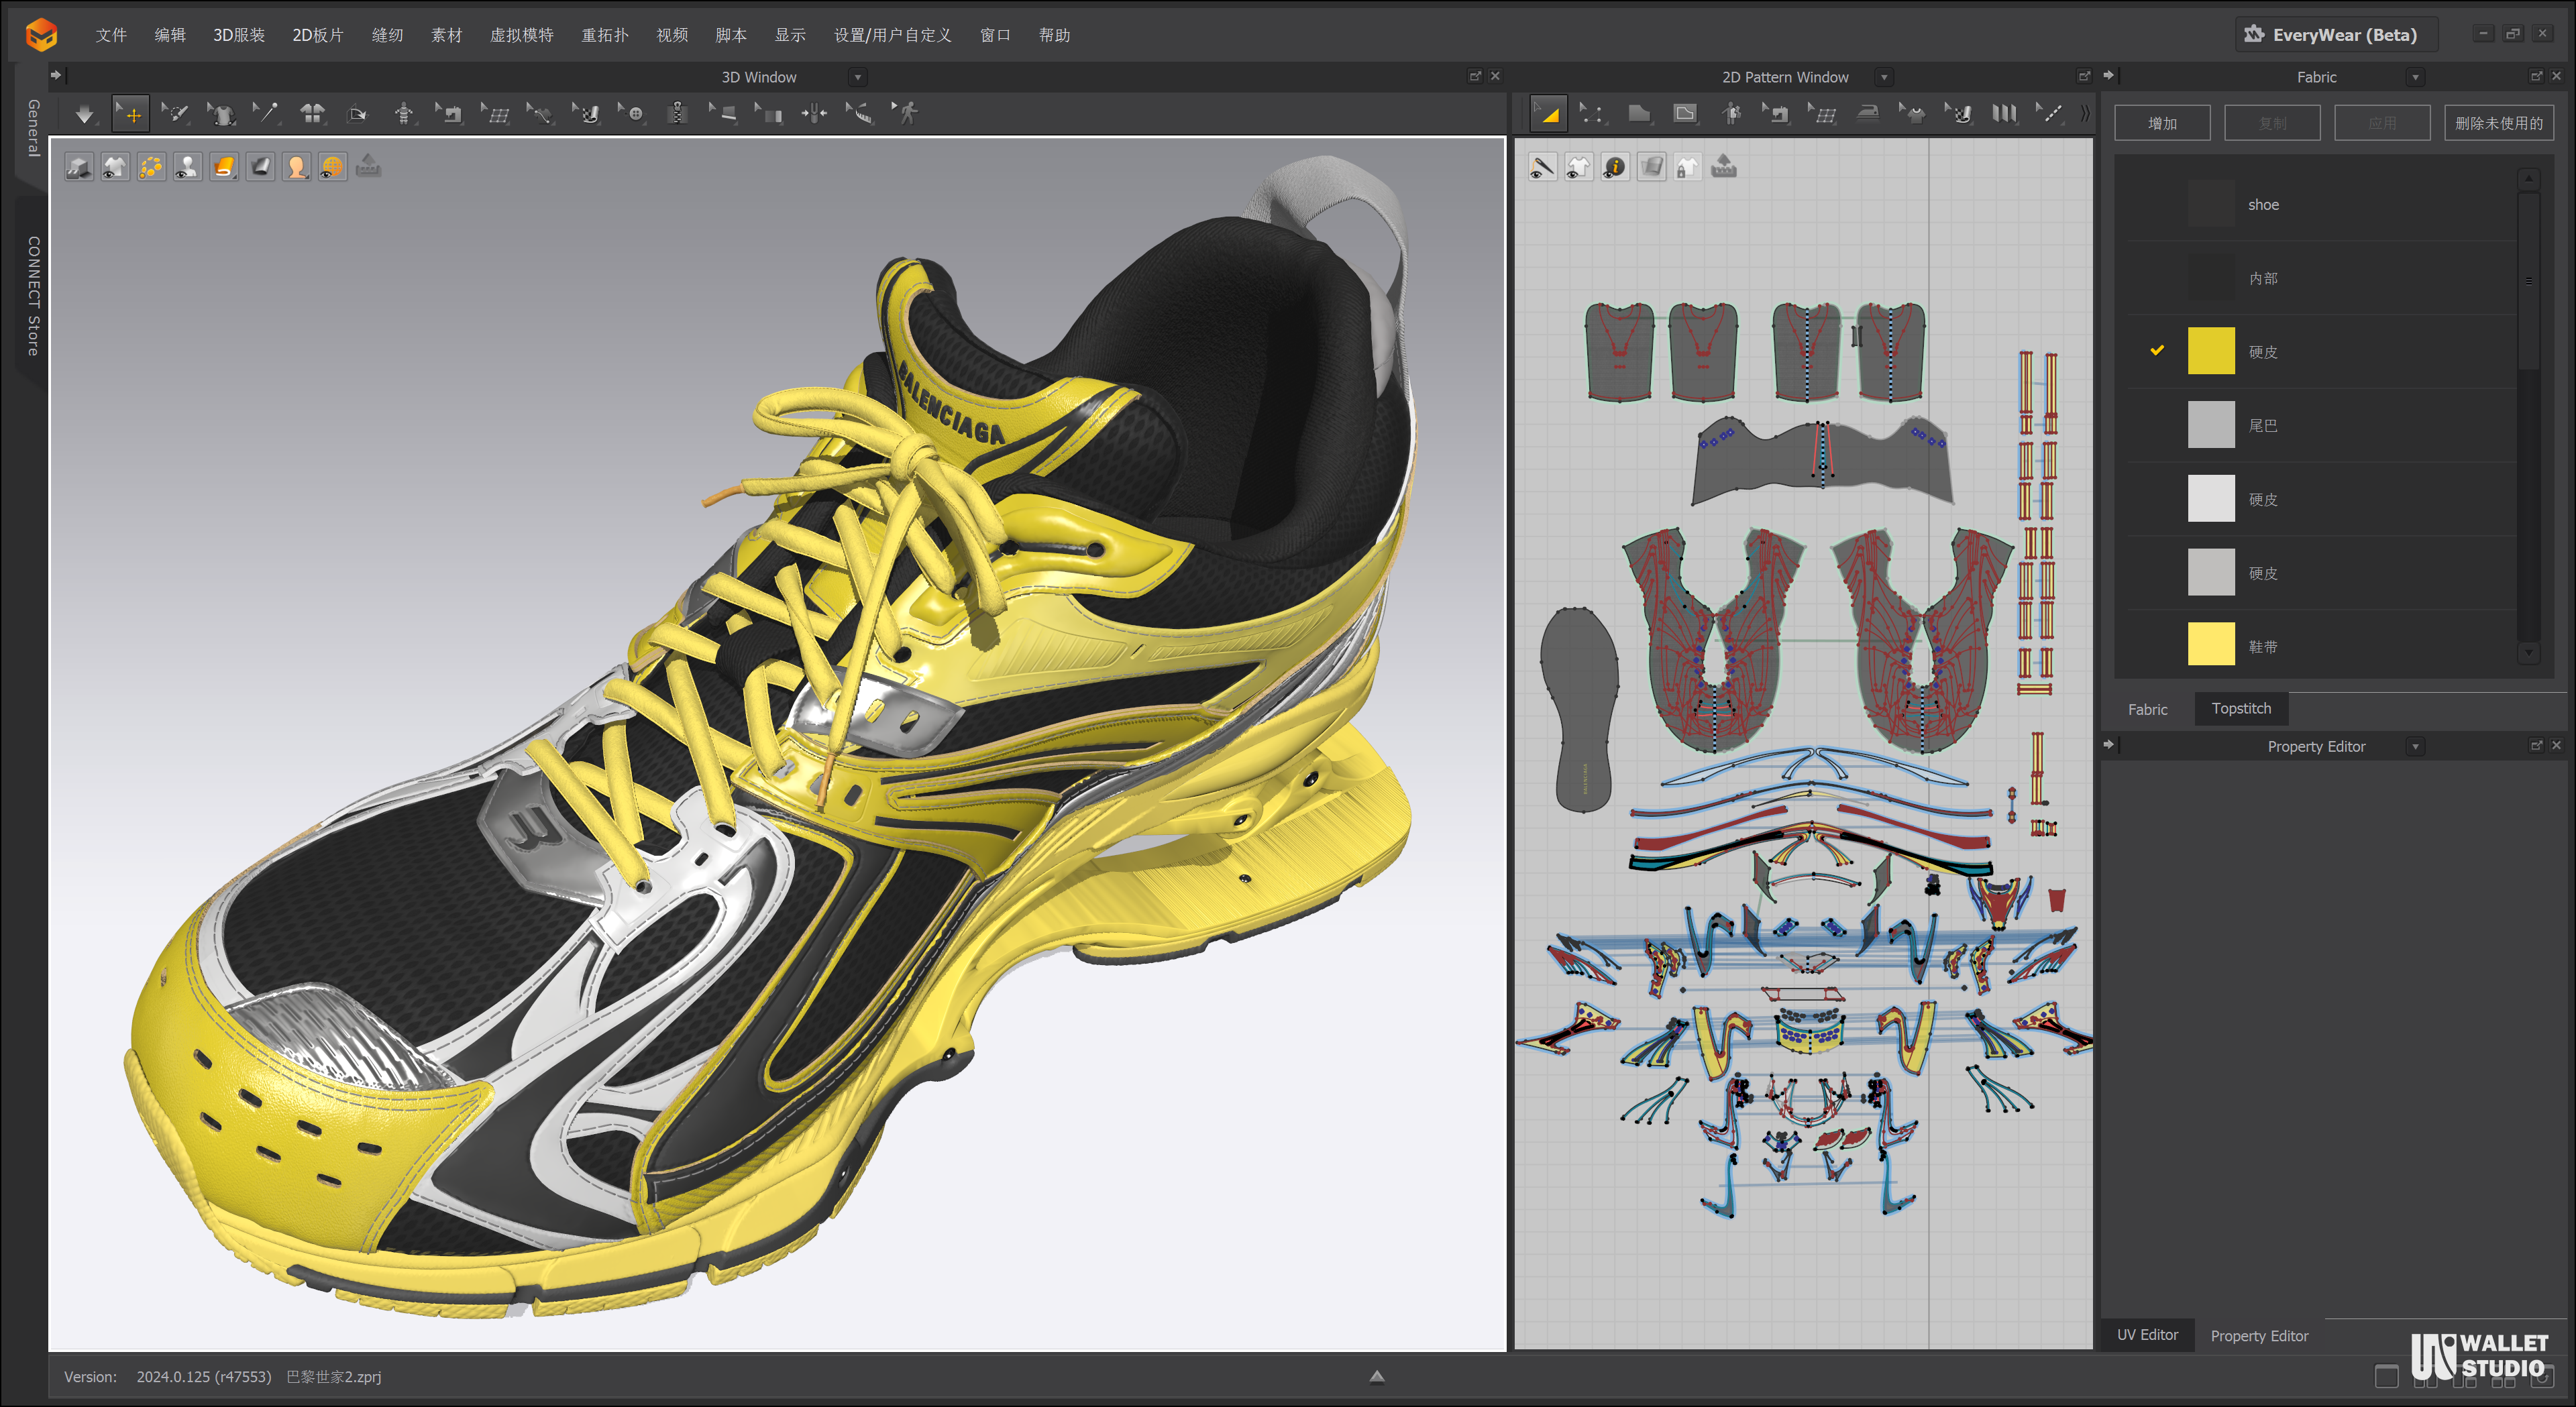
Using the previously created sole pattern, I began to extend and create the entire shoe pattern. The mesh upper was the most important part, and I chose to sculpt this model in ZBrush. I sculpted a rough shoe based on references and then retopologized it. Following the same method used for the sole, I created the upper, ensuring proper UV mapping. After converting it for clothing use and importing it into Marvelous Designer, I obtained the initial shoe upper pattern. The initially imported pattern had many unnecessary points, which I cleaned up.
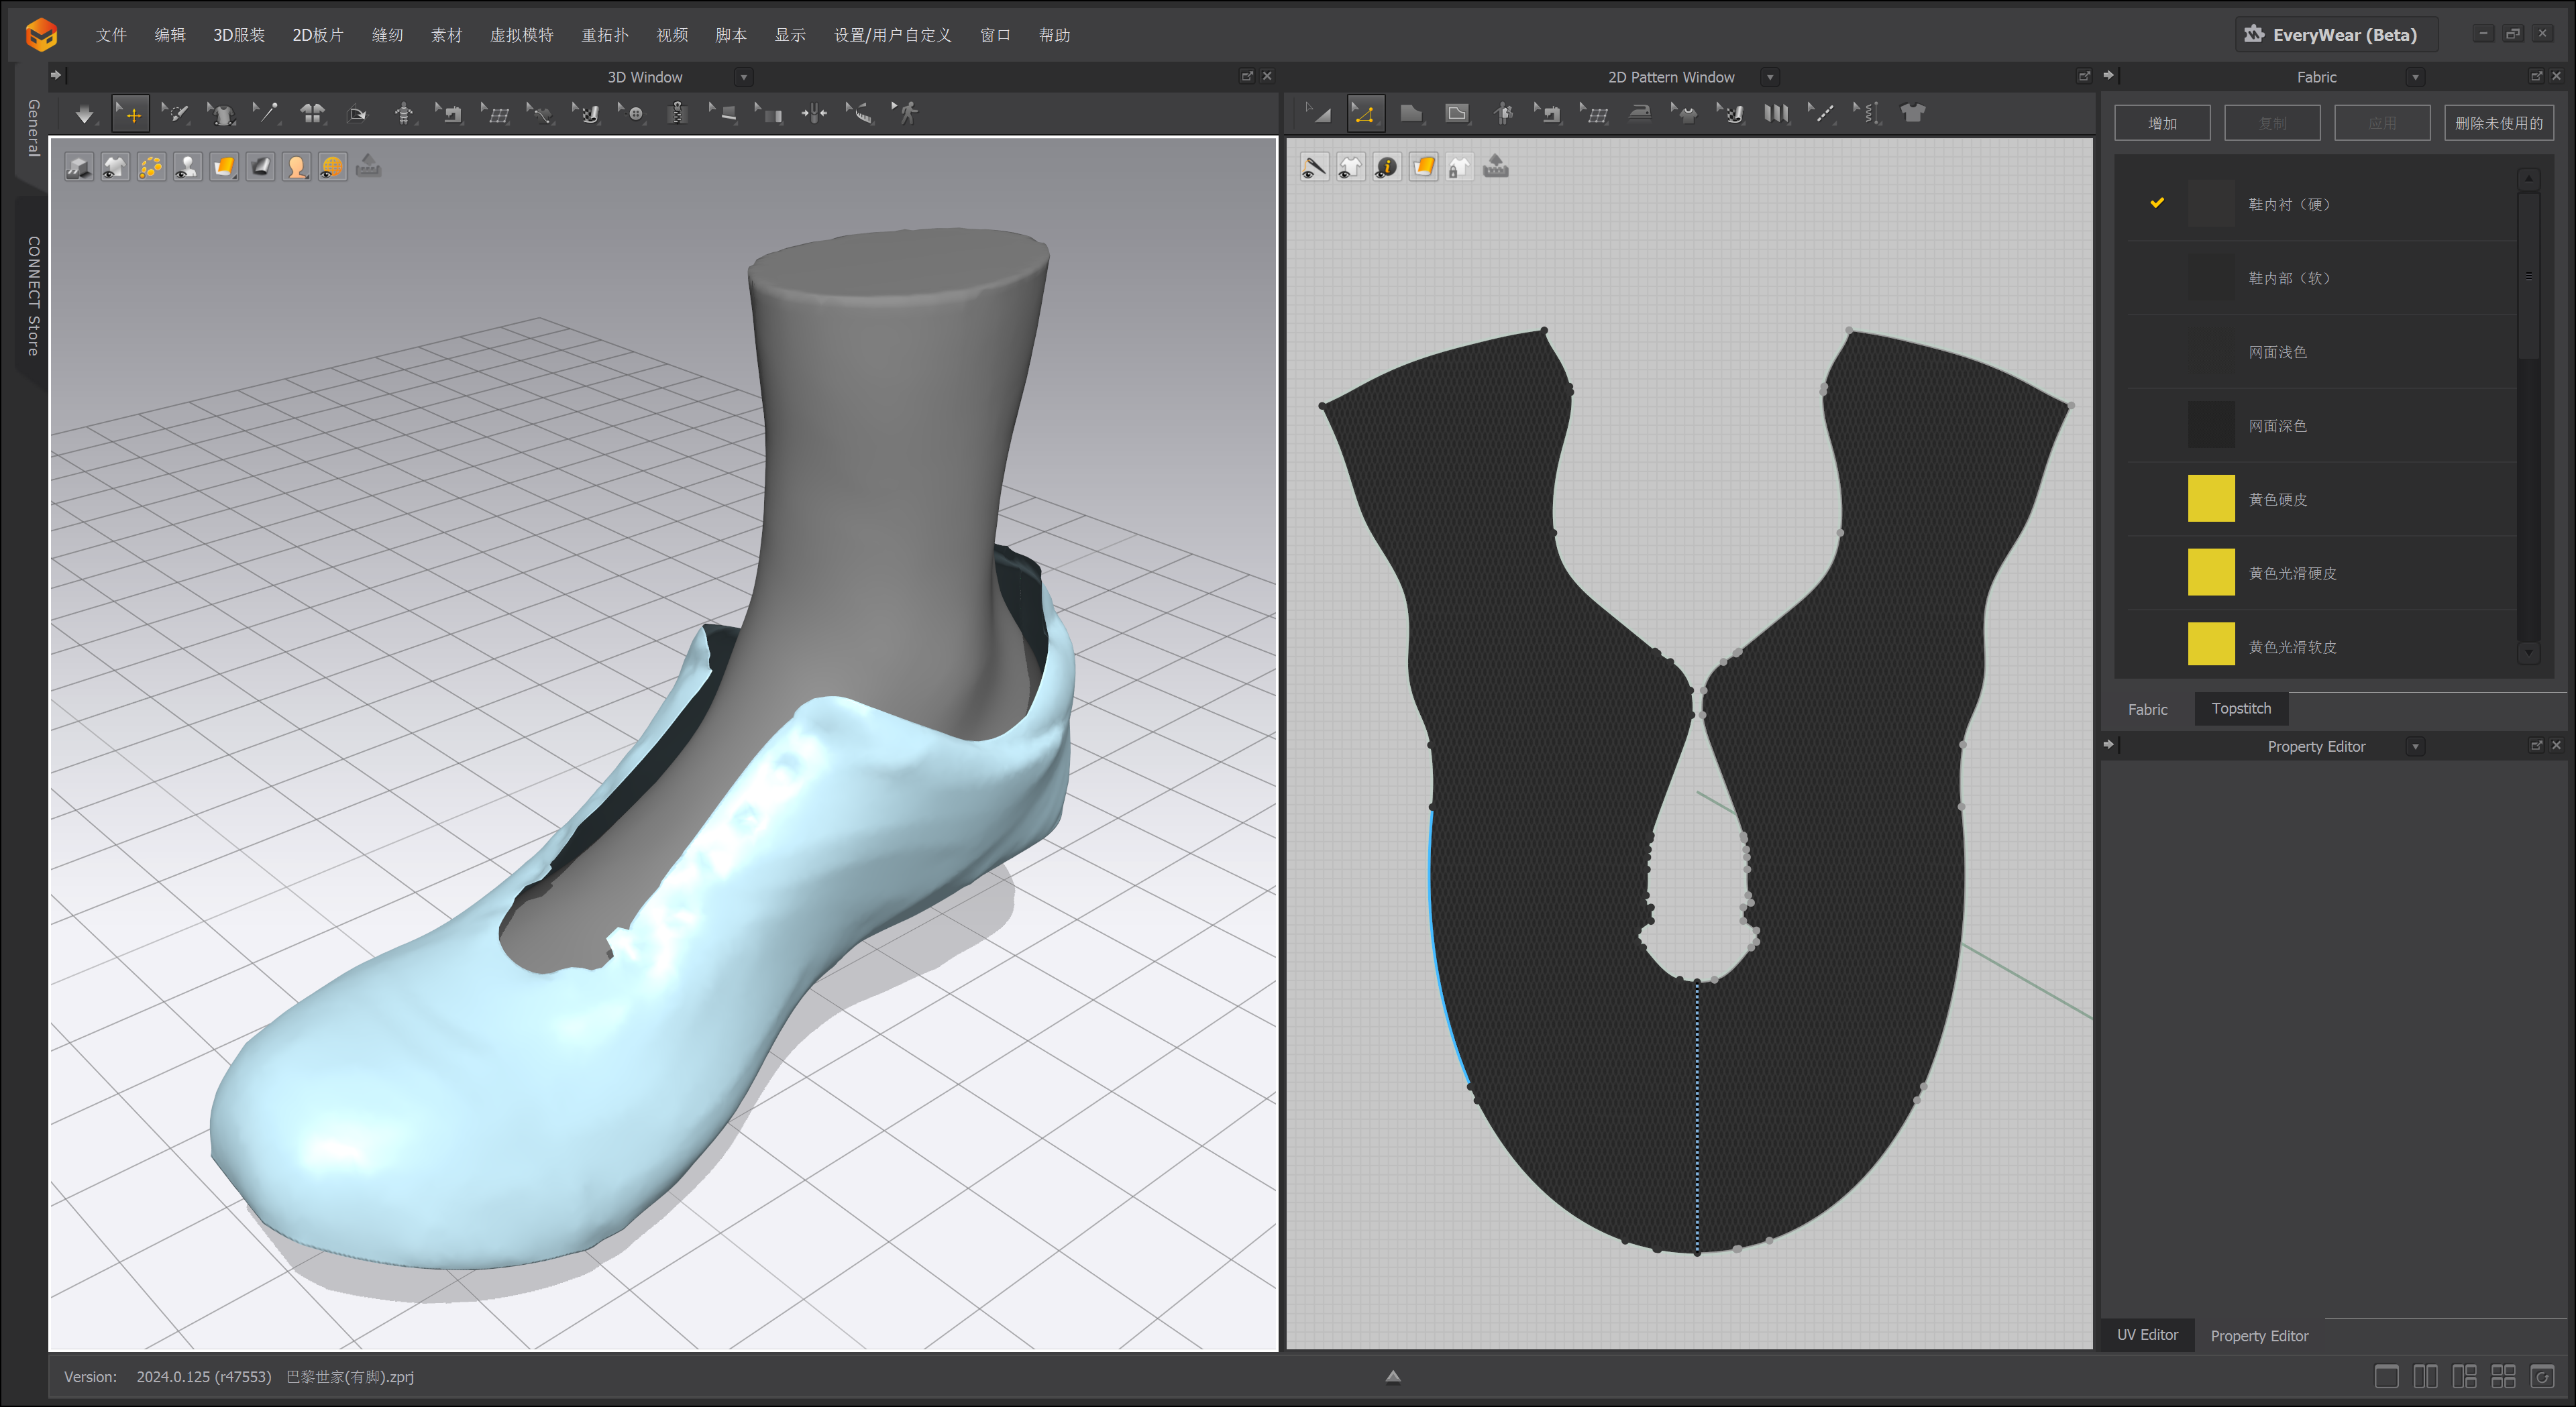
Creating the Upper Assembly Pattern Pieces
For the other pattern pieces on the shoe upper, I prefer to use draping techniques. In Marvelous Designer, I can create these draped patterns using line segments.
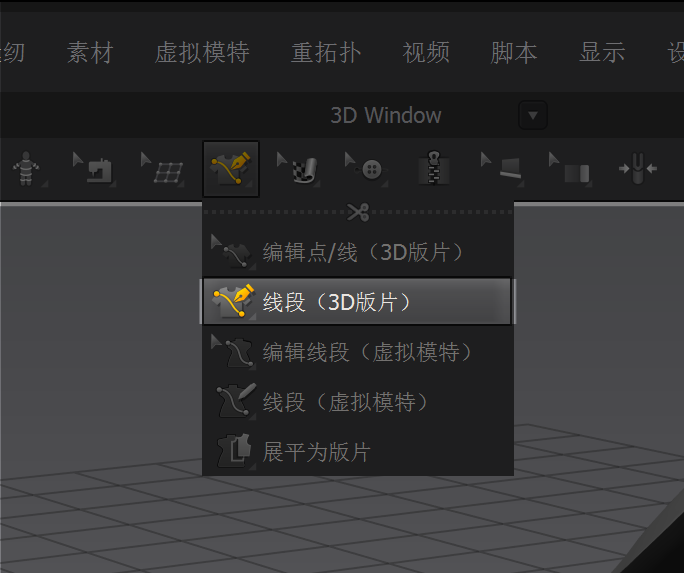
This approach allowed me to quickly draw pattern pieces directly onto the shoe upper.
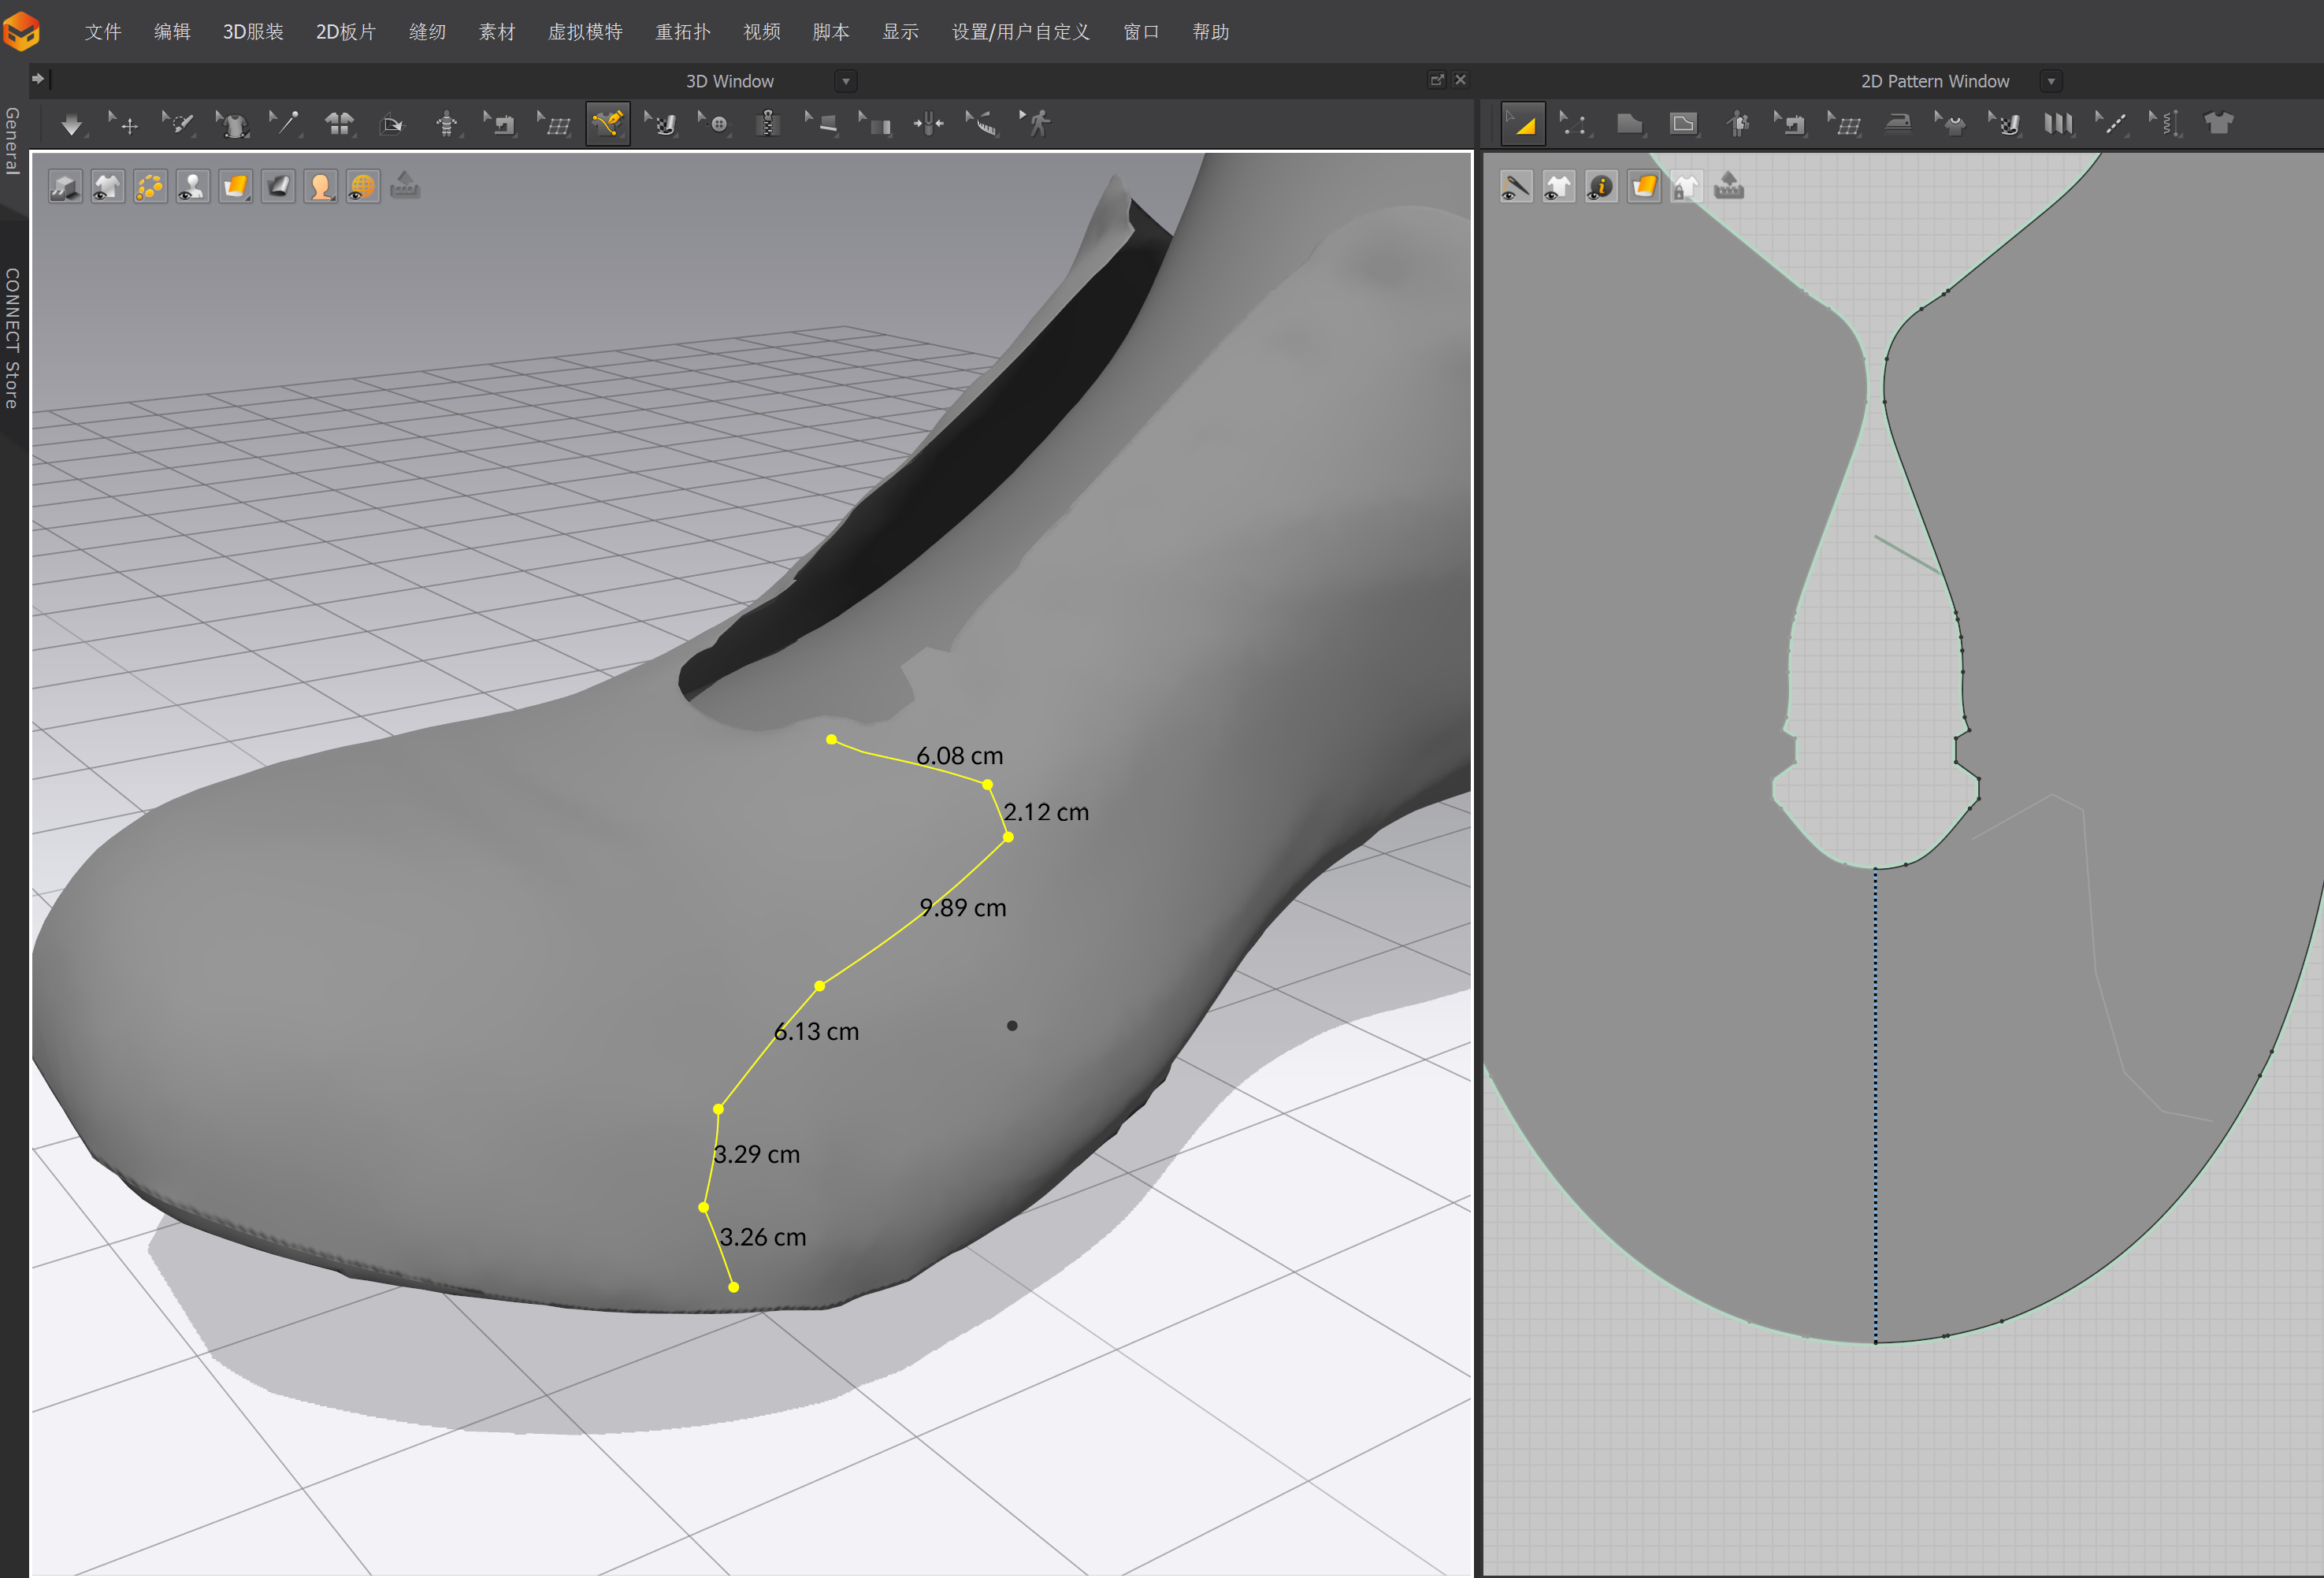
I selected the editing line segments and right-clicked to convert them into internal shapes.
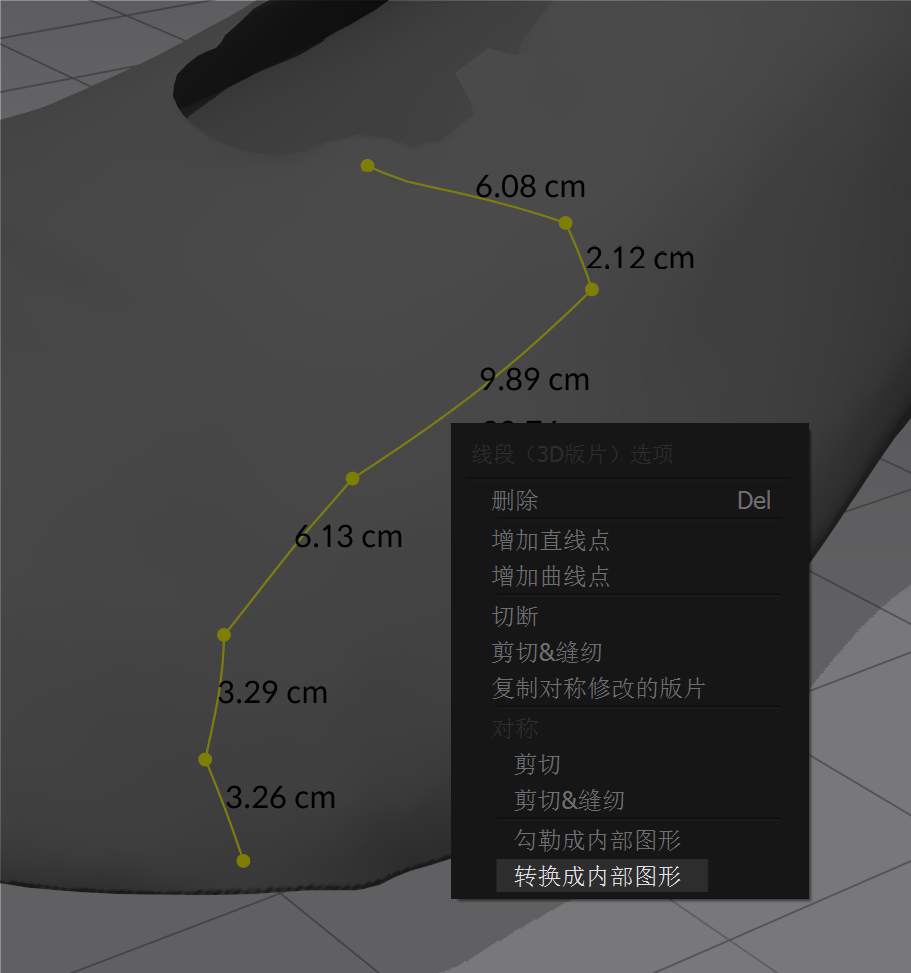
By following this method, I was able to create all the pattern pieces. After obtaining these internal shapes, I pressed the "I" key to outline them as pattern pieces, completing the assembly pieces on the shoe upper.
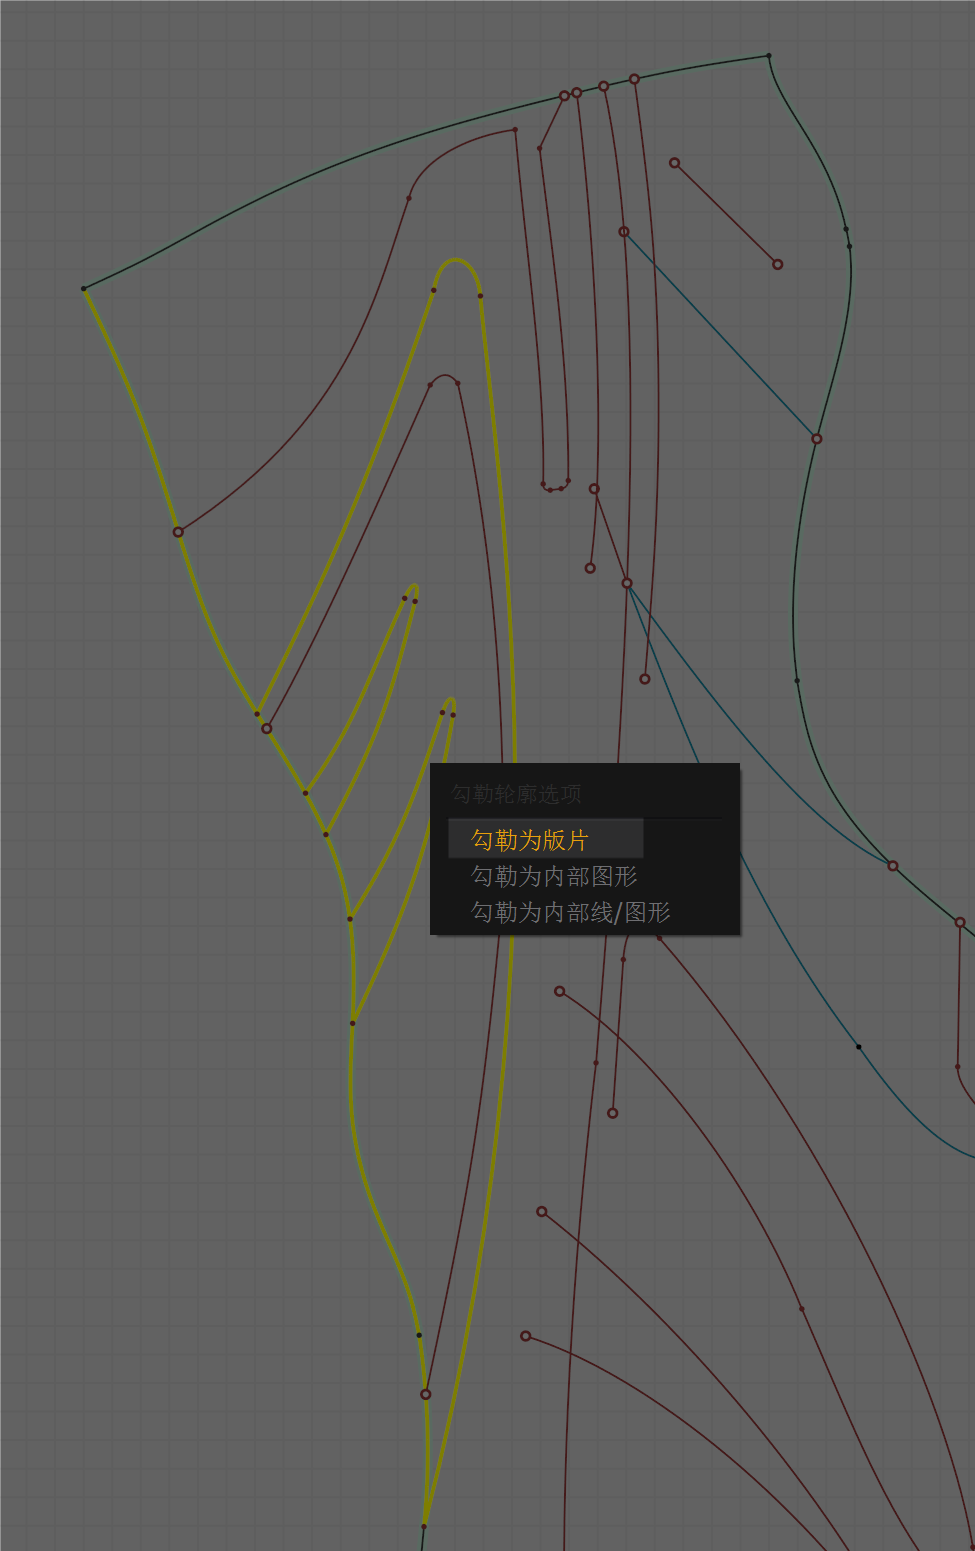
There were many assembly pattern pieces on the shoe upper, so in the end, I obtained a complex internal shape. I retained these internal shapes, as they would serve as the sewing edges for the subsequent sewing patterns.
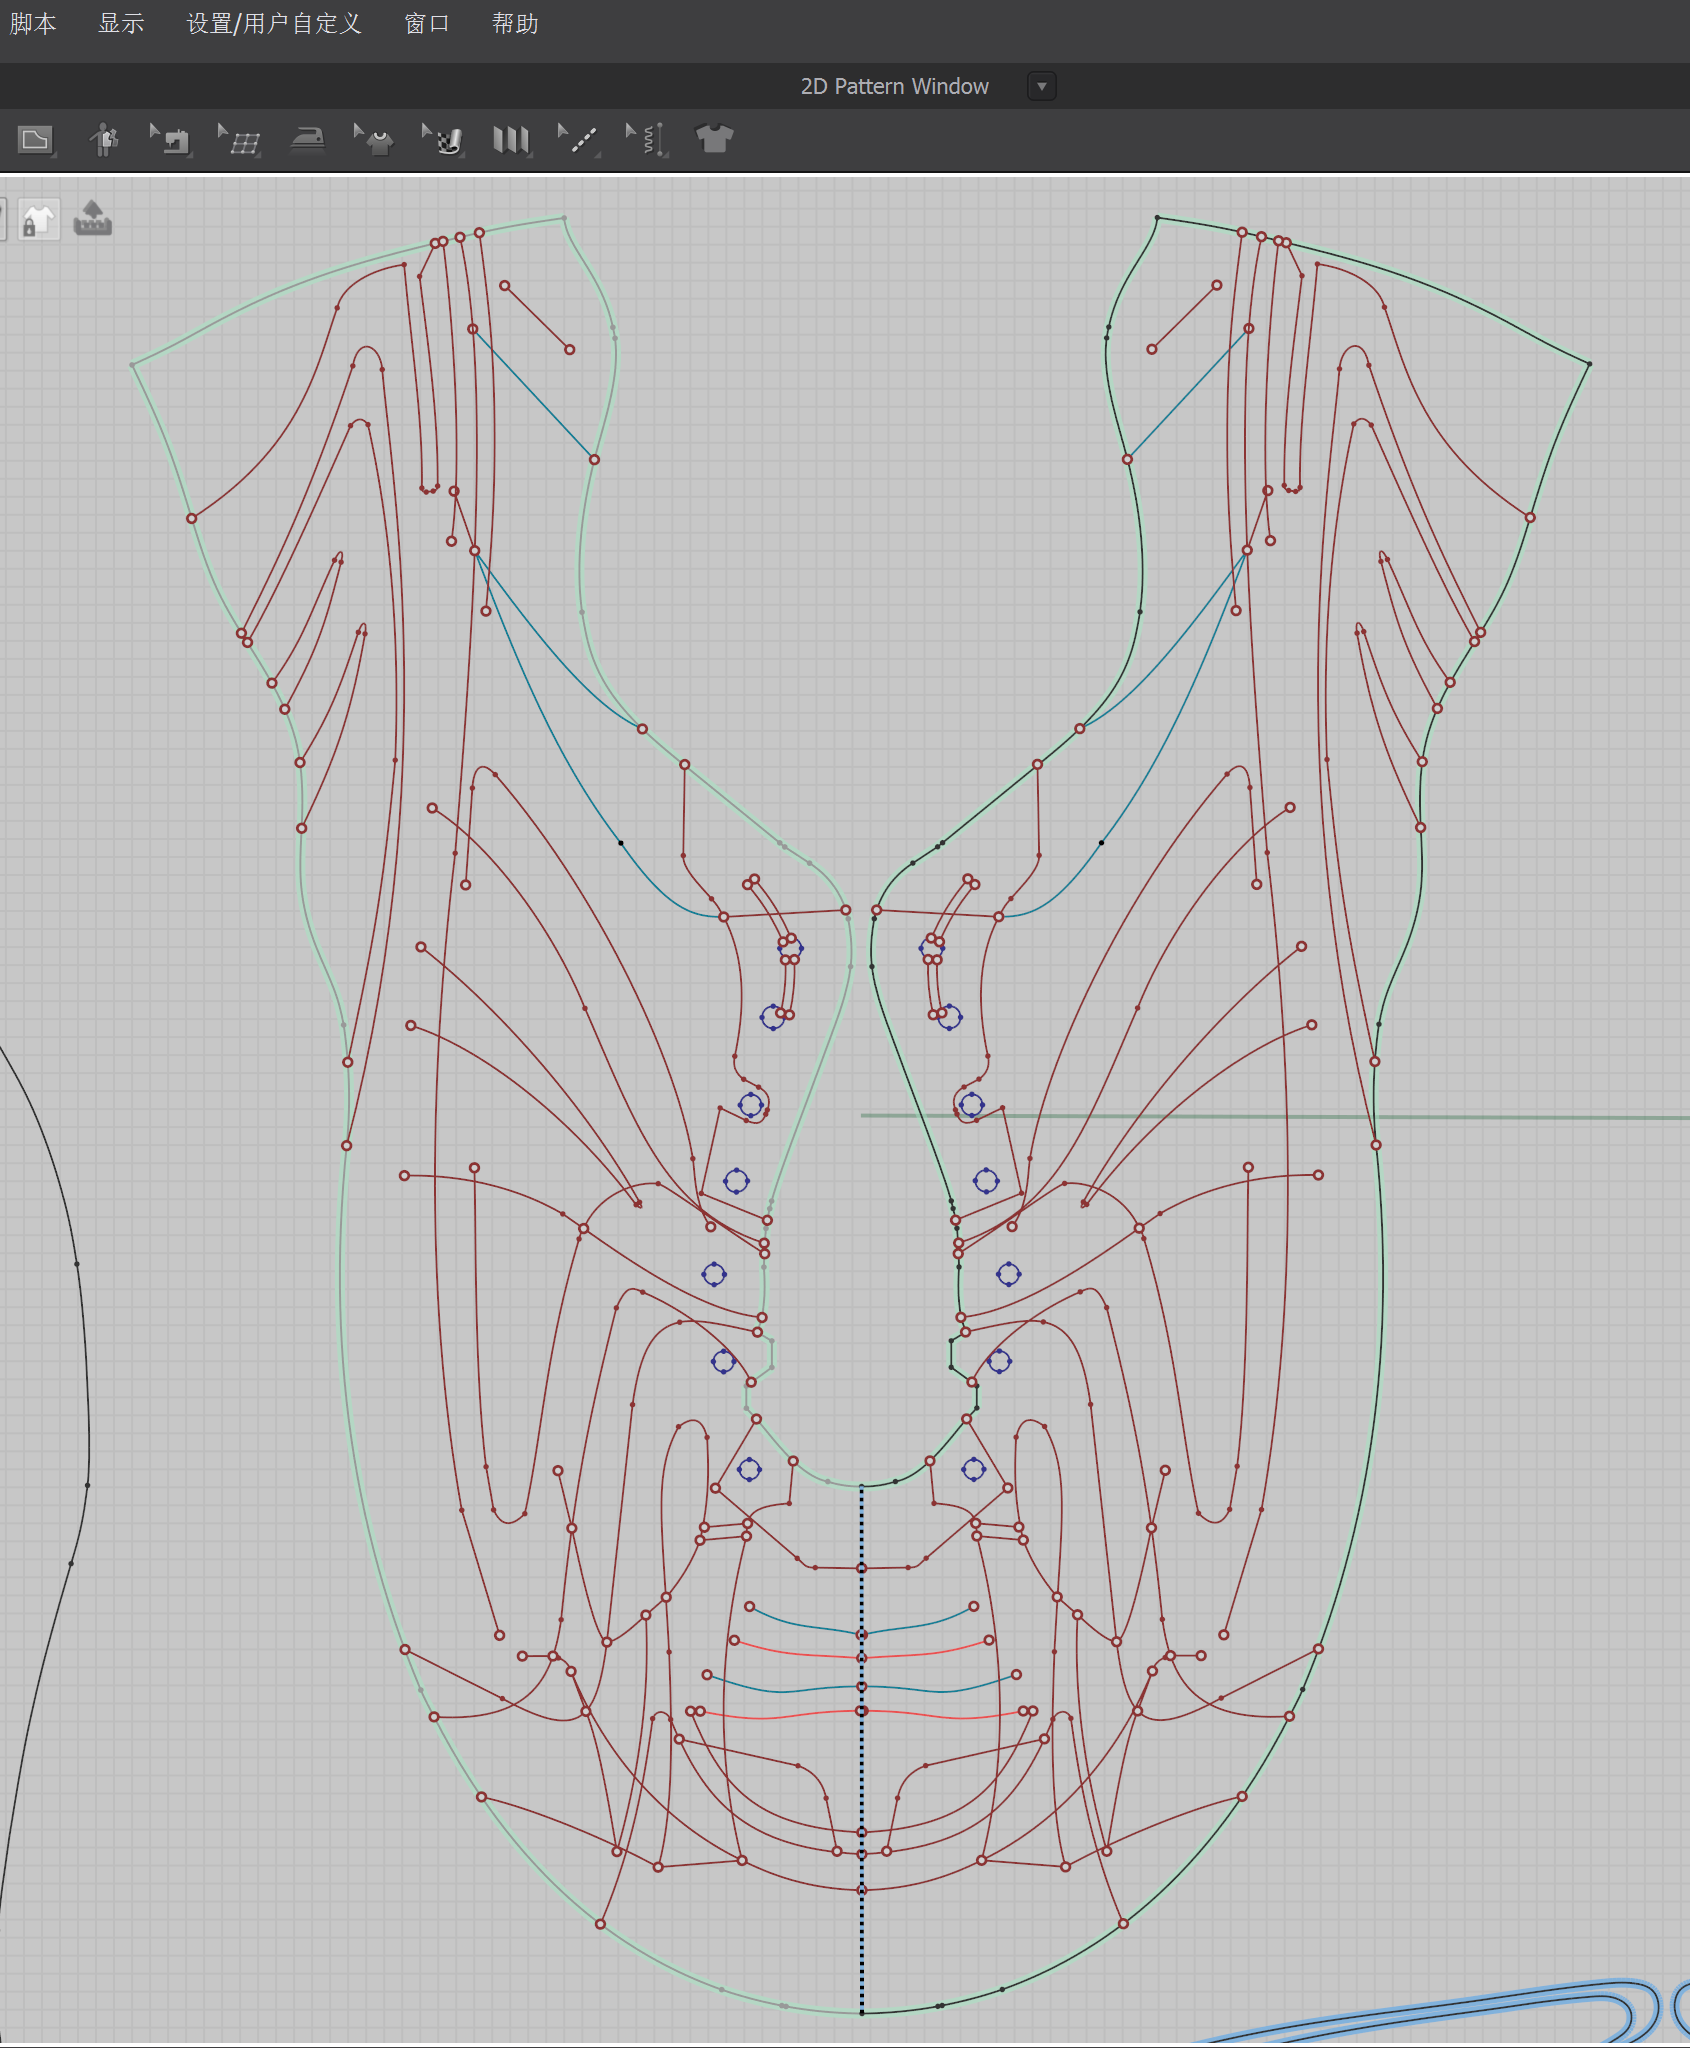
Sewing Patterns
For the majority of shoes, we typically assume that the pattern pieces are completely symmetrical, which makes the process much easier. Therefore, I only needed to create the pattern pieces for one side, and during sewing, I also only had to sew one side.
There wasn't much to say about the sewing patterns. The only aspect that needed emphasis was the overlapping relationships between the pattern pieces. While this wasn't complex, the process could be a bit tedious to operate.
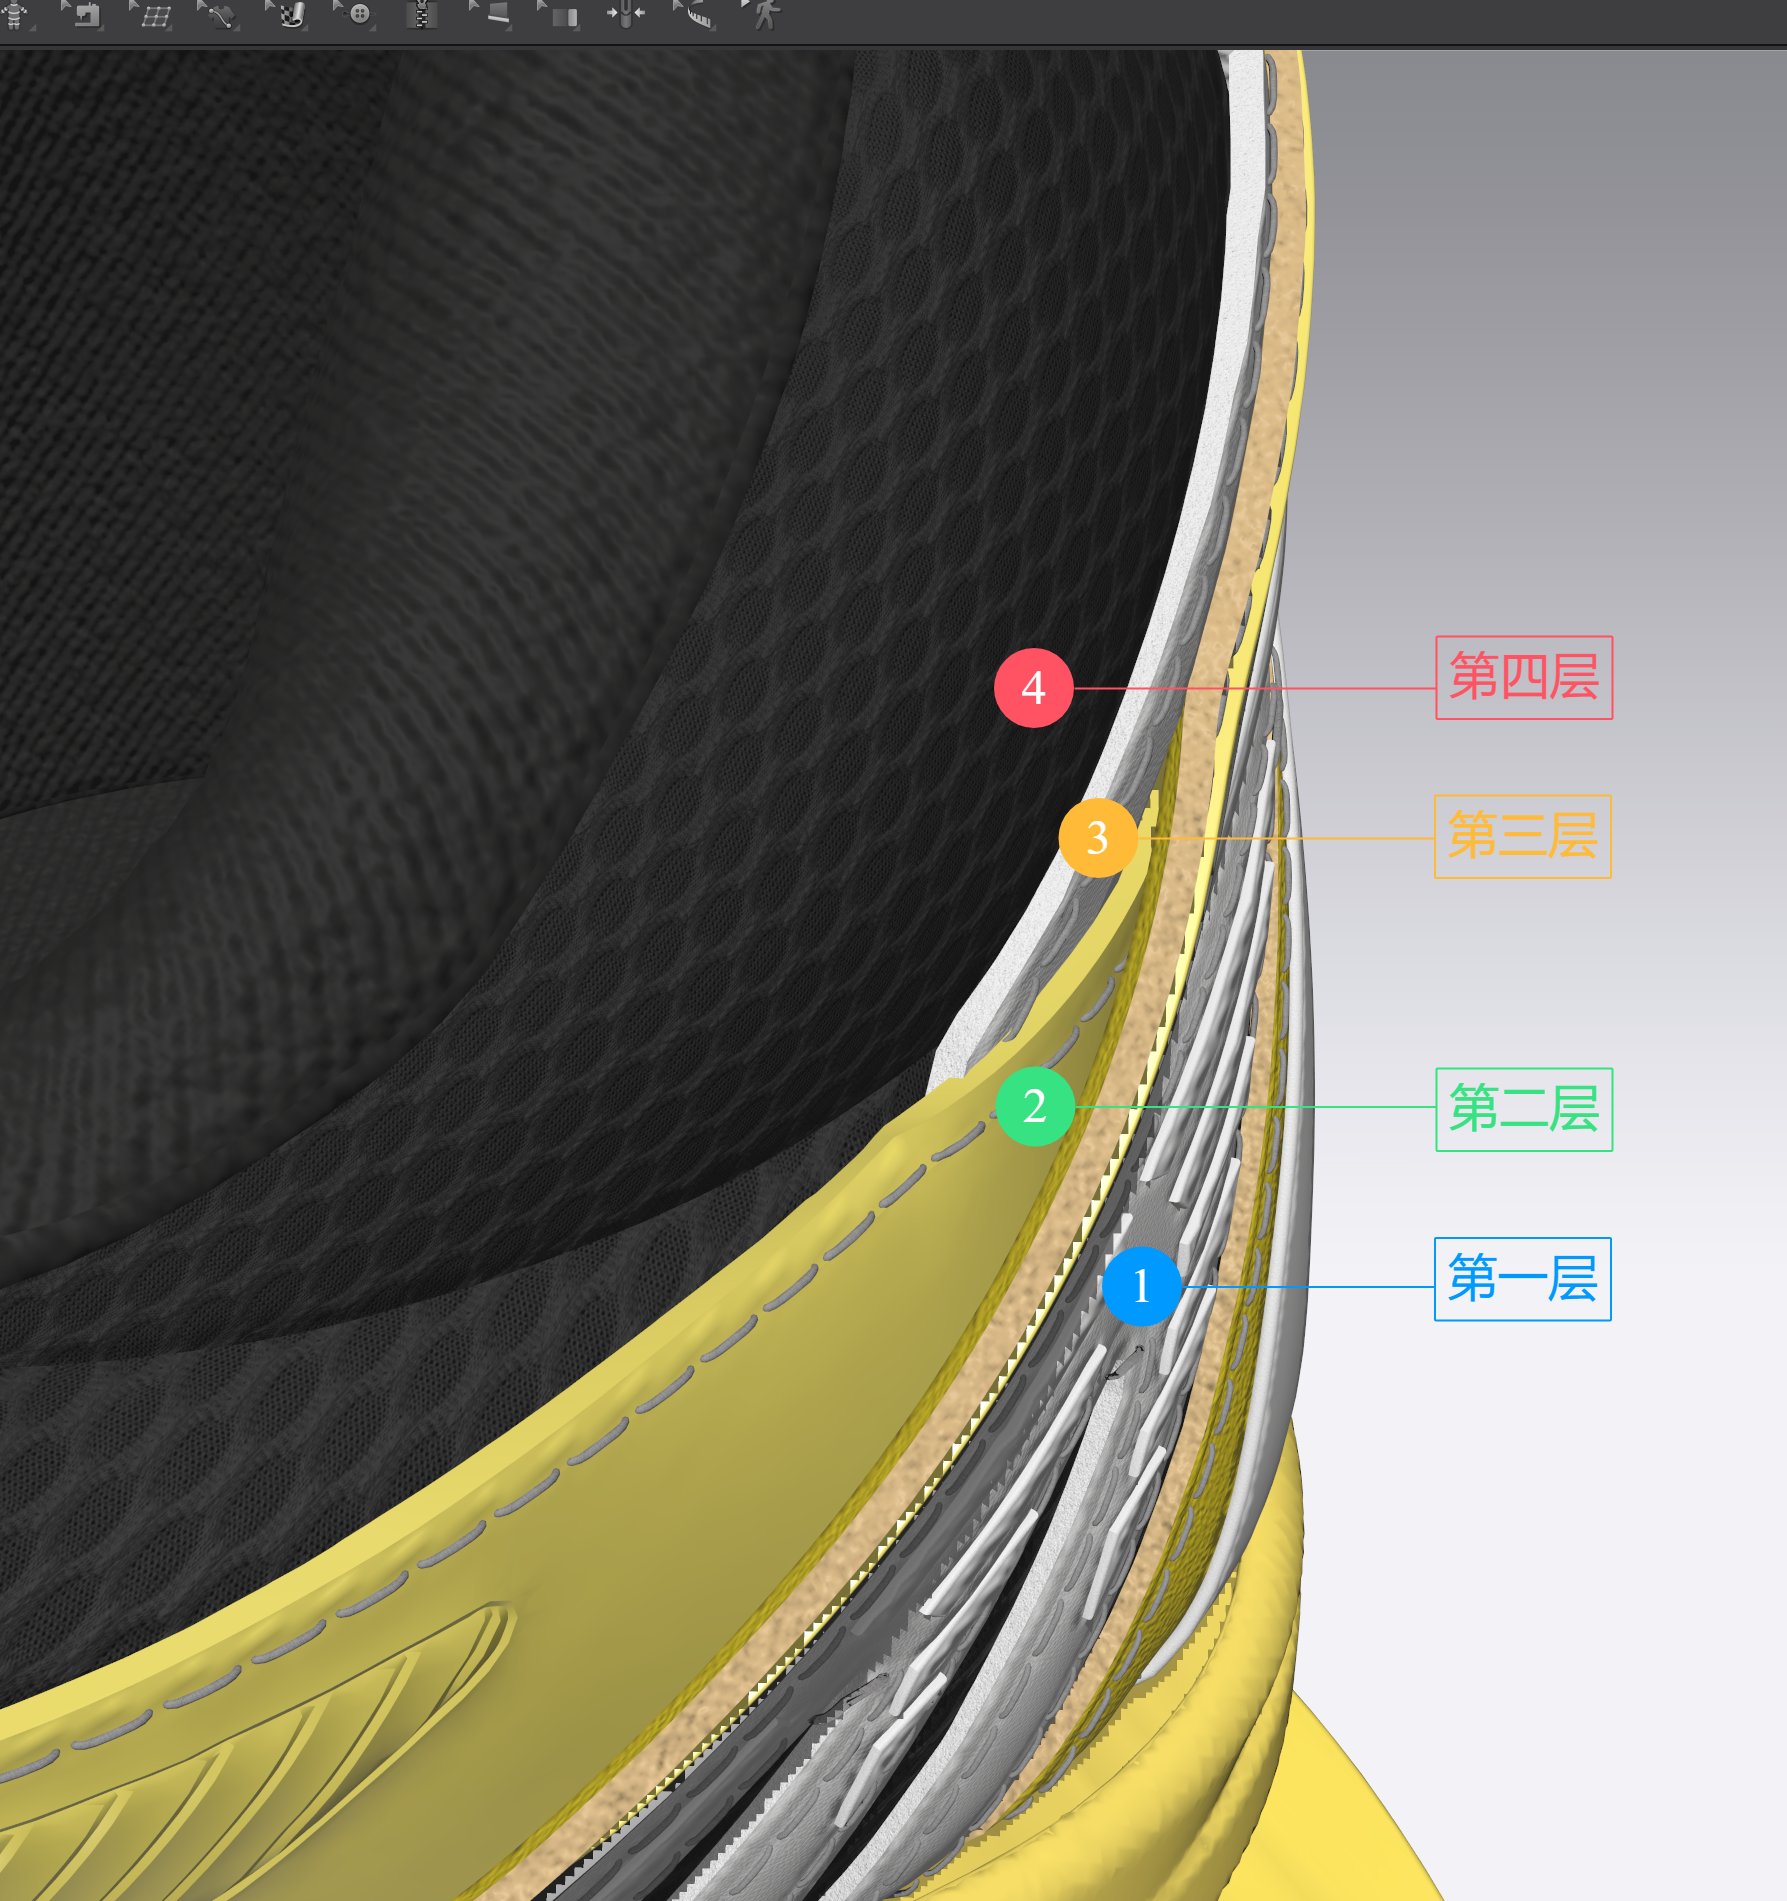
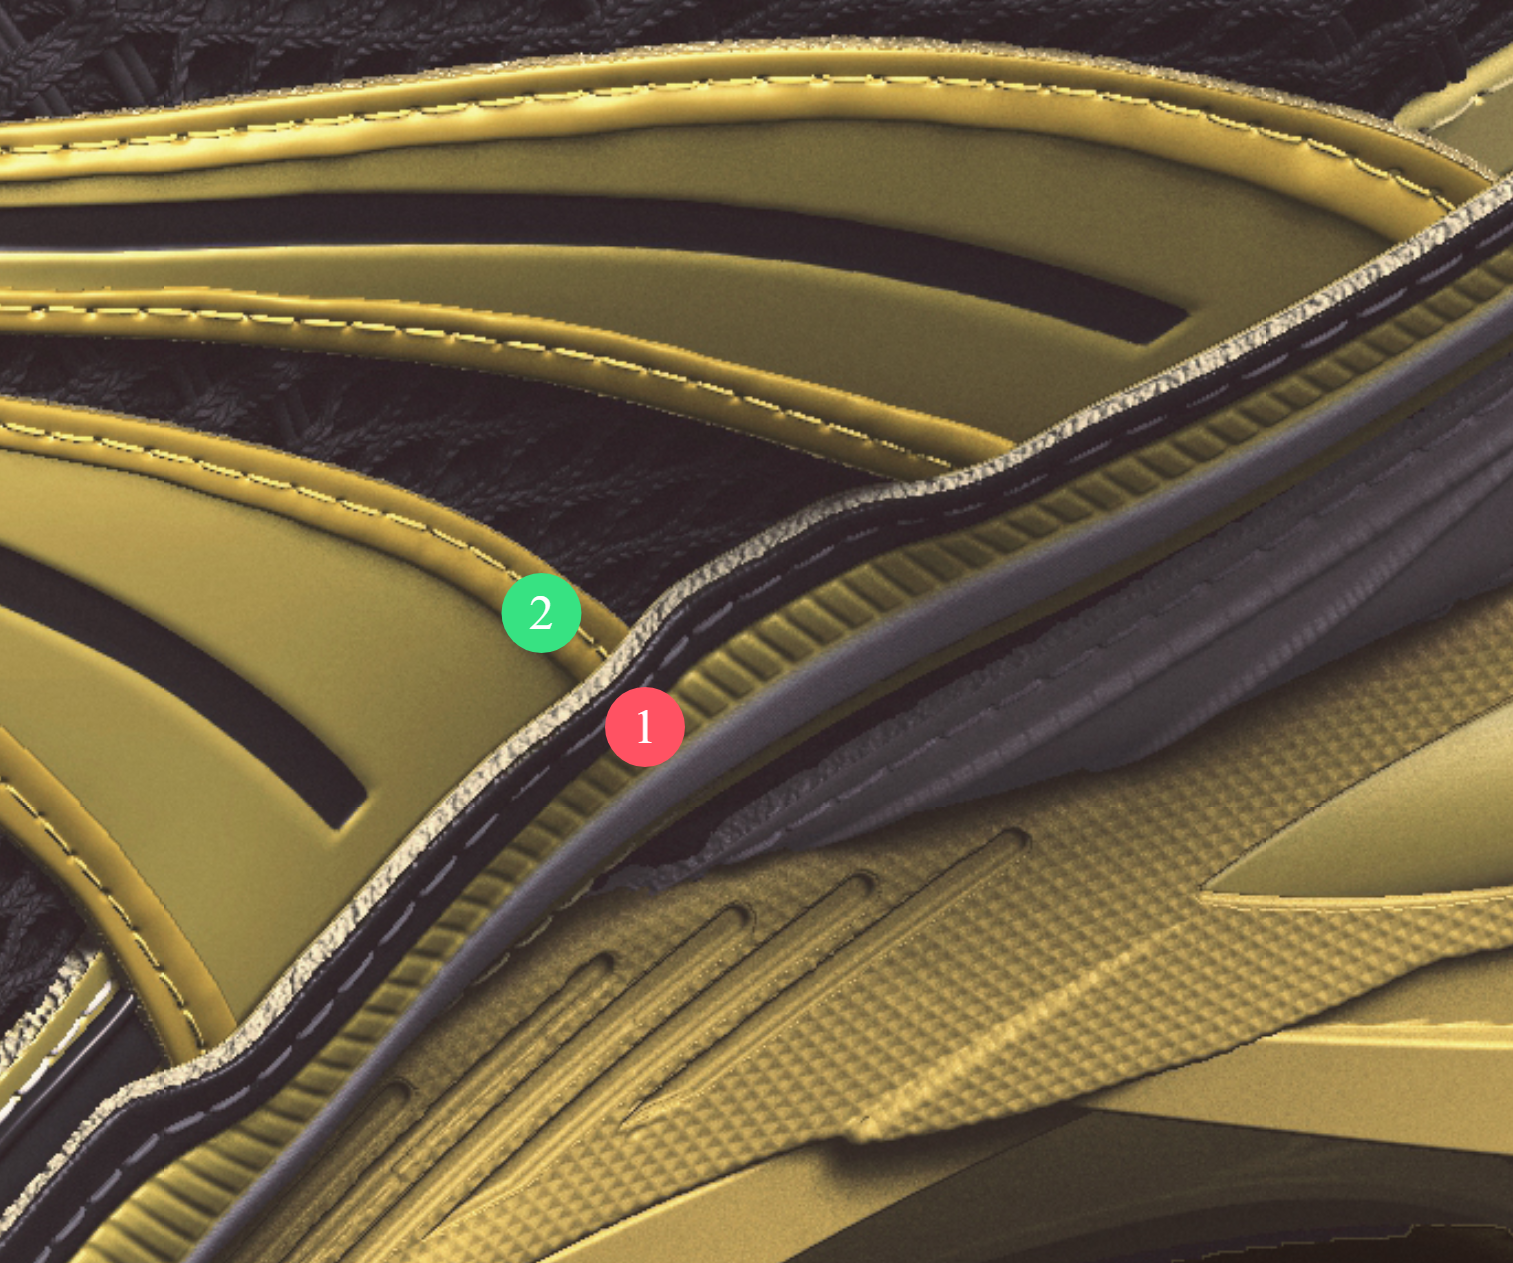
There were many instances of such layered sewing in this shoe. While following the realistic method of layering and sewing each piece was a bit cumbersome, it allowed for a more delicate representation of authenticity.
Realistic modeling focuses on ensuring that the overall shape is correct and visually appealing while paying attention to the creation of minute details. Only by doing so can a true sense of texture be achieved in the final presentation.
Creating the Shoelaces
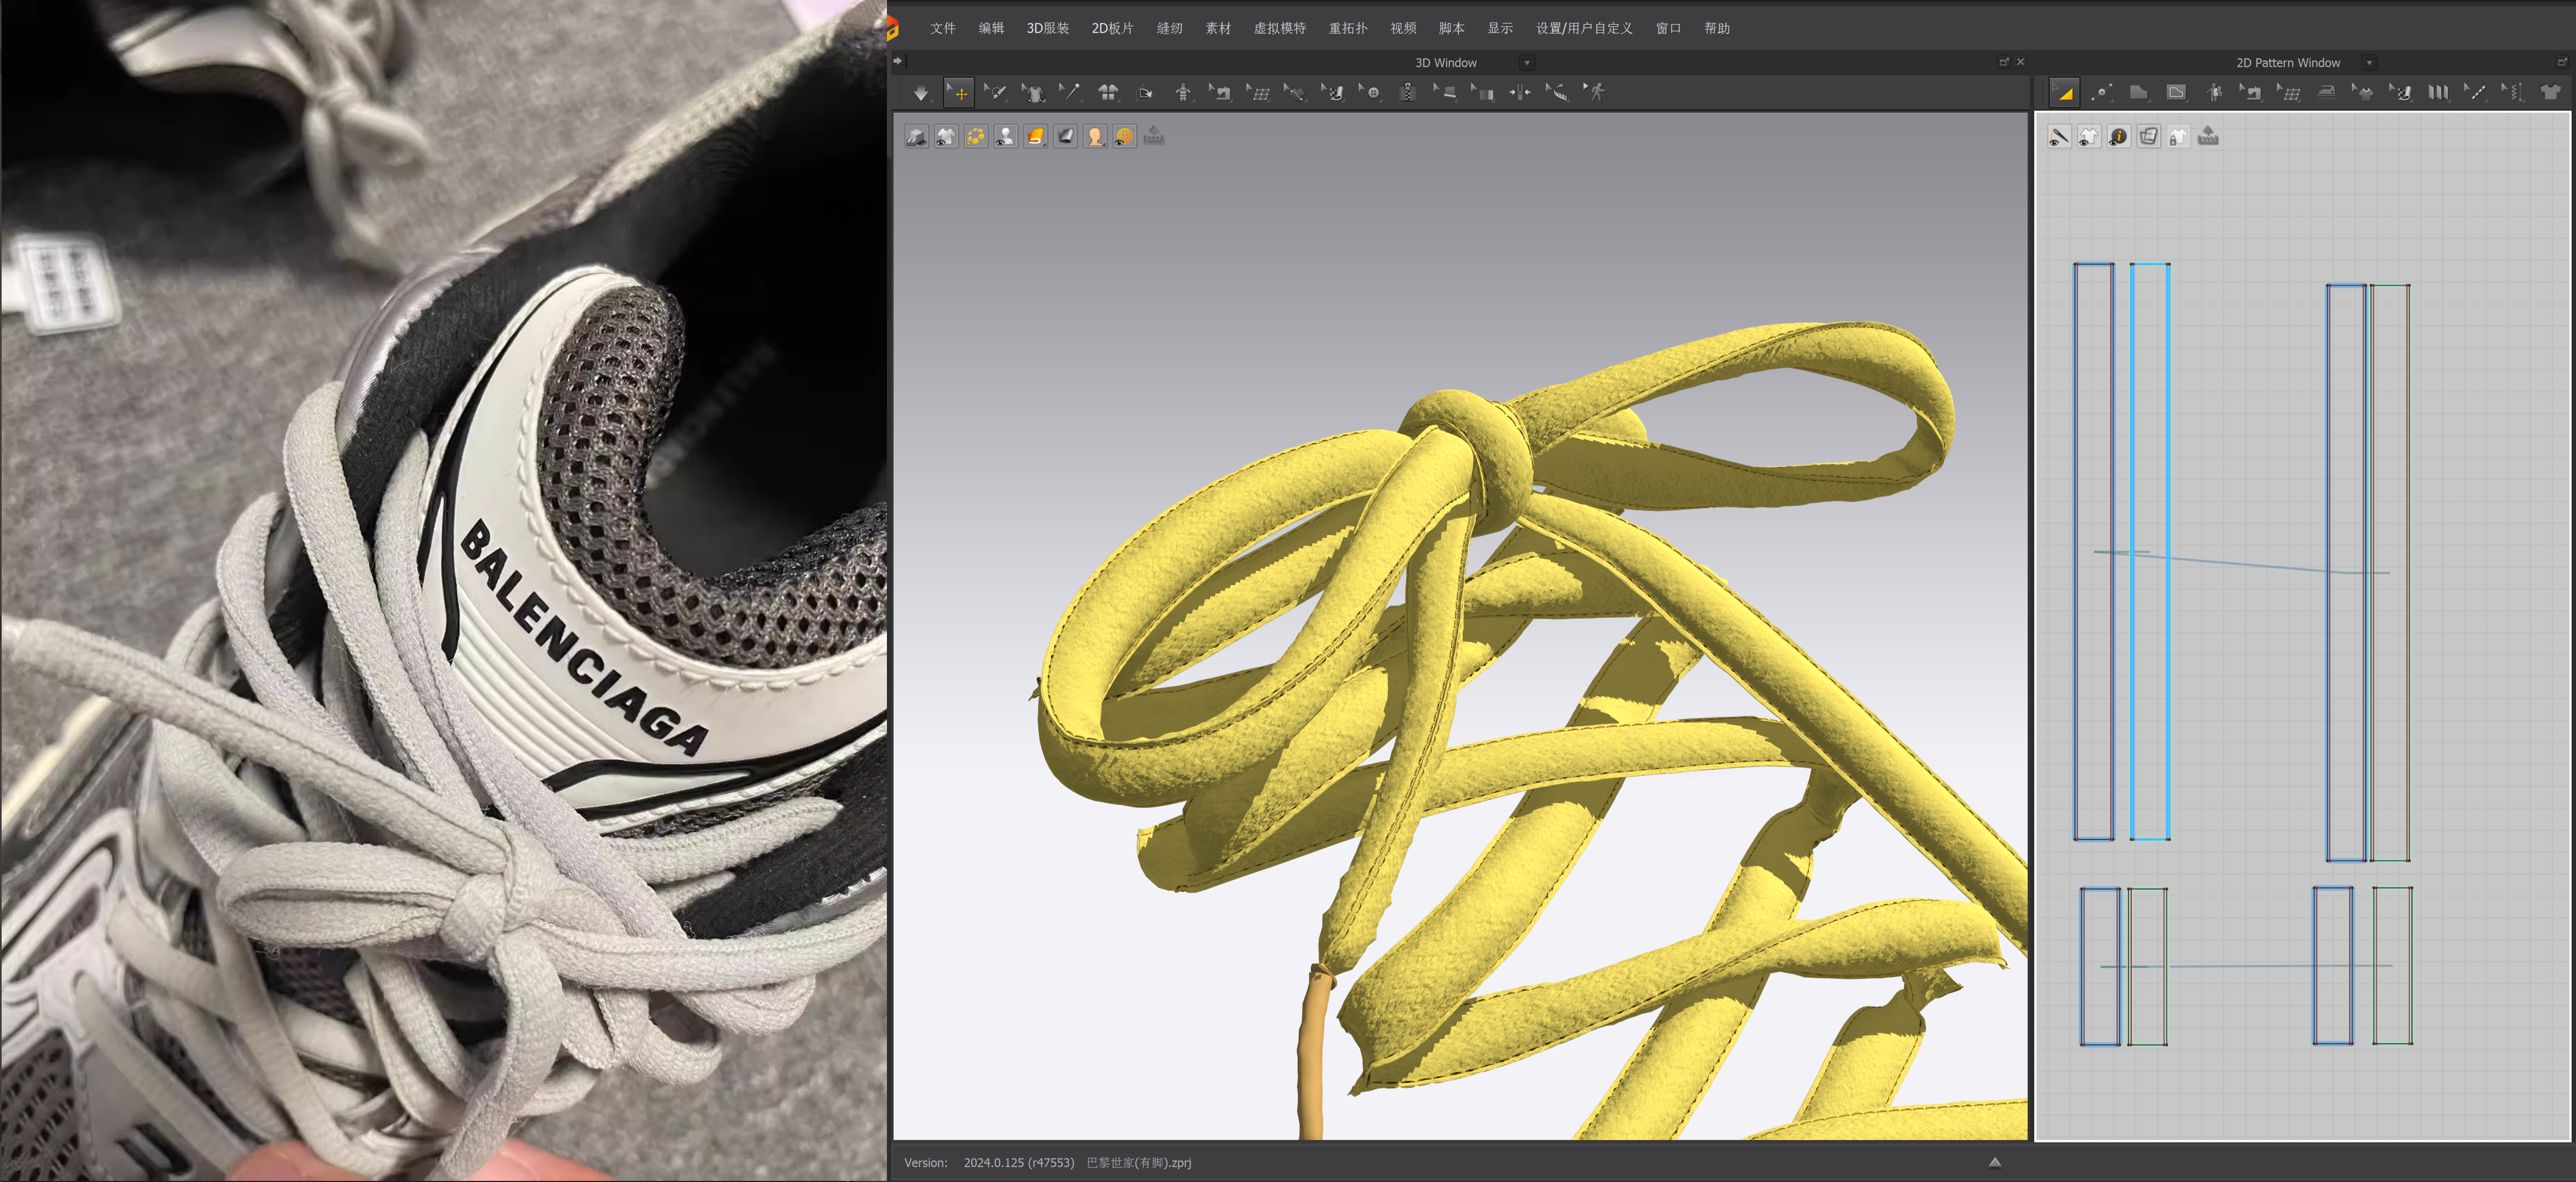
The shoelaces for this shoe are round, so I couldn't simply use a single pattern piece. Instead, I used a double-layered sewing technique, which resulted in a much more natural appearance.
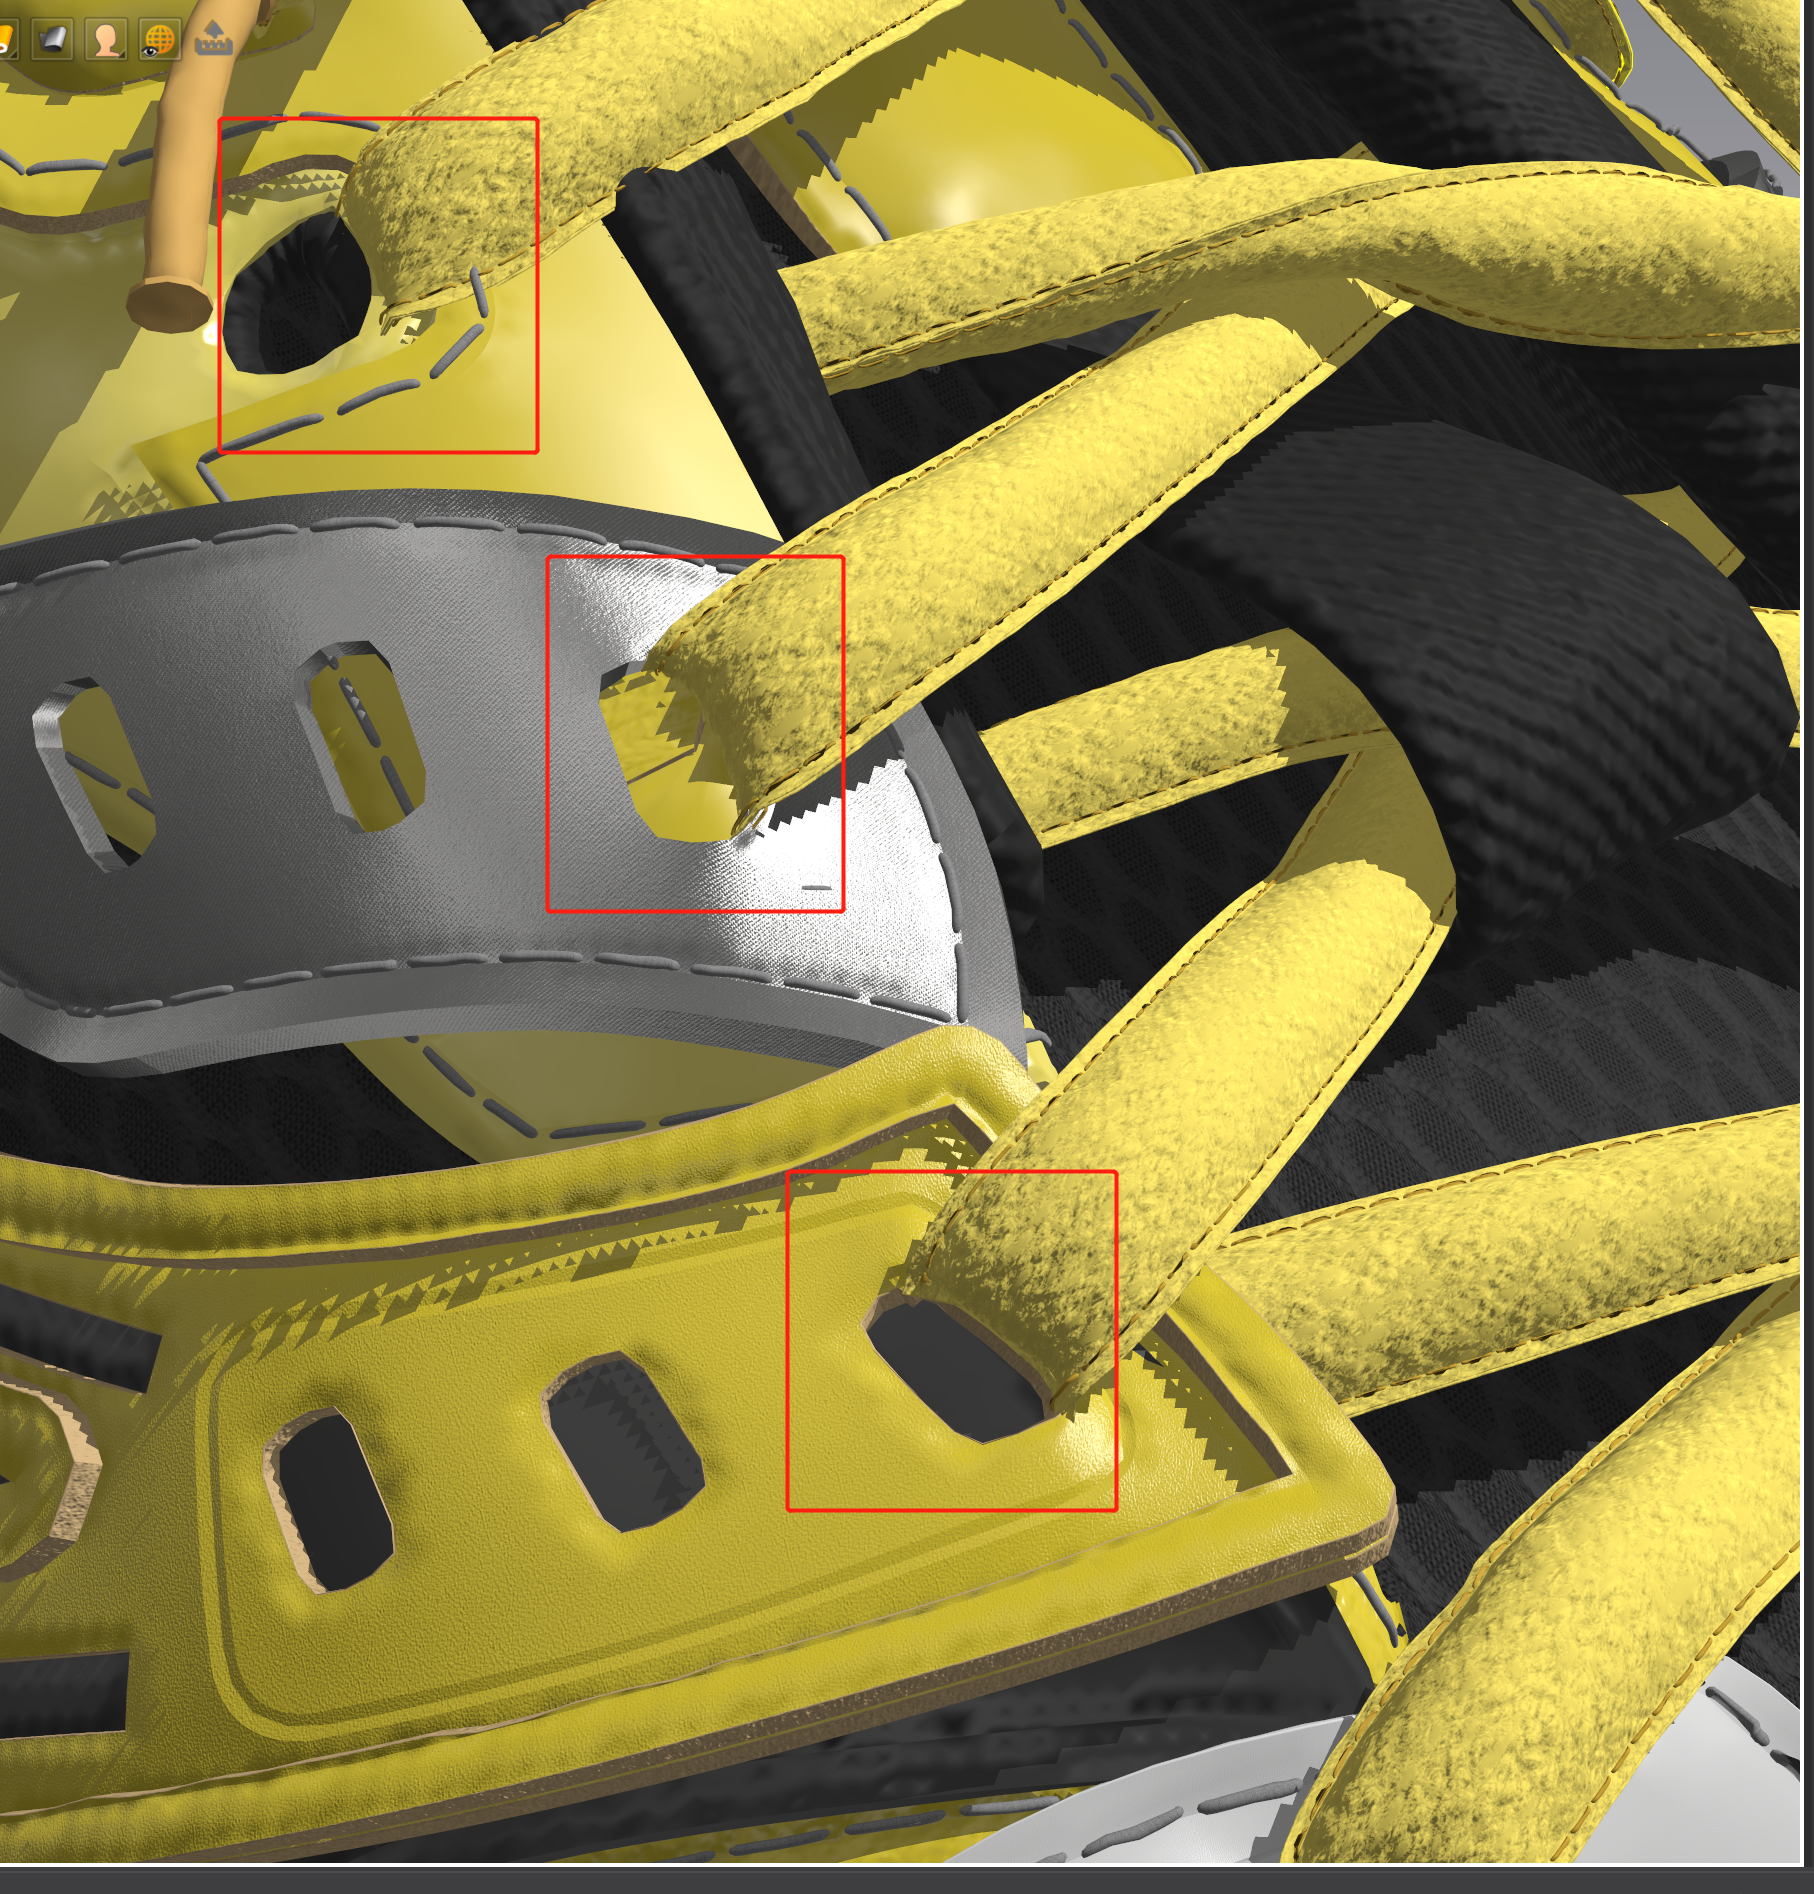
I created a faux effect for the shoelaces passing through the holes. Of course, it was possible to follow the realistic method of threading them through, but that was a bit more complicated. Instead, I directly sewed the shoelaces to the edges of the holes.
Final Adjustments
In this step, I made overall minor adjustments to areas that differed from the references, correcting any interlacing or distortion issues caused by the complex sewing.
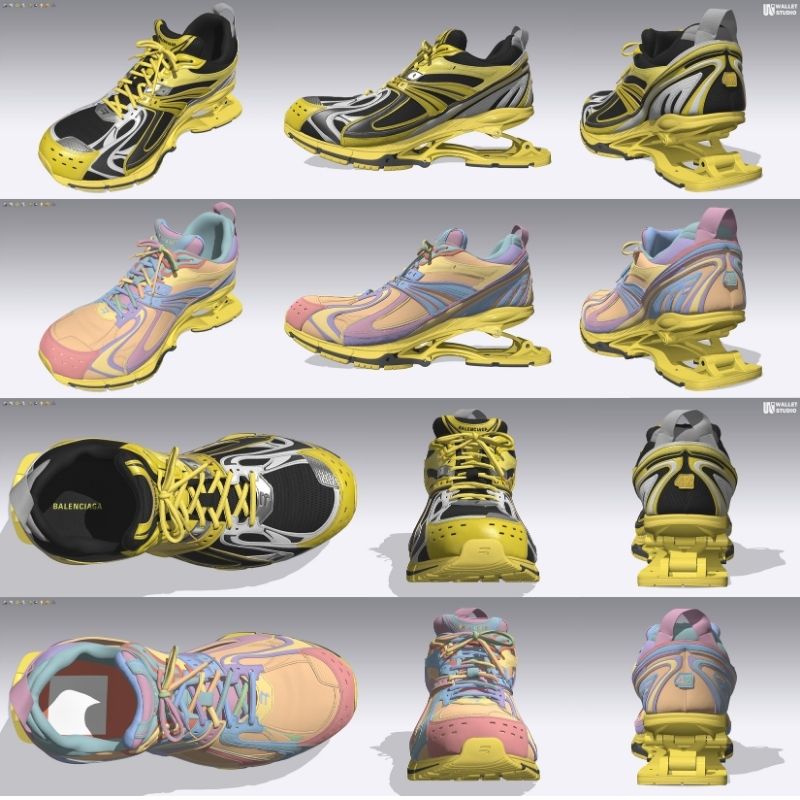
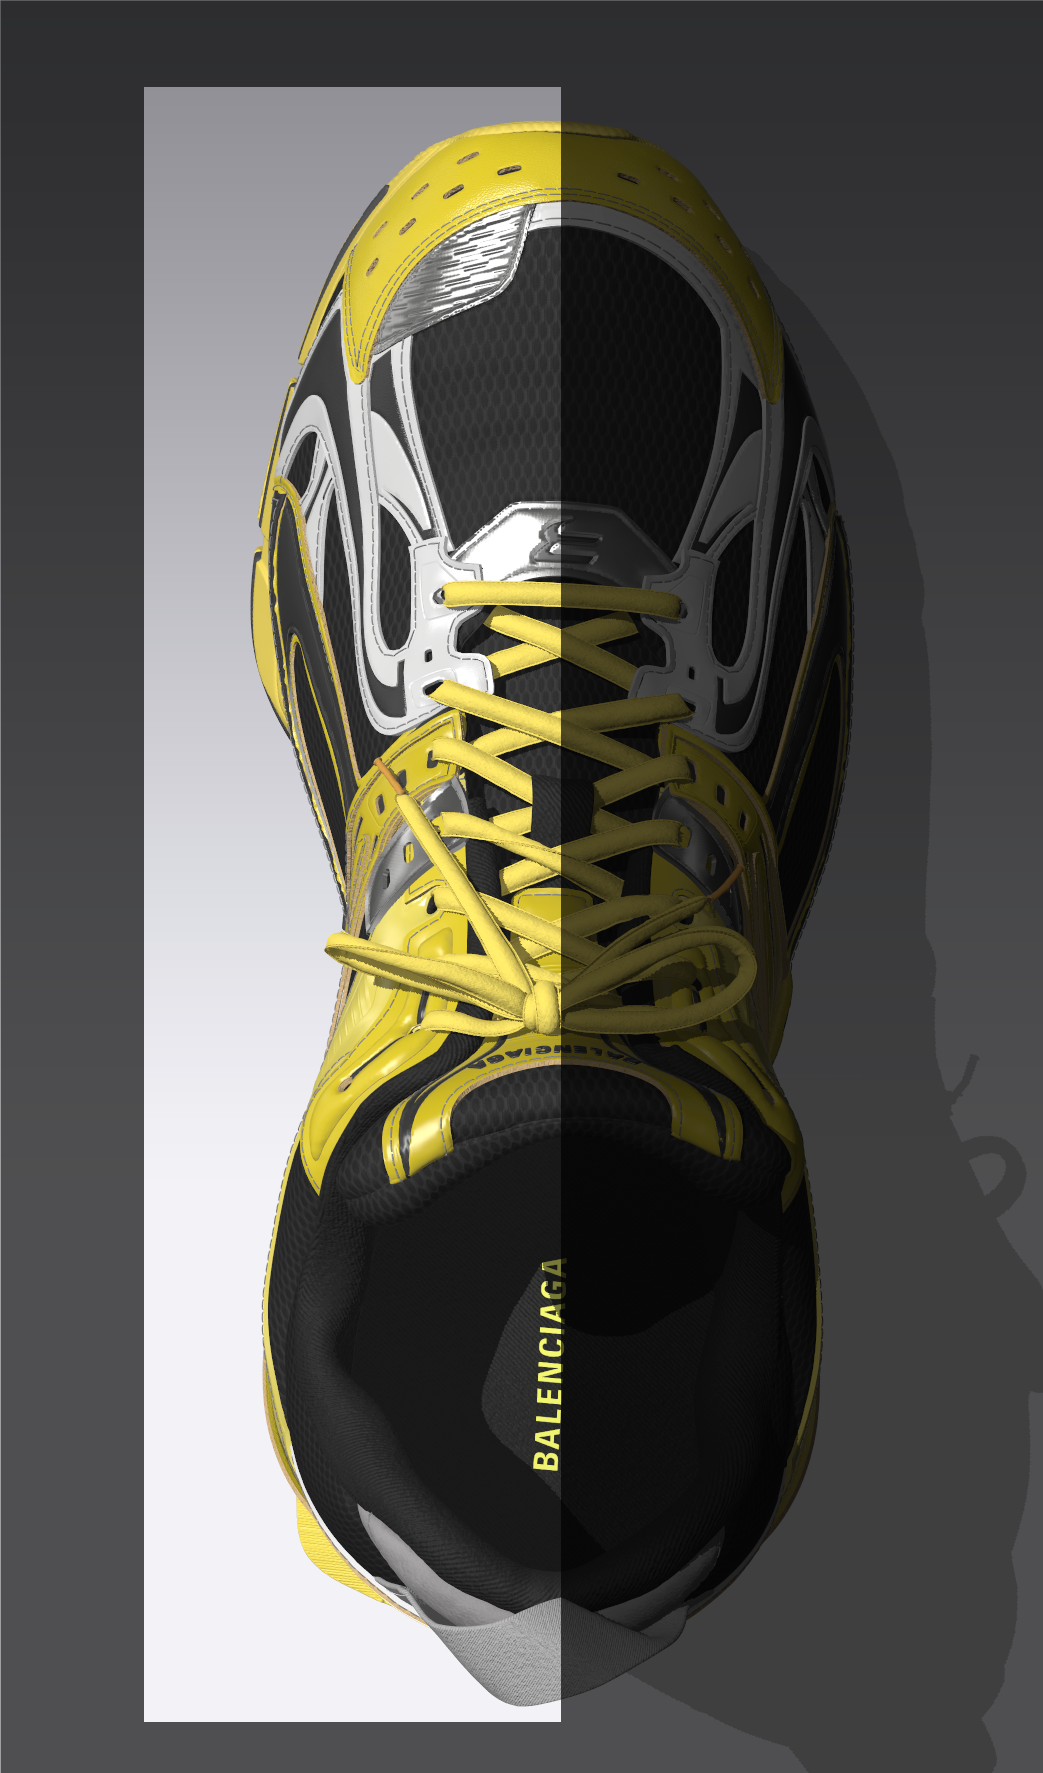
Final Presentation on Marvelous Designer
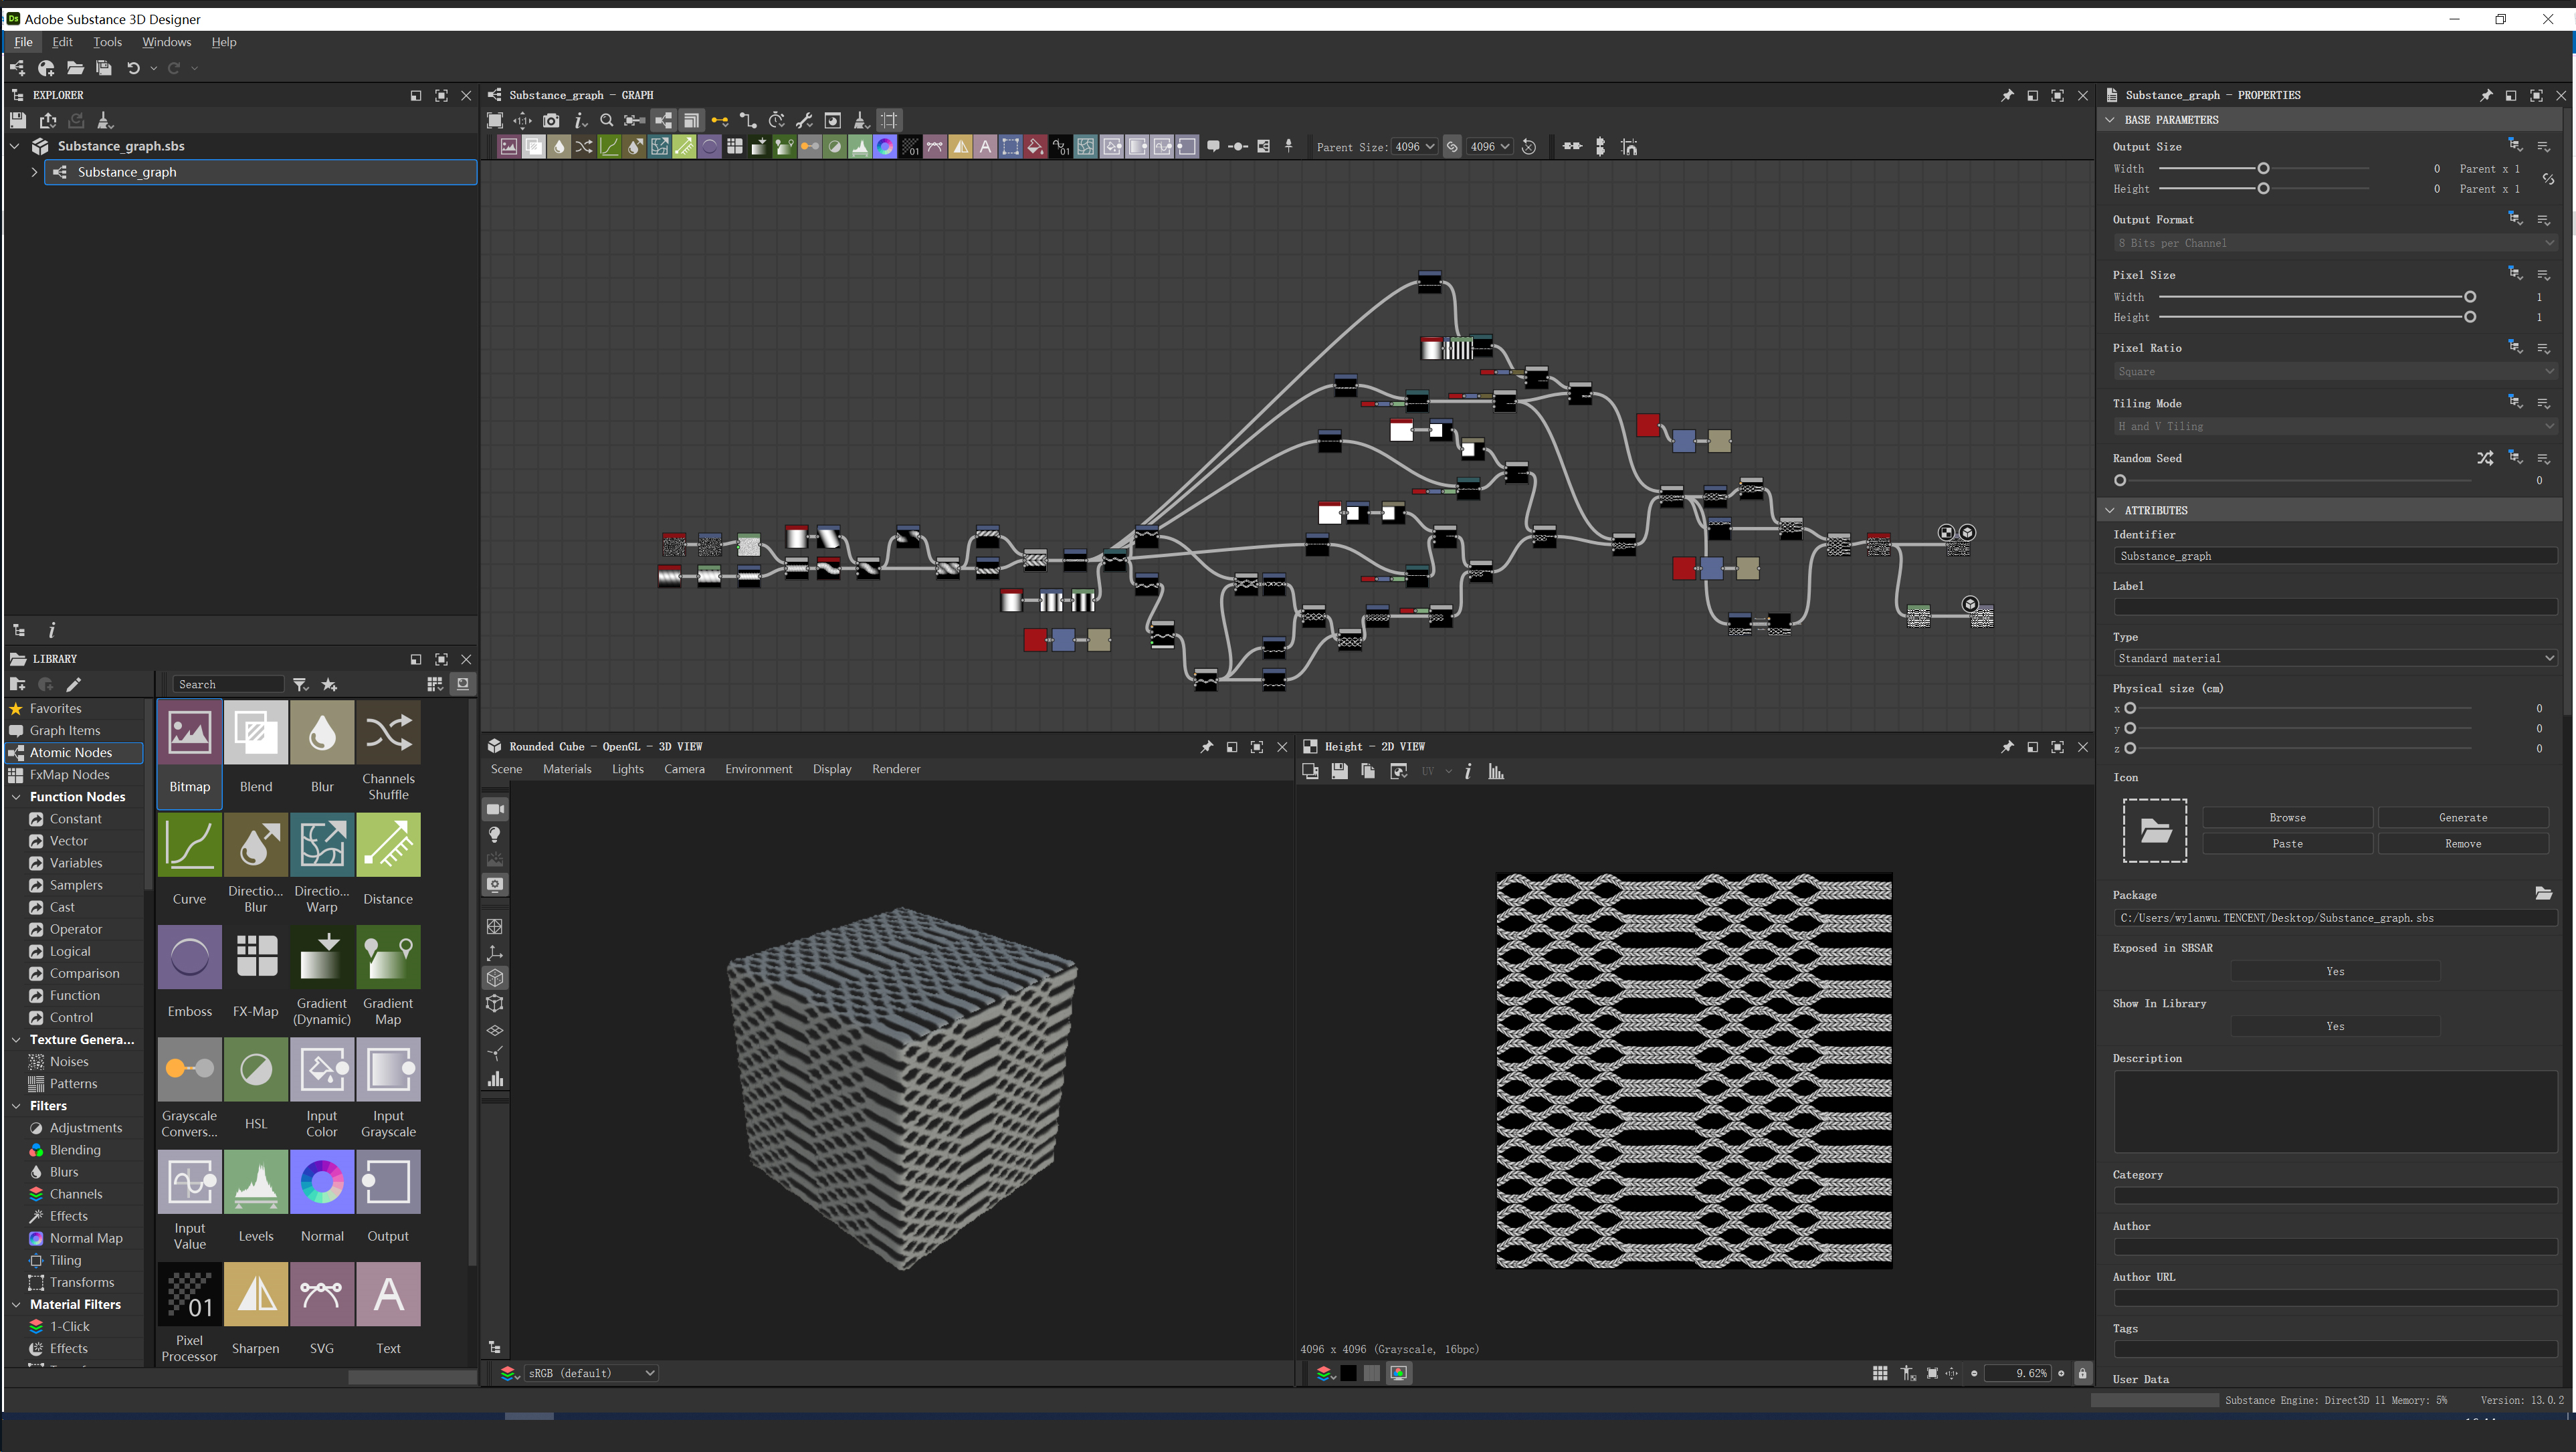
Creating the Mesh Texture in Substance 3D Designer
The mesh for this shoe was quite unique, and after searching through existing mesh textures, I found that none were suitable. Therefore, I decided to create the mesh texture using Substance 3D Designer. Compared to the complex patterns typically made in Substance 3D Designer, creating this mesh was relatively simple. I later obtained a displacement map, which I used in ZBrush to convert into a model.
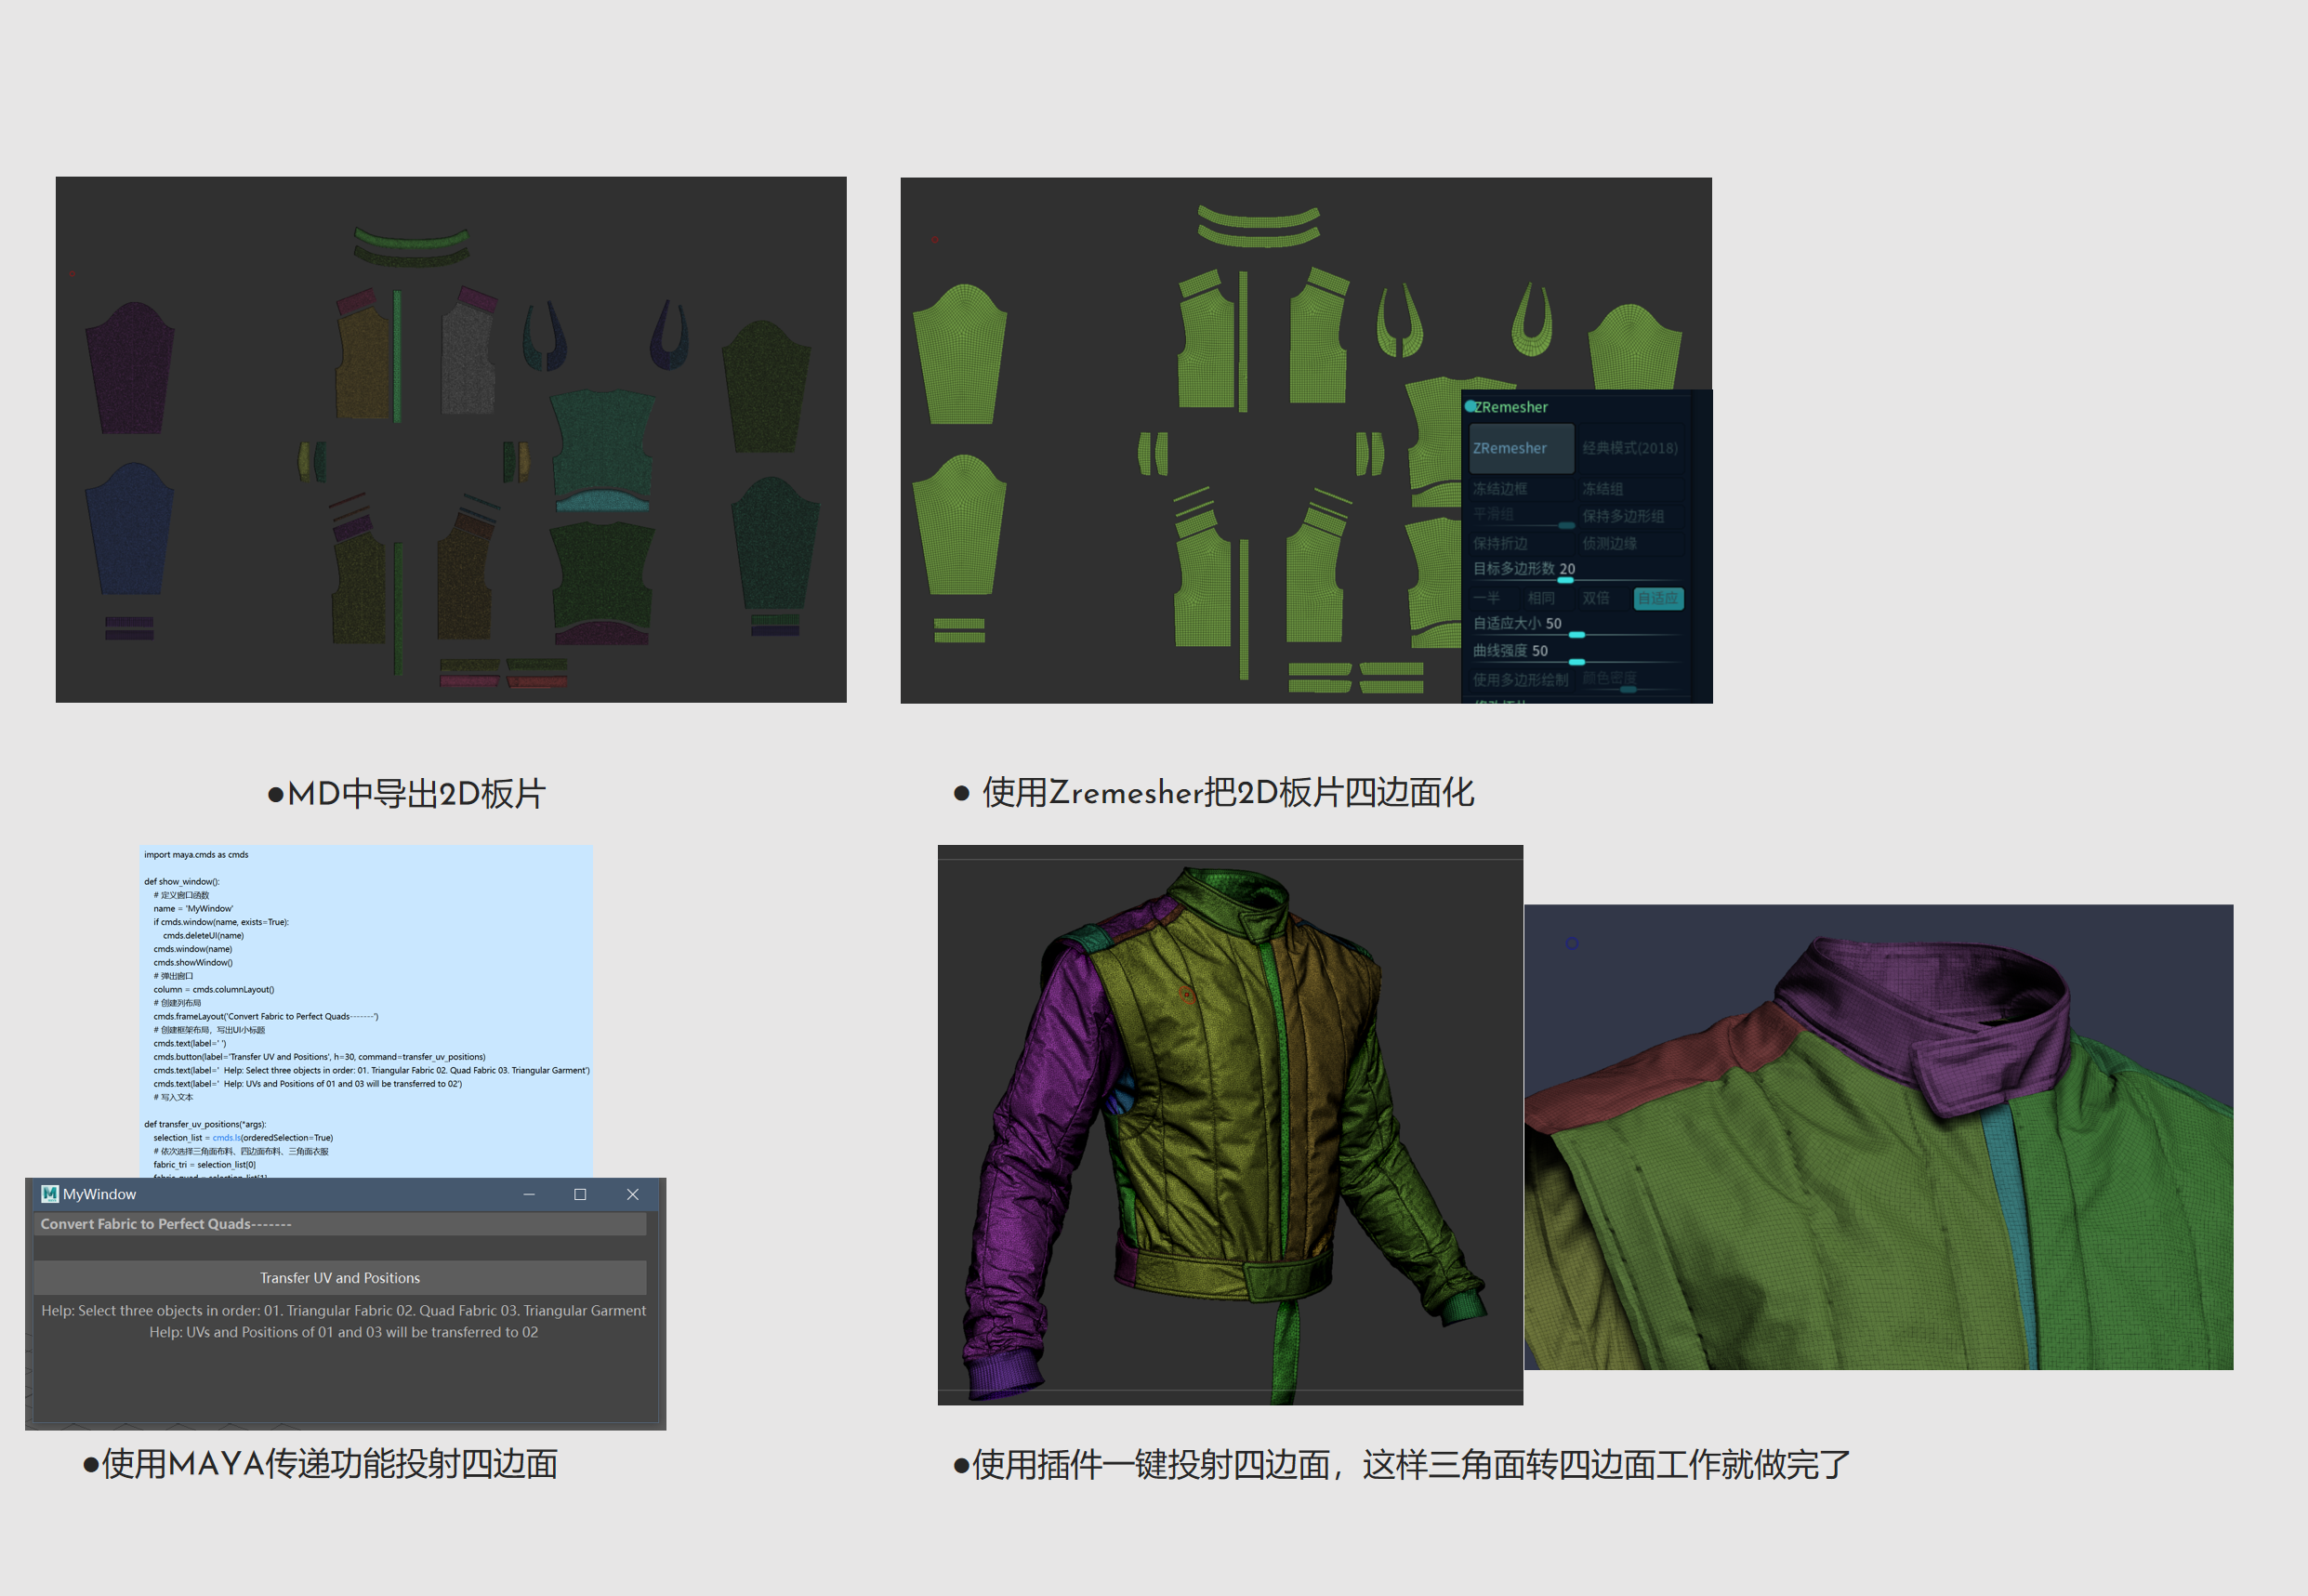
Refinement in ZBrush
The process in ZBrush was similar to my usual clothing handling. I first cleaned up the mesh, using the workflow diagram from my previous racing suit project as a reference.
After cleaning up the mesh, I proceeded with the normal refinement work, which included:
Adding wrinkle variations that Marvelous Designer couldn't handle
Enhancing fabric changes at the seams
Introducing memory folds
Refining the edges
Adding texture details
Creating simple textures in ZBrush
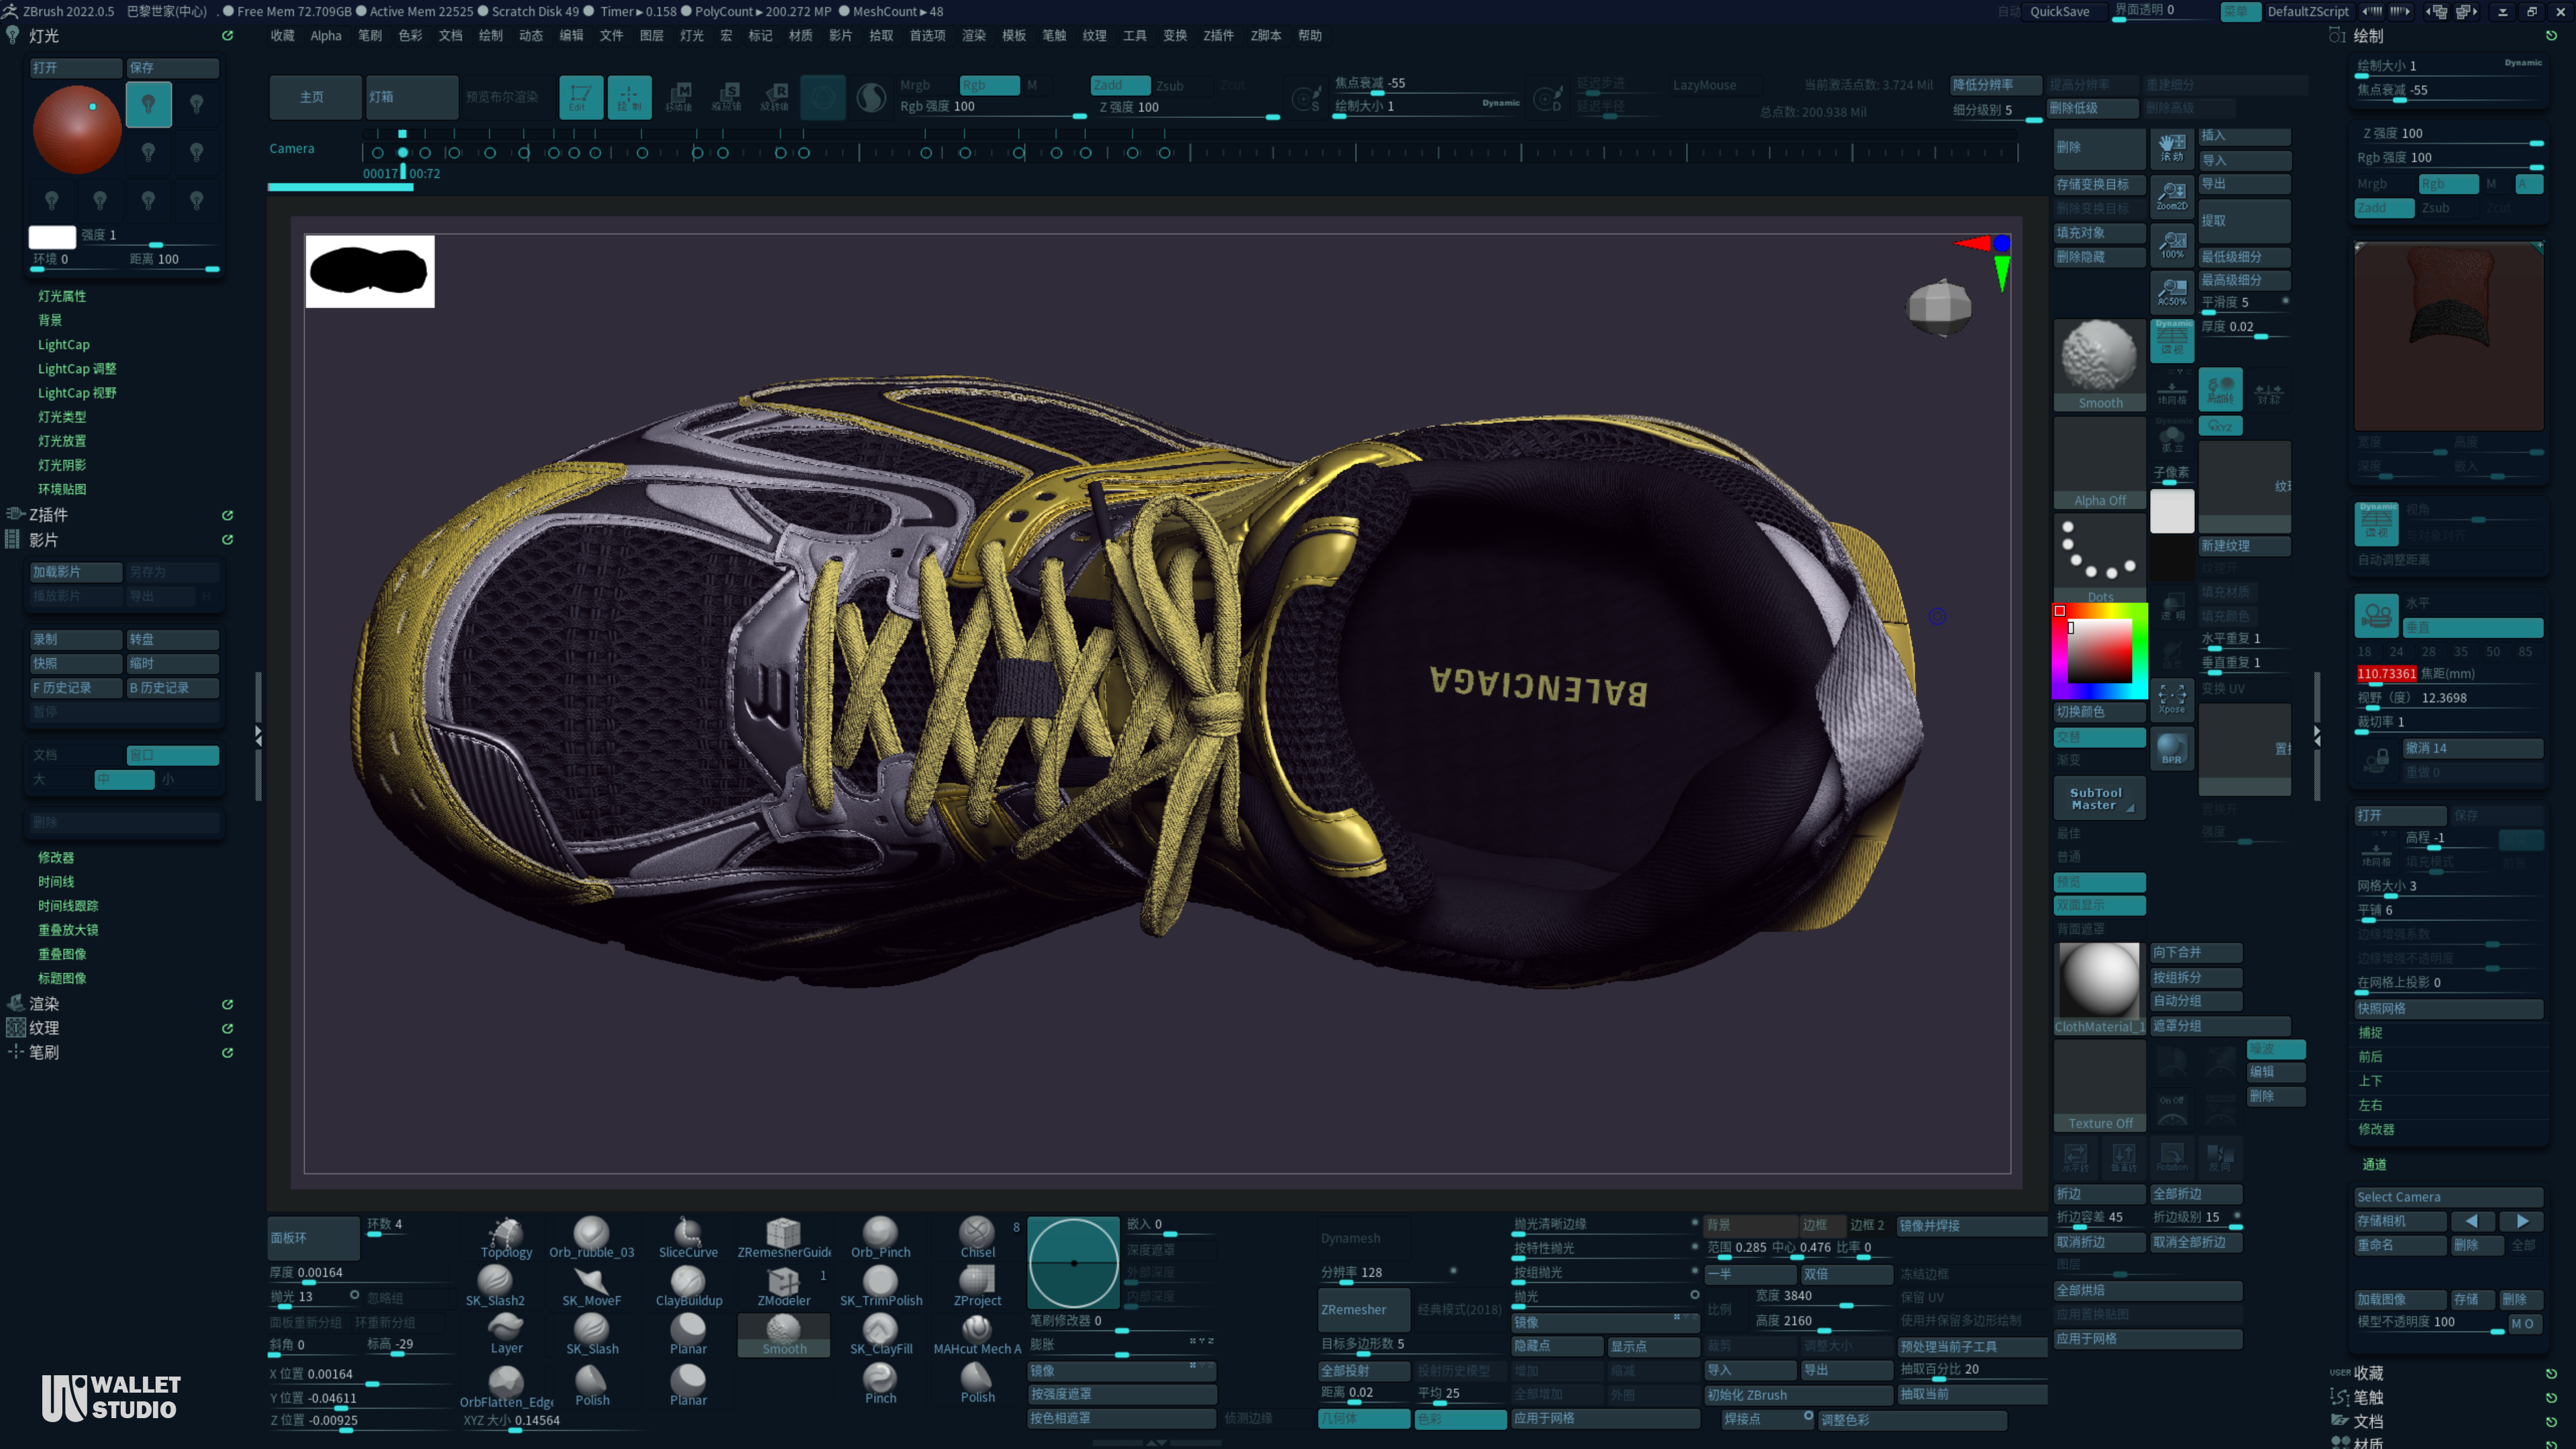
In ZBrush, I preferred to express all details through the model. For the shoe's detail creation, I divided the process into three layers:
Base Texture: I selected base textures according to different materials.
Wear Effects: Materials like leather and cotton are the most susceptible to showing wear. Leather develops cracks and wrinkles over time, while cotton forms memory folds.
Edge Details: The front, back, and side of the leather exhibit three distinctly different textural states. The front is smooth due to processing and features the unique grain of the leather, while the side shows a cross-section, revealing the torn appearance of the leather. For the shoelaces, the front is woven, and the side shows the seams of the weaving. Addressing these details significantly enhances the overall realism.
Final Rendering
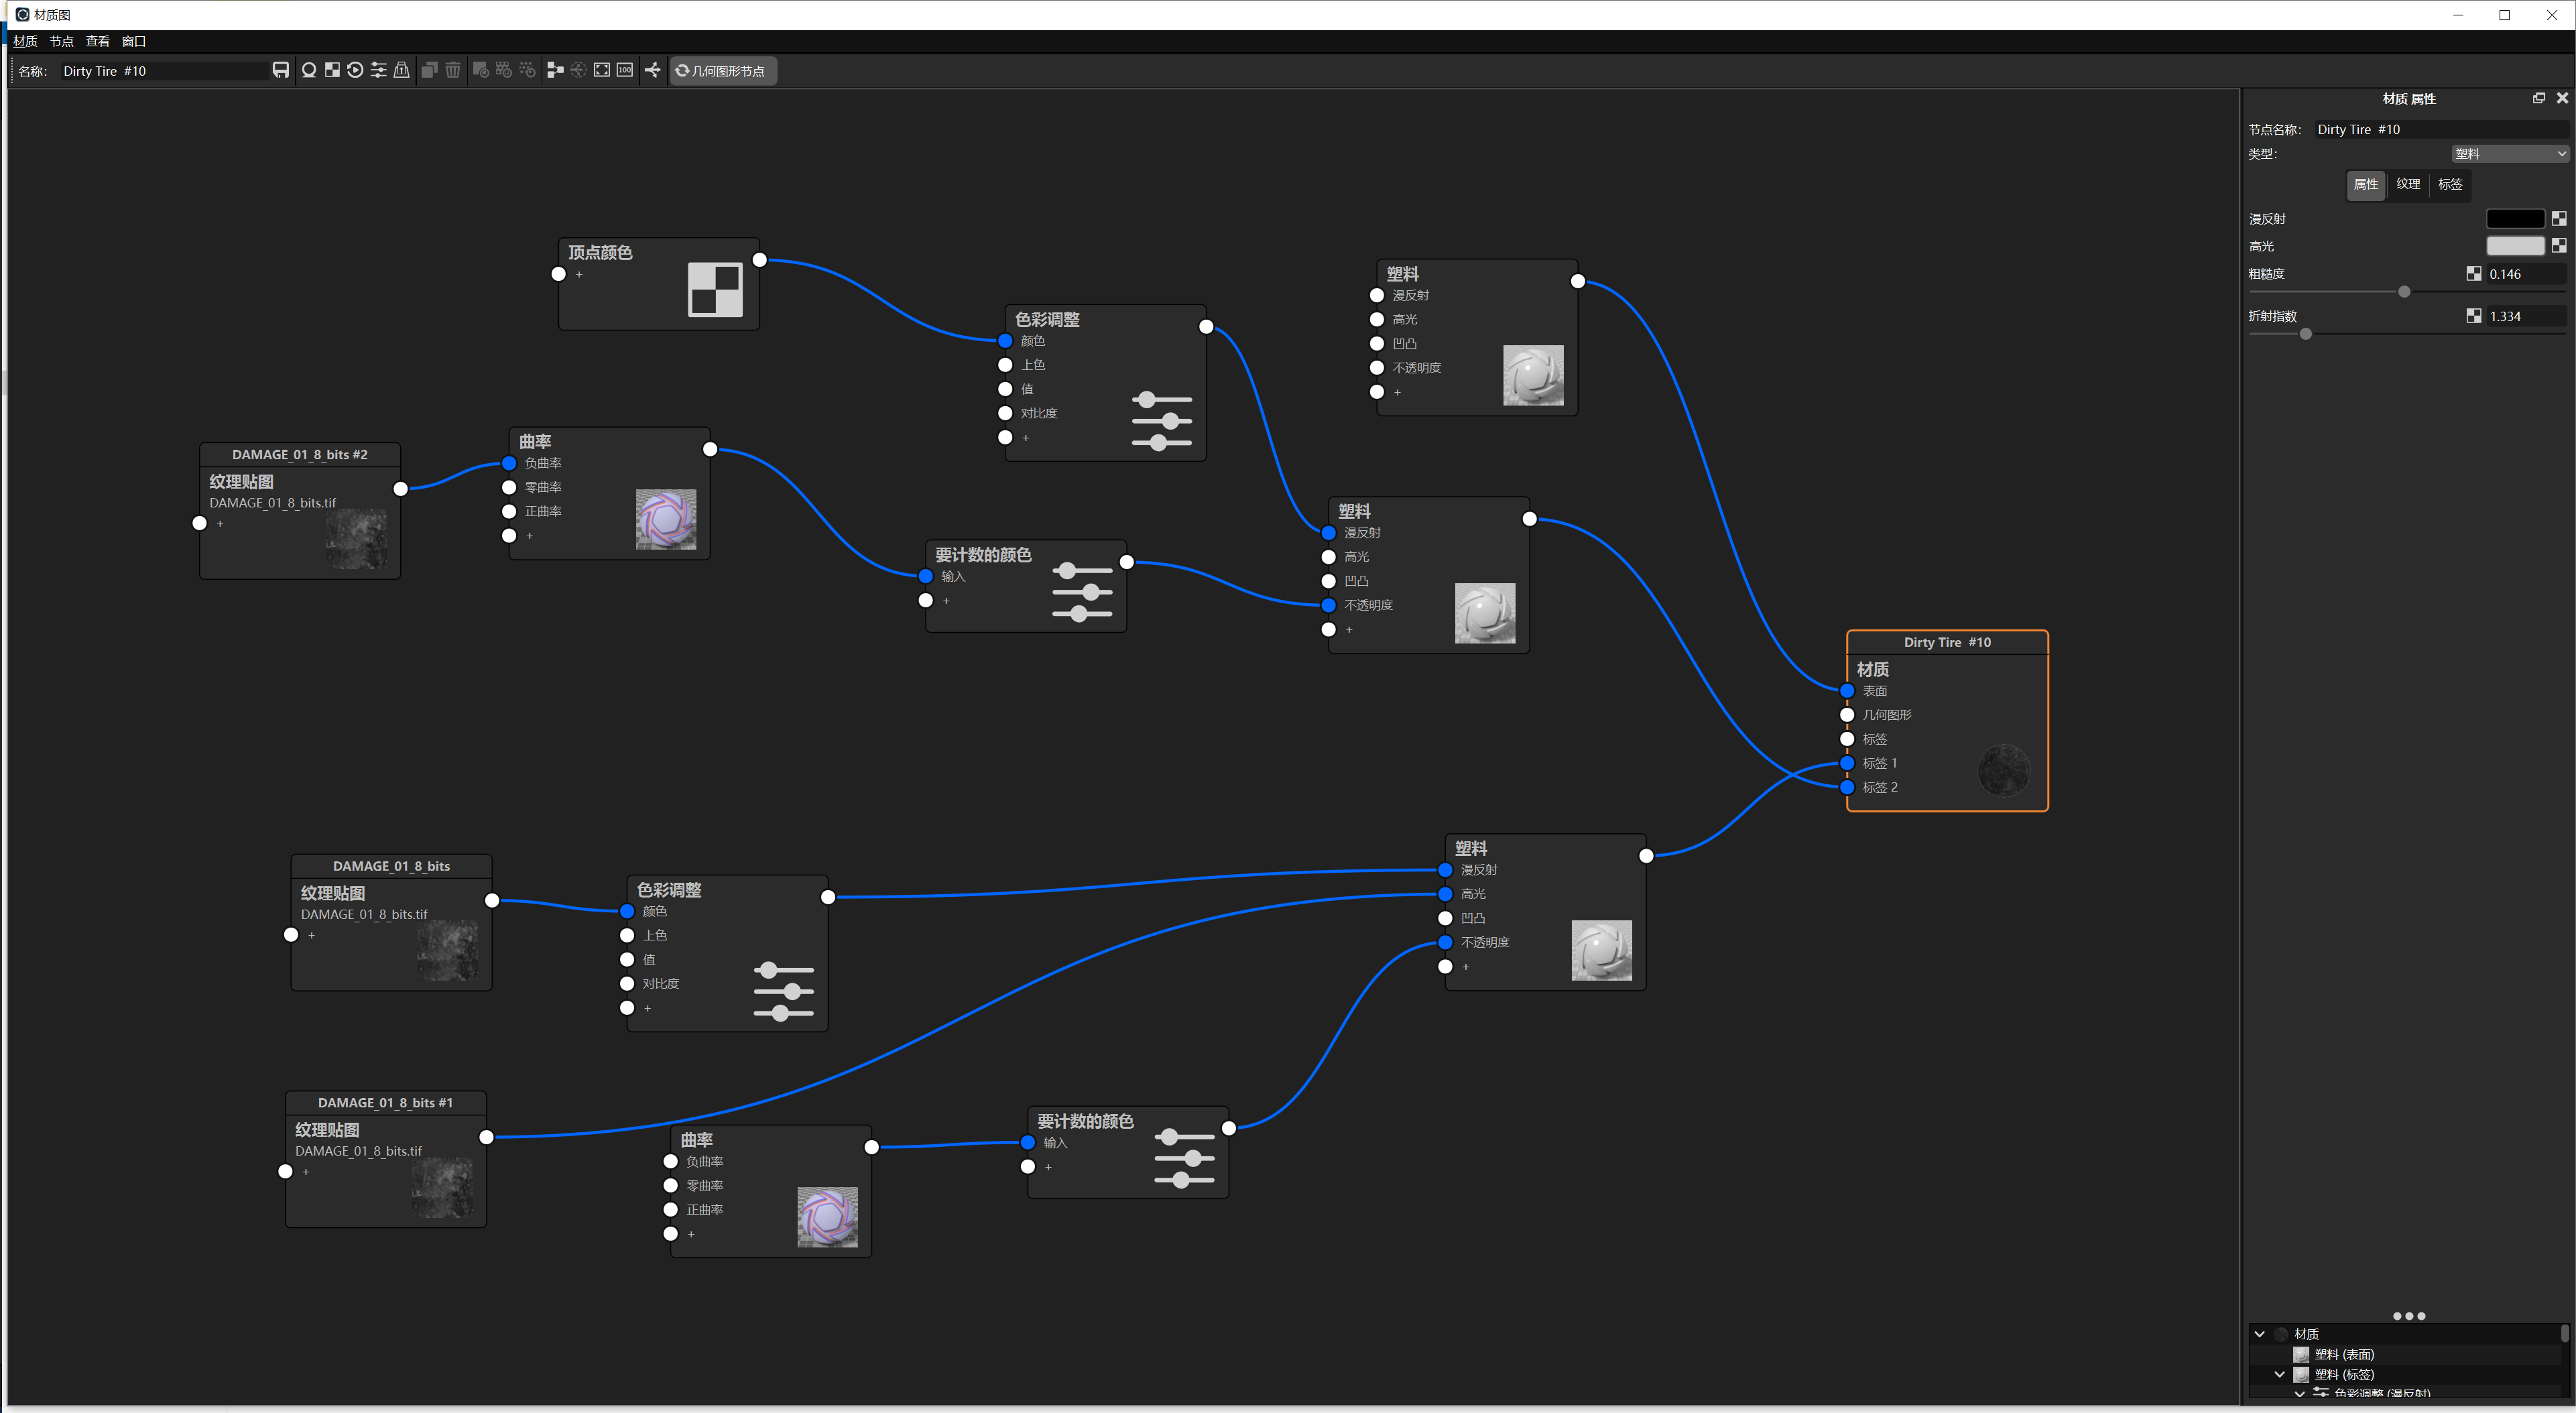
For the final rendering, I used Keyshot, primarily because it supports a very high polygon count. Renderers like Blender and Marmoset cannot handle high-resolution models, and I prefer not to create low-poly versions. Therefore, Keyshot was an excellent choice, and I also opted to create the materials directly within Keyshot.
Summary
The shoe creation process was quite intricate, especially in achieving the special interlacing design within the streamlined structure, which took considerable time while also ensuring the stability of the shoe shape. Additionally, the detail handling in ZBrush was time-consuming. In terms of Marvelous Designer, the requirements for pattern-making in shoe design were relatively lower, making the process simpler compared to clothing creation.
In your "Balenciaga X-Pander Spring Shoe" project, you used Marvelous Designer for the initial pattern making. What made you choose Marvelous Designer for this process?
The draping feature in Marvelous Designer is extremely convenient, allowing me to easily create the intricate pattern pieces on the shoe upper. Most importantly, it supports modifications at any time. While traditional methods can also quickly produce models, they are relatively cumbersome to modify, especially when dealing with complex patterns. Additionally, although the shoe's materials are stiff and less prone to wrinkles, the shoes made in Marvelous Designer may lack some realism. However, they still exhibit a certain degree of authenticity. The fabric simulation in Marvelous Designer can convey subtle realism, making it more natural than hand-sculpting.
Can you give us a quick overview of the different tools used in your pipeline?
The entire process involved using Marvelous Designer for initial pattern-making, Substance 3D Designer for creating the shoe's mesh, Plasticity for the sole construction, ZBrush for detailing, and Keyshot for the final rendering.
Are there any areas/ideas you would like to utilize Marvelous Designer in your future project?
Yes, I will continue to use Marvelous Designer in other game projects, as well as in my own design projects. I am currently working on a new tutorial case.
Are there any tips and tricks with Marvelous Designer that you can share with the community?
Marvelous Designer is essentially a garment design software, so to create reasonable and aesthetically pleasing clothing, users need to possess certain pattern-making skills and basic knowledge of garment construction. This will better assist them in achieving their desired design outcomes.
How can you describe your overall experience of the use of the Marvelous Designer?
Among the various fabric simulation software and plugins I use, Marvelous Designer is irreplaceable. Although it may be slightly inconvenient compared to some emerging software or plugins in certain aspects, this does not detract from its outstanding and precise simulation results.
by Wallet (我是你的小钱包呀!)
Artstation
이 작업은 CLO, Substance, ZBrush, Keyshot, game 등의 기술로 제작되었습니다.
Marvelous Designer로 이와 같은 3D 의상·캐릭터 작업을 직접 만들어볼 수 있습니다.