A Daruma in a Down Jacket - How to Create a Humorous Visual Expression Using Marvelous Designer
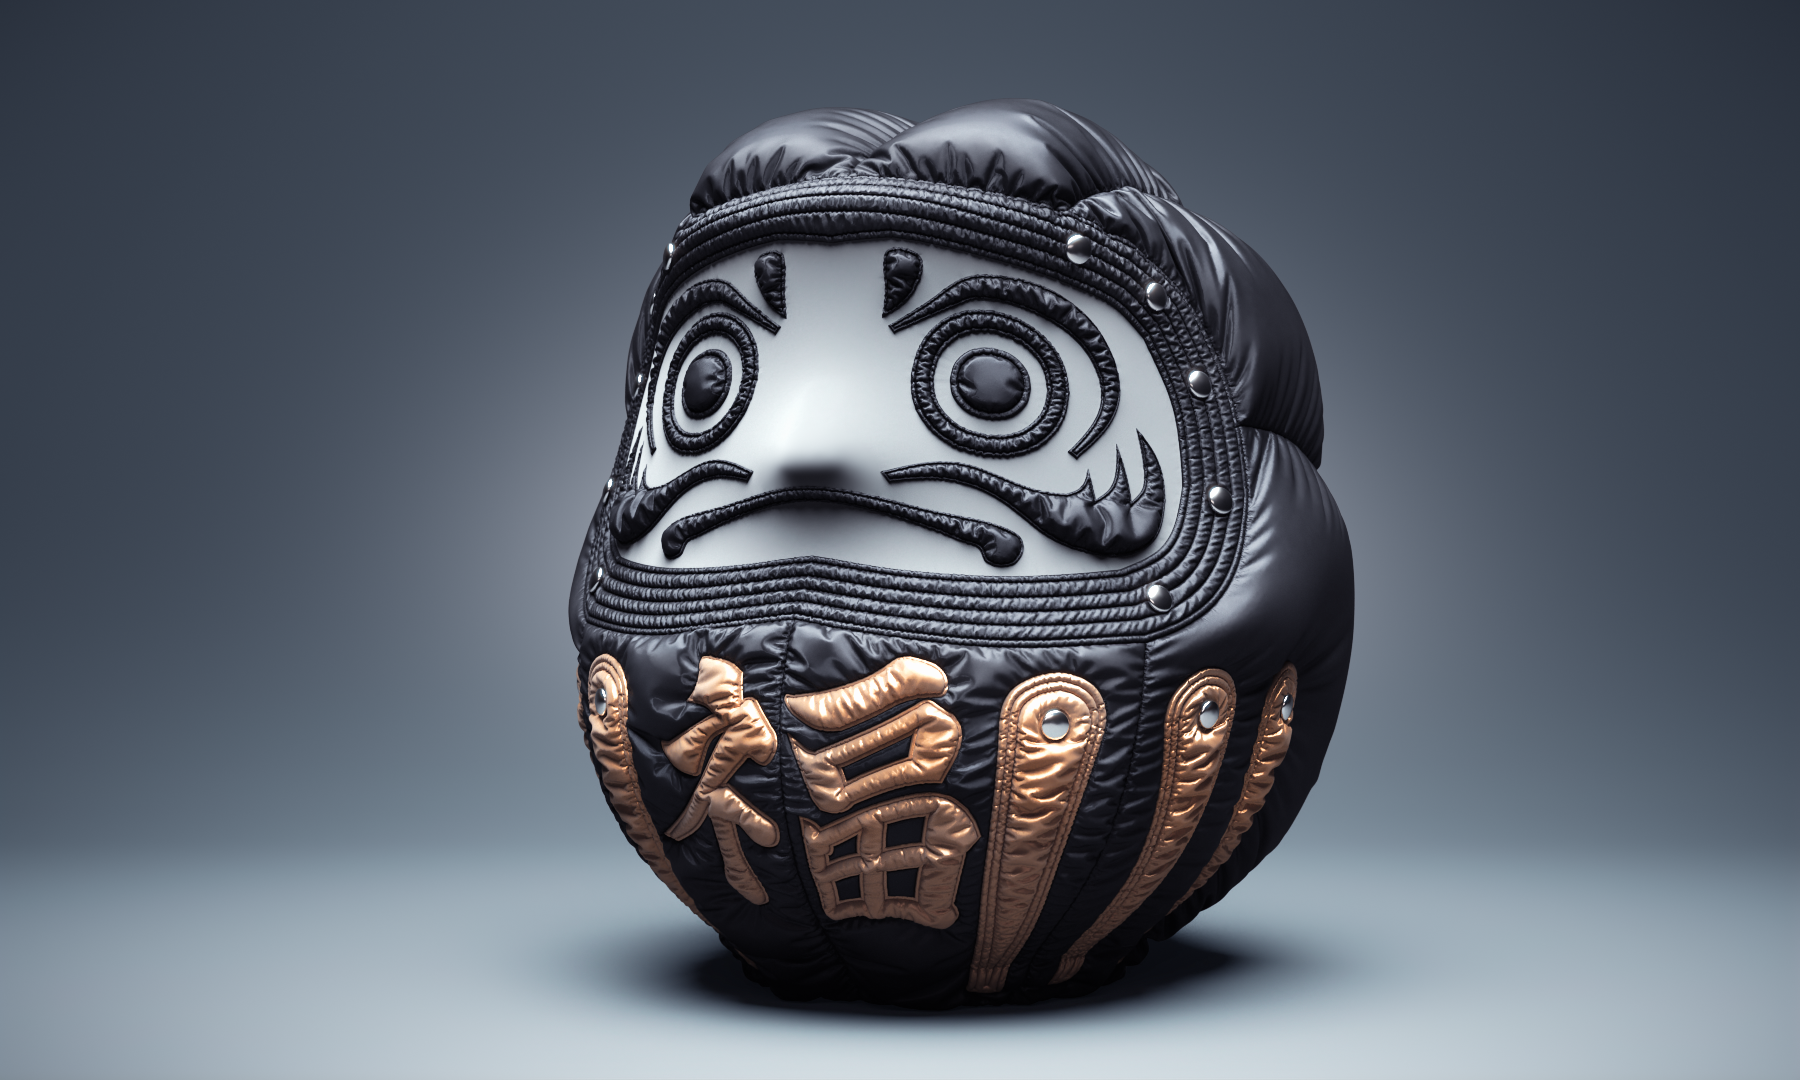
3DCG artist Masaya Horie / horimon creates works that fuse fashion and visual expression, primarily using Marvelous Designer, Cinema 4D, and V-Ray. As an example of his work, he took on the humorous and bold idea of dressing the rounded shape of a Japanese lucky charm, the "Daruma," in a down jacket.
In this interview, he shares the behind-the-scenes details of his production, from his unique pattern-making workflow utilizing the 3D Pen (Avatar) feature to his techniques for reproducing the signature puffiness of down through pressure differences between the inner and outer fabrics, as well as the secrets to realistic quilting expressions.
First of all, please introduce yourself to the community.
Hello, my name is Masaya Horie.
I primarily create works centered around 3DCG, focusing on the intersection of fashion and visual expression. My main tools are Cinema 4D, V-Ray, Substance, and Marvelous Designer. On X, I also share my design intentions and the techniques I use in my production process.
Regarding the Concept
How did the idea of dressing a traditional Daruma in a down jacket come about? Please tell us how you arrived at this humorous and visually striking concept.
For my New Year's production theme, I created a piece featuring the Japanese lucky charm, the "Daruma," as a motif. While respecting the Daruma's symbolism of perseverance and achieving goals, I aimed for an expression that possessed an element of surprise, humor, and visual novelty.
Initially, I considered using leather materials, but as I explored new interpretations not bound by existing imagery, I deliberately arrived at the idea of dressing it in a down jacket.
By fusing a traditional motif with a modern fashion item, I intended to create a sense of approachability while simultaneously generating visual contrast and amusement.
I created this piece hoping to present it as a work reconstructed from a modern perspective while maintaining its symbolism as a lucky charm.
Regarding the Workflow: Could you give us a brief overview of the tools used in your production pipeline for this project?
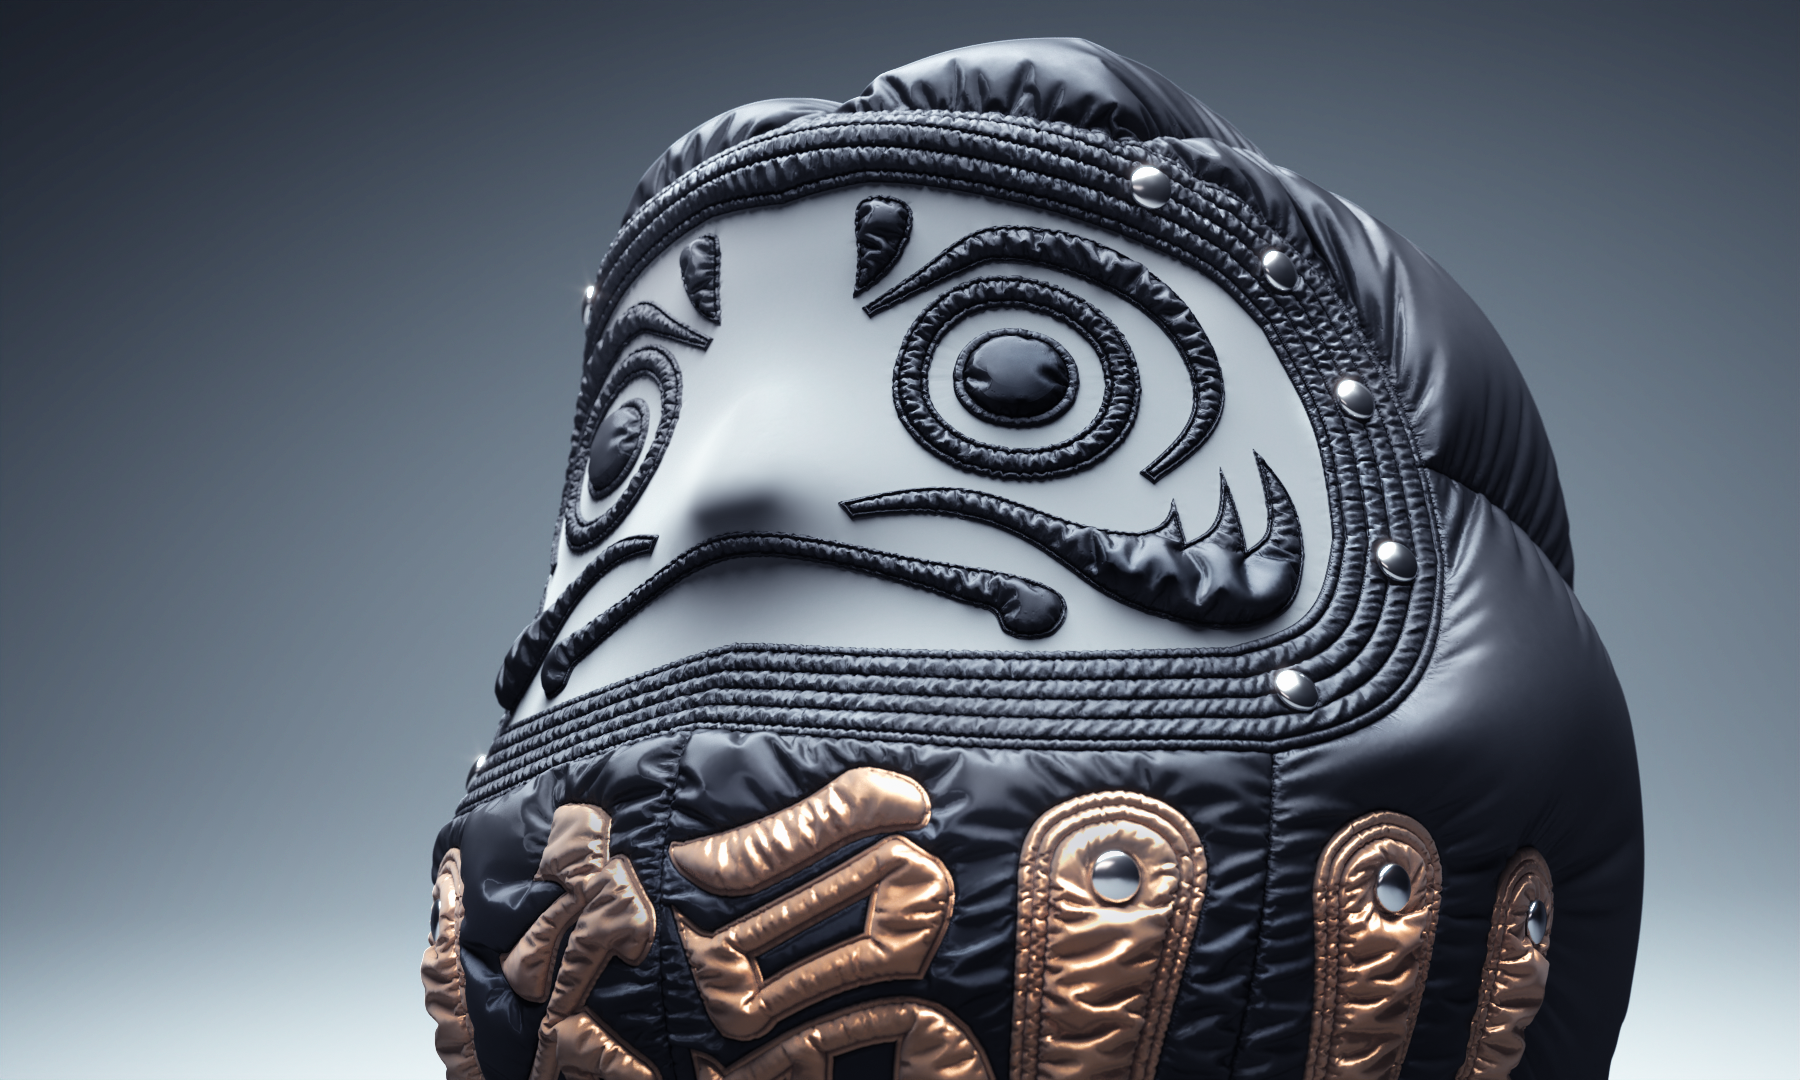
For this project, I first modeled the main Daruma body in Cinema 4D, and then used Marvelous Designer to create the down jacket. After combining the Daruma and the clothing, I performed the lighting, material setup, and rendering in Cinema 4D using V-Ray.
In each step, I finely adjusted the balance between shape and texture, focusing on expressions that visually and clearly convey a sense of three-dimensionality and material feel.
I elevated the overall quality with the goal of naturally harmonizing the traditional motif with modern material expressions.
Did you encounter any specific difficulties when creating a pattern for a round, spherical shape? What techniques did you use to make the fabric look like it naturally "wraps around" the Daruma?
Because the Daruma is overall quite rounded, it's difficult to create a pattern to fit that shape using conventional methods, so I considered a different approach. I decided to use Marvelous Designer's 3D Pen (Avatar) feature, as I thought it would allow me to intuitively create the base pattern for the down jacket.
By using this feature, I could draw lines directly onto the modeled shape to create the pattern, making it possible to work efficiently and intuitively while constantly checking the form. To make the fabric look like it's wrapping around the Daruma, I set the outer fabric pattern to be slightly larger than the inner base and adjusted the pressure to express the characteristic puffiness of a down jacket.
● Production Flow
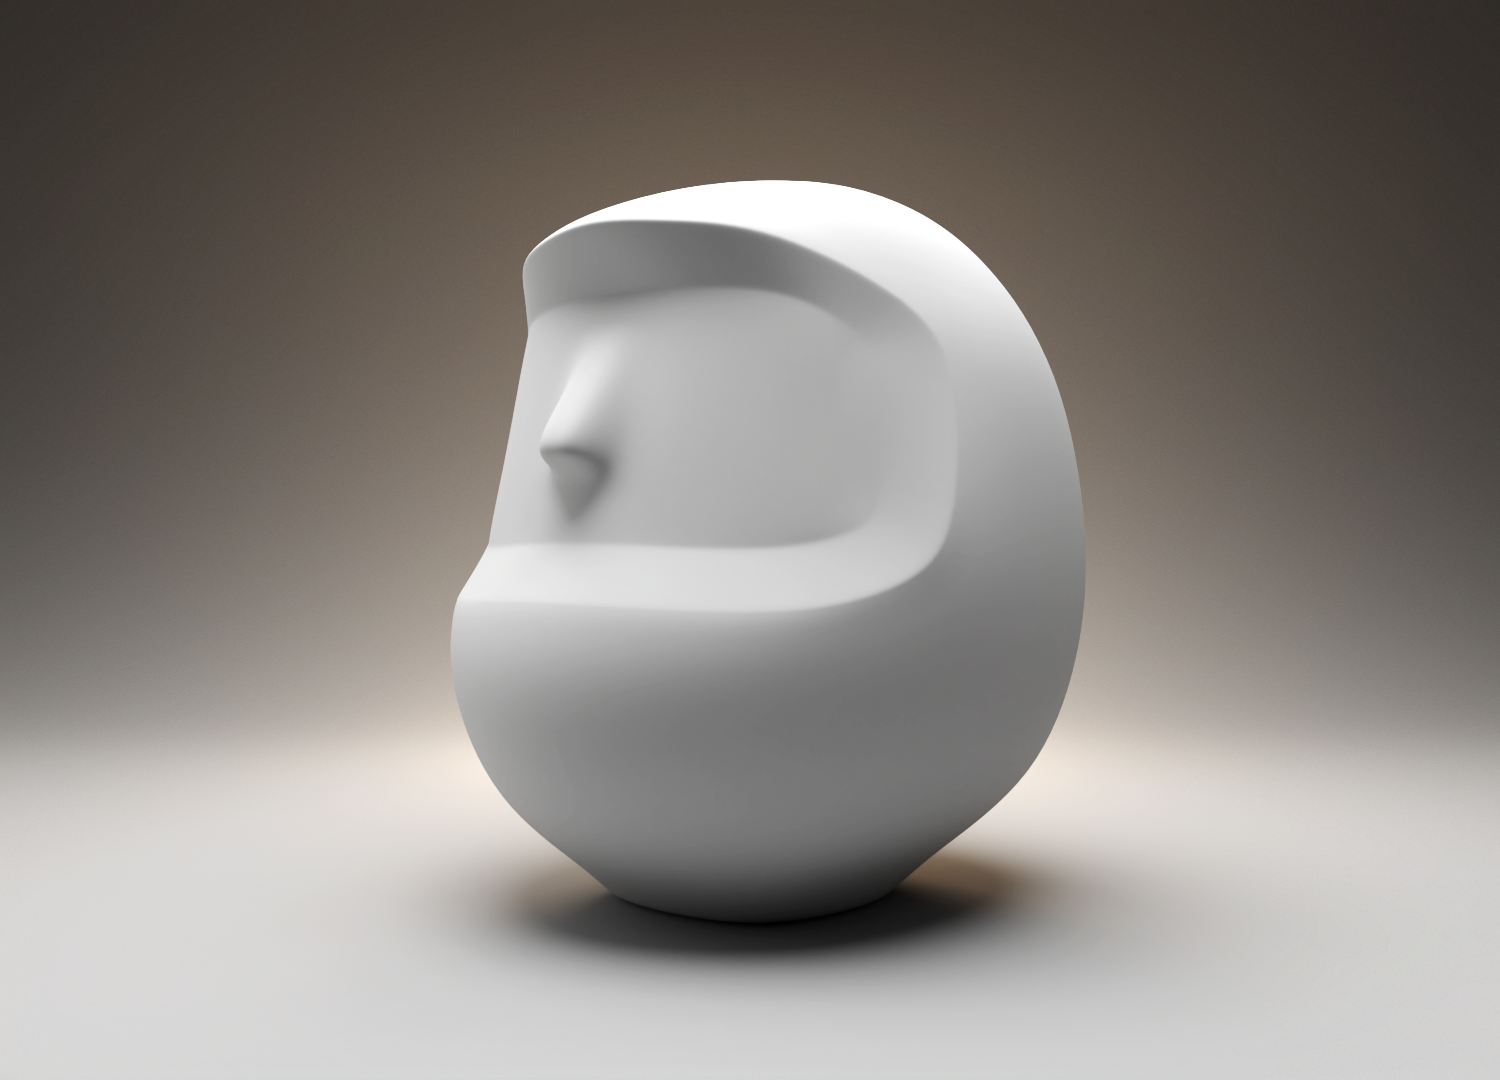
● Model the Daruma shape using a DCC tool.
Lift it slightly off the ground to make room for the fabric to tuck under.
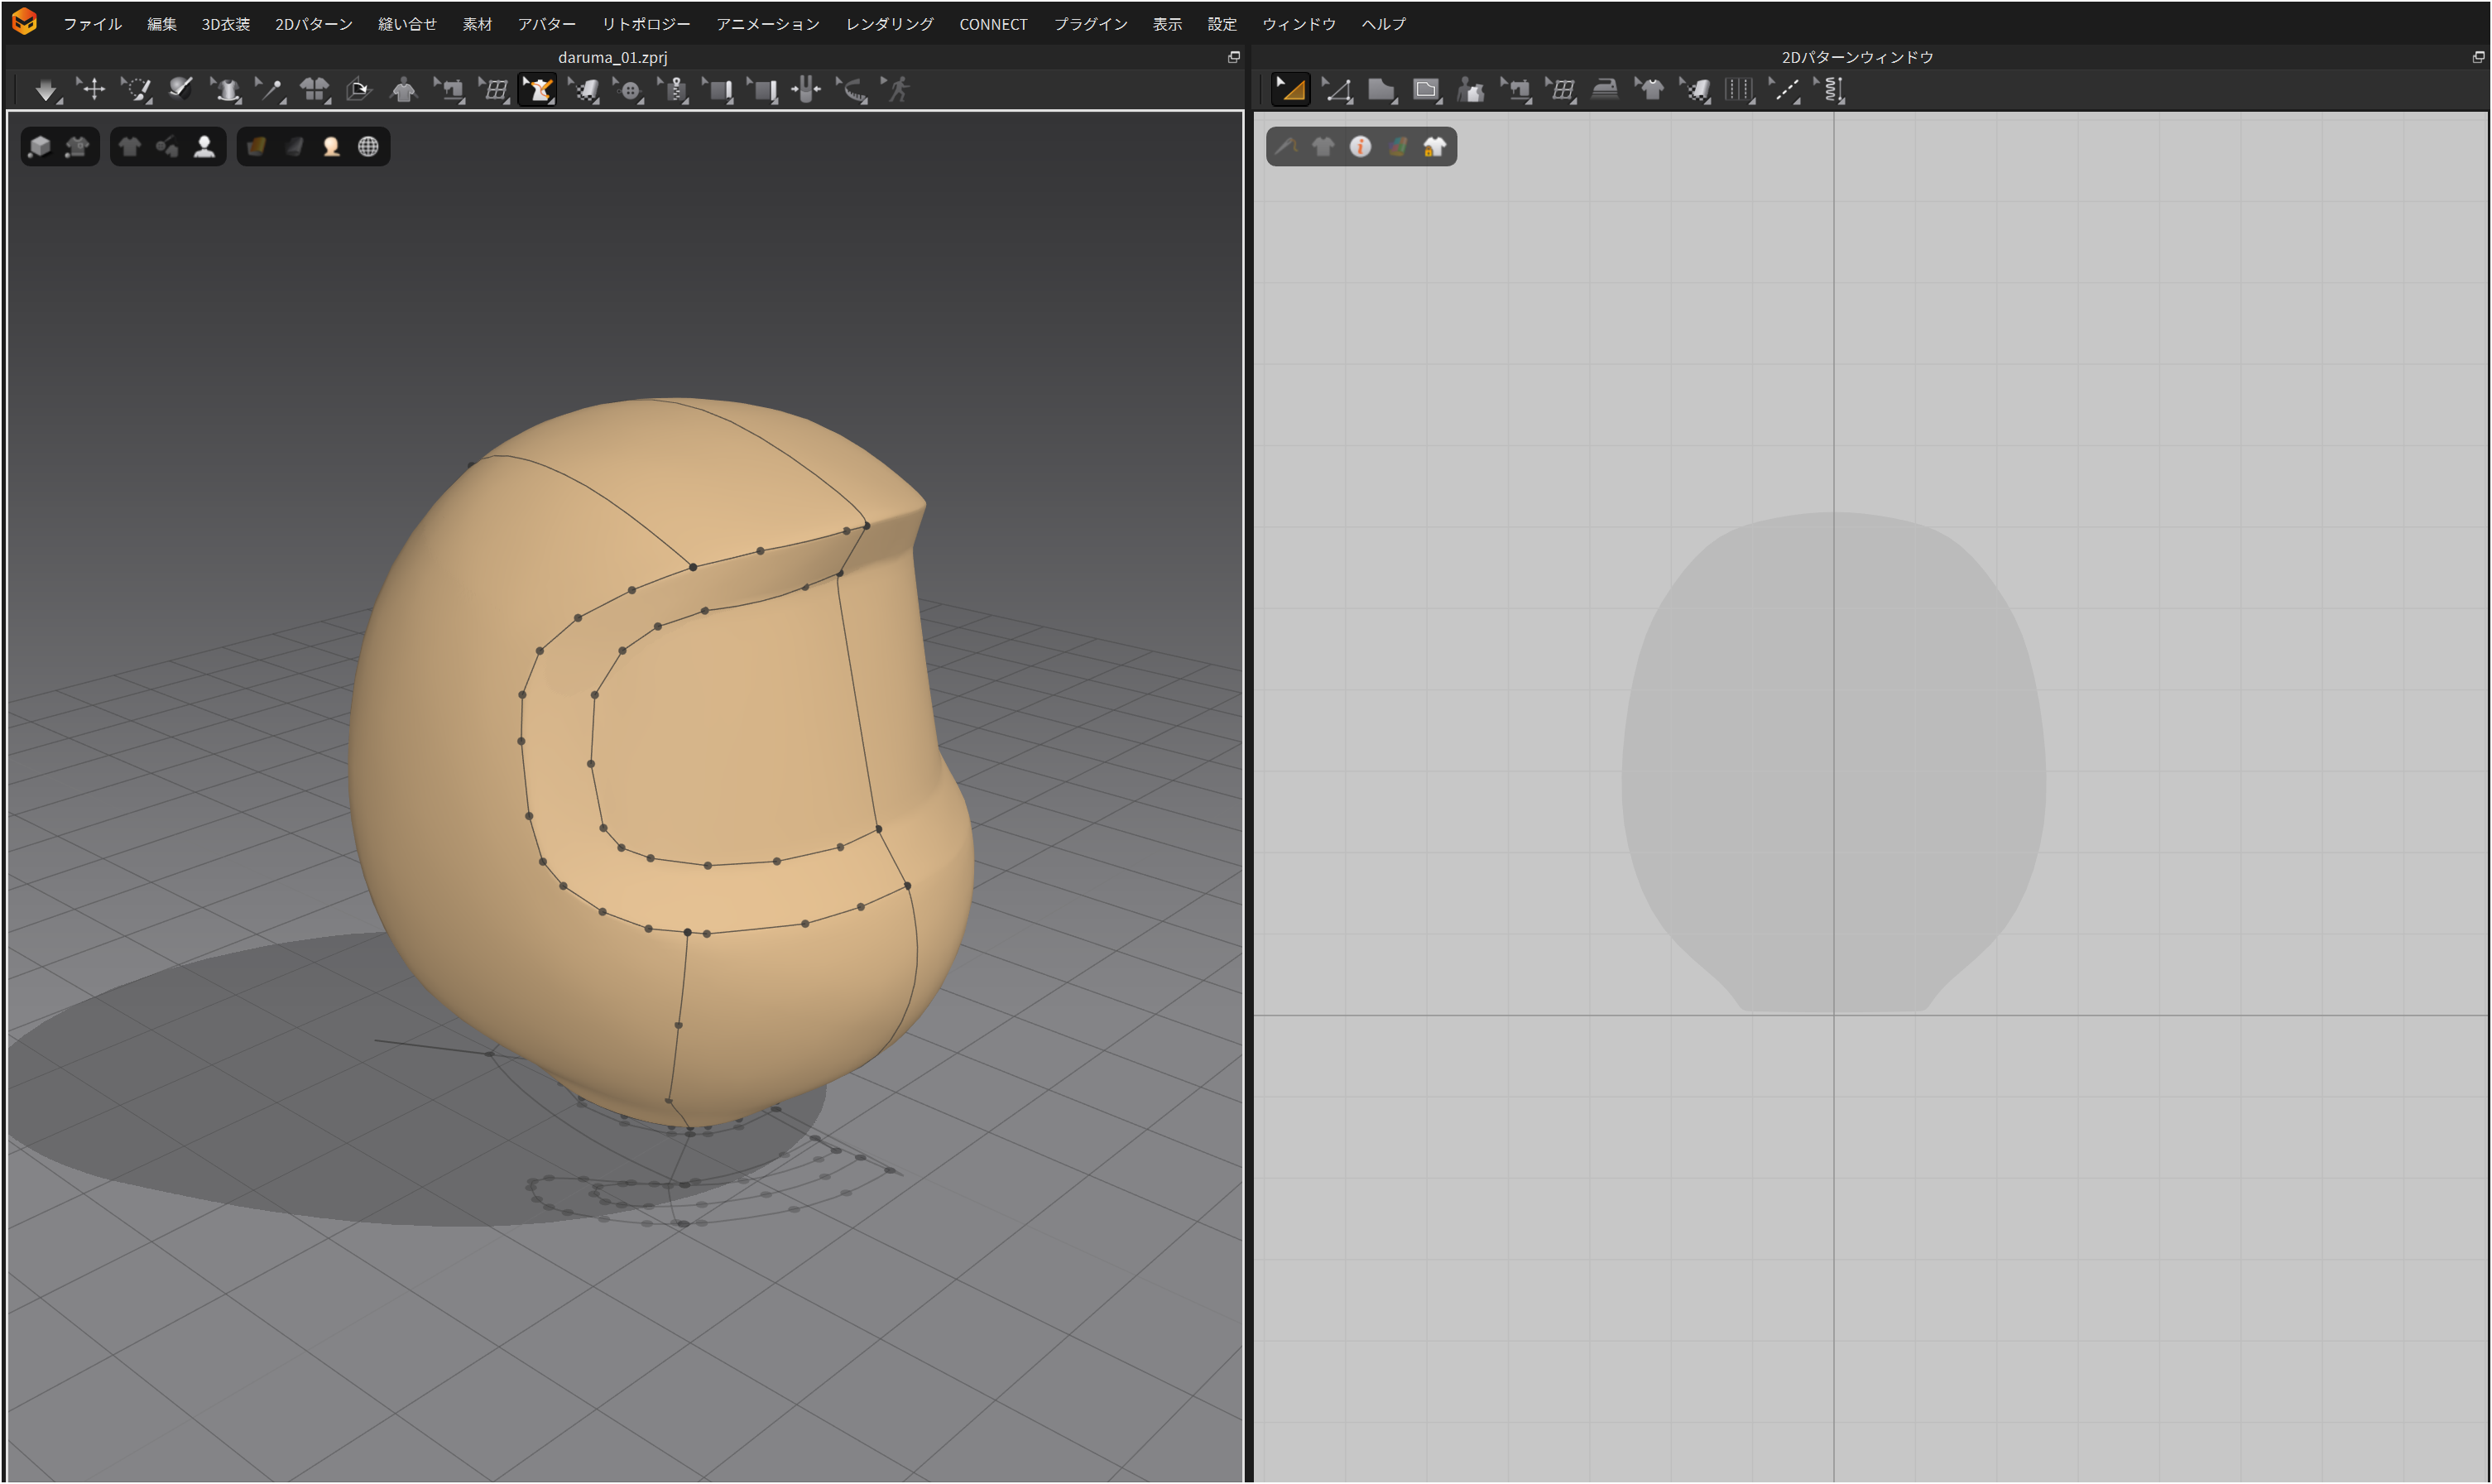
● Import the Daruma FBX data into Marvelous Designer, and use the [3D Pen (Avatar)] tool to trace the shape and create a pattern for just one half.
Draw these lines keeping the quilting of the down jacket in mind.
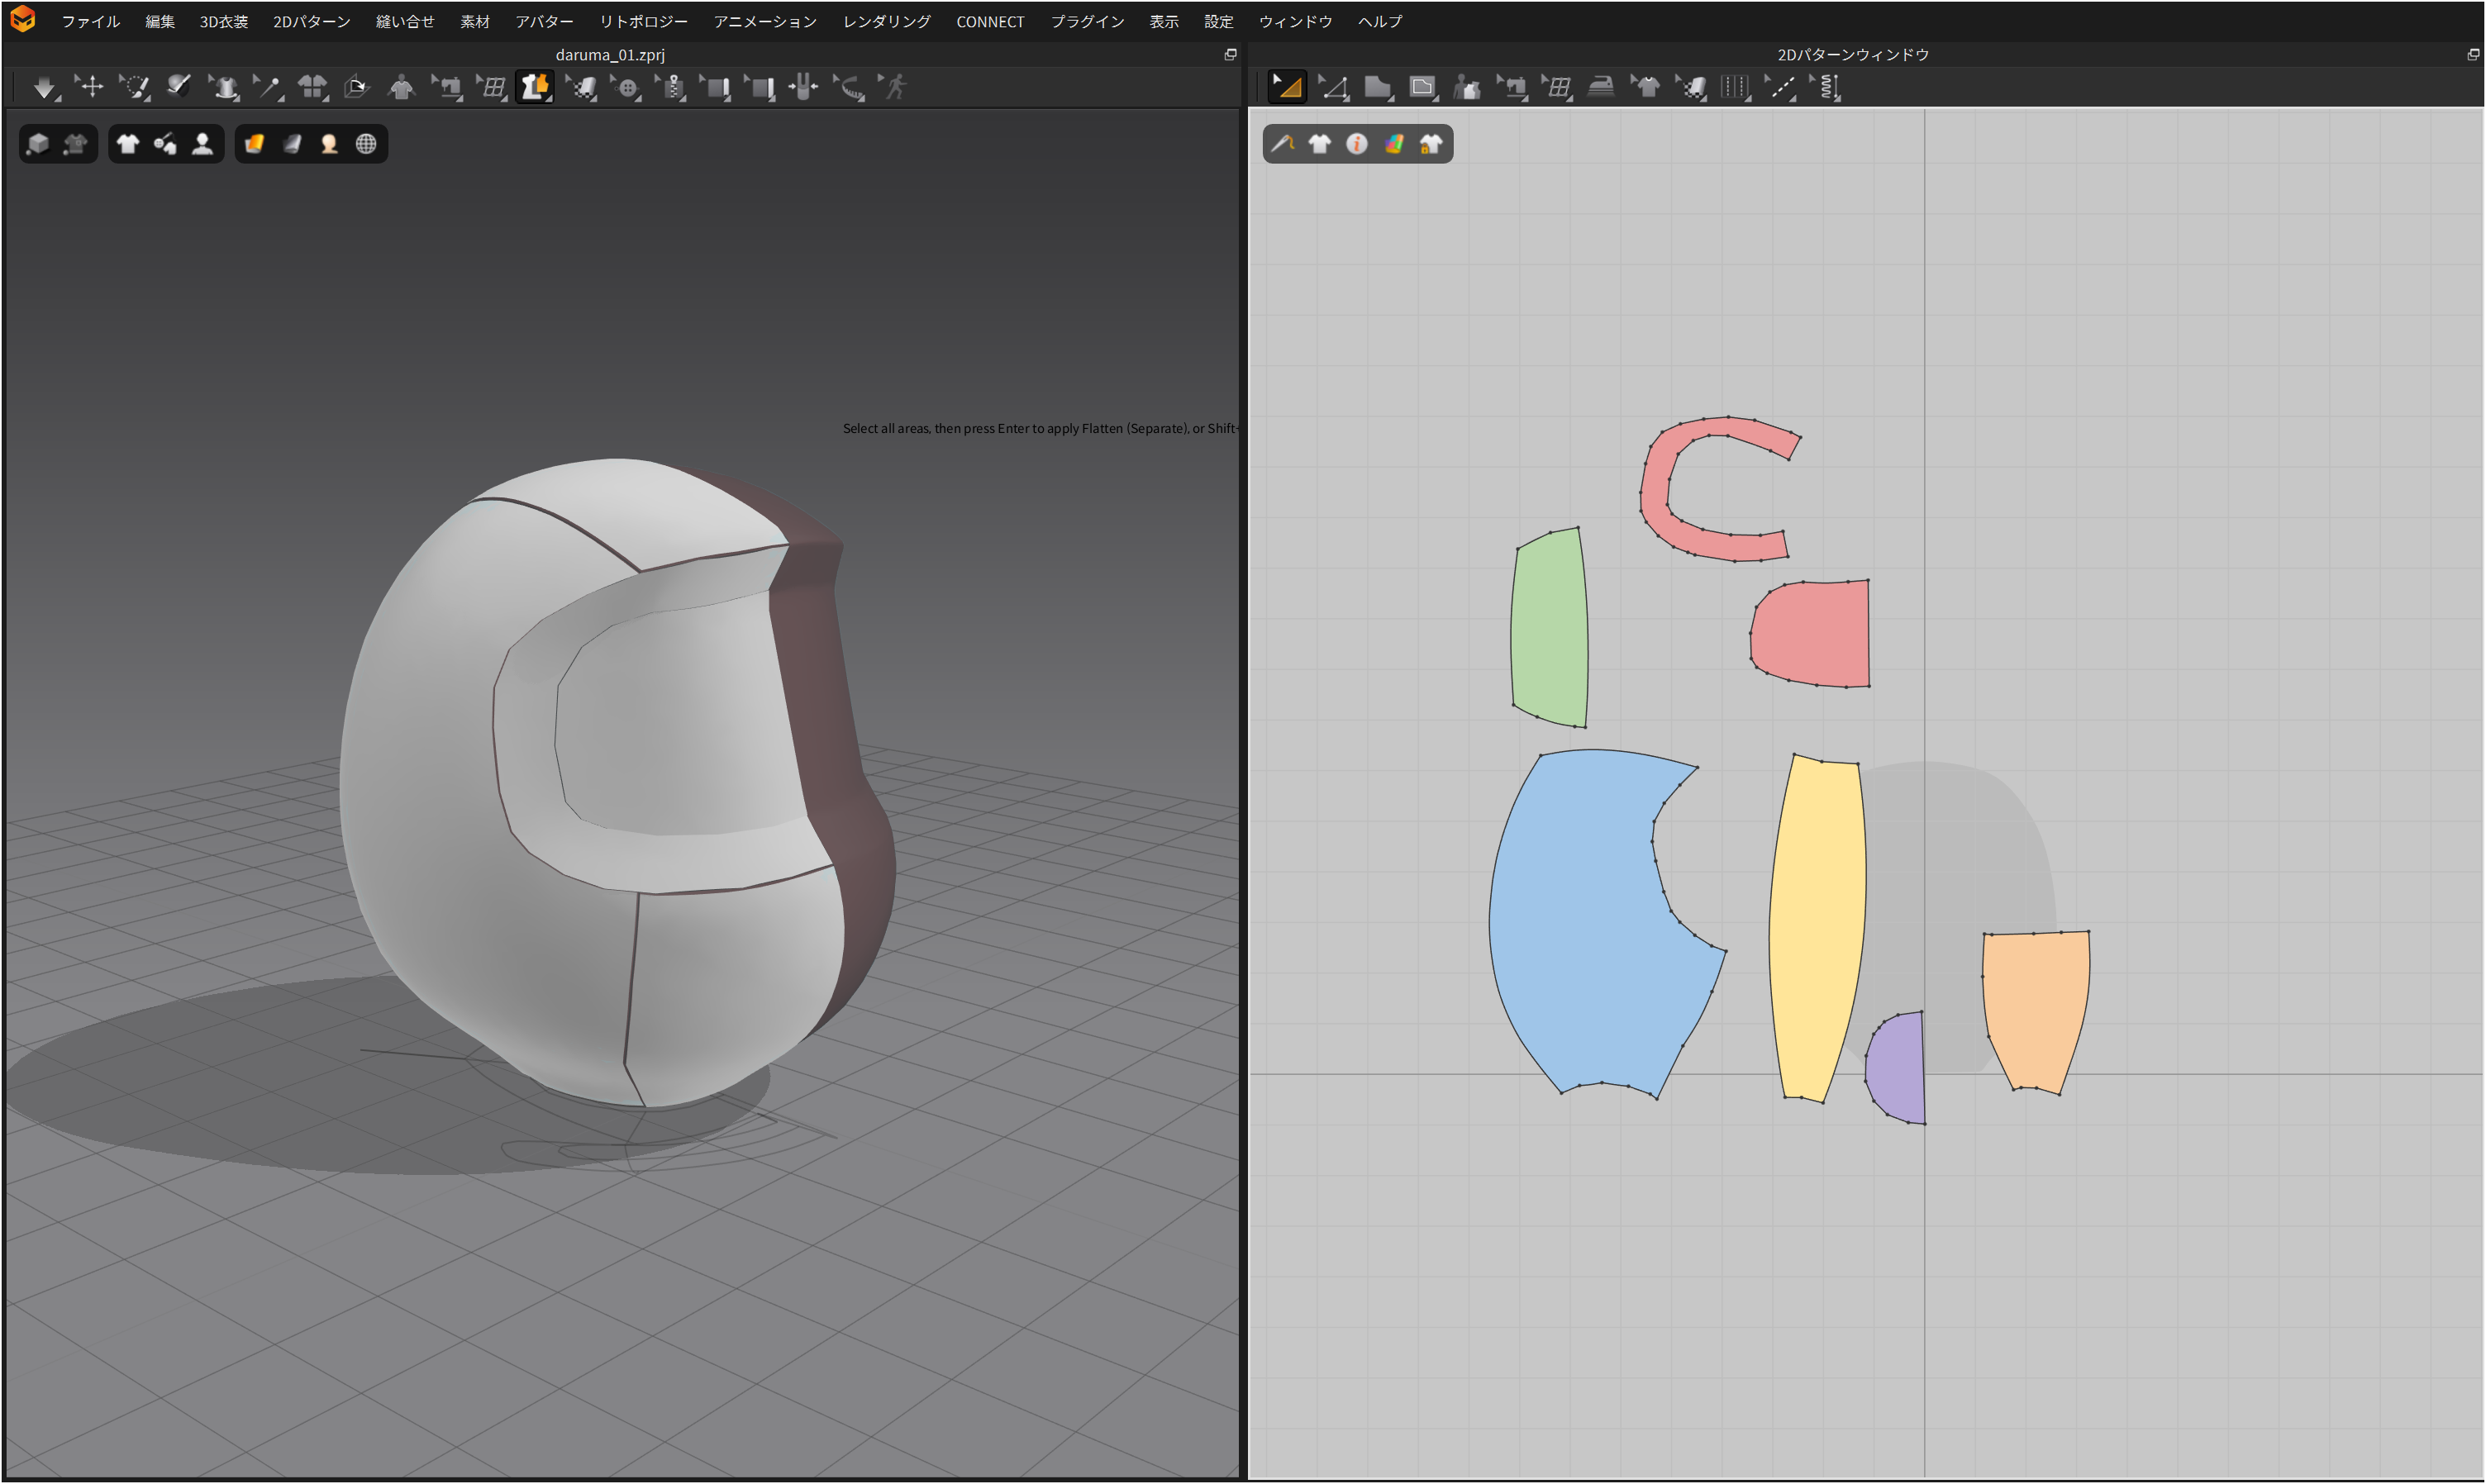
● After drawing the lines, convert them into a pattern. Then, adjust the created pattern in the 2D window.
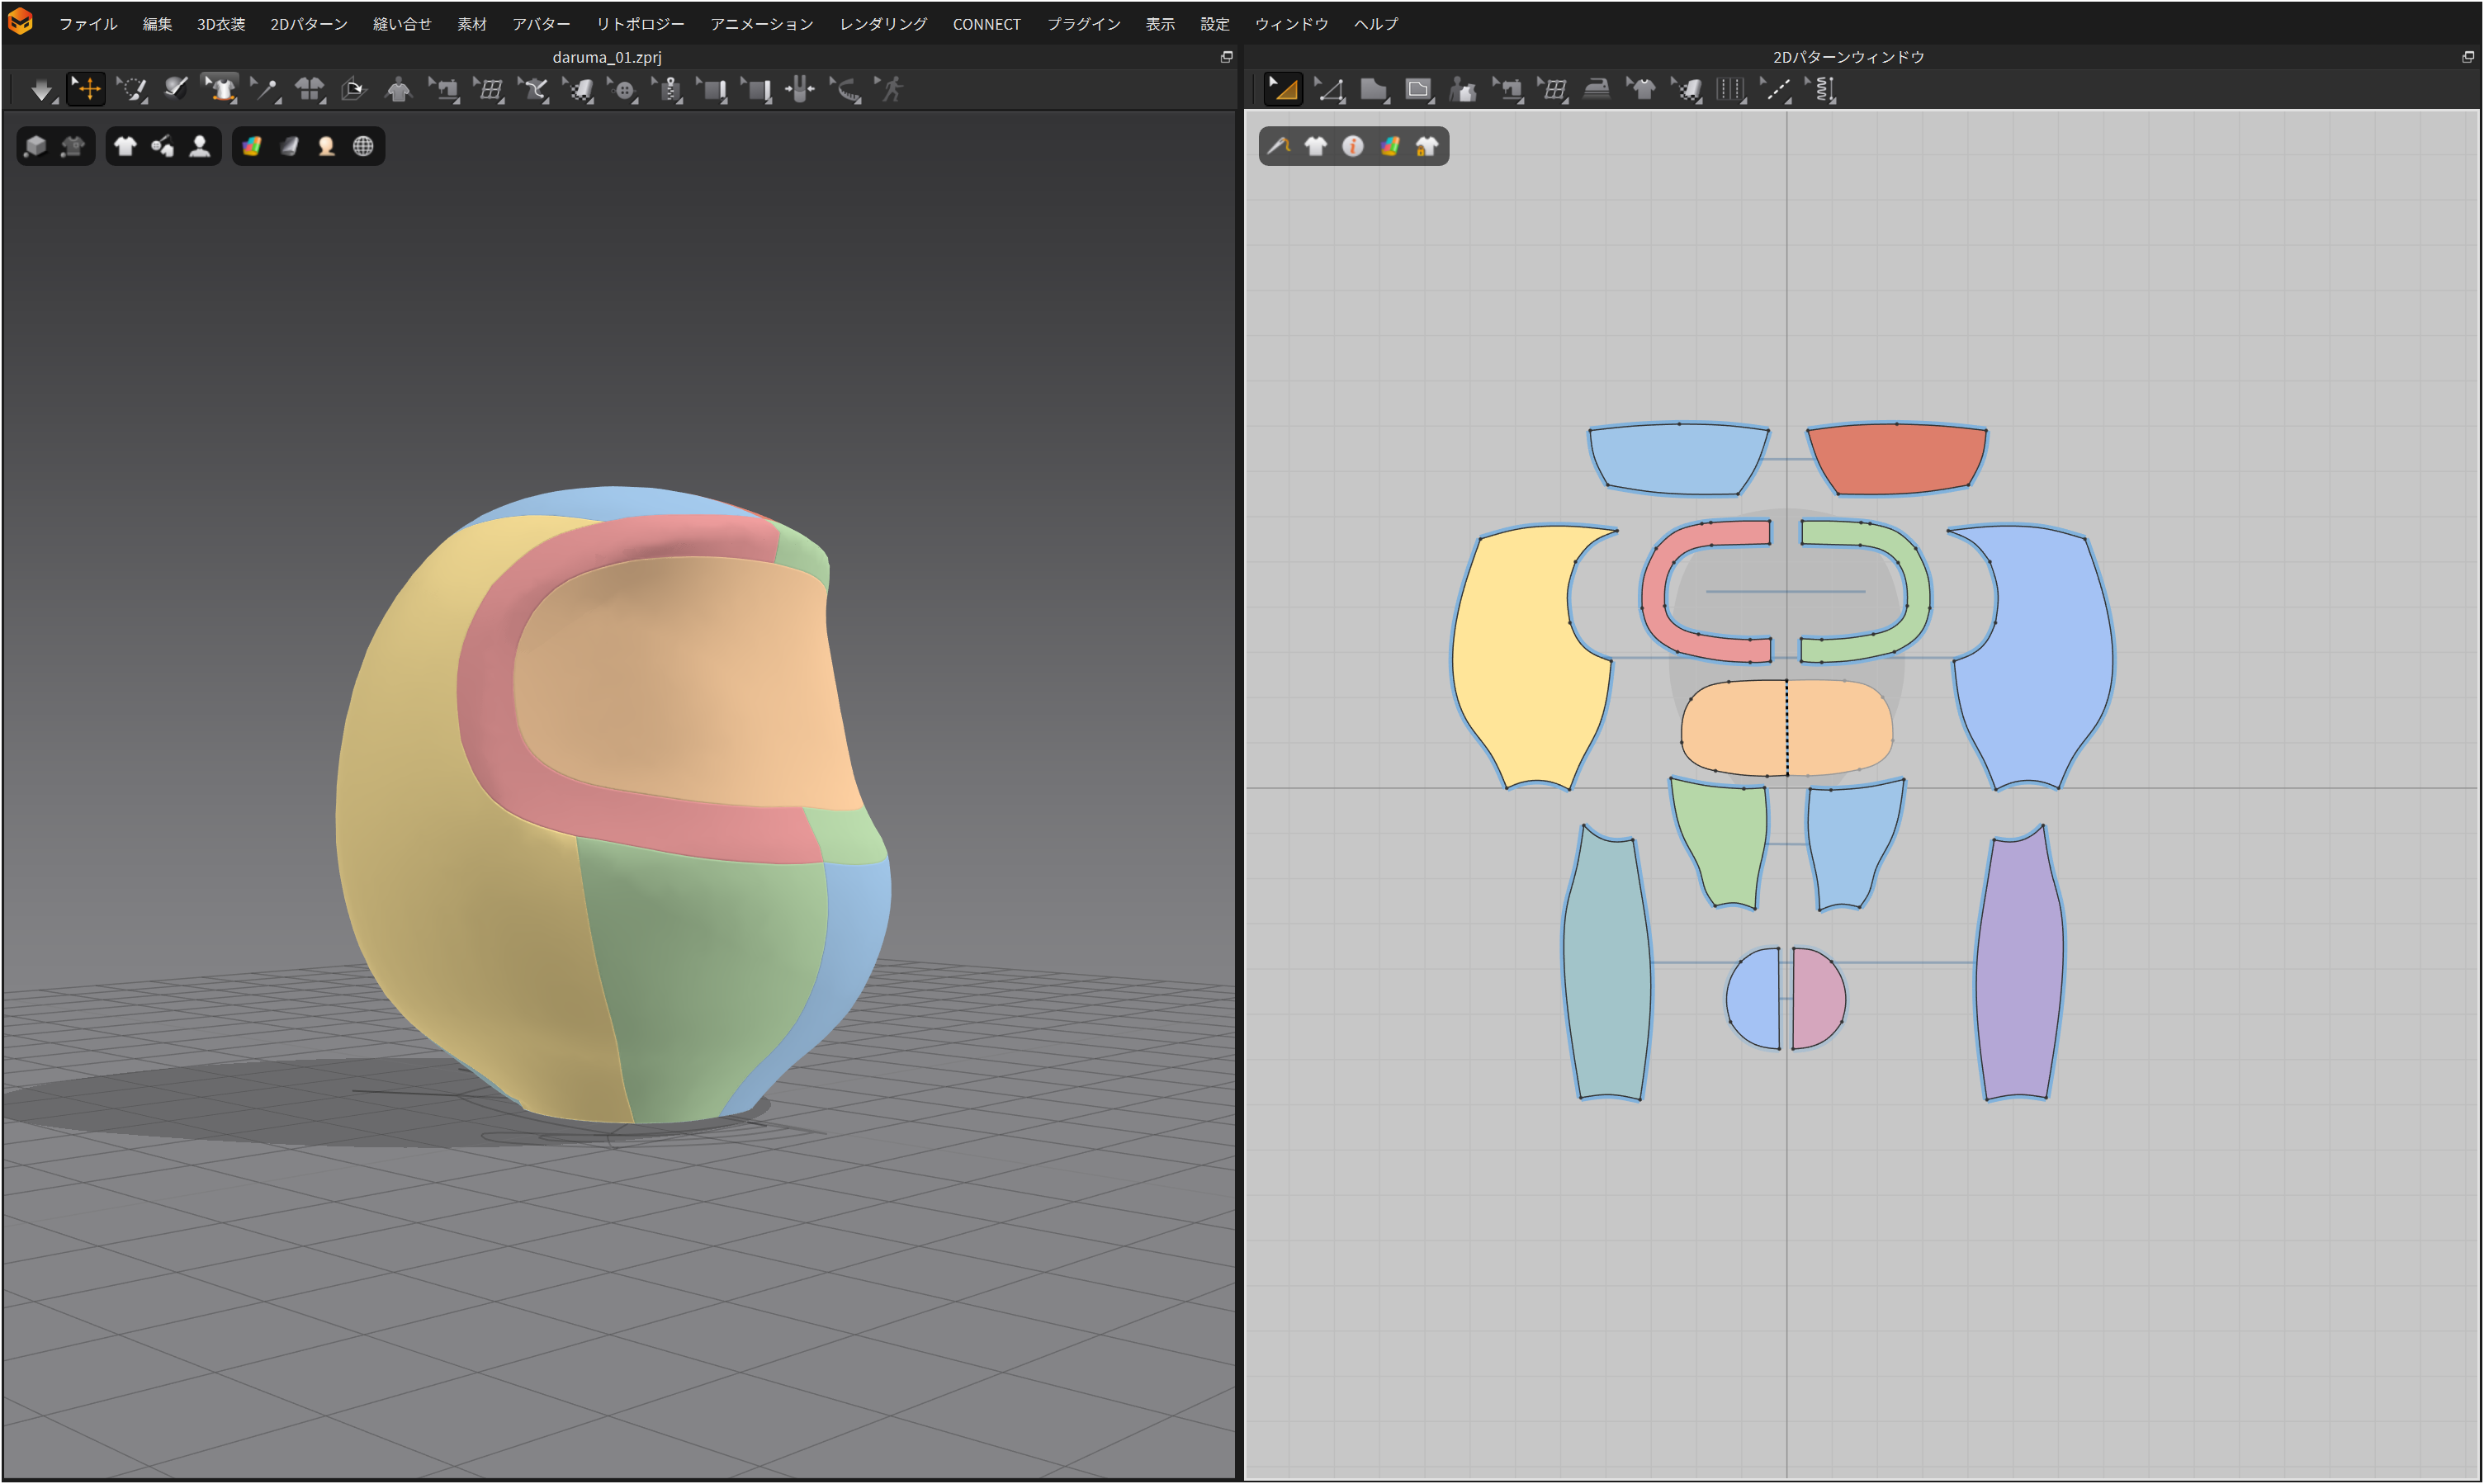
● Adjust the pattern shape and use [Symmetric Paste] to create the pattern for the other half.
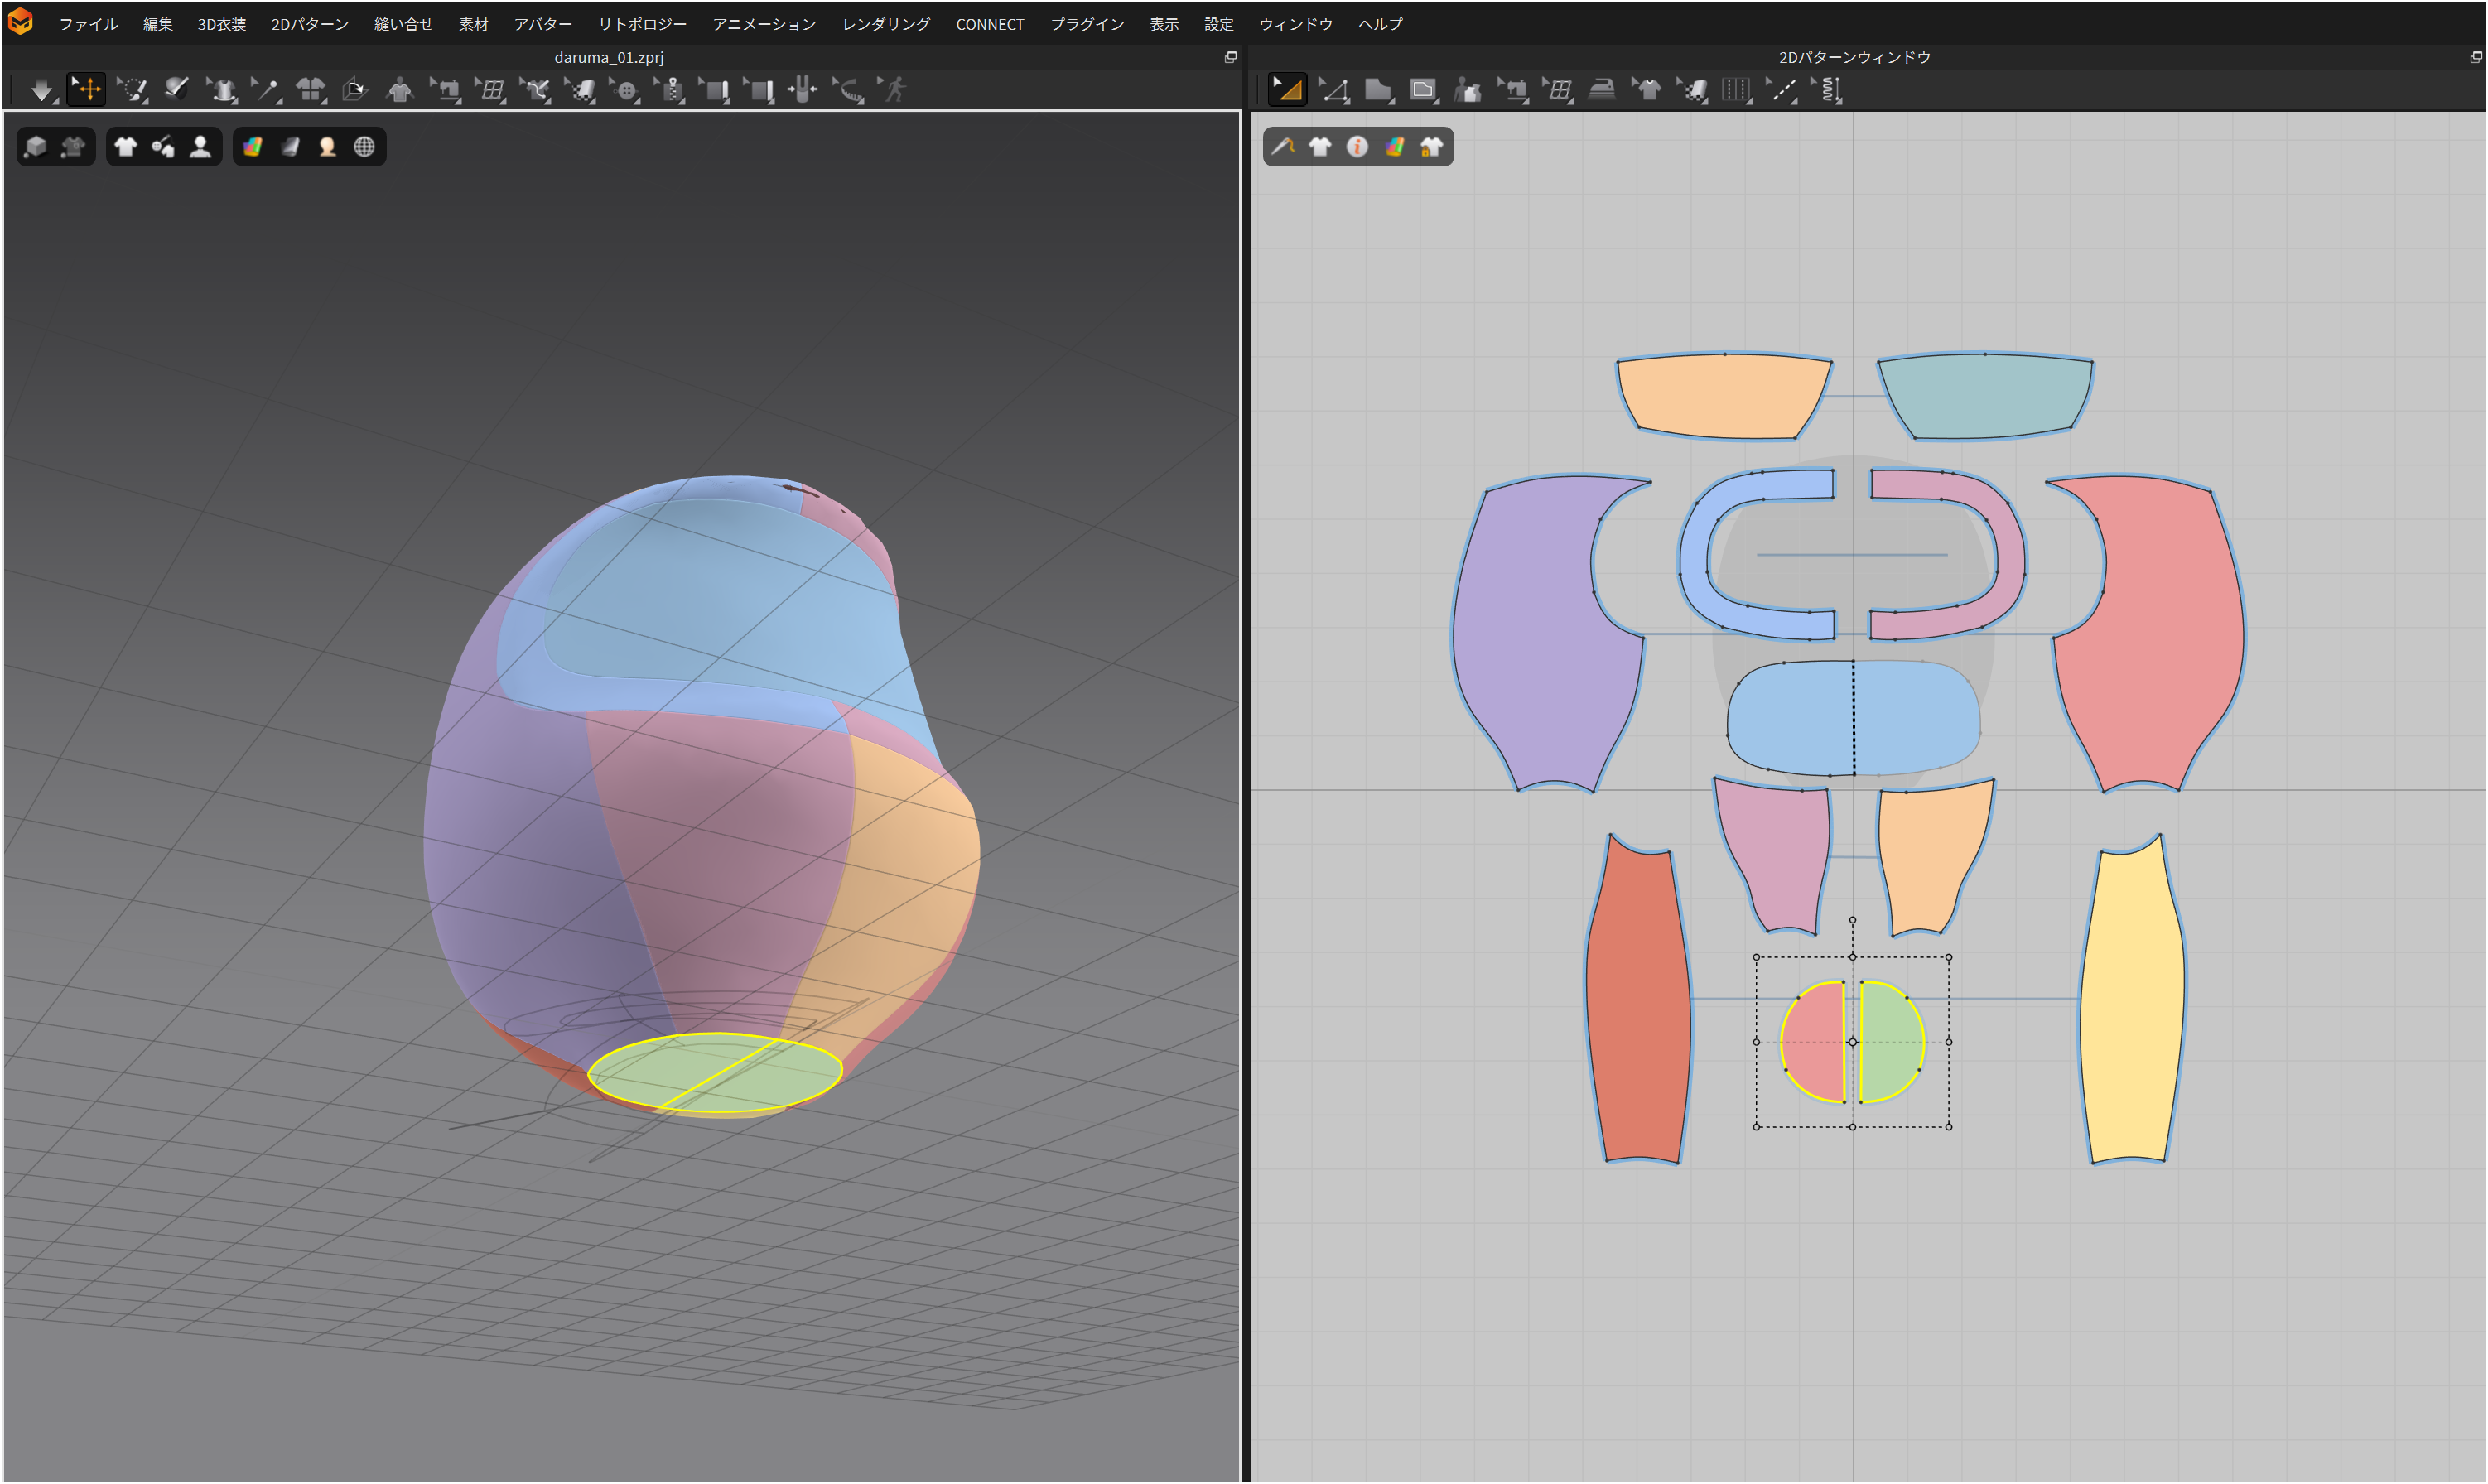
After that, drape it onto the Daruma.
● "Freeze" the circular fabric piece that acts as the bottom.
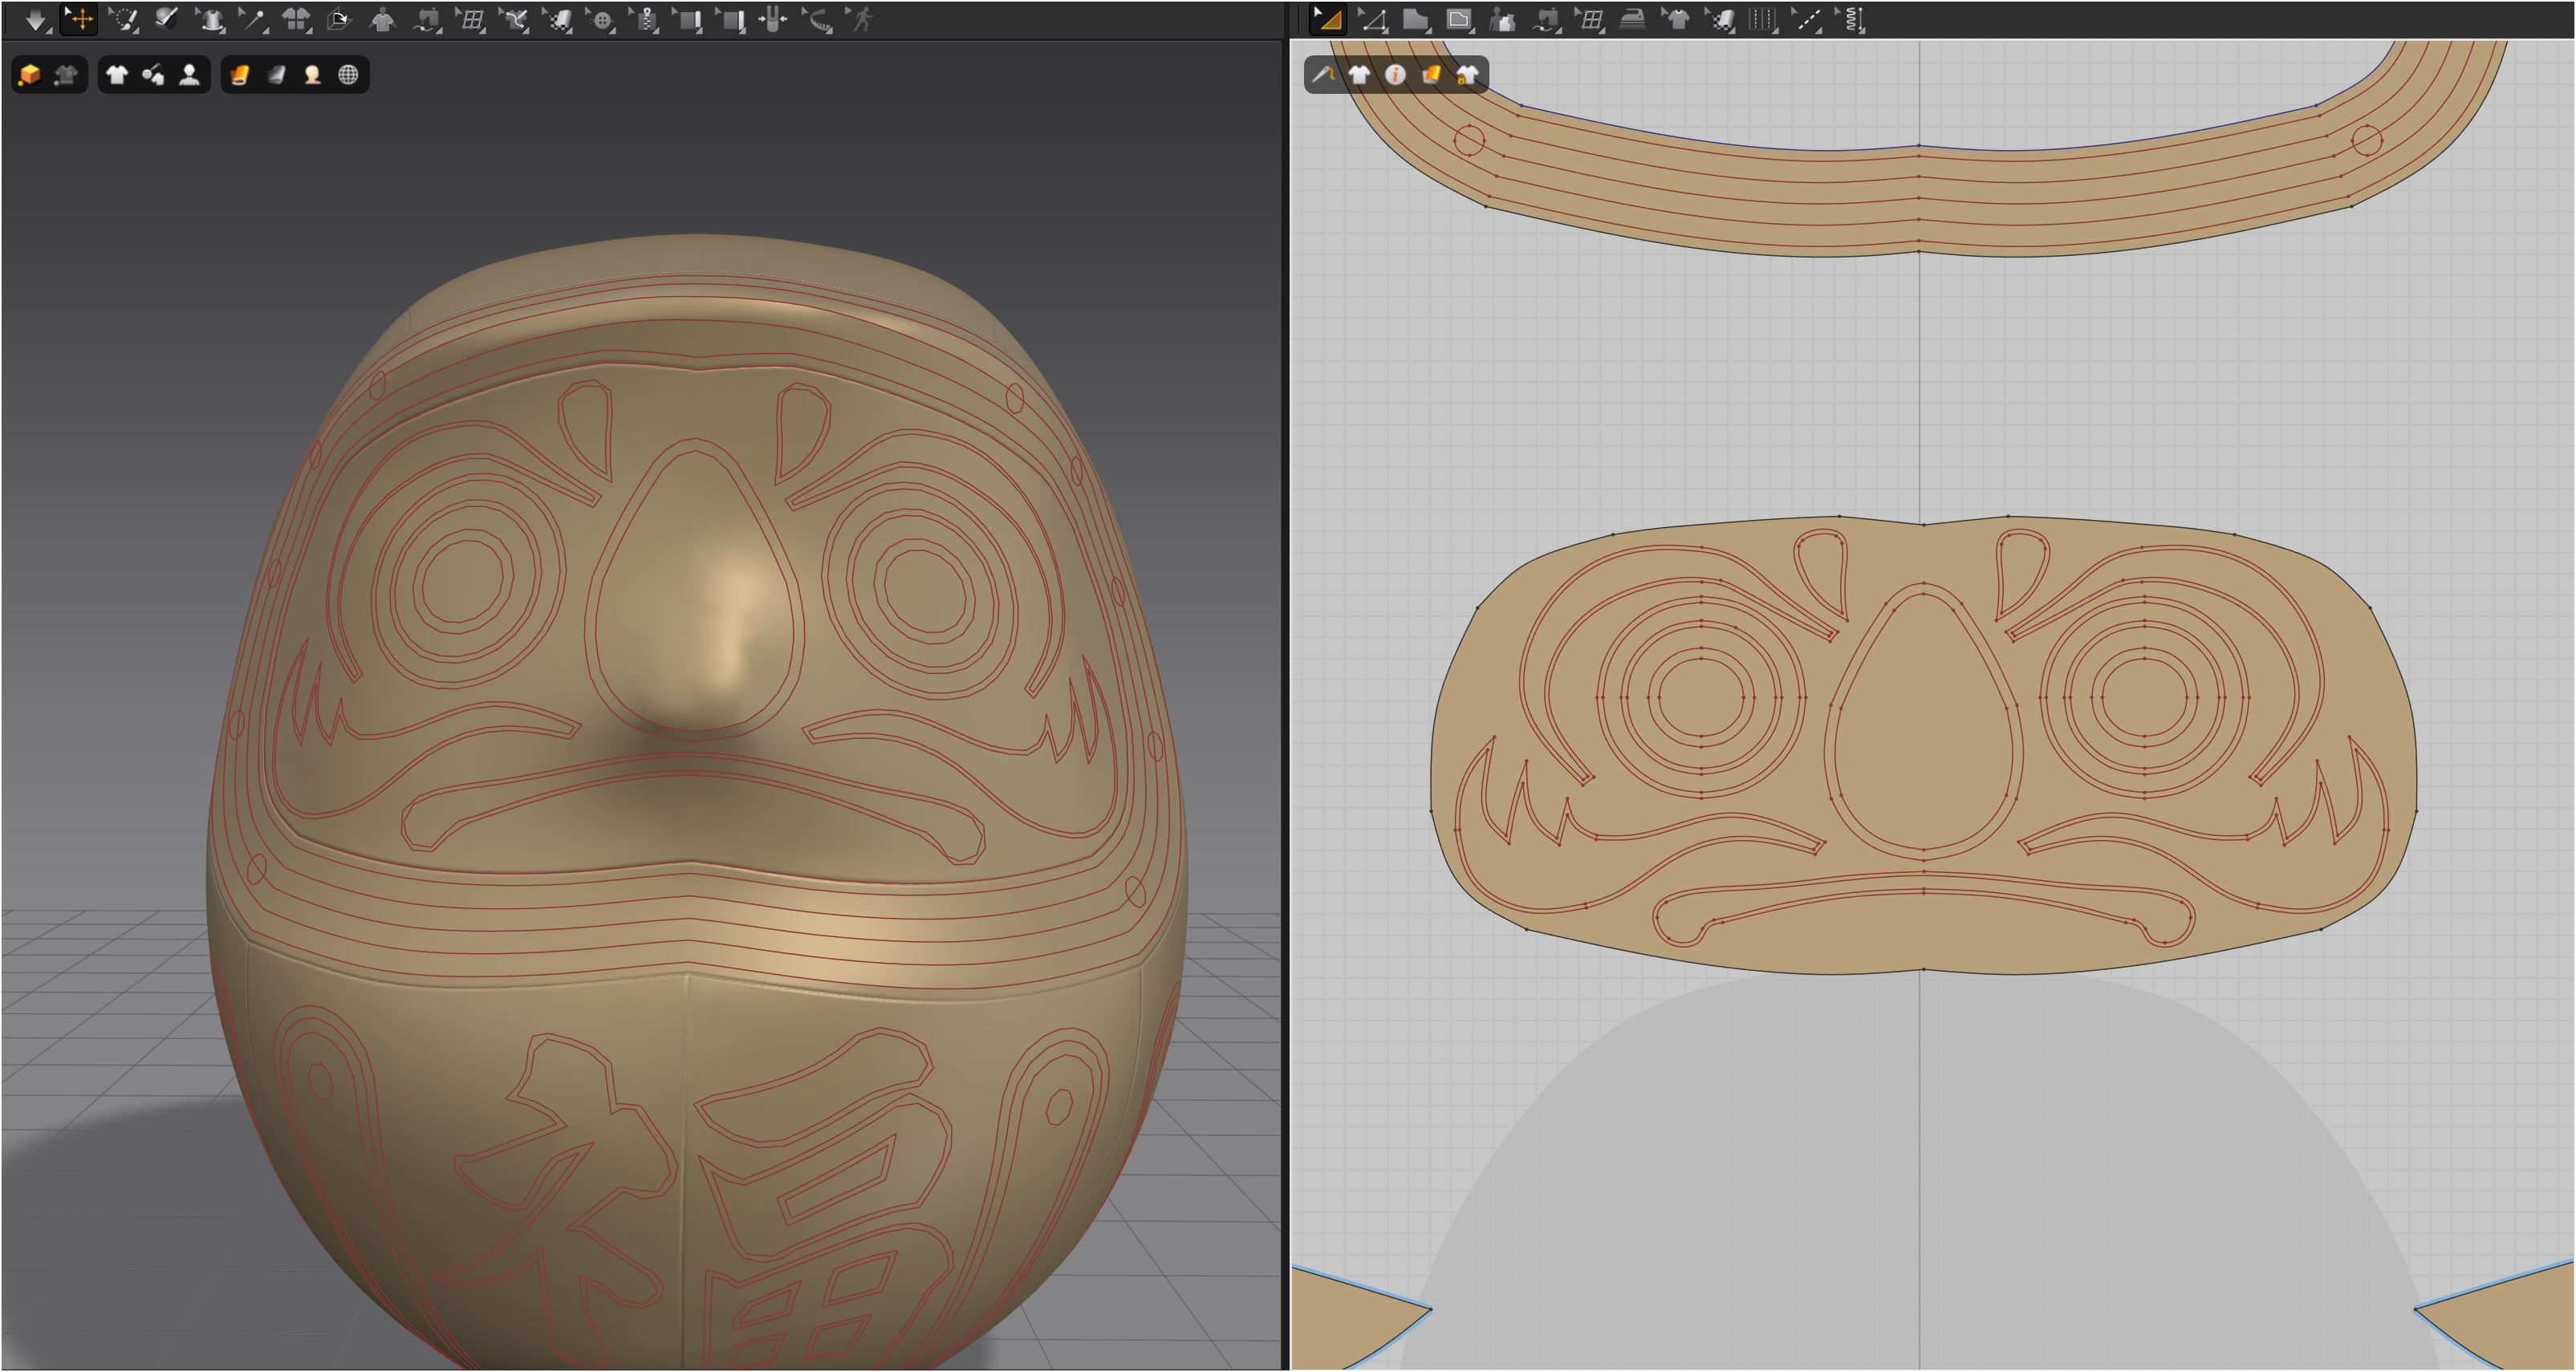
● On the base layer worn by the Daruma, create the face and text using "Internal Lines." Set the particle distance to 10mm. Also, set the pressure to "-10" so the fabric tightly adheres to the Daruma's shape. Arrange the internal lines while keeping the final design in mind to balance the shape and the aesthetic.
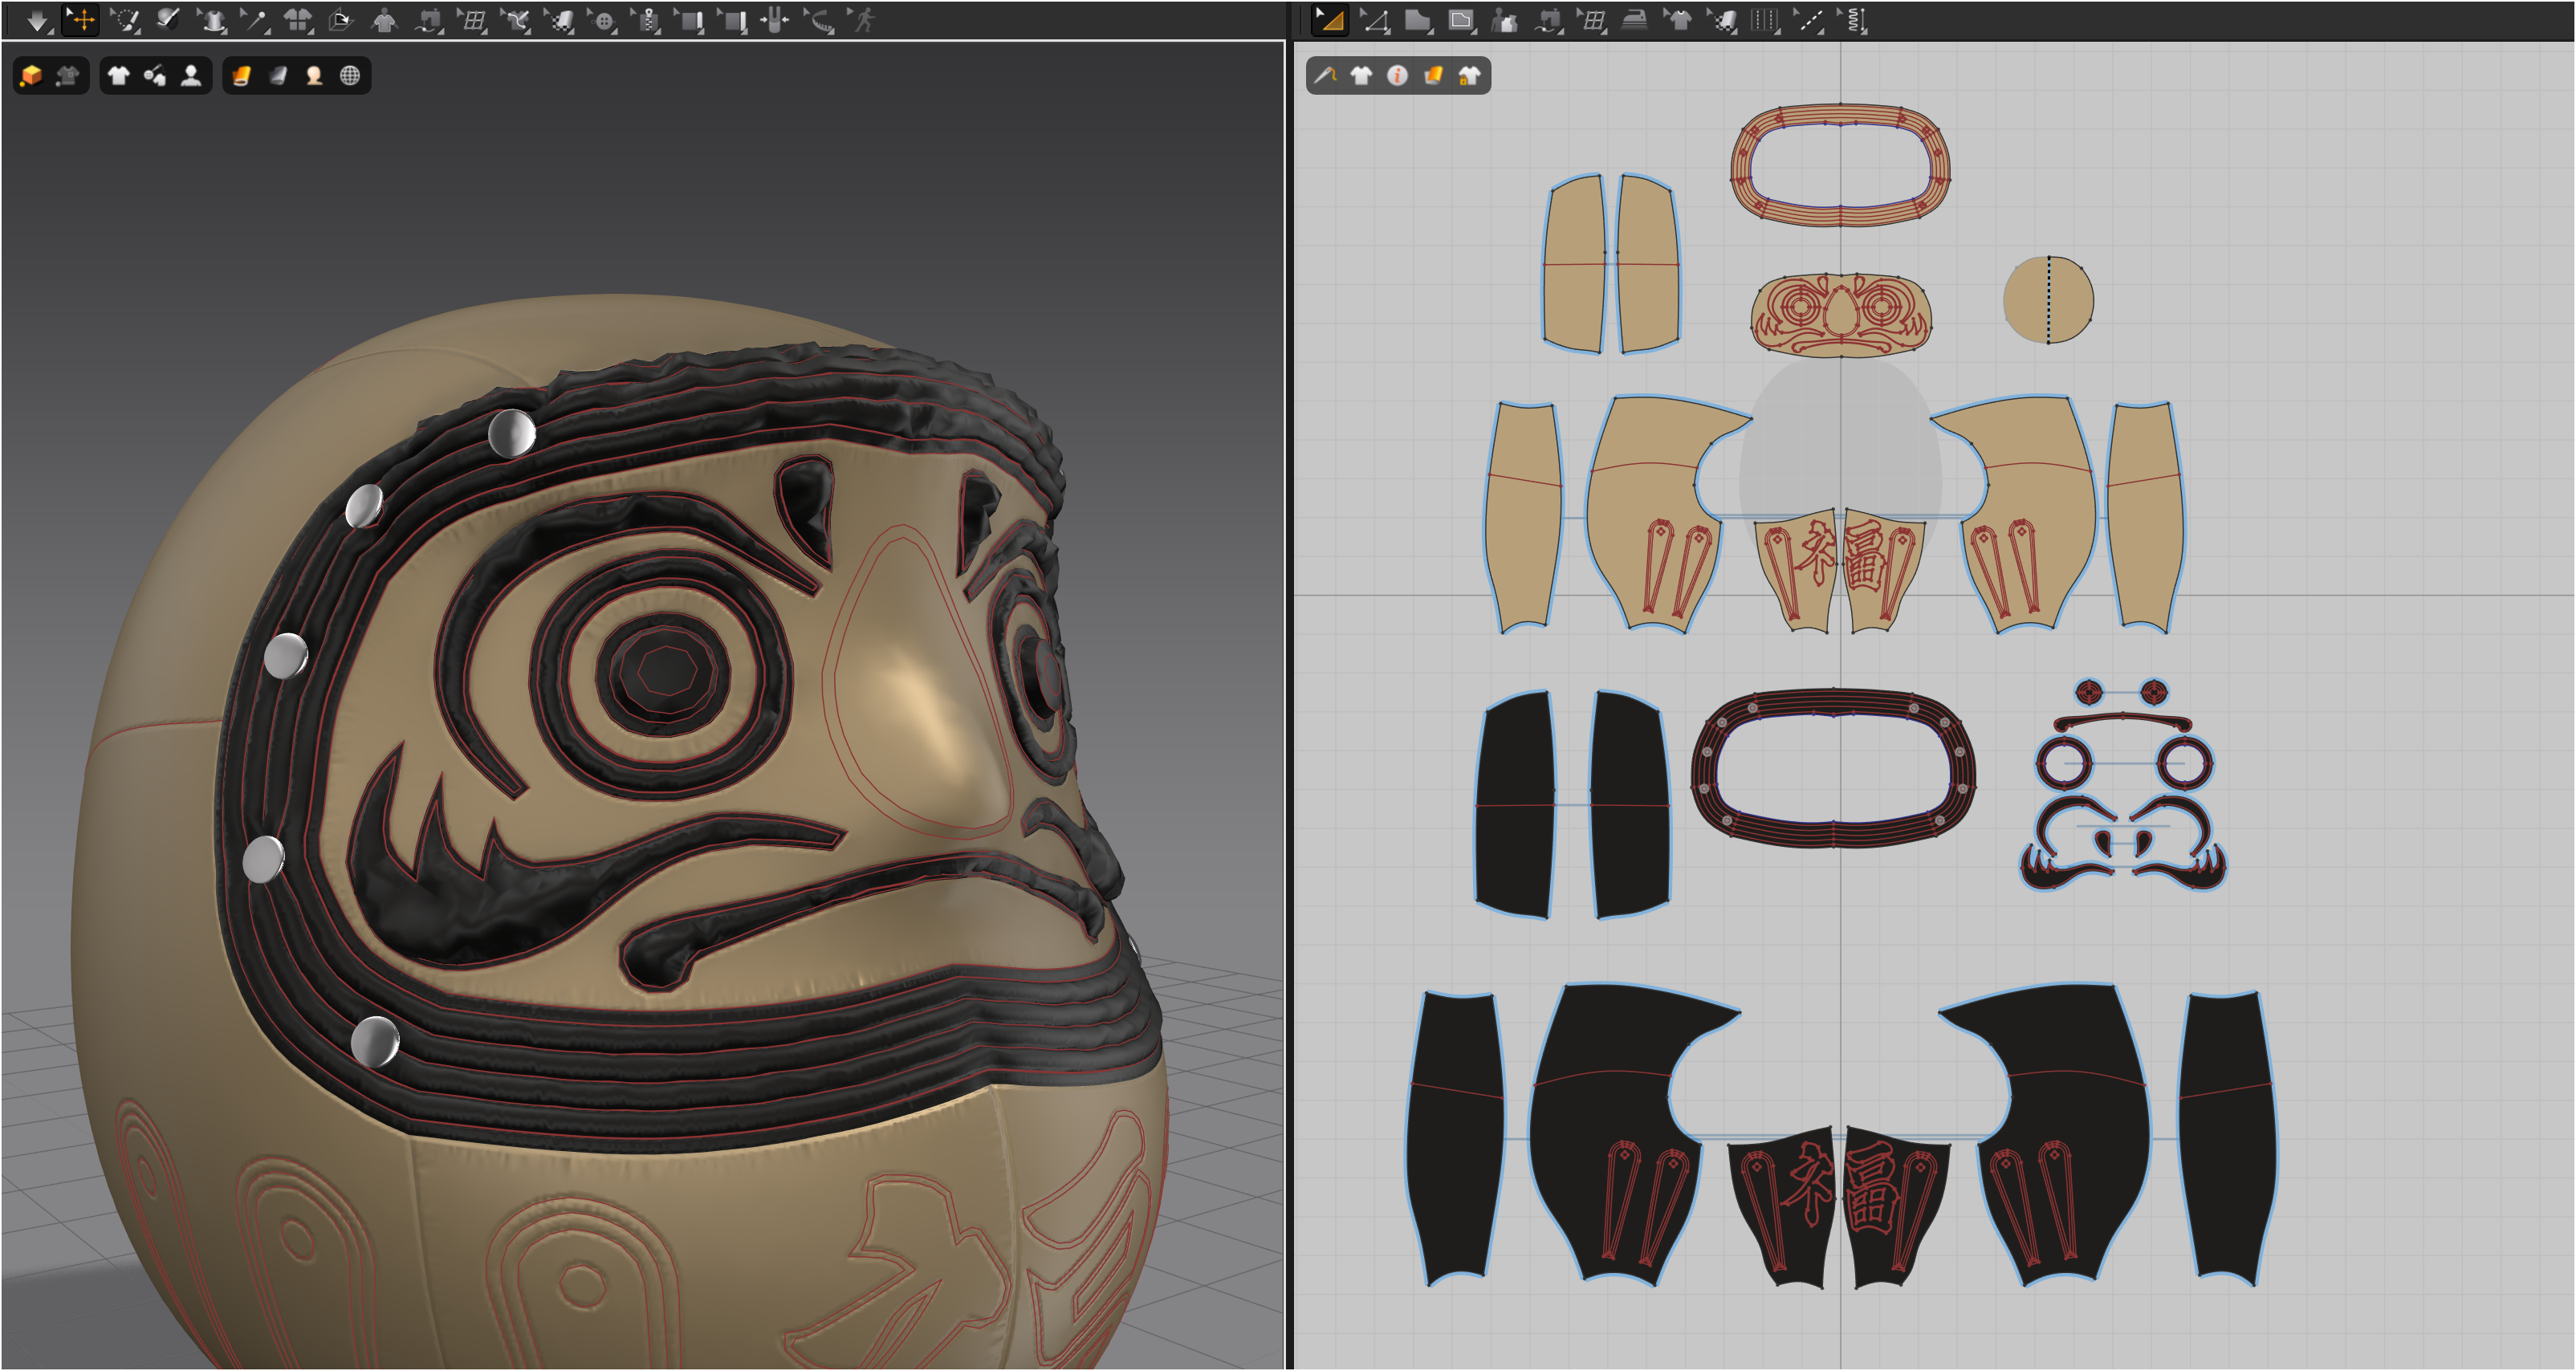
● Copy the base layer to create the outer fabric layer. Increase the size by 115–120%. Adjusting the fabric size differences between the base and outer layers is what expresses the volume of the down.
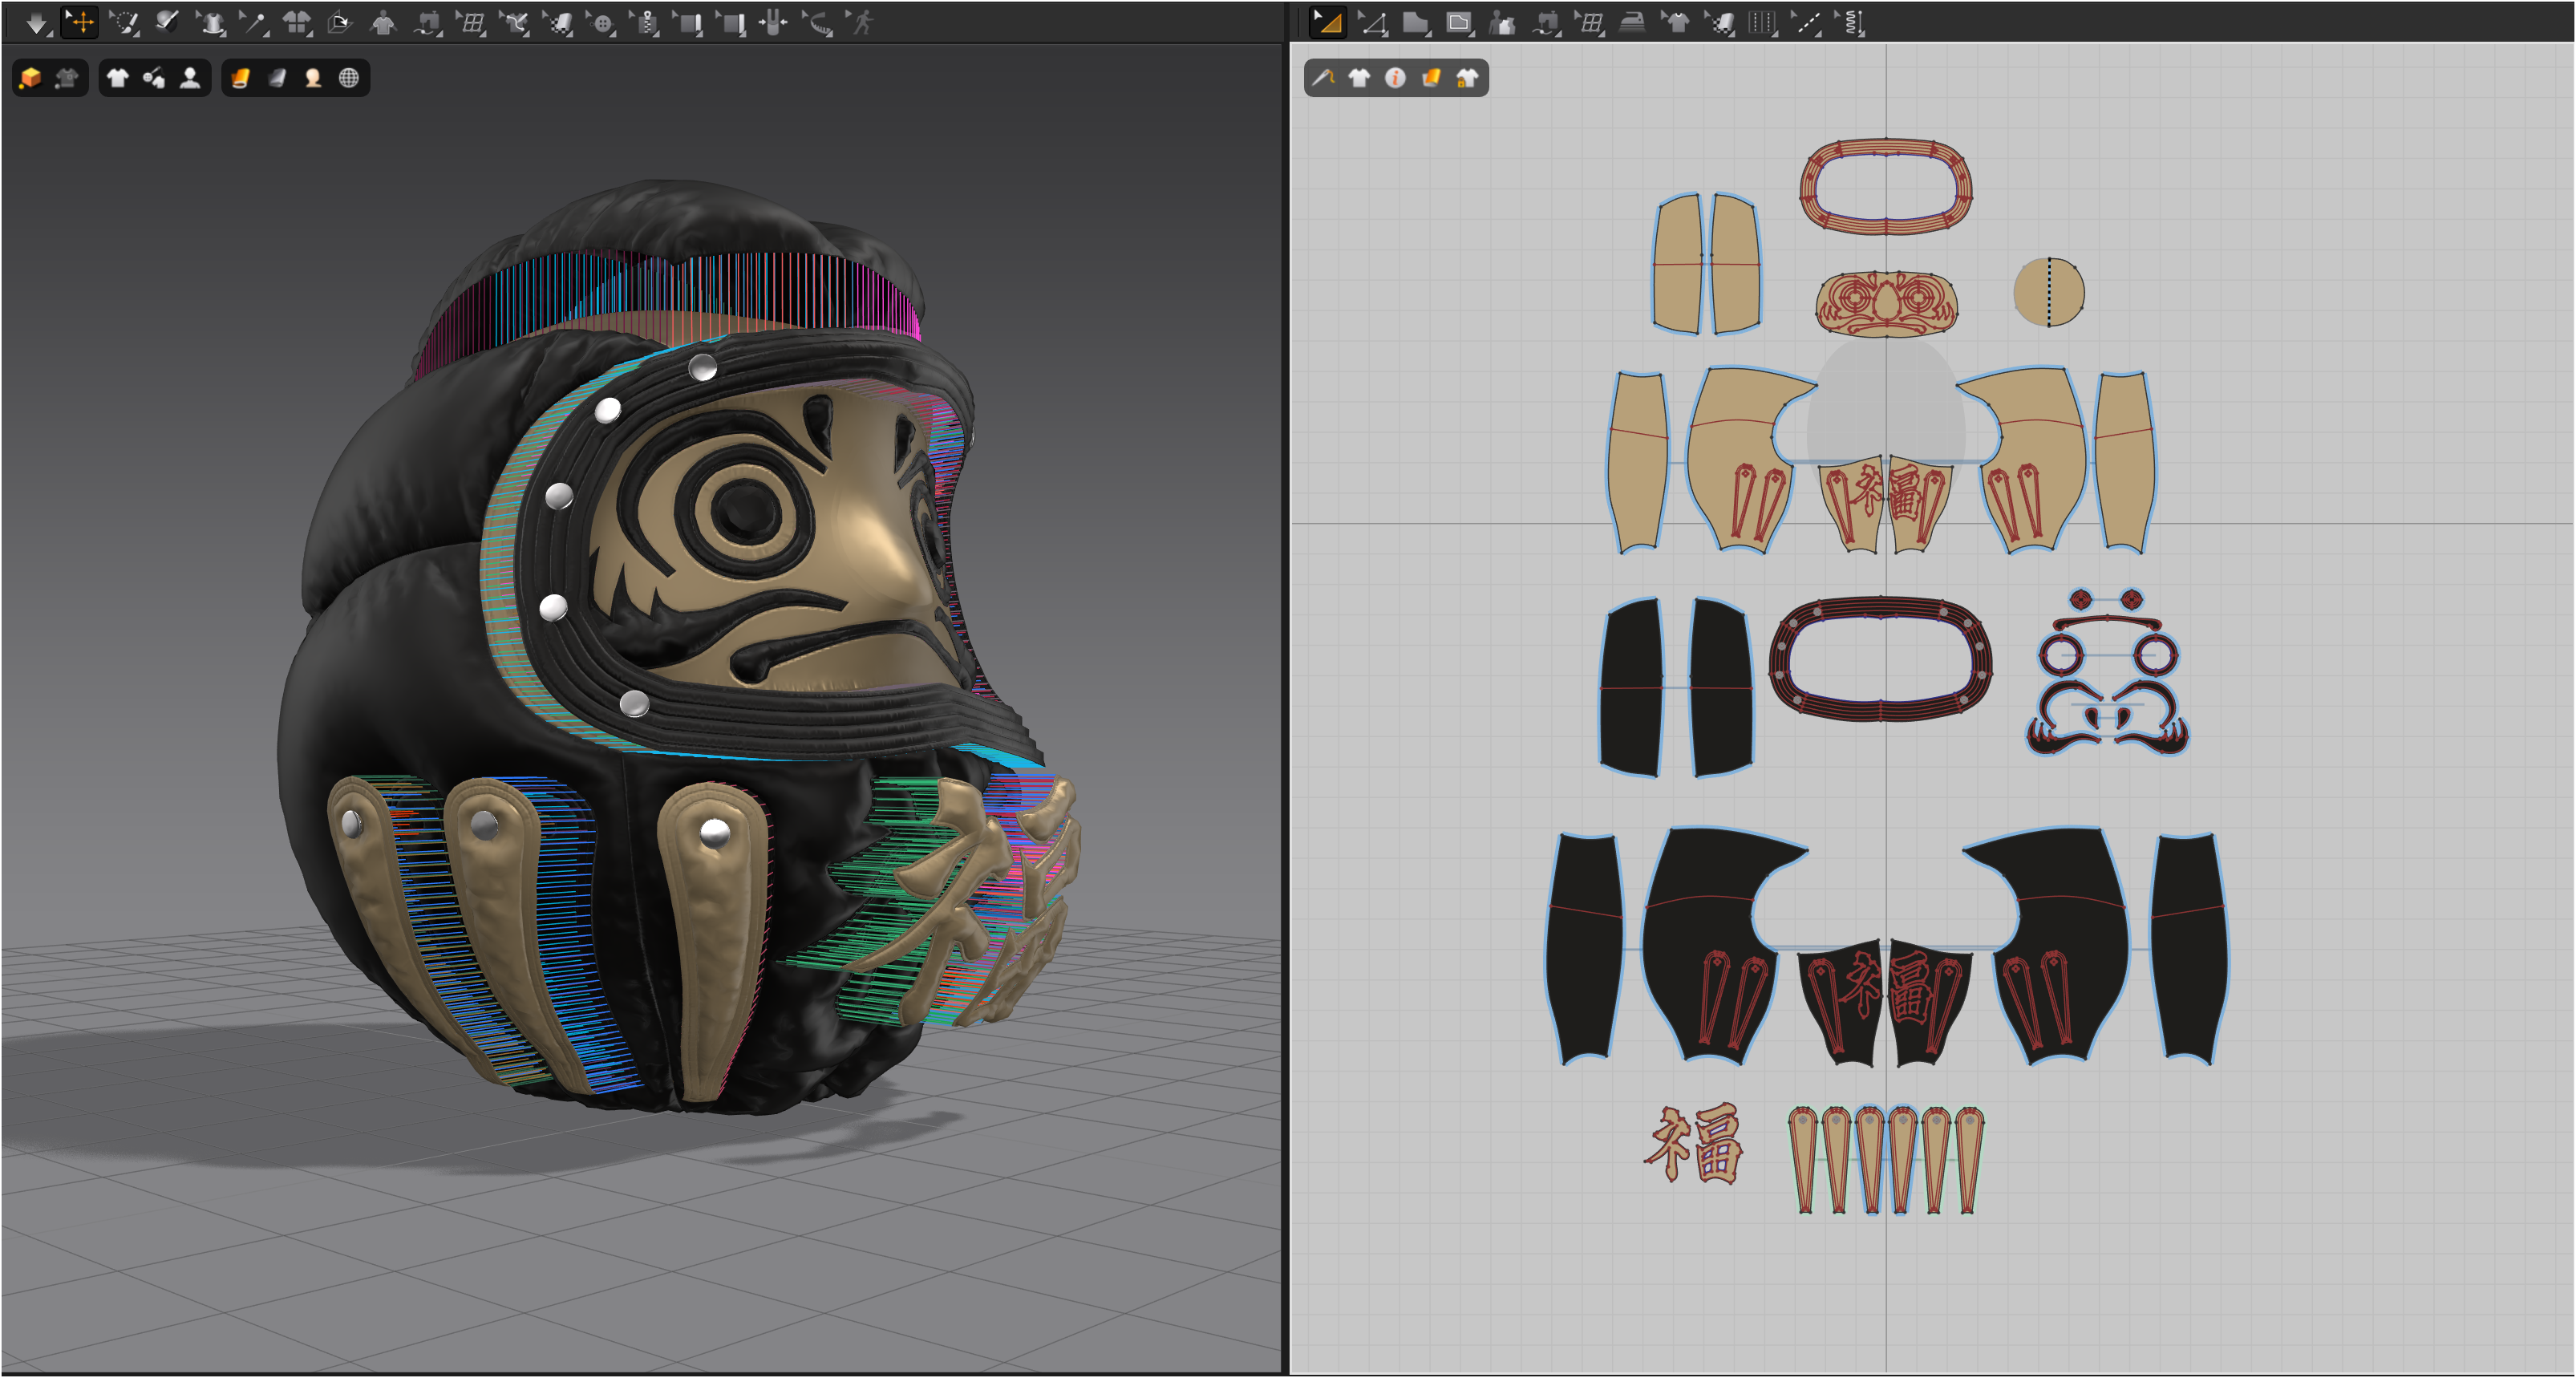
● Copy the "福" (Fortune) character and the vertical belly lines from the outer fabric. Increase the size of these copied pieces by about 115–120% as well.
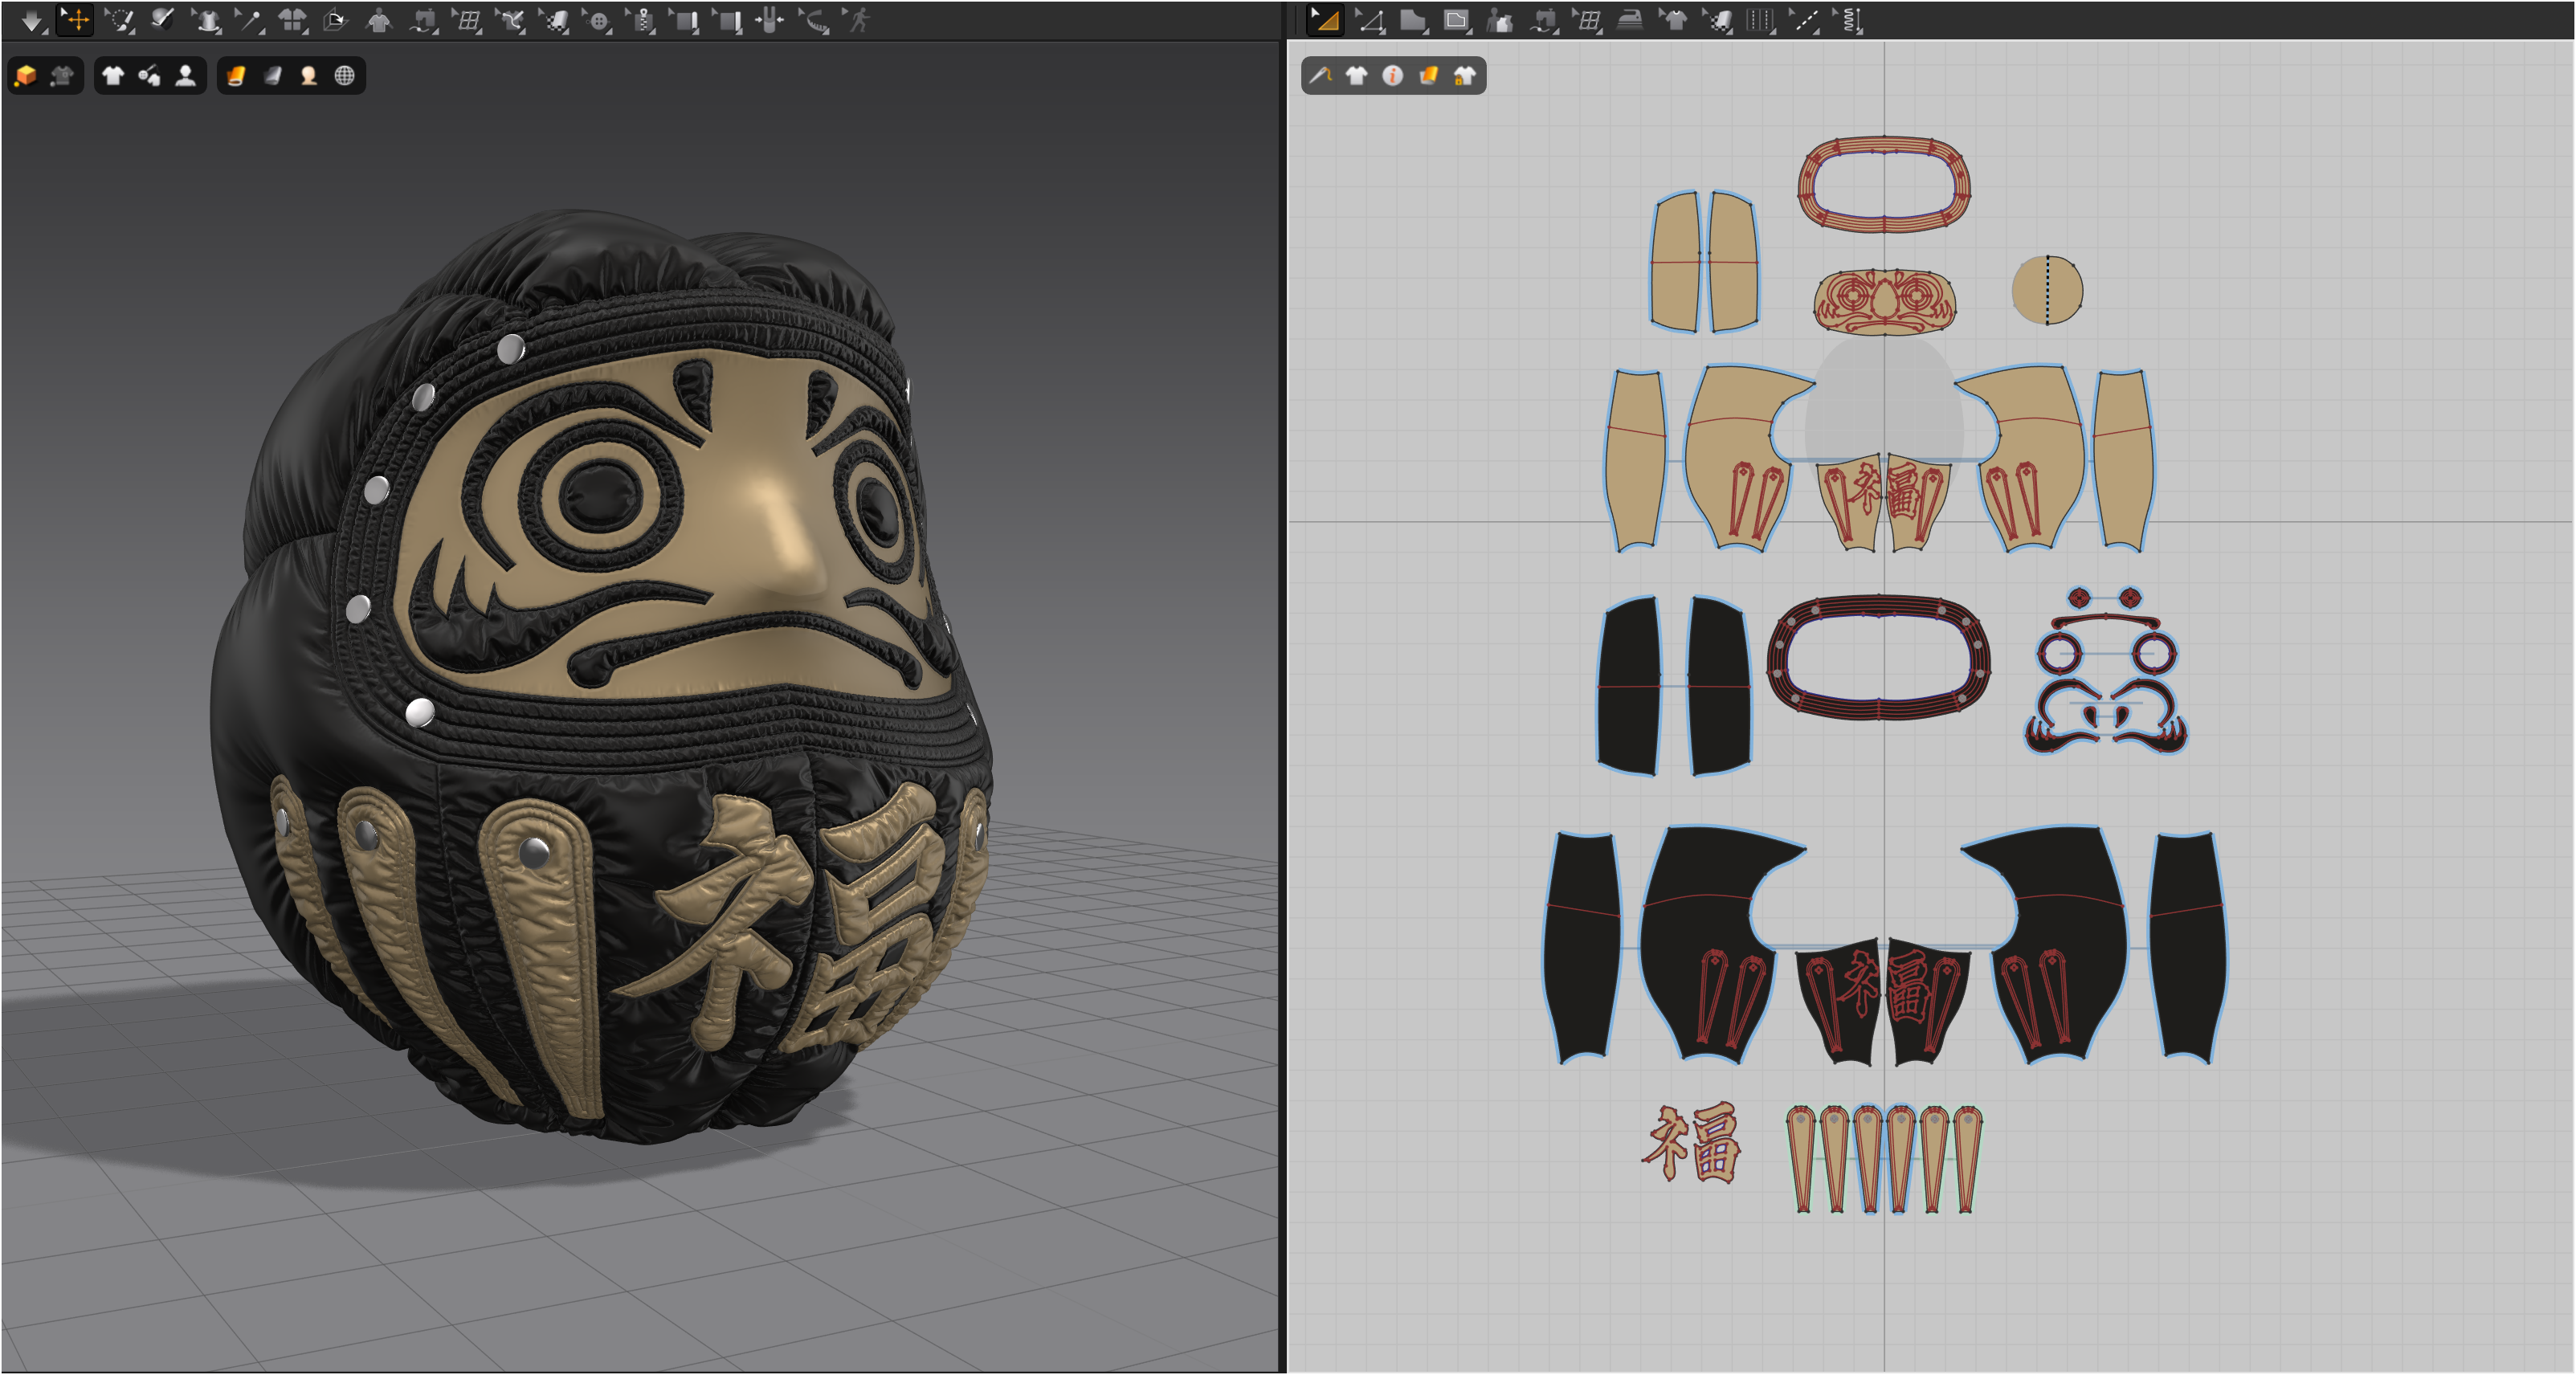
● Sew all the fabrics together and set the pressure of the outer fabric to "+10". Doing this allows you to express the puffiness of the down. Adjust the simulation while paying attention to the wrinkles caused by the seams and the swelling of the air-filled fabric.
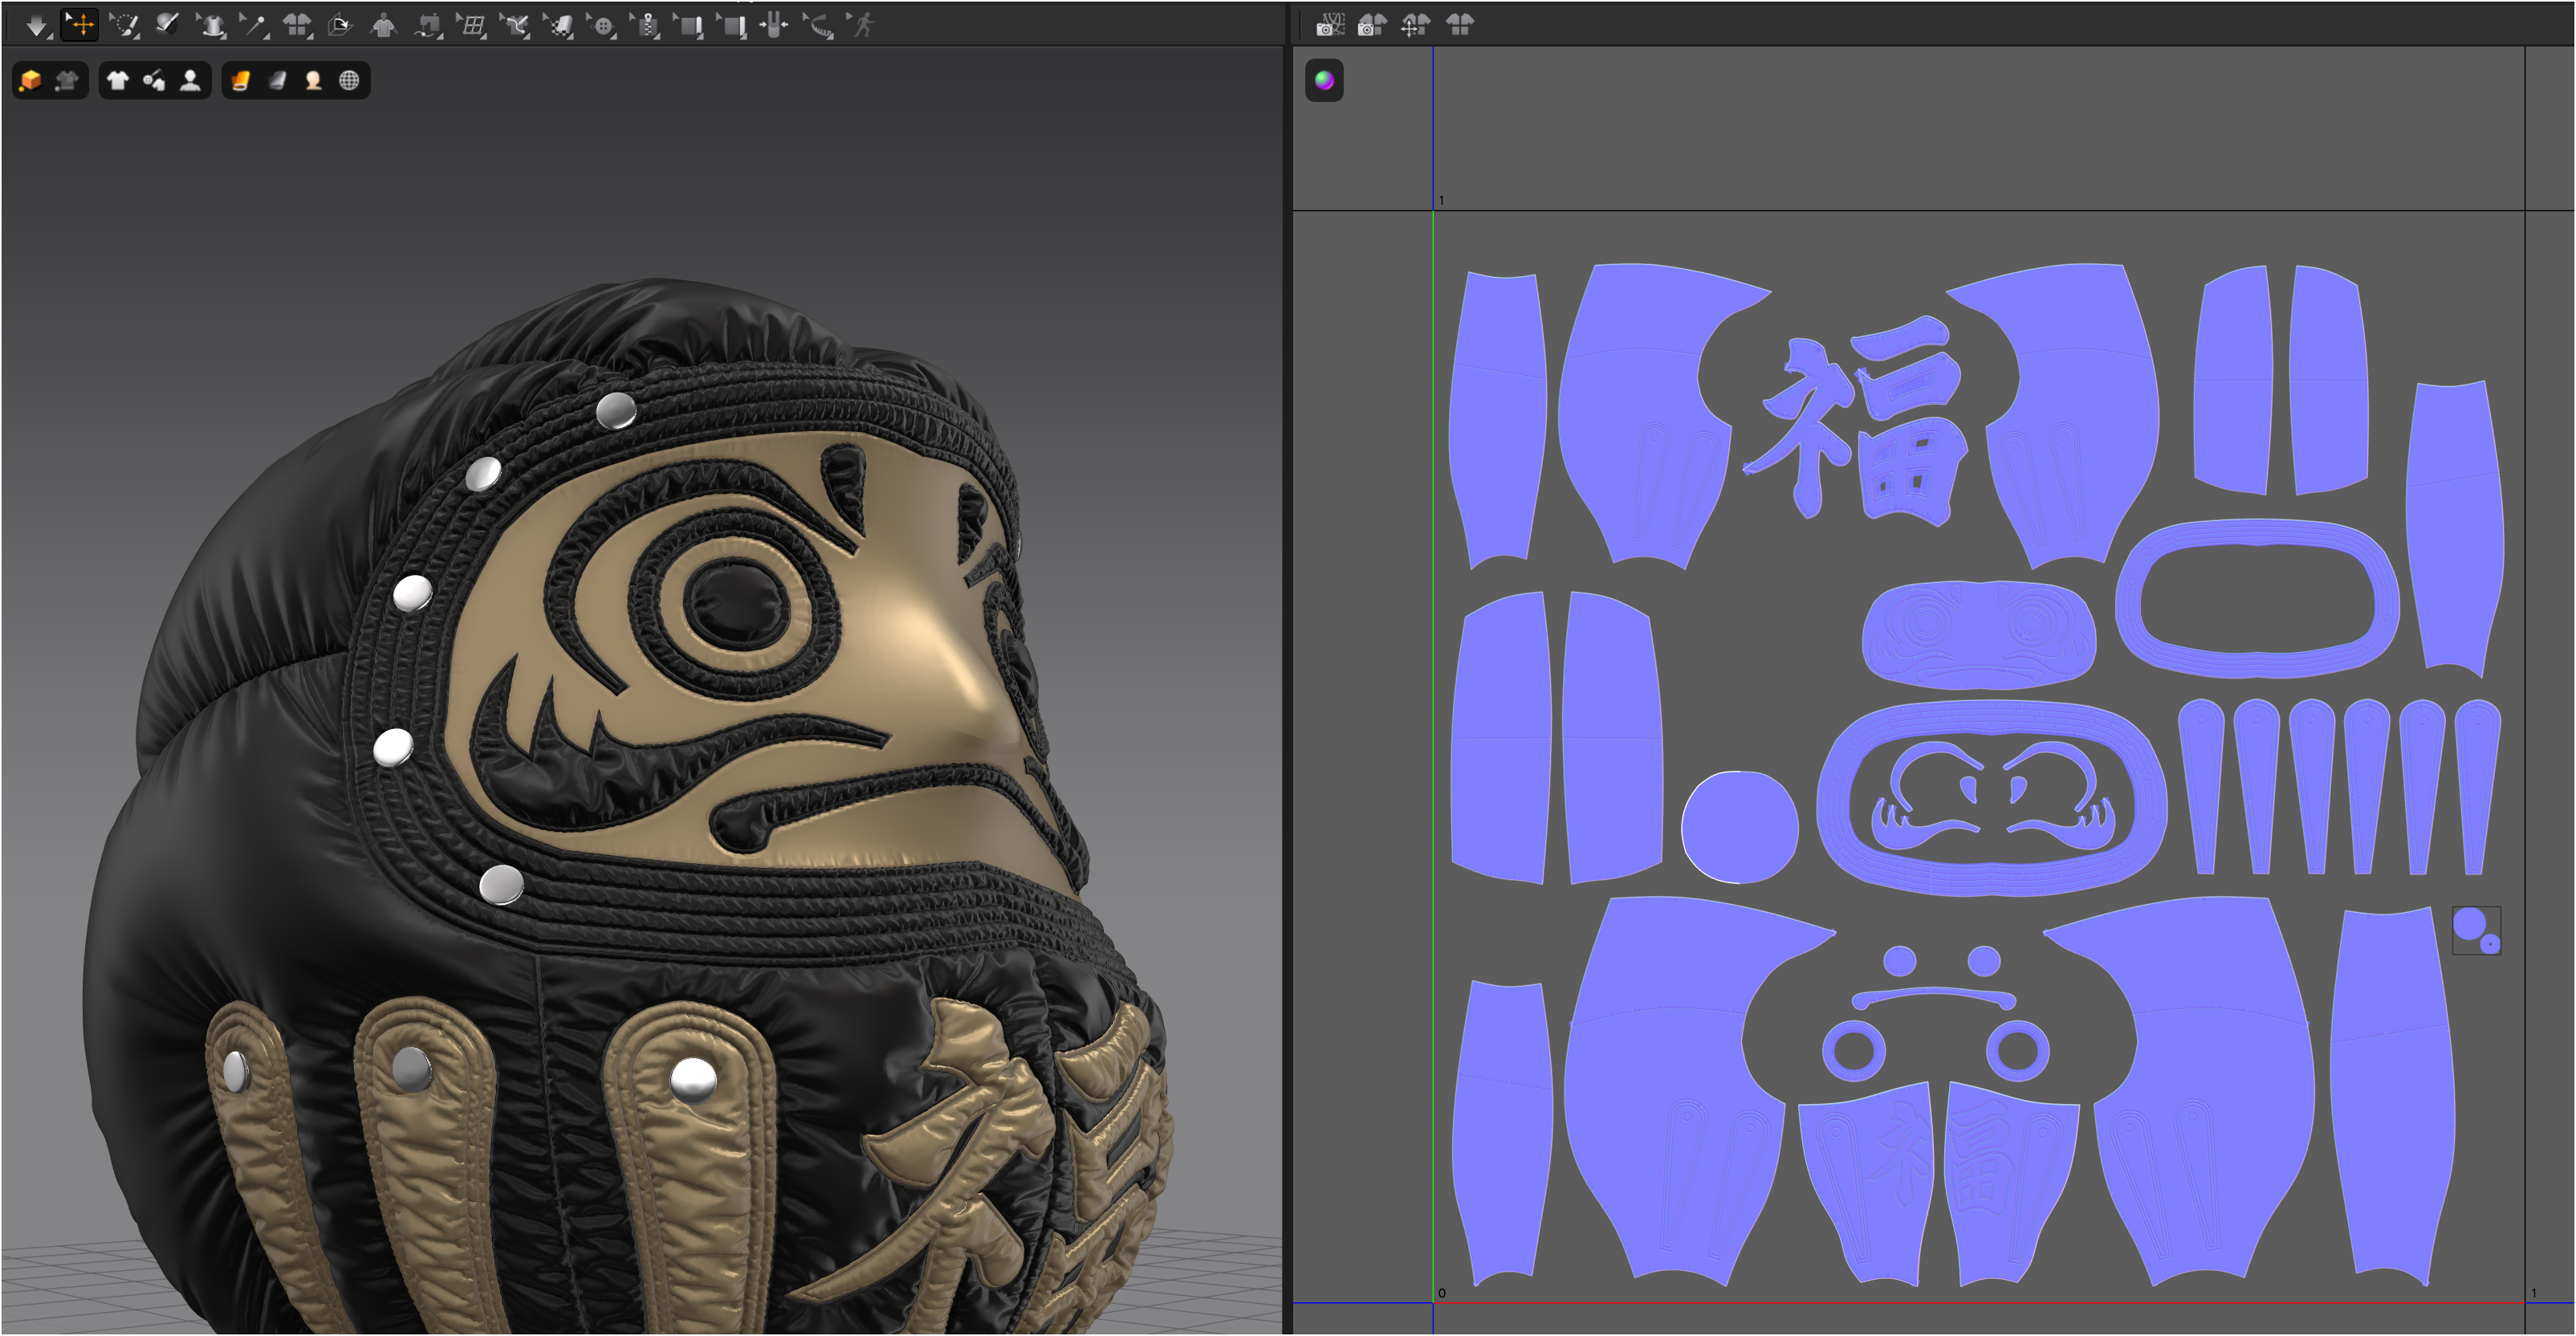
● Finally, apply Puckering where necessary. Set the particle distance of the outer fabric to "2mm".
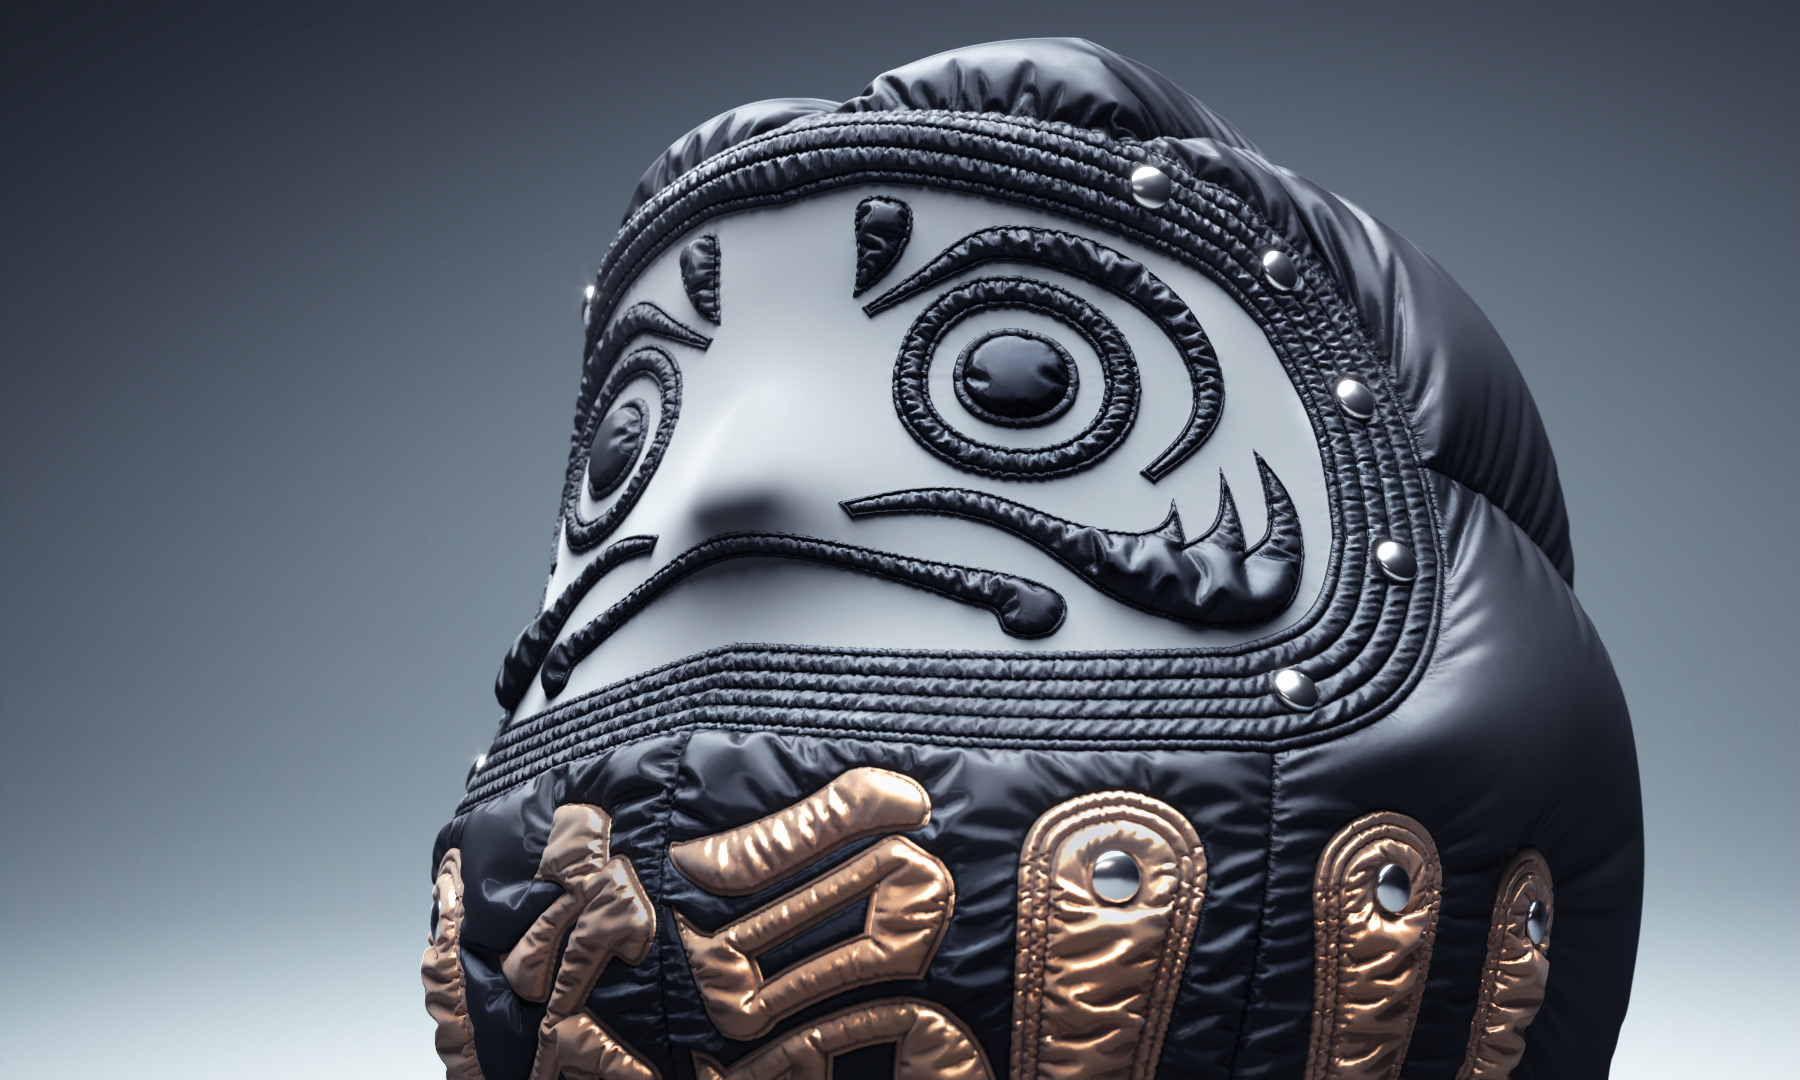
● Final Rendering: Rendered in Cinema 4D V-Ray.
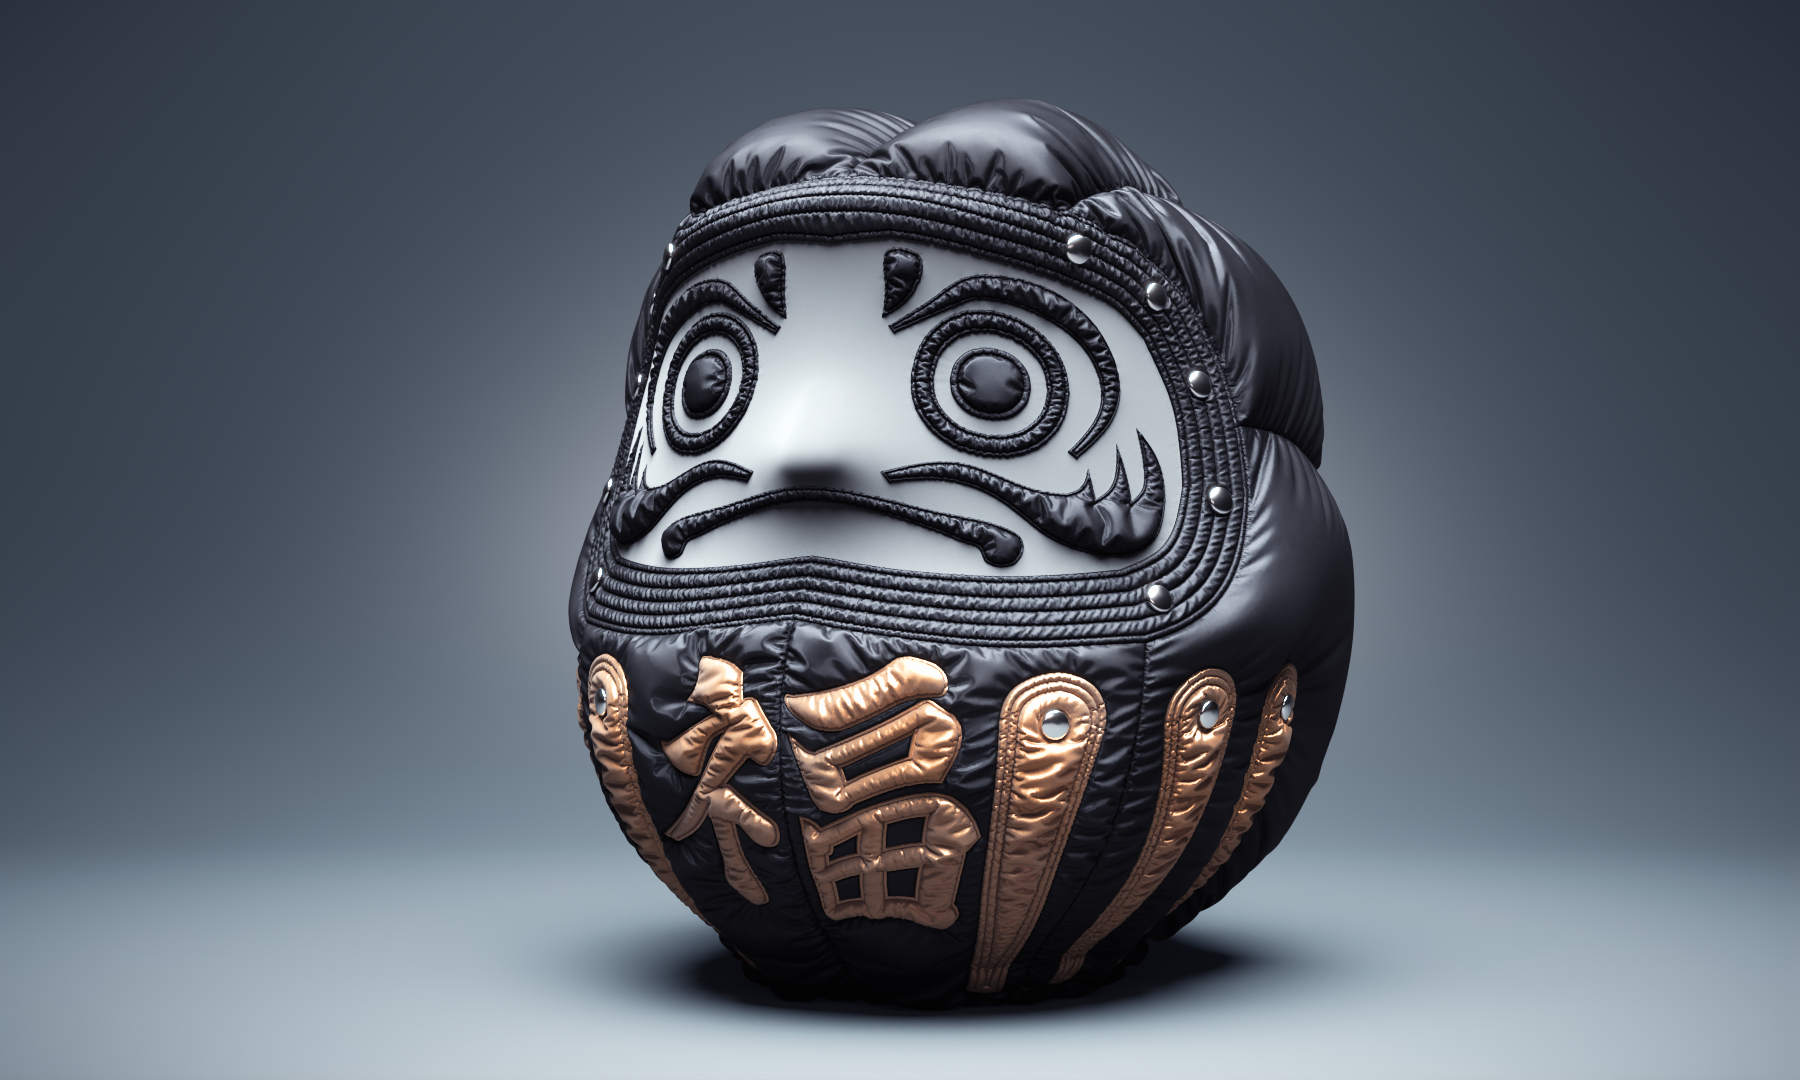
● Final Rendering
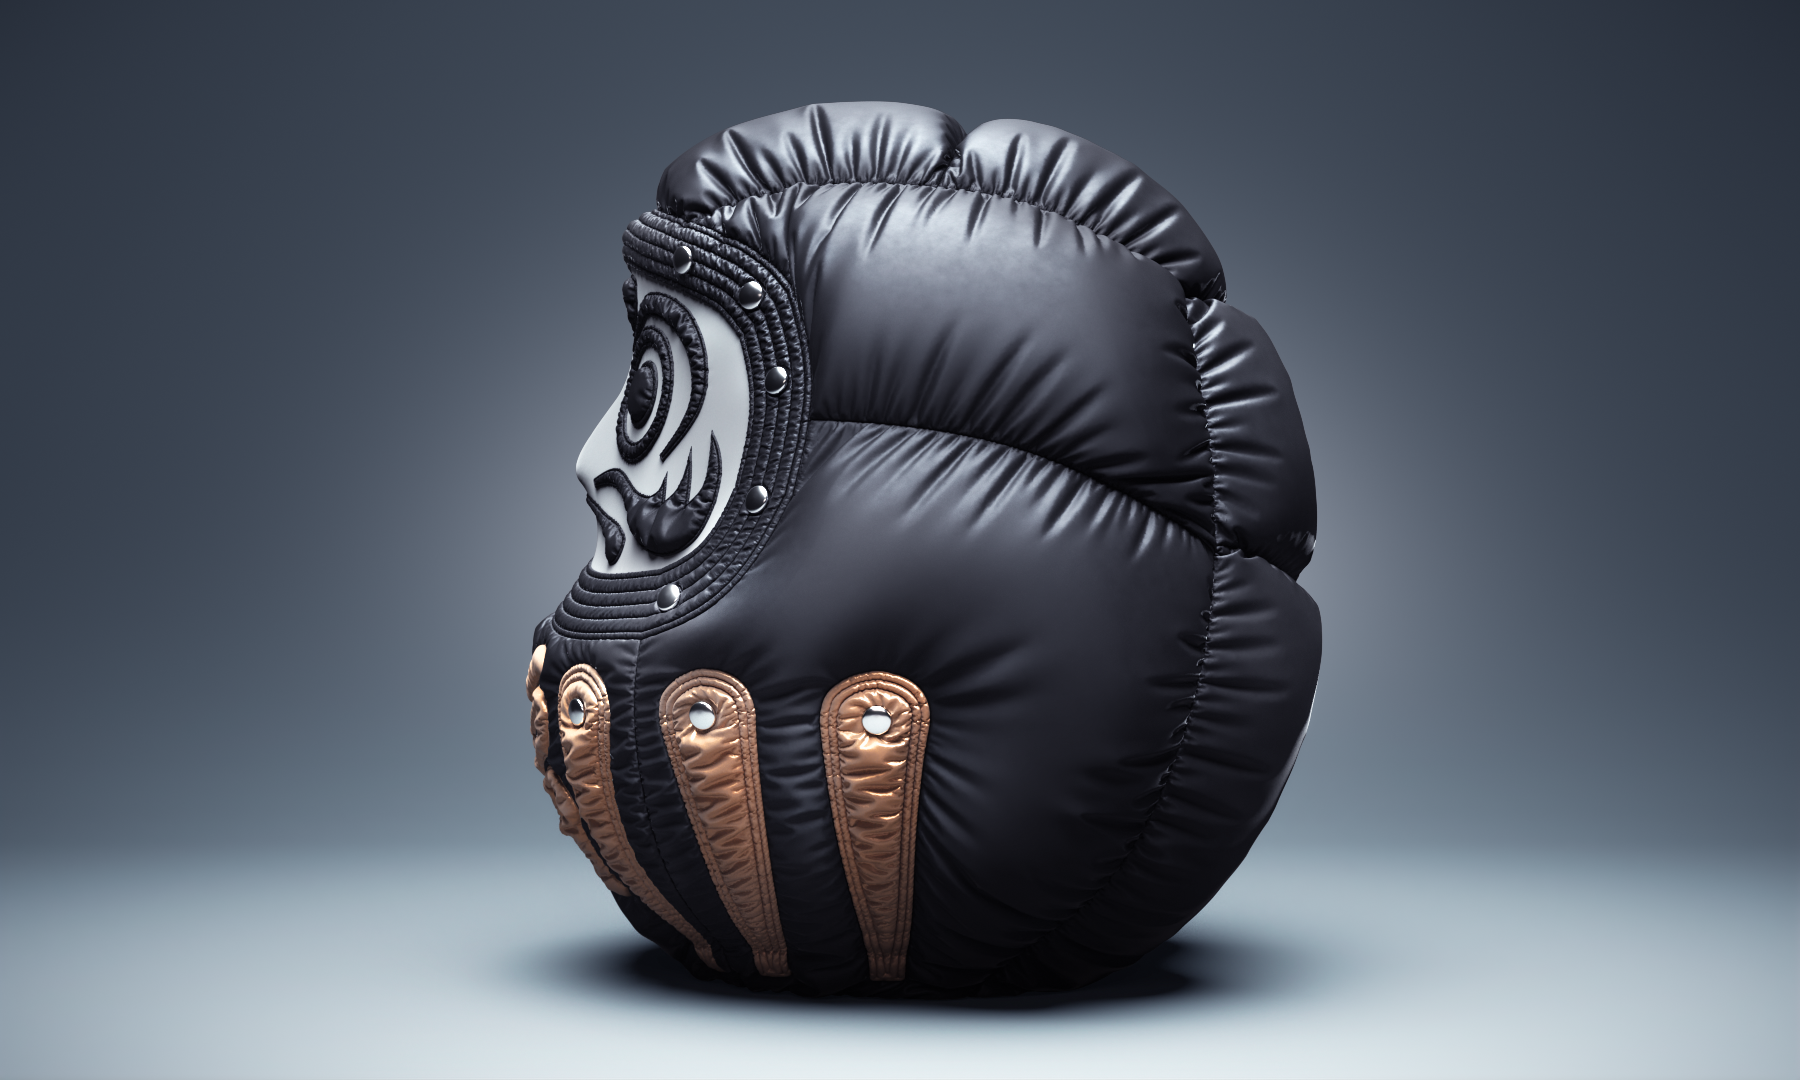
How did you achieve the deep, realistic quilting seams? How did you adjust the tension balance so that the Daruma didn't just look "baggy," but firmly "puffed up"?
I applied a puckering process using normal maps to the quilted areas. By setting a fine particle distance for the fabric, the seams form naturally even during the simulation stage, resulting in a realistic quilting expression.
To express the specific volume of a down jacket, I adjusted the fabric size and pressure in stages. First, I made the base fabric slightly smaller than the Daruma's shape and set the pressure to -10 to create a tight fit against the body. On top of that, I made the outer fabric larger than the base and adjusted its pressure to +10, which creates the voluminous, puffy look characteristic of down. If it puffs up too much, the overall silhouette collapses, so I repeatedly ran the simulation, checking the balance and making fine adjustments to achieve the optimal volume.
Please share any other tips or techniques regarding Marvelous Designer, or any advice for the community.
People often think it's difficult to create clothing without specialized tailoring knowledge, but Marvelous Designer is equipped with features that allow you to create patterns intuitively. This means you can start creating without necessarily having advanced knowledge of apparel.
I think if you start by using familiar motifs as your subject and get used to the controls, you'll soon be able to enjoy a wide variety of cloth simulation expressions. One of the great appeals of this tool is that it allows you to give shape to any "fabric-based idea," without being confined strictly to clothing. I hope you value free thinking and enjoy the creative process.
이 작업은 Cinema4D, Material, 3DPen, DownJacket, Daruma, Pattern 등의 기술로 제작되었습니다.
Marvelous Designer로 이와 같은 3D 의상·캐릭터 작업을 직접 만들어볼 수 있습니다.