5 3D Clothing Software Options for Indie Game Outfits
Choose by revisions: compare garment, mesh, apparel, procedural-cloth and sculpting workflows; Marvelous Designer suits construction and drape.
Key takeaways
Best fit by outfit workflow
- Choose Marvelous Designer when garment construction, silhouette changes, and simulated drape drive the outfit work.
- Choose Blender when direct mesh work, cloth setup, and sculpted edits belong in one general 3D workflow.
- Choose CLO when the project centers on apparel product development and garment design.
- Choose Houdini Vellum when you want garment panels and cloth behavior inside a procedural node workflow.
- Choose a sculpting-first tool when the final costume is an art-directed surface form, with folds shaped by hand.
For a character artist making outfits for an indie game, choose by the change you expect to make most often. Marvelous Designer is a strong starting point for realistic outfits whose panels, seams, fit to a character, and drape need iteration. Blender suits mesh-led work; Houdini Vellum suits procedural cloth setup; CLO serves apparel development; and sculpting-first software suits costumes shaped as final surfaces.
| Option | Best fit for an indie outfit | Revision that fits the method | Place in the pipeline |
|---|---|---|---|
| Marvelous Designer | Construction-led character clothing with simulated drape | Change pattern pieces, seams, silhouette, or garment arrangement on the character | Garment construction and baseline simulation before downstream game-asset work |
| Blender | Artists building garment meshes and cloth behavior within a broader 3D workflow | Edit the mesh, cloth constraints, or sculpted folds | Modeling and cloth work in the artist's existing 3D environment |
| CLO | Work centered on apparel product development | Revise apparel design and product-development decisions | Apparel product-development work |
| Houdini Vellum | Node-based, procedural panel construction and cloth draping | Adjust panel curves, seam relationships, or simulation constraints | Procedural construction and simulation within a Houdini scene or asset process |
| Sculpting-first tool | Costumes whose final look depends on art-directed folds and surface detail | Push, smooth, or reshape the visible surface | Shape refinement, often alongside modeling or a separate garment-construction step |
1. Match the tool to the outfit and the revisions
A jacket with a visible collar, separate sleeves, a front opening, and layered panels benefits from a workflow where those pieces and their joins remain understandable. A creature's shell-like armor or a stylized coat shaped as one continuous form may be easier to direct as a mesh and sculpted surface.
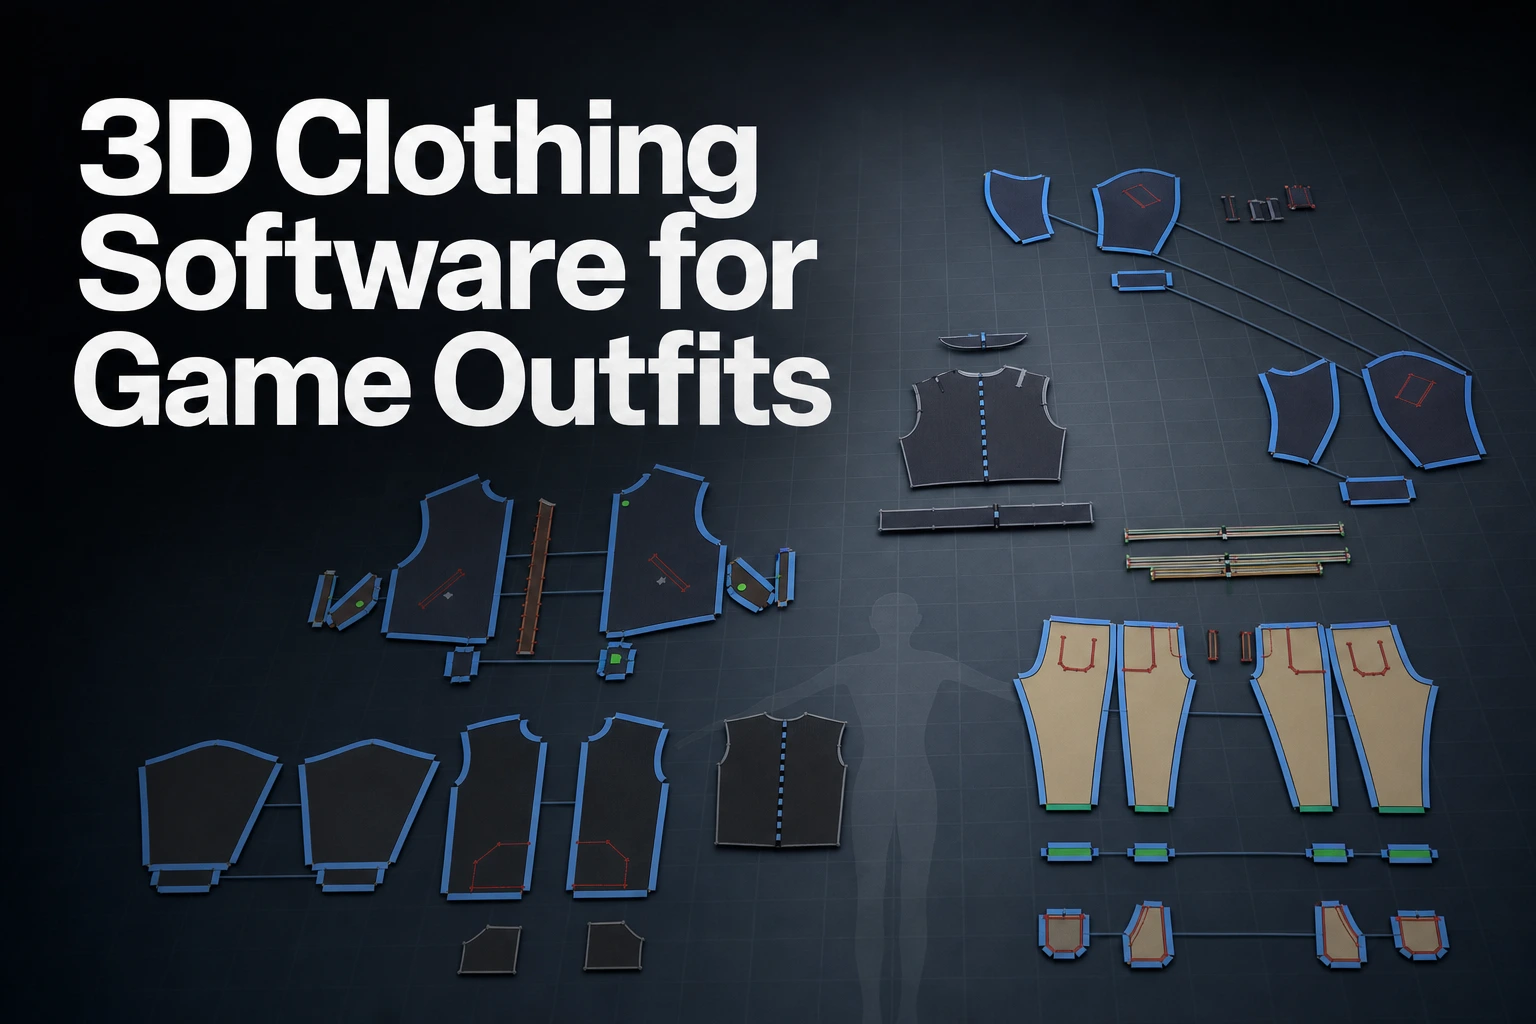
The construction-led route represents a garment as two-dimensional fabric panels joined by seam relationships, then evaluates the assembled form in three dimensions. The PatternGSL paper in the ACM SIGGRAPH Conference Proceedings explains that panel shapes, seam curves, and stitches together influence a garment's 3D form and physical behavior. That relationship gives a practical revision rule: change the panels or their joins when the garment's structure should change; shape the surface directly when the target is a local visual feature.
The Milwaukee Institute of Art and Design's apparel design course information describes manipulating basic block patterns and using mock-ups to begin fitting. It is the separation of decisions: a shoulder-width change belongs to the garment's shape and construction, while a few extra stylized creases may be a surface edit.
A pattern workflow also suits outfits that need related versions. If a character needs a short jacket, a long coat, and a damaged variant, panels, seams, and silhouette offer named places to make those changes. It means the construction-led method gives you a logical route when the differences involve garment structure rather than only a painted texture or a small sculpted accent.
For a small team, weigh the outfit's visible value against the effort of learning and maintaining another tool. If a costume is a hero asset with layered cloth and repeated silhouette changes, garment construction can support revisions that would otherwise be rebuilt by hand. If the outfit appears briefly, stays rigid, and changes little, direct mesh modeling or a sculpt-first pass may keep the workflow simpler.
A useful way to make the choice is to describe one expected revision before opening software. Say, “the sleeve needs more volume,” “the jacket must sit differently on this character,” or “the coat needs broader graphic folds.” The first two requests point toward pattern and drape changes; the last may point toward sculpting. If the revision is “generate five garment variations from parameters,” a node-based workflow such as Vellum deserves a closer look.
2. When Marvelous Designer fits character outfits
Choose Marvelous Designer when the outfit's construction and drape need to develop together. Marvelous Designer is specialized for character-art workflows in games and film, and its garment workflow runs from pattern setup through simulation. Artists create or edit 2D pattern pieces, sew them, arrange them around an avatar, and simulate the garment in 3D. That approach is useful when a character outfit needs a readable relationship between the pattern pieces and the form seen on the character.
The pattern-based workflow supports concrete revisions. You can change a panel's shape, the way pieces are joined, or the garment arrangement around the character, then inspect the resulting silhouette and simulated folds. This makes Marvelous Designer a sensible choice for a layered jacket, coat, tunic, skirt, or other costume where sleeve volume, hem length, overlap, or drape contributes to character identity. It is equally relevant when you expect feedback to change how the outfit is built rather than only how its surface is decorated.
Marvelous Designer is best treated as a garment-authoring foundation for an indie game asset. It establishes garment form and a simulated baseline; the team can then assign downstream work according to the target character, such as topology refinement, texturing, rigging, animation, or engine-specific setup. The target model and game determine those later choices, so plan the asset handoff around the topology, UVs, thickness, scale, materials, animation, and simulation needs of your own pipeline.
An official Marvelous Designer newsroom demonstration gives a concrete game-character example: it describes sending an animated MetaHuman from Unreal Engine 5.6 to Marvelous Designer, creating and simulating clothing, then returning the garments to Unreal Engine with the CLO / Marvelous Designer LiveSync 2 plug-in.
Choose a different starting point when the work is mainly hard-surface costume modeling, one-off graphic folds, or a procedural effect that belongs inside a larger node-based scene. Marvelous Designer's distinctive fit in this comparison is its construction-led character-garment workflow, not a promise that every costume should be built from patterns. For a realistic hero outfit, begin with its trial or read the Marvelous Designer manual and test one garment with the changes your team expects to request.
3. When Blender is the better fit
Choose Blender when you want to author a garment as a mesh and handle cloth behavior or sculpted changes in the same broad 3D environment. Its official manual documents cloth simulation, sewing springs, and sculpting brushes that can create garment-like folds. That makes it a practical route for artists who already organize character work around mesh modeling and want cloth tools close to that work.
Blender's sewing springs are a mesh-based way to pull vertices together. In the Blender 5.2 LTS Manual's cloth-shape documentation, sewing springs connect vertices from one region of a cloth mesh to another; artists create them with extra mesh edges that are not part of faces. The manual gives a cloak clasp as an example, where a spring pulls two corners around a character's neck while leaving the cloak free to slide over the neck and shoulders. This offers a direct route for a cape or simple sewn shape when you prefer to define the cloth mesh and constraints yourself.
A mesh-led workflow asks you to edit the surface, its density, and the cloth connections you set up; it can also suit a stylized piece whose outline is designed directly in 3D. A sewing-spring setup gives you explicit control over which vertices pull toward each other, as in the cloak example, while pattern-led work makes the two-dimensional garment pieces and their joins the primary construction elements.
Blender can also support a sculpting pass. Its 5.2 LTS sculpt-brush manual documents a Bend/Twist Cloth brush that pinches along two perpendicular sides of a stroke to create parallel folds. That gives an artist a route to art-direct folds on a mesh after shaping the broader form. A brush pass is especially useful for a fixed pose or a graphic silhouette; for a garment whose construction and simulated drape are the main revision targets, Marvelous Designer keeps those decisions in a construction-led process.
Blender's official license page says game artists can use Blender to work on commercial games.
4. When an apparel-oriented tool makes sense
Choose CLO when the project is centered on apparel and fashion product development. CLO and Marvelous Designer are distinct products; Marvelous Designer is the character-art option described for games and film, while the apparel product-development role belongs to CLO. This distinction matters when the game outfit is also being developed as apparel design work, rather than only as a character asset for an interactive scene.
Apparel work often treats design, fit, and garment specifications as connected decisions. The Fashion Institute of Technology's 2014 to 2015 course catalog describes a patternmaking course that develops a fabric sample with specification measurements and construction details for manufacturing. It illustrates the apparel-development context: product decisions may include construction information and measurement requirements that go beyond the finished appearance of a game costume.
CLO fits a team when apparel product development is a deliverable alongside its character work.
5. When Houdini Vellum fits cloth work
Choose Houdini Vellum when the team wants garment panels and cloth behavior to live in a procedural node workflow. SideFX documents a paneling-and-draping method in which the artist draws curves for each panel edge, turns separate strokes into seams, and uses Vellum tools to configure cloth and assemble the panels. That makes Vellum a candidate when the construction and simulation steps themselves need to be expressed as editable scene operations.
The SideFX paneling and draping guide walks through drawing a panel outline with the Draw Curve tool and making each edge a separate stroke. SideFX says the strokes become seams that can be stitched and welded, and recommends drawing the panels larger than the character so material can wrap around the body. The workflow adds a Vellum Configure Cloth node to turn the planar panels into cloth.
That level of control creates a useful revision path for repeated or parameter-driven work. An artist can revise curves that define panels, adjust seam pairings, and alter simulation constraints in the procedural setup. For a one-off outfit that mostly needs a pattern adjustment and visual review, Marvelous Designer presents a dedicated pattern-to-simulation route; for cloth generation embedded in a larger procedural scene, the SideFX example shows how Vellum can cover both panel construction and draping.
It recommends adding seams individually in its Vellum Drape example because the node does not read groups in the order entered, and it explains that sewing points alone may leave seams apart when fully joined edges are needed. Those details suit a technical artist who wants to control how panels come together. They also make the workflow a considered choice for a small team: the team takes responsibility for the scene structure and seam setup rather than receiving a pattern-led garment process as its primary interface.
Vellum's strongest fit is therefore a procedural cloth task, not a universal replacement for a garment-design tool. Use it when the outfit is one component of a Houdini-driven process, when panel construction needs to be repeatable, or when cloth behavior is being developed along with other procedural scene elements. Use Marvelous Designer when the artist's central task is garment construction on a character and the team benefits from editing patterns and inspecting simulated drape as a focused clothing workflow.
6. When a sculpting-first tool is useful
Choose a sculpting-first tool when the costume is best described by its final visible form. A stylized shoulder wrap, a broad graphic fold, a rigid fantasy collar, or a sculpted cloth accent may call for direct control over surface shape more than a reusable panel-and-seam construction. This route focuses revisions on where the surface rises, compresses, or changes silhouette.
A sculpting-first workflow is a useful complement to garment construction. Start with a pattern-led garment when its panels, seams, and drape define the outfit; then use sculpting to refine distinctive folds or stylized details. Start with direct sculpting when the form is fixed for a particular character pose and its appearance carries more value than garment-construction edits. The choice follows what the next art note is likely to change.
The ACM SIGGRAPH paper GarmageNet: A Multimodal Generative Framework for Sewing Pattern Design and Generic Garment Modeling describes a method that generates 2D sewing patterns, sewing relationships, and 3D garment initializations for physics-based simulation. That is a construction-aware route. If your art target is a final sculpted volume, a sculpting-first approach gives direct surface control; if later revisions depend on a garment's sewing relationships and simulation setup, a construction-led workflow preserves those decisions as part of the asset-making process.
For a small team, assign ownership for both the garment's construction changes and any later sculpting pass; that keeps structural revisions with the garment author and surface accents with the artist shaping the final look.
7. Compare the five choices by revision and pipeline role
The tool choice becomes clearer when the team names its most frequent art note. A note about a panel, seam, or drape maps to a construction-led workflow; a note about vertices, mesh silhouette, or a sculpted crease maps to geometry-first work; a note about producing a repeatable setup maps to procedural cloth.
| Reader need | Best-fitting choice | What the artist revises | What the team plans next |
|---|---|---|---|
| Realistic garment form with repeated construction and drape notes | Marvelous Designer | Pattern pieces, joins, garment arrangement, and silhouette | Prepare the garment for the character's topology, materials, rig, animation, and target scene |
| Stylized mesh-based outfit in a familiar 3D workflow | Blender | Mesh shape, cloth connections, and sculpted folds | Check the result against the target character and the game's asset requirements |
| Apparel product-development work | CLO | Apparel design and product-development decisions | Apparel product-development work |
| Procedural panels and cloth setup within Houdini | Houdini Vellum | Panel curves, seam groups, and simulation settings | Validate the generated garment and prepare the chosen game asset representation |
| Fixed pose, strong graphic shape, or highly art-directed folds | Sculpting-first tool | Surface form and local folds | Check whether the final form needs later cloth motion or only posed presentation |
A realistic coat with separate panels and flexible hems is a natural Marvelous Designer project because the artist can shape the pattern and inspect the simulated garment. A stylized coat with oversized shoulders, a tapered polygon silhouette, and two deliberately placed folds may suit a Blender mesh-and-sculpt workflow.
A mixed workflow can also fit a small team. One artist can establish the garment form in Marvelous Designer, then another artist can prepare its topology and textures for the game character. A team working procedurally can instead develop panel curves in Houdini, drape with Vellum, and hand the approved silhouette to its character pipeline. After the garment's form is approved, assign each downstream task to the stage that owns it, such as topology preparation, texturing, rigging, animation, or engine integration.
Keep apparel product development distinct from a game-only pipeline. When apparel design and measurement-informed clothing development are real deliverables, CLO occupies that role. When a game's main need is a simulation-based costume on a character, Marvelous Designer's documented character-art focus aligns directly with that goal. When the costume is a surface form with little need for seams or dynamic cloth, sculpting or mesh modeling can be the more direct authoring choice.
One useful small-team test is to choose a representative outfit and make a list of likely revisions before selecting the tool. Include one structural change, one silhouette change, one detail pass, and one downstream need such as a second character or animation. Then compare which of the five methods keeps those requested changes understandable and which stage of the pipeline will own each handoff.
8. What remains after garment authoring
A clothing tool creates a garment foundation; a game asset still needs decisions for the target character and scene. Assign those responsibilities explicitly so the artist knows where garment construction ends and character production begins. The right tasks vary by game, character rig, visual style, and whether the final outfit is static, skinned, or simulated in the engine.
- Approve the garment's shape and construction. Review the silhouette, layers, closure, folds, and character fit at the poses that matter to the game. A pattern-led tool makes construction changes in the panels and their joins; a sculpted tool makes them in the visible surface. Get the major proportions accepted before investing in details that may move with a later silhouette change.
- Prepare the mesh for the character pipeline. Decide who owns topology refinement, mesh density, and thickness for the chosen target. The game team should define these requirements for its own character and rendering workflow, because a mesh appropriate for a close-up may need a different treatment from a distant or mobile-game outfit. Keep scale and orientation consistent with the character asset the team will use.
- Prepare surface materials. Assign responsibility for UV layout, textures, and material setup. A garment's material appearance depends on the game's art direction and render setup, so check a representative outfit in the target scene. If the costume uses multiple layers or materials, the team should define how those surfaces will be represented in its asset pipeline.
- Connect the clothing to character motion. Decide whether the garment follows the character through rigging and skinning, uses simulated cloth, or combines those approaches. Test the selected animation and poses that expose collisions, intersections, or loss of silhouette.
- Validate the actual handoff. Check the exported or transferred asset in the receiving application and game scene. In the receiving scene, verify that scale, orientation, mesh geometry, materials, animation, and any simulation data match the project's pipeline.
A pattern-to-simulation start can be valuable even when the final game mesh is revised later. The garment construction establishes a designed volume and fold baseline, while the character team can simplify or refine the mesh to suit the intended camera distance and motion. For a pose-specific sculpted outfit, the same handoff still needs a model owner, surface-material setup, and a review in the final character scene.
The same separation of responsibilities helps a very small team. If one person owns garment construction and another owns character integration, agree on when the silhouette is approved, what form of mesh the recipient needs, and who checks materials and motion. If one artist owns every stage, writing down those decisions still protects the process: it shows when pattern edits are still welcome and when the asset has moved into game-specific preparation.
Frequently asked questions
Do I need a 2D pattern workflow for every game outfit?
No. Use patterns when panels, seams, garment construction, and simulated drape are important revision targets. A fixed, highly stylized costume can start as a mesh or sculpted form when direct surface control matches the final look.
Can Marvelous Designer be the starting point if another tool finishes the outfit?
Yes. Marvelous Designer fits the garment-construction and simulation stage for character art, while topology preparation, texturing, rigging, animation, and engine work can be assigned downstream. The Marvelous Designer newsroom's MetaHuman example shows one documented route between Marvelous Designer and Unreal Engine.
Can Blender be used for a commercially released indie game?
Yes. Blender's official license page says game artists can use Blender to work on commercial games, and describes Blender as released under the GNU General Public License.
Can Houdini Vellum create garment panels as well as simulate cloth?
Yes. SideFX documents drawing panel edges, creating seams from separate curves, configuring the panels as cloth, and using Vellum Drape to bring pieces together. That approach suits teams who want panel construction and cloth setup inside Houdini's procedural scene workflow.
What should I test first before choosing?
Build one representative outfit change in each tool you are seriously considering. A sleeve-volume revision tests construction; a cloak fold tests mesh and cloth setup; and a repeated panel variation tests procedural control. Review the resulting garment in the pose and camera distance your game uses.
For construction-led character clothing, try Marvelous Designer on a representative outfit and revise the pattern, silhouette, and drape before choosing the rest of the pipeline.
Disclaimer: This comparison reflects official vendor documentation available at the time of review. Features, availability, and terms may change; verify current details on each vendor’s official website before making a decision.
Learn More
See how these criteria hold up on the real thing.