Not Just Clothes – Designing Plush Characters with Marvelous Designer
Discover how plush artist Lizichuan uses Marvelous Designer to bring his favorite characters to life — one stitch at a time. From digital patterns to real-world softness, his workflow bridges the virtual and the handmade.
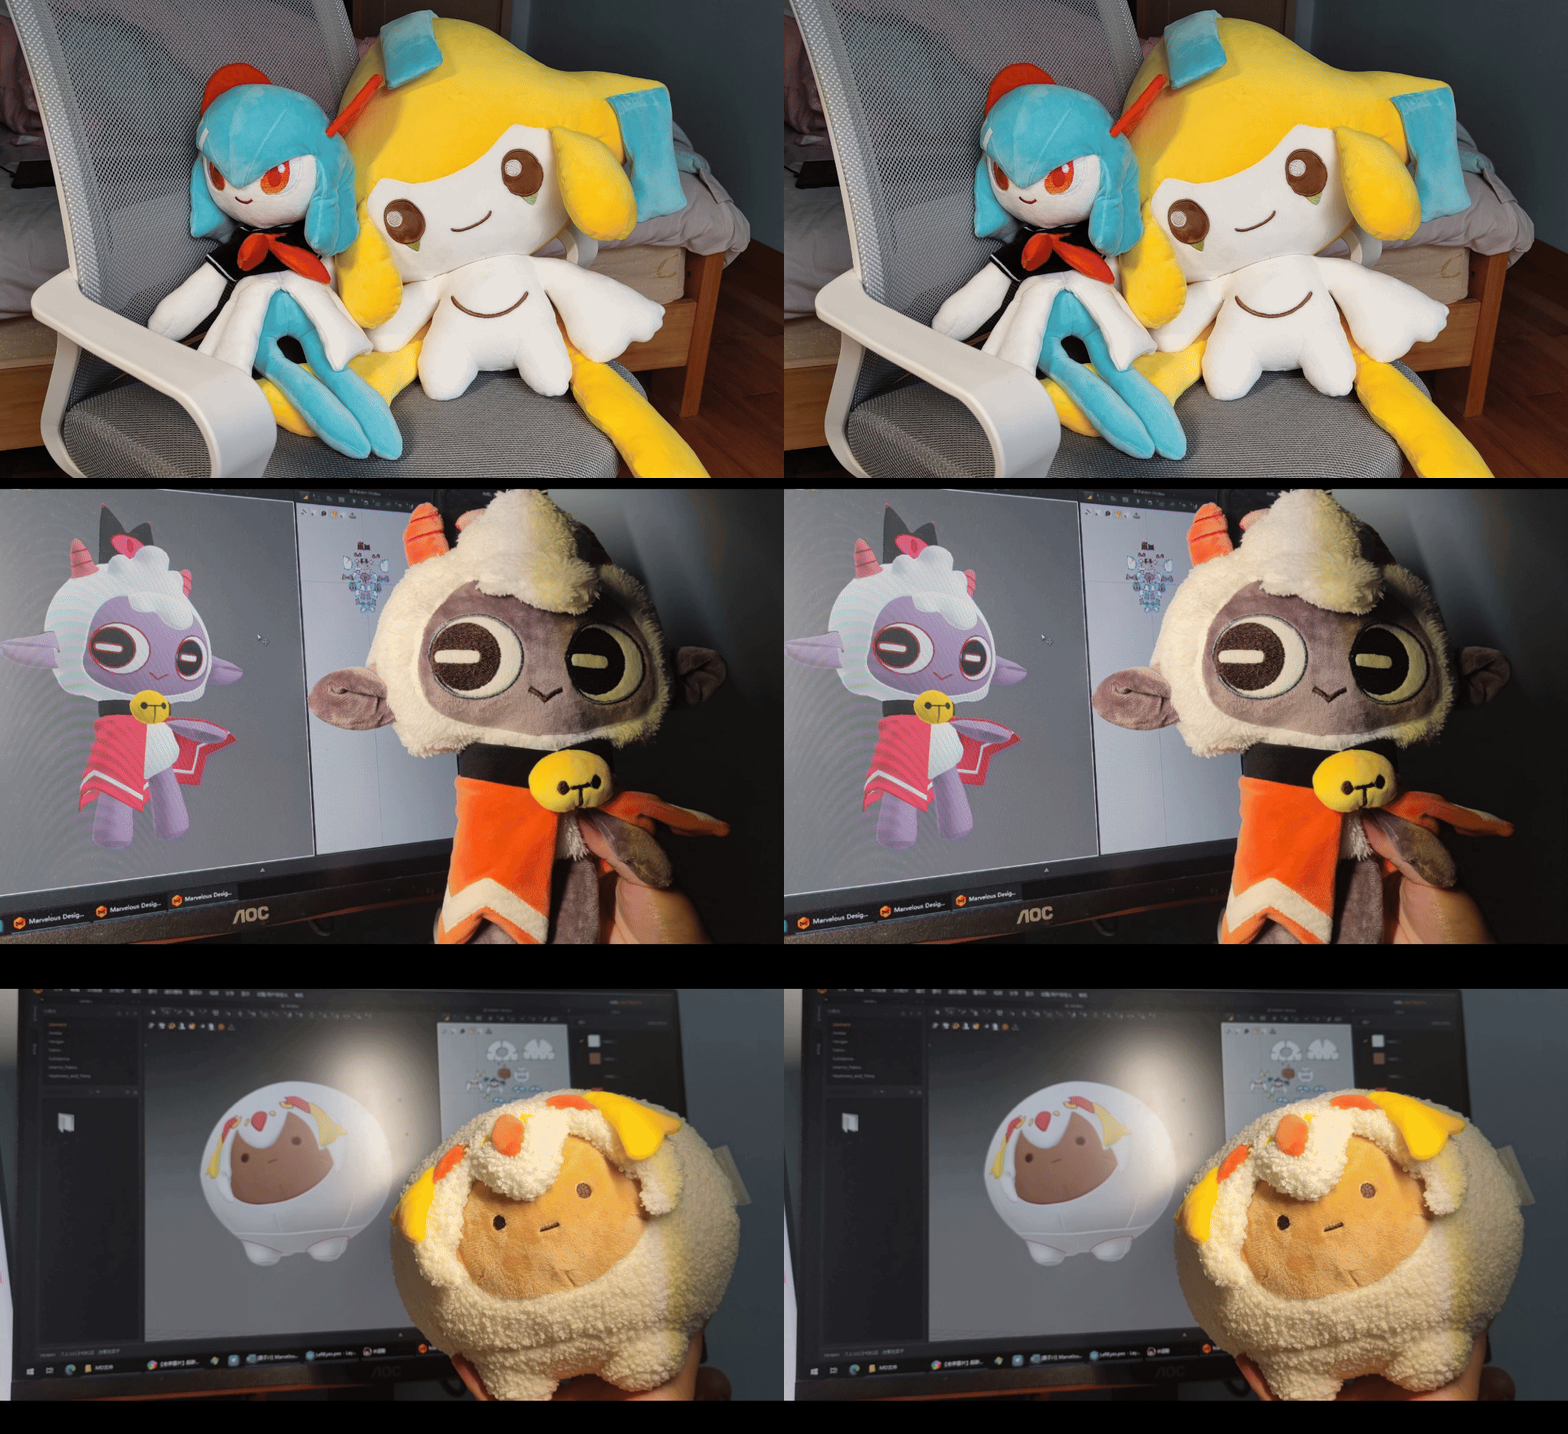 Interview with Lizichuan | Visual Artist
Please introduce yourself to the Marvelous Designer community.
Hi everyone, I’m Lizichuan from China. I’m a visual artist with a deep passion for crafting, illustration, and gaming. I’m particularly drawn to characters that combine both cuteness and non-human elements, and I’m inspired by art styles that merge Western cartoon dynamics with Japanese aesthetics—such as Splatoon, Made in Abyss, and works from Studio Trigger. Influenced by the Brony community and fellow Pokémon fans, I spend my spare time creating plush toys based on my favorite characters. Through my work, I hope to capture their most beautiful moments and bring them to life in the real world.
Right now, I’m using Marvelous Designer to help me bring that dream closer to reality.
Can you tell us how you got started with plush-making and how Marvelous Designer became part of your workflow?
My journey began when I came across the brony community, where I discovered many talented plush artists creating exceptionally high-quality pony dolls. Back when I was still in university, I started experimenting with making plush toys of my own. However, without access to a sewing machine or embroidery machine, I could only dabble at a very basic level.
After starting my career and acquiring my own equipment, I decided to revisit plush-making more seriously. However, pattern drafting proved to be particularly time-consuming and technically demanding. In China, it’s also difficult to find relevant tutorials online. Courses related to plush design are typically part of vocational education, which means that unless you’re enrolled in a related program, you would need to learn through long-term in-person apprenticeship with experienced pattern makers.
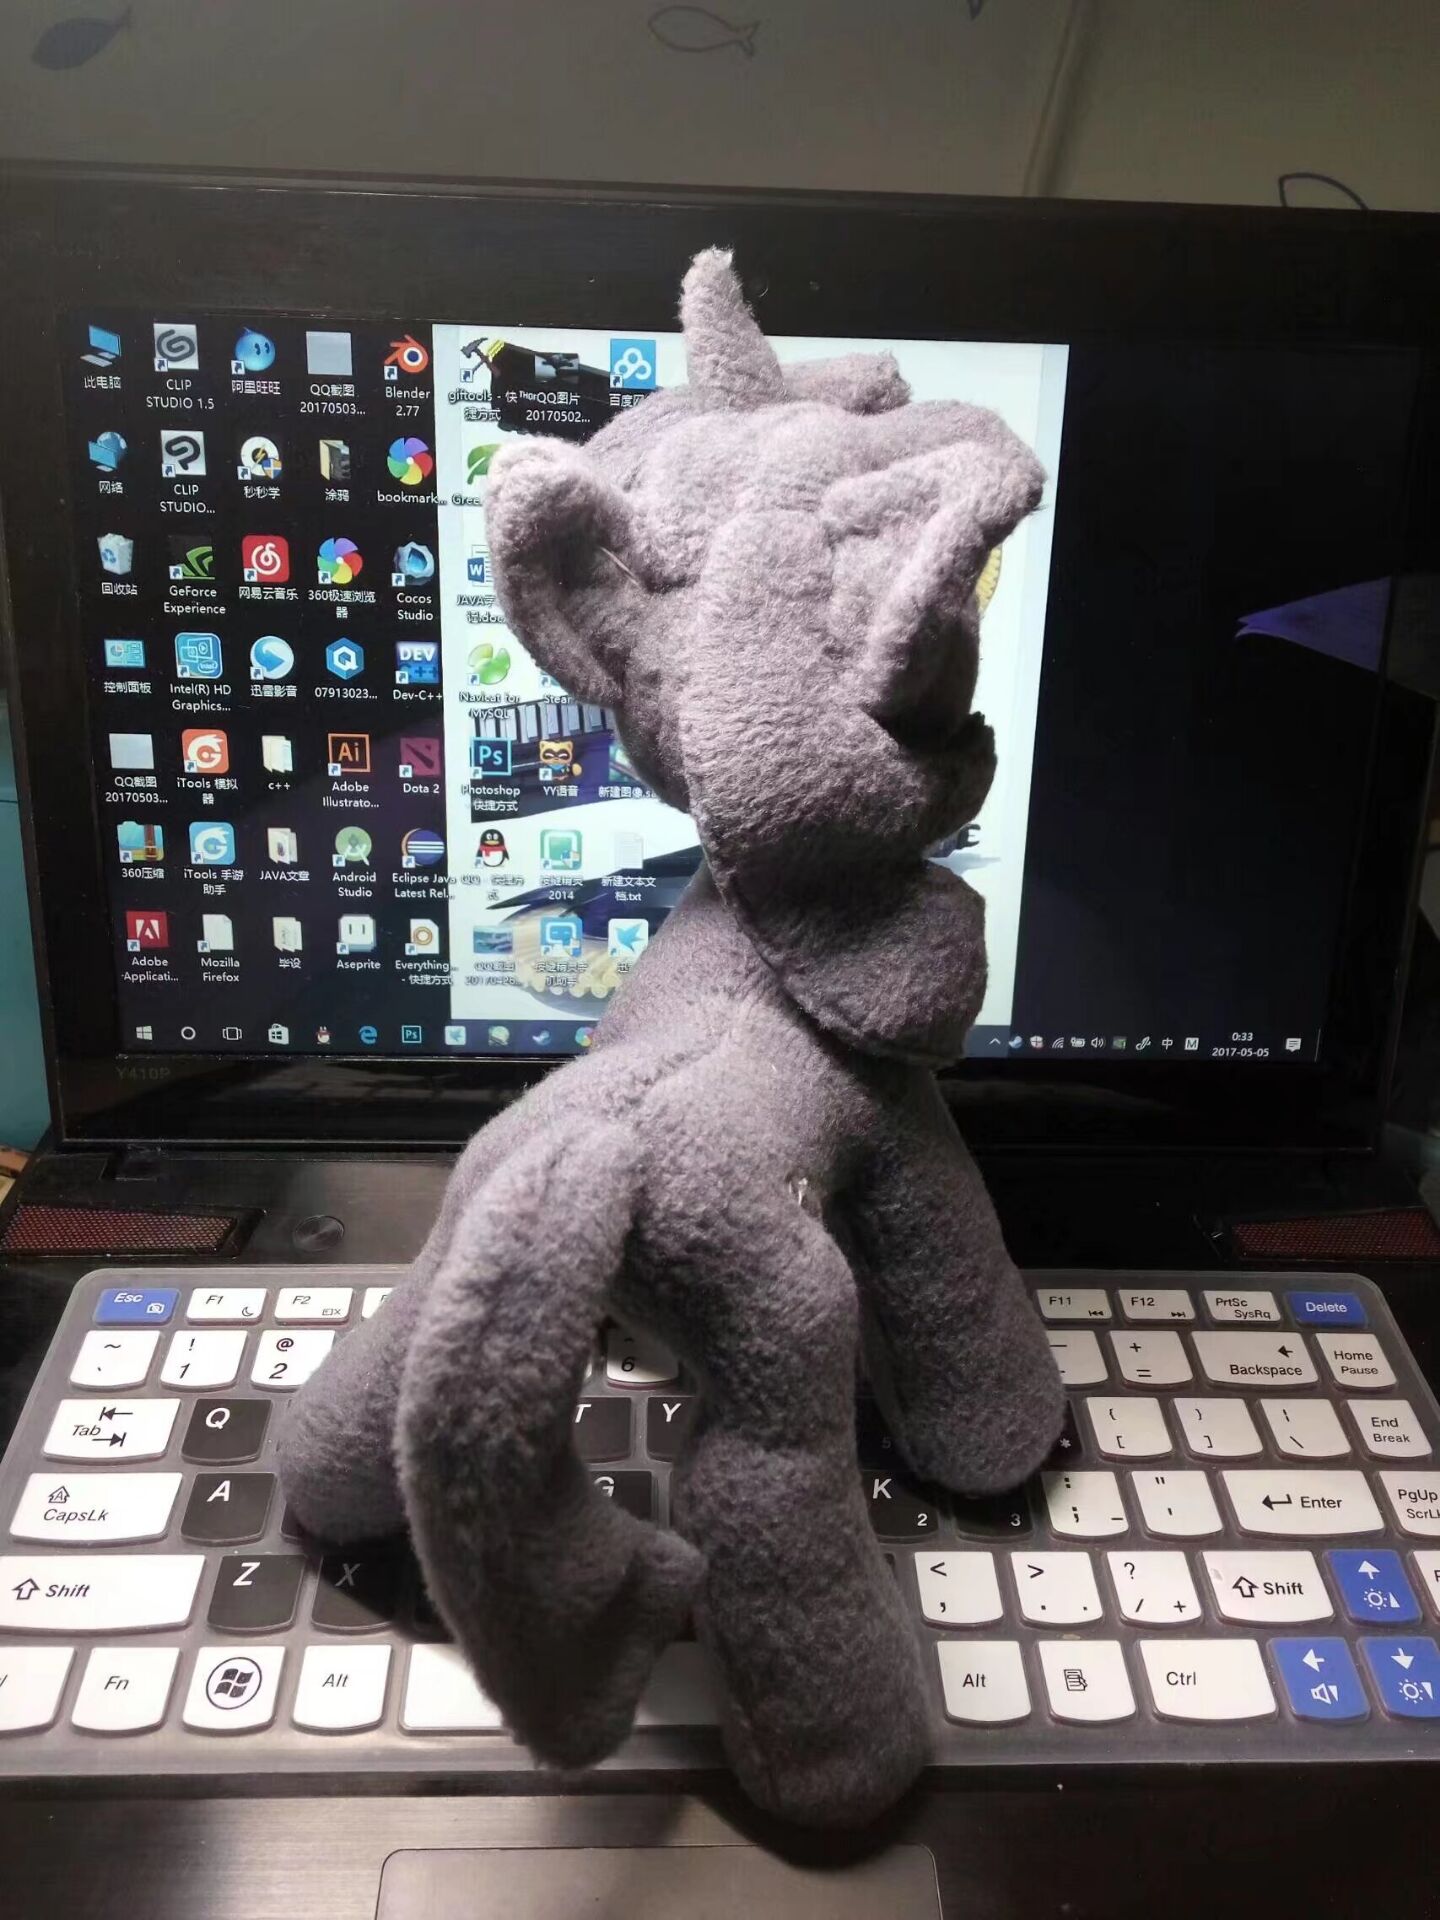
Additionally, due to generational and aesthetic differences, it’s often challenging for factory-employed pattern makers to fully understand the characters and styles I love. I had to rely on myself. At first, I tried a cloth simulation plugin in Blender, but the results weren’t ideal. Another method I attempted involved sculpting the desired shape using modeling clay, wrapping it in masking tape, and then cutting it to derive a pattern — but that approach didn’t allow for the complexity I was aiming to achieve.
Since I don’t have a background in traditional 3D modeling, I asked a colleague from my company’s 3D team if there was any software that could help unfold a 3D surface into a 2D pattern based on marked seams. That’s when they recommended Marvelous Designer. Initially, I wasn’t sure if it would work for plush-making, but while researching tutorials on Bilibili, I came across a rabbit plush tutorial that revealed the software’s potential in pattern development.
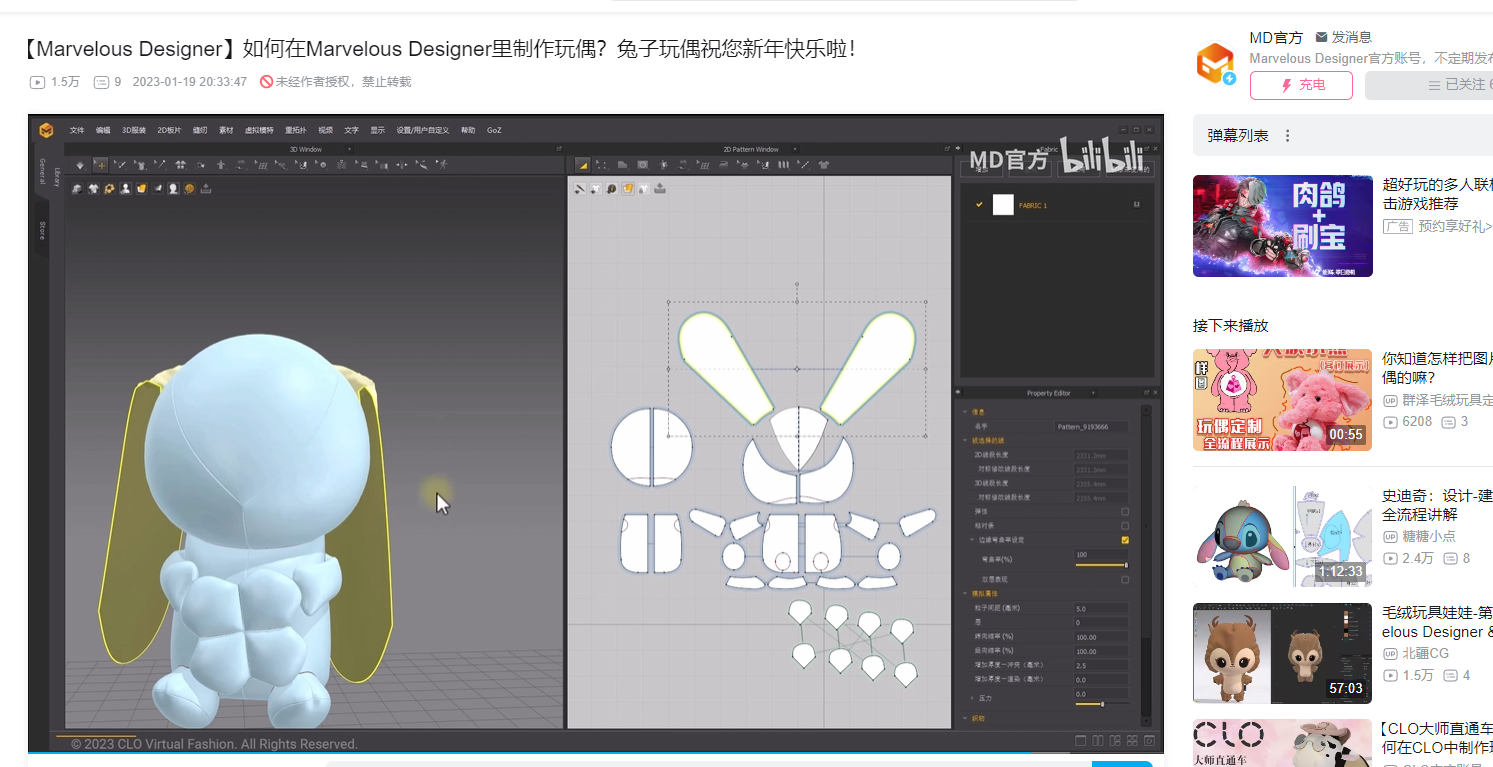
After learning the basic operations — like creating pattern pieces and sewing them together — I started practicing by replicating some free, publicly shared patterns I found online. Once I confirmed that the full workflow was viable in MD, I began developing my own designs.
How do you usually plan your creative process?
For me, a full workflow generally includes the following steps, although some of them may occasionally overlap:
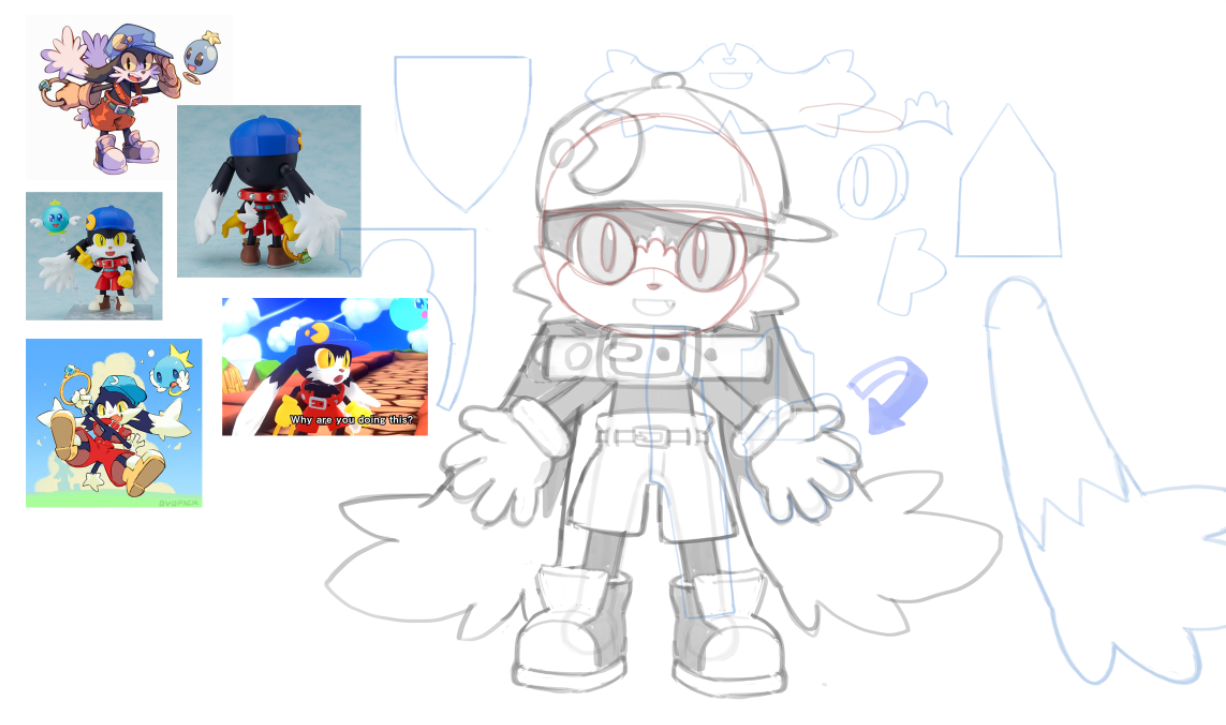
Conceptual Design – I start by designing and drawing a front and side (or three-view) sketch of the plush. These drawings don’t require shading or highlights — just clear structural outlines. If you have strong spatial awareness and experience, this step can sometimes be done mentally or by using reference images directly in Marvelous Designer, adjusting proportions according to your preferred art style.
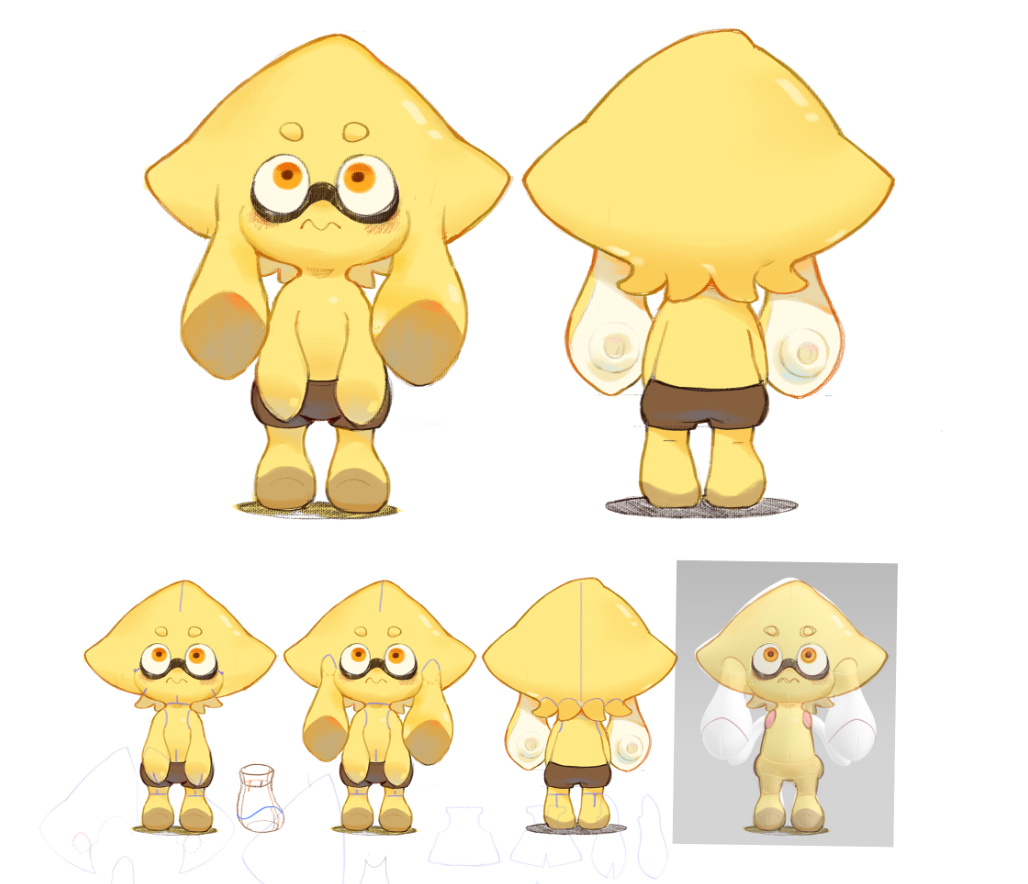
Seam & Dart Planning – Next, I map out the seam lines and darts on the draft design. This step heavily relies on spatial reasoning and design experience. For those who find it difficult, the sculpting + masking tape method can also be a helpful alternative.
Flat Pattern Drafting – Based on the planned seam lines and darts, I unfold the shapes into flat patterns. These drafts don’t need to be precise, as they are not final. For mirrored pieces, only one side needs to be drawn.
Pattern Creation in MD – I then import the pattern into Marvelous Designer, recreate the pieces digitally, arrange them roughly in 3D space according to the seam positions, set the fabric parameters and pressure, and run the simulation.
Iteration & Adjustment – This stage involves a long and often repetitive process of refining the pattern. Patience is key. Once the form is accurate, I export the UV layout to Photoshop.
UV Annotation – I fill in missing information such as pattern names, color coding, fabric direction, and alignment markers. If the pattern is only for personal use and self-explanatory, these notes can be omitted.
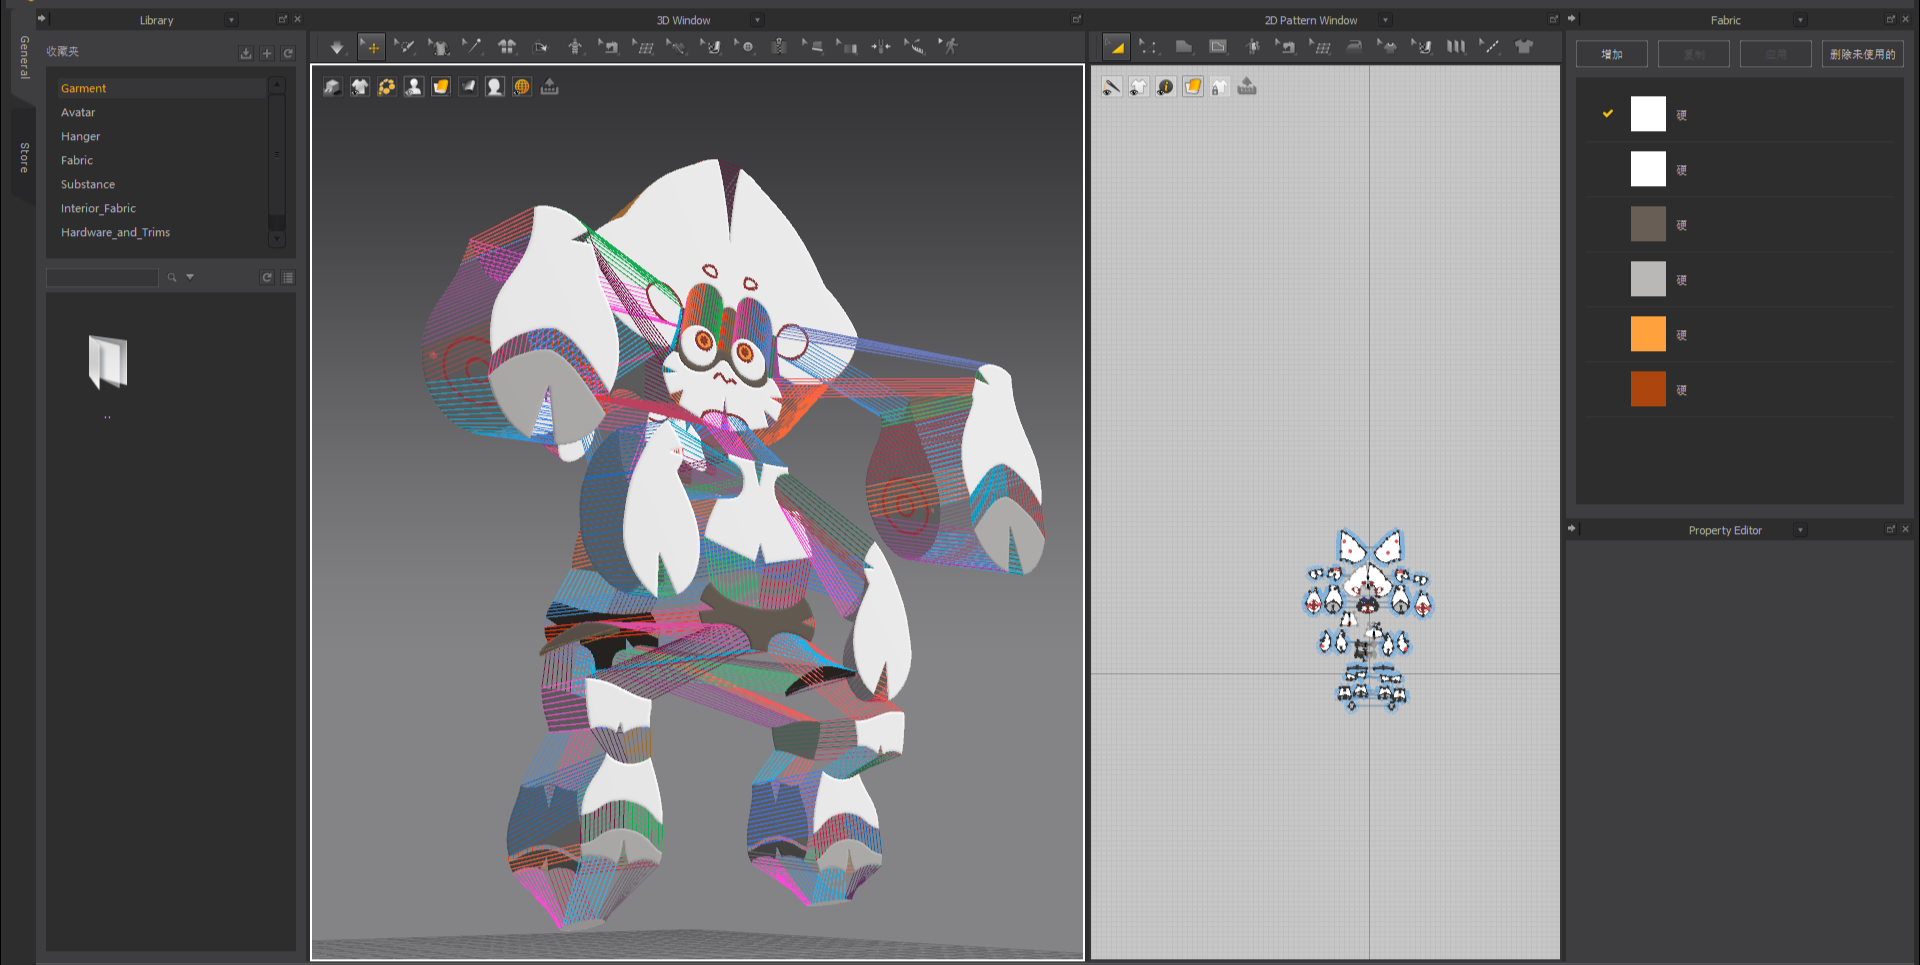
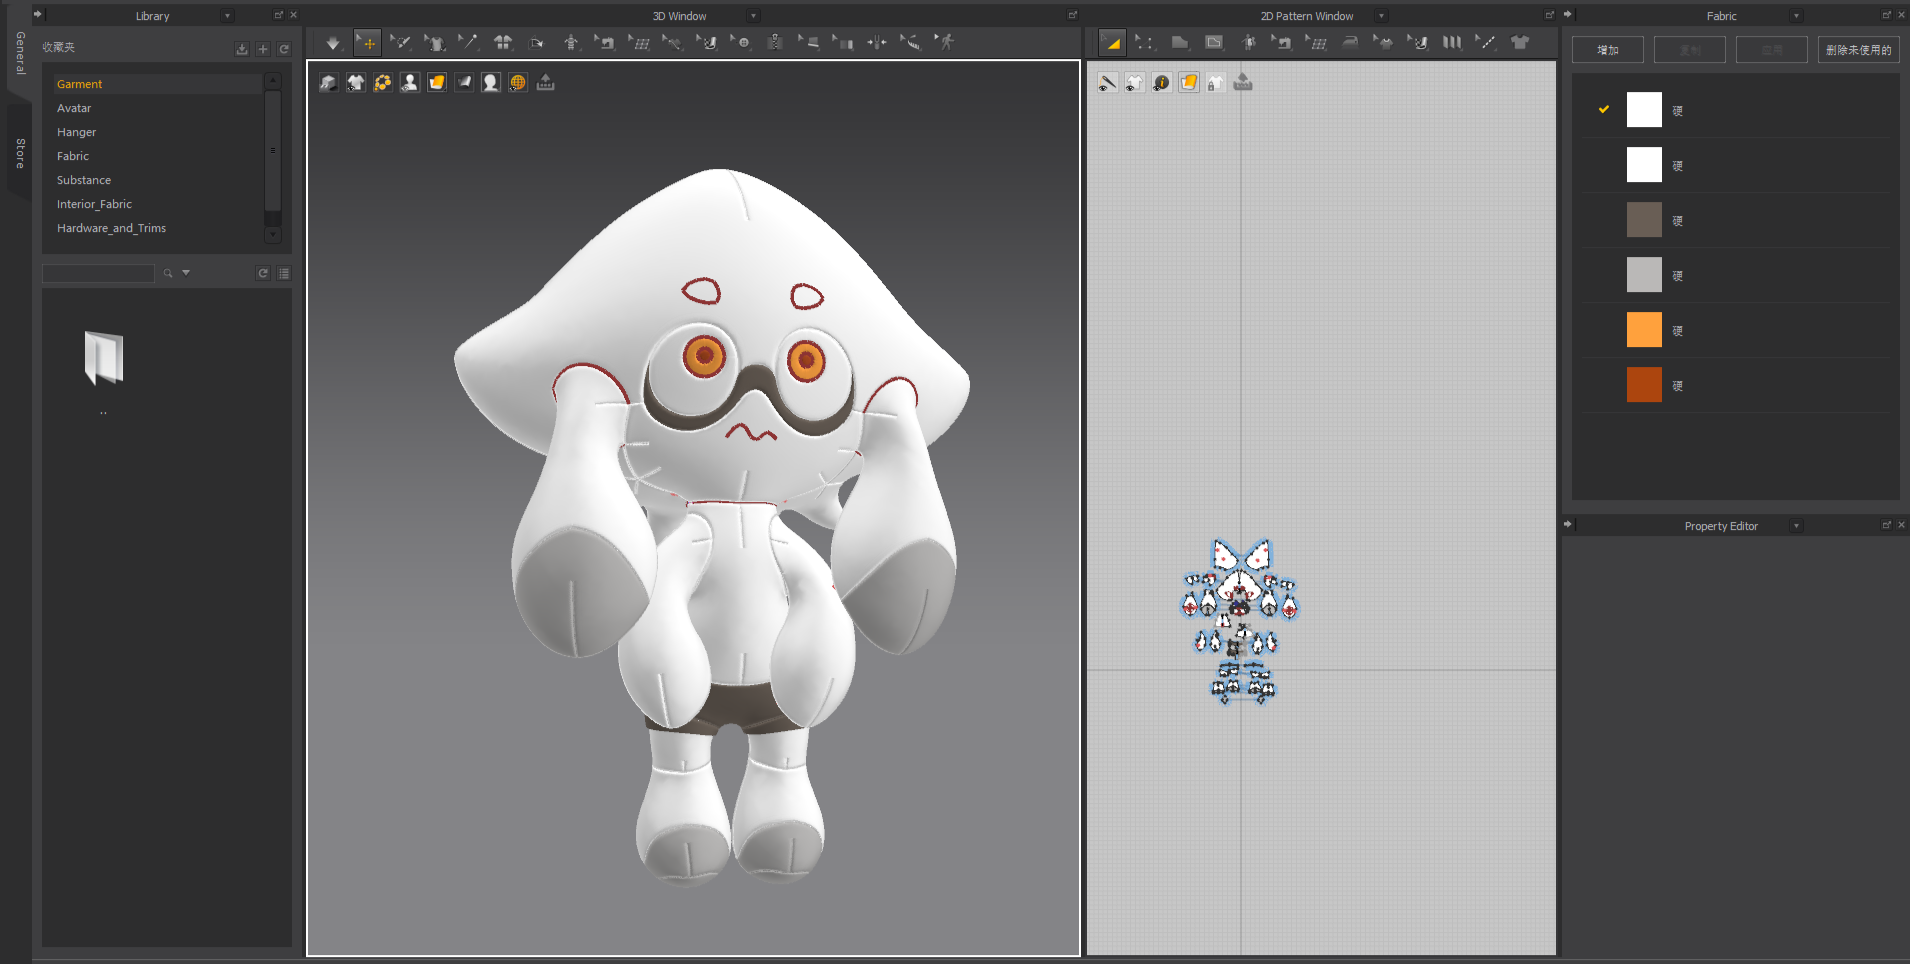
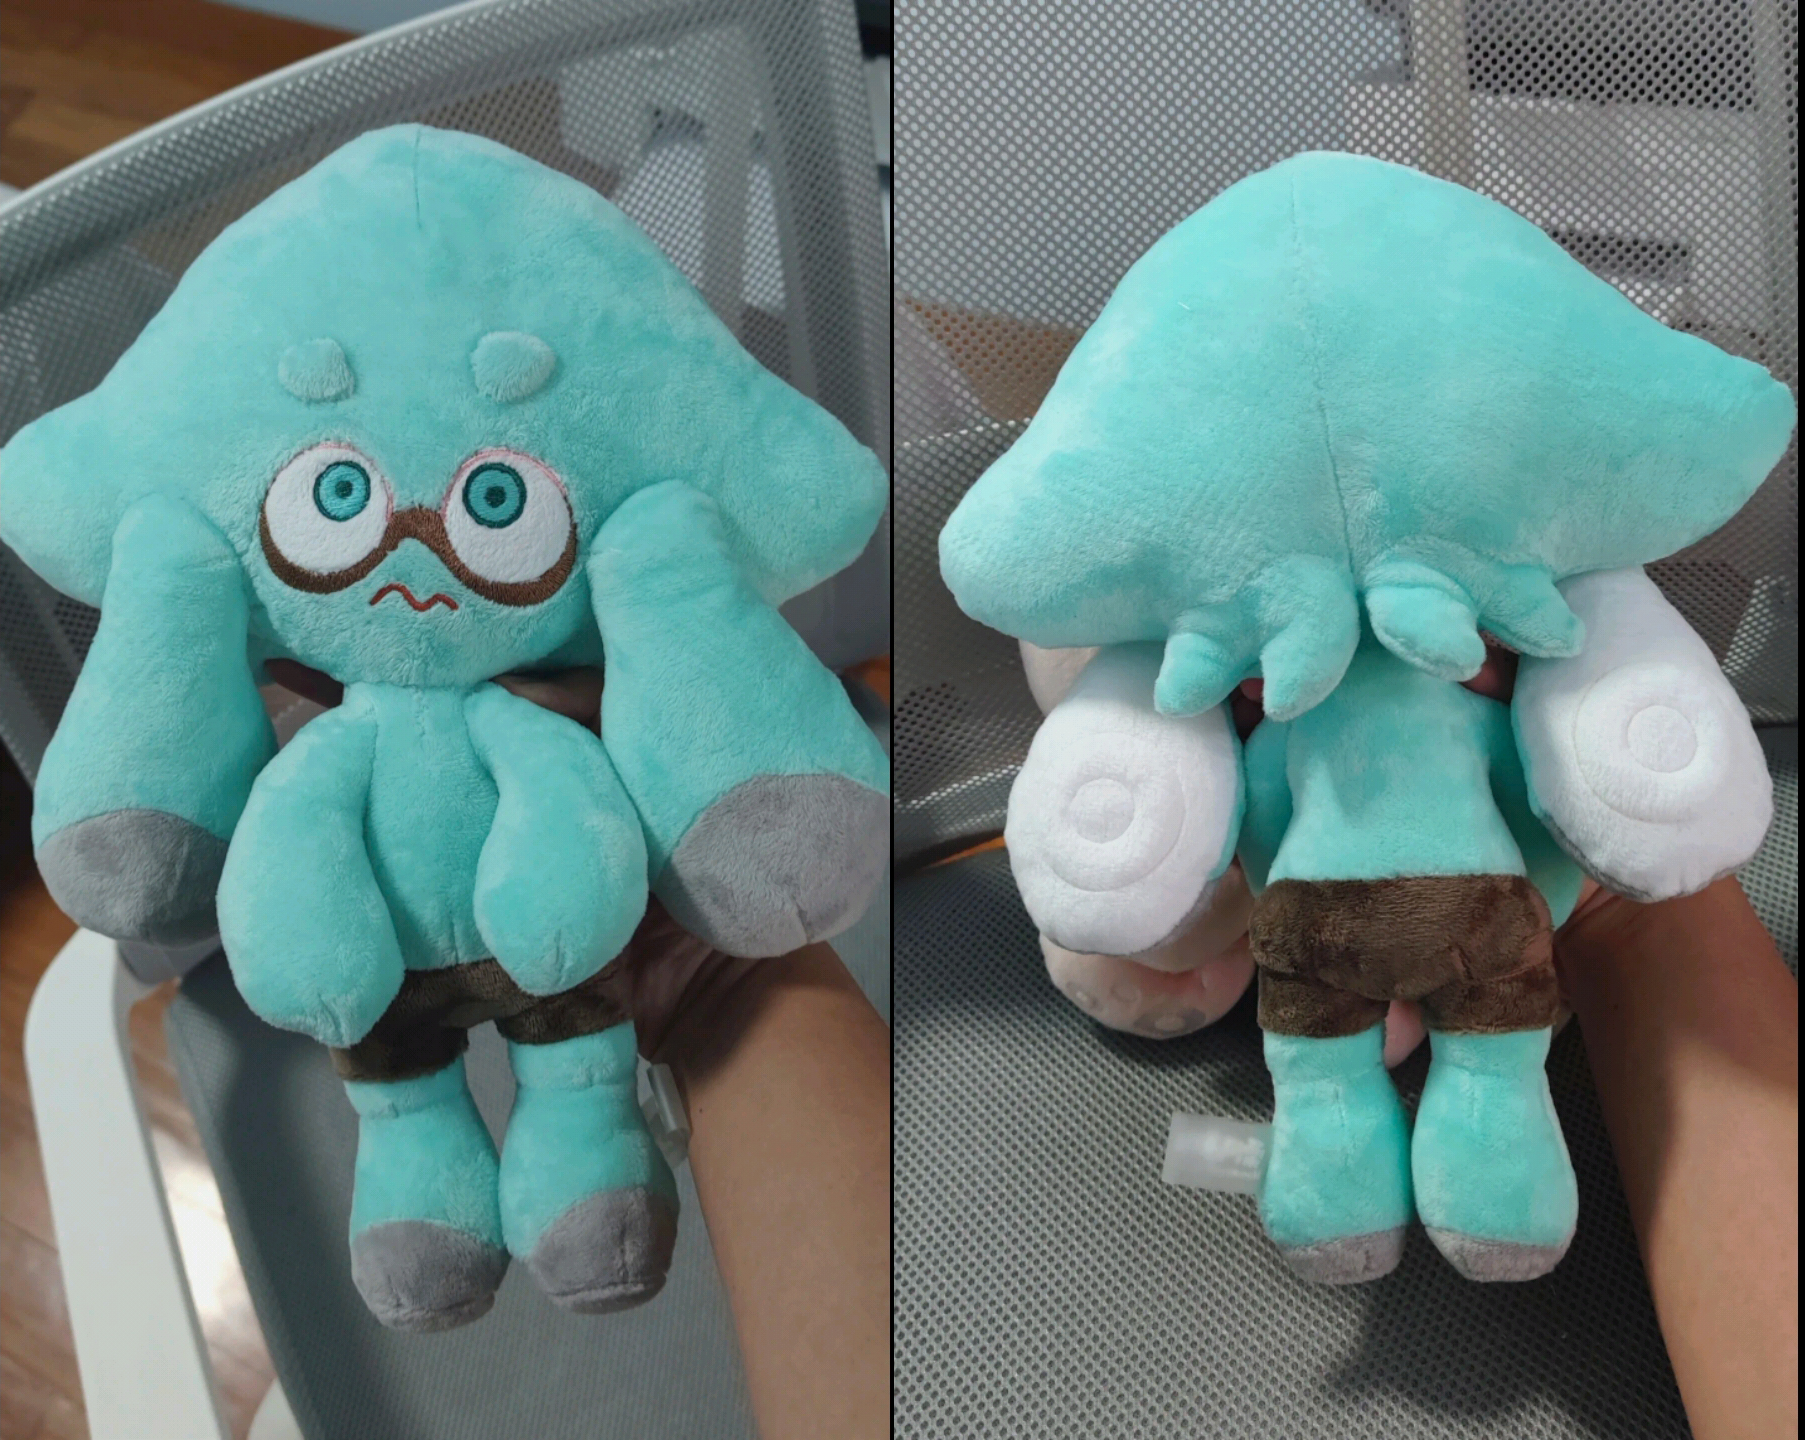
Layout & Fabric Cutting – I arrange the patterns for printing, then transfer them onto the correct fabric colors and cut out each piece.
Embroidery Design – For pieces that involve embroidery, I import the pattern into PE Design, create the embroidery artwork, and complete the embroidery process.
Final Assembly – All pattern pieces are sewn together. Any special construction techniques — such as adding interfacing, invisible stitching, or preassembling certain components — are handled individually.
Could you introduce one of your favorite or most representative plush?
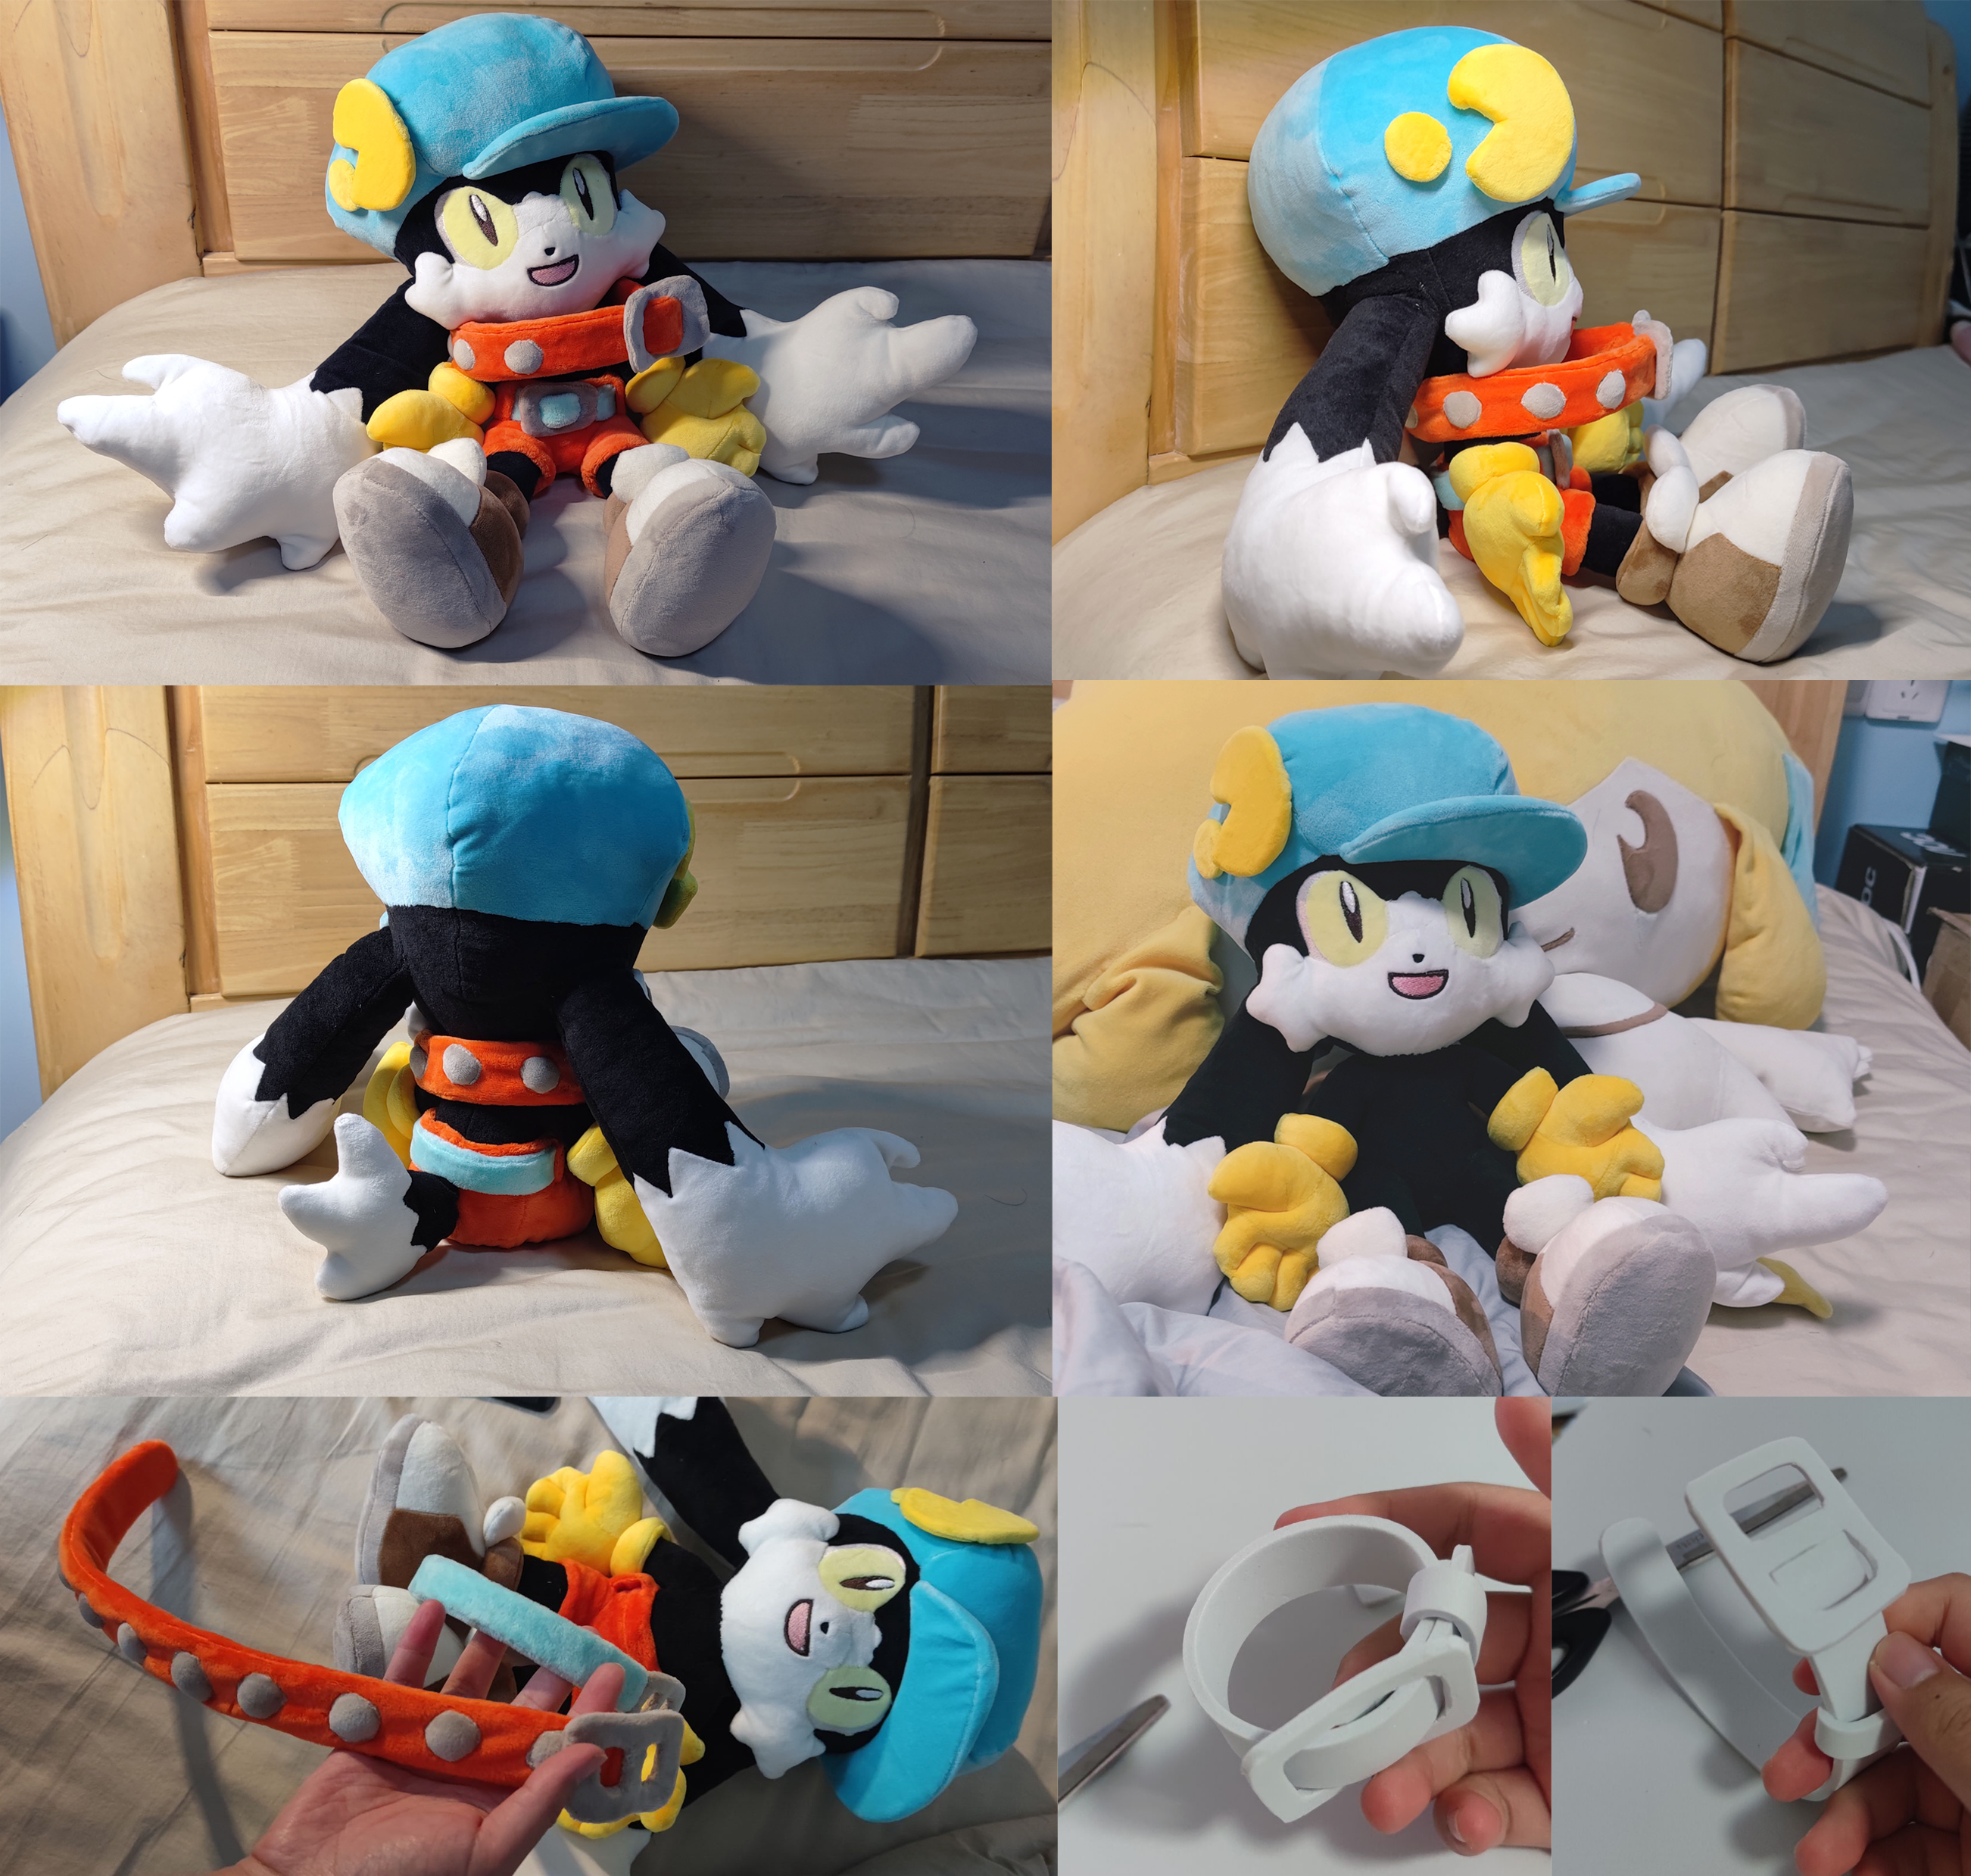
One of my most representative works is a plush figure of Klonoa, a character from Bandai Namco’s Klonoa: Door to Phantomile video game series. This project was commissioned by a friend who couldn’t find an official plush large enough to match his expectations. Since he gave me full creative freedom, I aimed to stay as true to the original design as possible while subtly incorporating my own artistic style.
The plush features fully removable accessories, including a belt, pants, and collar — each crafted with realistic construction to enhance the sense of authenticity. These elements brought significant challenges in Marvelous Designer, especially when simulating how the belt and collar interweave. To preserve the softness of the toy and avoid using hard materials, I used EVA foam wrapped in fabric for parts requiring structure, such as the brim of the hat and the collar — a method often used in cosplay prop-making.
Interestingly, I didn’t expect the plush to be able to sit upright on its own. But thanks to the support provided by its ears and tail, the finished piece can sit without needing a wall, which was a delightful surprise.
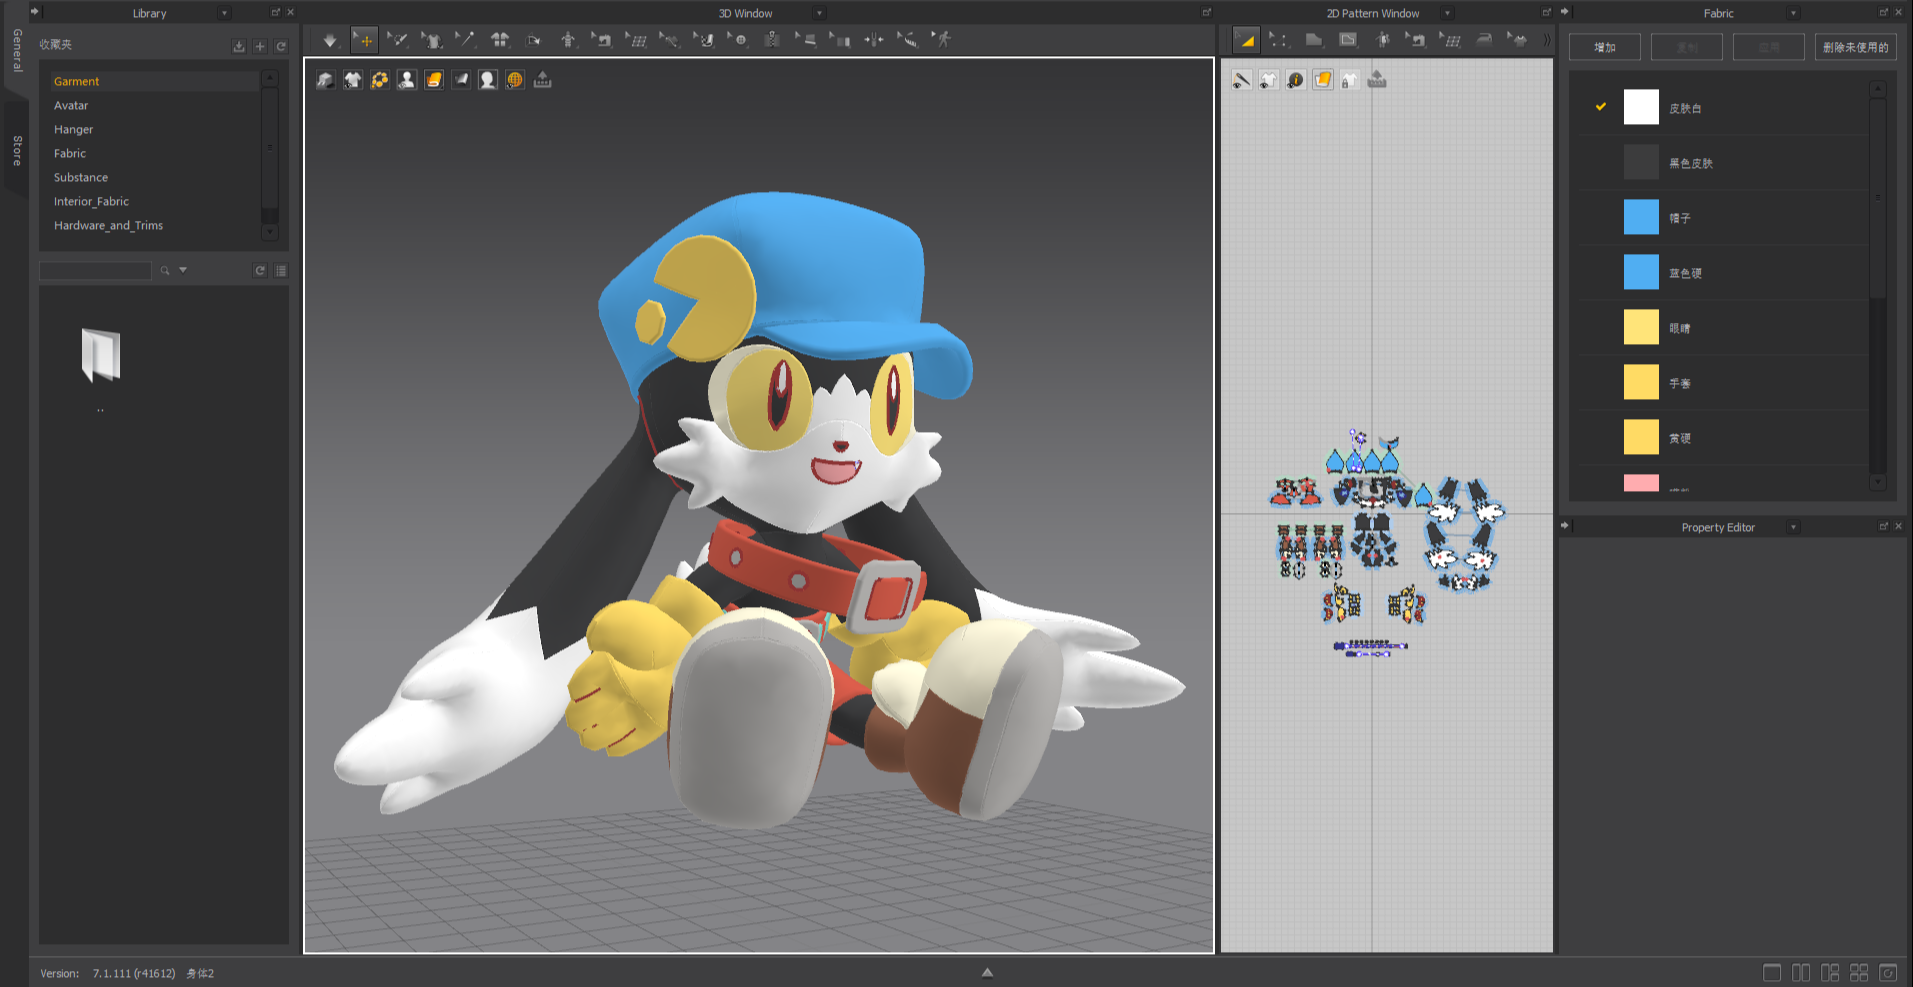
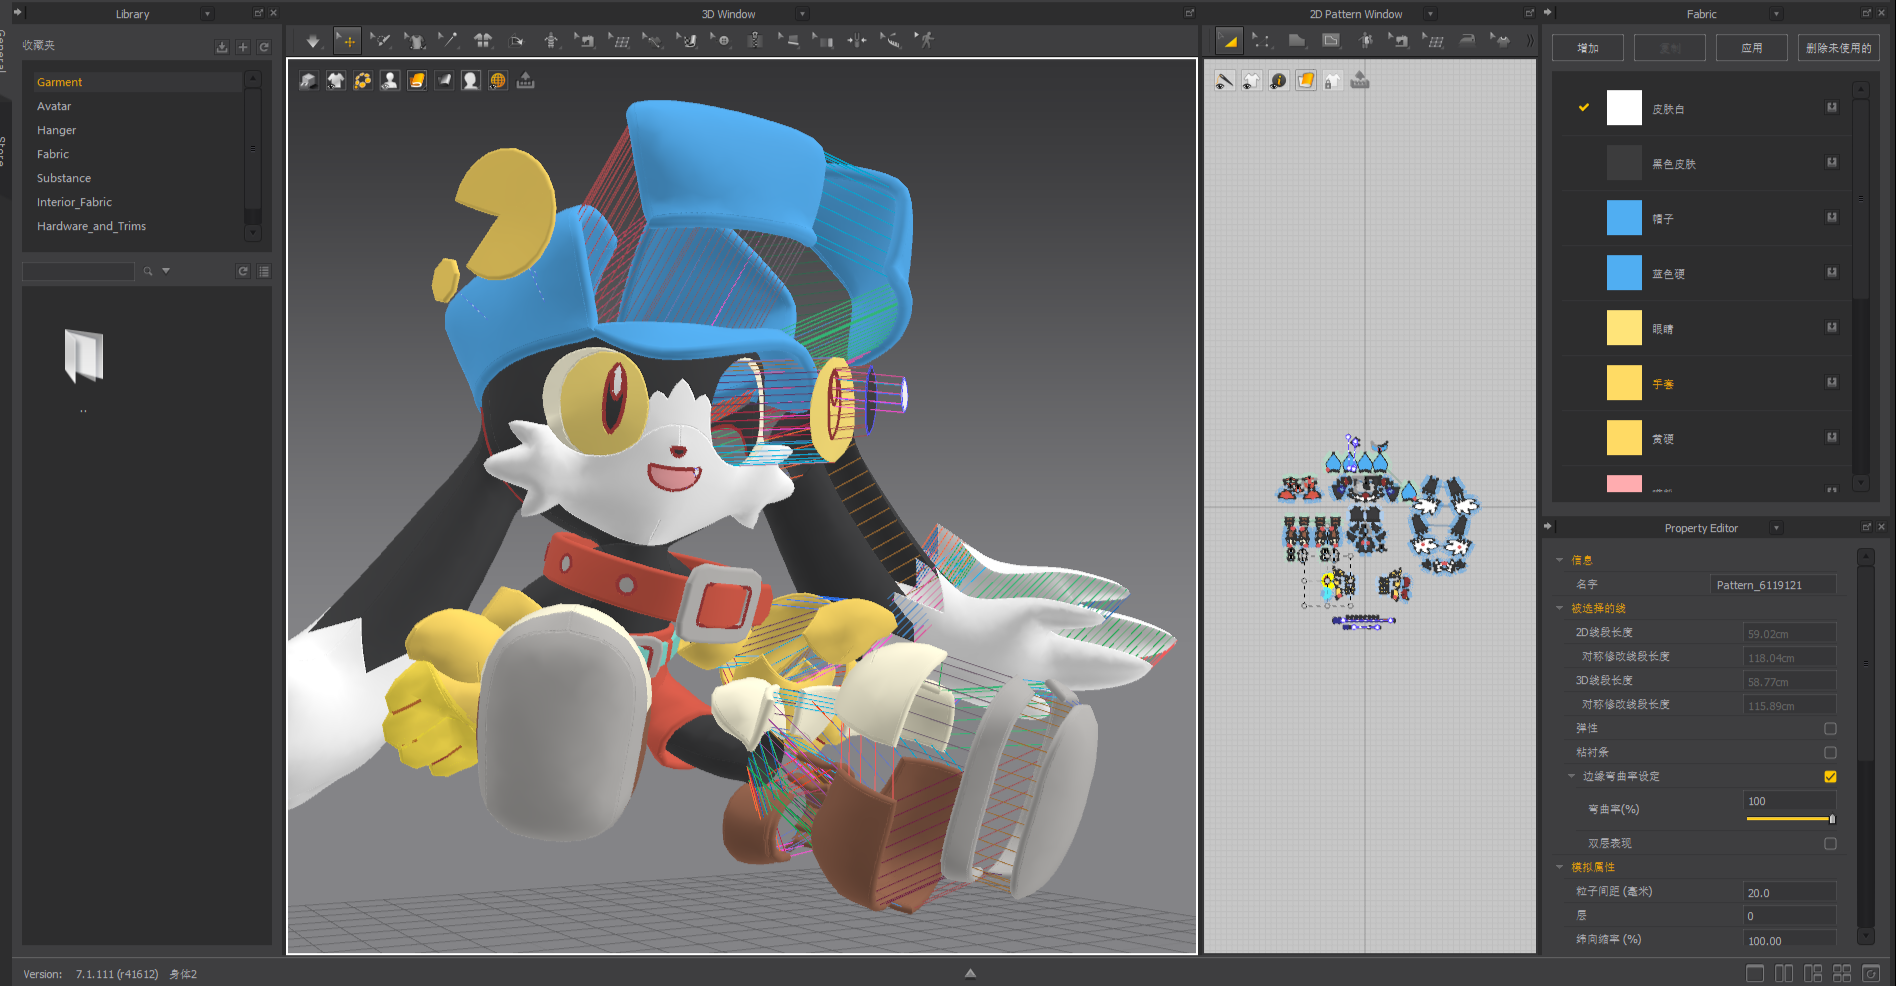
This project remains the most complex one I’ve completed so far: the final pattern involved 43 unique shapes, 126 total pieces, and five components separate from the body. One regret, however, is that due to the limitations of my home embroidery machine, I couldn’t apply applique embroidery on the collar. As a result, the round motifs on the collar aren’t as refined as I had hoped.
When designing dolls and garments in Marvelous Designer, which details do you pay the most attention to?
During the design process, the physical properties of the fabric and the dimensions of the design are always my top priorities. If the fabric parameters are not set correctly, the 3D simulation cannot faithfully represent the real-world result — and that would undermine the entire workflow.
Another crucial factor is the proportion between facial features and body structure. The aesthetics of a character’s face directly impact the overall personality and impression of the plush. When creating characters, I try to stay as faithful to the original art style as possible, since that’s what initially attracted me to the character. However, if the original design includes elements or proportions that don’t translate well into plush form, I will subtly adjust them while preserving the character’s stylistic essence — often leaning toward a more cartoon-like proportion.
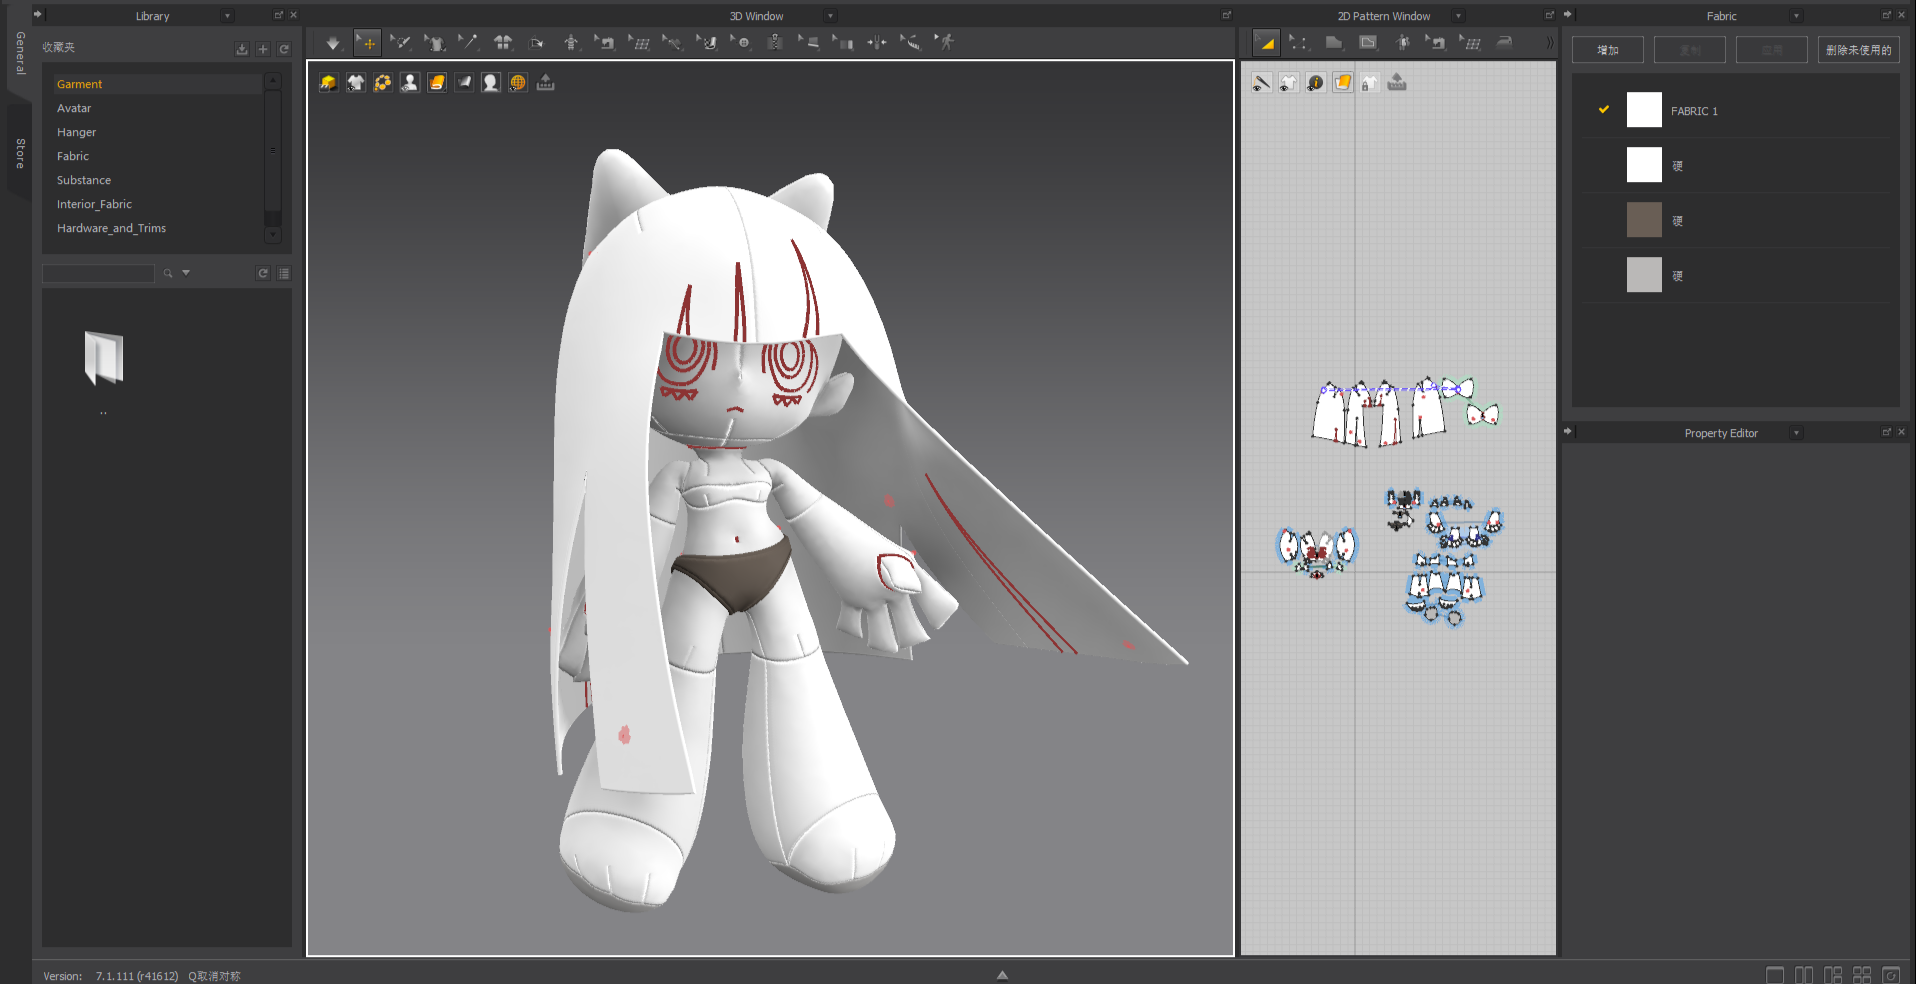
Additionally, when producing plush toys at different sizes, I never simply scale the pattern up or down without modification, even if the outline remains the same. This is because the larger the plush, the more significantly the fabric’s own weight and stretch properties come into play. Larger pieces demand greater structural integrity, especially to support the weight of the head. Therefore, each size variation requires a reworked pattern. Ideally, the target size should be decided at the very beginning, and fabric scale settings should be adjusted accordingly in MD.
Lastly, some stages of the process — like embroidery and final stitching — are not completed within Marvelous Designer and instead rely on hands-on craftsmanship. That’s why, for facial features or detailed markings, I prefer using internal shapes rather than applying textures. This method allows for more flexible, precise adjustments in both position and size during the production process.
Could you briefly introduce the tools or software you use throughout your workflow for this project?
In addition to Marvelous Designer, the main software I use includes Photoshop and PE-DESIGN.
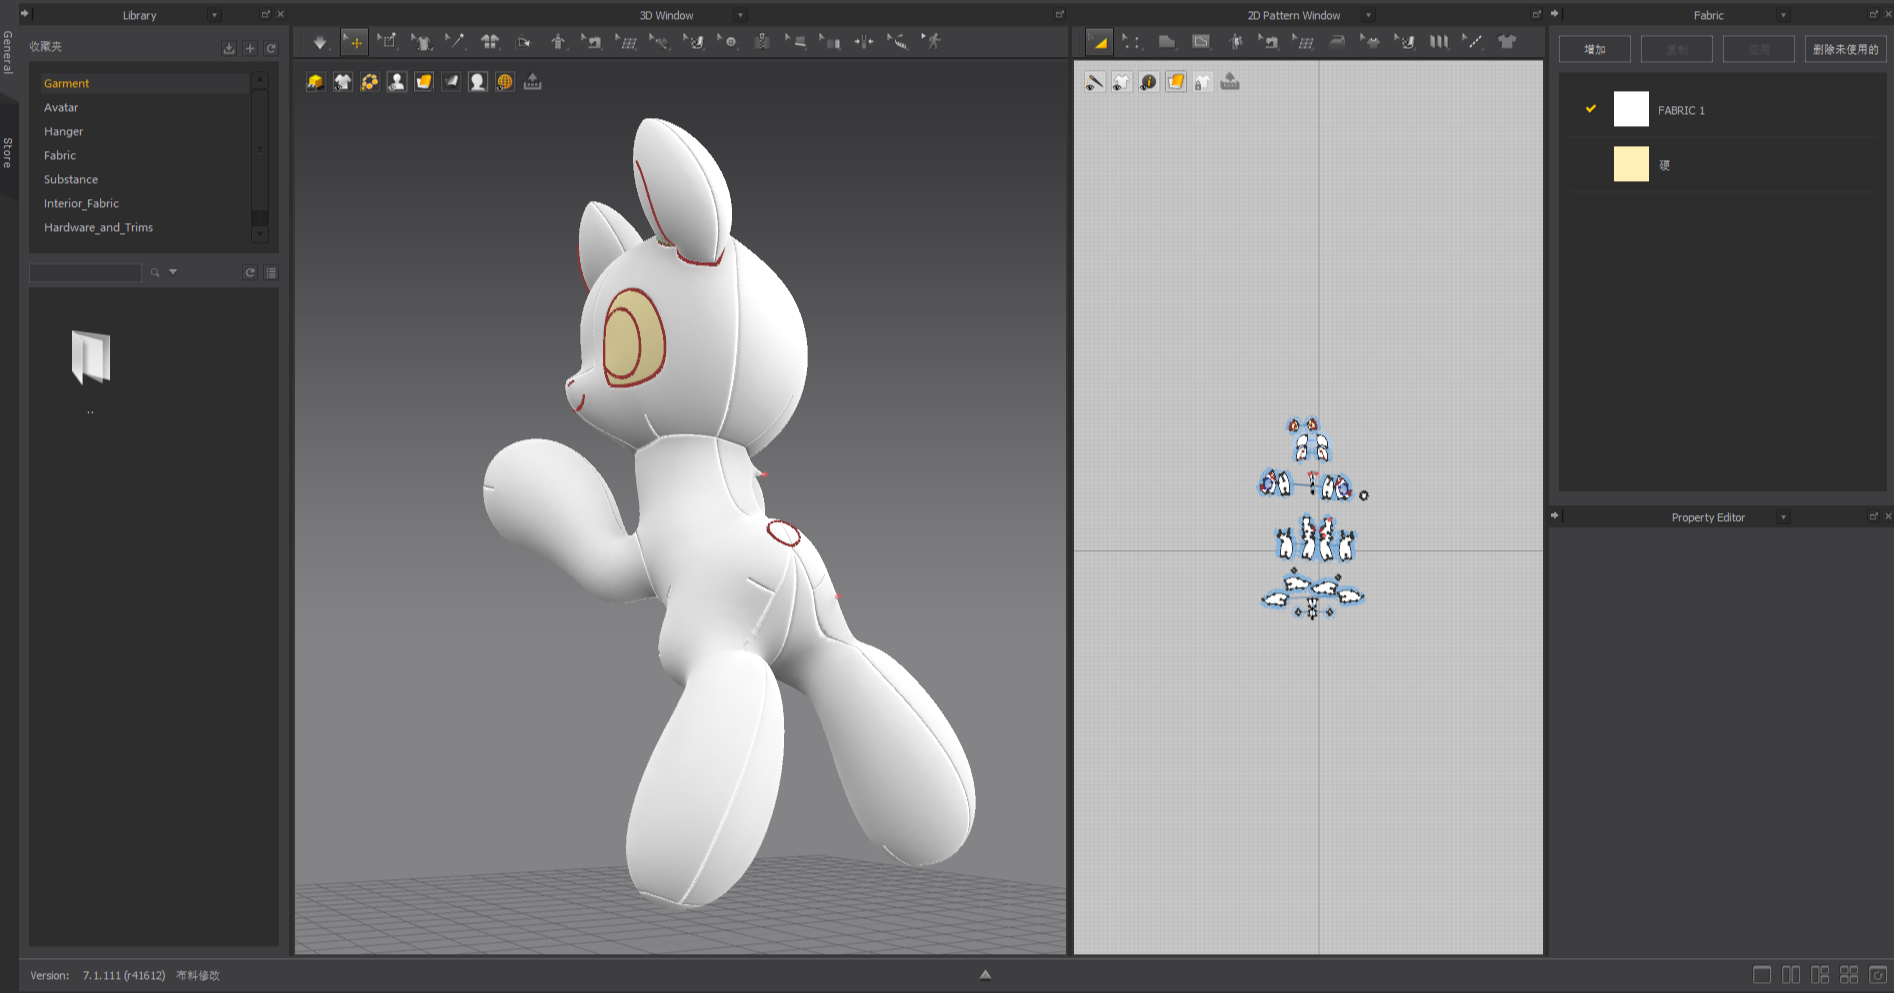
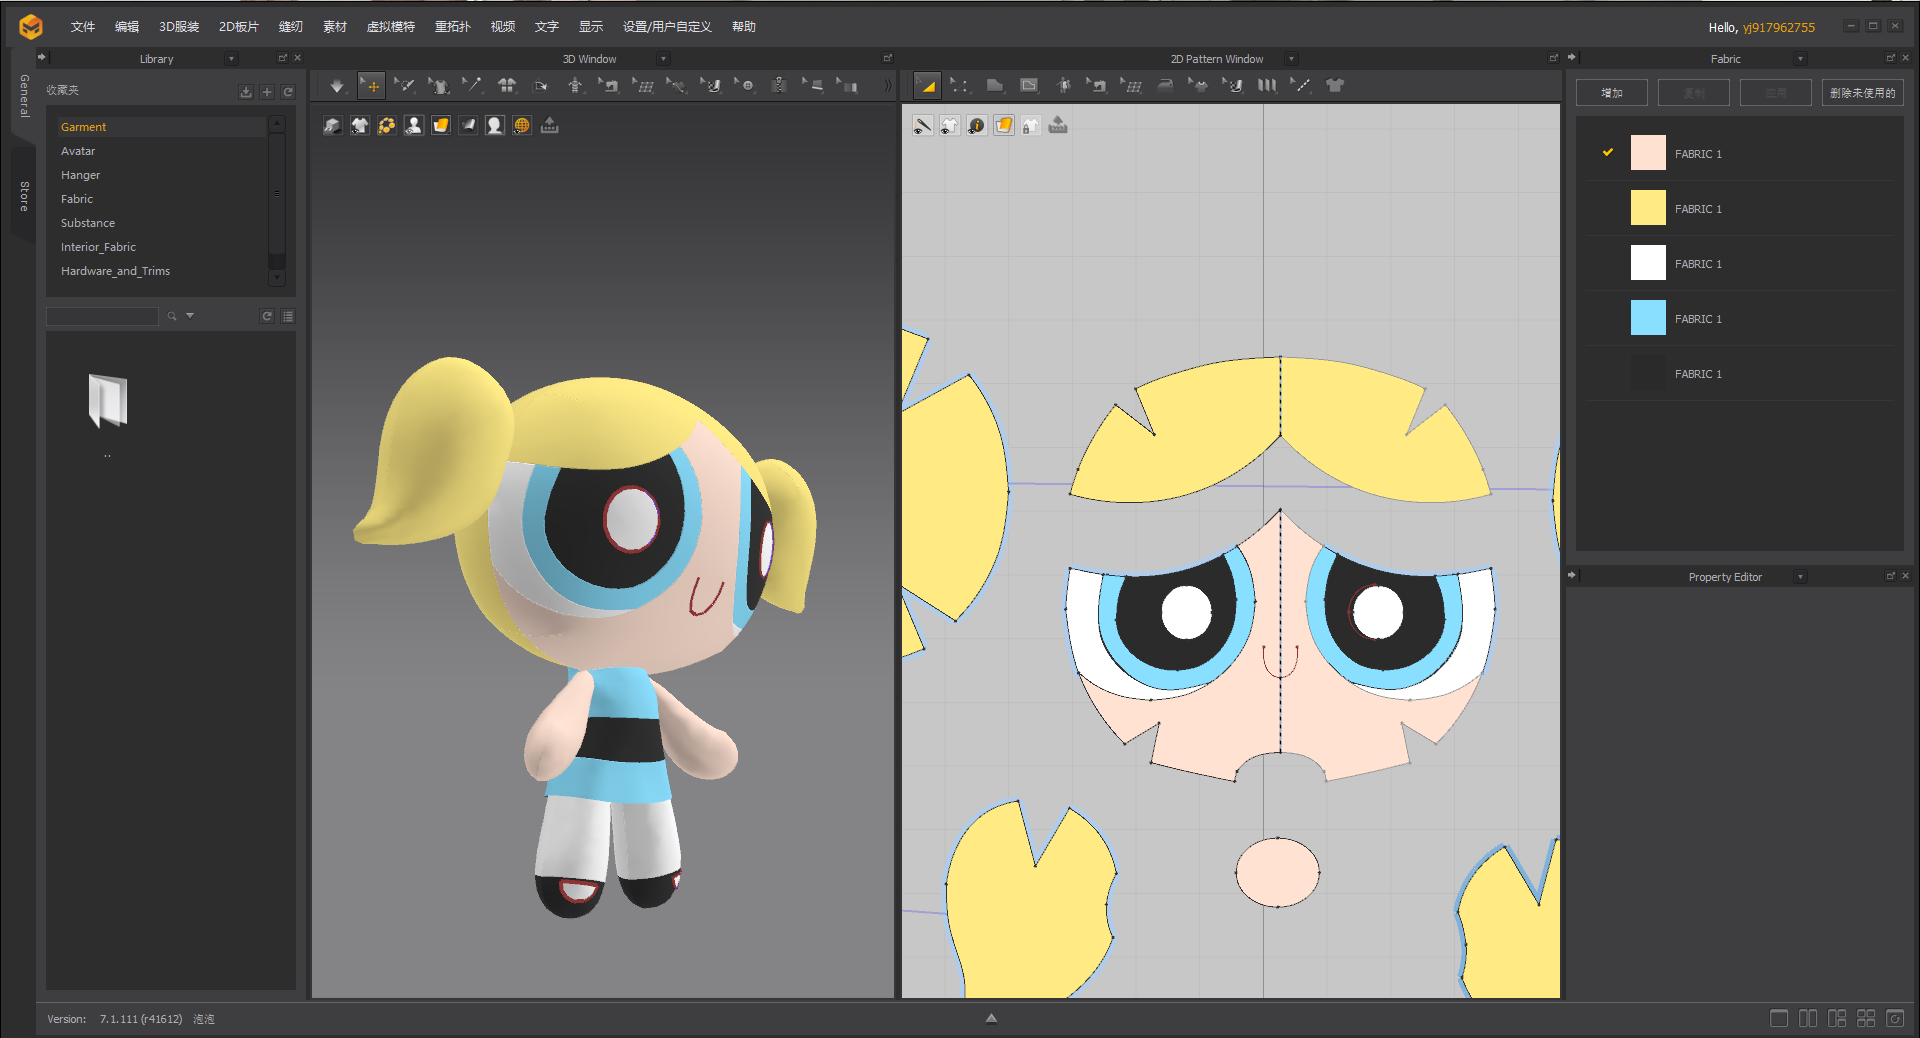
Marvelous Designer is used to simulate the sewn and stuffed form of the plush, allowing me to validate and refine the initial patterns. This step significantly reduces the cost and time associated with repeated physical prototyping.
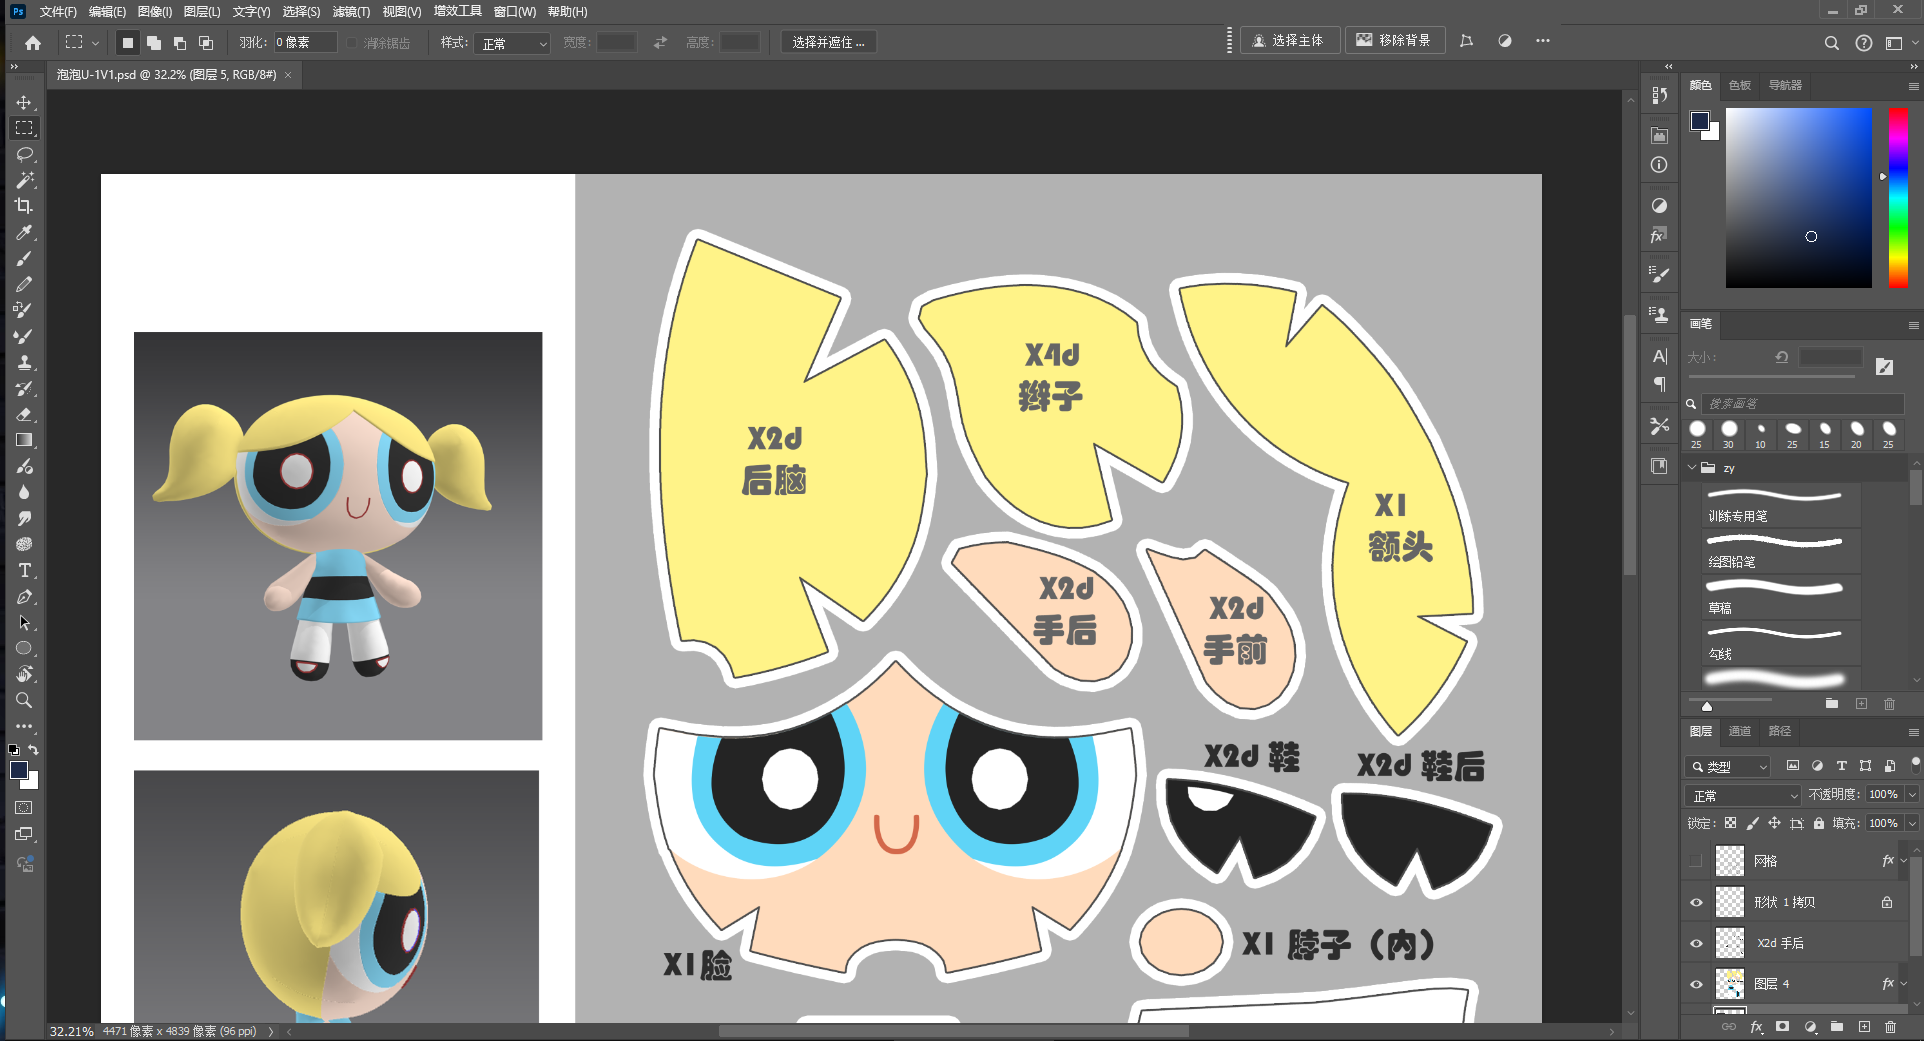
Photoshop is primarily used for creating the initial concept illustrations, editing the raw UV maps exported from MD, and adding key information such as seam lines, alignment markers, color coding, and layout formatting to generate the final printable pattern sheets. That said, other raster-based painting software like SAI, CSP, or Painter could be used in place of Photoshop depending on personal preference.
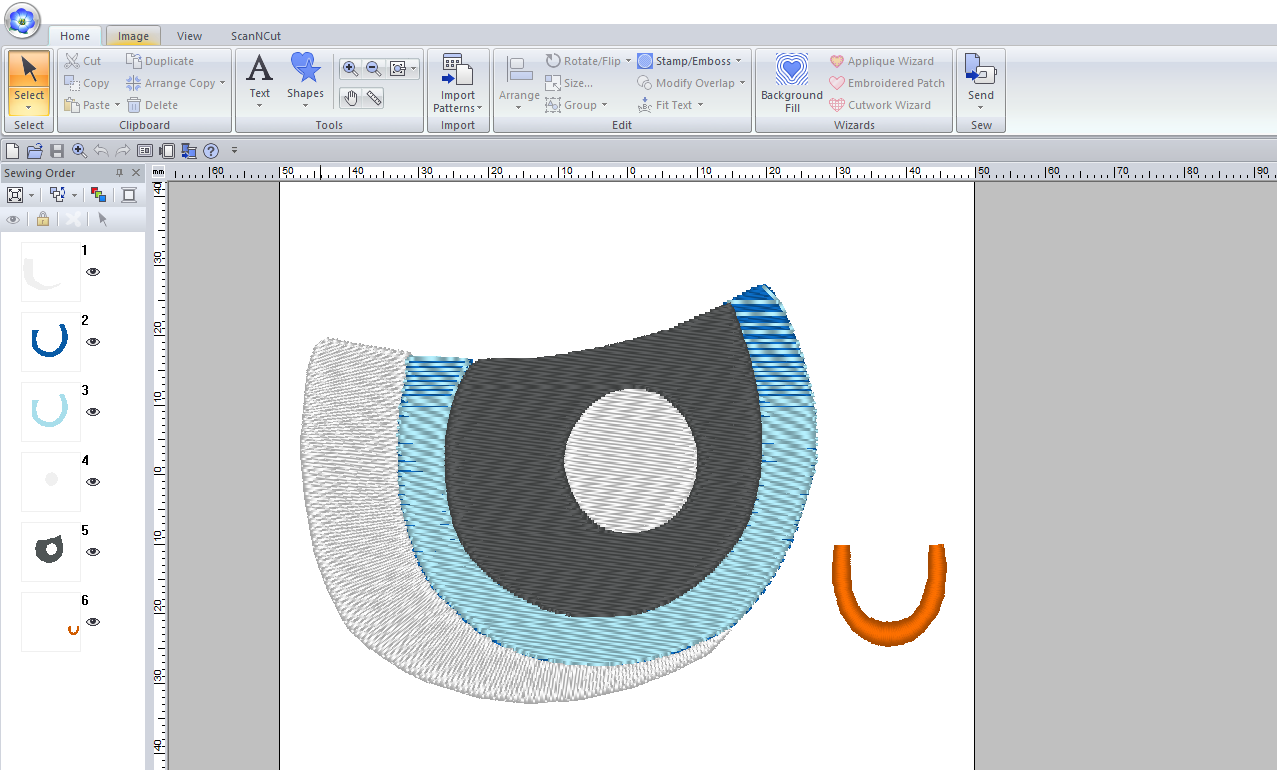
PE-DESIGN is the embroidery design software that comes with Brother embroidery machines. I use it to design stitchable details like facial features or decorative motifs. It generates machine-readable embroidery files for the actual stitching process. While Wilcom is a more commonly used, professional embroidery software, I prefer PE-DESIGN due to its better compatibility with my equipment.
As for the integration between MD and Photoshop, the main point of interaction is the UV image export. After arranging the 2D pattern pieces properly in the UV window, I export one or several transparent PNG images, which are then edited in Photoshop. One critical step is aligning the UV layout with the original 2D pattern positions — skipping this can result in scaling errors. Once this step is complete, the MD portion of the workflow is considered finished.
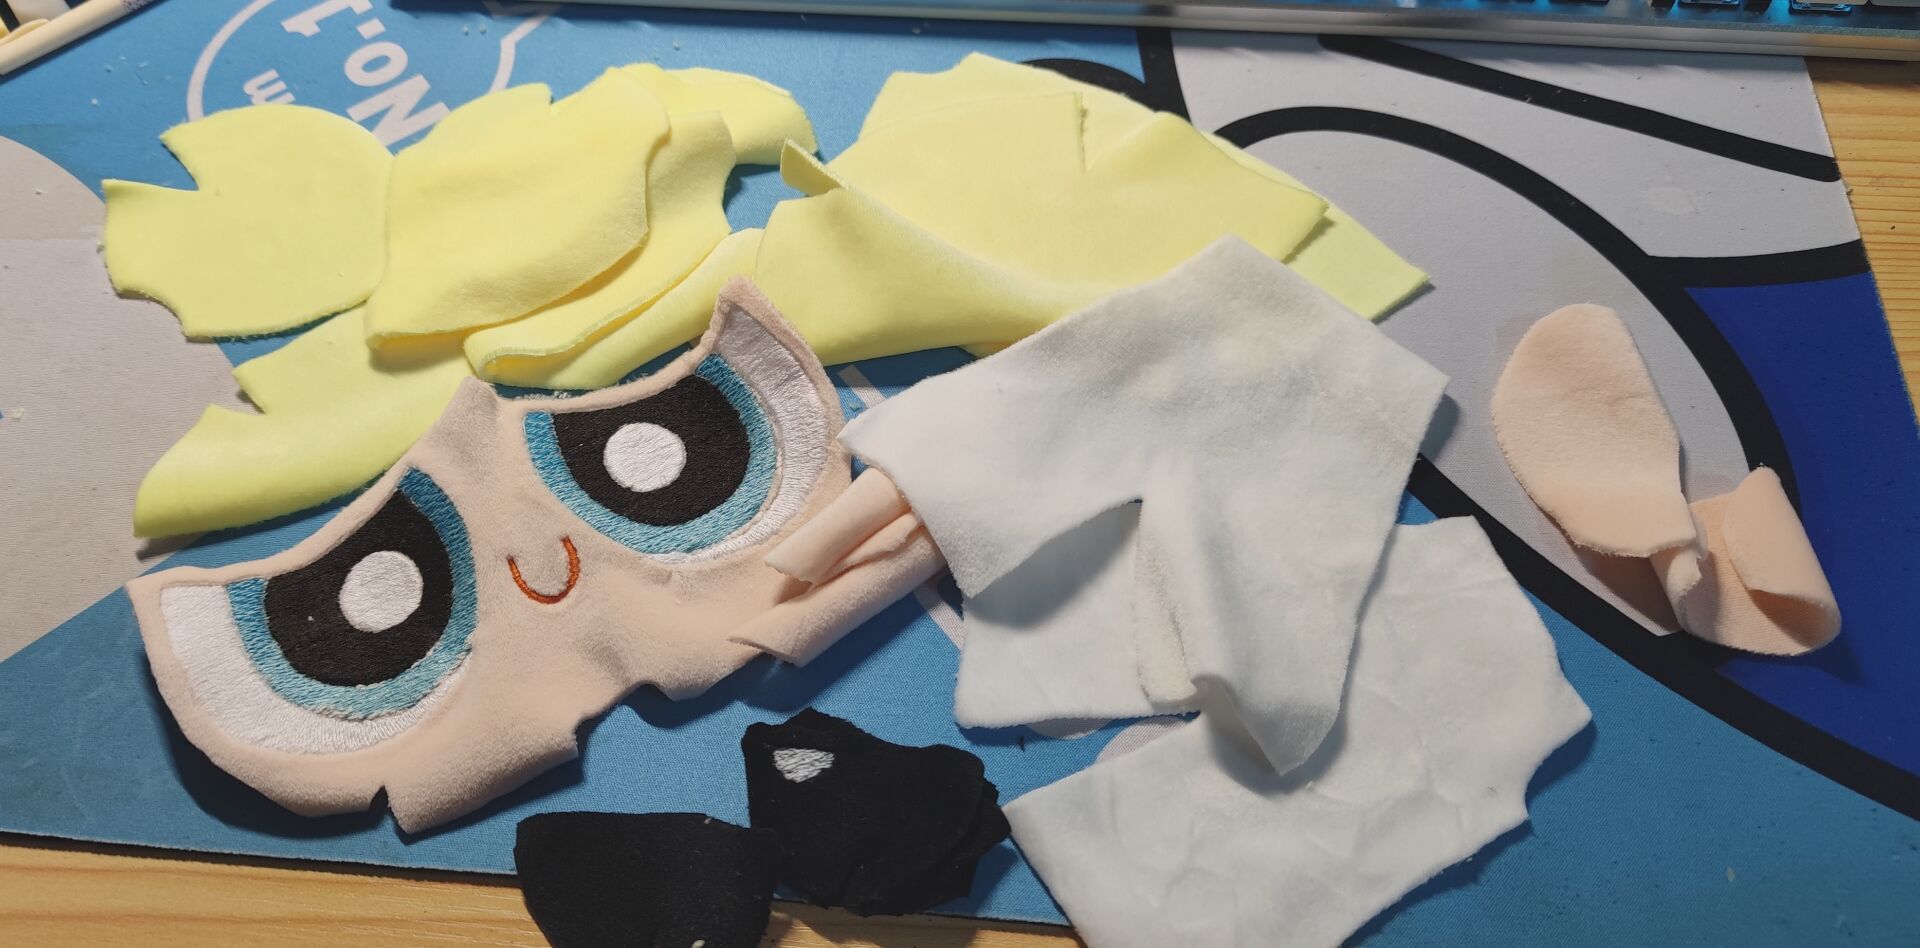
What has been the biggest challenge you've encountered while learning and using Marvelous Designer? How did you overcome it?
The most significant and long-standing challenge I’ve faced in Marvelous Designer is how to accurately set fabric properties in order to simulate the final look of a stuffed plush figure after adding internal pressure. Unlike regular garments, plush toys change shape considerably when filled with stuffing: the fabric stretches under tension and gains internal support, which alters its physical behavior and results in a fixed form. Replicating this effect digitally is particularly complex.
In MD, I typically use the Simulation Properties – Pressure to mimic the stuffing process. After completing all pattern drafting and sewing, I apply pressure to the fabric pieces, causing the sealed patterns to inflate like balloons. However, this method still falls short of accurately simulating the way real plush behaves when stuffed with cotton. The discrepancy is especially noticeable in embroidered areas, which tend to become as stiff as denim and stretch differently compared to the rest of the fabric.
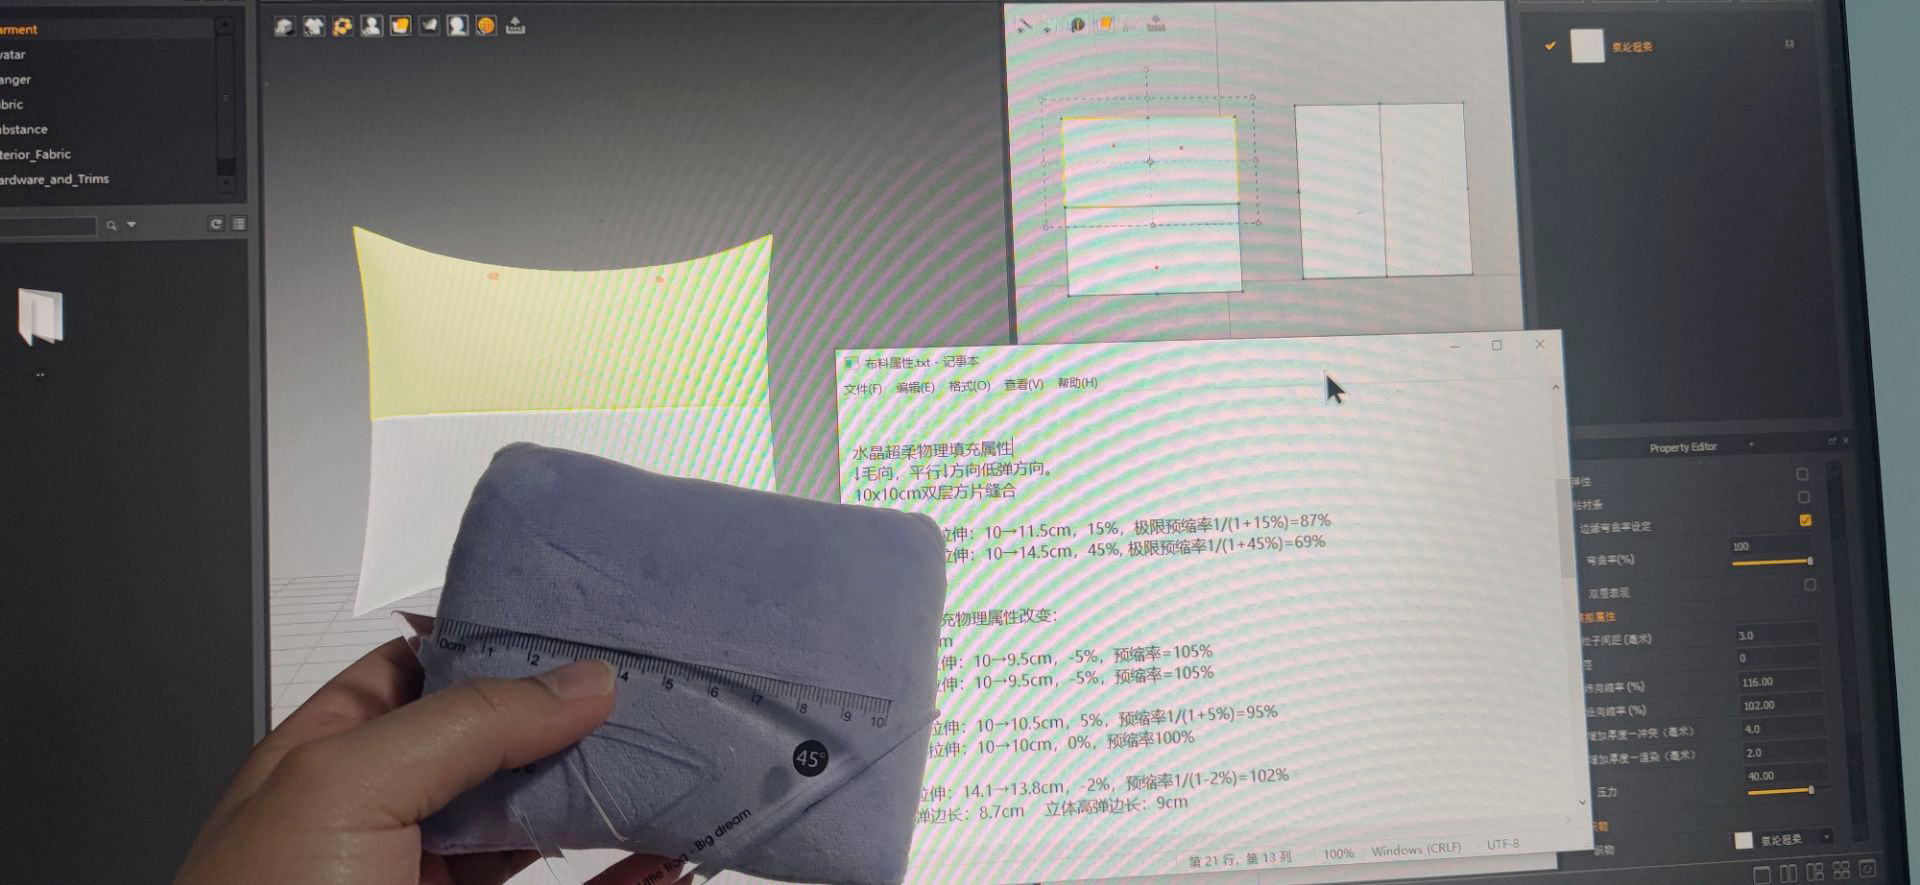
To address this, I conducted real-world fabric tests using the plush materials I work with most often. I cut two 10×10 cm fabric swatches, tested their maximum stretchability, then sewed and filled them with cotton. Using a ruler, I measured how much each section stretched after stuffing. I then recreated the same conditions in MD, gradually adjusting the fabric parameters until the digital results closely matched reality. Once I found a reliable match, I documented the values for future use — enabling a more accurate simulation of how the fabric behaves post-stuffing.
For embroidered sections, I isolate them using internal shapes and assign them different fabric presets — typically high-stiffness, non-stretch materials — or apply the bonding feature within MD to reflect their actual rigidity.
Do you have any advice for beginners who are interested in incorporating Marvelous Designer into their plush-making workflow?
The most crucial foundation lies in developing artistic skills and spatial awareness — the ability to mentally construct a 3D object and deconstruct it into 2D patterns. This comes with practice, experience, and a great deal of patience. I suggest starting with a character you love — it makes the learning process more enjoyable and motivates you to push through challenges.
Marvelous Designer is a powerful tool for validating patterns digitally, which helps reduce the time and cost of physical prototyping. It brings the trial-and-error phase of pattern testing into a virtual environment. However, it does not replace the core task of initial pattern creation. Personally, I draft the design in Photoshop, import it into MD, and then refine it after sewing the 3D form. Since the 2D and 3D views update in real time, it’s a highly intuitive way to make adjustments.
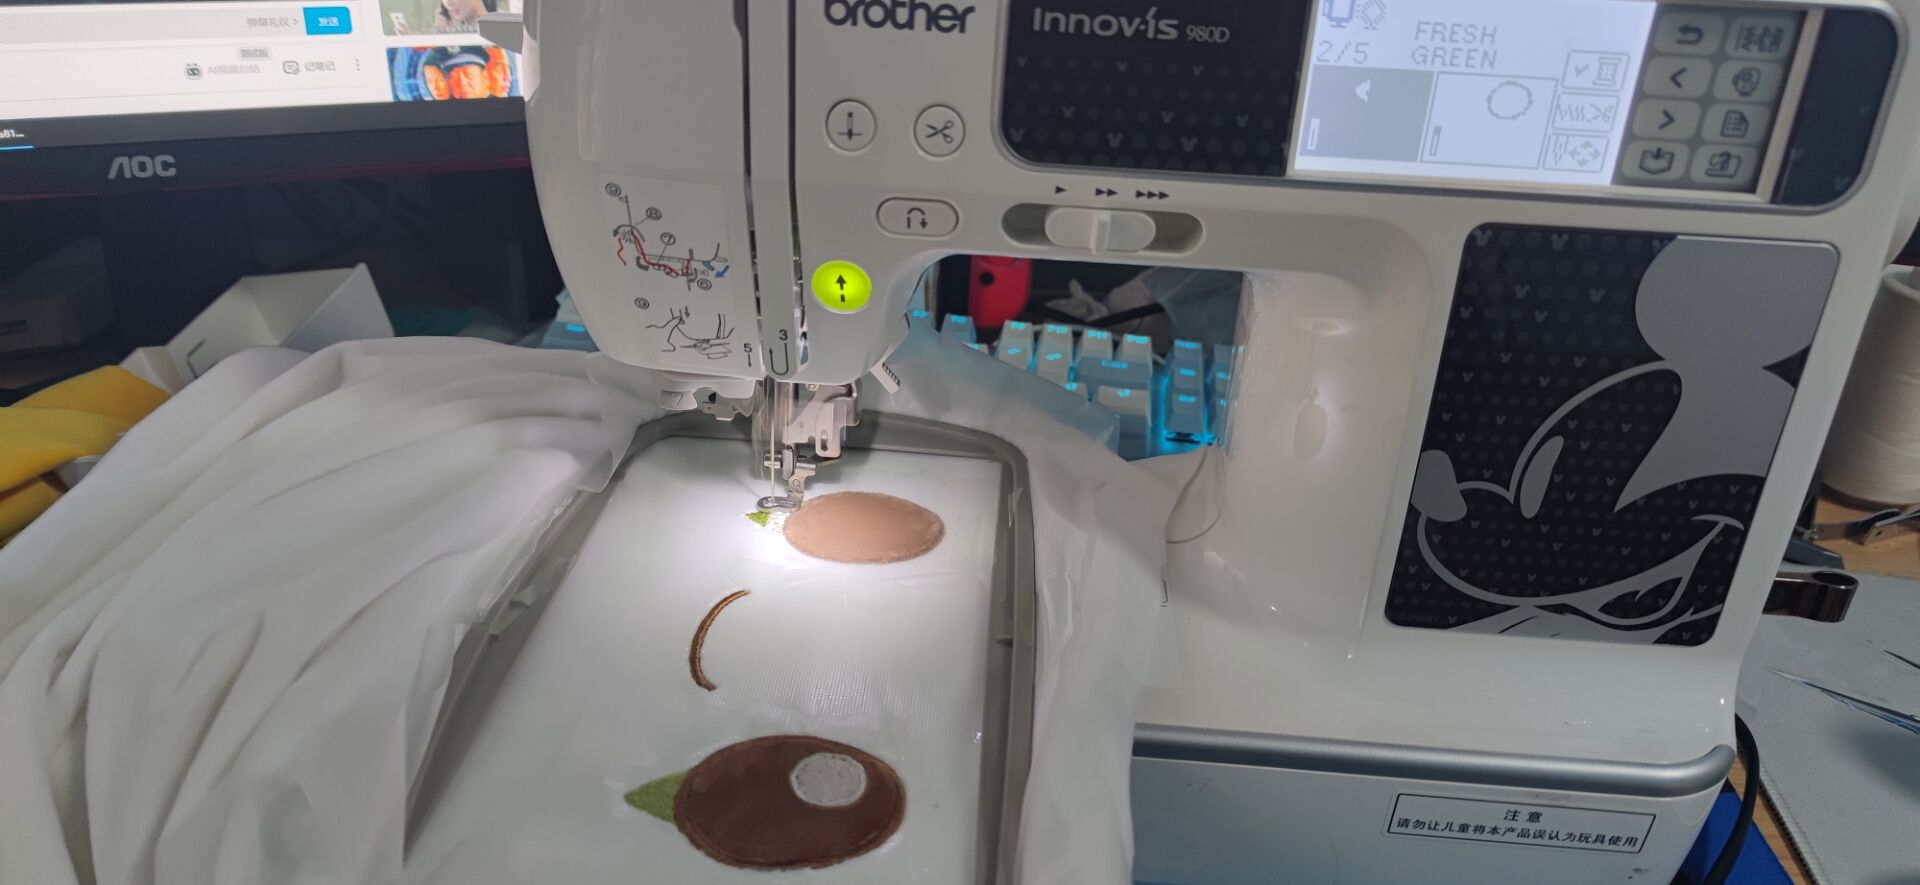
In addition to learning the software, it’s also important to gain knowledge of common plush fabrics and stuffing materials, including properties like durability, weight, pile direction, and elasticity. Keep in mind that the 3D result in MD may differ from the real-life outcome due to variables such as parameter settings, fabric stretch, stuffing type, and stitching inaccuracies. These small discrepancies can accumulate — the so-called “butterfly effect” — and ultimately lead to a final product that doesn’t meet expectations. This is also why repeated revisions are often required when collaborating with factories during mass production.
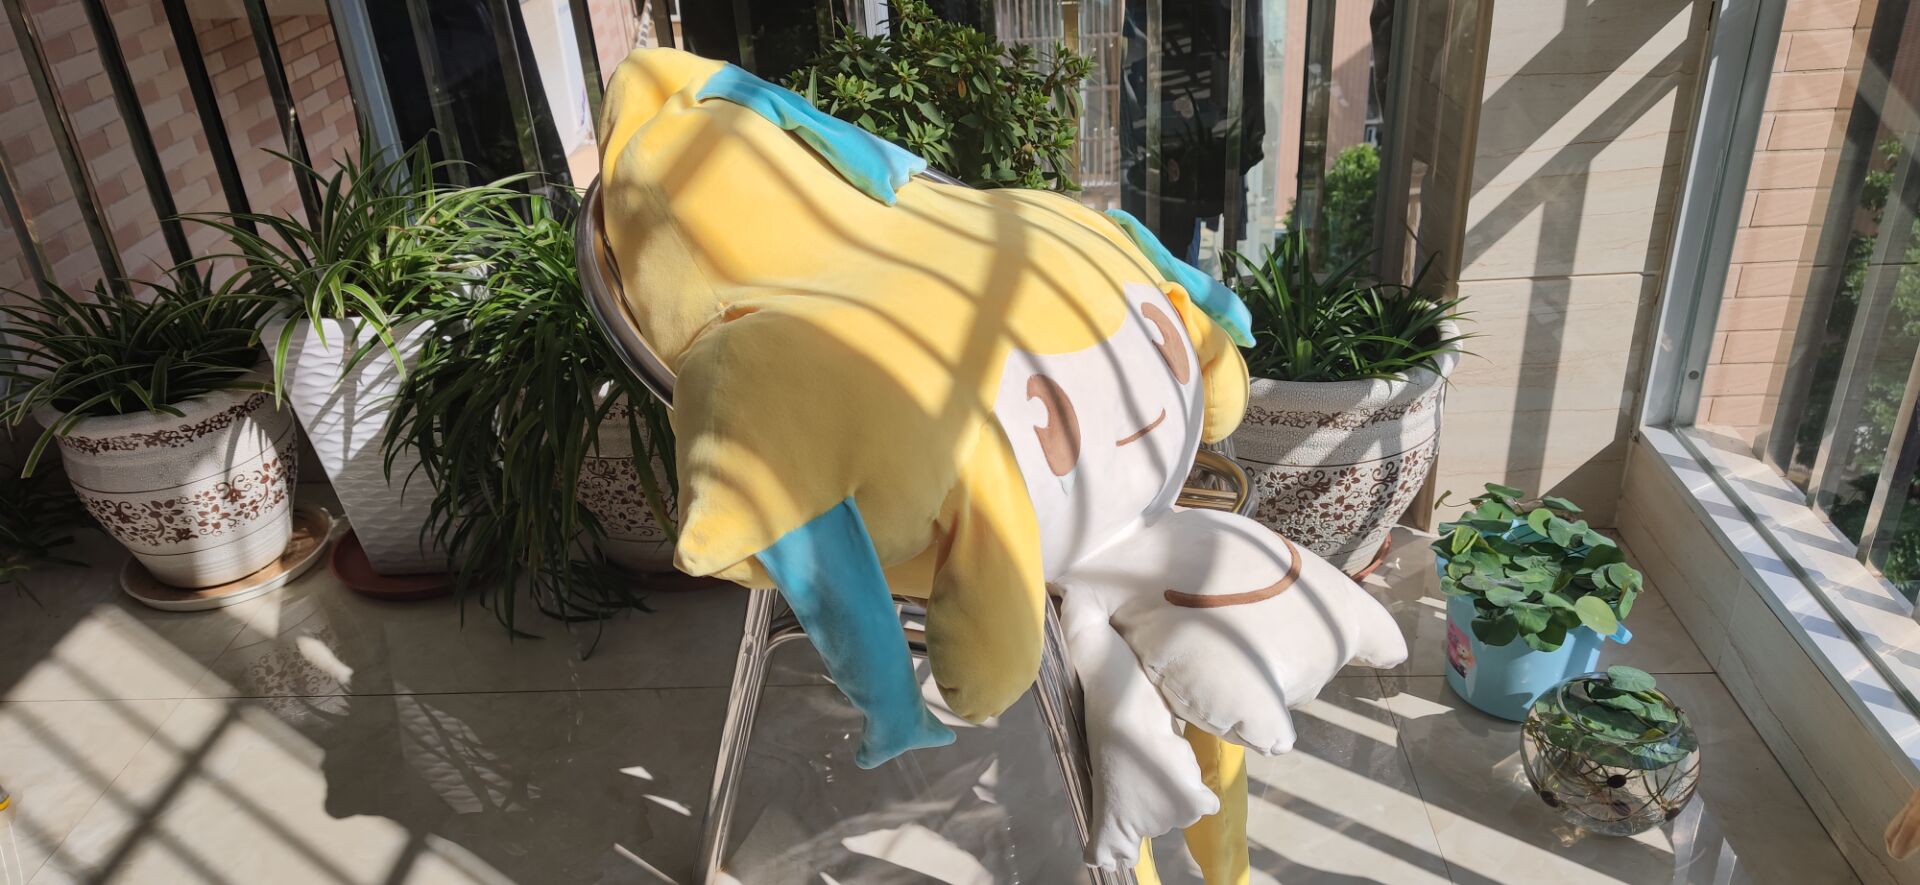
For beginners, I recommend using non-stretch or low-stretch fabrics (like short-pile minky). High-stretch materials tend to deform dramatically after stuffing, which can result in a finished product that looks completely different from the original design — a discouraging outcome for someone just starting out.
Lastly, honing your aesthetic sense is essential. The official Pokémon plush collection is an excellent learning reference — as one of the world’s most successful IPs, the design quality, diversity, and craftsmanship are top-tier. Beginners can even try purchasing simple plush toys, carefully deconstructing them, and recreating the patterns in MD before sewing them back together — it’s a great way to gain hands-on experience.
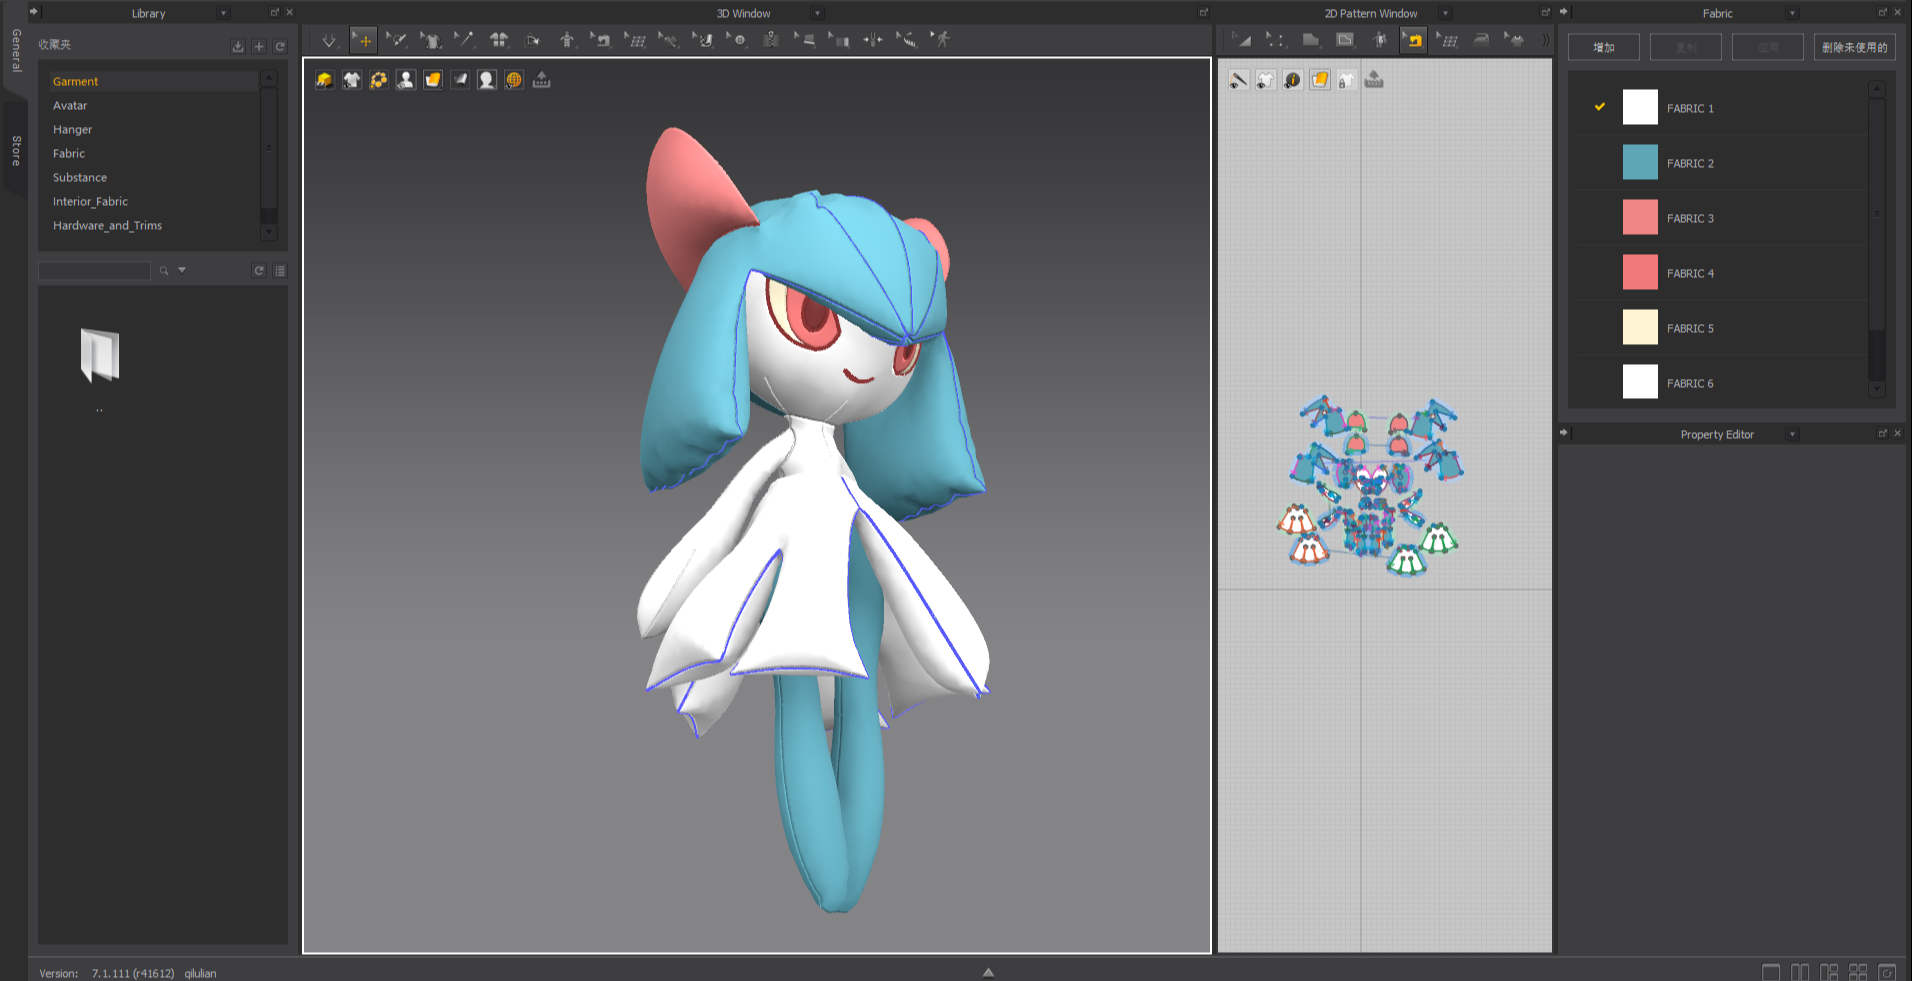
What has your overall experience been like using Marvelous Designer?
Since I’m not a professional game artist, I only use a limited set of features within Marvelous Designer that are relevant to my personal creative workflow — primarily the basic tools such as fabric property adjustments, pattern making, and simulation. These functions alone have been quite sufficient for my current needs.
That said, I believe that as my work evolves — especially if I begin designing more complex plushies that involve clothing or intricate accessories — I’ll be able to further explore and unlock more of what MD has to offer. It’s entirely possible that there are already features within the software that could benefit me, but I simply haven’t discovered them yet.
Even so, Marvelous Designer has already proven to be incredibly valuable. As an independent creator, I don’t have the resources to run multiple rounds of physical prototyping like a factory would, nor do I benefit from economies of scale to offset the cost of development. Being able to shift this portion of the design process into a virtual environment is a meaningful and cost-effective solution.
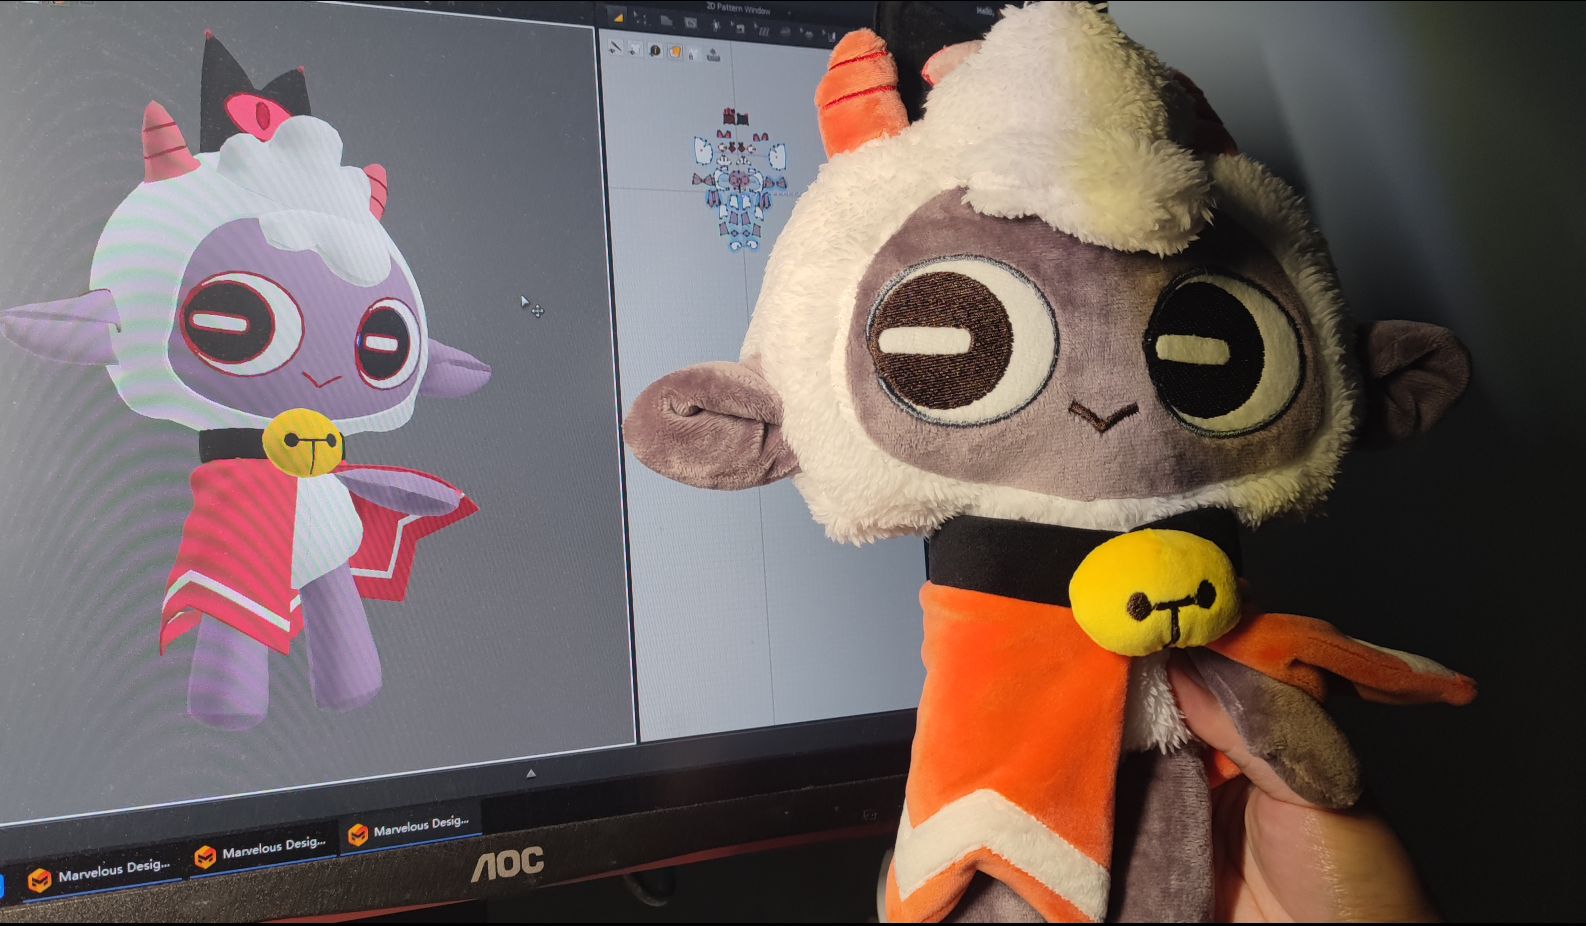
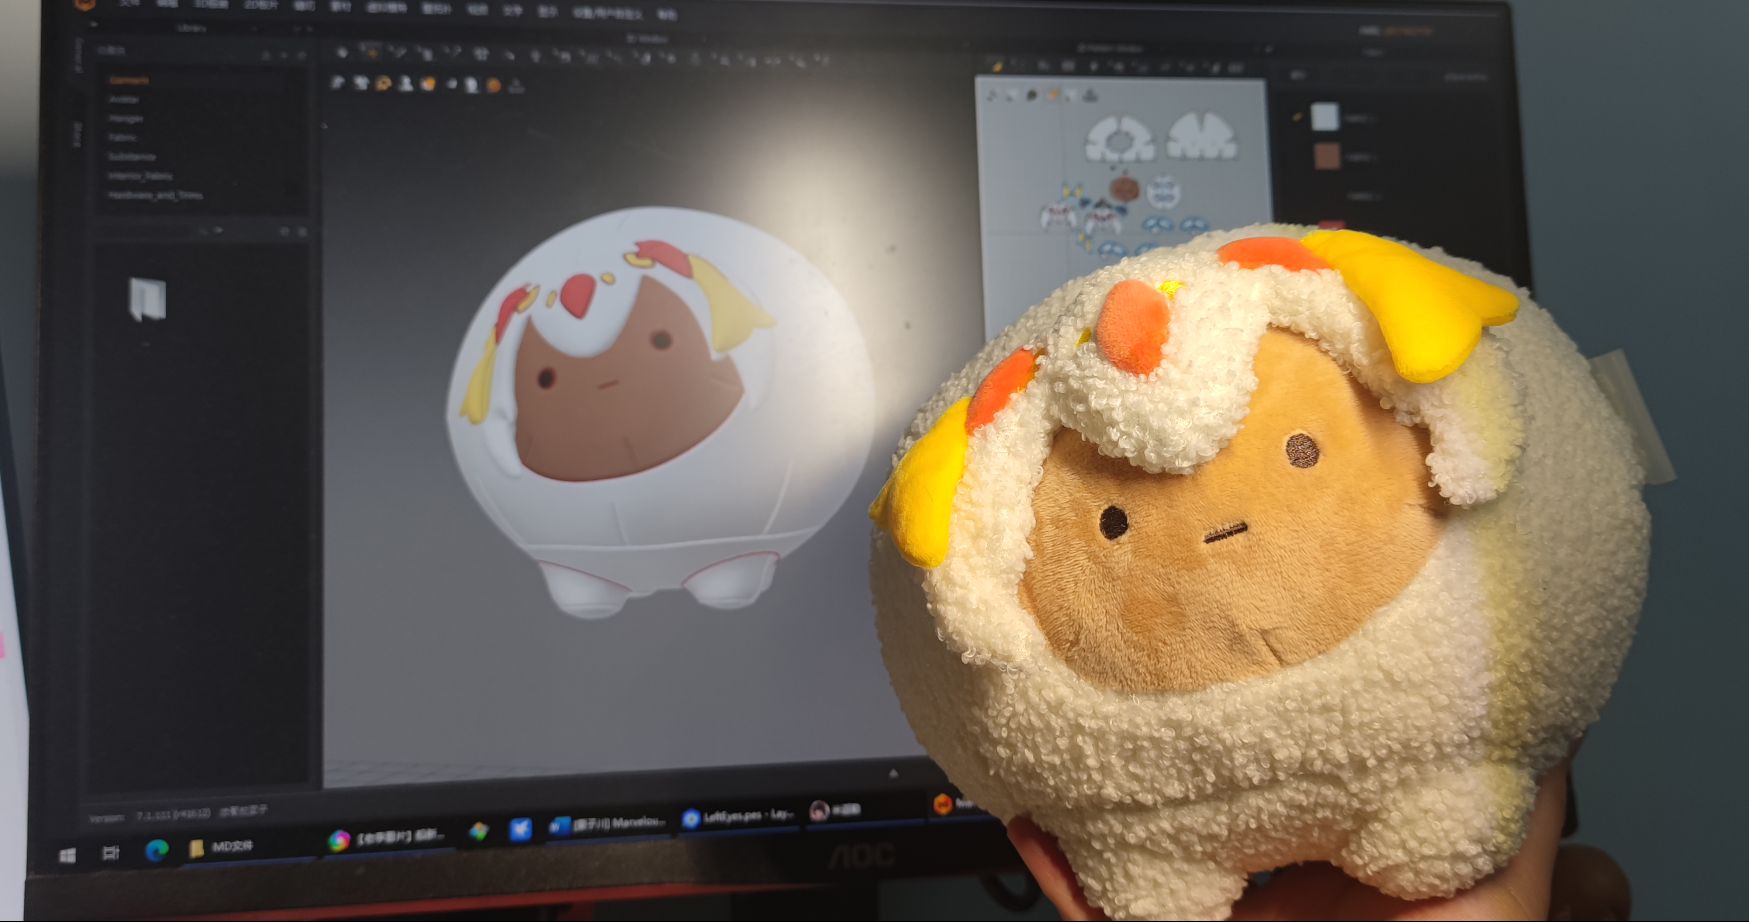
이 작업은 Photoshop, PE-DESIGN, Plush 등의 기술로 제작되었습니다.
Marvelous Designer로 이와 같은 3D 의상·캐릭터 작업을 직접 만들어볼 수 있습니다.