Hazmat Suit and Rina Tavik
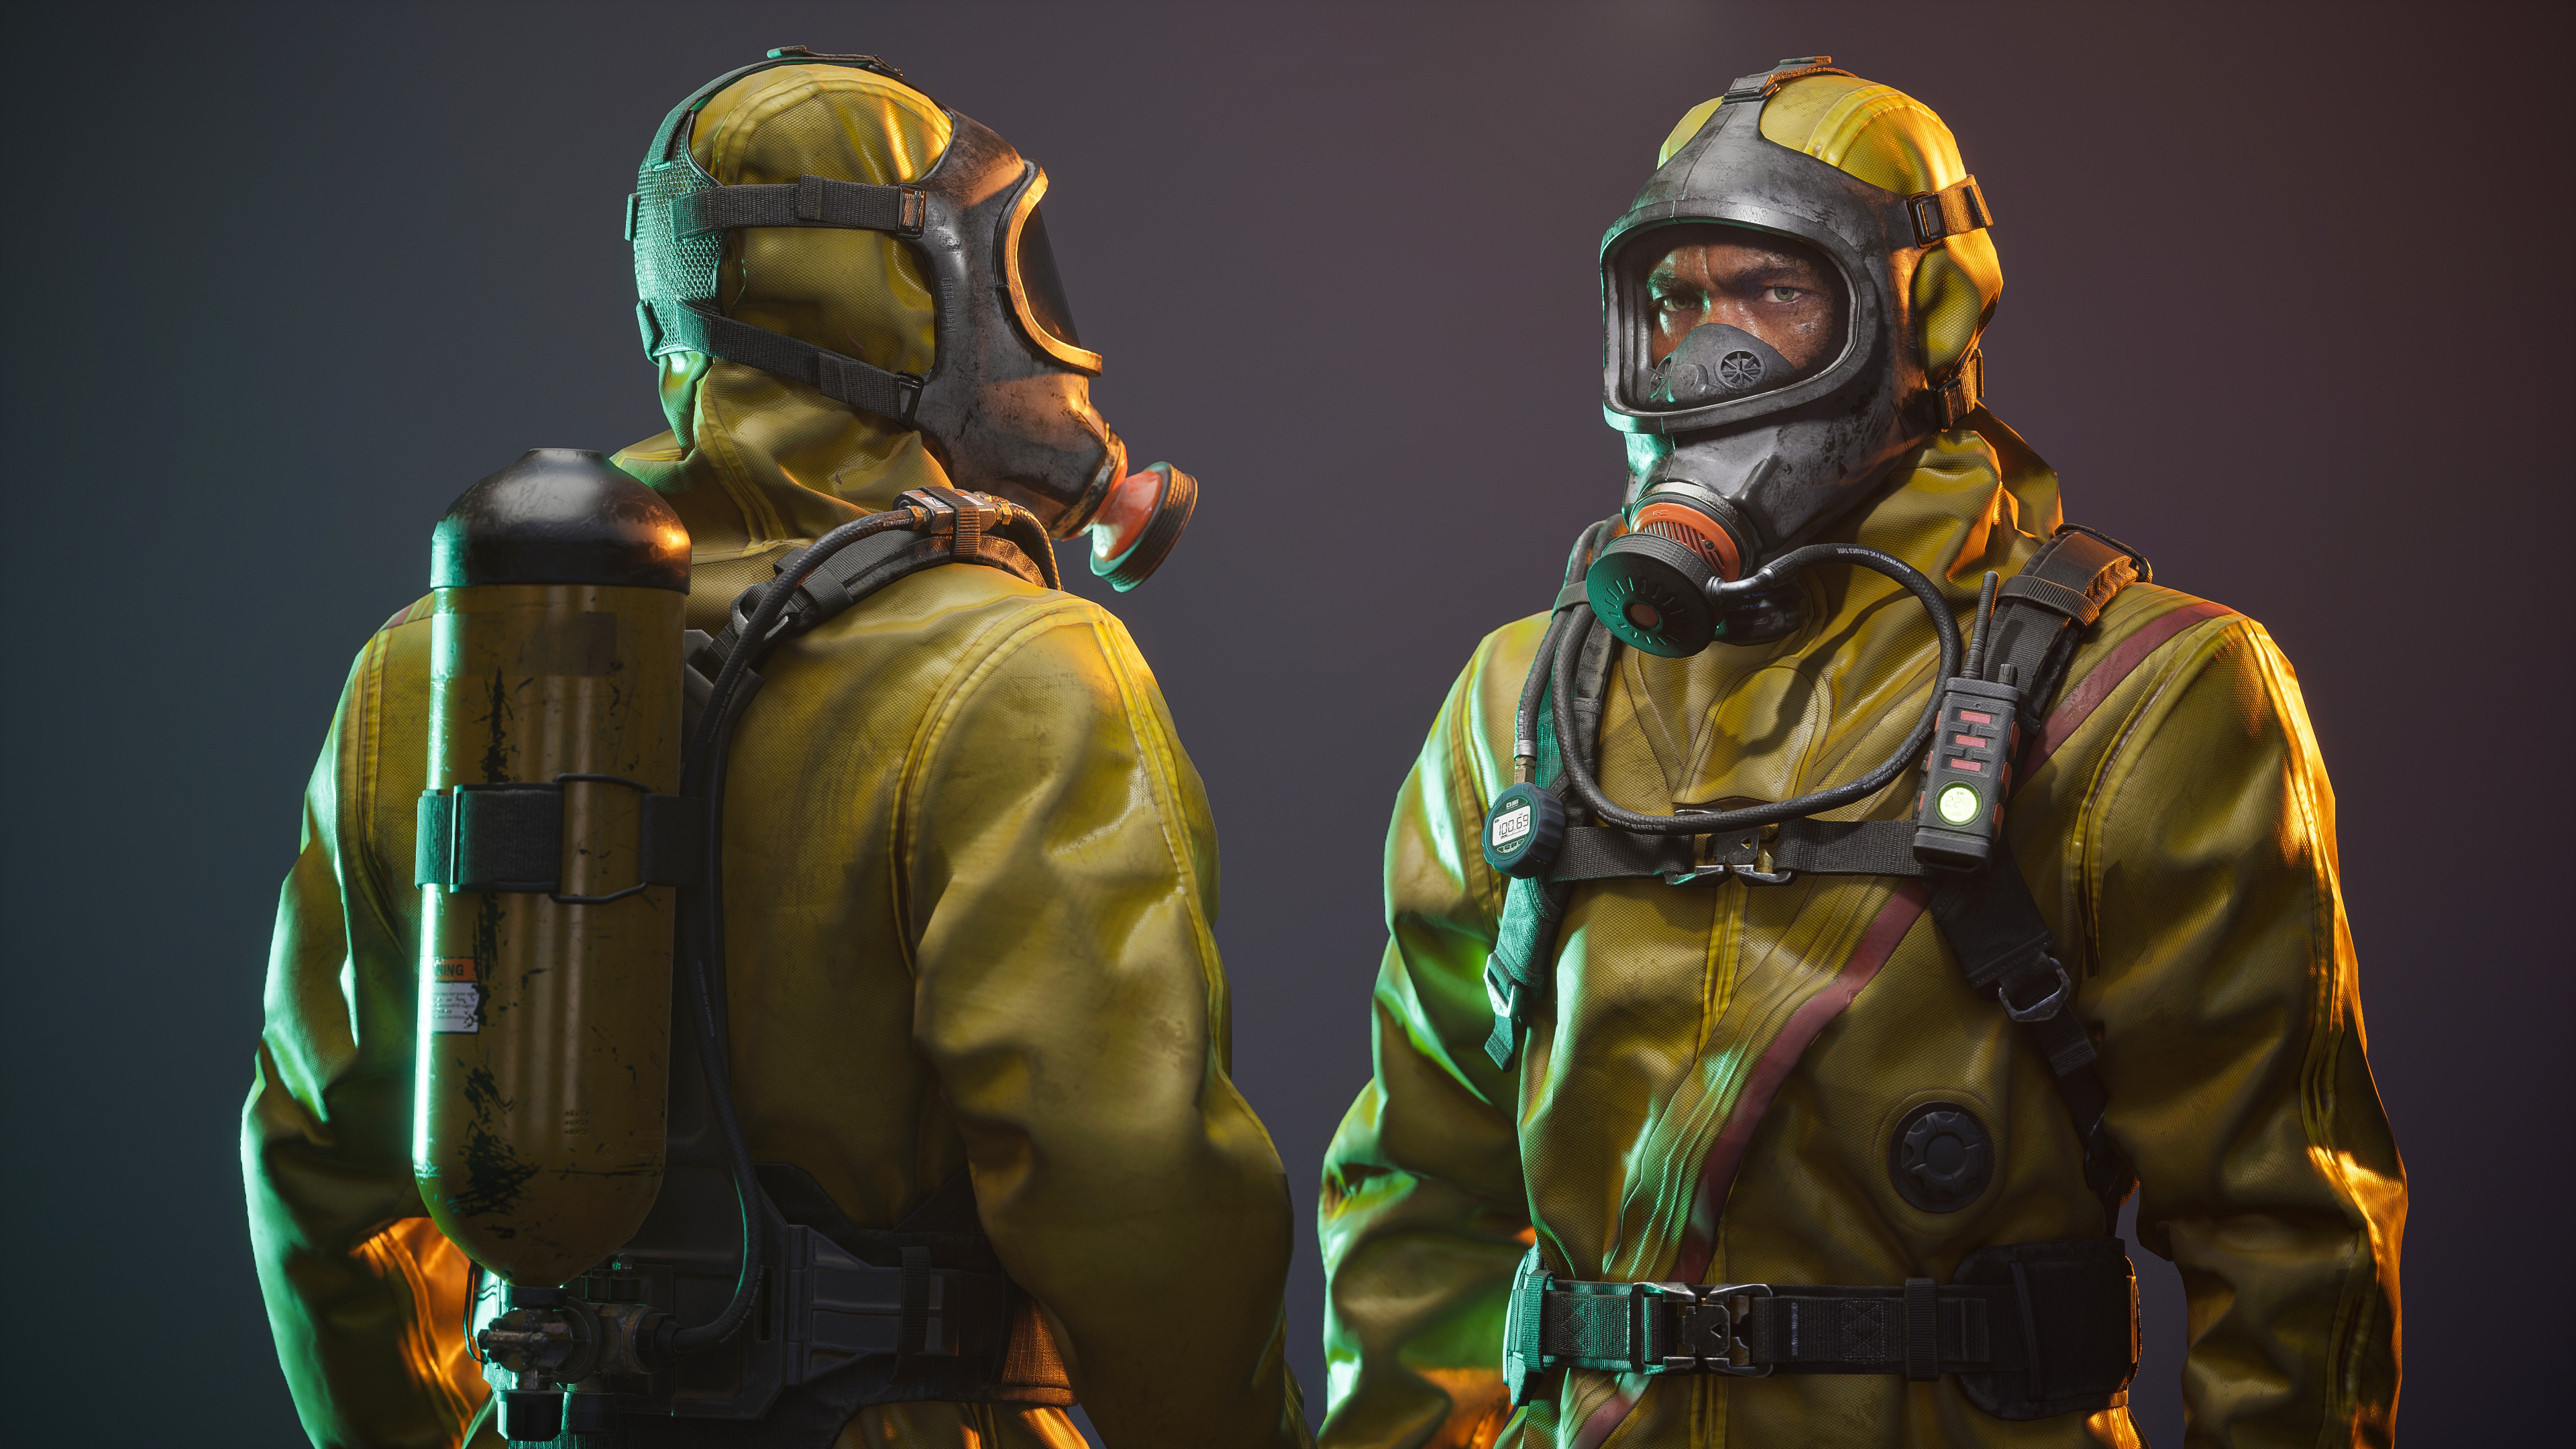
3D artist Christopher Chui showcased his Hazmat Suit and Rina Tavik projects, highlighting Marvelous Designer's role in creating realistic fabrics like rubberized and puffer materials. Using tools like 3ds Max and Unreal Engine, he emphasized early testing, seam accuracy, and fabric layering.
Interview with Christopher Chui | Realtime Hazmat Suit for Metahumans | 3D Character Artist
Can you introduce yourself and your background as an artist?
I’ve always been fascinated by cloth ever since my mum taught me how to sew. I’ve been using Marvelous Designer since its first version. Back then cloth was something that had to be sculpted in zbrush and you could definitely tell it wasn’t to the same quality. Since I started using MD I was constantly pushing how realistic and efficient the results could be. The software offers so much flexibility, letting you create garments through techniques like draping or cutting fabric directly from the body.
Could you introduce your projects that you’re showcasing to Marvelous Designer community today and what inspired it?
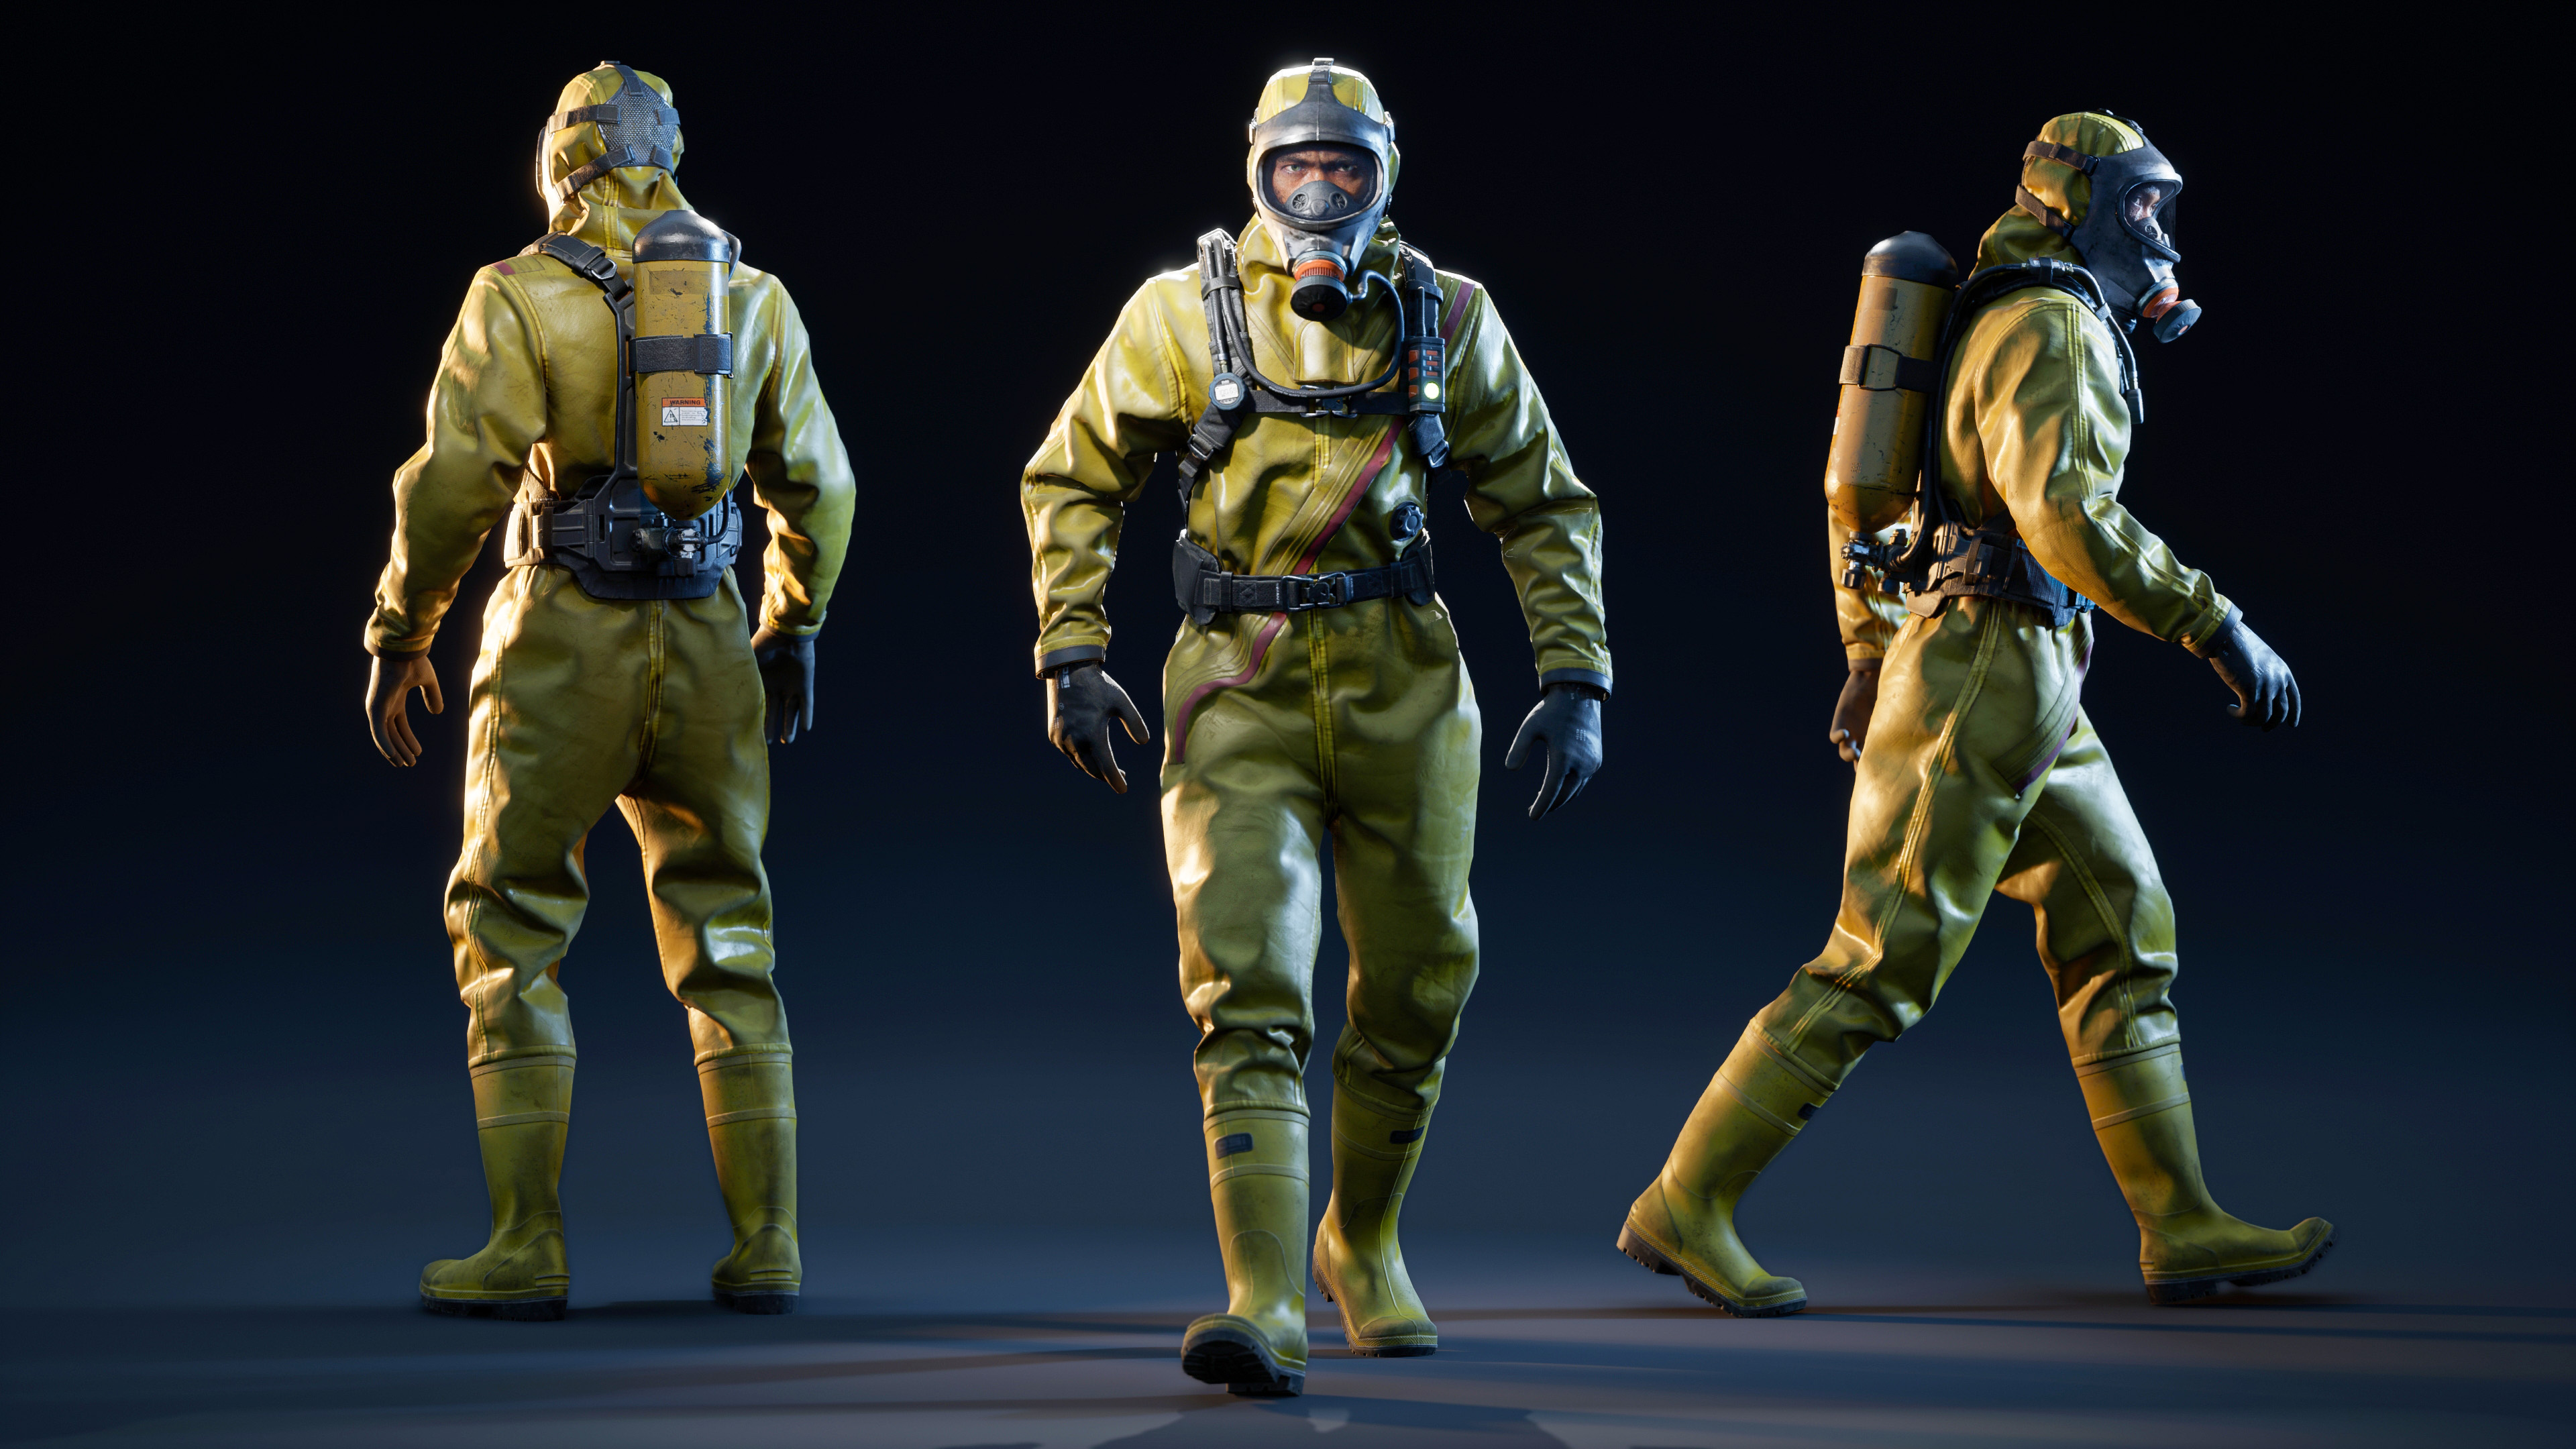
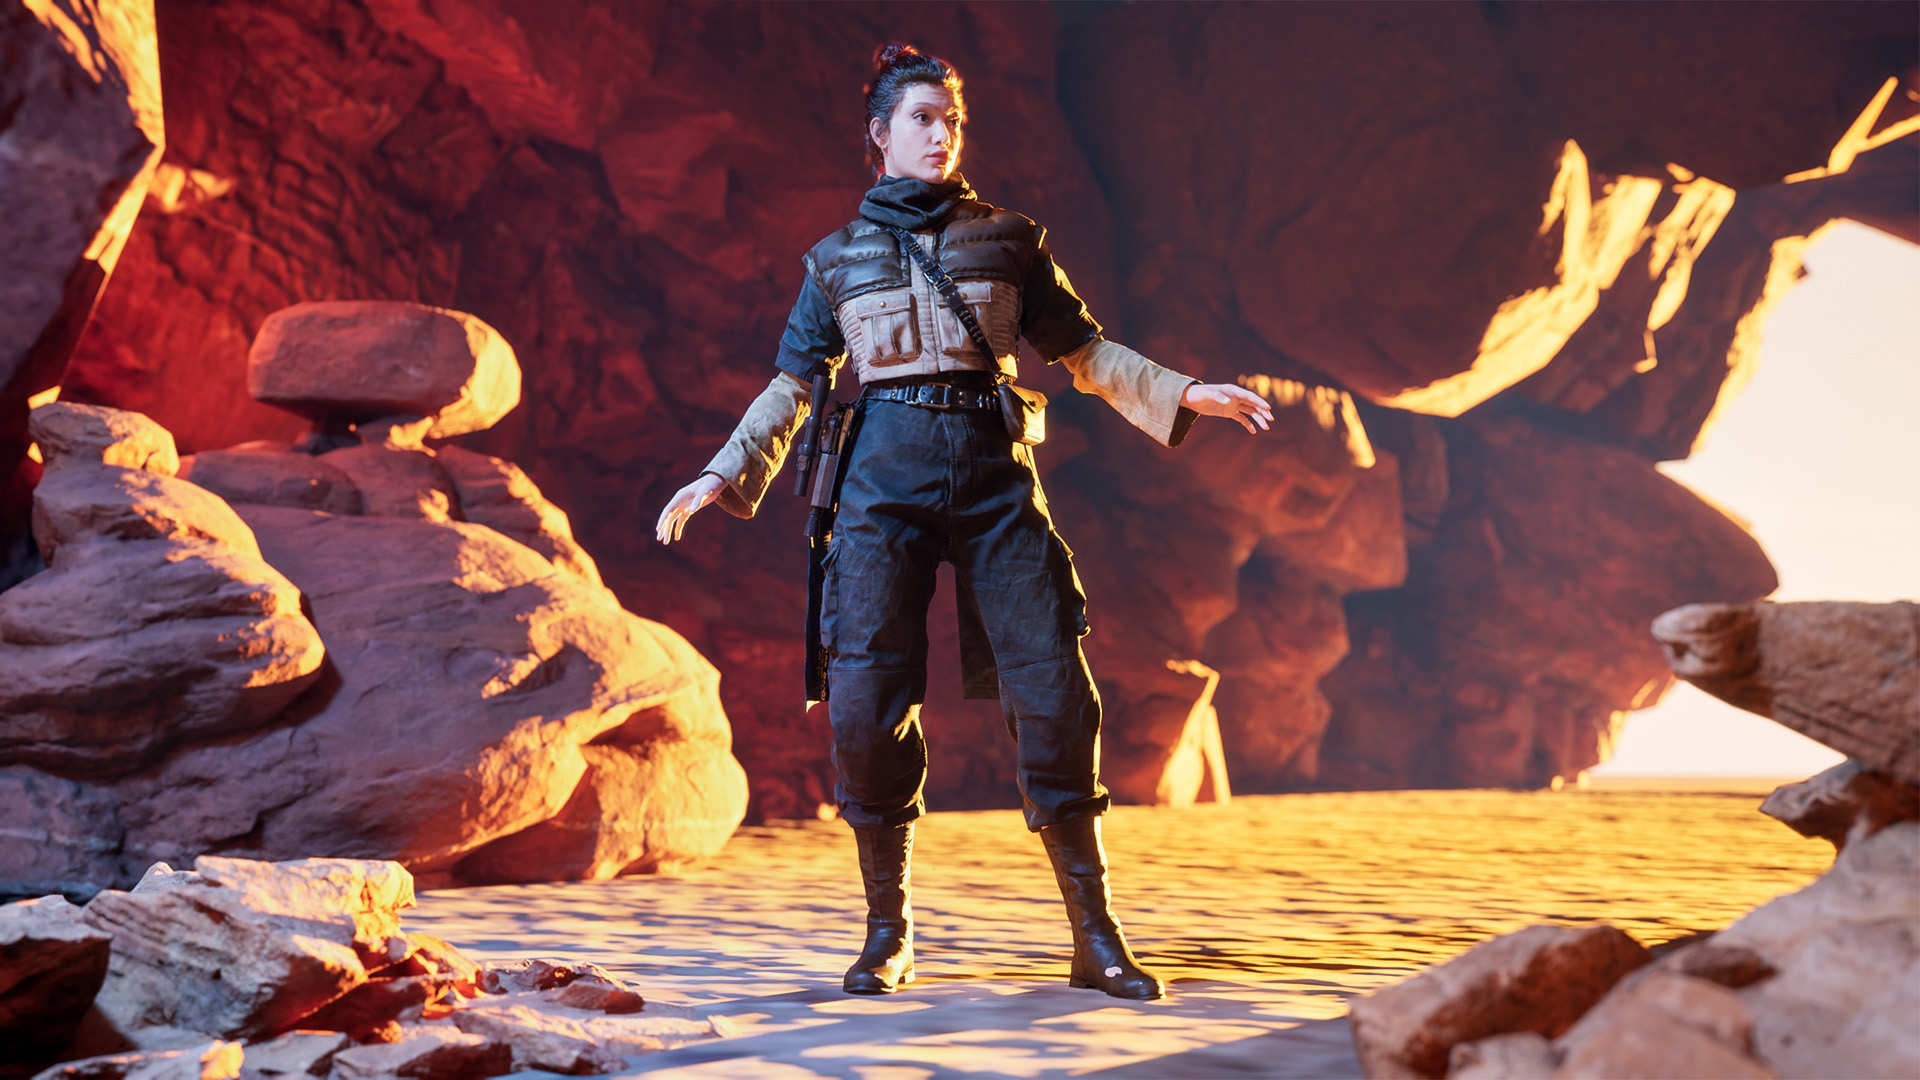
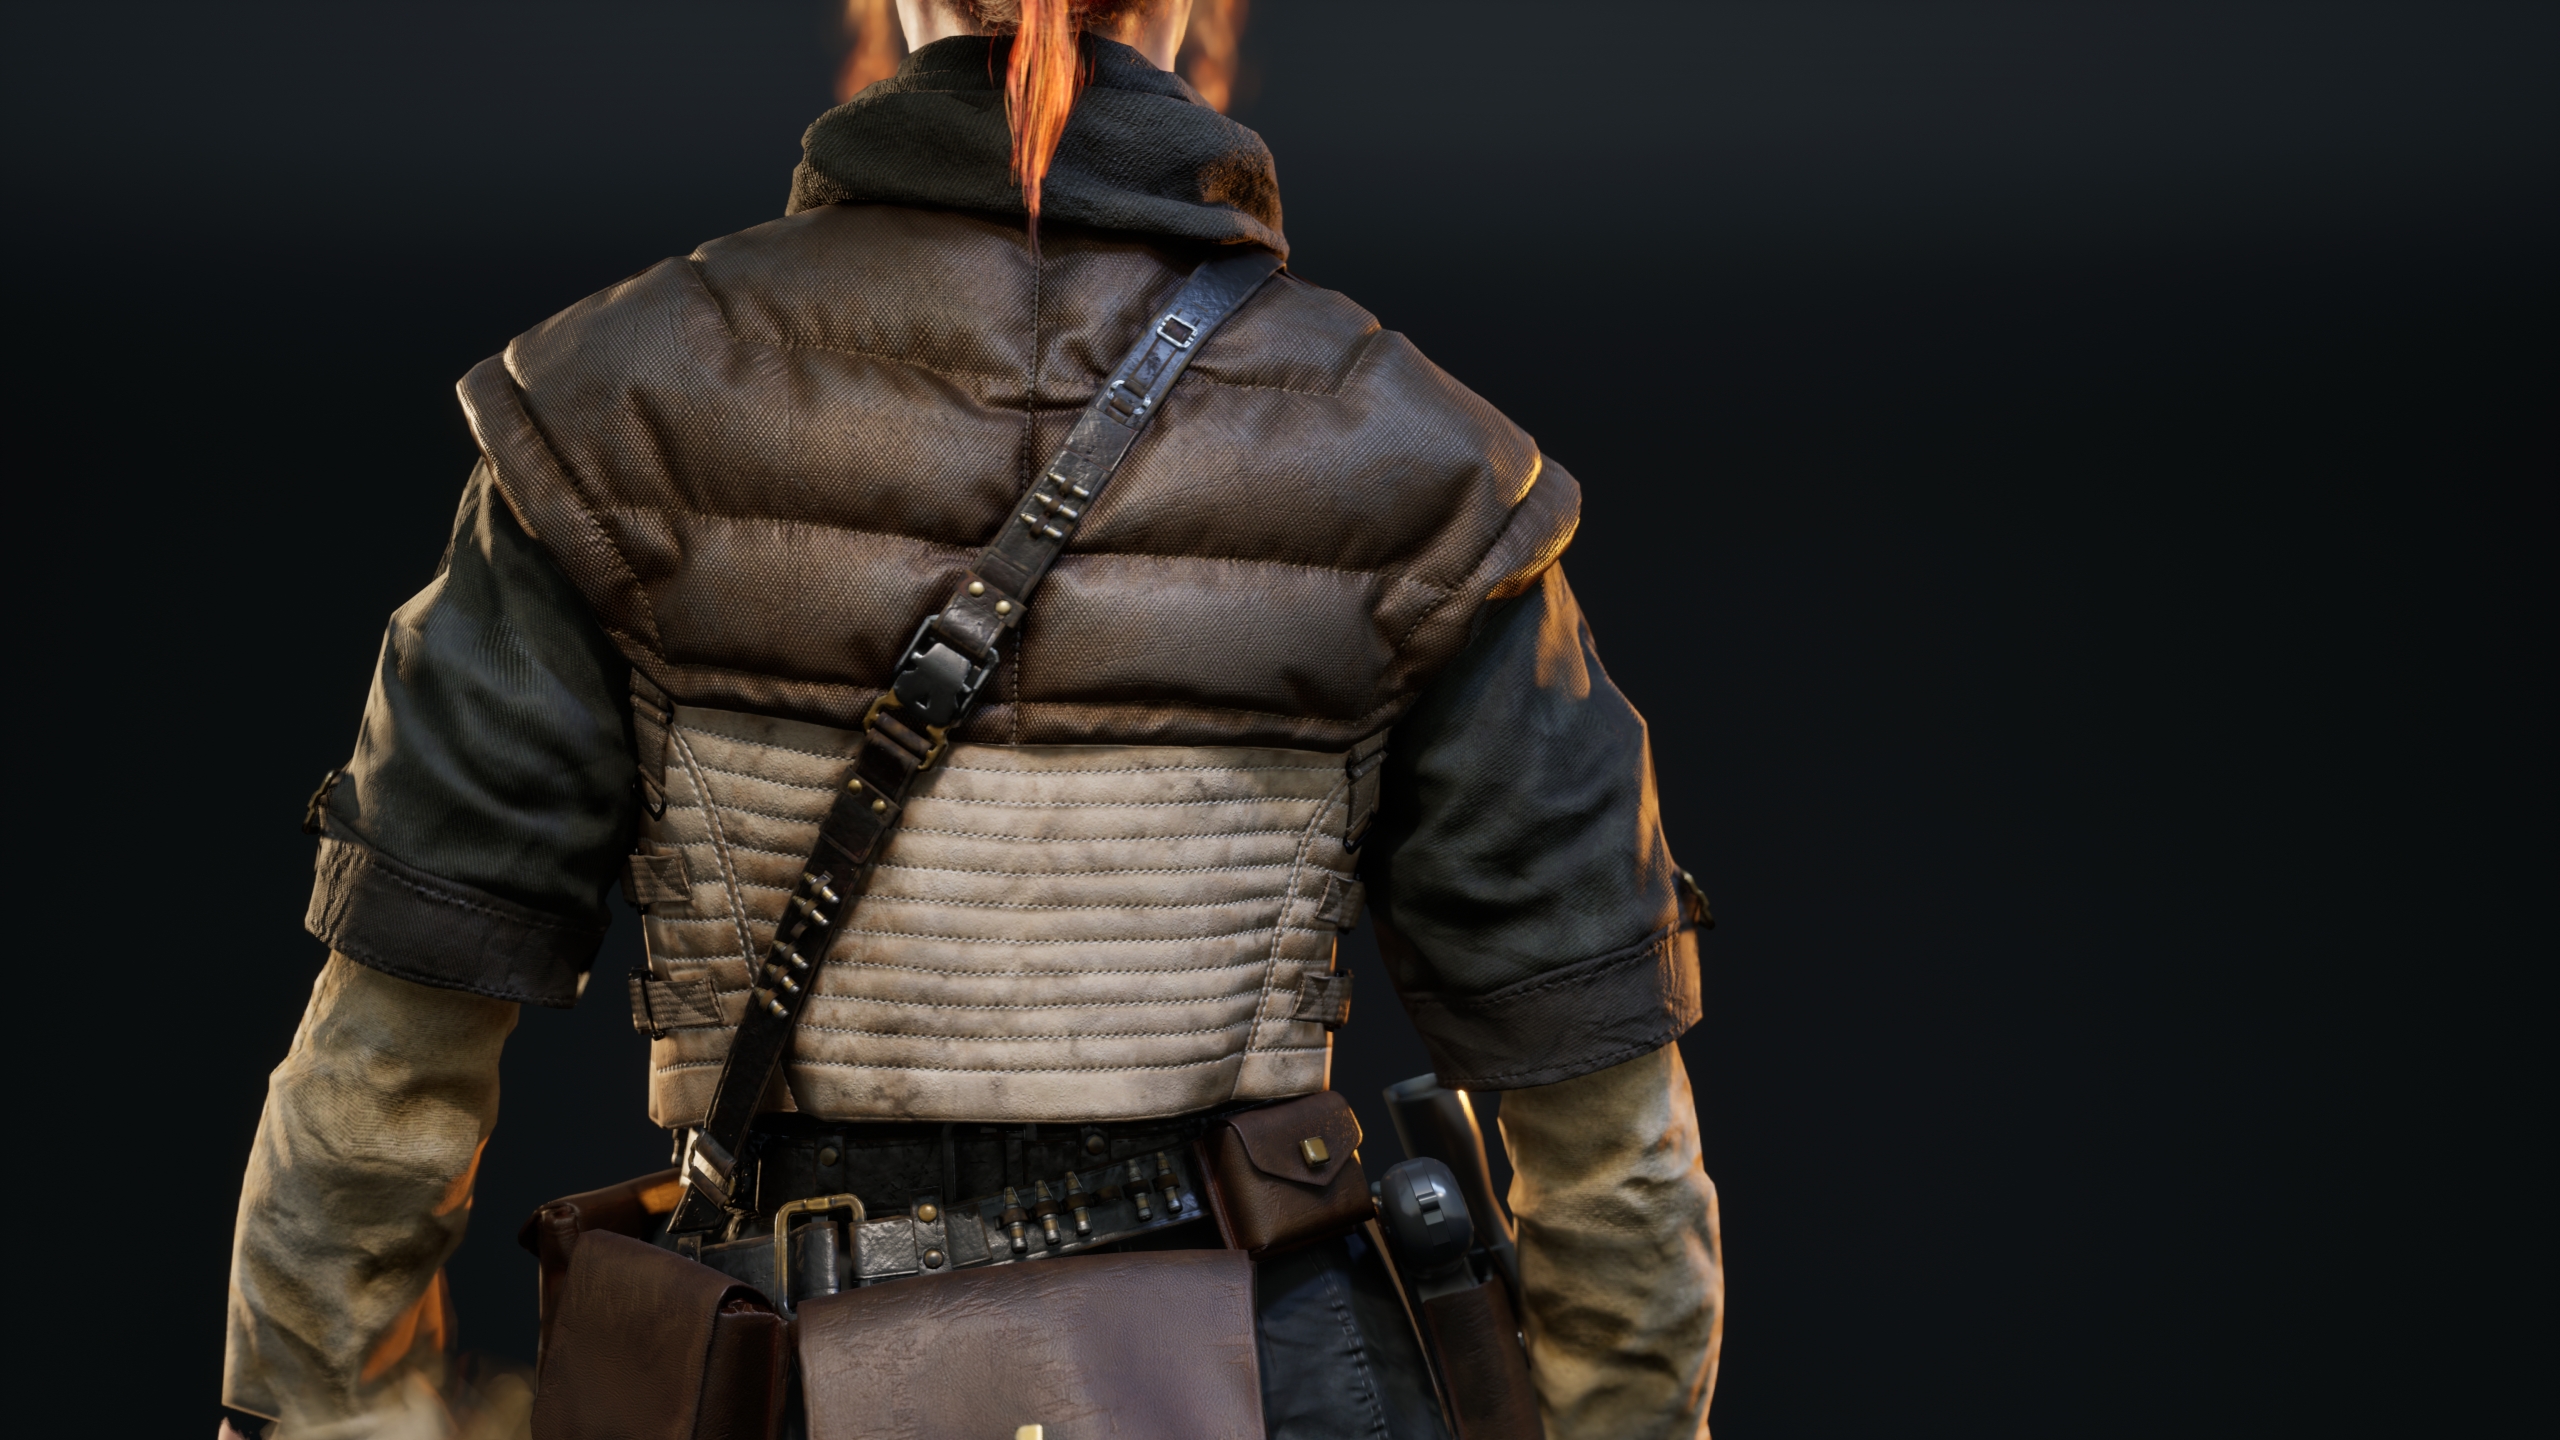
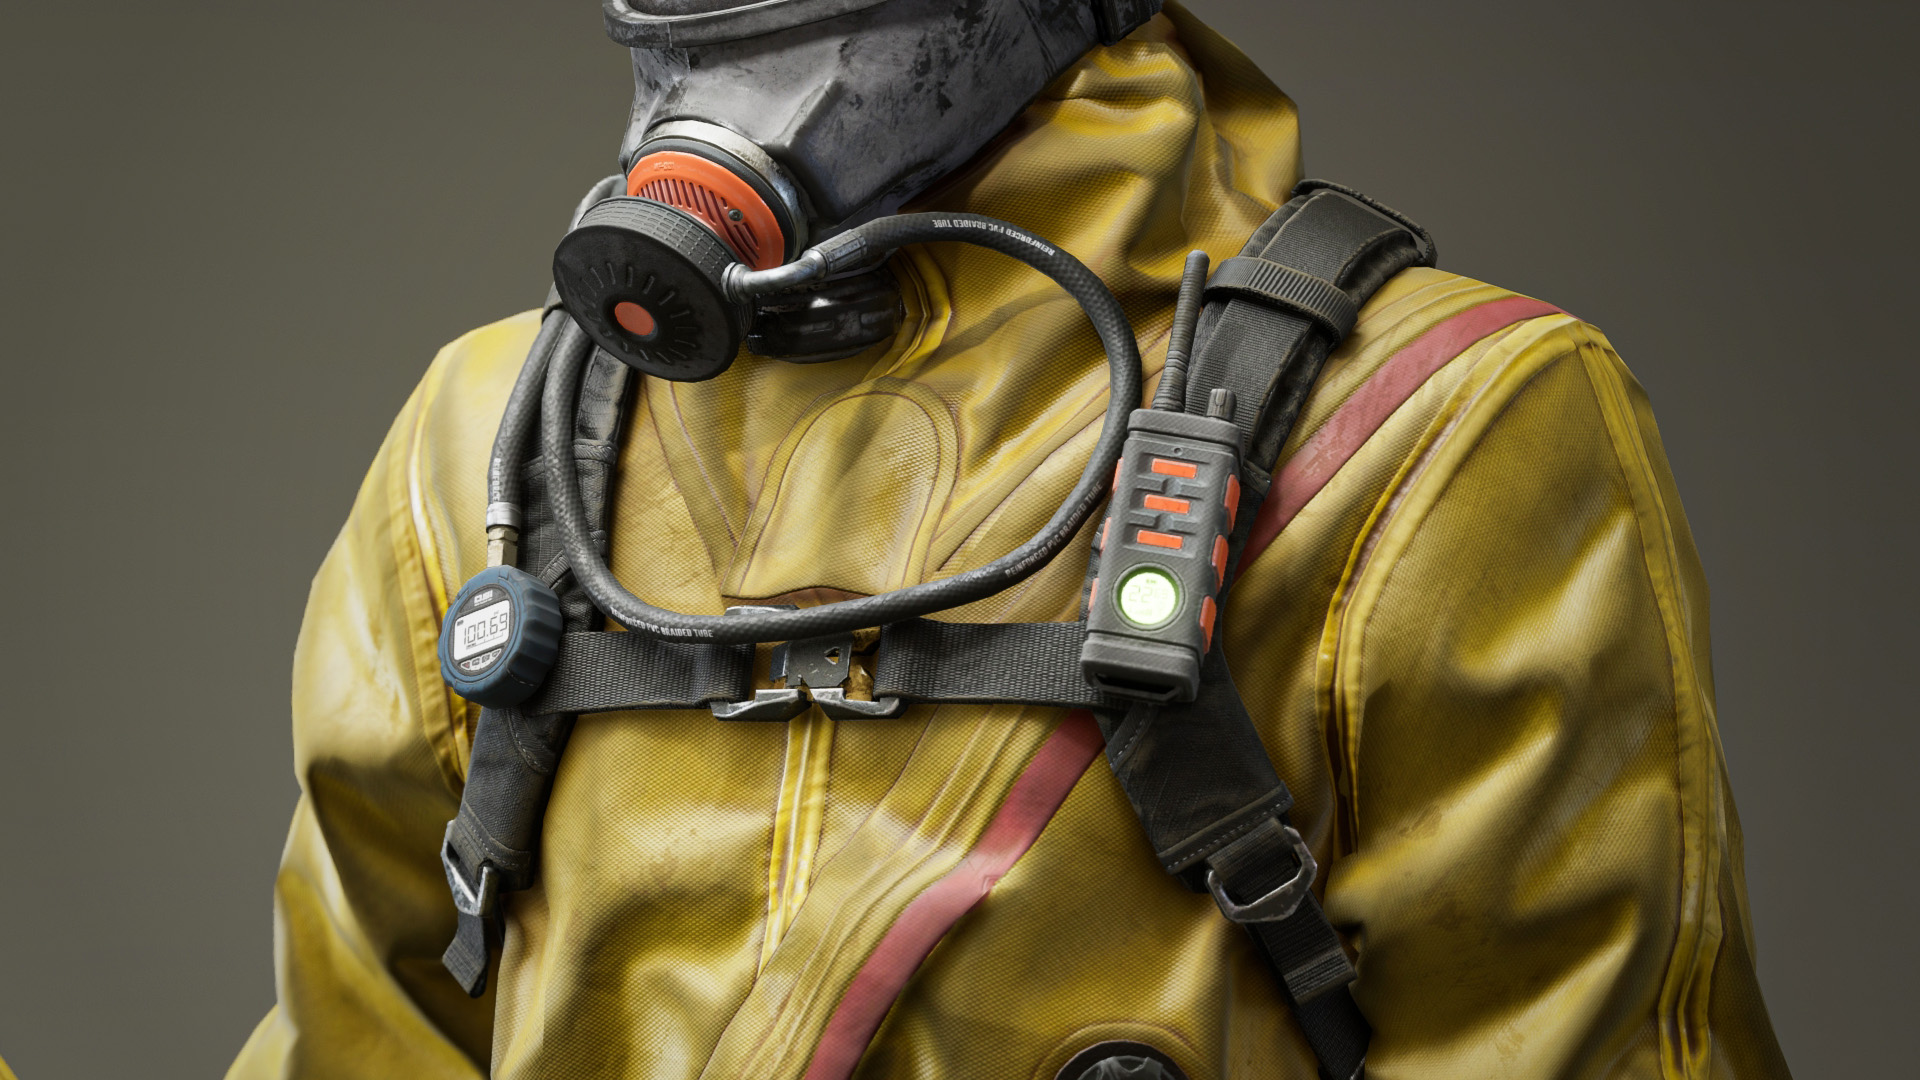
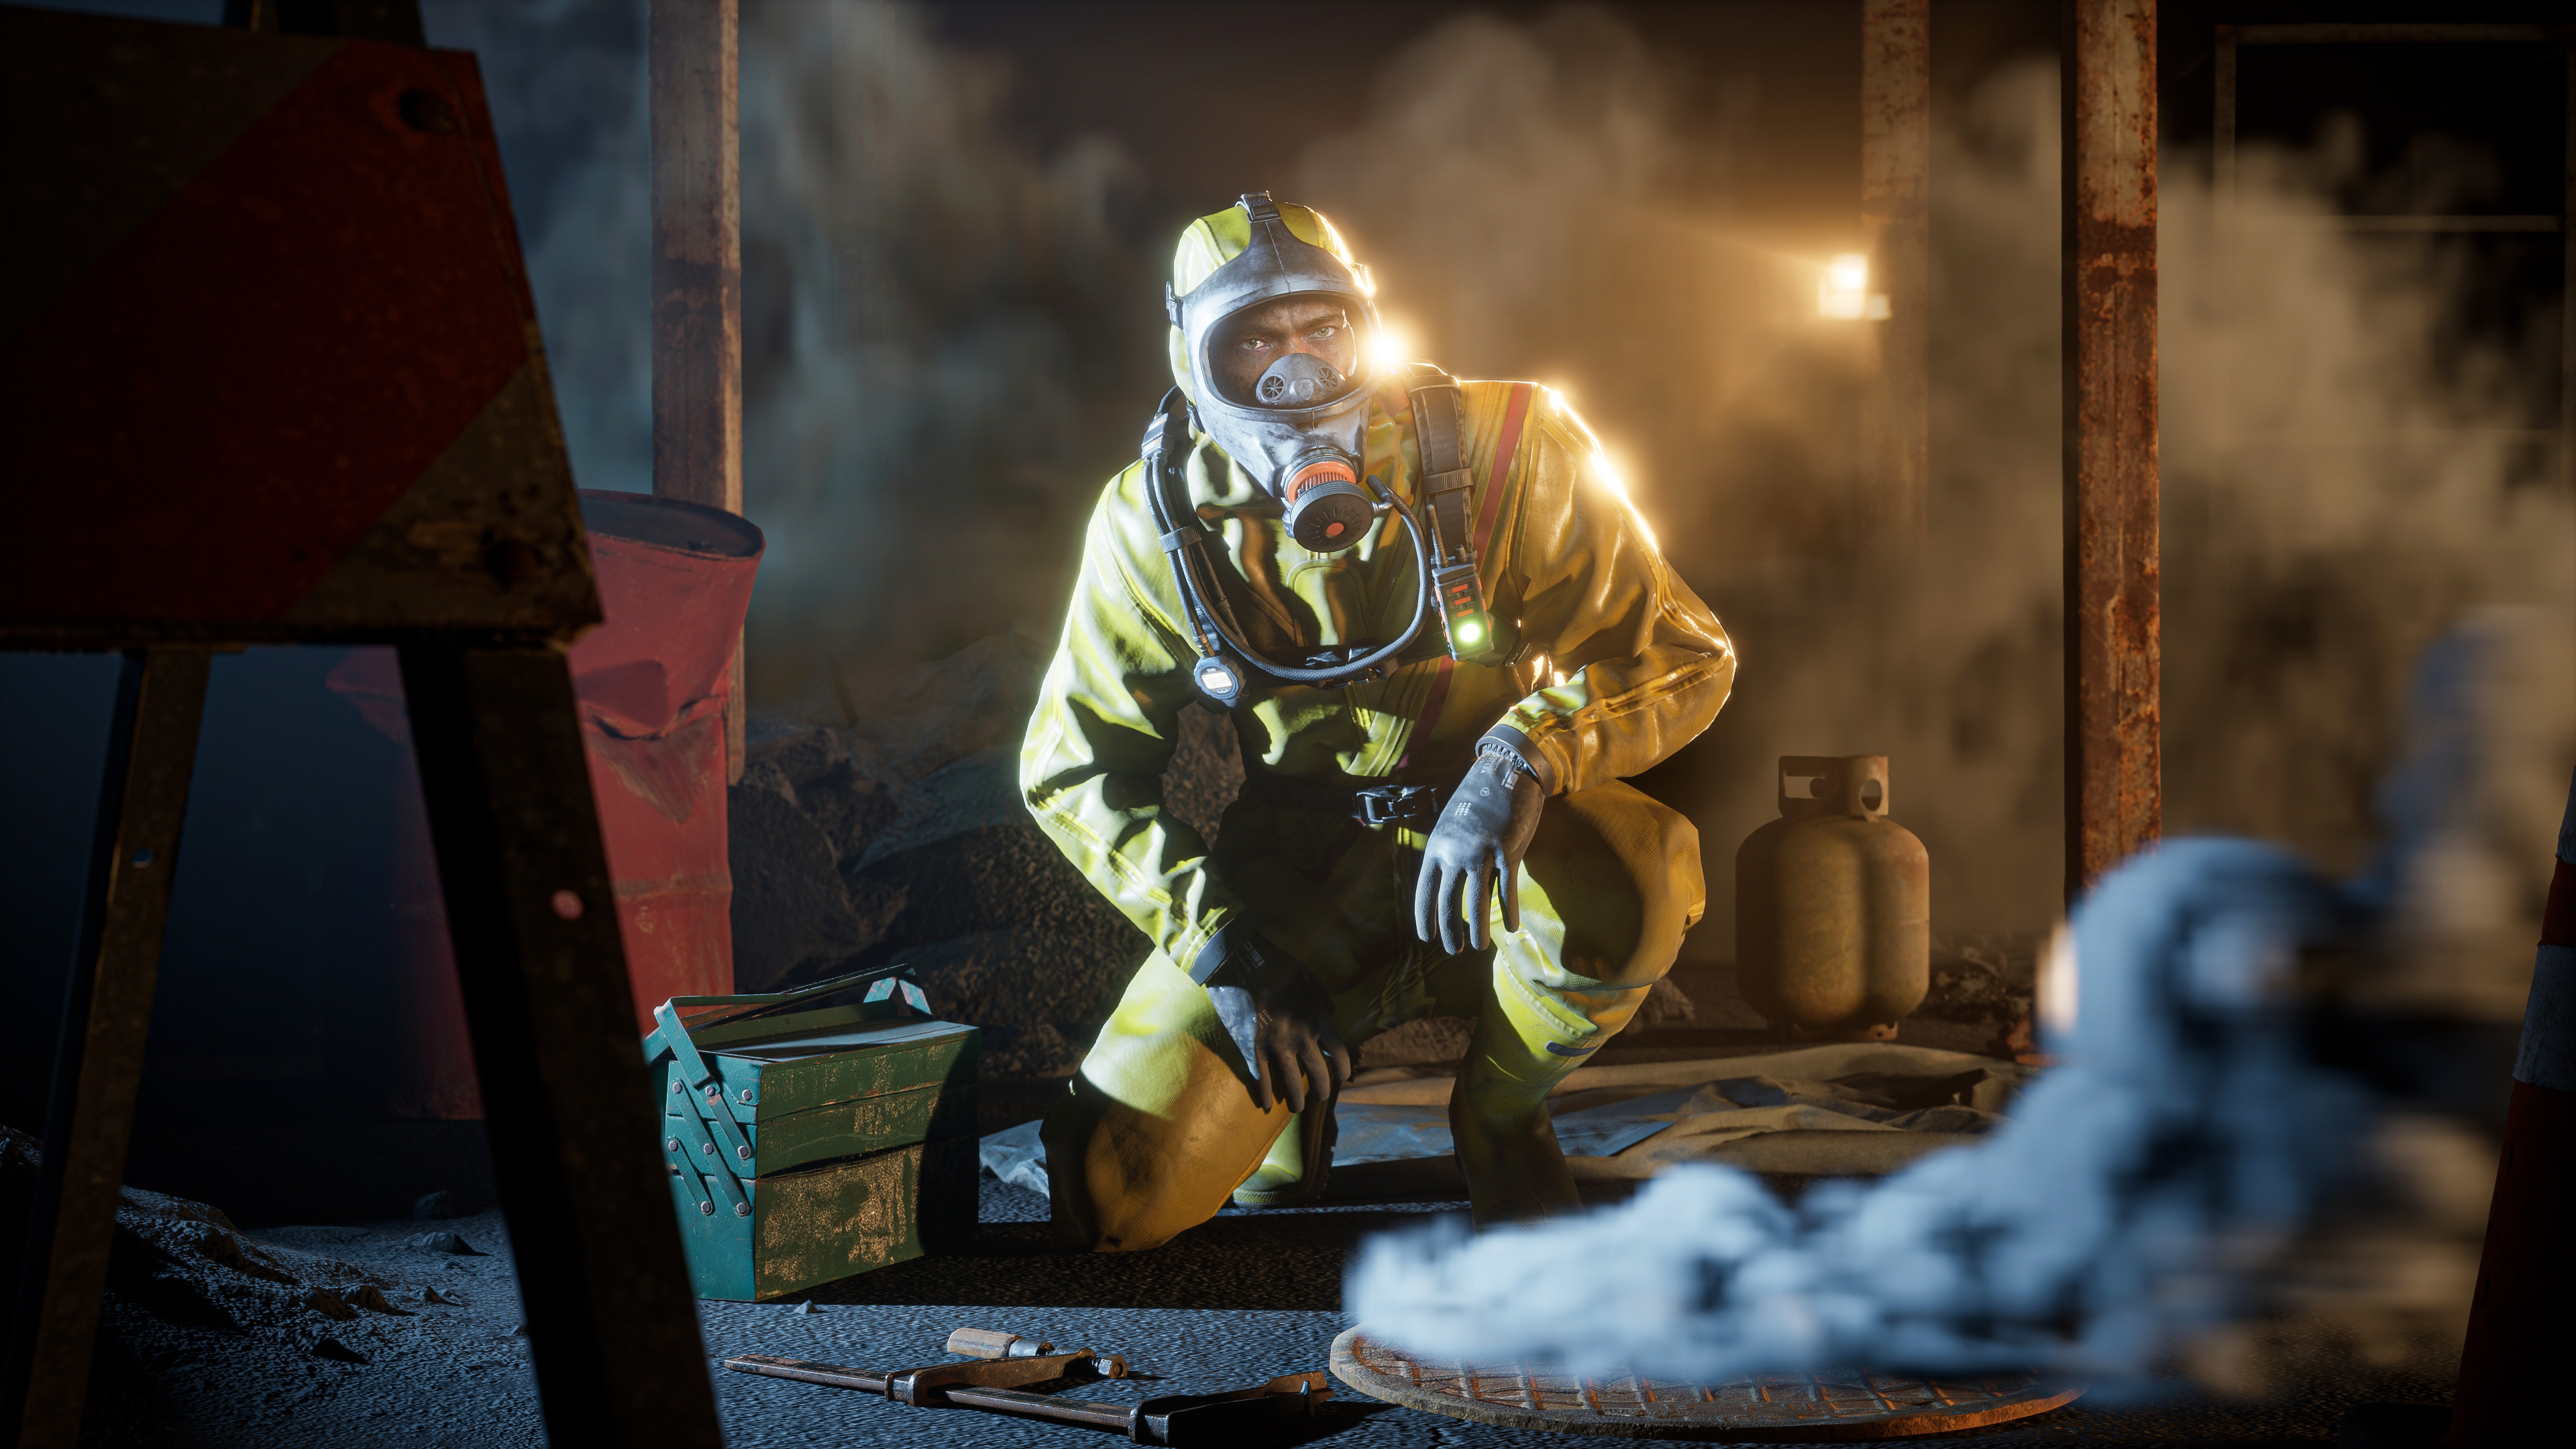
The two projects I’m showcasing are the Hazmat Suit and Rina Tavik. Both were inspired by the challenge of working with complex fabrics. For Rina, I wanted to experiment with puffer jacket materials, while the Hazmat Suit was an opportunity to tackle rubberized fabric. It was also important for both pieces to show how the fabrics react to straps and belts, emphasizing the compression which is typically hard to do in 3D which MD is perfect for.
What made you choose Marvelous Designer, and how did it support your artistic vision?
Speed is critical when iterating on a design and Marvelous Designer is perfect for that. One of my favourite tools is the Line (Avatar) and Flatten feature, which lets you draw lines on a surface (avatar) and peel off a flattened layer of fabric. This quickly provides a base to begin planning out elements on your garment.
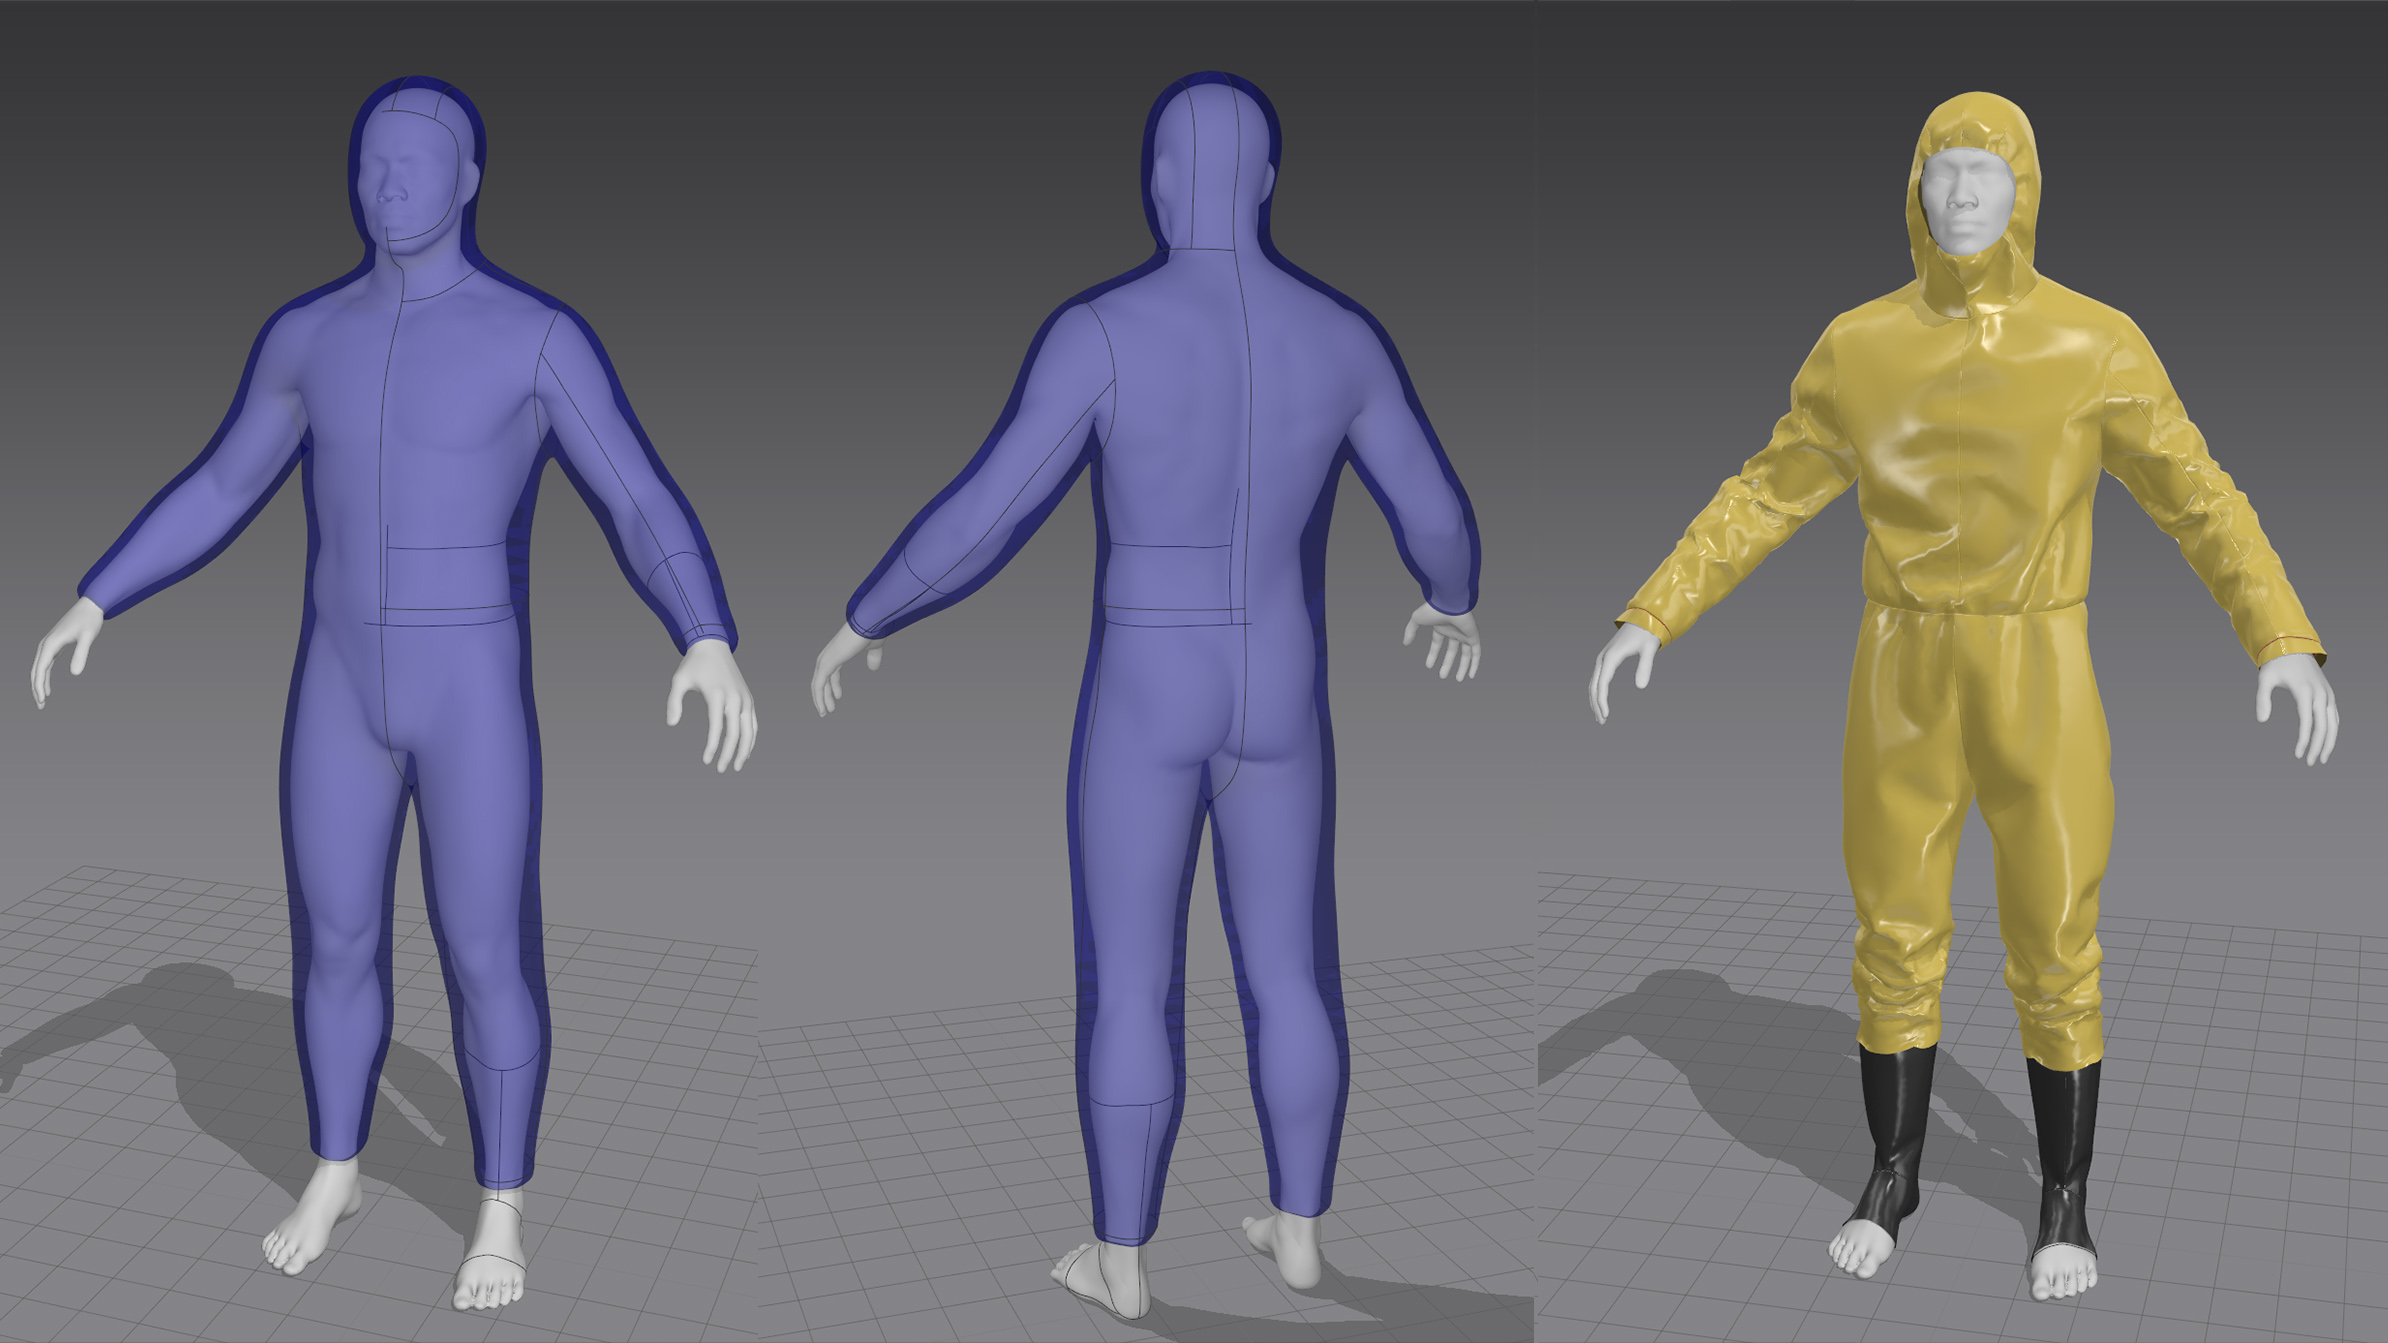
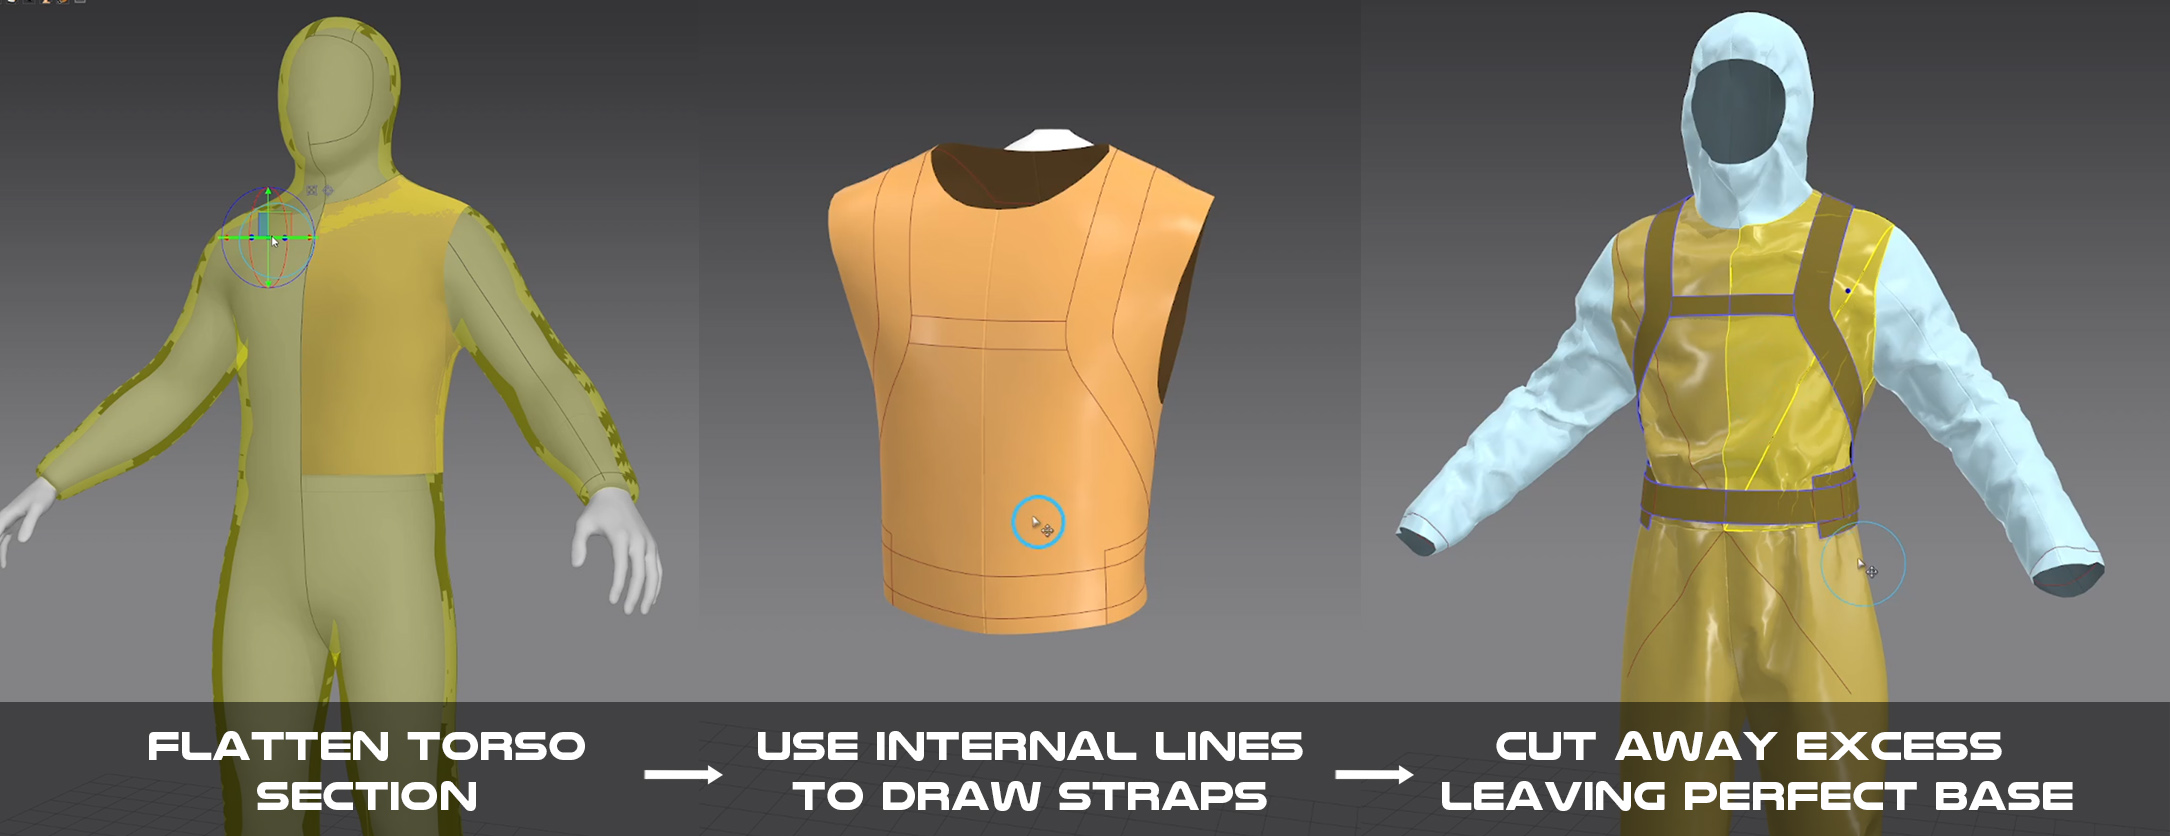
To get the best results, I smooth out the crevices and surface details on the avatar, as they can affect the flattening process. For the Hazmat Suit, I used this technique to create a torso garment, planned the harness placement, and cut away excess fabric to form a perfect base.
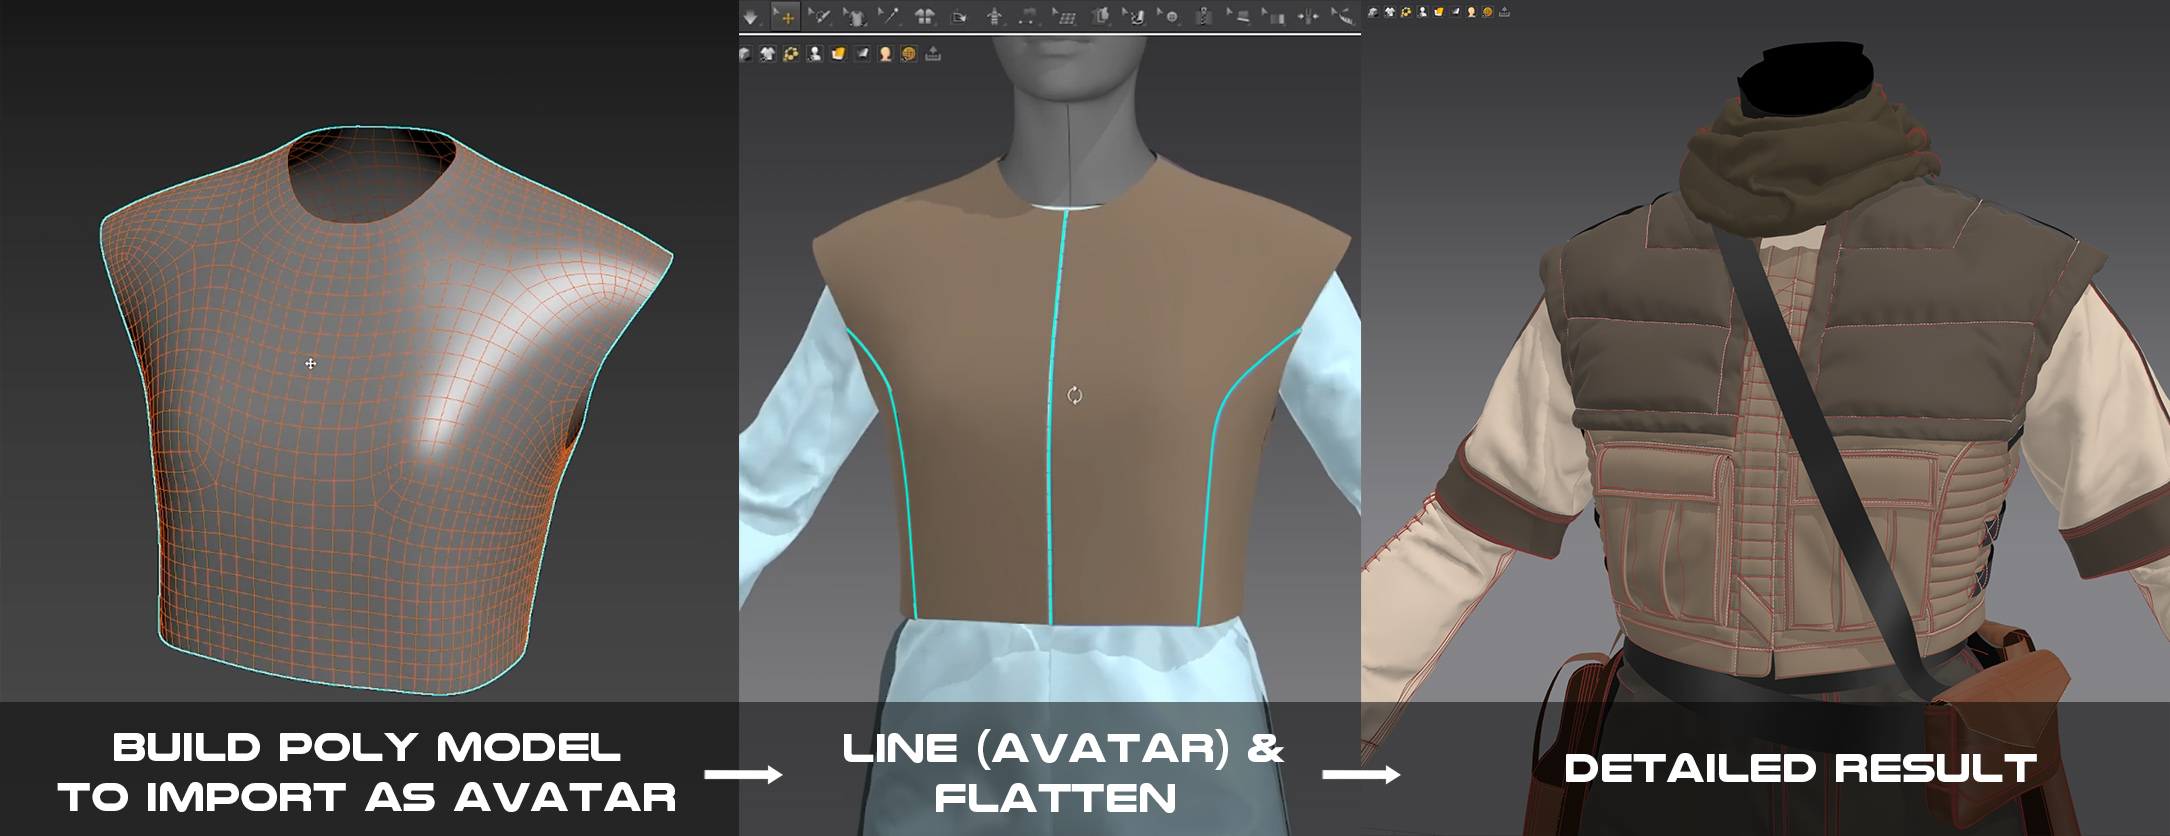
For Rina Tavik, I encountered stretching issues with the torso piece. To fix this, I imported a custom-shaped geometry as an avatar, used the Line and Flatten tool, and created a relaxed base that matched the intended shape exactly. This method ensures a clean and precise starting point for garment construction.
Could you provide an overview of the tools and techniques you used in your workflow?
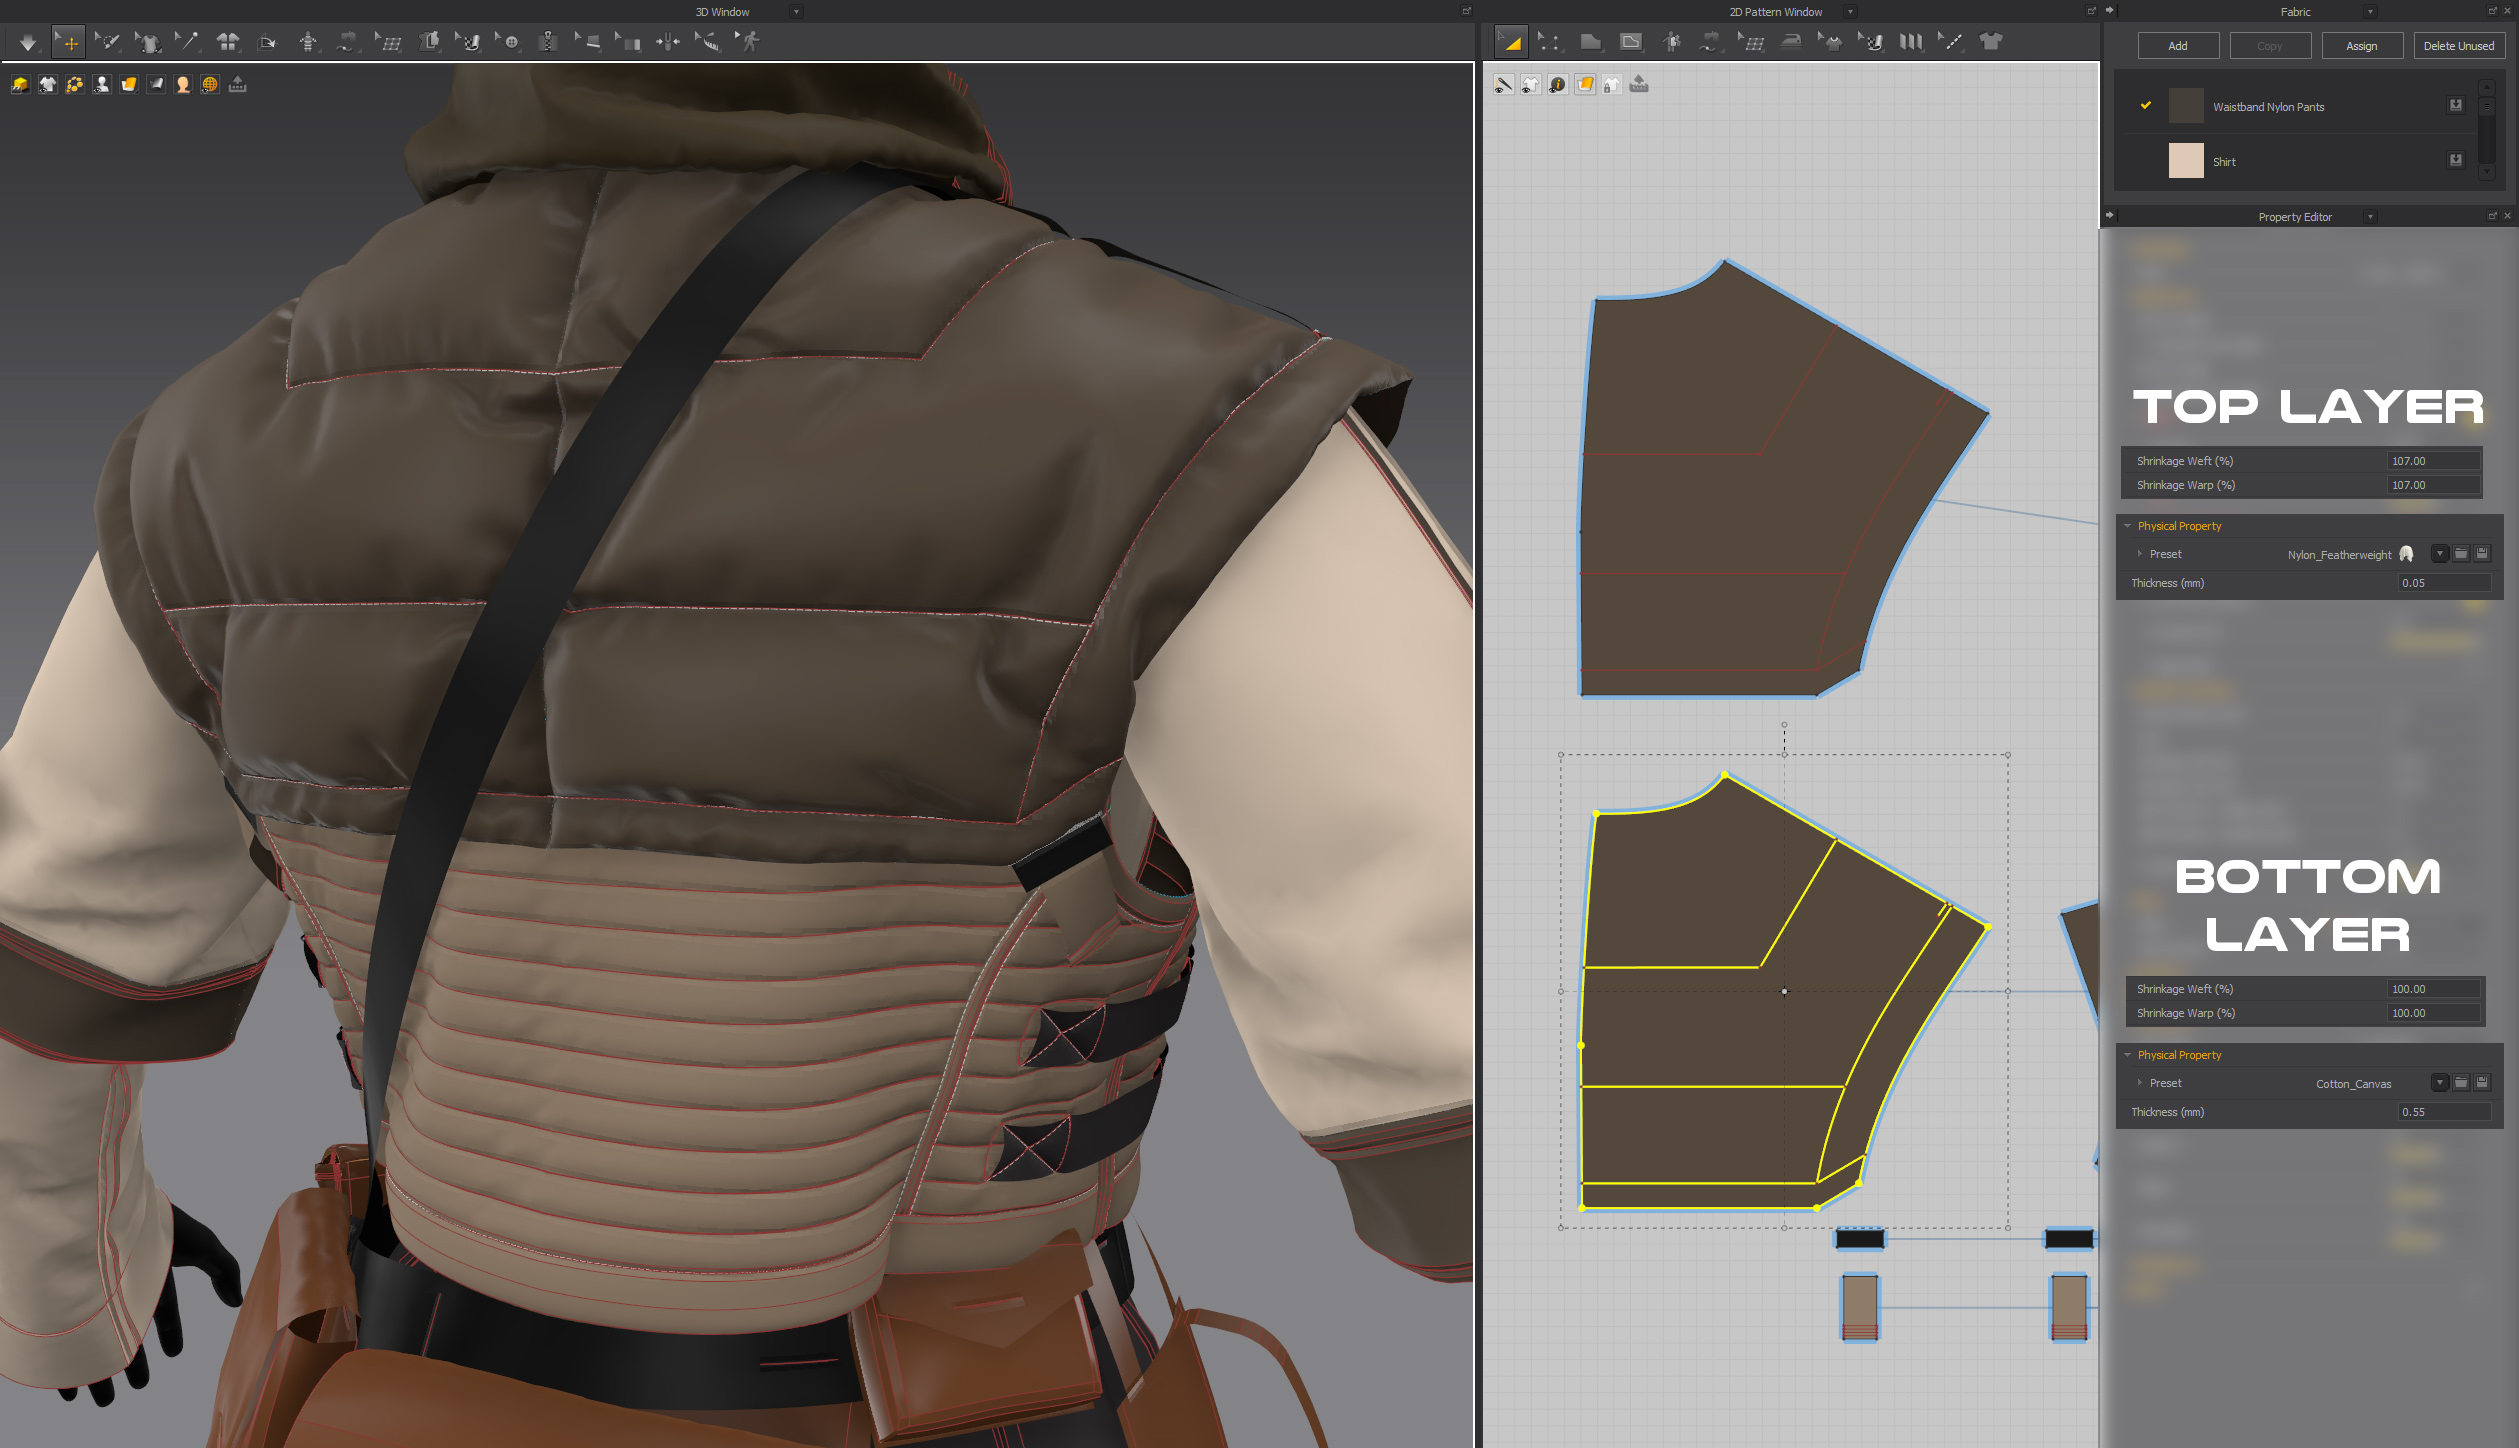
I start by concept designing the cloth in Marvelous Designer focussing on silhouette and overall proportion. I then use 3ds Max and Hyper3D.ai for kitbashing objects and hardsurface elements. For both projects, I employed a two-layer cloth technique: a thicker bottom layer (like cotton canvas) and a lightweight nylon top layer with larger weft and warp settings for finer wrinkles. I refine the cloth in MD, reducing particle distance to 5 or less for detailed wrinkles. The hard surface elements and the low poly are created in 3ds Max, with clean baking in Marmoset using multiple bake groups. Finally, I texture in Substance Painter and test the look in Unreal Engine.
What challenges did you encounter while working on this project, and how did you overcome them?
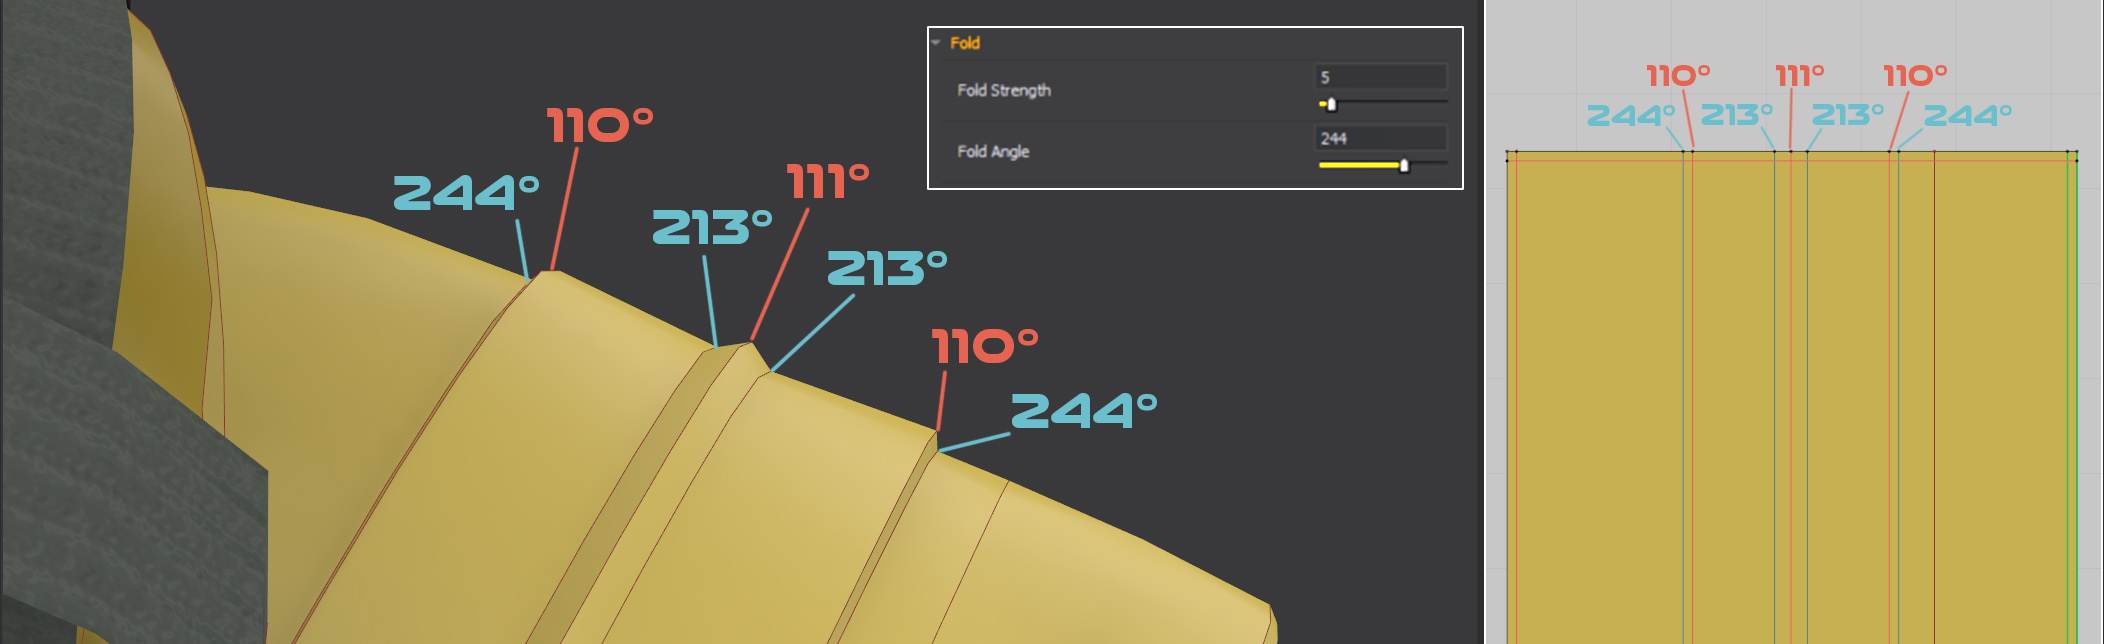
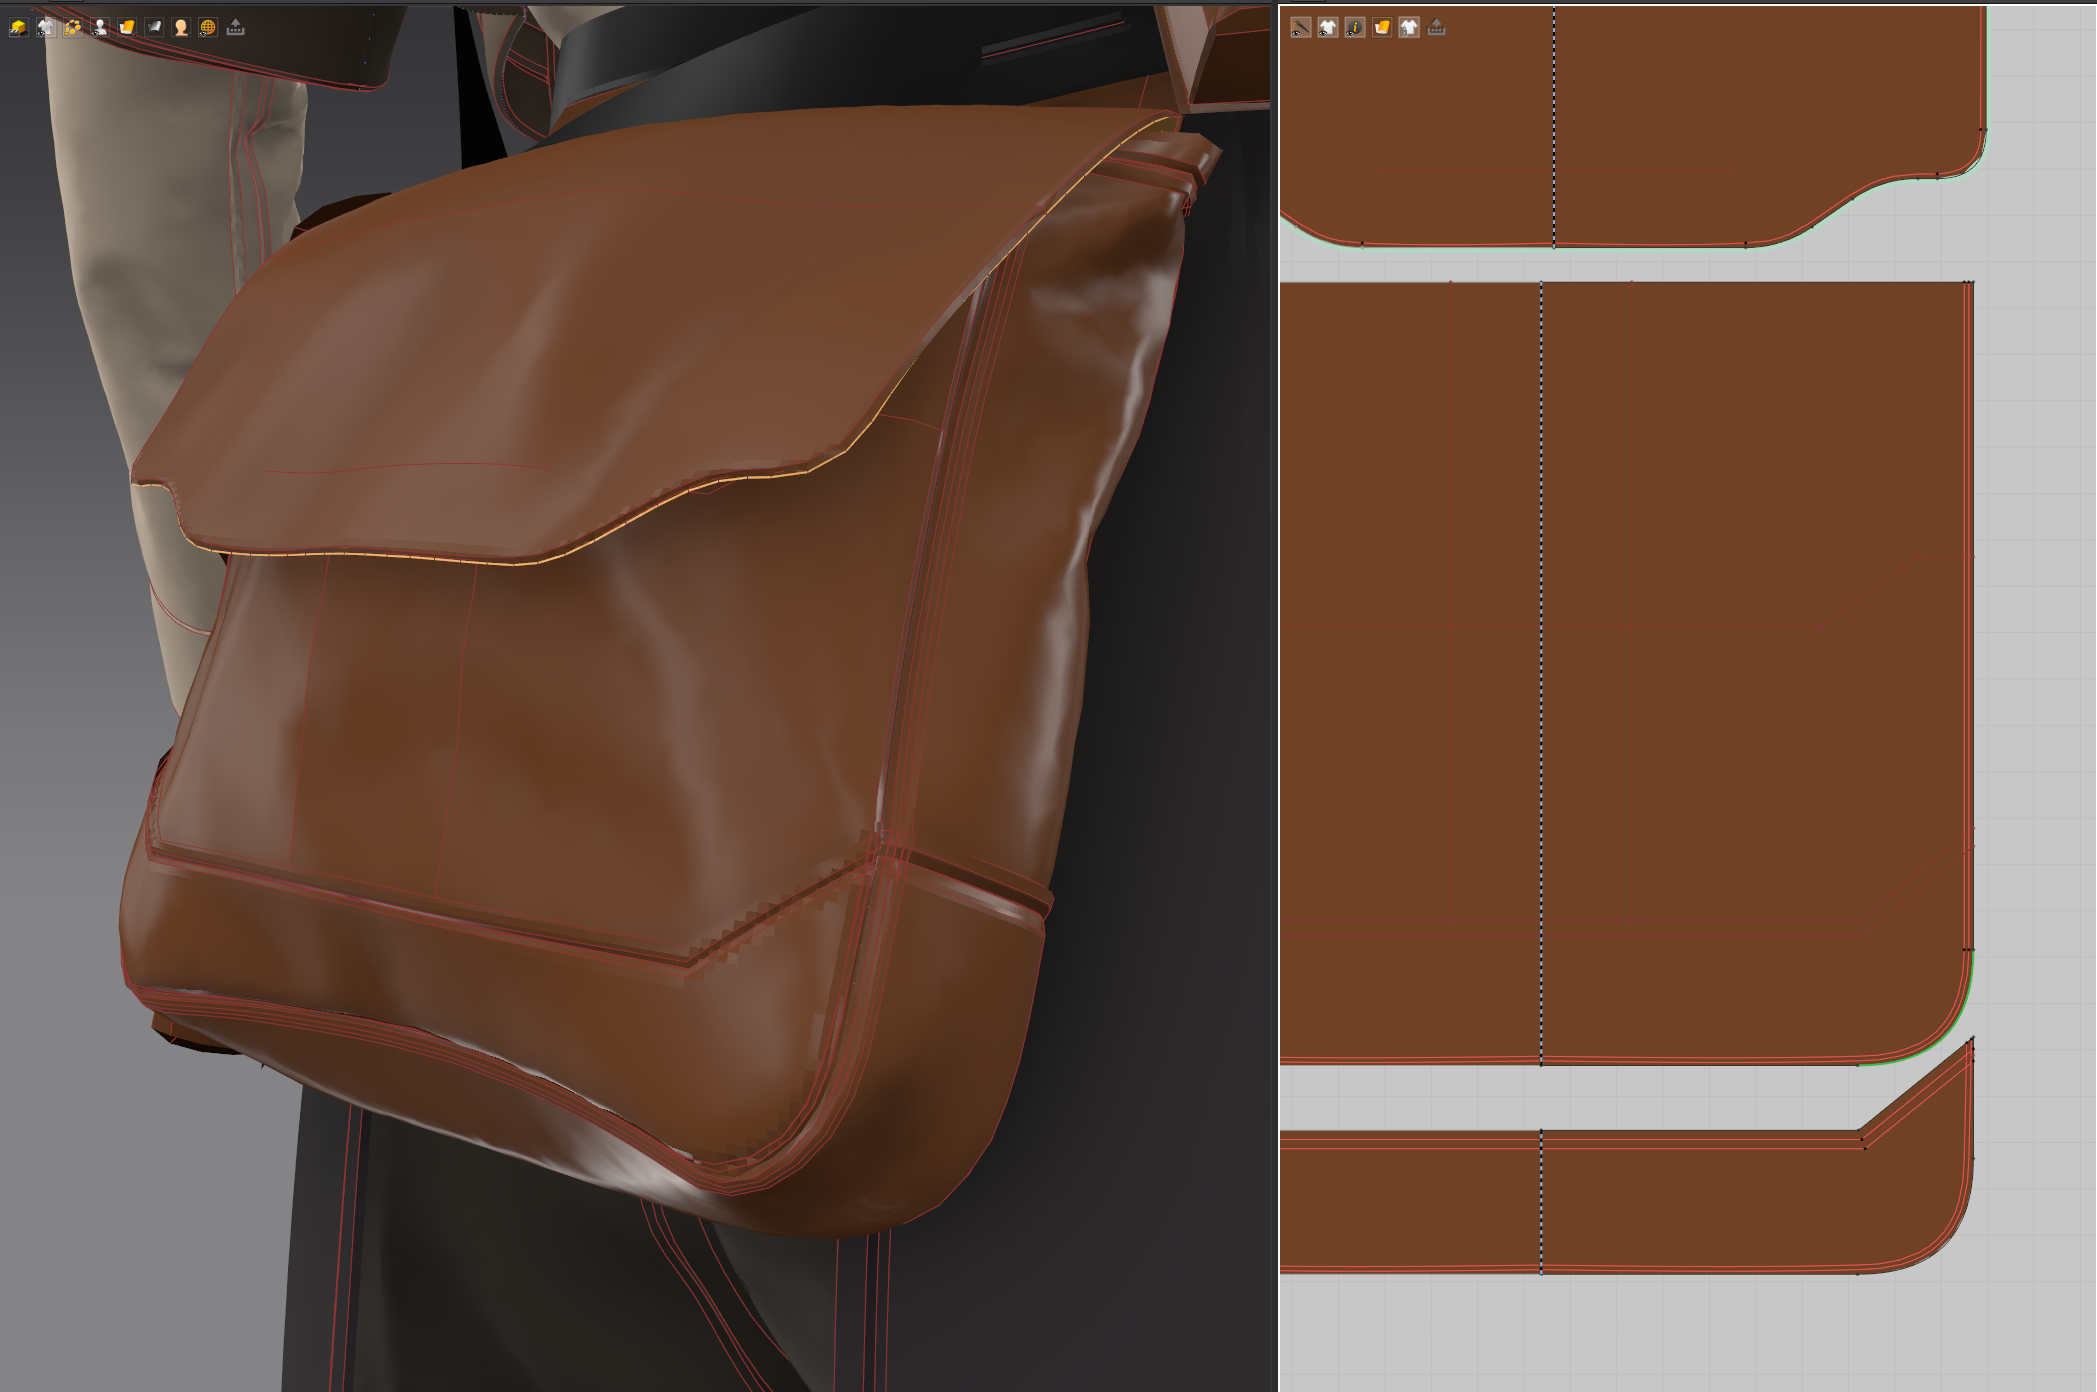
Seams are one of the biggest challenges, as they’re often overlooked but are crucial for capturing the character of the fabric. To get them right, I add multiple internal lines with angle folds to achieve the correct thickness and shape. Using references is essential here, replicating the real-life look of seams makes a huge difference, as you can see in the leather bags for Rina Tavik.
What advice would you give to other artists integrating Marvelous Designer into their Unreal Engine workflows?
Import your model into Unreal as early as possible to check its form and how the surfaces look in the engine. This will guide your decisions when finalizing the cloth in Marvelous Designer. Making adjustments after baking is much more time-consuming, so catching issues early will save you a lot of effort.
How would you describe your overall experience using Marvelous Designer for this project?
Marvelous Designer is essential for all my characters. I rely on it heavily for both the concept phase and adding intricate details. Its speed allows me to experiment with silhouettes and shapes easily before finalizing a design, making it an invaluable tool for creating complex characters.
Link to Artstation
이 작업은 UnrealEngine, 3dsMax, CharacterArt 등의 기술로 제작되었습니다.
Marvelous Designer로 이와 같은 3D 의상·캐릭터 작업을 직접 만들어볼 수 있습니다.