WHEN DIGITIAL MEETS TRADITIONAL
AMC Studio collaborates with La Blouse Roumaine, blending tradition with tech. Marvelous Designer aids precise garment recreation, enriching cultural storytelling.
Studio Introduction
AMC Studio is an art studio offering digital art creation (3D, 2D, and Concept Art), content solutions, and technical tools for the gaming industry. Our incredibly skilled and passionate team of artists creates top quality art and offers production services for a broad range of project types. We’ve partnered with great names in the industry and helped shape some of the most acclaimed titles, such as: Dead Space Remake, The Witcher 3, Marvel’s Spider-Man, Call of Duty franchise, World of Tanks, Mafia Definitive Edition & more.
What project do you want to present to us?
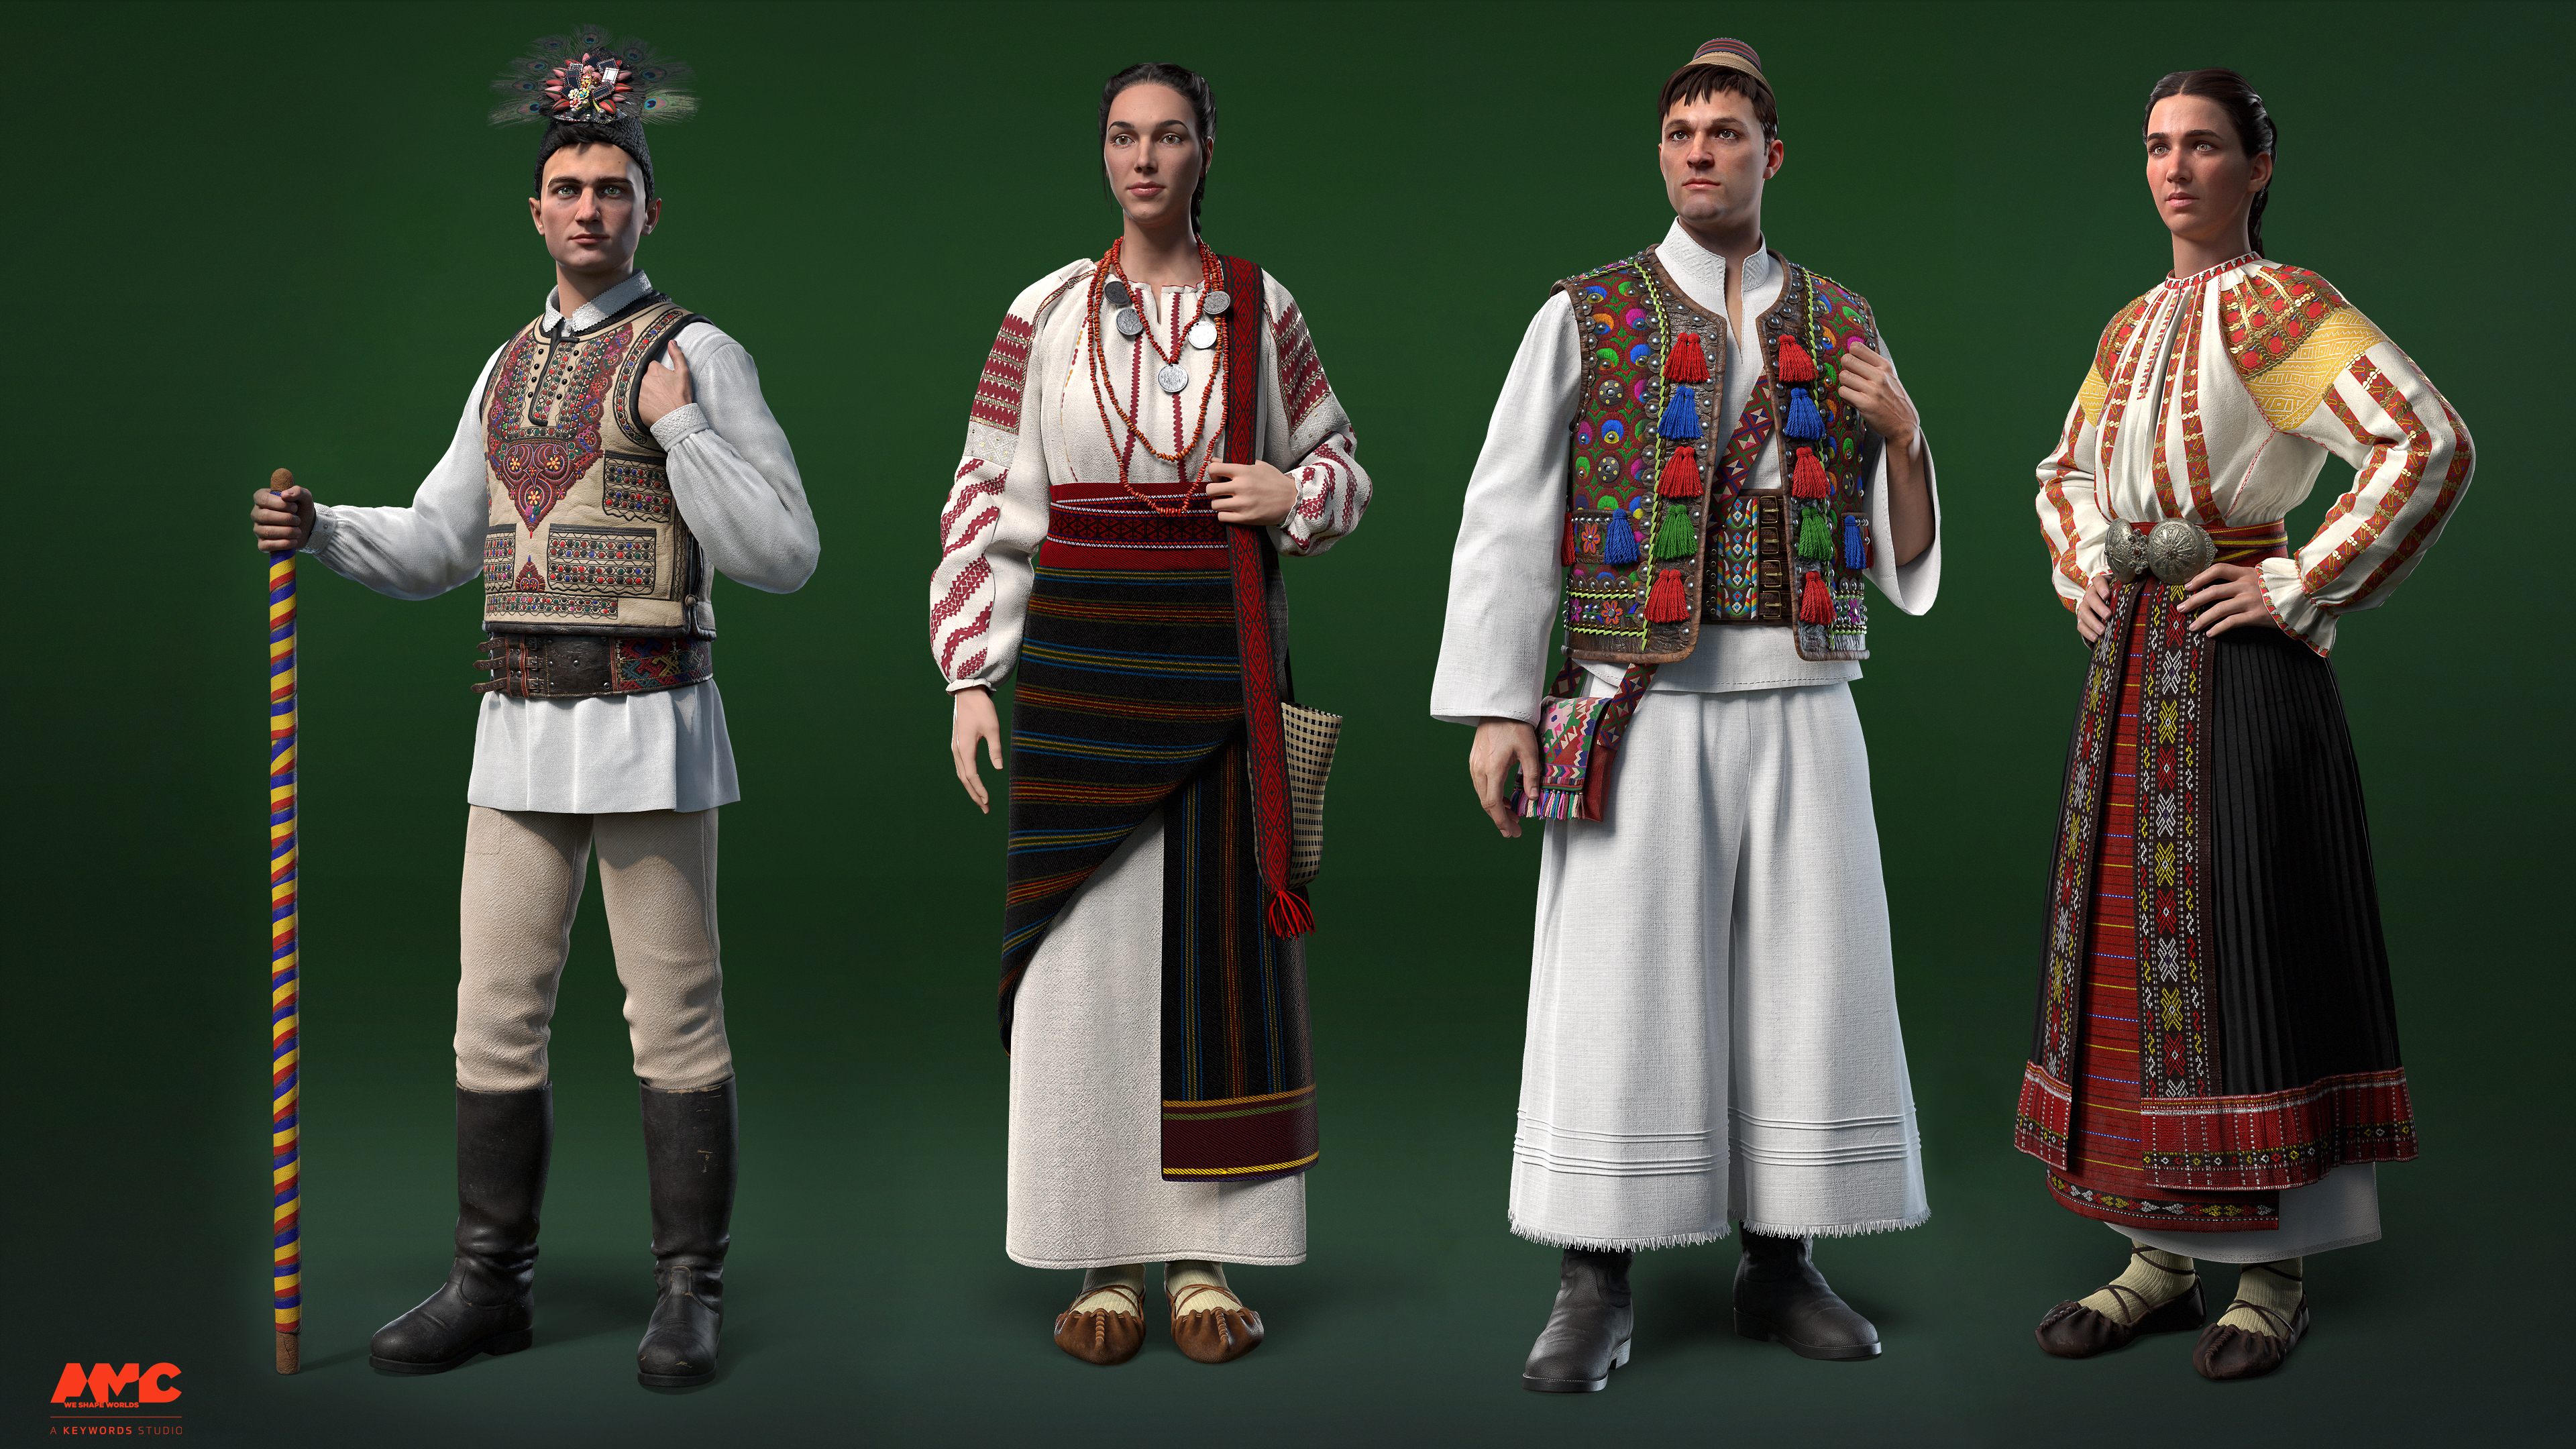
The project we are about to present is a collaboration between 2 realms: the traditional and the digital. We worked alongside La Blouse Roumaine, a non-governmental organization that promotes Romanian folklore, tradition and culture. The project’s objective was to recreate a few traditional costumes from different parts of Romania.
We had to do a lot of research and work with scientific consultants to make sure we recreated the costumes as authentically as possible. All colors and geometric shapes have a particular meaning, the position and the way the ornaments are placed is also very important. So we had to make sure we got everything right.
When do you start using Marvelous Designer on your costumes?
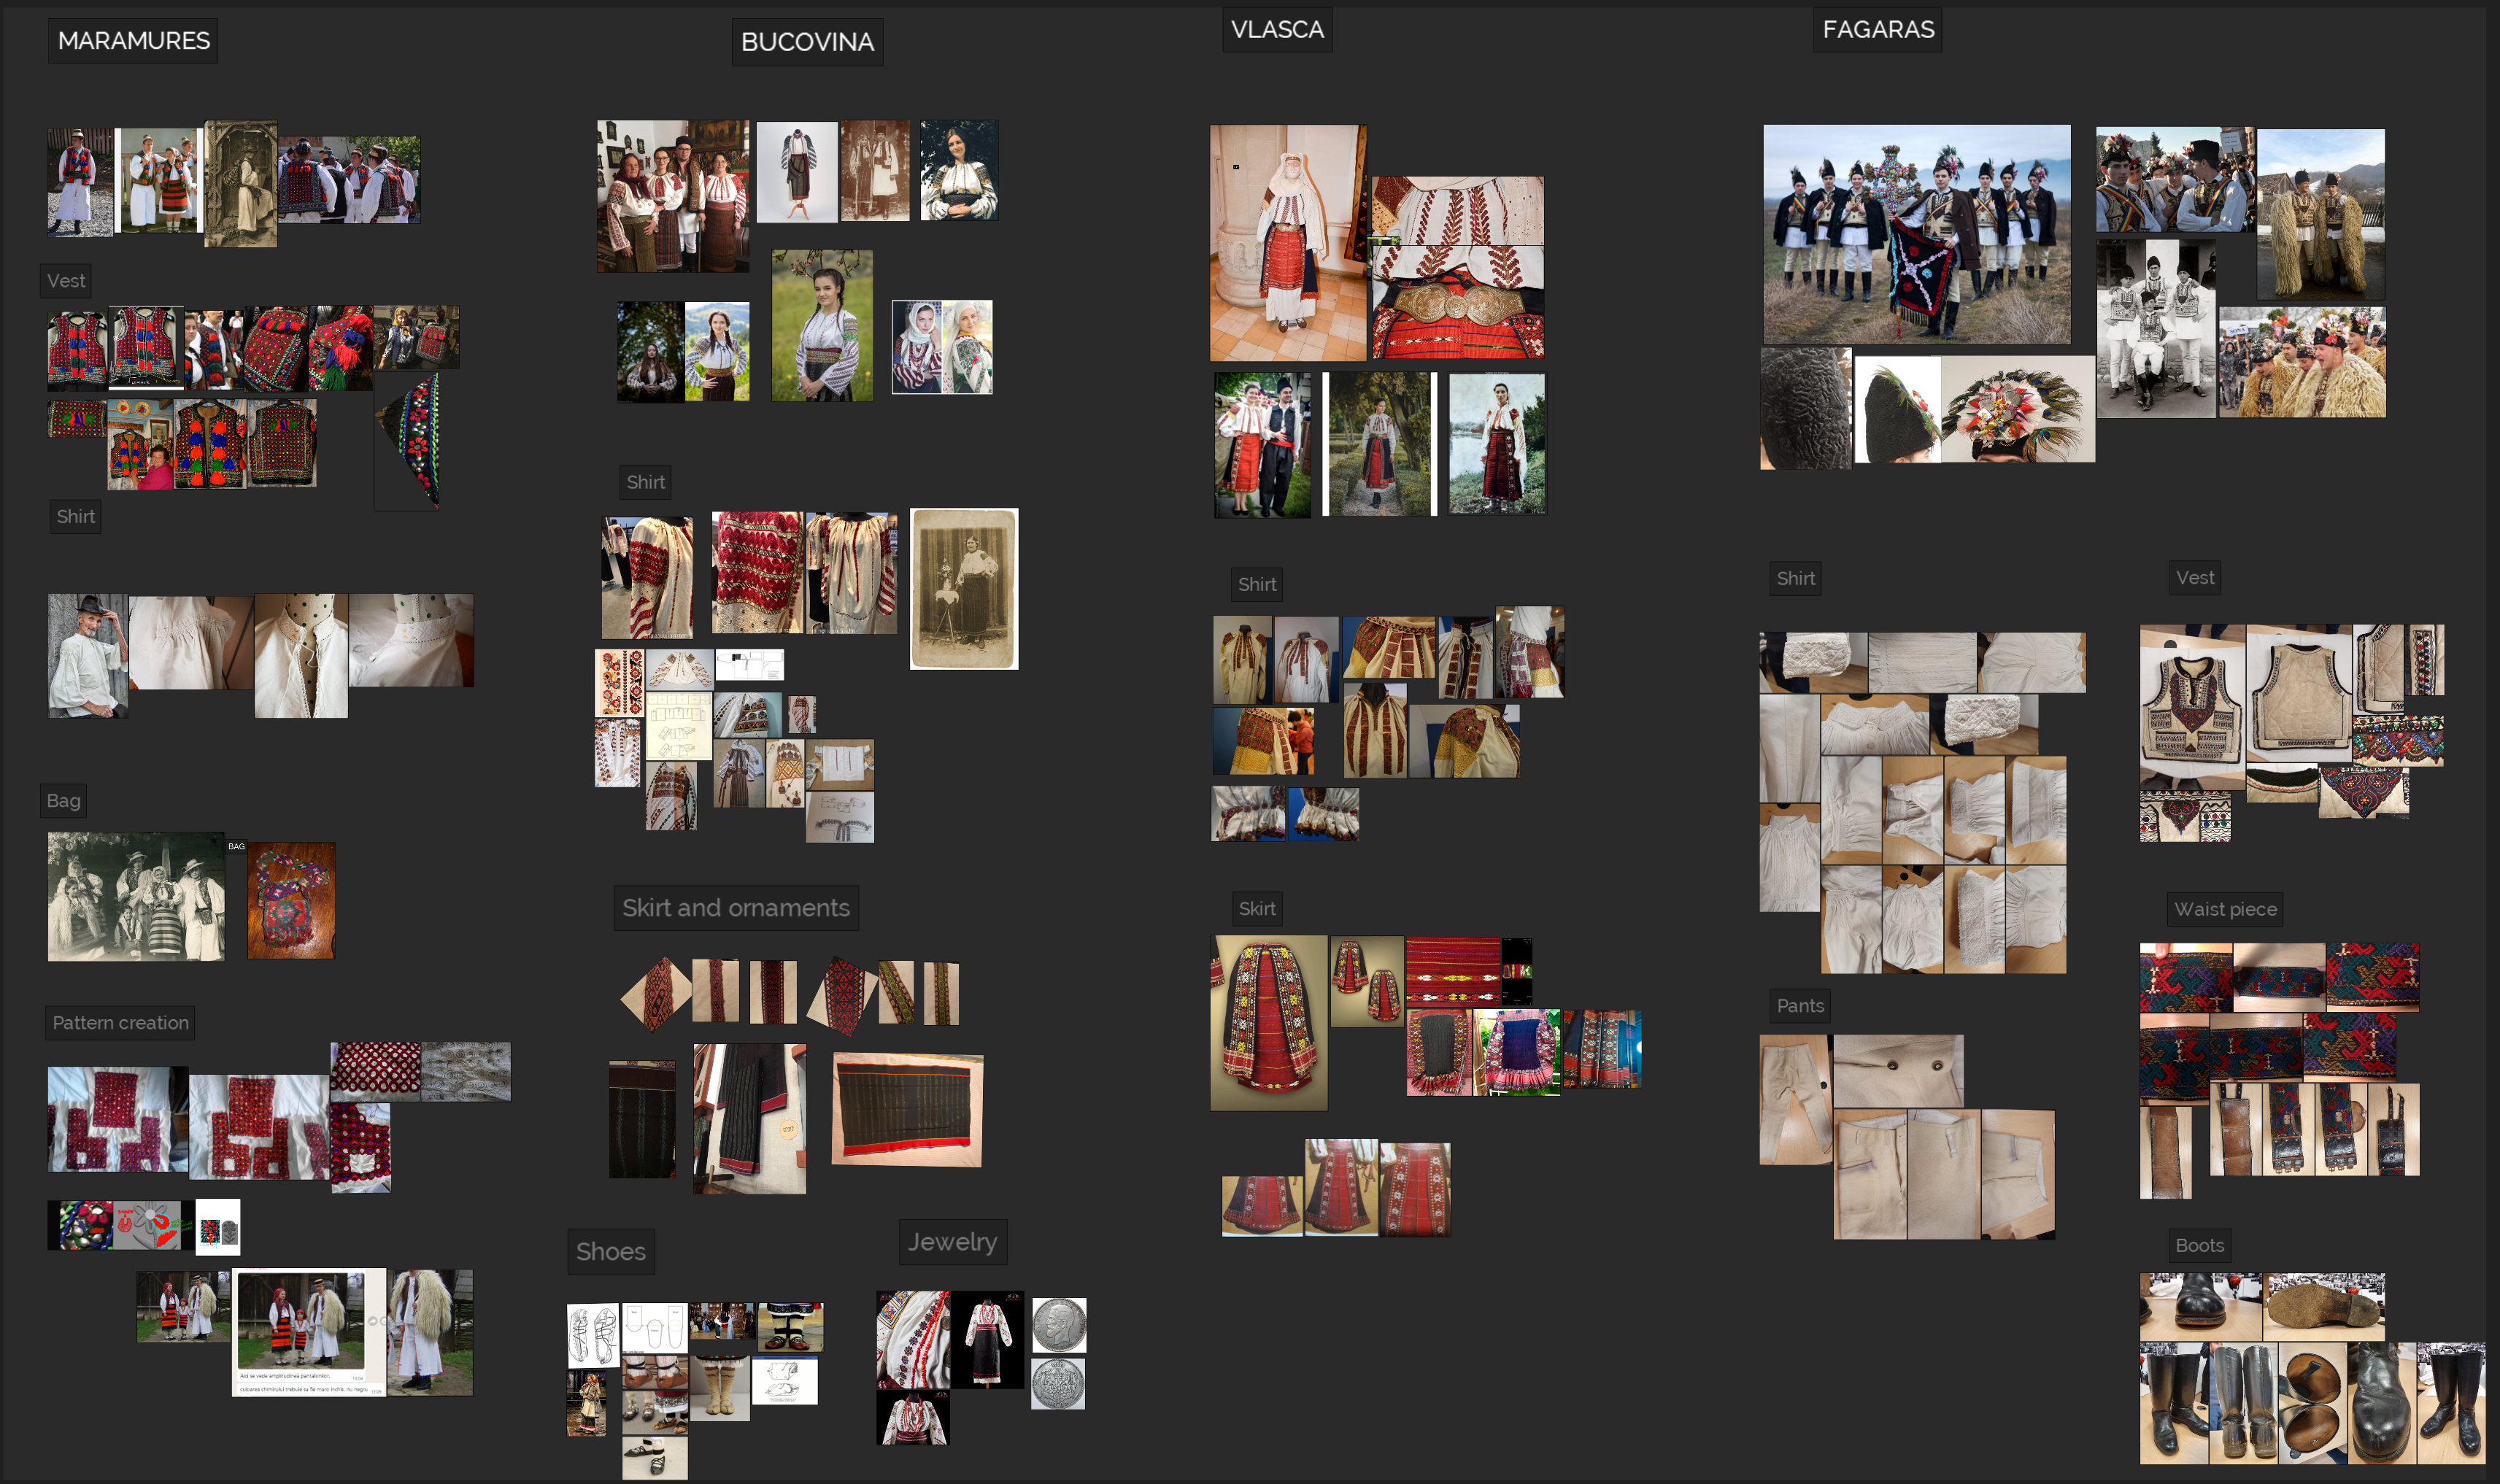
The first step before jumping into the actual work is to gather the references. In this particular case, some were researched by us and then discussed with the embroidery consultants. Some came from books or museum archives, and some were provided by our partners in the project. You can see a few of the references we gathered for each costume that helped guide us in our process.
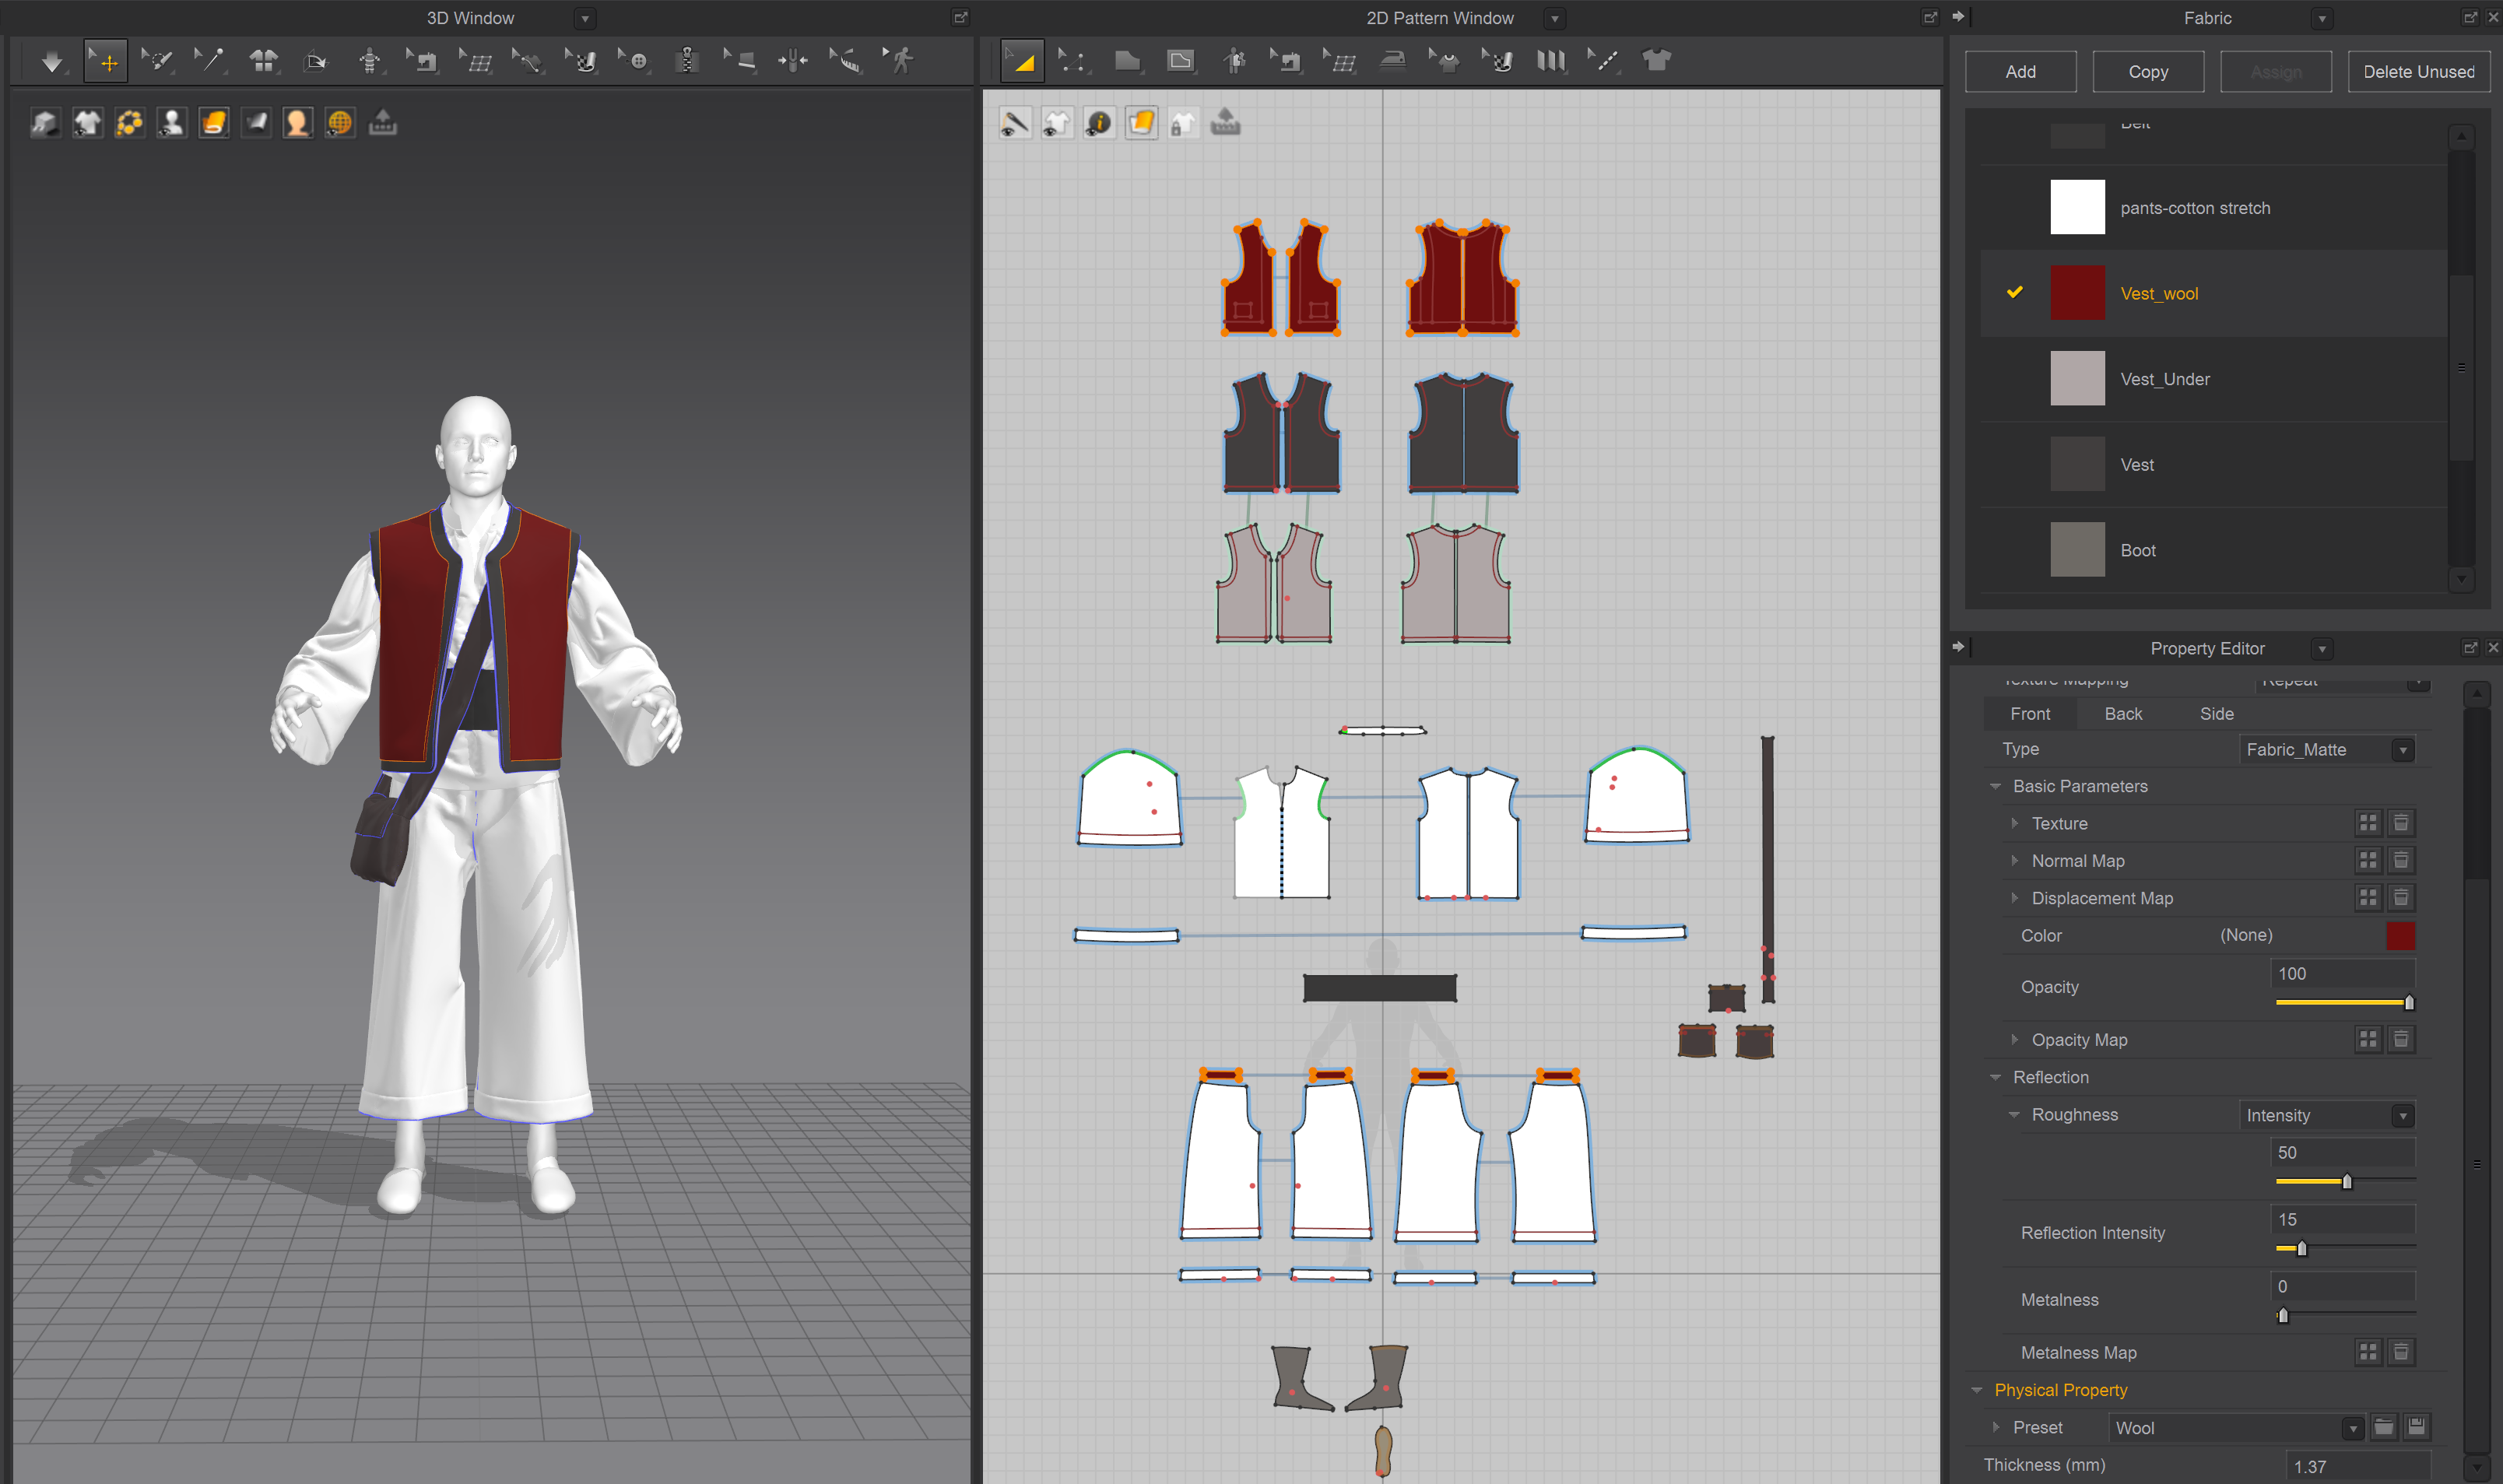
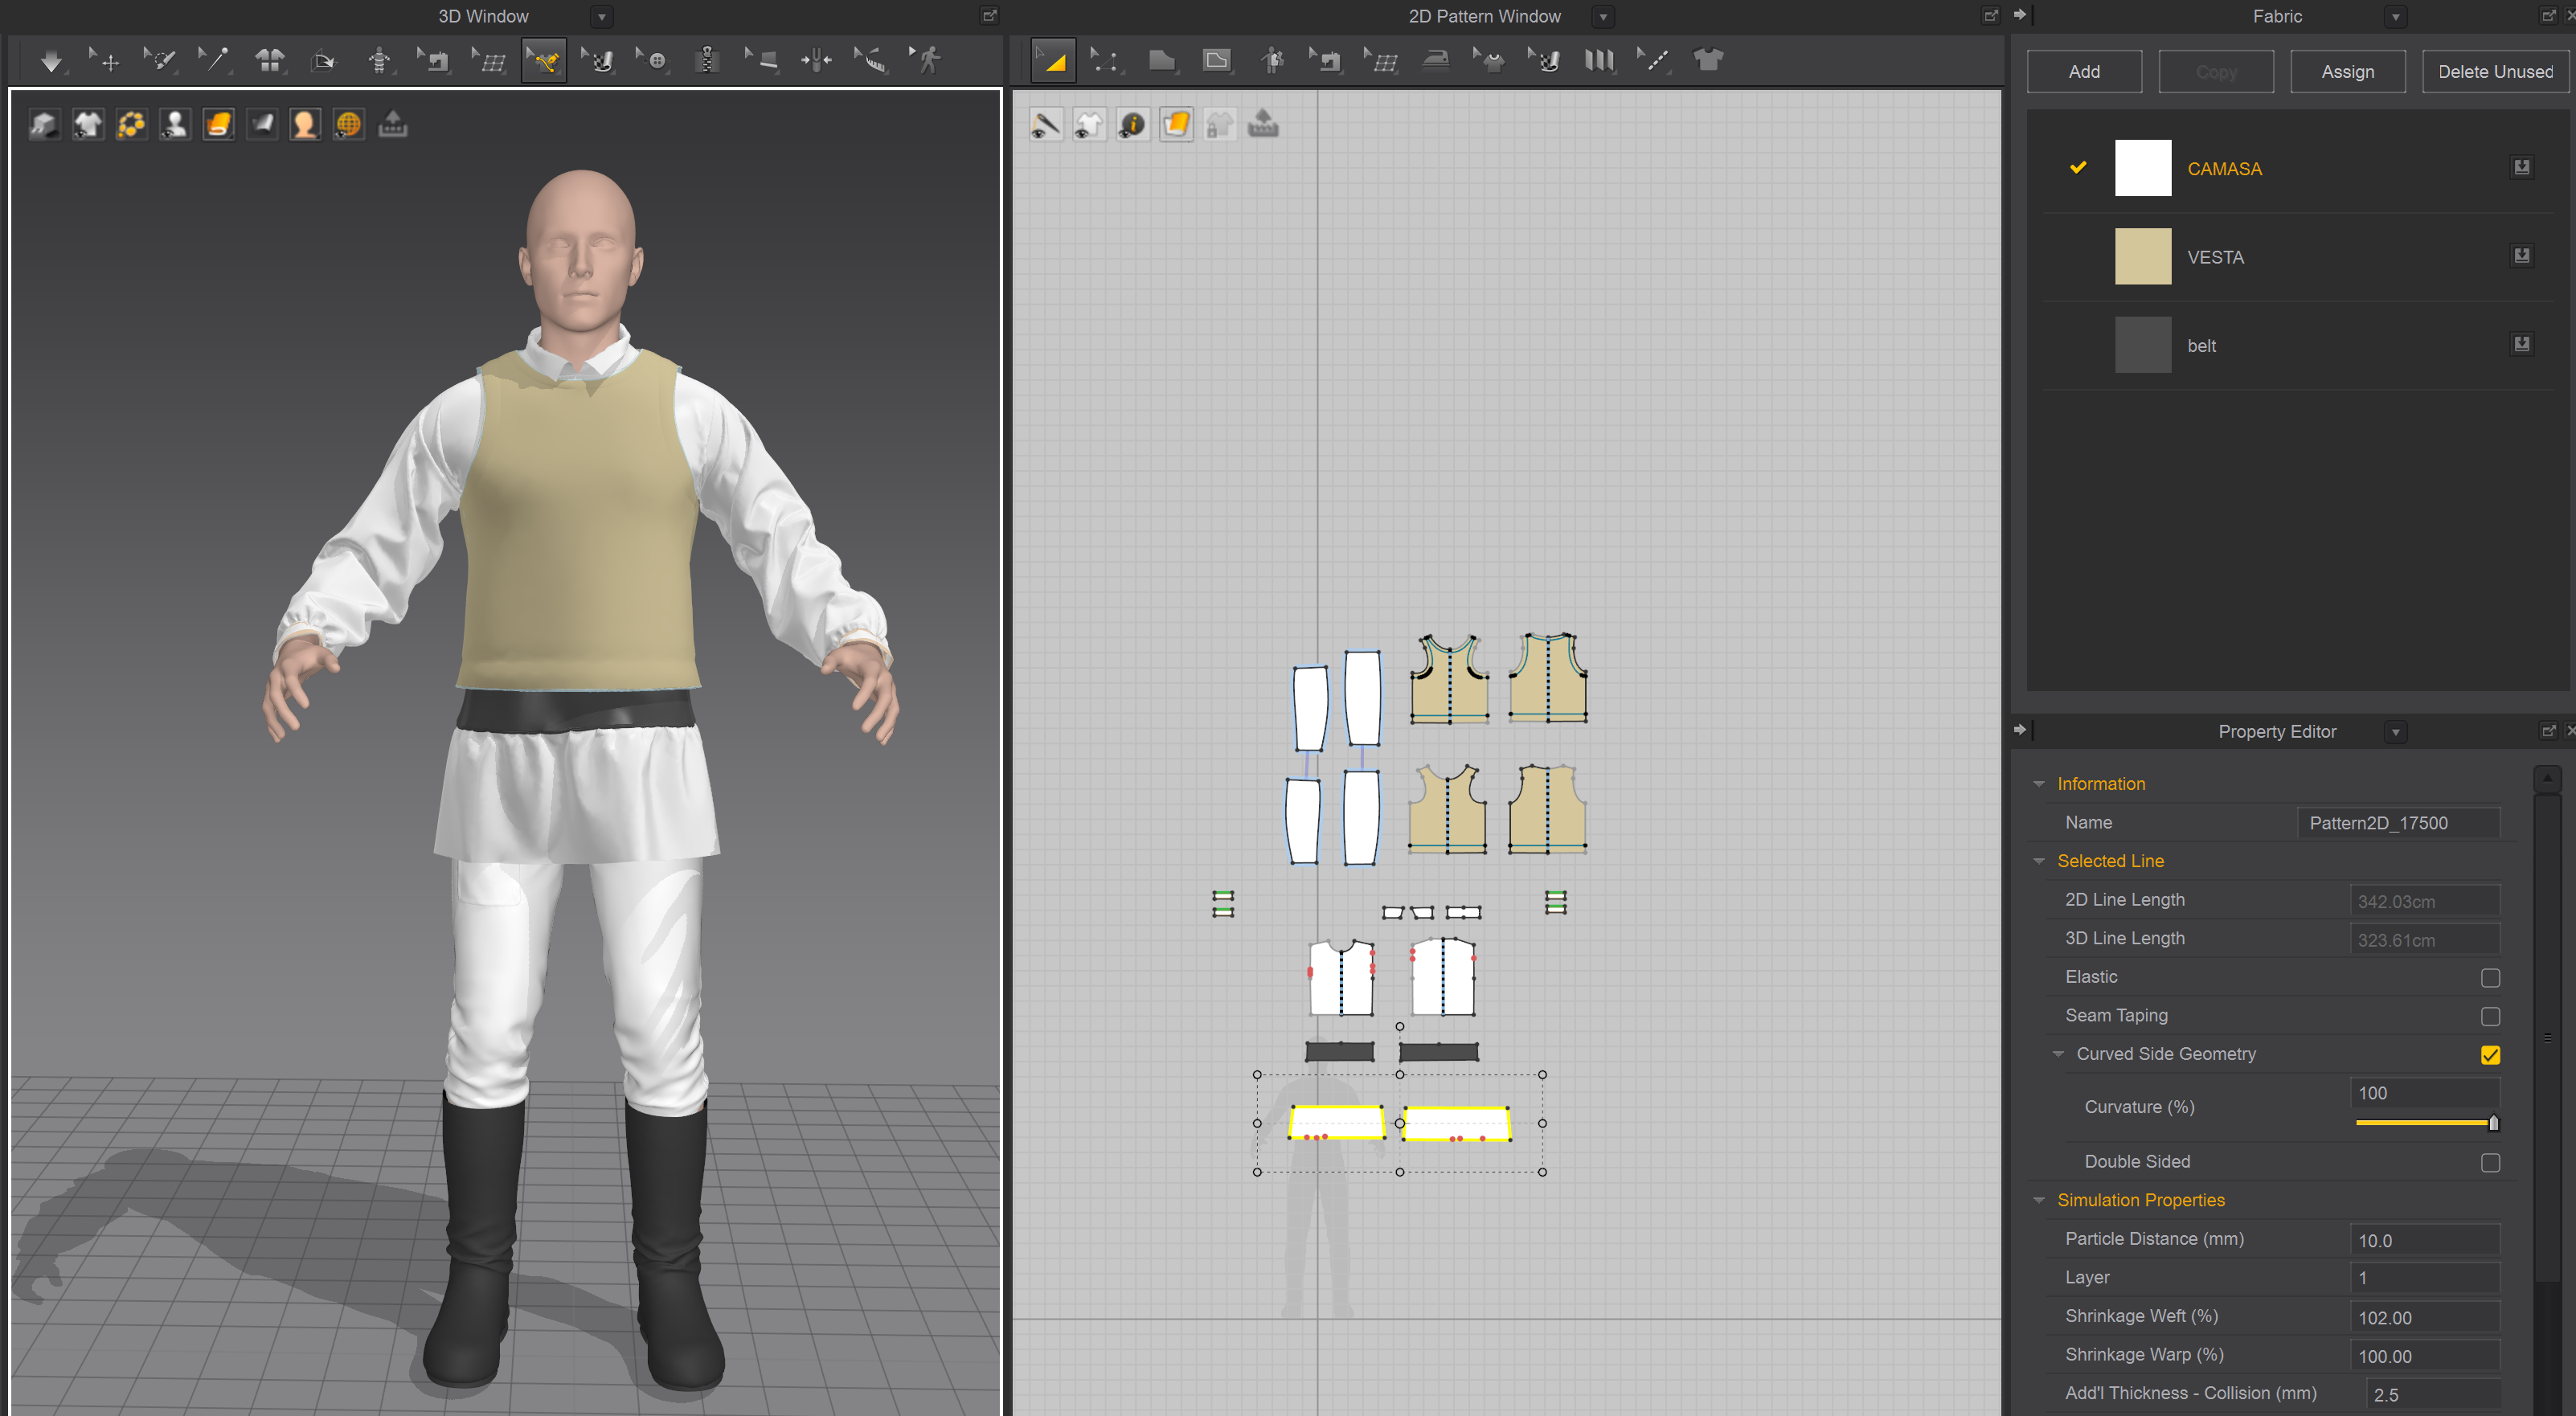
The next step is to create a blockout that helps us see the bigger volumes and establish the general proportions. In this case, we chose to start the blockout directly in Marvelous Designer, because we decided it would be best suited to help us see some quick realistic fold simulations. It was also very important for us to capture the materiality of the garments from the beginning, so the variety of material presets really helped in this endeavor.
Some settings that we found very useful are Shrinkage Weft and Shrinkage Warp. That’s because they allowed us to change the proportions of the garment on the horizontal and vertical axis without actually changing the 2D pattern, which is a non-destructive workflow, and it saves a lot of time. Working with layers is also very handy, and we used them in creating our vest. We needed it to have a stiffer feel while also having some folds that we could control easier, so we found this to be the best approach.
What are the long-term benefits of using Marvelous Designer?
When we were happy with the results we had in Marvelous, we prepared the garments for export one by one. First, we lower the particle distance if needed, to get the maximum amount of details.
After that, we quadrangulate or remesh the garment and we export it with the following settings: single object, unwelded, thin and unified UV coordinates on. Usually, we export with unwelded points, but it’s not a rule. It depends on how you approach the garment later.
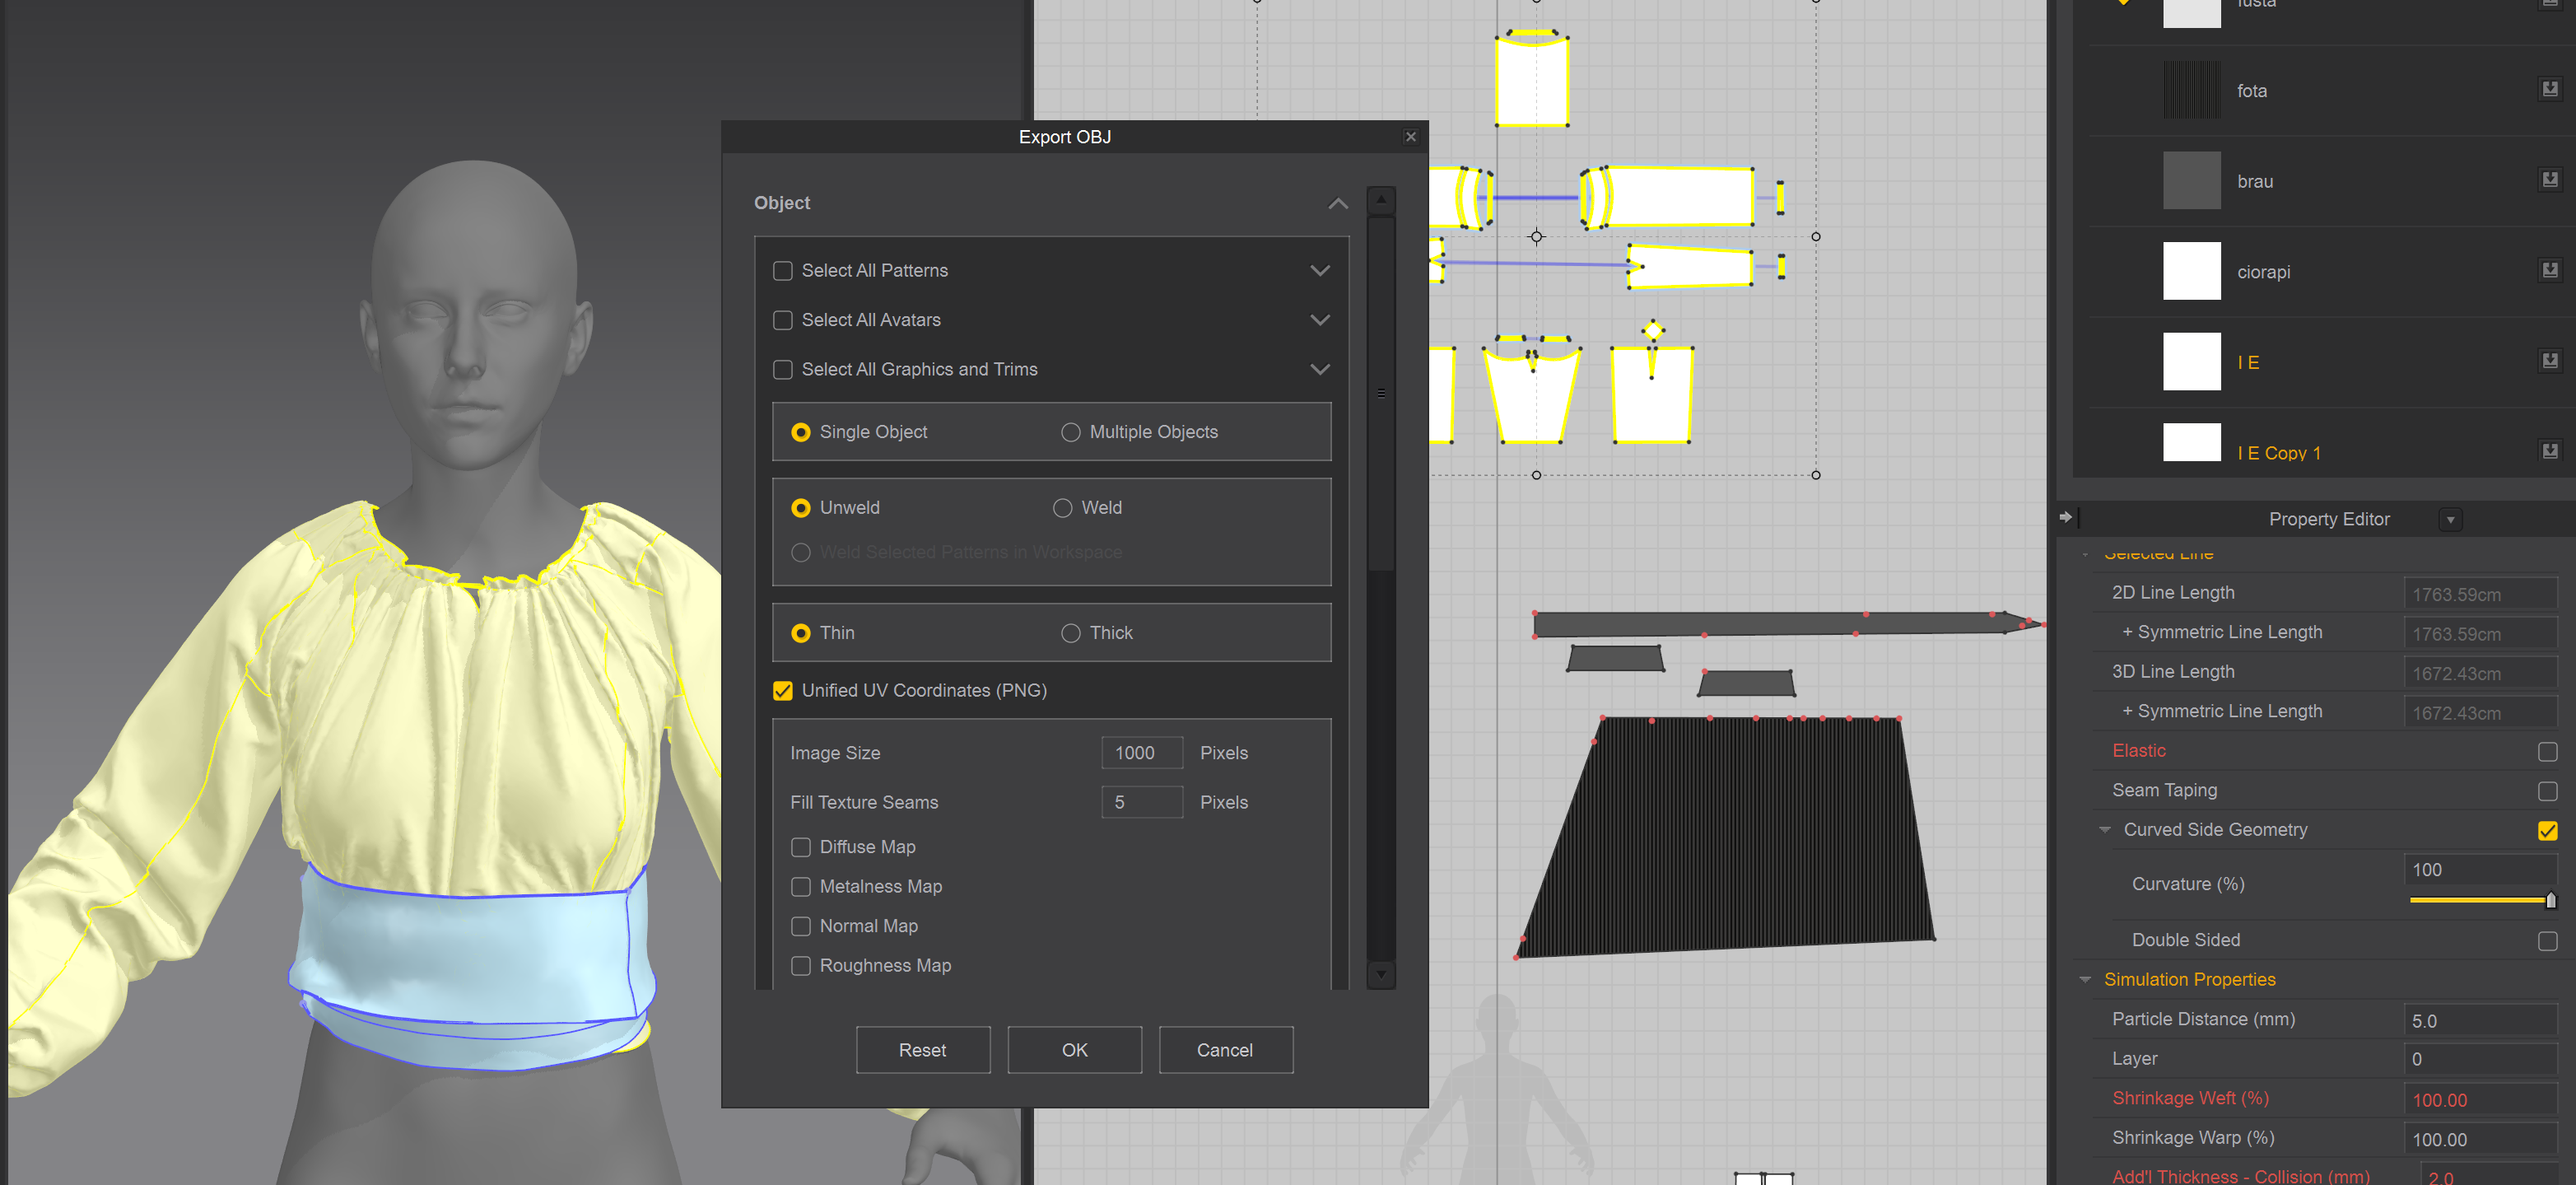
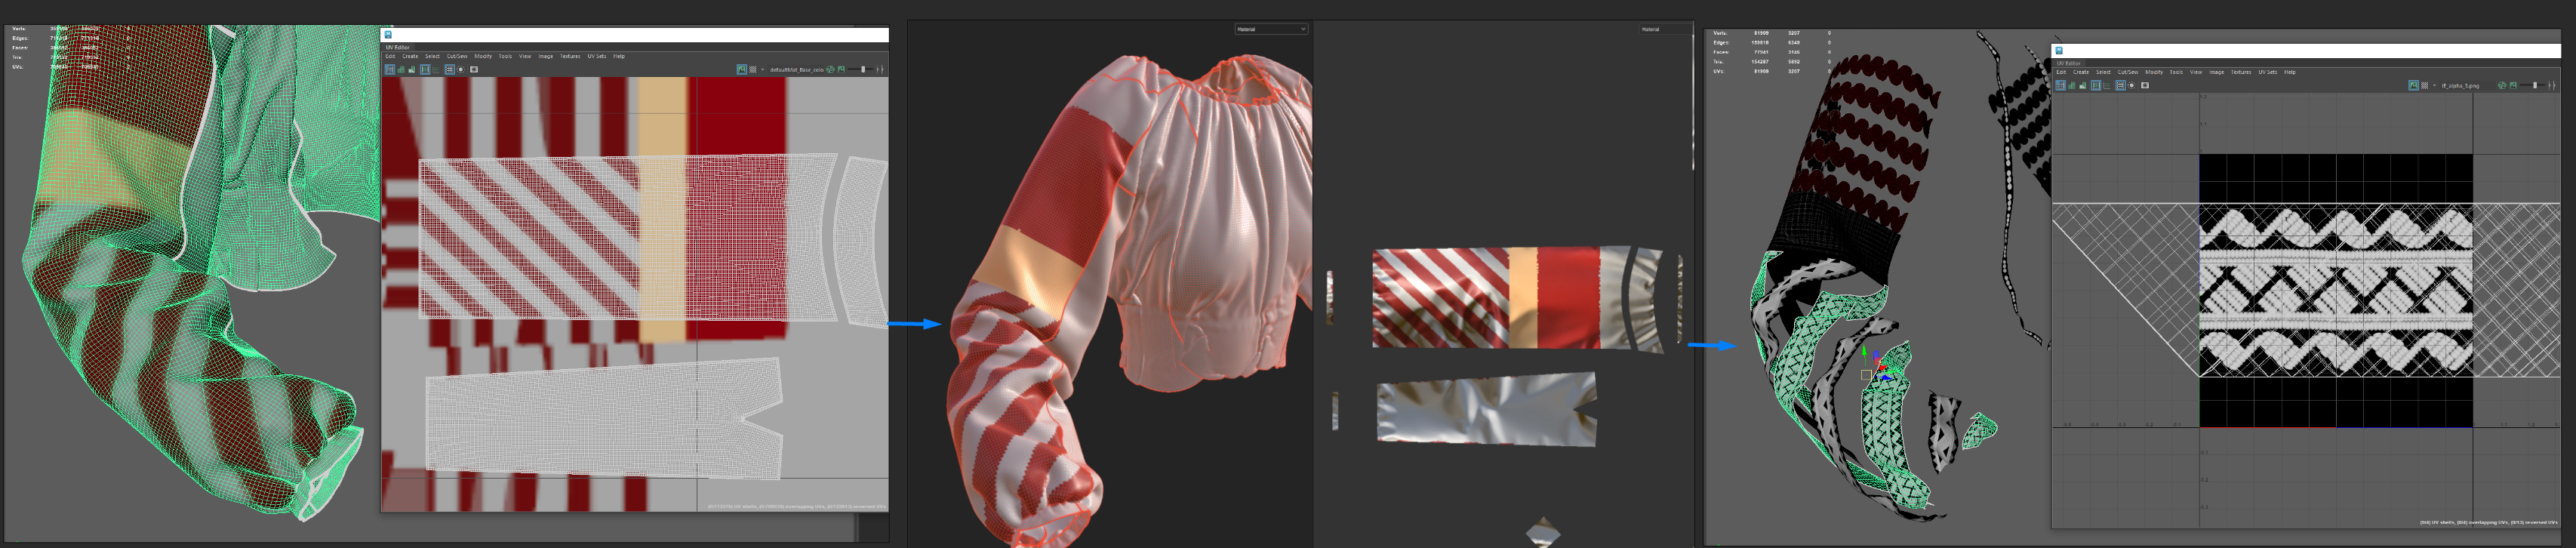
We reset the 2D arrangement and export the pattern so we can later use it in Maya.
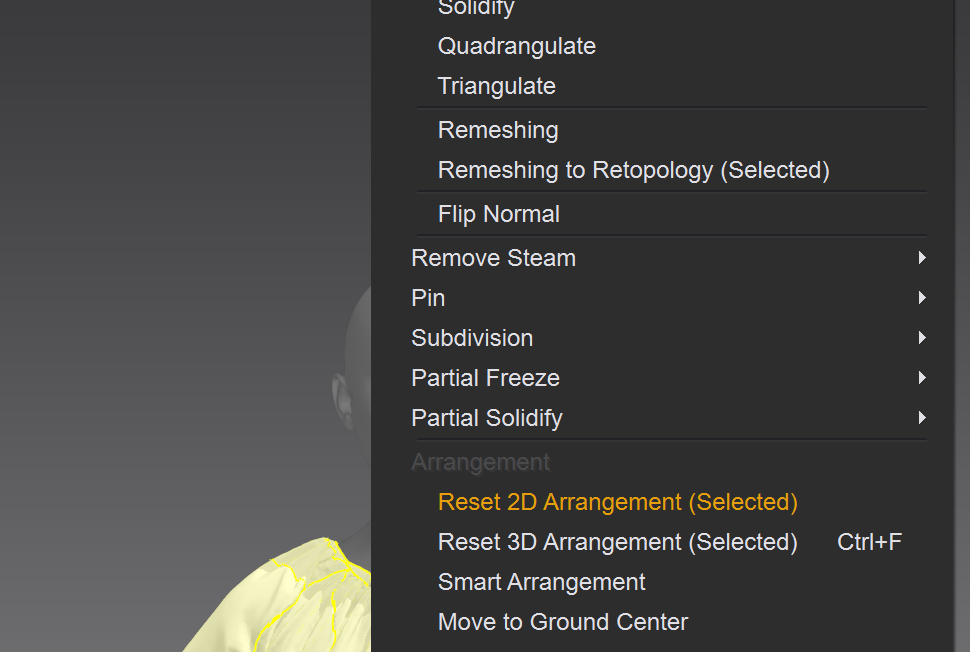
After that, we import the 2D pattern in ZBrush and ZRemesh them to have a cleaner, sculptable topology. A tip here is to go quite low with the geometry resolution because it's easier to control. Keep in mind that you now have the initial 2D pattern from Marvelous and another zremeshed version of it.
The next step is to go to Maya and import the 3D garment and 2D pattern initially exported from Marvelous Designer, and also the ZRemeshed 2D. Make sure you match the contour of the remeshed 2D pattern with the one from Marvelous.
You can now transfer the UV's from the 2D pattern in Marvelous Designer to your ZRemeshed pattern.
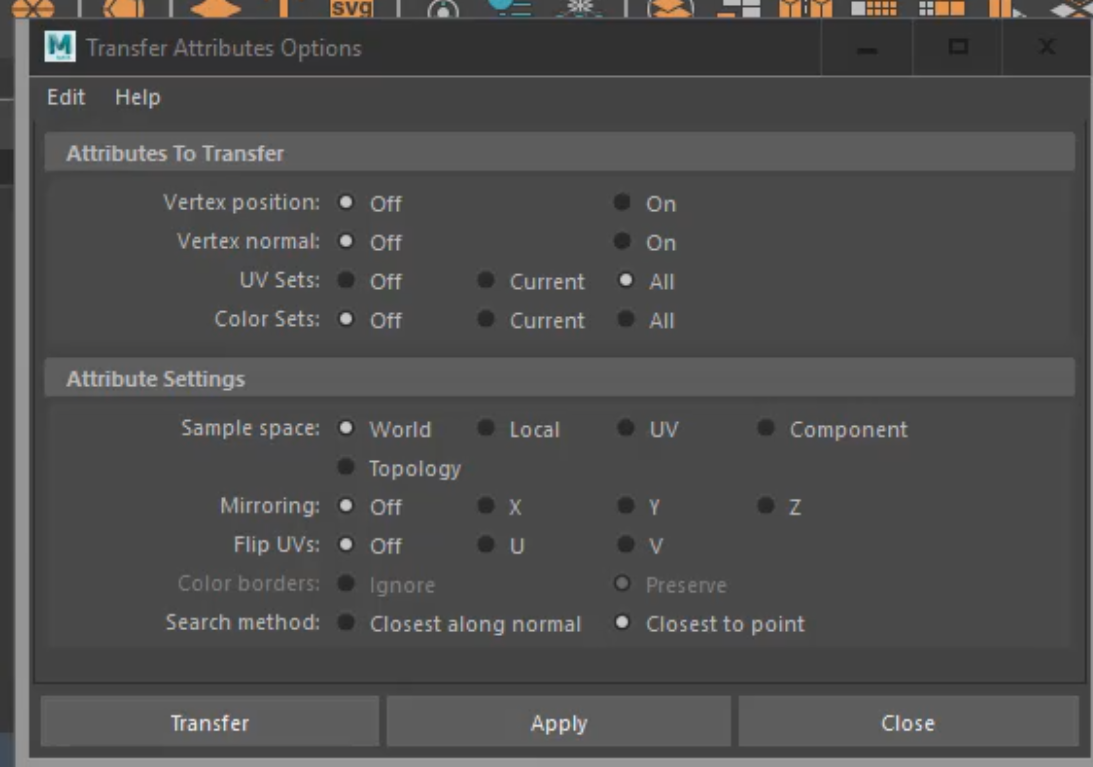
The same operation will be made to transfer the attributes from the 3D garment to your 2D remeshed pattern, though some settings differ.
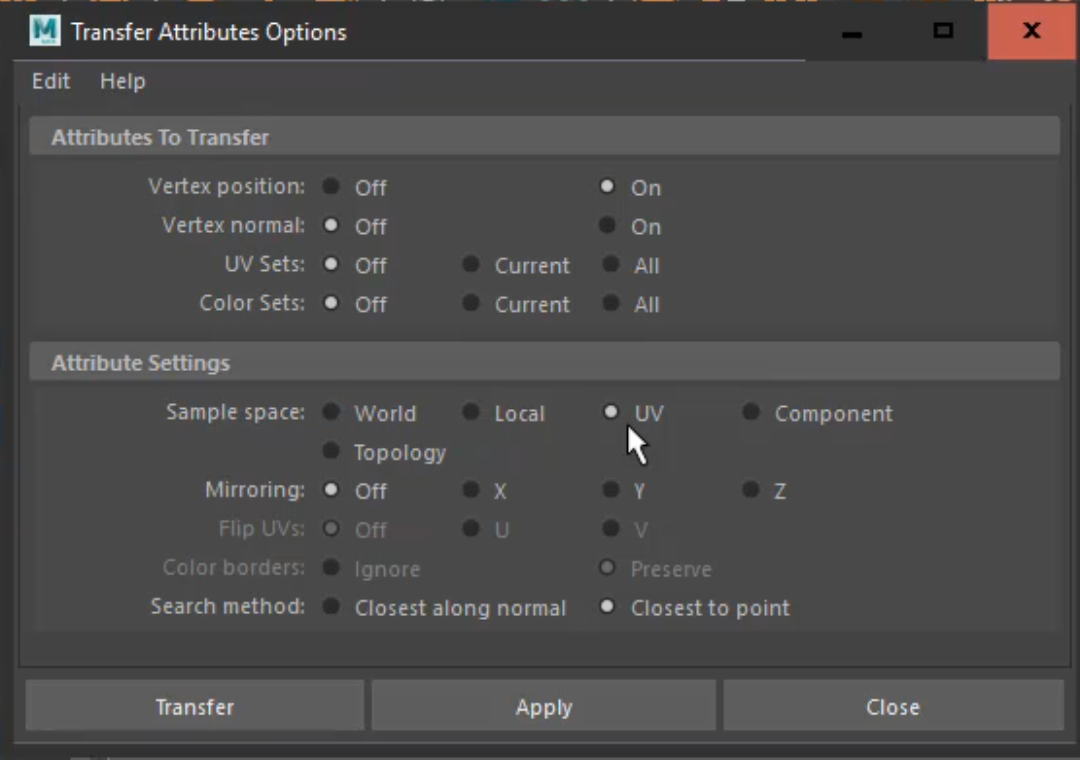
Now you will have a clean geometry with UV’s to work with. We transfer back to ZBrush and start adding thickness with Panel Loops.
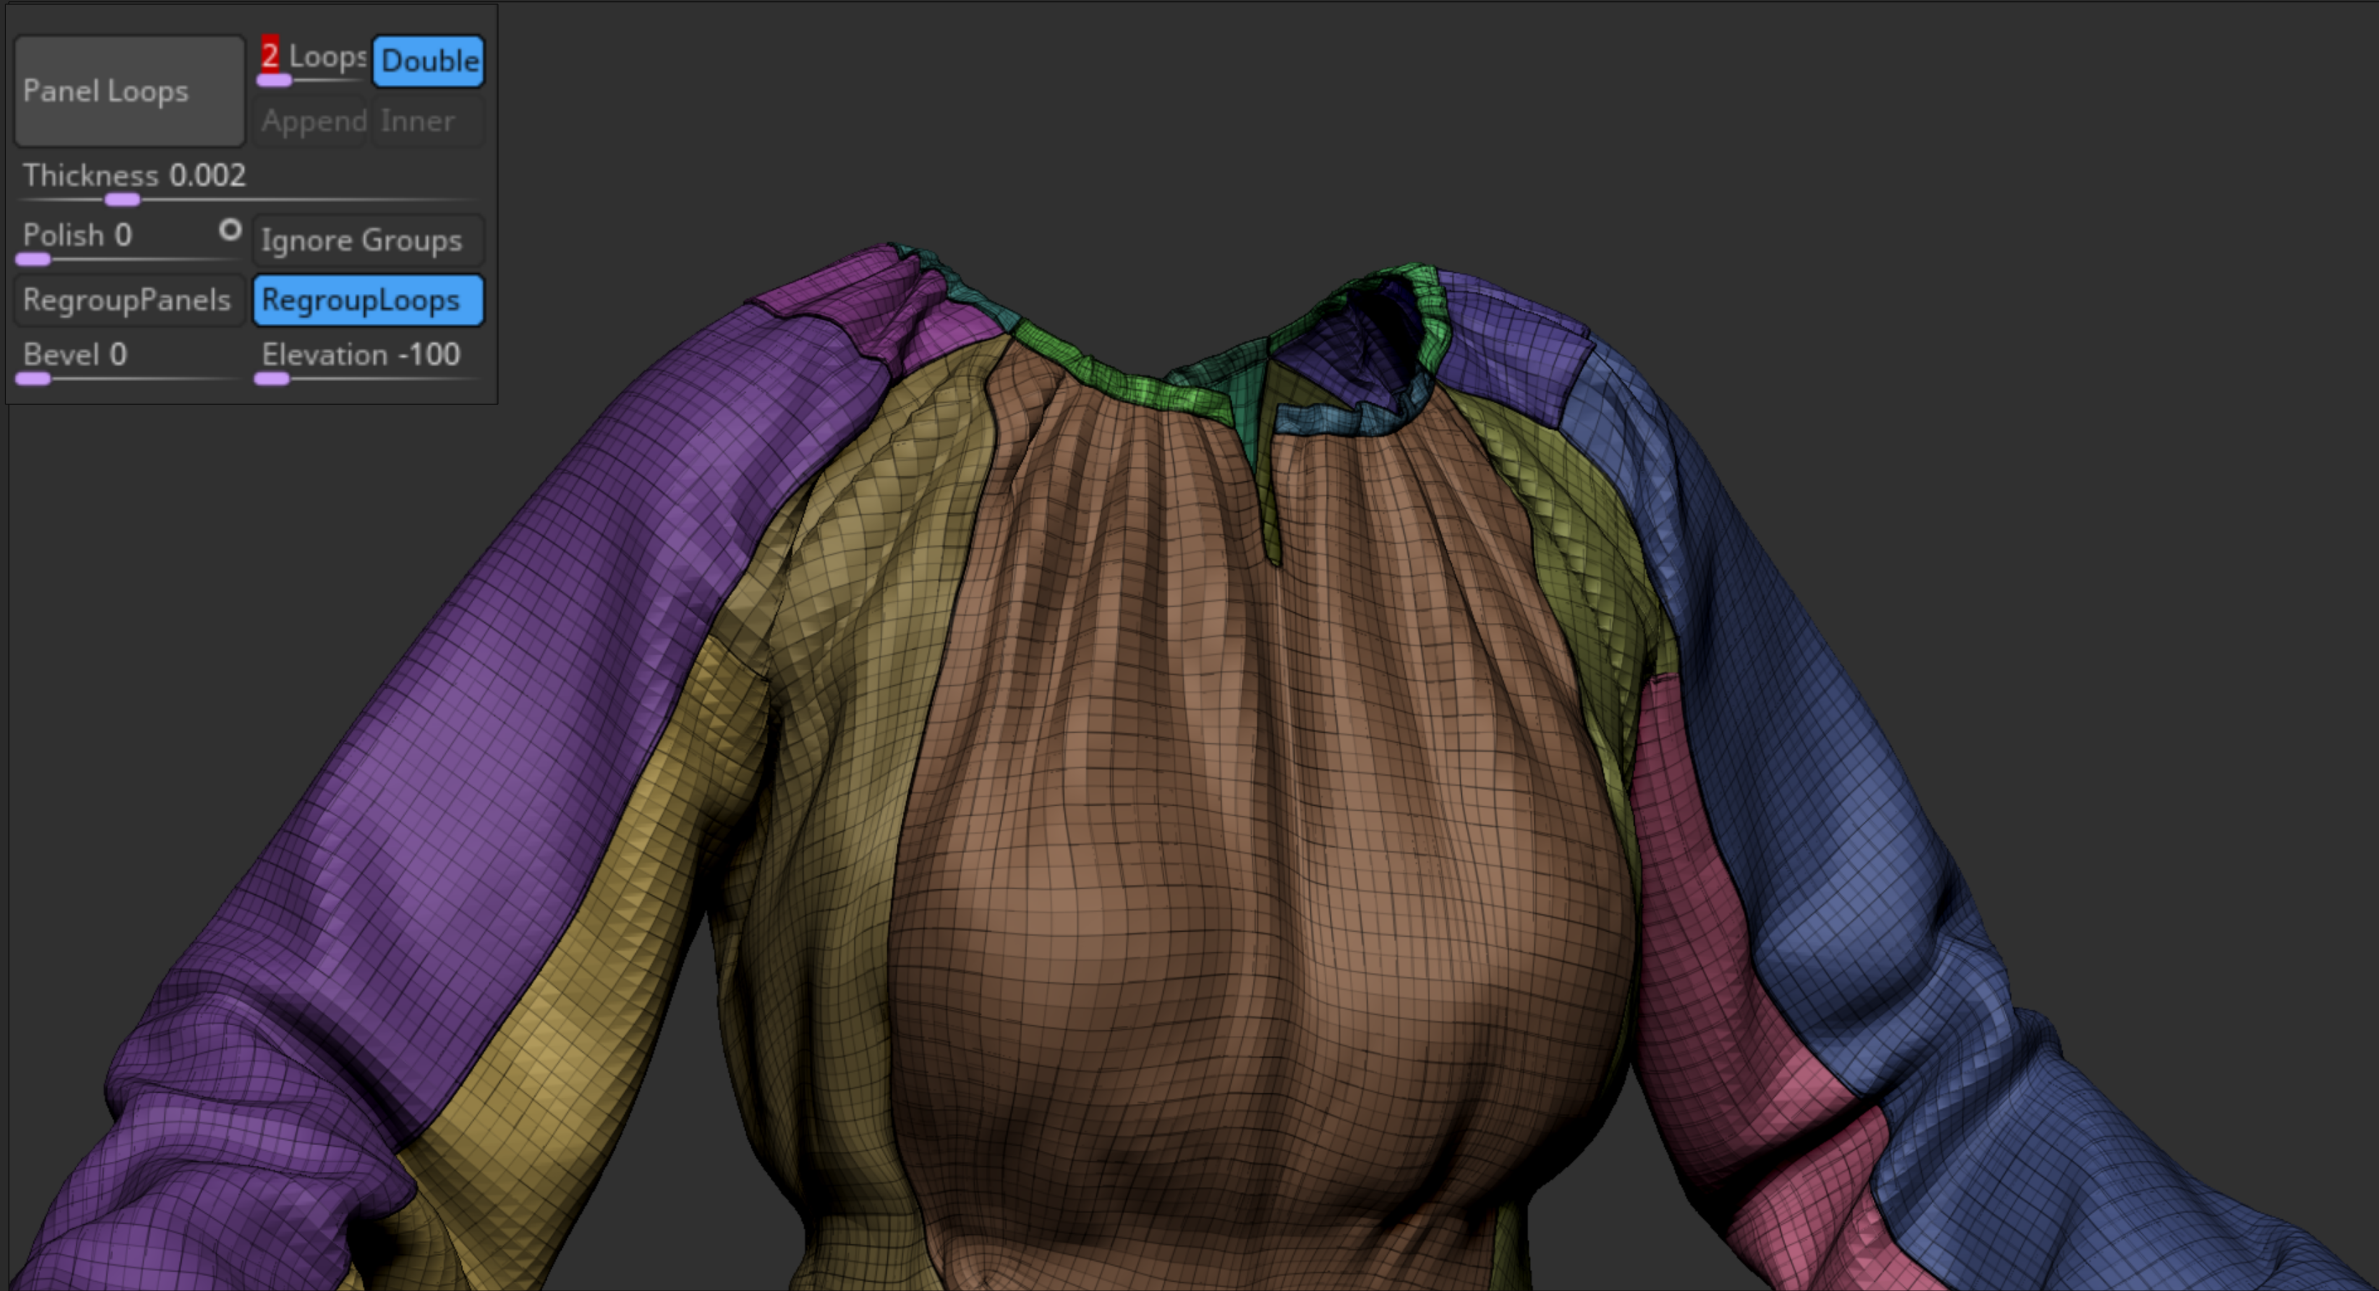
We again use the initial 3D garment form Marvelous to re-project all the details on the newly cleaned geometry using morph target on each subdivision created. That’s so we can easily clean all the imperfections that might appear during this process with the morph brush. As you can see, using Marvelous helps us a great deal along the way. Not only to achieve believable and fast folds but also on the technical side, giving us the possibility to extract really nice UV’s as well.
How was your pattern making process and did you encounter any challenges?
After having a good base to start from, we begin to add all the necessary details. For this project we needed to be very precise in creating all our ornaments and symbols because they all have stories to tell. The costume as a whole tells you which part of the country the person wearing it comes from, sometimes down to a particular street in a village, what sort of celebration it’s worn for, whether the person wearing it is young or elderly. Woven in the fabric are also some traditional protective charms. All in all, our traditional costumes are like wearable temples.
So taking everything into account, it was crucial for us to recreate in 3D all the details as closely to the references as possible.
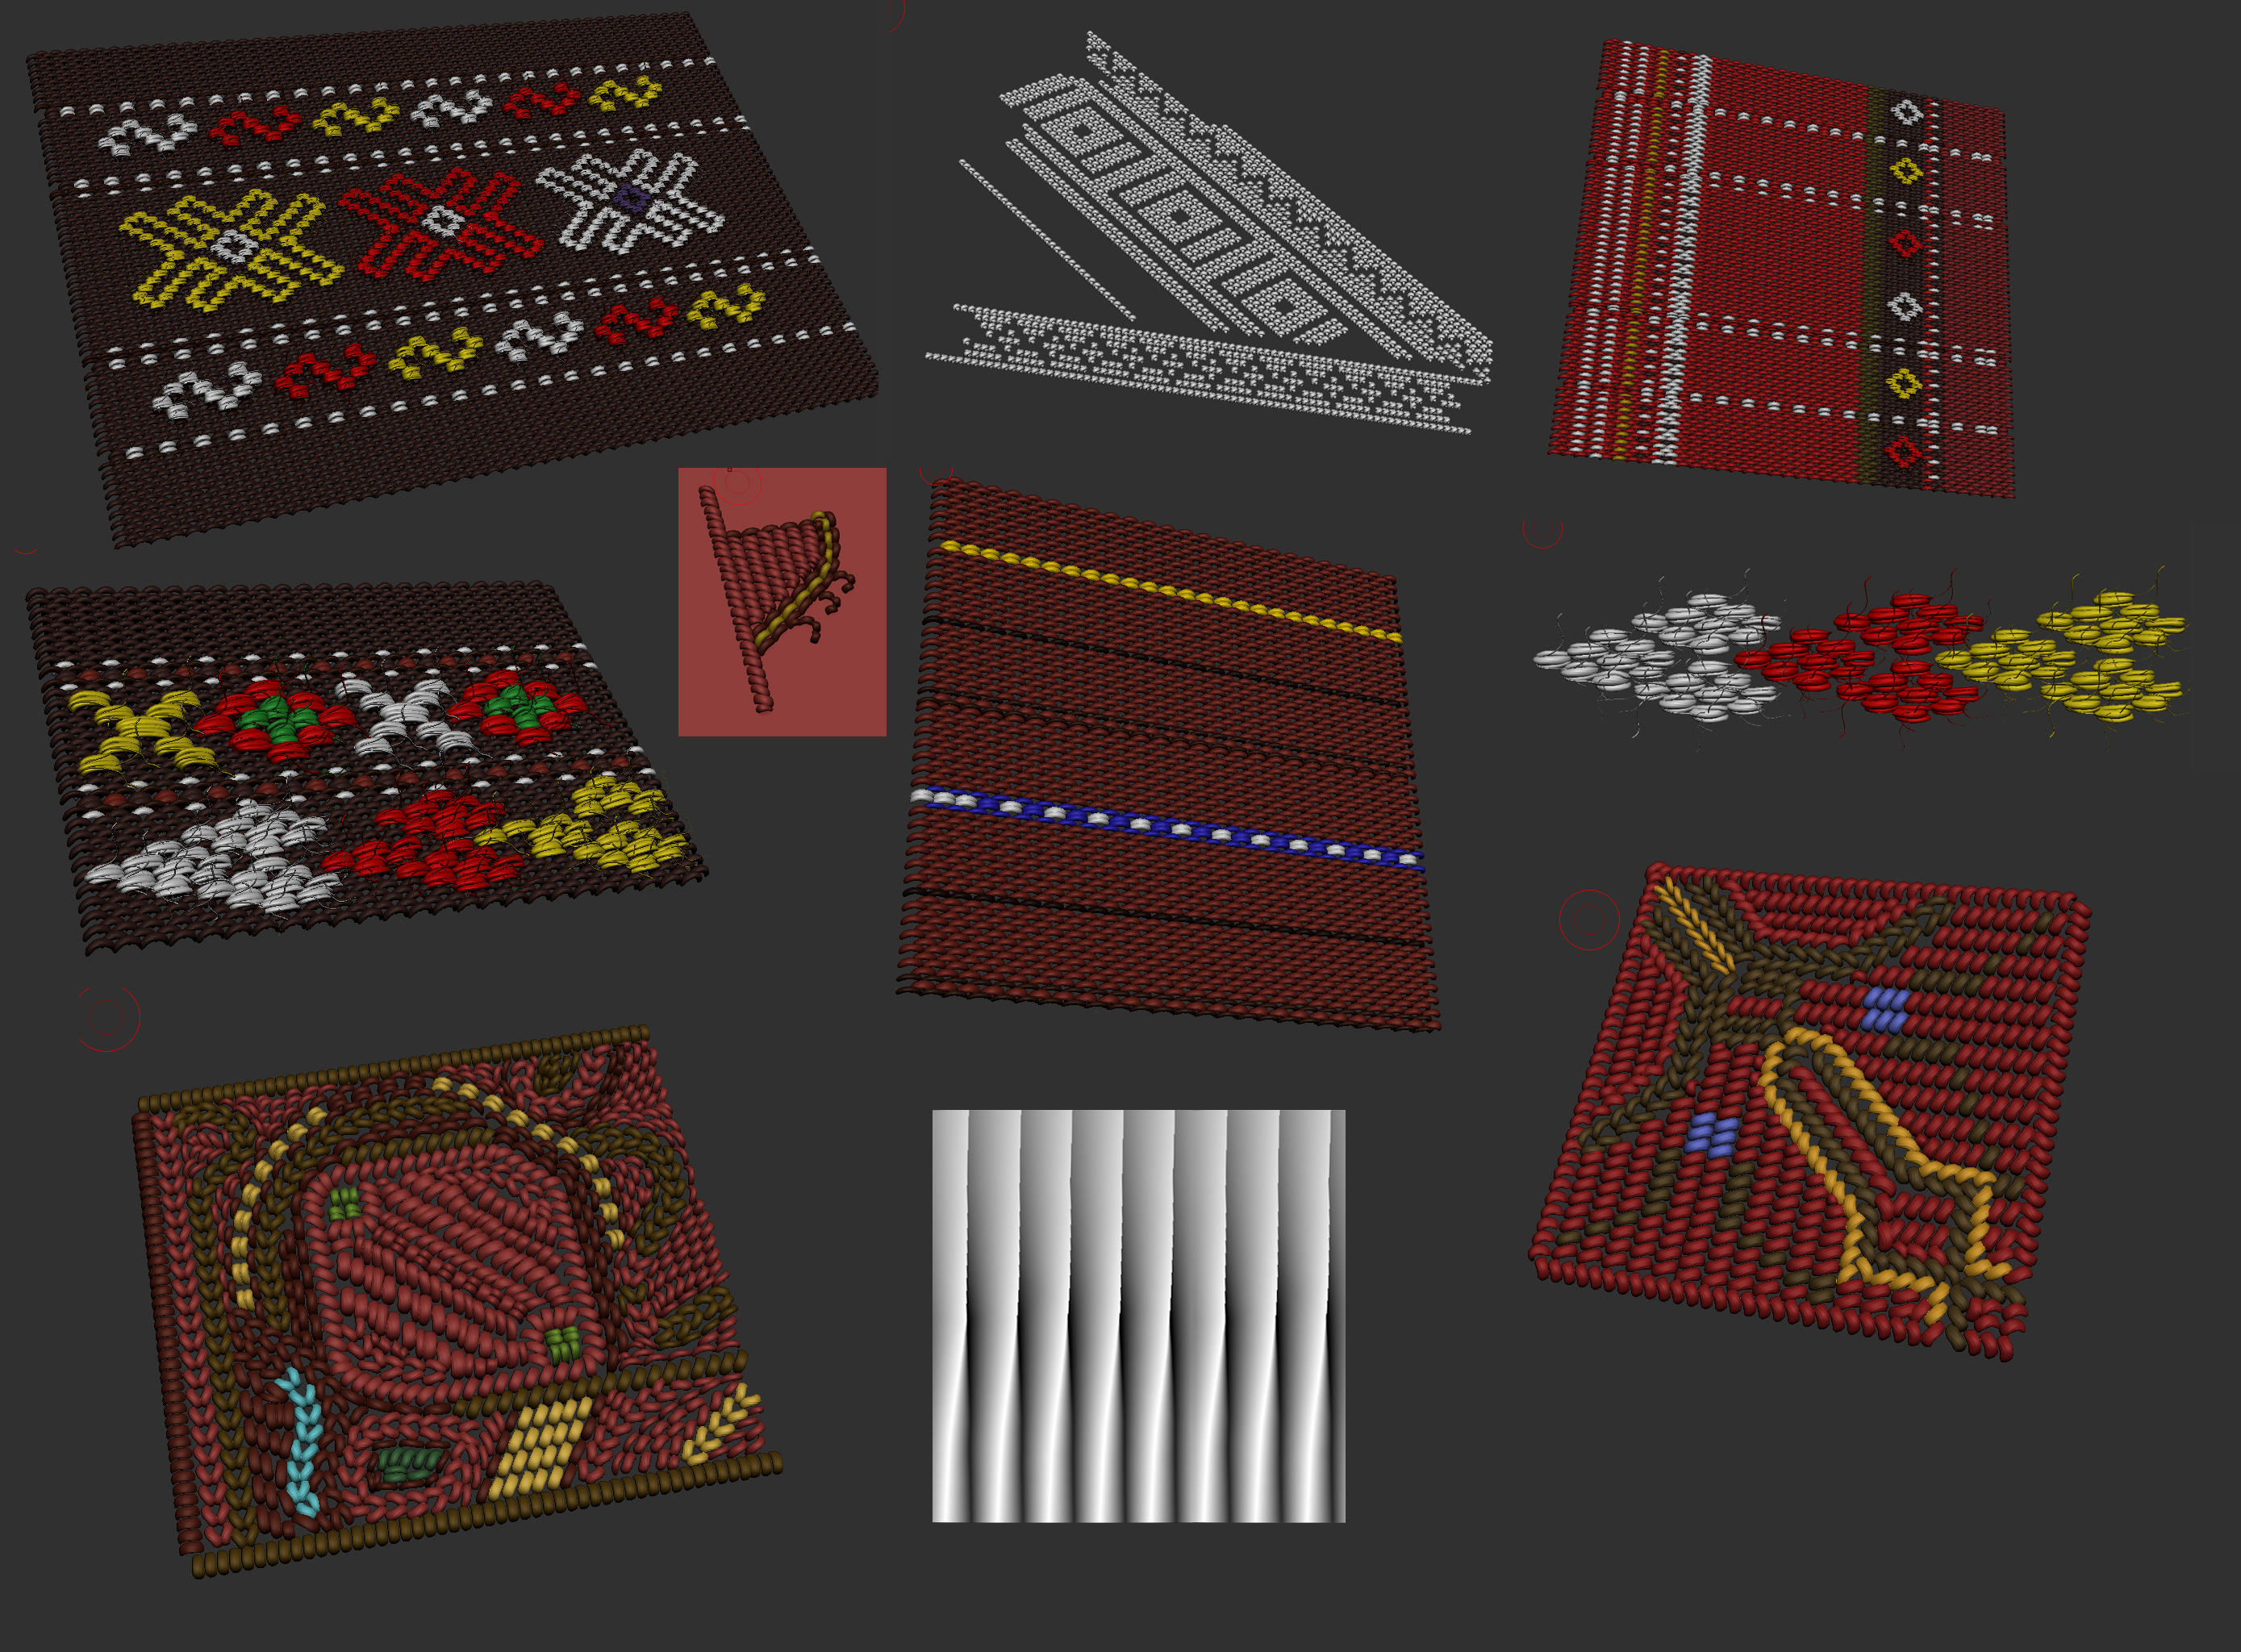
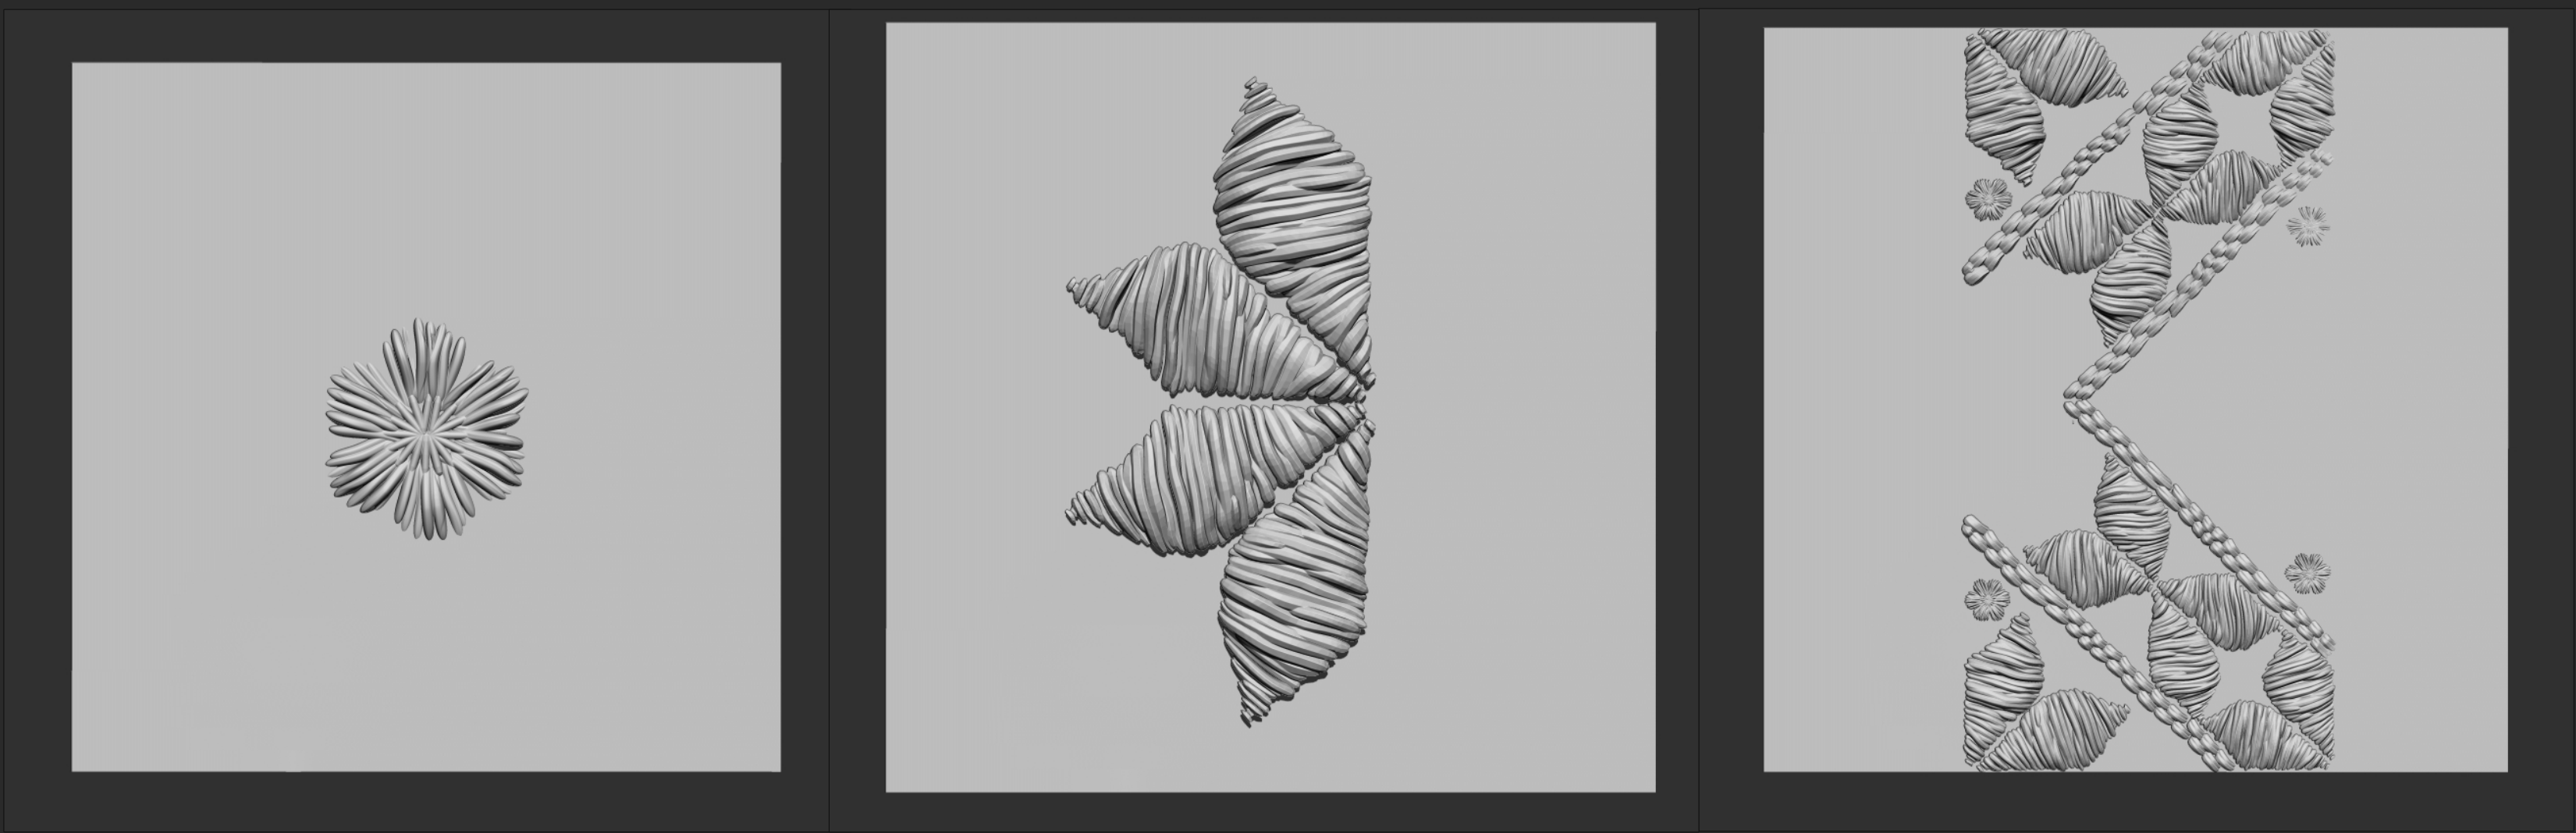
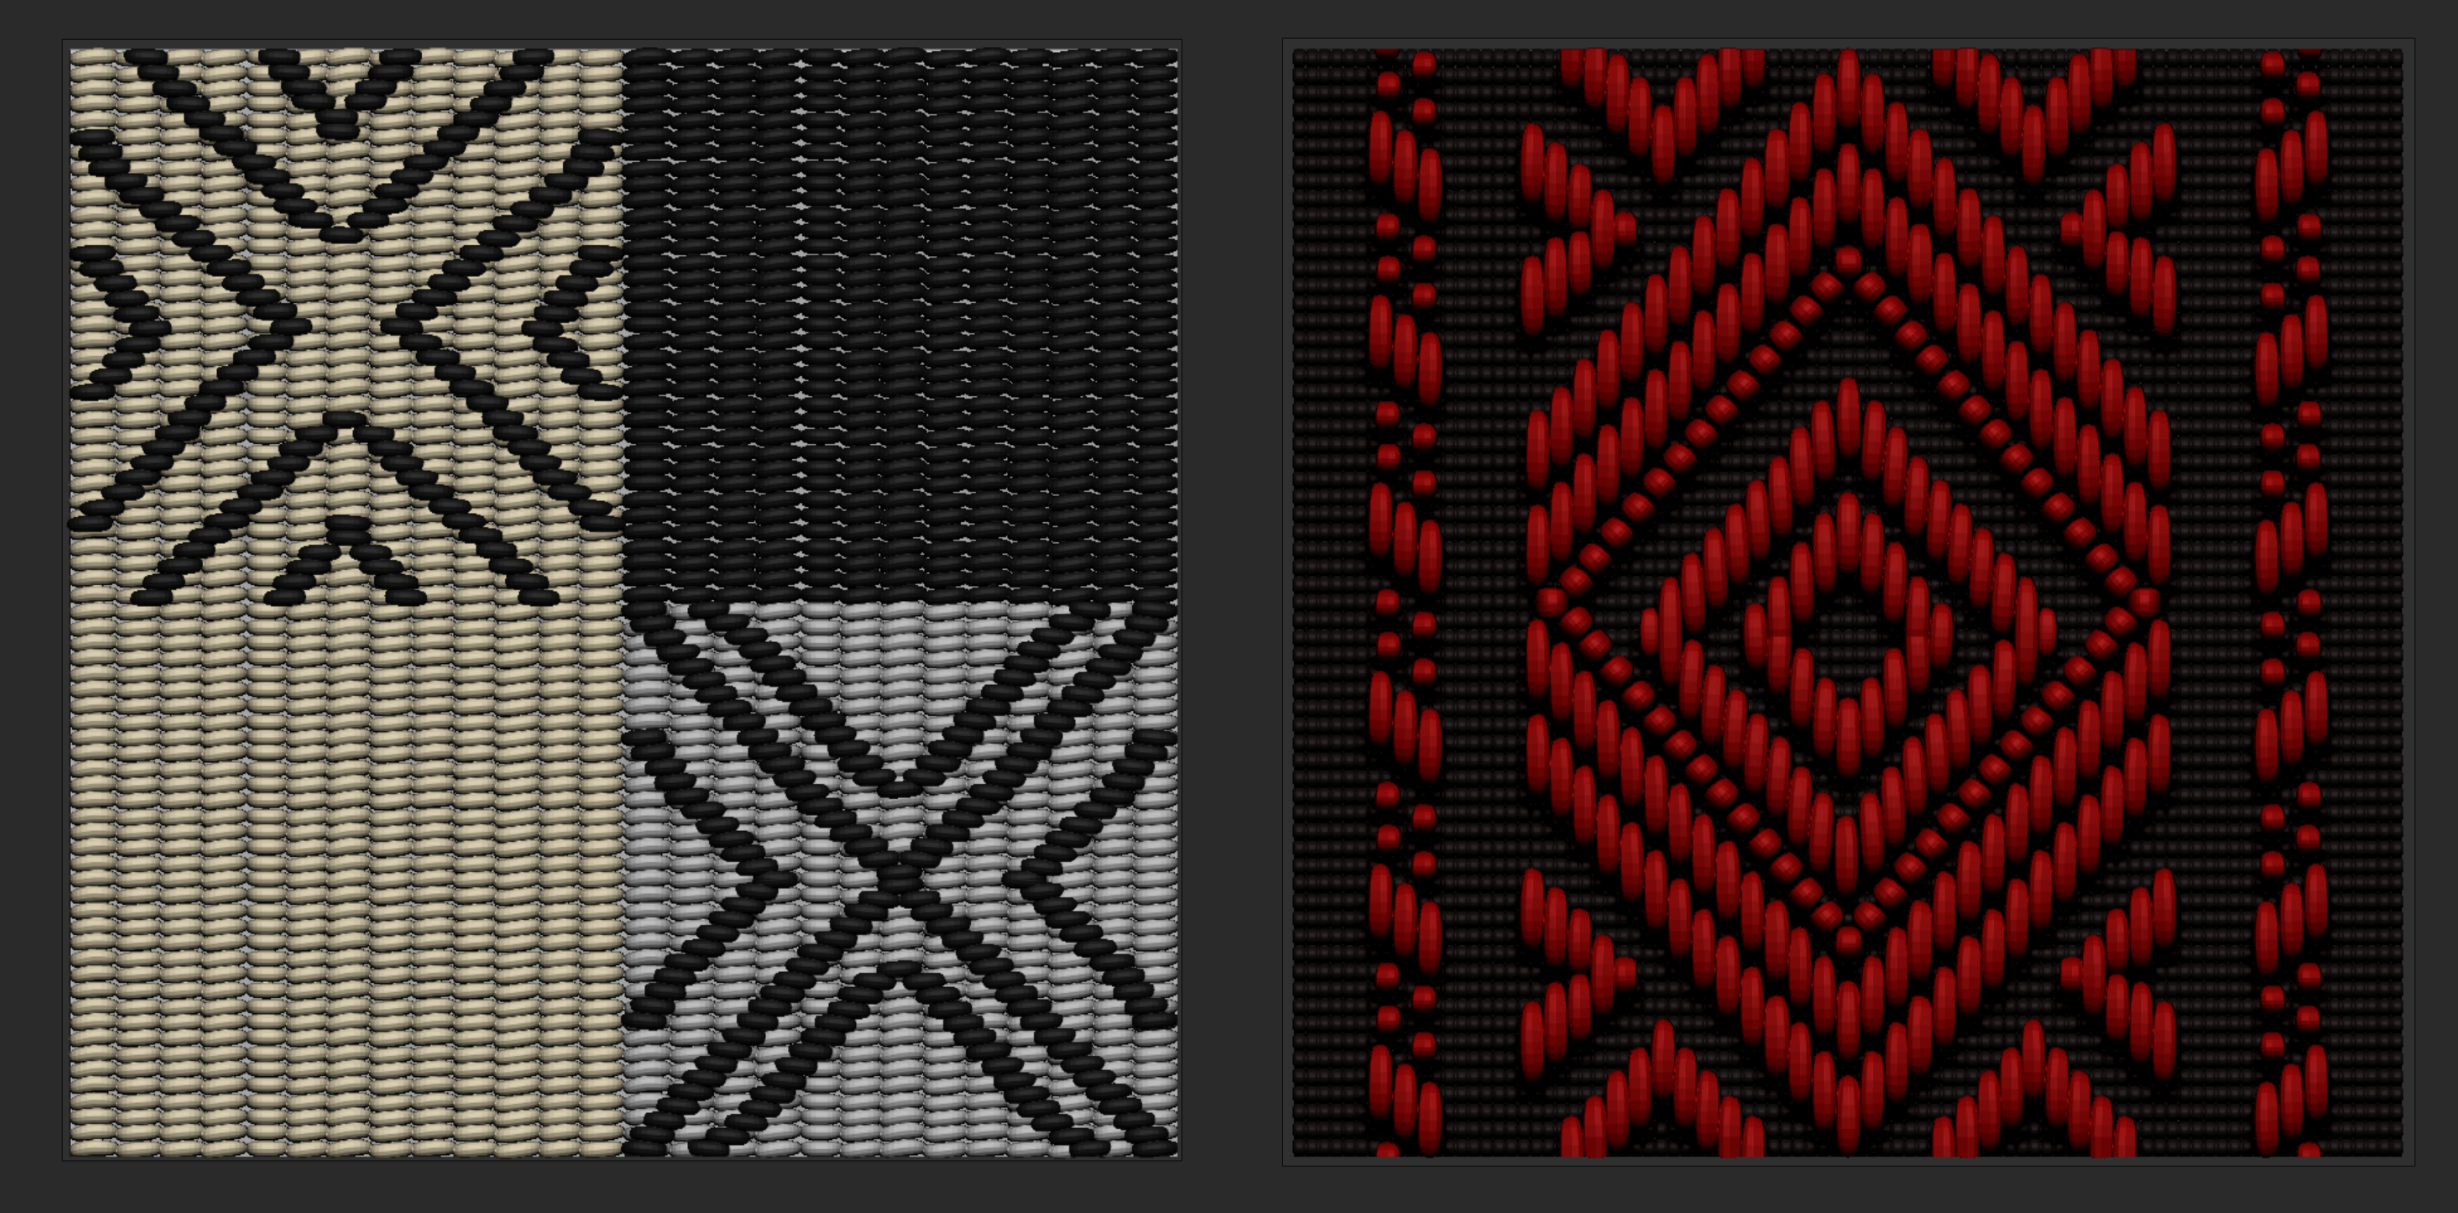
Something that we really focused on was the creation of the ornate patterns, which we worked on using different methods. One of the methods starts with creating the pattern in ZBrush, making sure it's tileable, assigning polypaint (for ID color if needed), making an imm brush to help with the placement and then either using it for the final baking stage, or creating a displacement from it.
IMM brushes
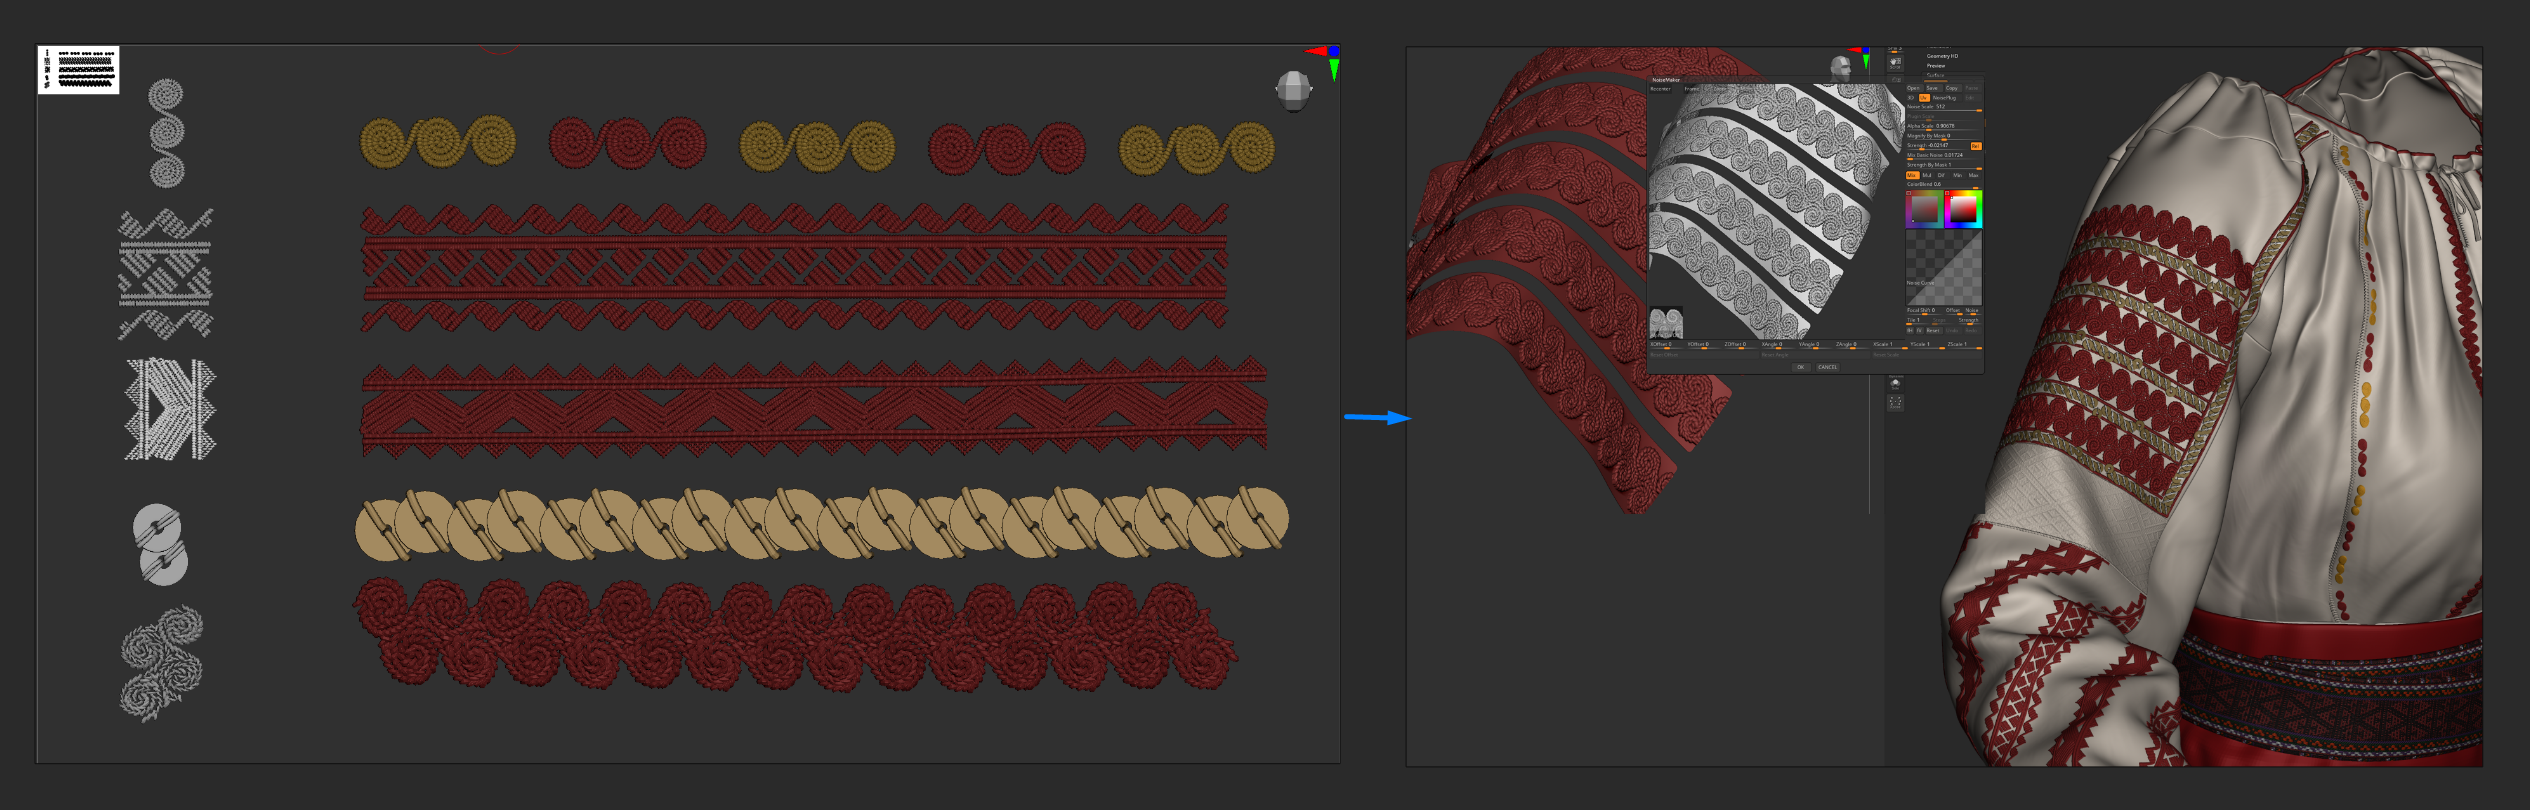
Planning the displacement map
Selection of patterns created in ZBrush.
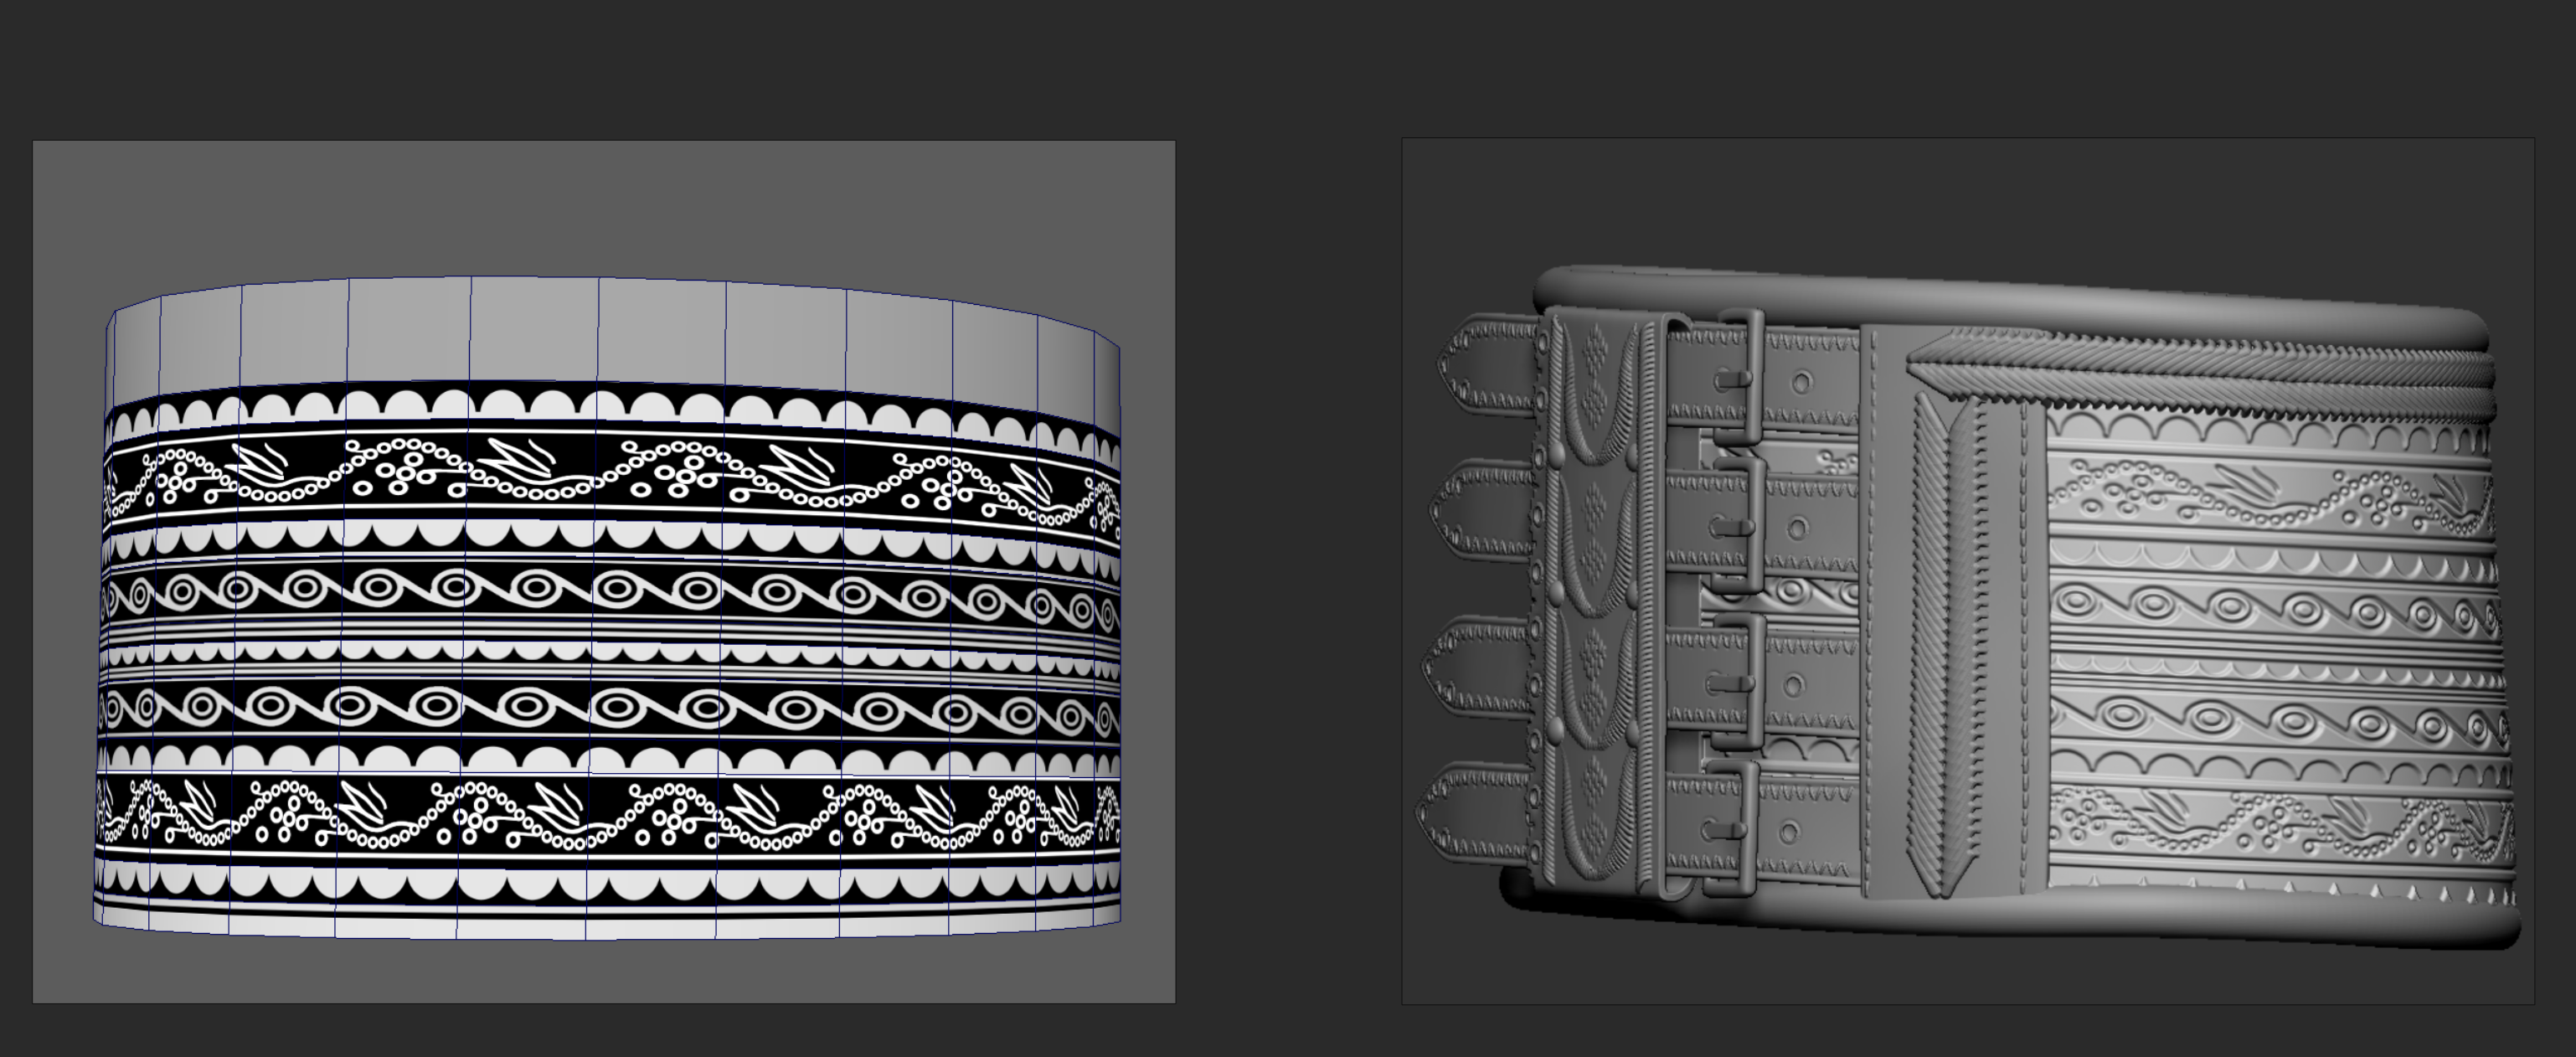
Another method used was to create masks that helped us achieve different results for materials, such as leather. There was a lot of testing done in Photoshop and ZBrush to make sure we achieved the proportions and distribution needed with each pattern.
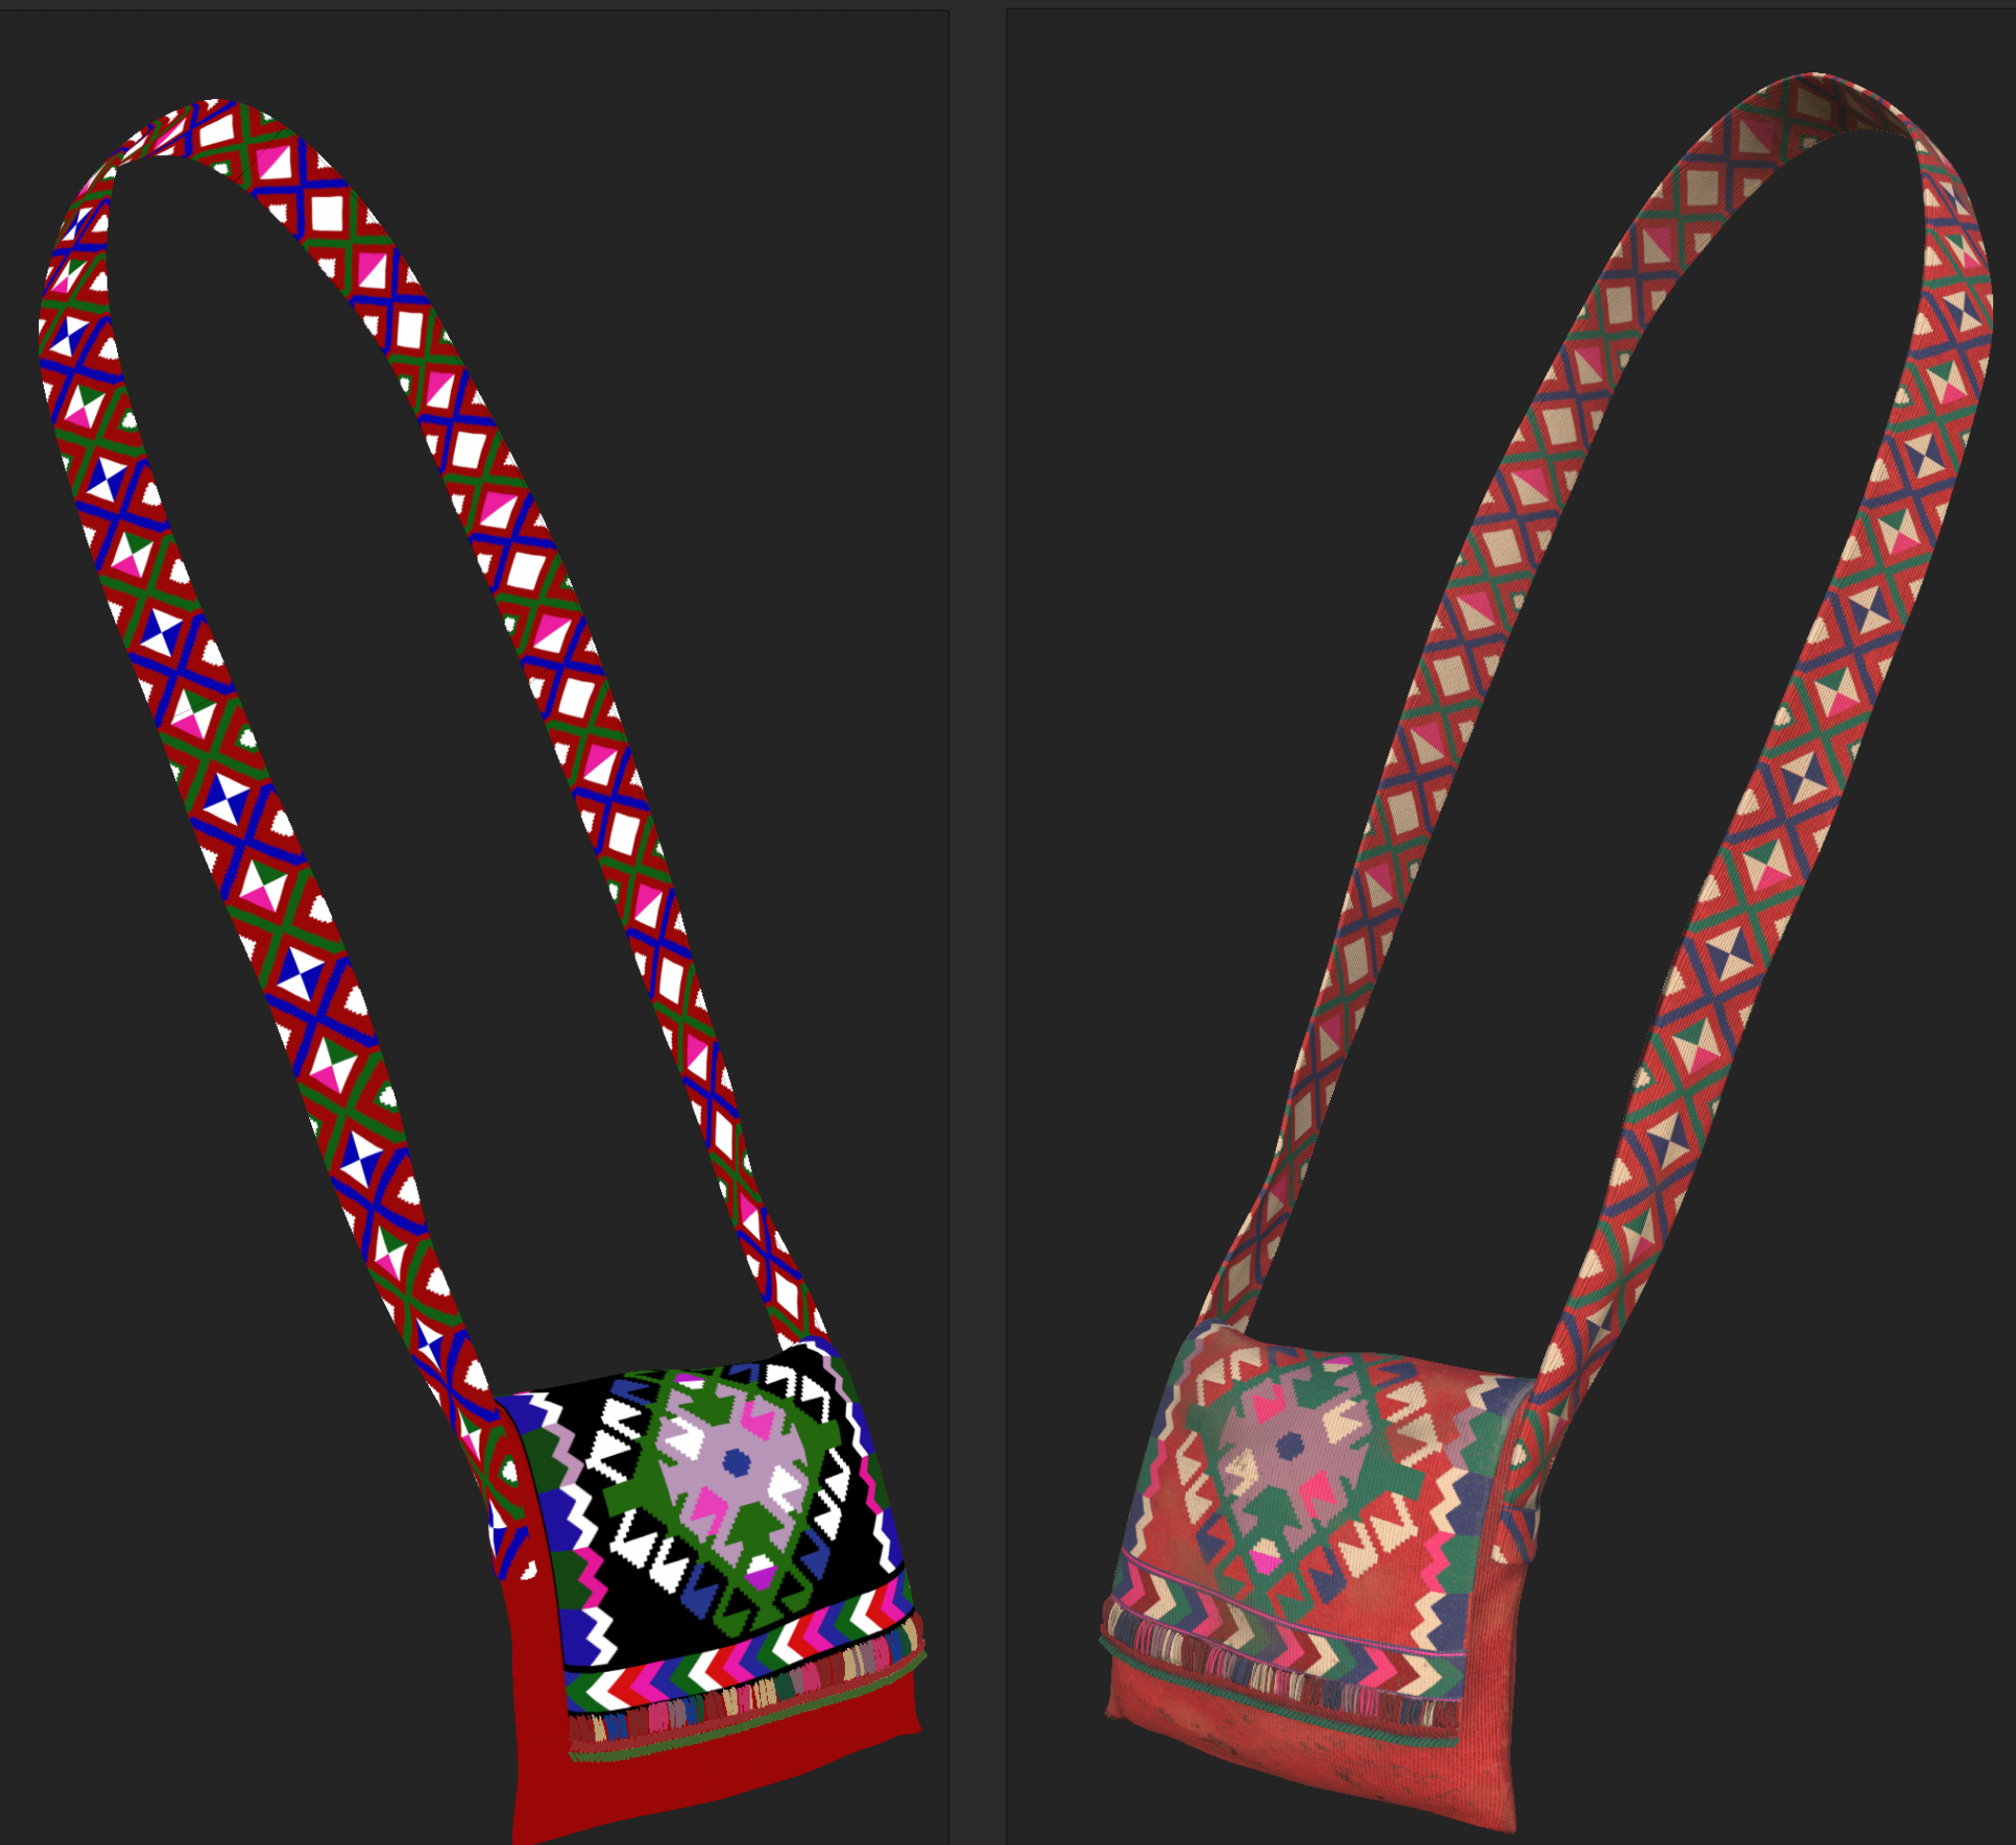
We also did the patterns by first creating a color map that was used as an ID map in Substance Painter to generate the desired pattern. This worked only with square looking embroideries.
이 작업은 VFX 등의 기술로 제작되었습니다.
Marvelous Designer로 이와 같은 3D 의상·캐릭터 작업을 직접 만들어볼 수 있습니다.