ONCE A WIFE
INTERVIEW from Winners, the 1st Place in Professional Category - Hunt: Showdown 3D Apparel Creation Contest
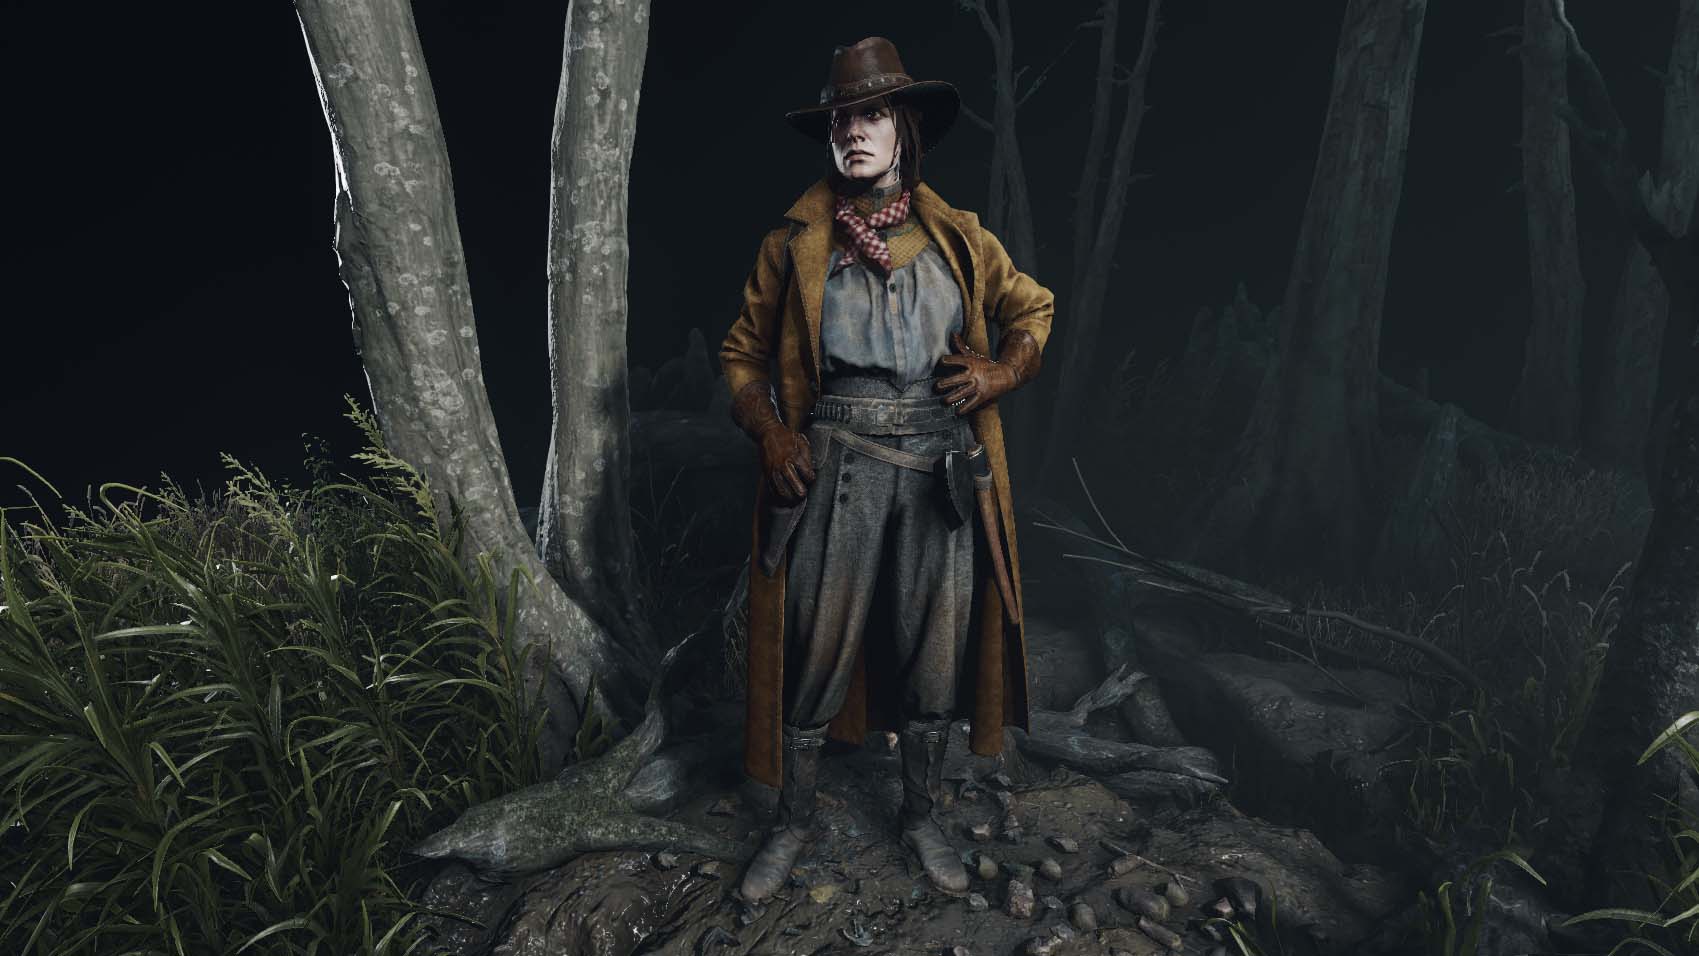
By Andrzej Rać-1st Place in Professional Category
Where did you get the inspiration of your hunter?
The inspiration for me was the actual game. I've tried to find all of the hunters that were in the game.
Luckily, I have the power of the internet at my disposal so it's super easy to do.
This allowed me to break all characters into parts, compare them, look at what they have in common and what the differences are, and finally what I would like to see in game and it wasn't there.
Then I have spent a considerable amount of time on Pinterest. I was browsing all sorts of clothing pictures from the time period and saved everything that caught my eye.
I think at this point I've decided to do a huntress and not a hunter. I find that women's clothing is usually far more interesting and fun to recreate.
After that I simply looked through everything I had and did a selection of what to throw away and finished with a few reference pictures to work with.
I was trying to go for something that she could wear when going for example to the city.
I imagined it would be a bit nicer and decorative but still suitable to work around the house everyday.
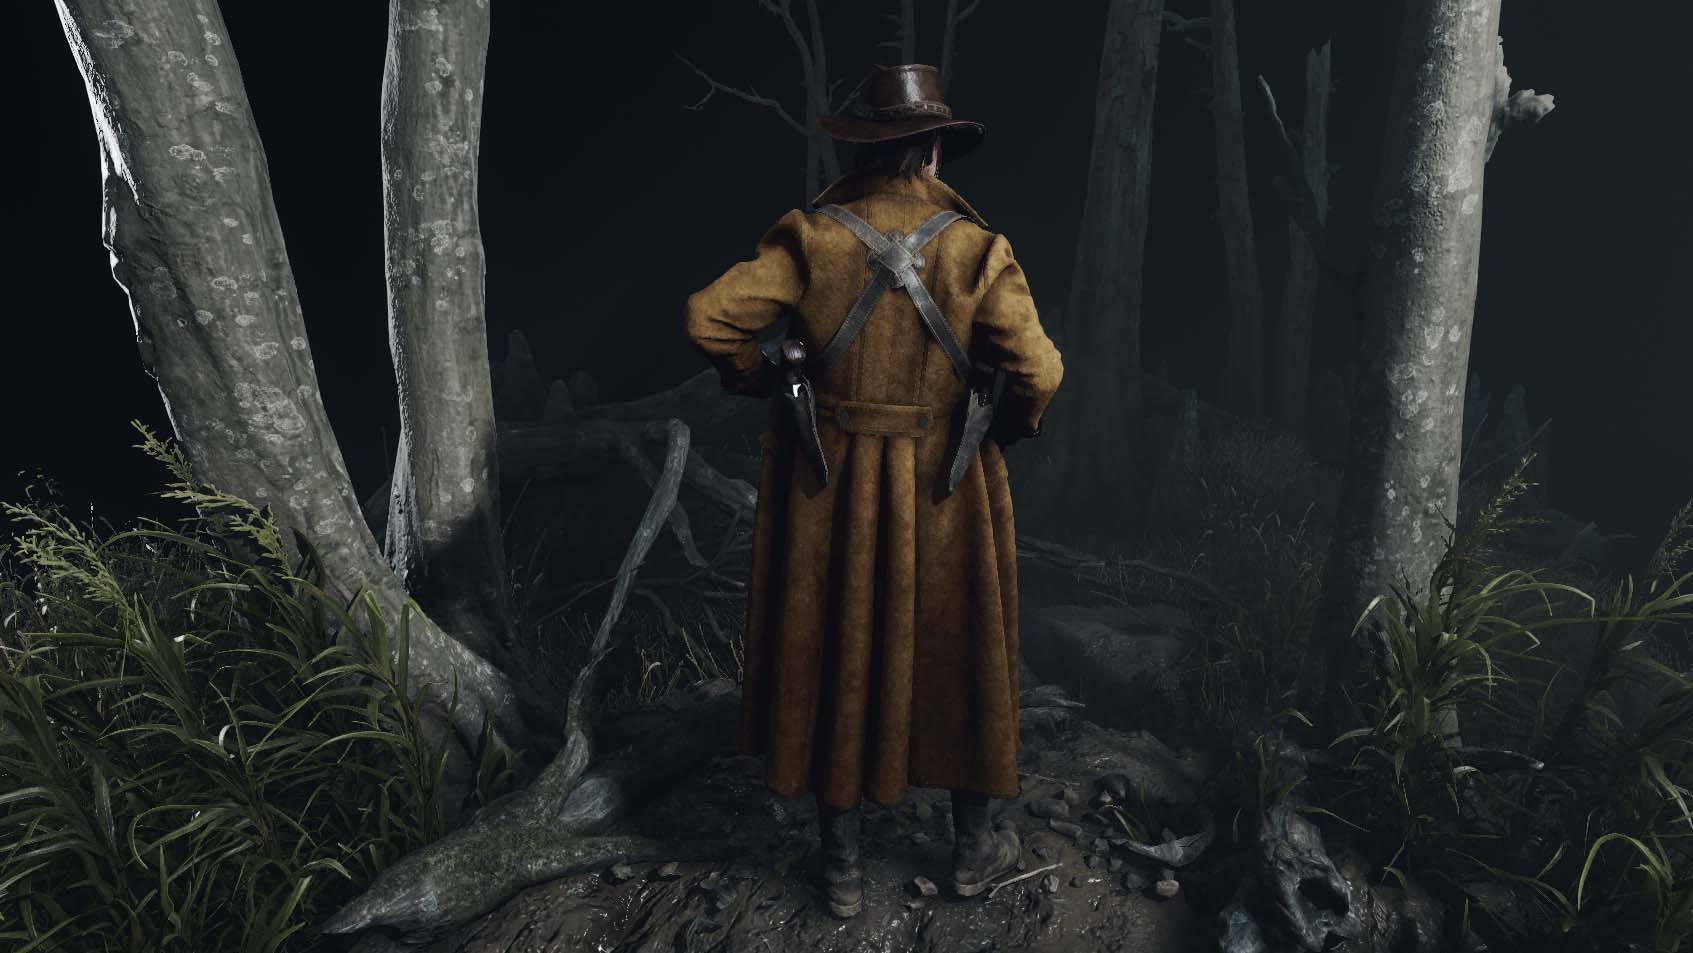
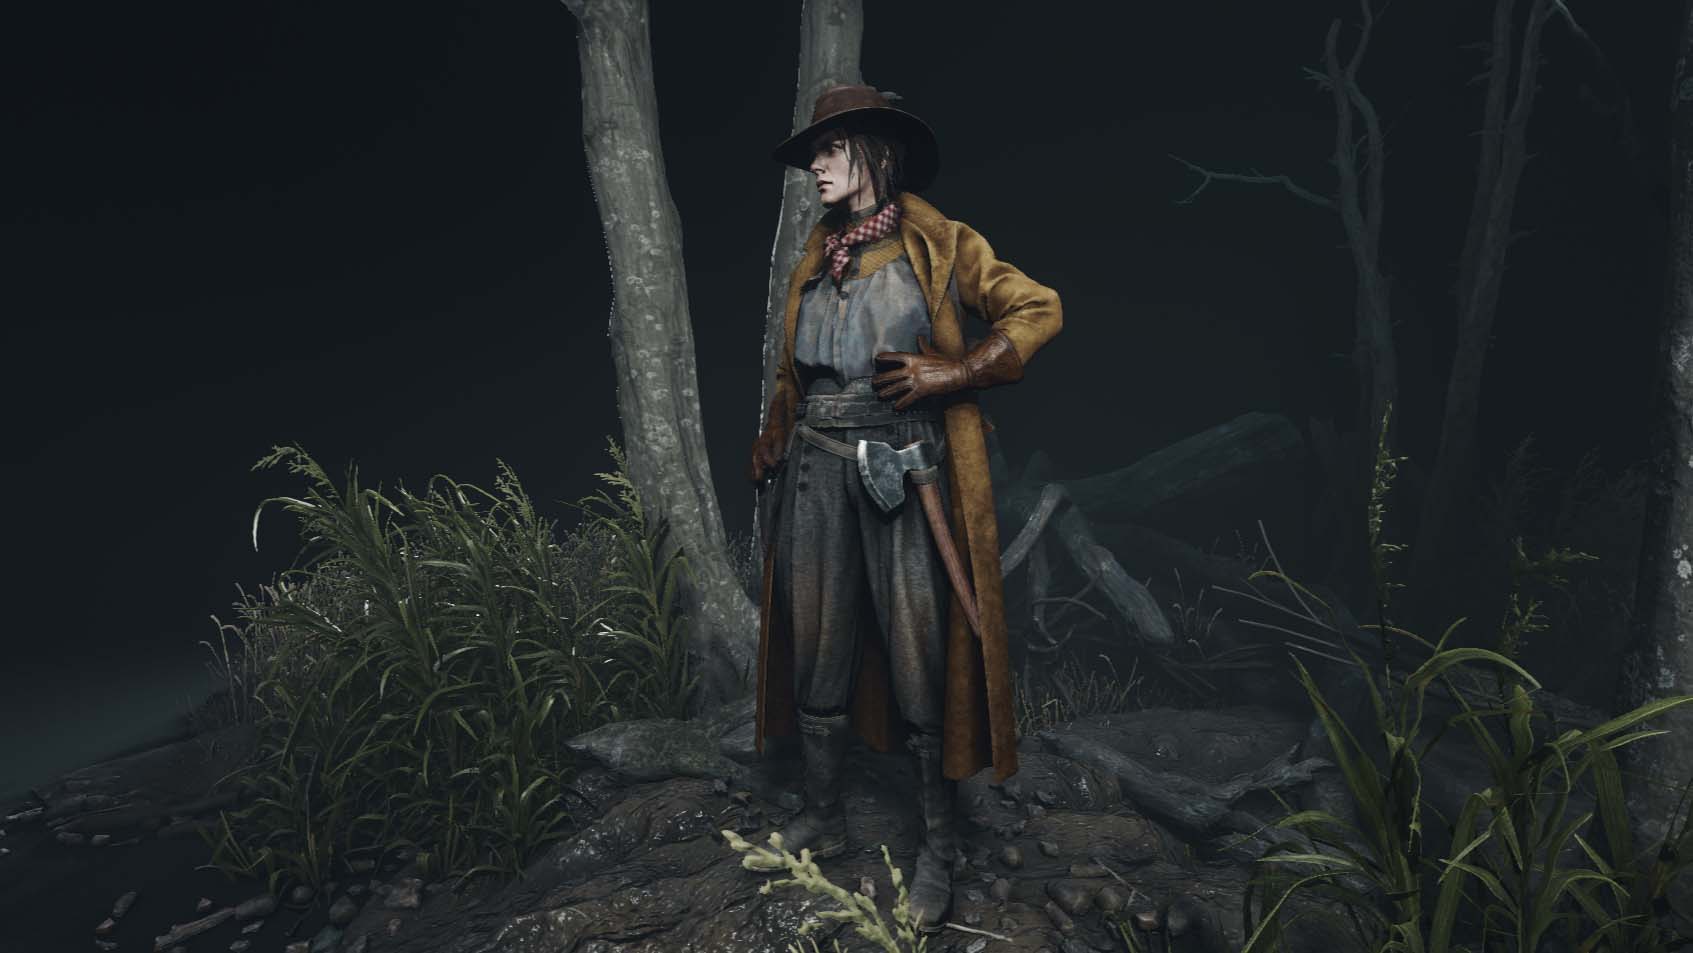
Loose shirt detailed around the neck and high waist pants loose around thighs, held together by leather wraps around the shins.
I've also added a leather loop to the belt and an axe for the times when You run out of ammo, and little red piece of cloth around the neck.
Looking at my design now I can see that I really didn't go that far away from the in-game designs.
I just mixed all the parts that I liked the most in different hunters.
I took a long coat, cowboy like hat and shoulder holsters and put them on the clothing I've found on Pinterest.
Could you explain in chronological order what process you went through for the garment creation of your winning work?
First and the most important thing for me after gathering my reference pictures was to find good sewing patterns,
because no matter how good Marvelous Designer is (and it's simply marvelous),
to simulate good looking garments, You have to create them the proper way.
Just like in real life where we have the best physical simulations, clothes won't look good if they were made the wrong way.
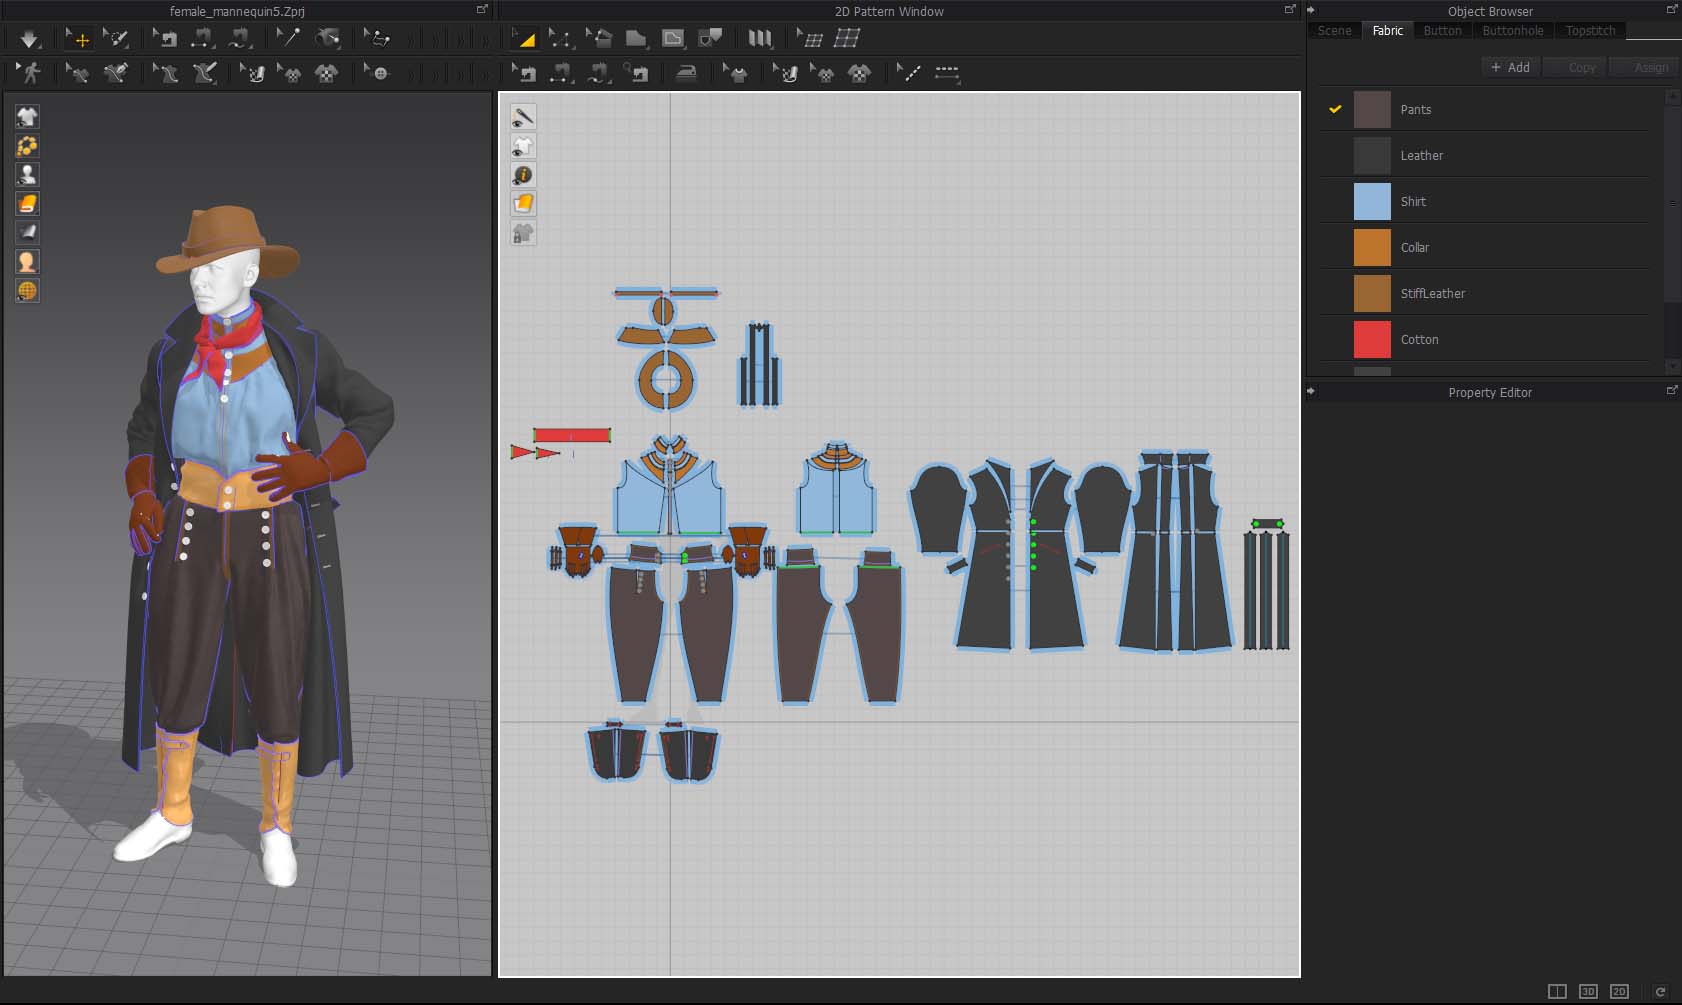
For the shirt, pants and the coat I started with Pants and T-shirt garments from Marvelous Garment Library.
Because there is no point to start from scratch.
I then modified those patterns to achieve desired look and assigned different materials to all parts to get different colors and appropriate physical properties.
For gloves I traced patterns from photo texture. I created a plane and assigned texture to its material and then edited the 2d texture to fill the plane.
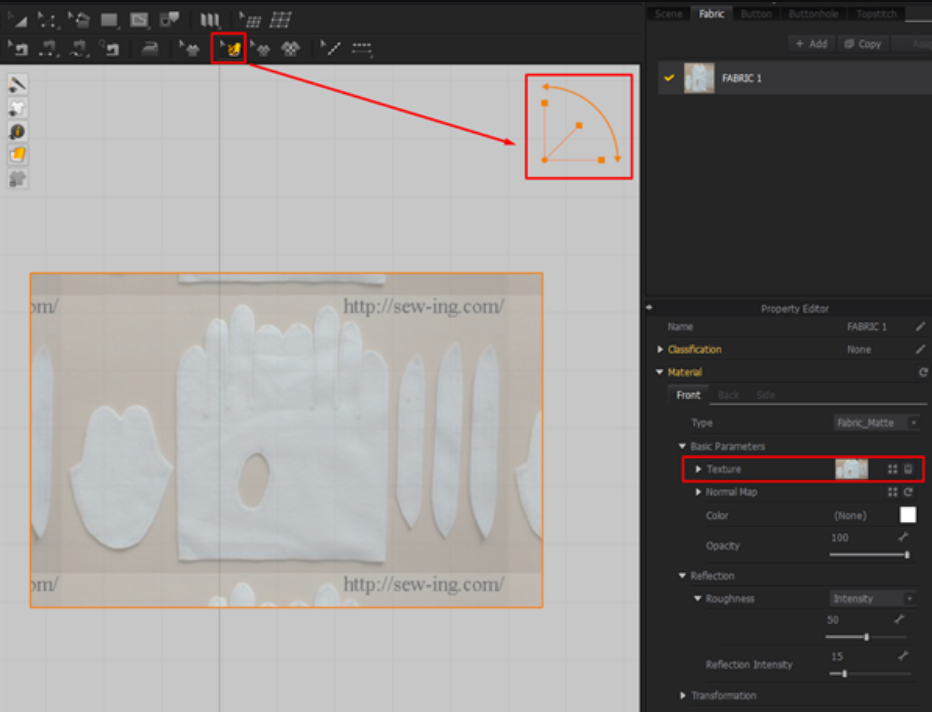
From here you simply trace what you see on the texture with the "Internal Polygon/Line" tool under the "G" key.
After you are done, you can select created edges, right click them and "CUT" out of the plane.
I did that to all the parts and sew them together on my character.
I think the hat and the cloth on the neck are the only things i did by hand and figured out how the patterns could look like without reference, because their shapes are simple enough to do that.
I keep different garments on different layers so there is no problem with overlapping when I simulate them.
For example, shirt is on layer 0 and pants on layer 1,Marvelous Designer automatically treats the shirt as tucked in because it is on the lower layer. It is very useful functionality.
Most patterns had Particle Distance set to 15mm. This setting was a good balance between optimal mesh density and simulation results.
I kept this until everything was in place and all parts of the garment had nice volume and shape.
From here I added buttons and seam taping in places where usually clothes are being sewed together (sleeve connection to body, front and back part connection and outside borders).
Seam taping reinforces those edges and makes the whole garment look more realistic. At least that's how I understand it's functionality.
With everything in place it was time to pose my character.
Until this moment, i worked with a simple mannequin shared by the Hunt Showdown team but it had no skeletal.
So i could not use it anymore. I have imported the Female Hunter model into Blender, posed it and key framed everything, then exported the final mesh with its animation into FBX file.
After switching avatars, you can go from Simulation to Animation tab. And, simply play your animation, and your avatar will change it's pose.
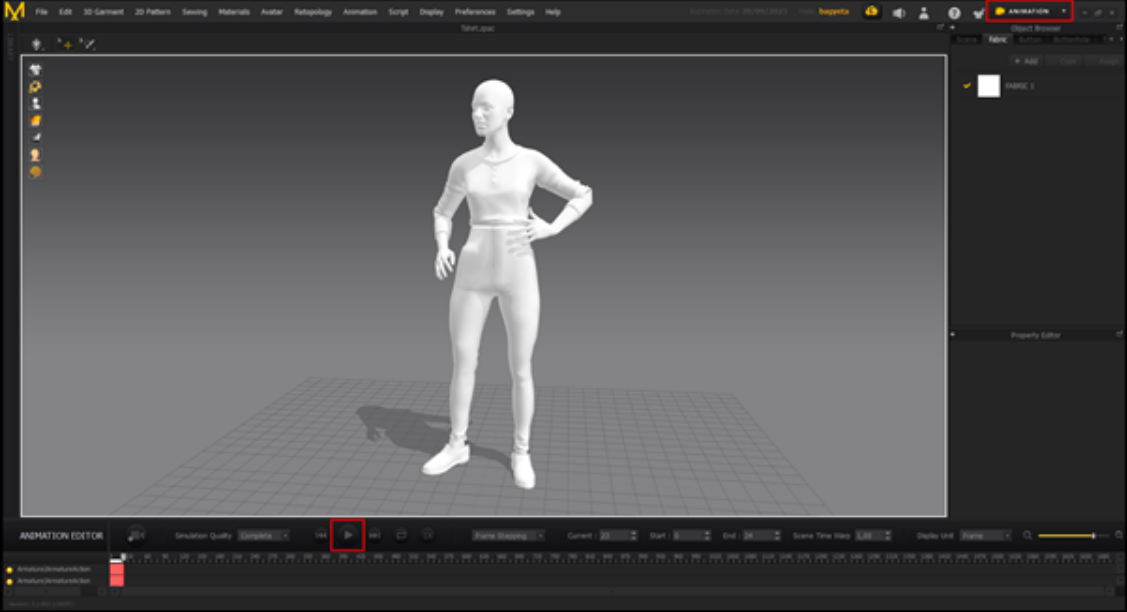
The process of posing garments was pretty straight forward. Freezing everything except pants and animating them to a new pose,
then freezing pants, going back to frame 0, unfreezing shirt and animating it to a new pose and so on.
I did this until everything was in it's final place. This took some time but animating everything at once was way
beyond capabilities of my machine and I had to manage somehow.
Now it was time to get my final meshes with proper density and best looking simulations.
Like with animating, i worked with one piece at a time. I changed the particle distance to 5mm to get nice folds.
I set Shrinkage weft and warp values to over 100% to "get more cloth" inside a single pattern without need to scale anything.
I found this useful trick in one of the tutorials on YouTube.
Then I changed mesh type from triangle to "Quad" and finally in simulation property I switched preset from Normal to "Complete (Nonlinear)" simulation type.
It is much heavier to compute for your PC but gives better looking results.
After all that you can simply export everything to OBJ files.
Marvelous Designer can automatically add thickness to your garment and include all the buttons you create.
For this kind of work it's extremely helpful because it saves time.
From here I worked on my UV's in Blender and Textures in Substance Painter and that's it.
What was the most difficult part, and what part did you spend a lot of time on to complete this artwork?
The Biggest headache was the posing of the coat and it was the most difficult part for me.
Firstly because it lays on top of everything and in basic position it is strongly intersected with other parts that are already in final place.
Secondly it's being pushed to the back by hands and it wasn't folding the way I wanted.
For this I had to use the Pin tool. It helped me to move it and hold the coat in certain positions during simulation which allowed me to avoid errors while animating.
I still had to move my pins to a new position every one or two frames but it did the work.
There's probably a better way to do this, but I had no time to experiment with different solutions.
Animating I think was the part that I spent most time on. Mostly because I never did it before.
What are the strong points that Marvelous Designer has?
One of the strongest points of Marvelous Designer is the fact that it can run even on slower machines.
You can always change particle distance to higher values and speed things up this way.
- Thanks to real fabric presets You will always achieve realistic effects.
There is no guesswork if something looks off, You know that is Your fault and there's something wrong with the way You created Your patterns.
- New manual retopology tool is also amazing.
It's super easy to draw quads in 2D View. You instantly see how everything lays out in 3d and can create low res versions of garments for other softwares to reproject the high detail.
I think those three are my absolute favorites but I am still learning this software so who knows what else I will find in the future.
Link to Artstation
Link to Instagram
이 작업은 contest, Simulation, Pattern, Avatar, CharacterArt, game 등의 기술로 제작되었습니다.
Marvelous Designer로 이와 같은 3D 의상·캐릭터 작업을 직접 만들어볼 수 있습니다.