Rasheeda
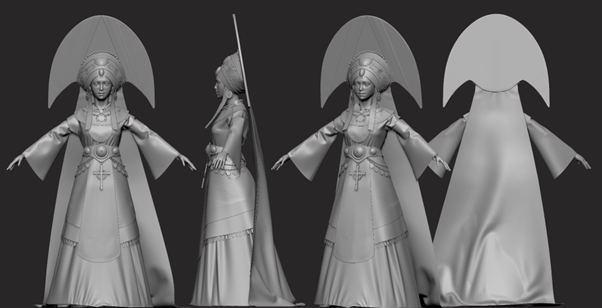
Anastasia Kukosh, a student at Think Tank Training Center, showcases her talent and passion for AAA game development with her impressive project, Rasheeda.
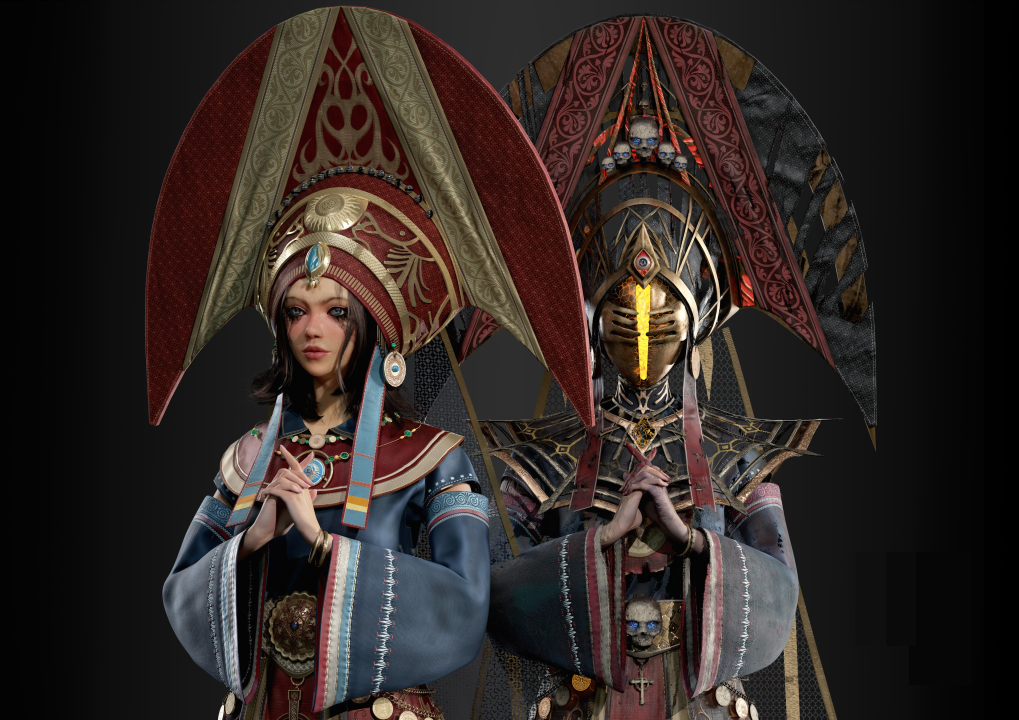
Interview with Anastasia Kukosh | Rasheeda | Character Artist
Artist introduction
My name is Anastasia Kukosh, I am a student at Think Tank Training Center. My passion for the arts started in my childhood, then I joined the Master's degree in Fine Art. After this formation, I began my journey in 3D modeling less than a Year ago. My goal is to join the future industries of the new generation of AAA Games. I used different softwares in my workflow, one of them is Marvelous Designer.
When did you start using Marvelous Designer and how did that affect your workflow process?
I started using Marvelous Designer at Think Tank about three months ago when we were given an exercise to make a leather jacket. During the exercise, we learned about insert offset lines, layers, pressure levels, and more.
For my final project in the second term, I decided to choose a character with clothing to gain a better understanding of the workflow. It turned out to be a great and successful experience where Marvelous Designer helped me solve half of the problems that I was worrying about.
As a student, how much time did you find sufficient to gain confidence in using Marvelous Designer?
I was pleasantly surprised by how easy it was to start using Marvelous Designer, and within a month, I was able to achieve some results. However, to produce high-quality work, you must invest more time in learning shortcuts, selecting the appropriate tool for each situation, and researching information for the tools you are unfamiliar with. If you take a break from using Marvelous Designer for some time, it can feel like starting from scratch again.
Explain the project's creation aspects, including intentions, goals, cloth design approach, and references.
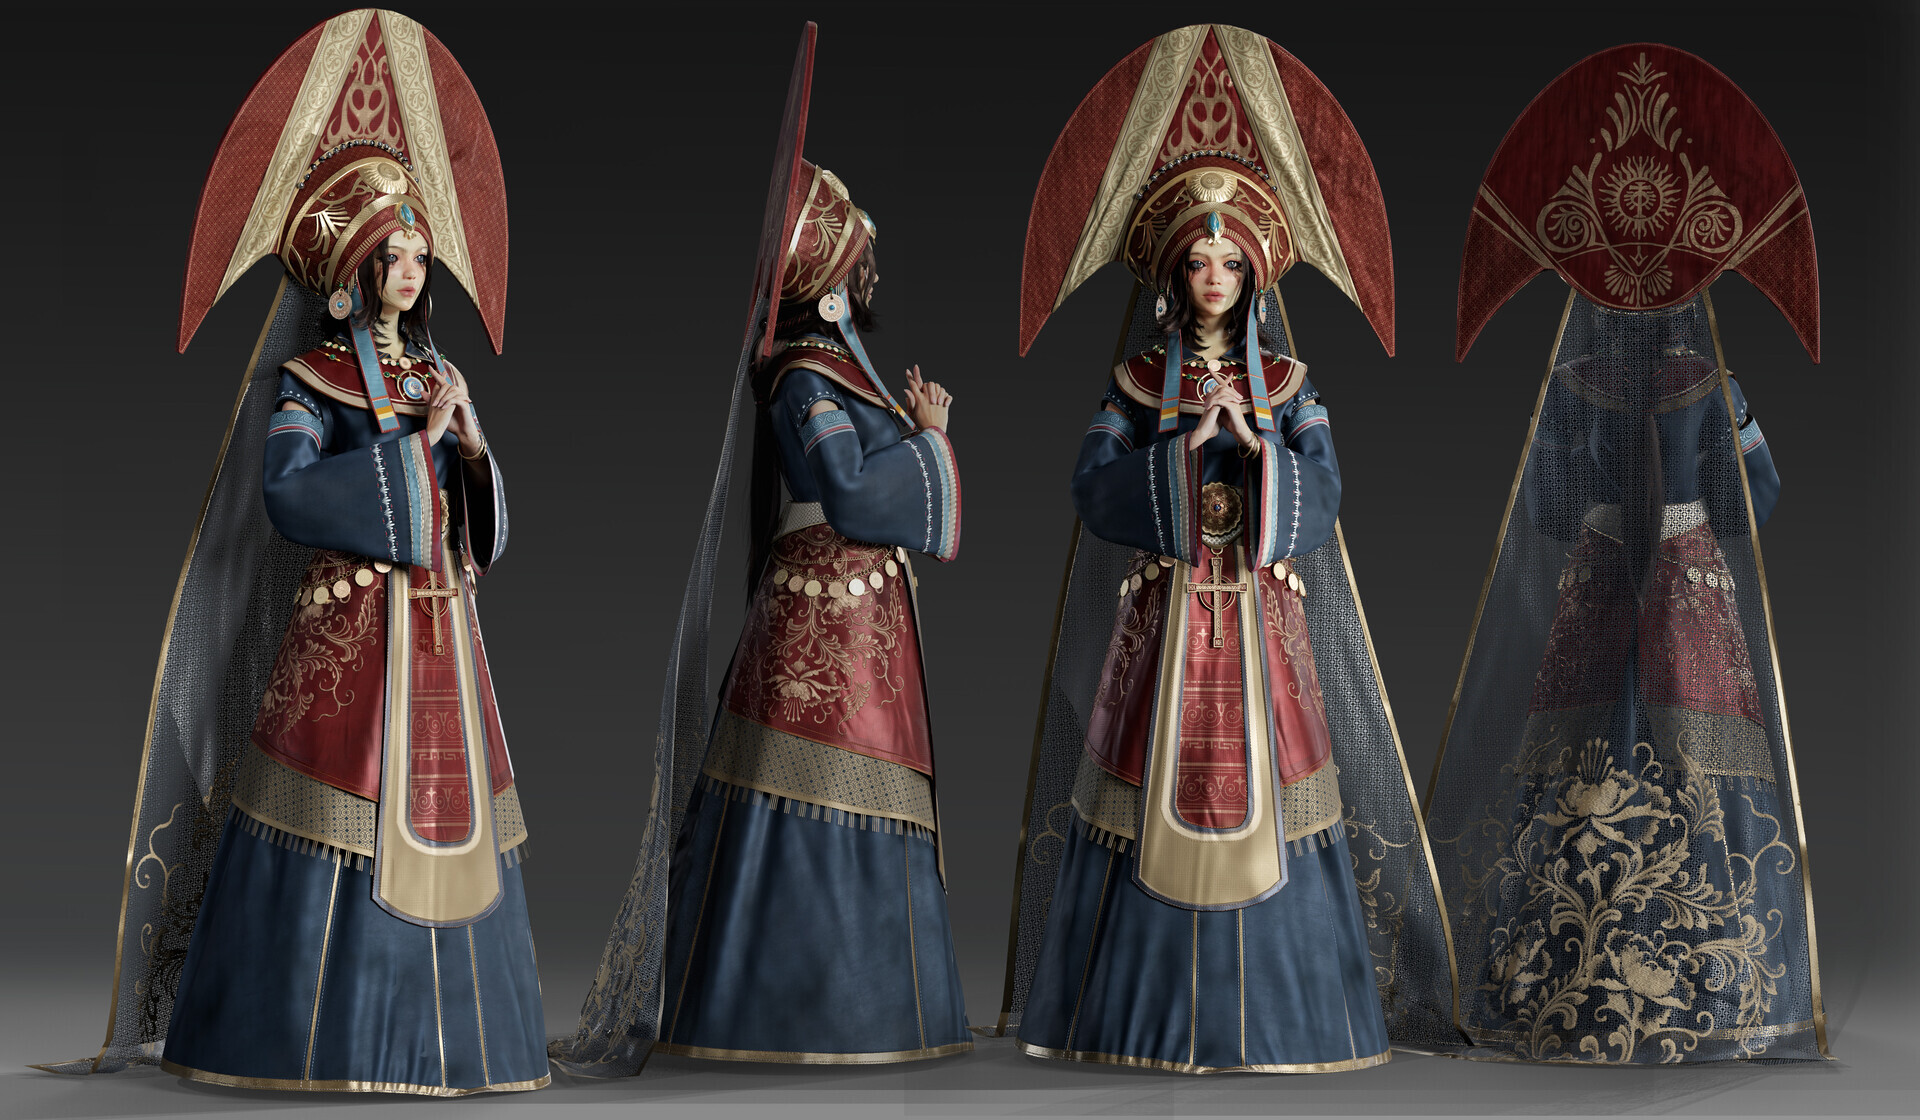
After studying at Think Tank for 7 months, I decided to use the concept of Maisie Mei's "Rasheeda - Holy Maiden". As I only had a month to complete it, I had to work fast and determine which parts would be the most time-consuming. Since I had no prior experience in character creation, I assumed that designing clothing and retopology would be the most challenging aspects.
The main goals were to use the right workflow, mastering fabric texturing,rendering in Marmoset Toolbag, achieving a lifelike facial representation, and to try working with hair cards.
Share your approach to working with Marvelous Designer. What tricks have you discovered to boost efficiency while building the hat?
I think that using Marvelous Designer is a good way to quickly and accurately block out the character's shape and simulate it in 3D space. If I like how it looks, I can then proceed to add more detailed features or move to other programs, like ZBrush.
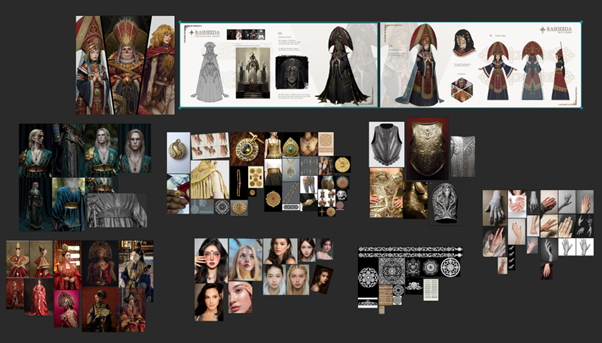
1. When I start a project, I begin by creating a mood board. This board contains a lot of visual information about the project, and I conduct my research using various platforms such as Google, Pinterest, and Artstation. I have a dedicated section on the board for clothing, where I gather patterns, textures, and information on how the clothes move, among other things.
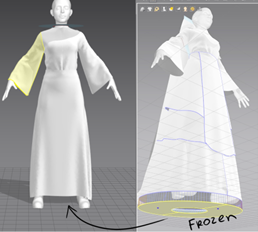
2. In Marvelous Designer, I begin by importing my custom model onto the canvas. Then, I create the garment by crafting simple shapes while referring to real clothing garments for inspiration. This helps me avoid making errors and ensures folds are accurate. Sometimes, I use frozen parts of the mesh to achieve specific shapes. My workflow in Marvelous Designer involves importing a custom model onto the canvas and creating basic patterns to form the foundation of the garment.
I conduct research and draw inspiration from existing designs to enhance the authenticity of my garment's construction. Emulating natural folds and drapes often yields more realistic results compared to attempting to replicate them from your head.
Additionally, I occasionally leverage frozen parts of the mesh to manipulate and achieve unique shapes.
Hat Modeling
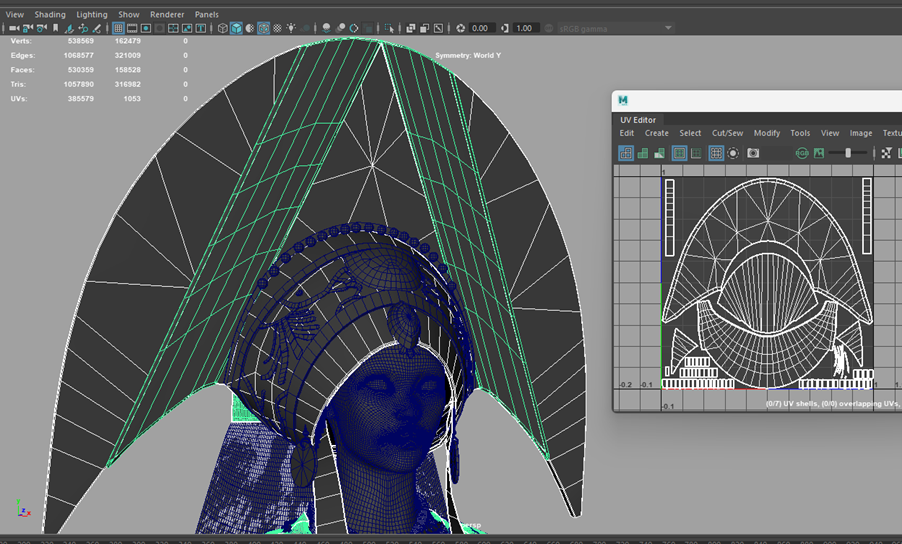
For faster results, I created a low poly hat and achieved a fabric look through texturing alone, without using HighPoly. The process was significantly faster and produced satisfactory results.
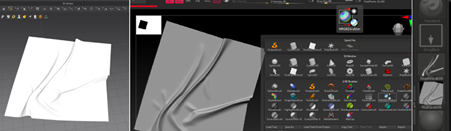
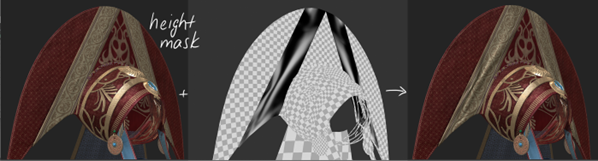
I used Marvelous Designer to create folds on a piece of fabric. Then, in ZBrush, I used RMGBZGrabber to create an alpha. I used this alpha as a height mask in Substance Painter.
Explain your process of moving between Marvelous Designer and other software. How do you prepare your project for a smooth transition?
For me, the quickest method was to export garments with UVs from Marvelous and reconstruct them in Maya before working on them in Zbrush. This way, I can preserve the UVs for baking. Additionally, I created most of the fine details such as seams, fabric structure, and microfolds in Substance.
Here are the steps:
Organize UVs for export and ensure no overlap for retopology.
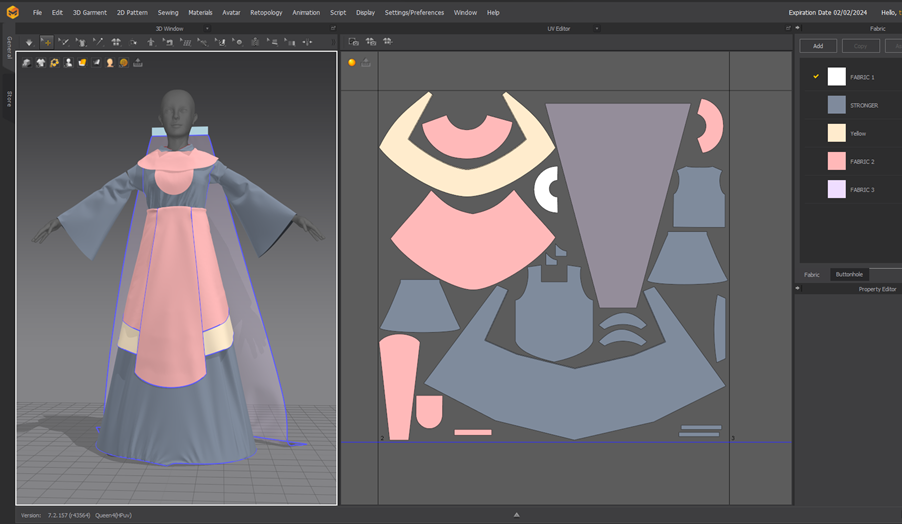
Export simulated dress with UVs with particles distance 5.0.or less
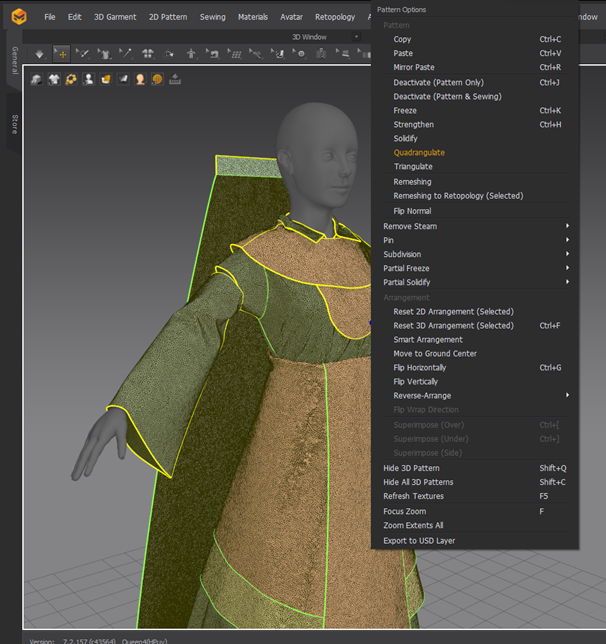
Select the all garment, right click →“Quadrangulate” with particle distance 20.0
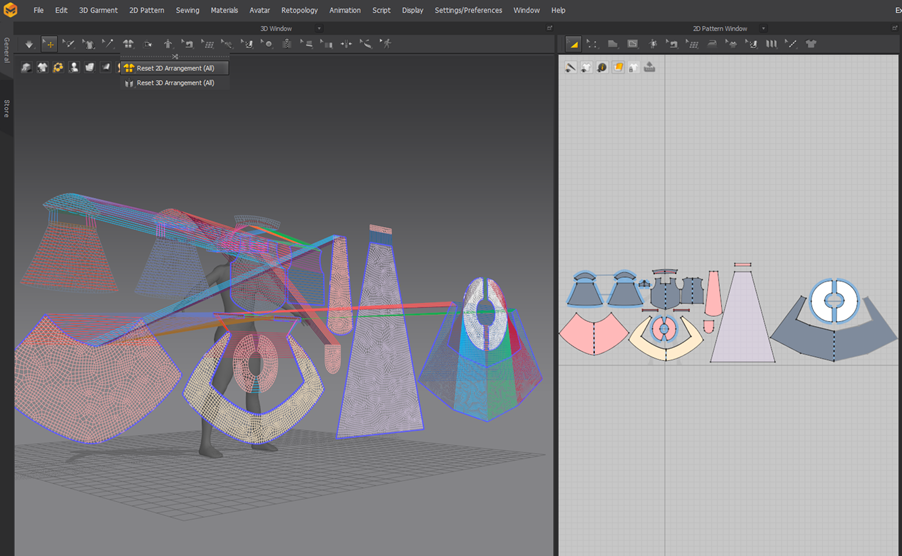
Make All mesh flatten and export it→ (Reset 2D arrangement all)
Import to Maya both versions from Marvelous Designer and the Avatar character.
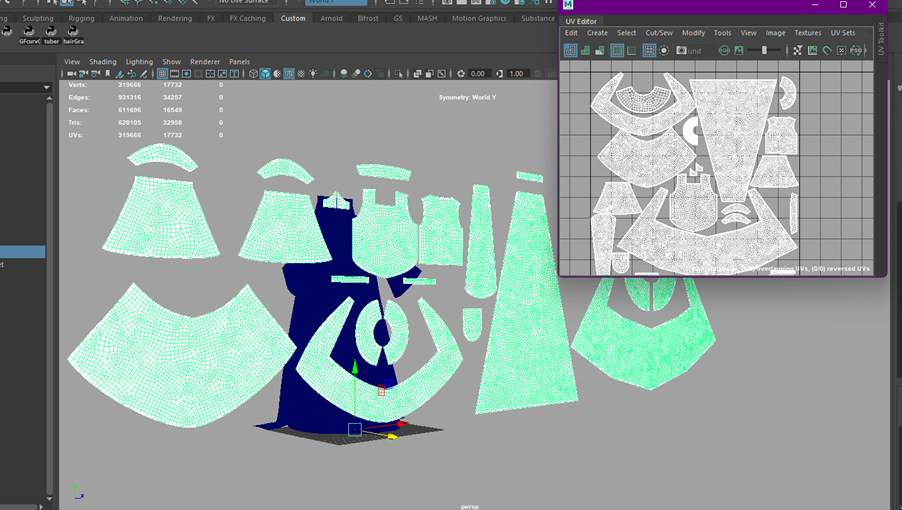
Prepare the Flatten Version to Retopology (Tip: Duplicate your flatten version and make live surface).

Transfer your Uvs from the old flatten version to the retopology one. (Tip: Use Transfer Attributes)
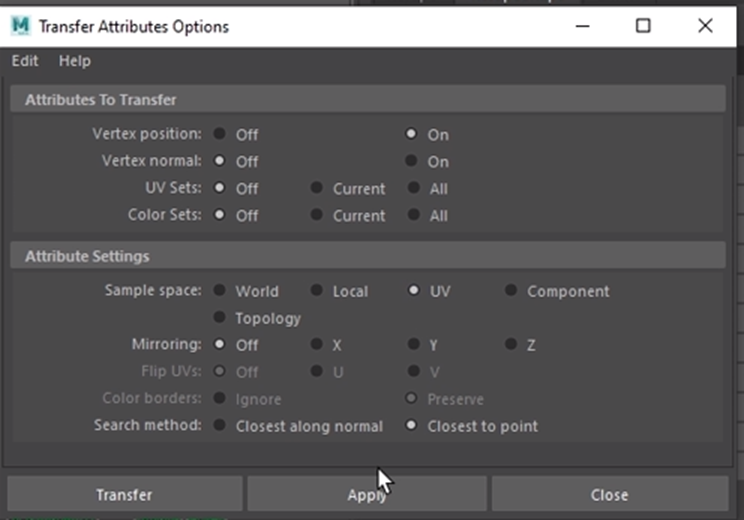
Transfer the vertices position of the simulated one on the flatten retopology to finally have a lower clothes resolution simulated.
Smooth this low version and transfer vertices again (step 8) to have a defined Hight poly.
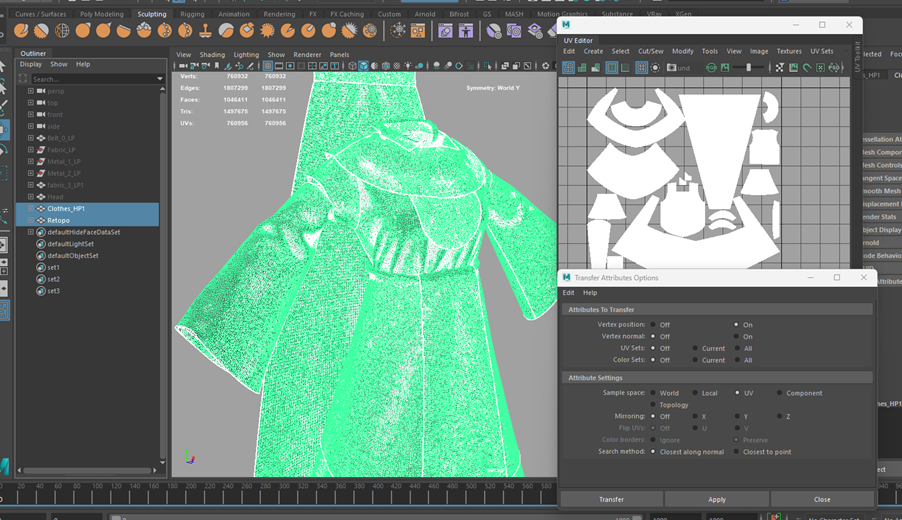
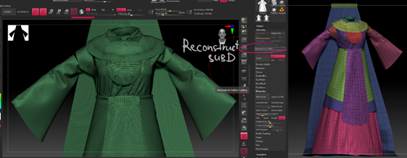
Import Into Zbrush and Reconstruct SunbD and Autogroup it. So here we have ready Mesh to work on with High poly and Low poly.
How can you describe your overall experience of the use of the Marvelous Designer?
I am very happy about using Marvelous Designer! Without it, it would’ve been difficult for me to achieve this result in just one month. The more I use it, the better it gets. Work speed is faster and provides a solid foundation for sculpting. Definitely Marvelous Designer must be in use in my work.
by Anastasia Kukosh
ArtStation
이 작업은 ZBrush, SubstancePainter, Maya, Avatar, IndividualArtwork, CharacterArt 등의 기술로 제작되었습니다.
Marvelous Designer로 이와 같은 3D 의상·캐릭터 작업을 직접 만들어볼 수 있습니다.