The Gentleman Fatal
INTERVIEW from Winners, 3rd Place in Amateur Category - Hunt: Showdown 3D Apparel Creation Contest. He completes making a hat, shoes and even the ammo belt. Read the whole work in process.
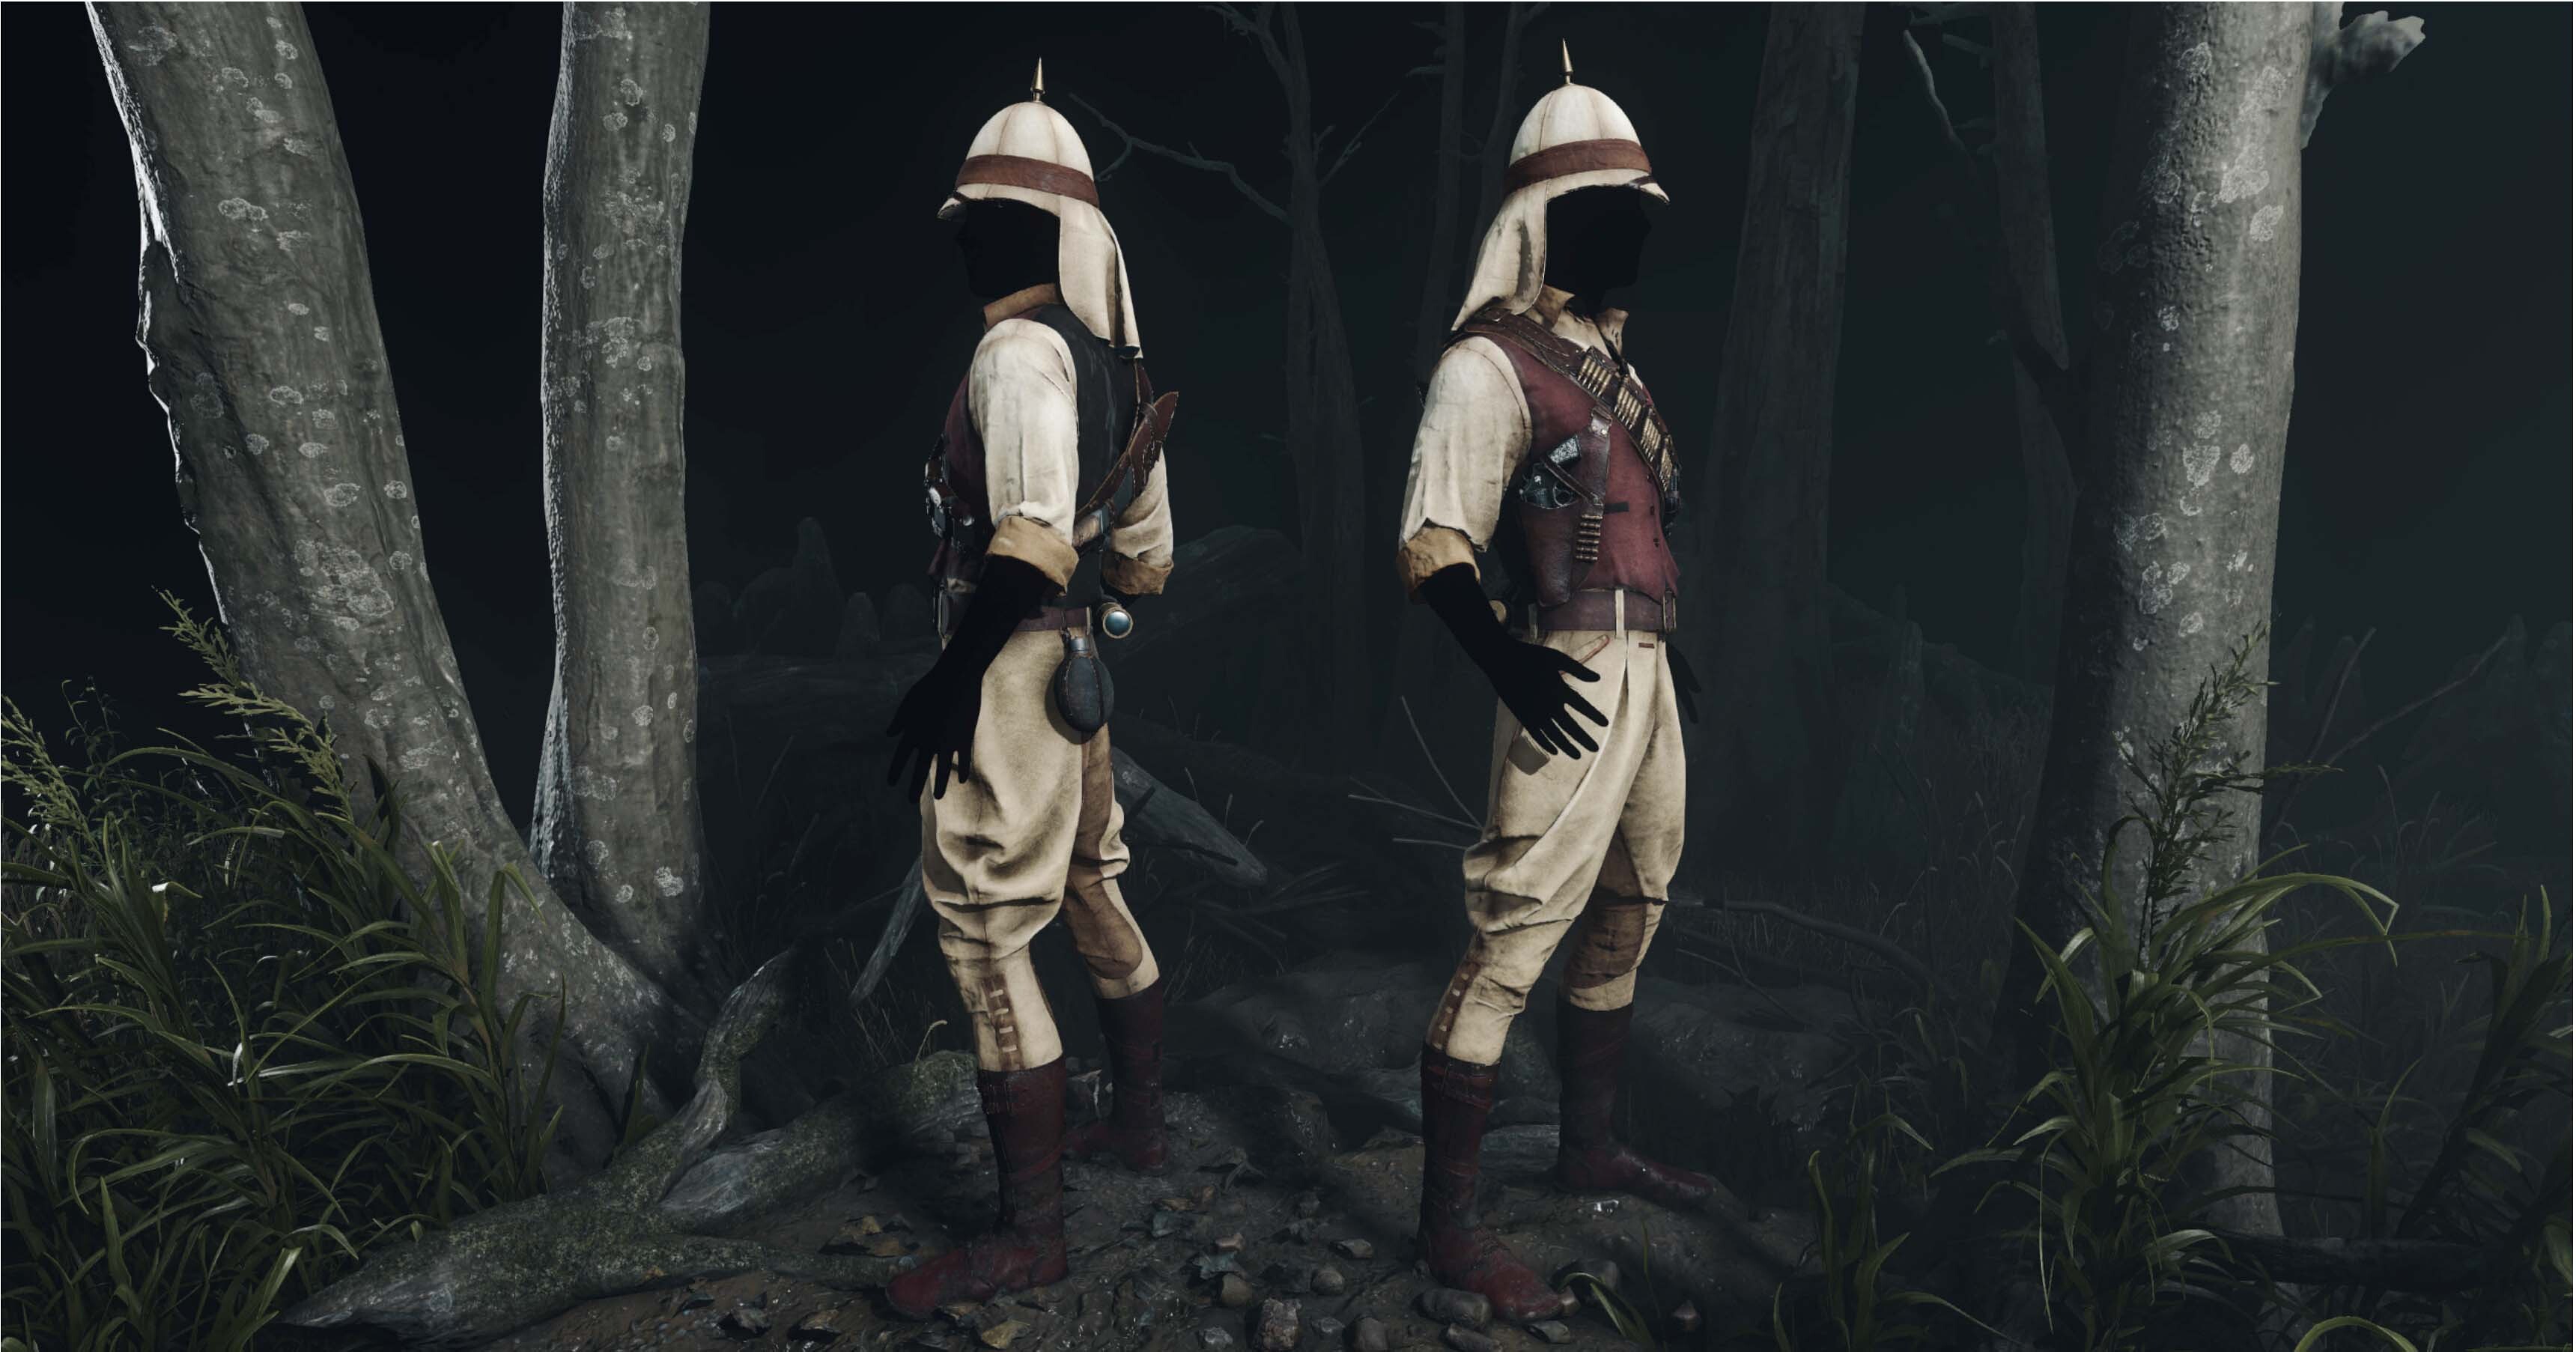
By Christian Zollinger-3rd Place in Amateur Category
1. Where did you get the inspiration of your hunter?
The initial and main part of the idea came to me when I looked at the cover of the German version of the graphic novel the airtight garage.
It is written and of course illustrated by the great Jean Giraud / Moebius and the cover depicts the main character, Major Grubert, sitting on a chair in front of a giant dead beast with a shotgun in his hands.
While I looked at the image I remembered the contest and that Hunt Showdown has a distinct lack of " classical safari hunters". Also, the movie Missing link by Laika was still in my head and from there I took the idea that the character might be a posh British adventurer who has kind of seen it all and is on the hunt for new adventures and pray.
So, I started to research who and when exactly this type of clothing was worn and if needed to adjust some things to conform to the time period of hunt.
As it turned out most of the conical stuff like the helmet and the pants, come from British colonial troops from Africa and India and where used from the end of the 19th century till world war 1. Some things like the type of ammo belt that I used as a base are more ww1 onward but I thought it would still fit since some weapons are also ww1 prototypes.
So after a few days of research, I pretty much got the base for my posh Indiana Jones / Safari Hunter type hunter.
2. Could you explain in chronological order what process you went through for the garnet creation of your winning work?
1 - Inspiration
I would start by describing my default process and later explain how I managed to achieve a specific result.
I start most of my projects with an idea I already have in my head.
So my plan for finding an idea is usually to look into Artbooks or comics or sometimes just browse Pinterest and google, till something sparks an idea.
2 - Research research research
When I found something I can hook an entire concept on, I start by researching the relevant material. In the case of my hunter, it was primarily looking into British military units of the 19th and early 20th century and very specific into the colonial troops in Africa and India since those were the ones with the iconic helmets. Once I know something about a key item like the helmet I can start to search very specific things like the gear and clothing of these troops. The helmet for example, is the colonial pattern version of the British pith helmet in this case a spiked pith helmet with puggaree and neck curtain.
Since the internet is the internet there are wells of information for anything in my case this website got nearly all the information I needed. (reference)
When recreating, the actual name of the garment is very important to achieve authentic results in Marvelous Designer. I found most of the information on the website above.
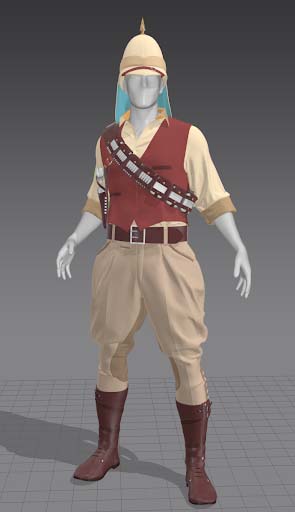
I decided to go with a simple button shirt a the pants type called breeches. For the boots I used ankle boots with stonewashed gaiters since it gives off the same silhouette as knee boots but breaks up the surface in interesting ways. The waistcoat was a bigger problem, since I wanted to add the vibe of a hunter to the military uniform. First I thought about leather jerkins with pouches for ammunition shells. but the combination of the jerkins and the breeches accumulated into a very unpleasant silhouette. I went with a leather waistcoat at first but with the introduction of the over shoulder ammunition belt I changed it to a cloth waistcoat without pouches.
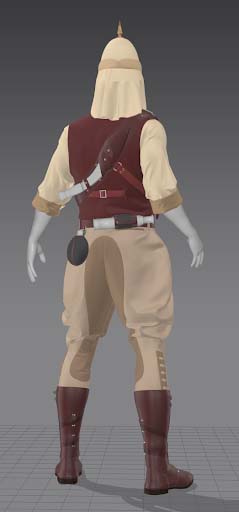
The over shoulder belt was introduced relatively late since I wanted to go with a gunslinger style double waist belt but when I searched for different types of belts later on, to get a specific reference I found the "Lee Enfield Leather Bandolier 303" I knew it must be something like this. started looking into over shoulder belts and combined two types of bandoleer with a knife scabbard and a shoulder holster. For the knife, I went with a Kukri to emphasis that he served time in India and has a thing for "exotic or untypical" items.
3 - sewing patterns
With all of the parts laid out I researched for sewing patterns that are as close as possible to the parts I wanted to recreate. In the next step I had to test them out, to make sure the fitting and style suits well to my needs.
Finding the patterns can be a hassle but it is worth it to get an authentic and stylish result. for some parts like the gaiters and the ammo belt, I didn't use a sewing pattern but just a picture of an openly laid out one. Sometimes it is hard to find the right reference and I have to work with what I can get.
4 - Building the base garments
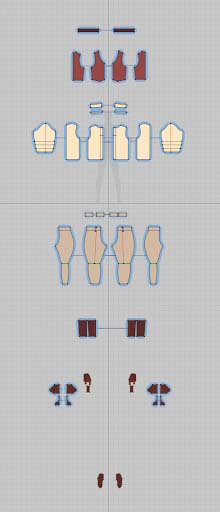
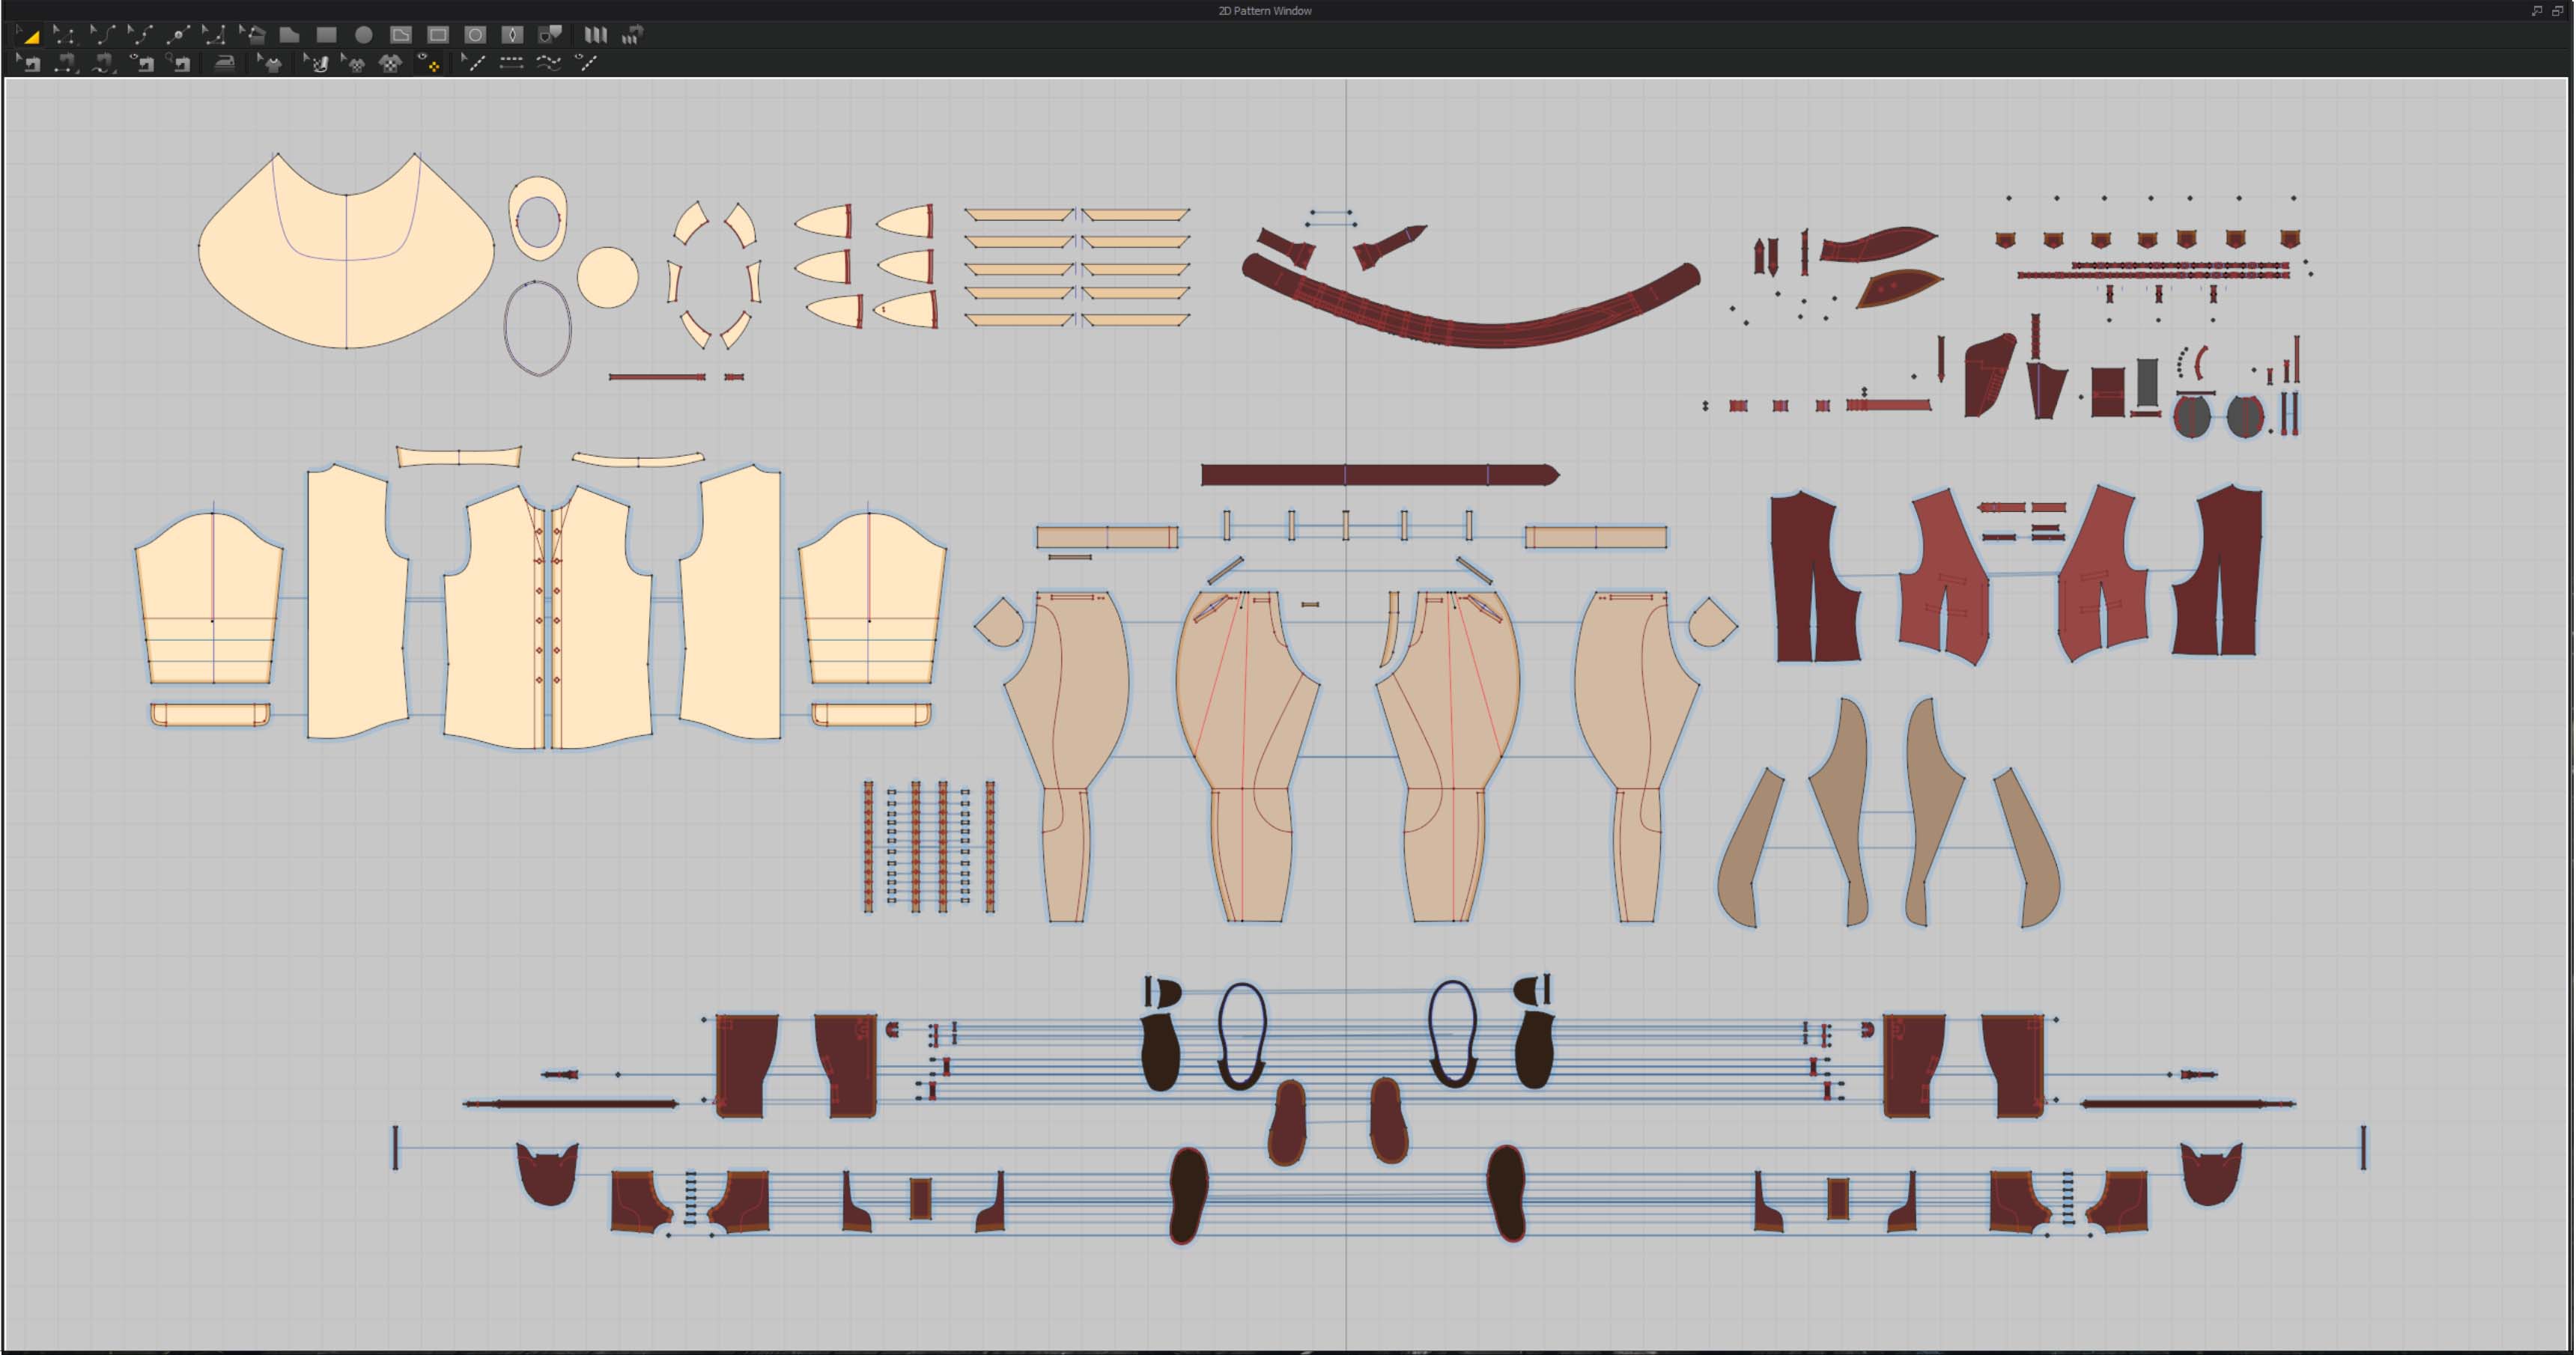
For building the base garments I simply create a square garment and apply a material with a sewing pattern as texture. Then I just trace the pattern with the internal line tool. After that, I place points at all corners and later use the curve tool. I try to keep it as simple as possible at this stage to be able to easily edit the fit when needed. Once I am done with the tracing I just cut out the curve from the pattern and apply a default material with color. I also apply a different color on the inside to be able to distinguish the backside in the 3d view port.
It is important to keep the symmetry on objects as long as possible to make changes easier.
At last I just arrange the parts on the avatar and sew them together.
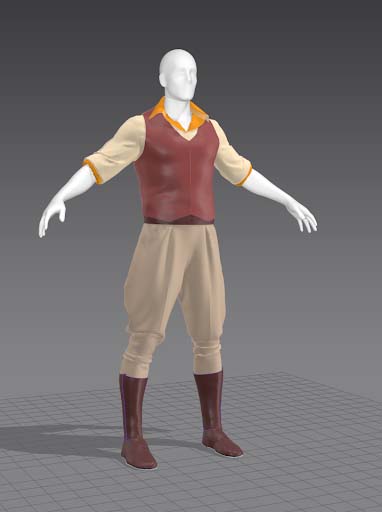
I repeat this process till I have all the bases ready. Now I can start a first rough fit . This allows me to have an early look at the fit and reiterate the proportions if needed to.
5 - Fitting and adding details
Next step is to go through the garments one by one and fit them till I'm happy with it. I also qualify them and add details like pockets and roll-up sleeves.
I start to experiment with different physics presets on the material till I find something fitting the look.
Also, I lower the particle distance to see better how the garment is following and folding.
6 - Posing and finalizing the look
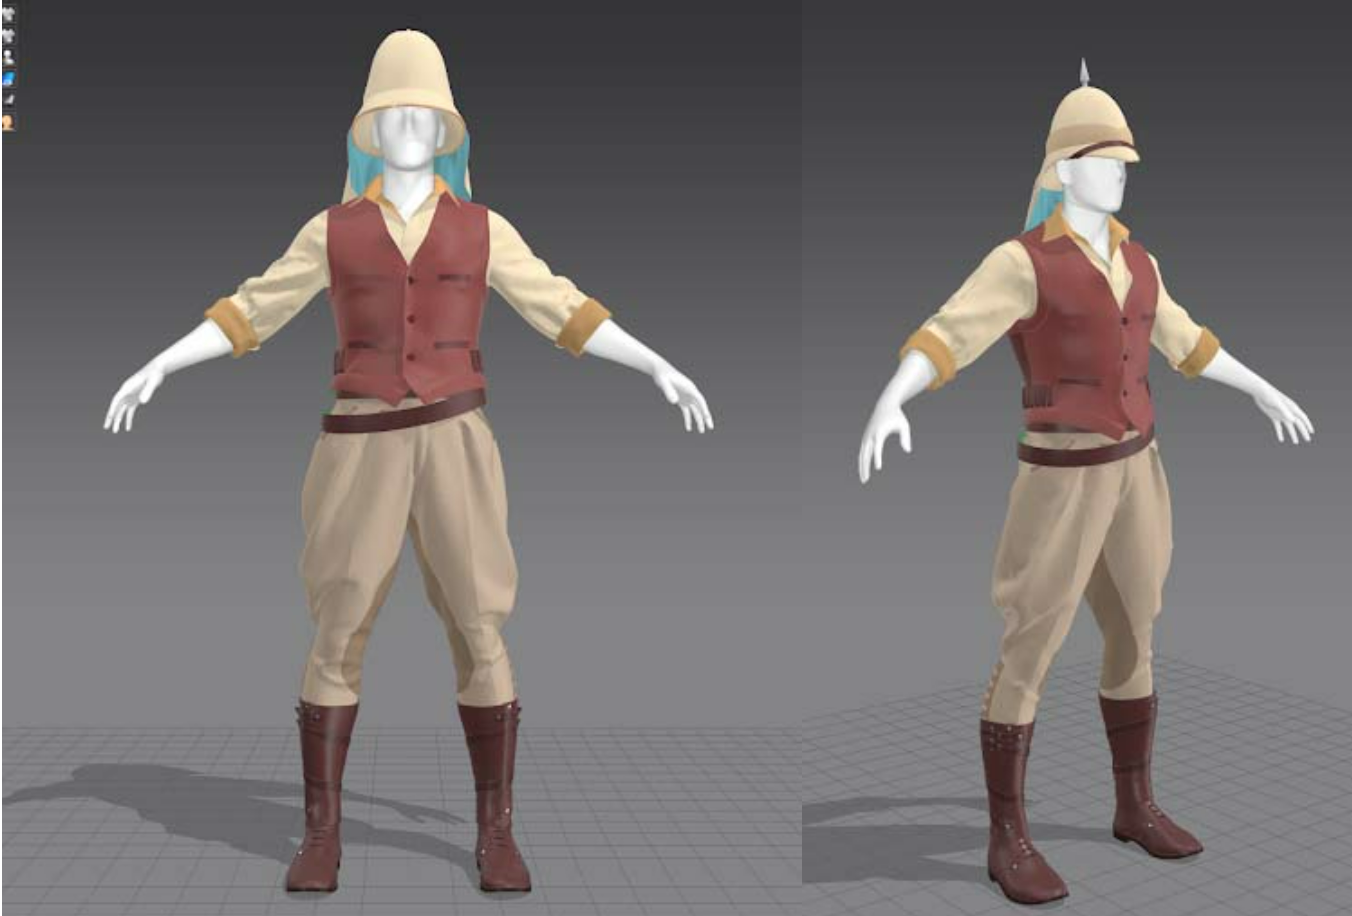
next I posed the avatar and adjusted the draping of some parts so they create a nice looking pose. That is pretty much the standard rundown.
7 - Feedback and failure
long the way, I tried to get feedback very regularly. I send my progress to some friends who are also artist and post them online for example on discord servers or in Facebook groups like 10k/hours.
It is a good sanity check, weather things work like intended and I might get some feedback about things I was not aware of.
Also, I tried not to get too attached to some ideas. Some things just don't work as intended so I just change them. failure happens to everyone and being perfectionist about an idea that doesn't work that well won't make the piece better. On the waistcoat, for example, I tried different ideas in terms of sewing patterns, placement of bags and strips, till one worked out fine and so I ran with it. Luckily Marvelous makes it very easy to just try out new things :)
Next, I will talk about how I approached specific problems in the creation.
The shirt:
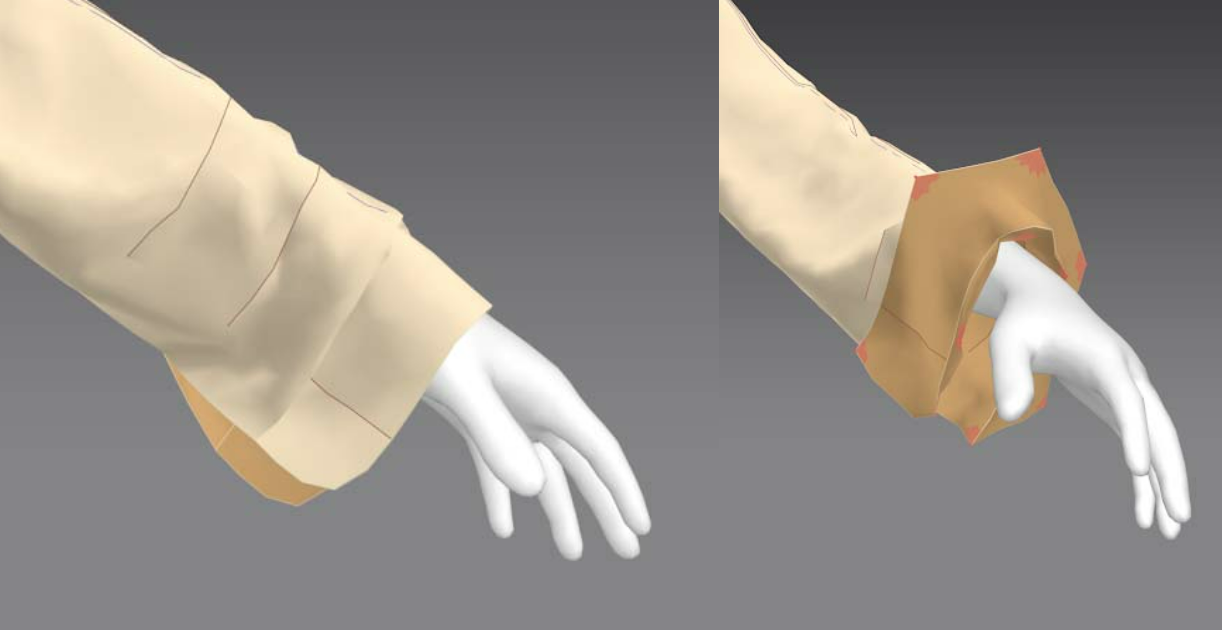
To fold up the sleeves I usually start by adding some internal lines with the offset as a feature.
I freeze the hole shirt except for the sleeve I am working on.
Now, I give the internal line that I want to fold first a fold angle and a high fold strength. After that, I use pins to get the sleeve to roll up once. When this is done I sew the end of the sleeve to the net internal line.
I repeat that process for the next roll up but I don't sew the last internal line so that the rest of the sleeve still can fold a bit into the rolled-up part.
When I'm done with one sleeve I either do the same thing on the other side or just duplicate the sleeve over to the other side.
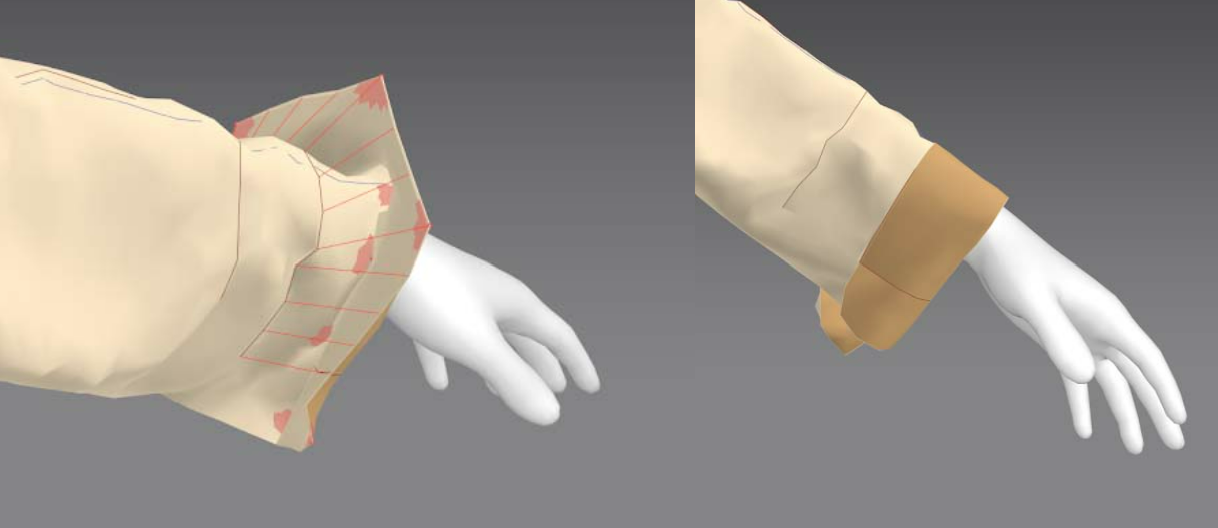
In general, I make extensive use of internal lines.
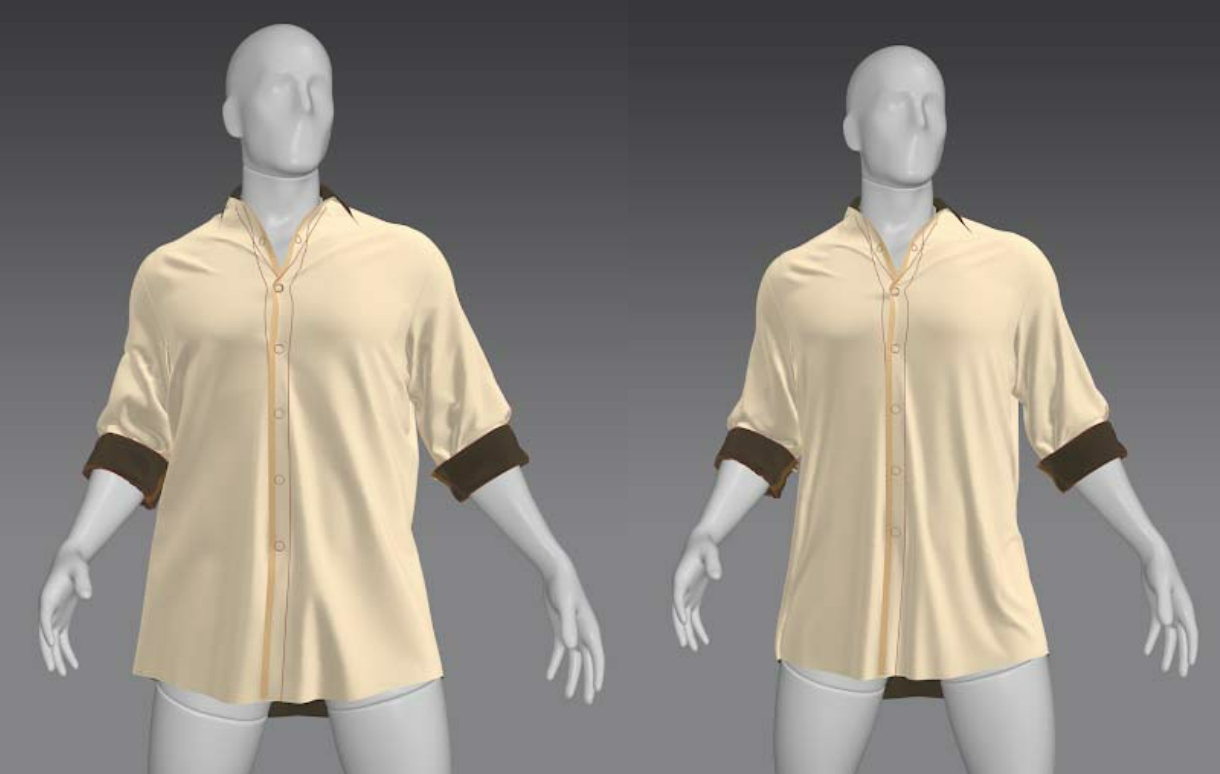
On the shirt, I used them to create a crease on the top side of the sleeves and to force the topology to work better on the fold on the neckline. Also, I emulate buttons with them. There is a button feature in Marvelous but I don't want to deal with the simulation of the buttons. Often I find it easier to just add them later.
I play around with seam taping quite a bit, on the shirt I used it to give the collar more stiffness and prevent it from folding too much on the outer edges. For the collar I like to use a bit stiffer material. The shirt was primarily simulated with the linen preset, the collar with denim. Also, I simulated the shirt one more time at the end with the Mysoftest material from Rosemary, to give the folds a more saggy and the shirt overall a more worn out look. (reference)
For double layers like on the pants, I plot out the part that I need to be doubled with an internal line on the first layer. When I'm happy with the shape I copy the layer on top, cut the internal line and delete the parts that I don't need. Then I just need to sew the layers together, freeze the first layer and hit simulate. Once the second layer is simulated I get everything back to layer 0.
I also use the pressure and shrinkage on the garments to control their behavior. I used pressure on the holster with a very minimal amount just so that it does not float too much away from the body. The boots have a slide amount of shrinkage to ensure that they don't sag and the gaiters got some pressure to make them stay where they are supposed to be.
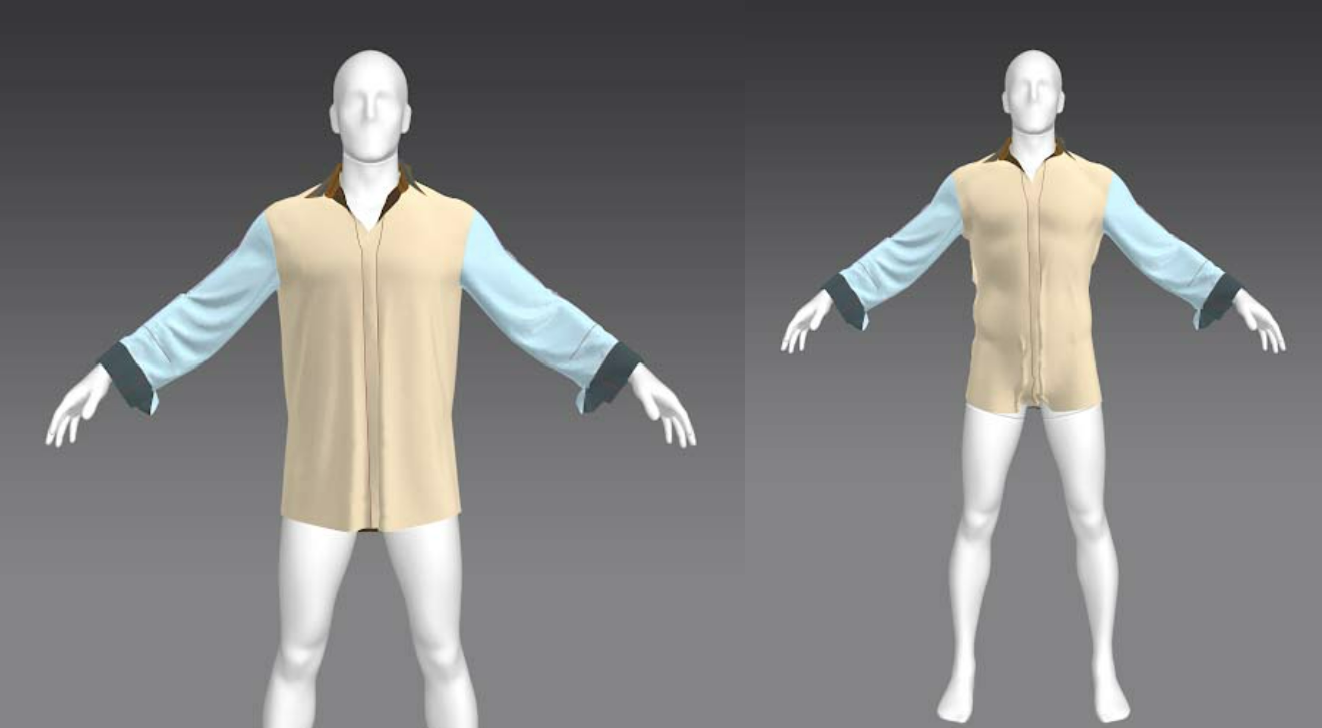
I often use pressure for shirts that need to be tucked in. Since sometimes the simulation has problems with stuff that is very near to the body and has layers on top of it, I try to get the shirt as close to the body as possible without a big fold so that it simulates nicely under the pants.
For this to happen I just freeze the collar and sleeves and then apply negative pressure to the shirt so that it will be sucked on the body. now I activate the pants and freeze them two. Next I get the pressure back to 0 and hit simulate. Once the shirt is extended again I stop the simulation and unfreeze the pants. Now, I simulate again and that's it.
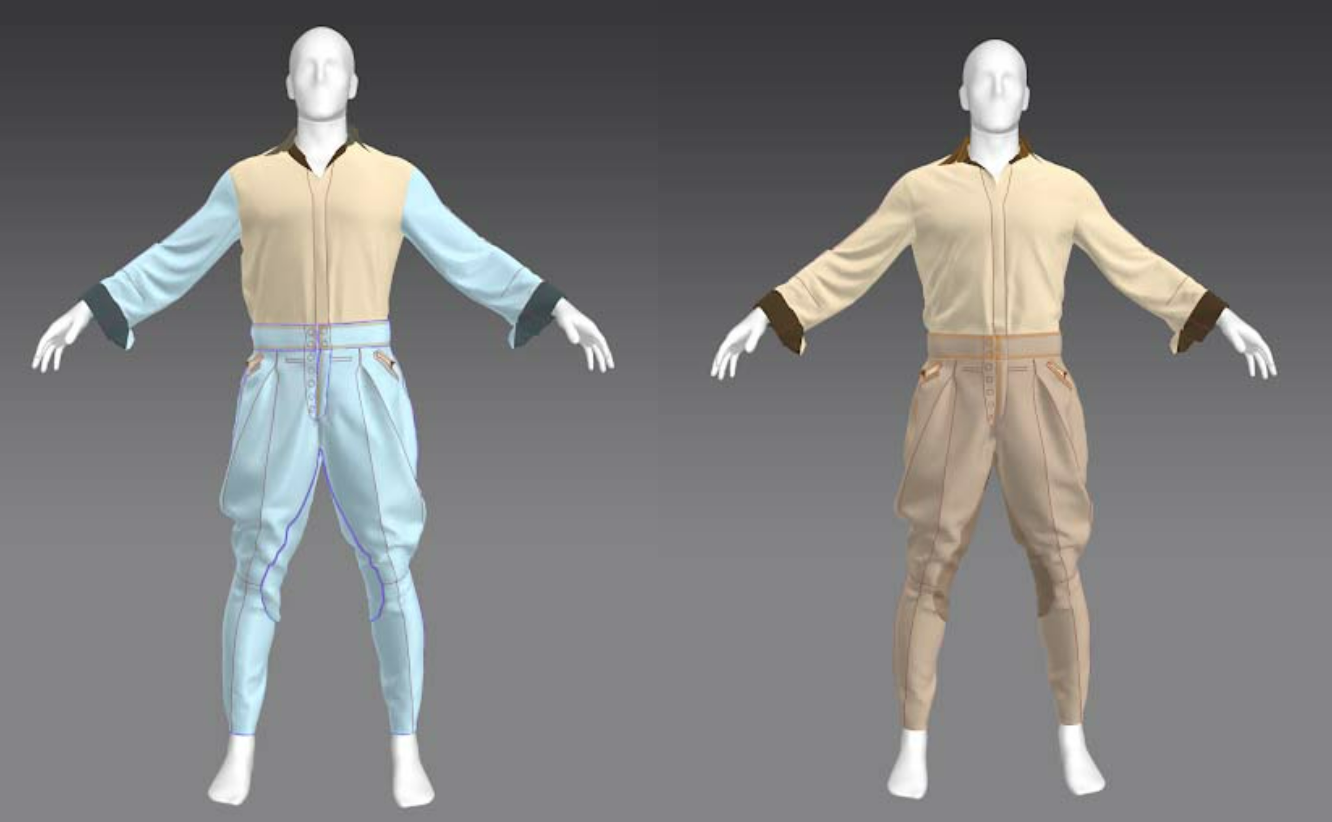
To ensure the straps on the gaiters do not slide down I heightened the friction of the material on the gaiters. this way it was easier to control how much they slide and also manipulate it. After I was satisfied with their position I applied some pressure again to make them stay.
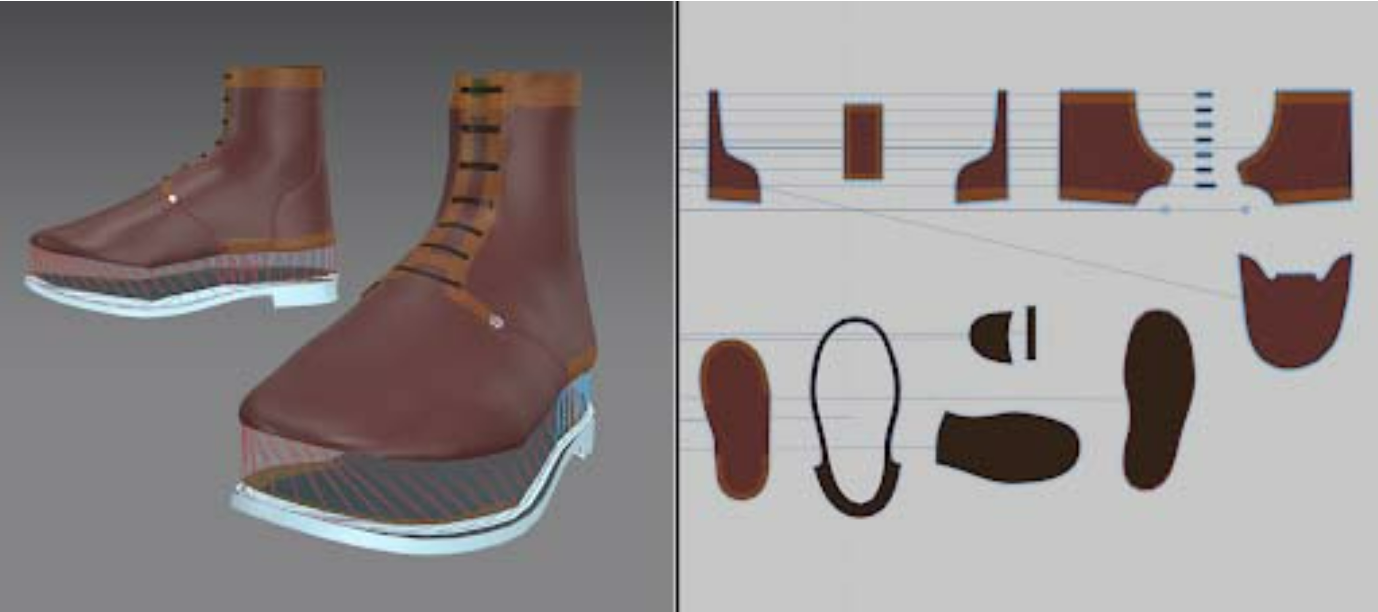
One very Interesting part to figure out how to build the soles of the boots. Since there is no way I know of to build hard surface objects in Marvelous he problem was to connect the sewing pattern of the boots with the avatar object, since the sole determines the lower part of the silhouette of the boots.
After some fiddling around I finally realized that meshes can be imported as garment and the UV maps can be used as the pattern. This way I could create a nice workaround. At first I modeled the soles in Blender and UV'ed them. I layed out the UV? islands on top, so that the inserted part would be its own island. The sole had to stick out from the boot a bit. Importing the soles to Marvelous as garment and used the UV as a pattern. Now,the soles were in and had patterns to interact with. Since I gave the inset of the soles it’s own UV island I could now sew the rest of the boot onto it. I just needed to keep the soles frozen all the time.
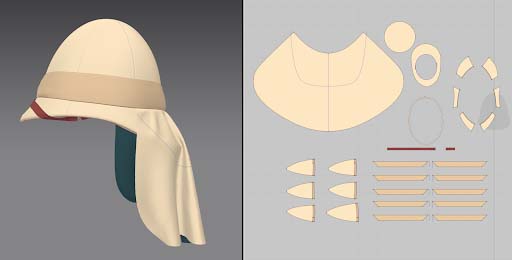
Importing a mesh as pattern made the creation of the hat very easy. I just had to pre build a model of the helmet in Blender and cut the UV the same way I would lay out the sewing pattern. After that, I imported the mesh as a garment. The base was ready. I just needed to do some cleanup on some points and the sewing. I took a slightly deflated version of the helmet as an avatar, this way I could just simulate the pattern without problems. With the shrinkage and pressure values, I had control over the shape and very quickly went into creating the puggaree.
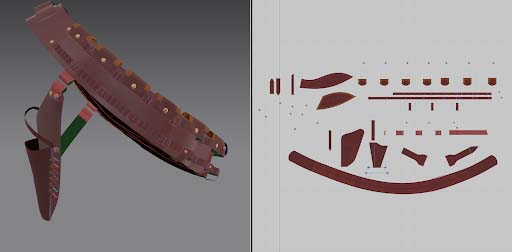
The ammunition belt was pretty much just a lot of offset as an internal line and split line.
I started by figuring out how much pockets I wanted and if the measurement for the pockets checks out.
After I found my measurements I just started adding internal lines and splitting them. making sure the lines had enough curve points so the split won't deform them.
From here on it was just a lot of placing points and lines. I wish there were a feature to do the same split line operation on multiple lines at once.
After I got the layout, I built the straps for the first pocket and sewed it on. It worked very well, so I duplicated it, but welded them later to keep everything changeable..
This is pretty much everything I did in Marvelous.
I imported everything to Blender and arranged the UV layout. It just needed to be workable, so I did pretty fast and tidy. Mainly I separated the lower and upper body as well as the props into their low texture sets. Also fixed some minor things like floating rivets.
I also baked the high poly onto the high poly to get some maps like curvature and position as information for the texturing process.
next up is Substance Painter.
I started by giving everything a base material from the material library to get a feeling for the textures.
After that, I experimented a lot with the materials and different generators to get some nice dirt and sun bleaching.
Since there was no ZBrush pass for this project I added memory folds in Substance Painter. For an overall effect, I combined a generator map from Substance with a wrinkle alpha to get some folds on the whole object, then I painted in memory folds at the seams with seam alphas.
Also I added a slight gradient to the diffuse textures to slightly emphasis the upper half of the hunter.
During the texturing process I exported the textures to CryEngine to be able to see, how they appear in the final scene. It appears quite different. For example the normal information from the memory folds, were way more visible in CryEngine, then in Substance Painter. I needed to scale those back quite a bit.
Also, the colors turned out slightly different. It might have something to do with the render engines in general but also the lighting is very different in the hunt scene. I chose the CryEngine hunt scene for the final render because it gives off a very distinctive hunt vibe. I am not deep enough into the whole render game to set up scene of equal quality, plus I could just position my hunter inside the scene with the other hunters and match it
3. What was the most difficult part, and what part did you spend a lot of time on to complete this artwork?
I think the hardest part is to translate the idea in my head into an actual garment. Getting the fit and feel of the garments right is very important to make believable 3D drapery . Also working it into an interesting silhouette is a part I still struggle with.
From a crafting a spekt attaching the patterns of the boots to a sole and solving the helmet has been the hardest part to figure out. In the end, I could use the same approach for both problems.
The part where I spent the most time on was the ammo belt.
Figuring out the patterns and measurements already took long enough. But to get it to simulate correctly with all the attachments was quite a piece of work.
4. What are the strong points that Marvelous Designer has?
The biggest strong point for me is the fast simulation and editing process, which enables me to think spontaneously and in the flow. Marvelous lets me try out variations very quick and easy, so I can make better decisions on what ideas I want to take further and always go back if needed.
For me Marvelous Designer is kind of like a swiss knife for 3D clothing. It let me translate real world sewing patterns into 3D meshes without much of a hassle. On top Marvelous delivers a high level of realism that would be hard to craft by hand, but doesn’t restrict you to being realistic. It is a big deal for me to be able to express authentic clothing when making 3D models for games. And the fact that Marvelous lets you visualize your ideas in such a n easy and fluid way makes it a tool that I really like working with.
Also being able to import UV’ed meshes as a garment with a sewing pattern proved to be a tremendous help. This way you can import very specific shapes and especially hard surface stuff, but still be able to interact with them, like I did with the soles of the boots.
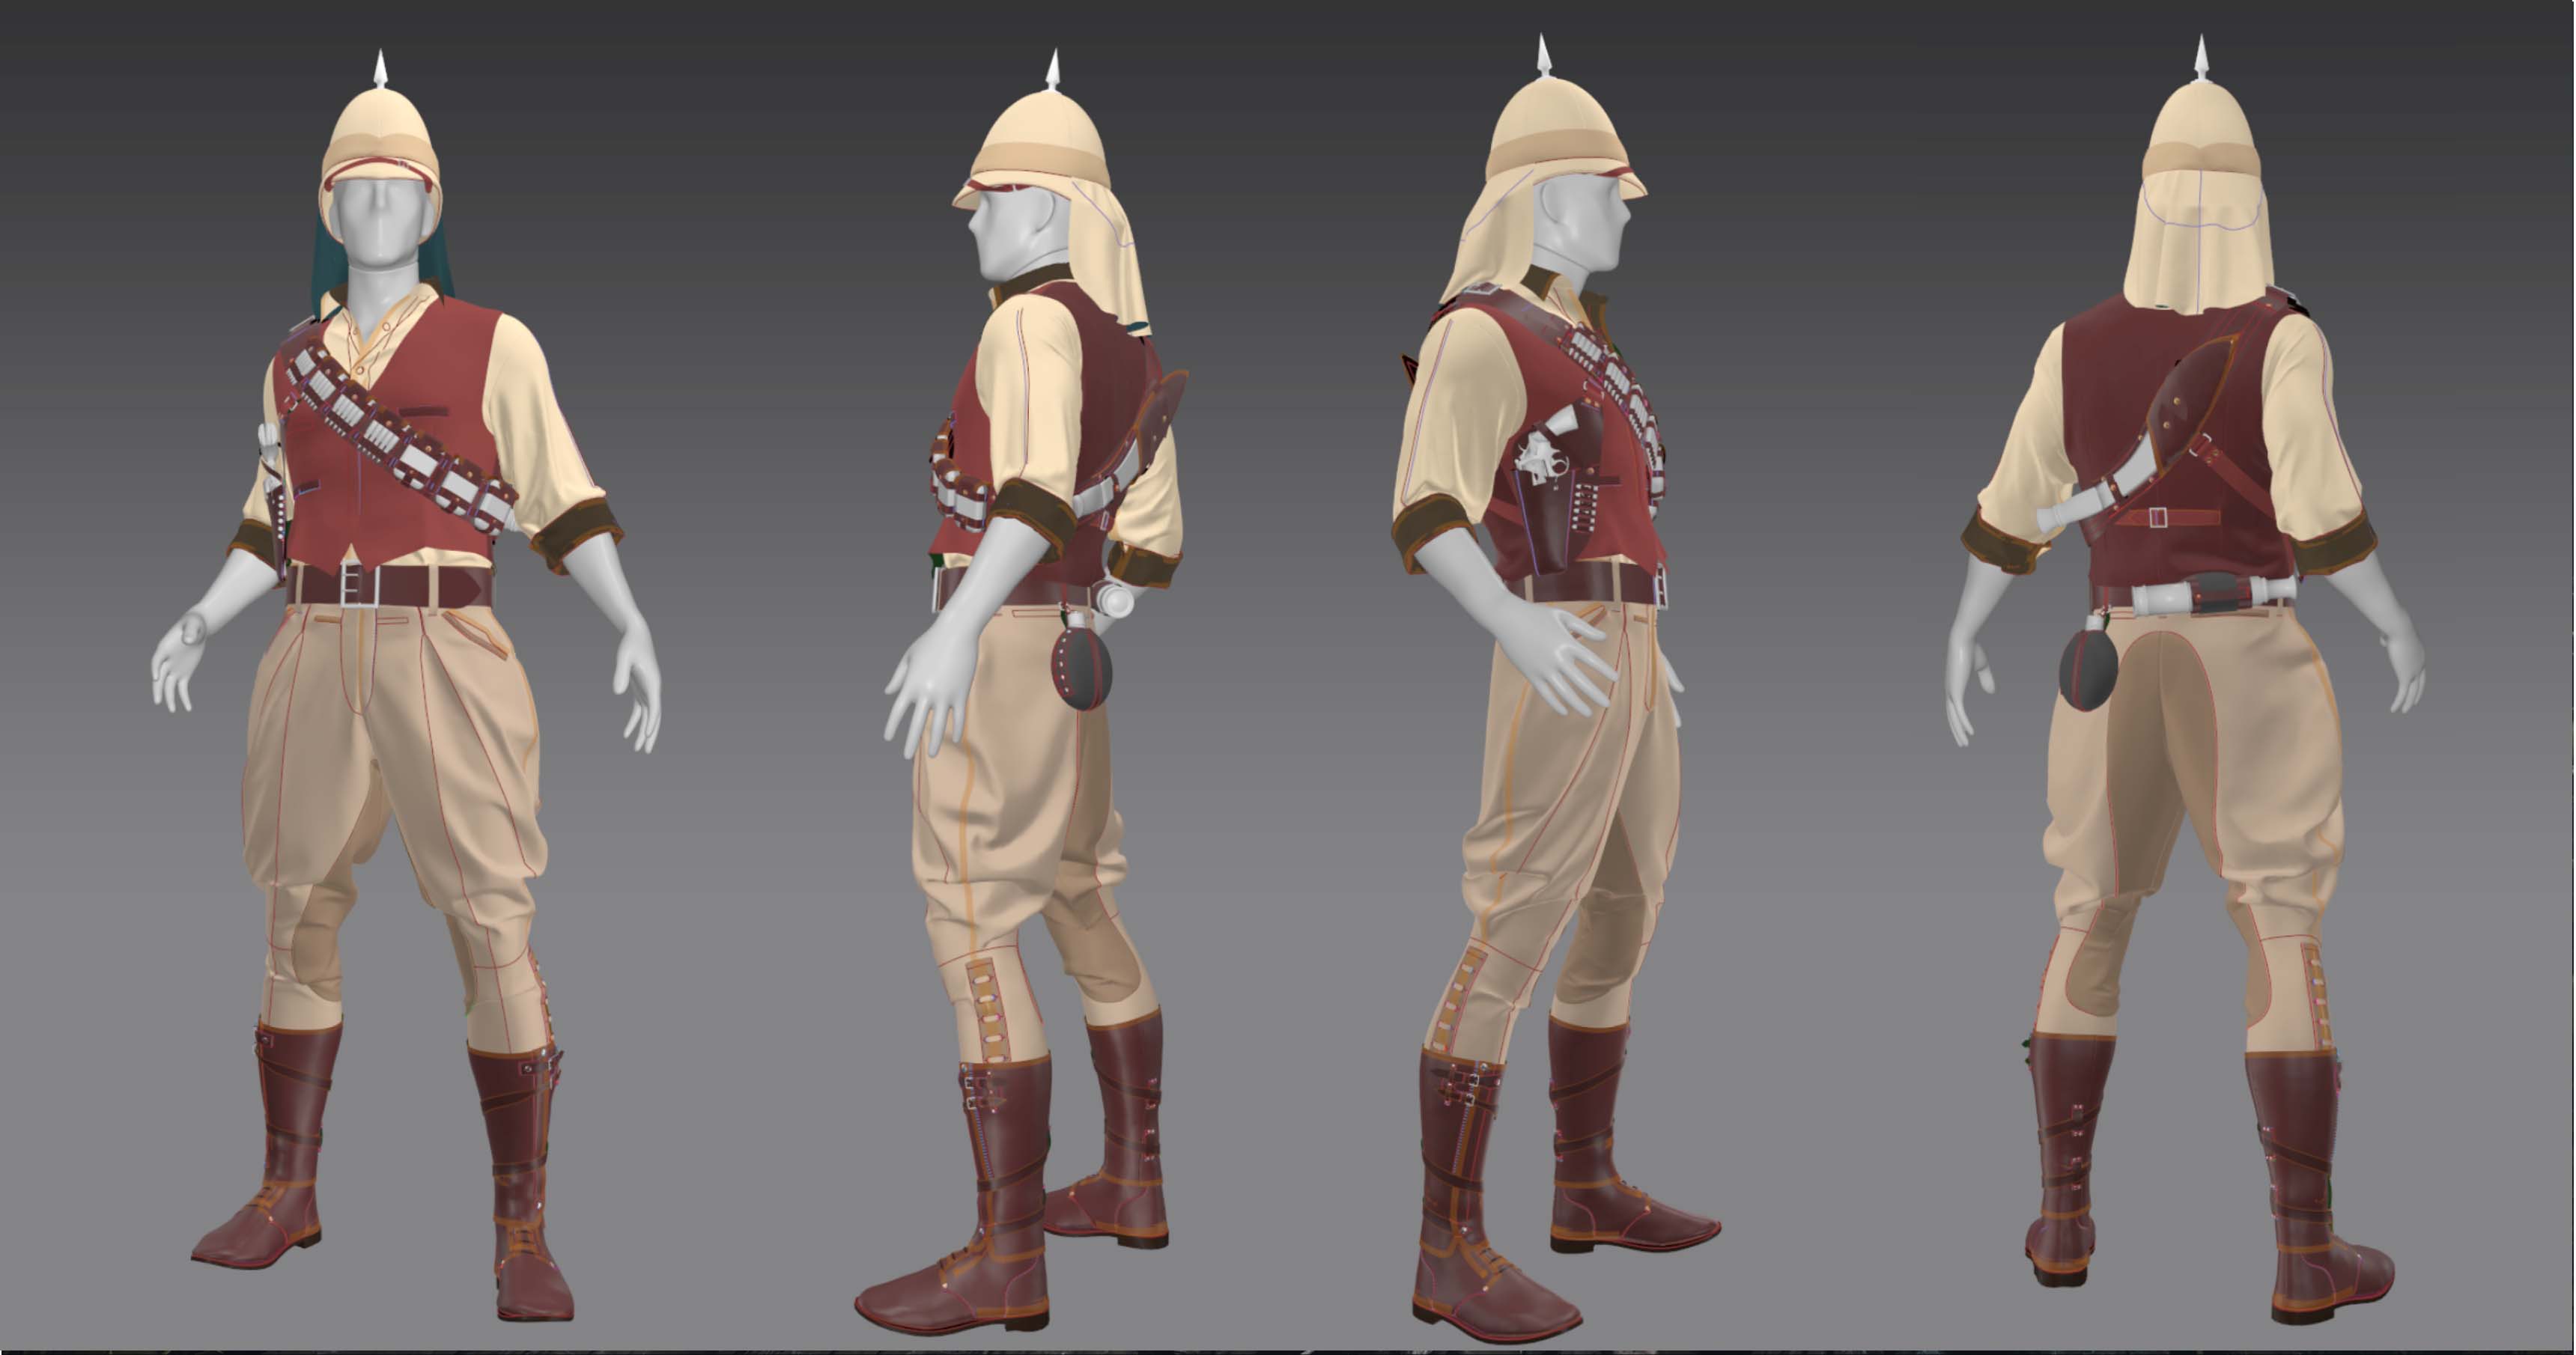
By Christian Zollinger
Link to Artstation
이 작업은 Blender, Marmoset, Substance, Pattern, Import_Export, Material 등의 기술로 제작되었습니다.
Marvelous Designer로 이와 같은 3D 의상·캐릭터 작업을 직접 만들어볼 수 있습니다.