Agnes | Shatterlight
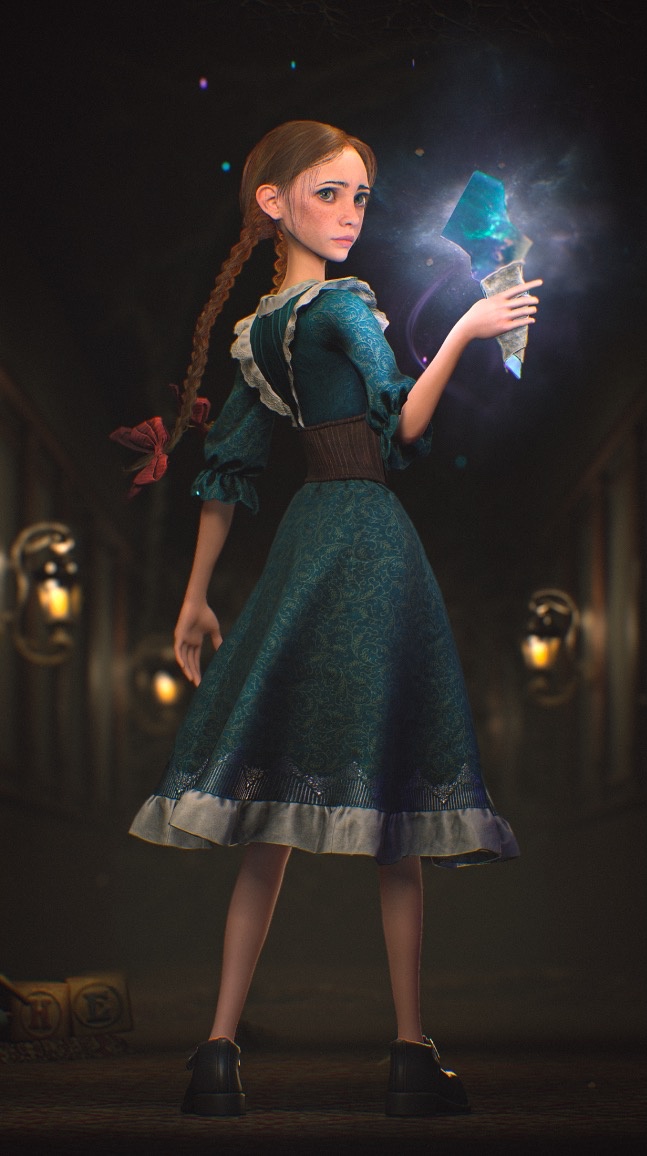
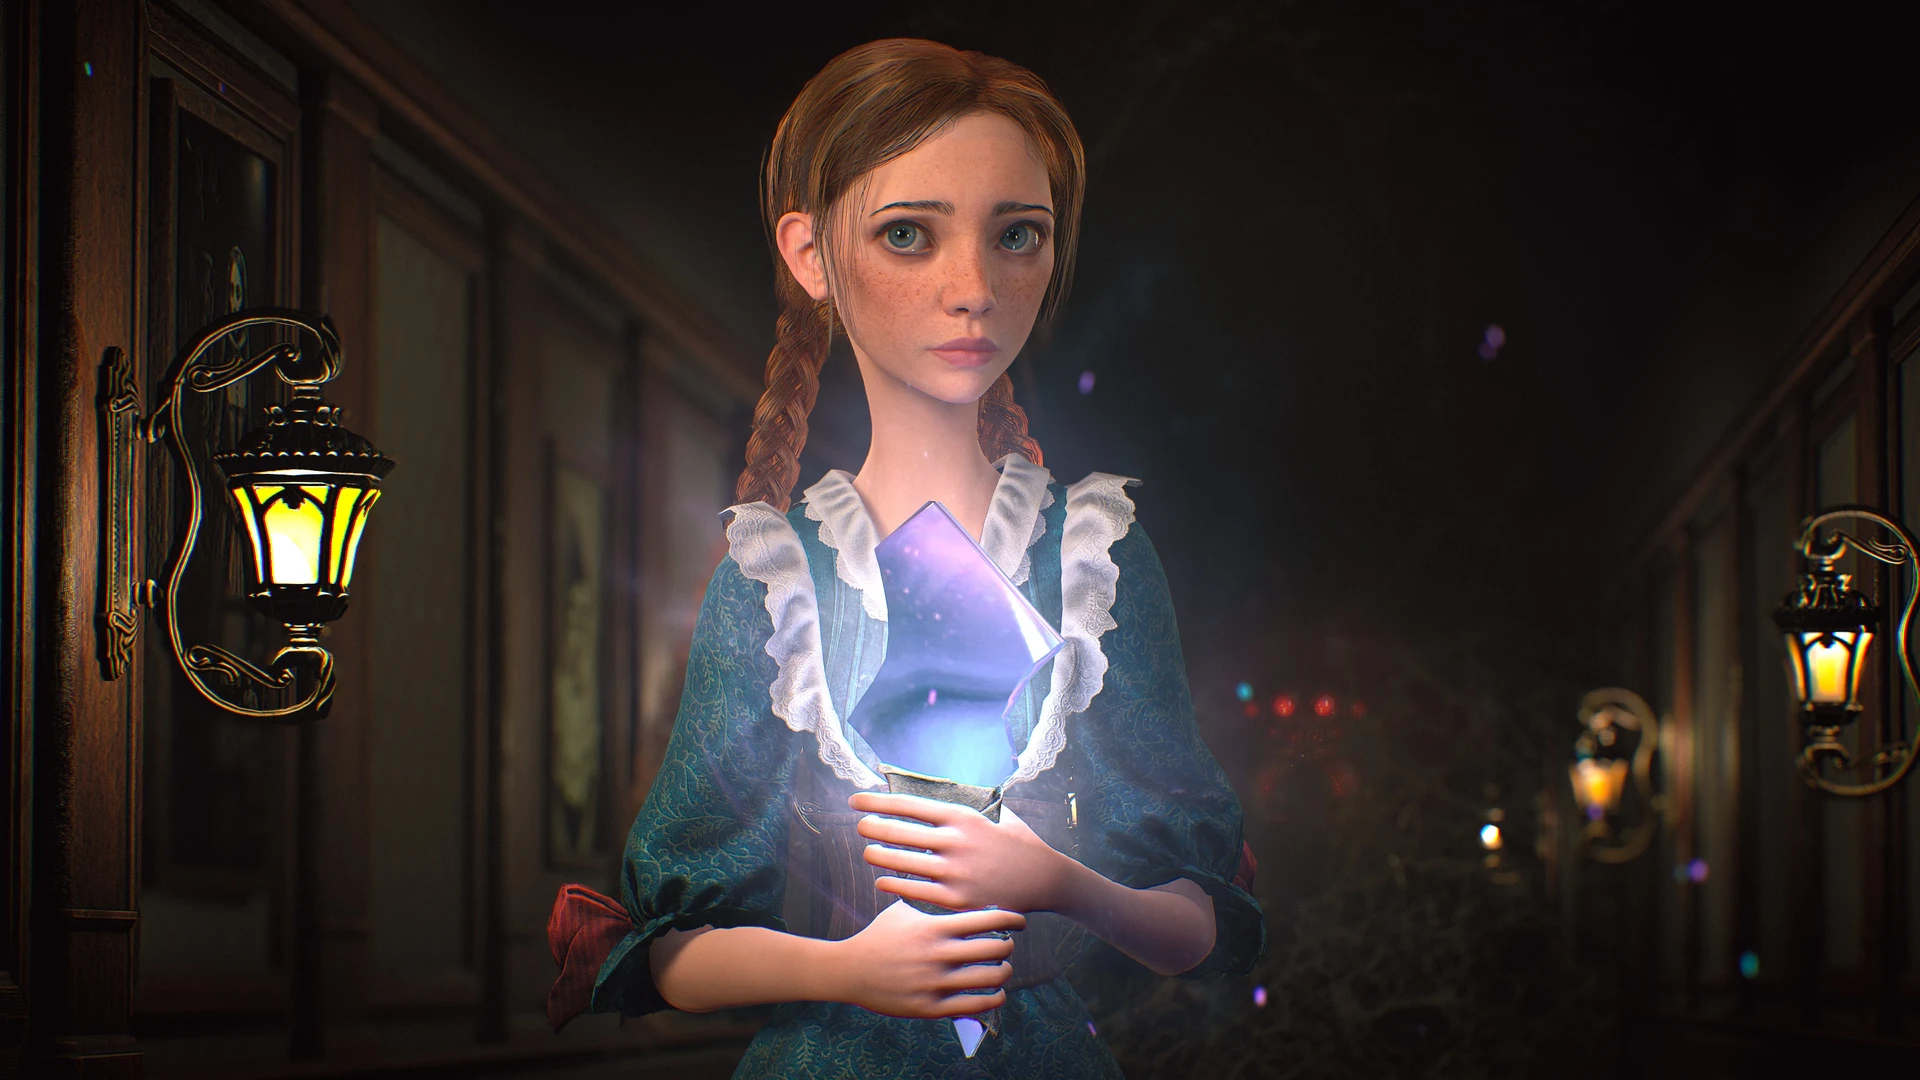
Meet Dinar Sirazetdinov, a talented 3D Character Artist who bridges the gap between digital tailoring and character storytelling. We dive into the creation of Agnes, a striking character from the horror game "Shatterlight".
Artist Introduction
Hello! My name is Dinar Sirazetdinov, and I am a 3D Character Artist specializing in creating characters for games and cinematics.
The main focus of my work is character modeling and texturing, with a strong emphasis on realistic clothing and materials. In my projects, I actively use Marvelous Designer to create complex fabric shapes, and the final integration is done in other 3D software packages.
How did you use Marvelous Designer in the artwork?
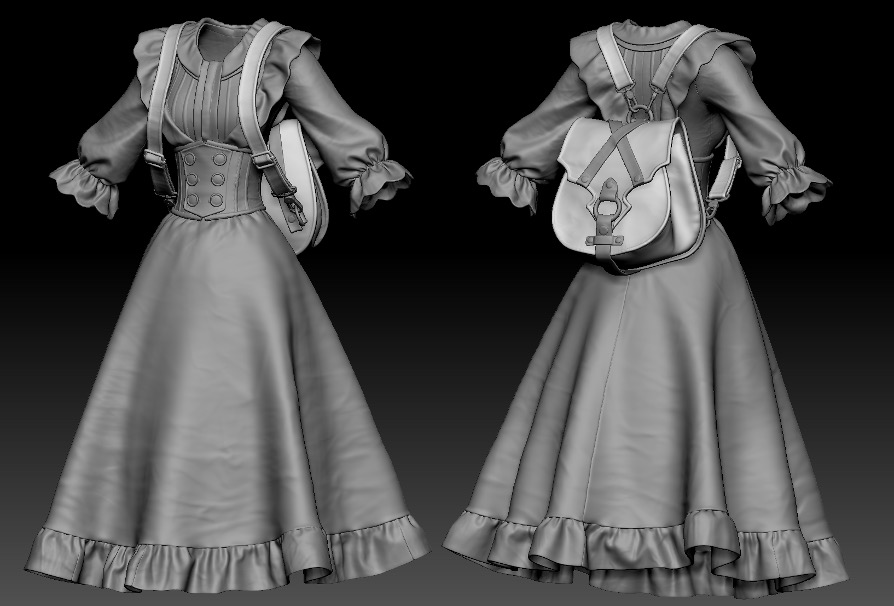
Before starting the clothing creation, I exported the basemesh from ZBrush and checked its scale and proportions in Maya. After making sure the basemesh had correct dimensions, I imported it into Marvelous Designer.
In Marvelous Designer, I began by creating basic 2D patterns for each clothing layer while simultaneously running fabric simulations in the 3D window to achieve proper fitting on the character.
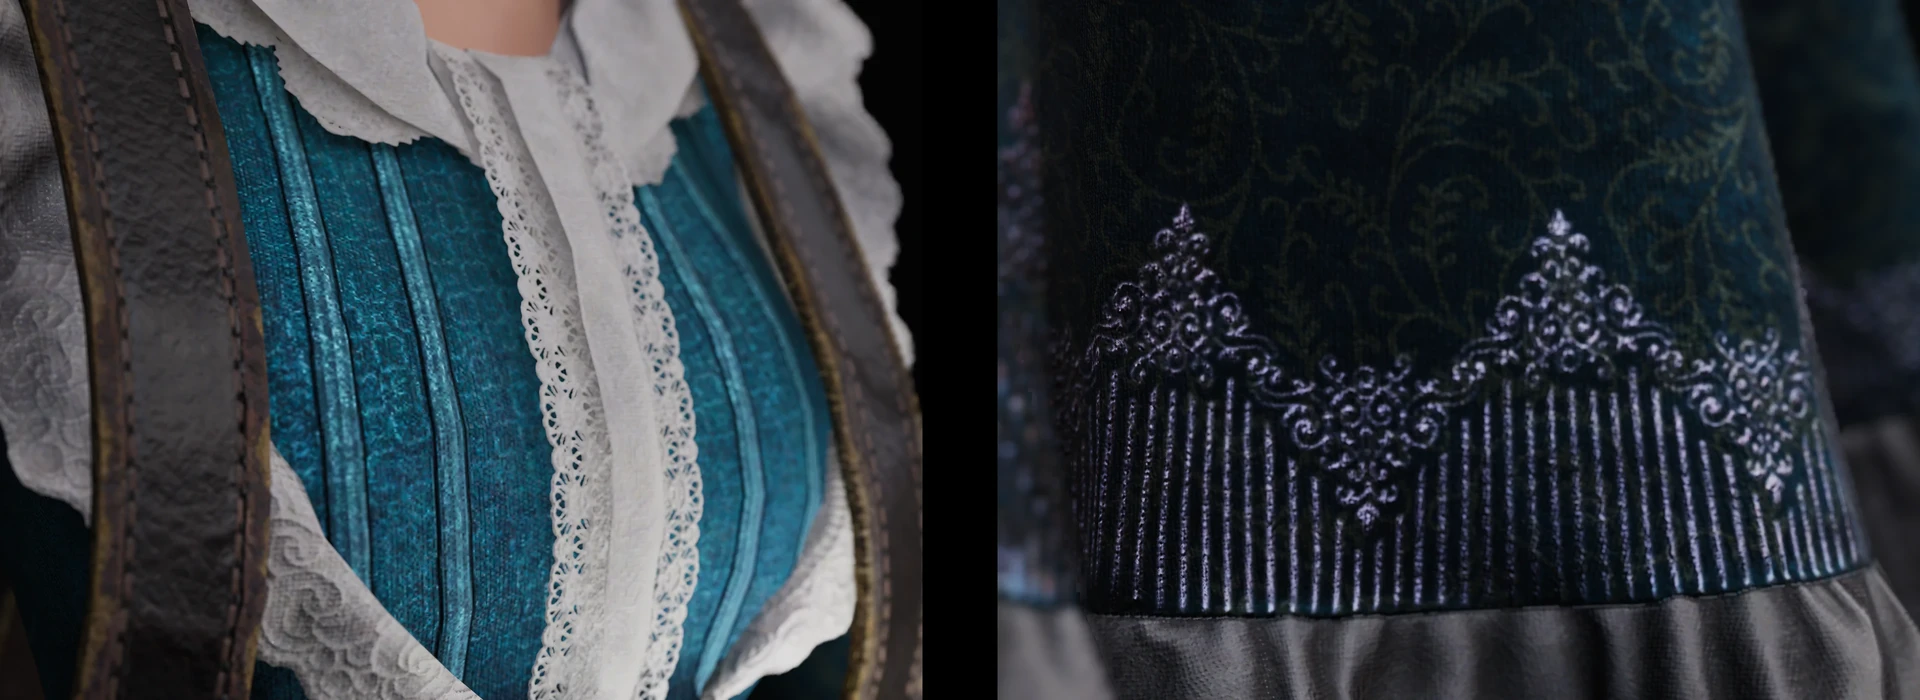
After finishing the main dress base, I moved on to adding the corset, lace elements, and additional visual details.
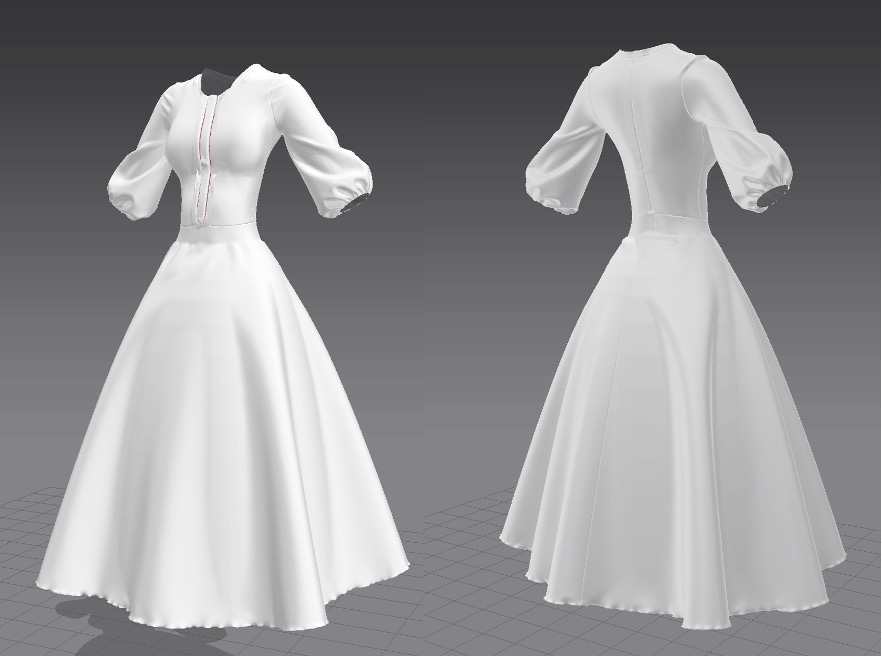
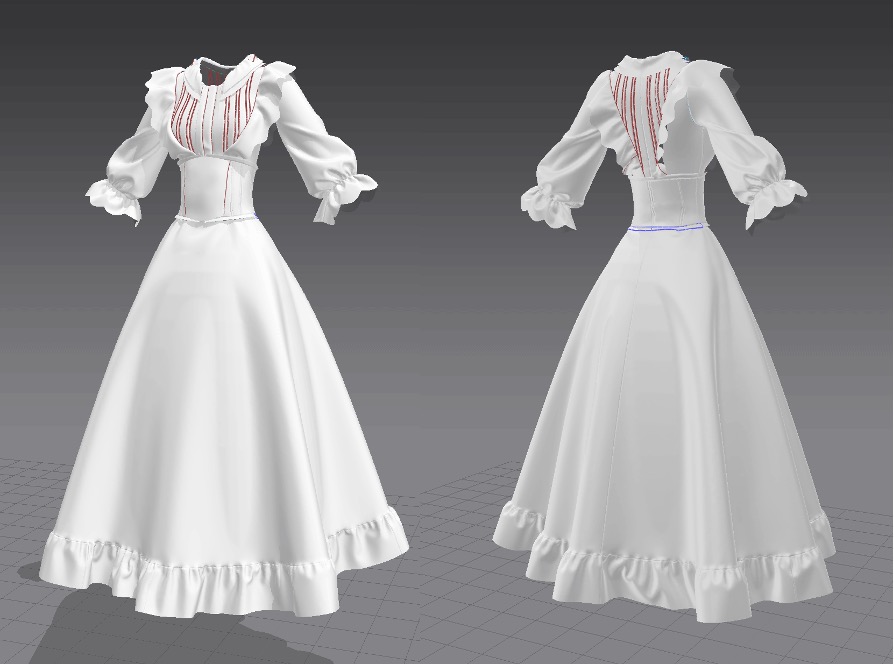
Then I adjusted the fabric physical properties such as density, stretch, and stiffness to achieve the desired visual effect.
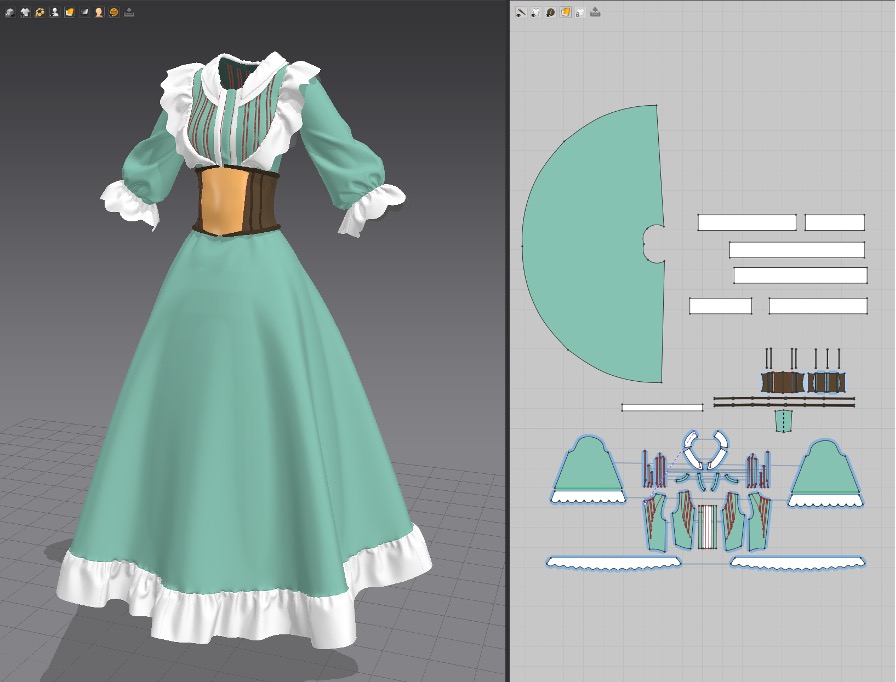
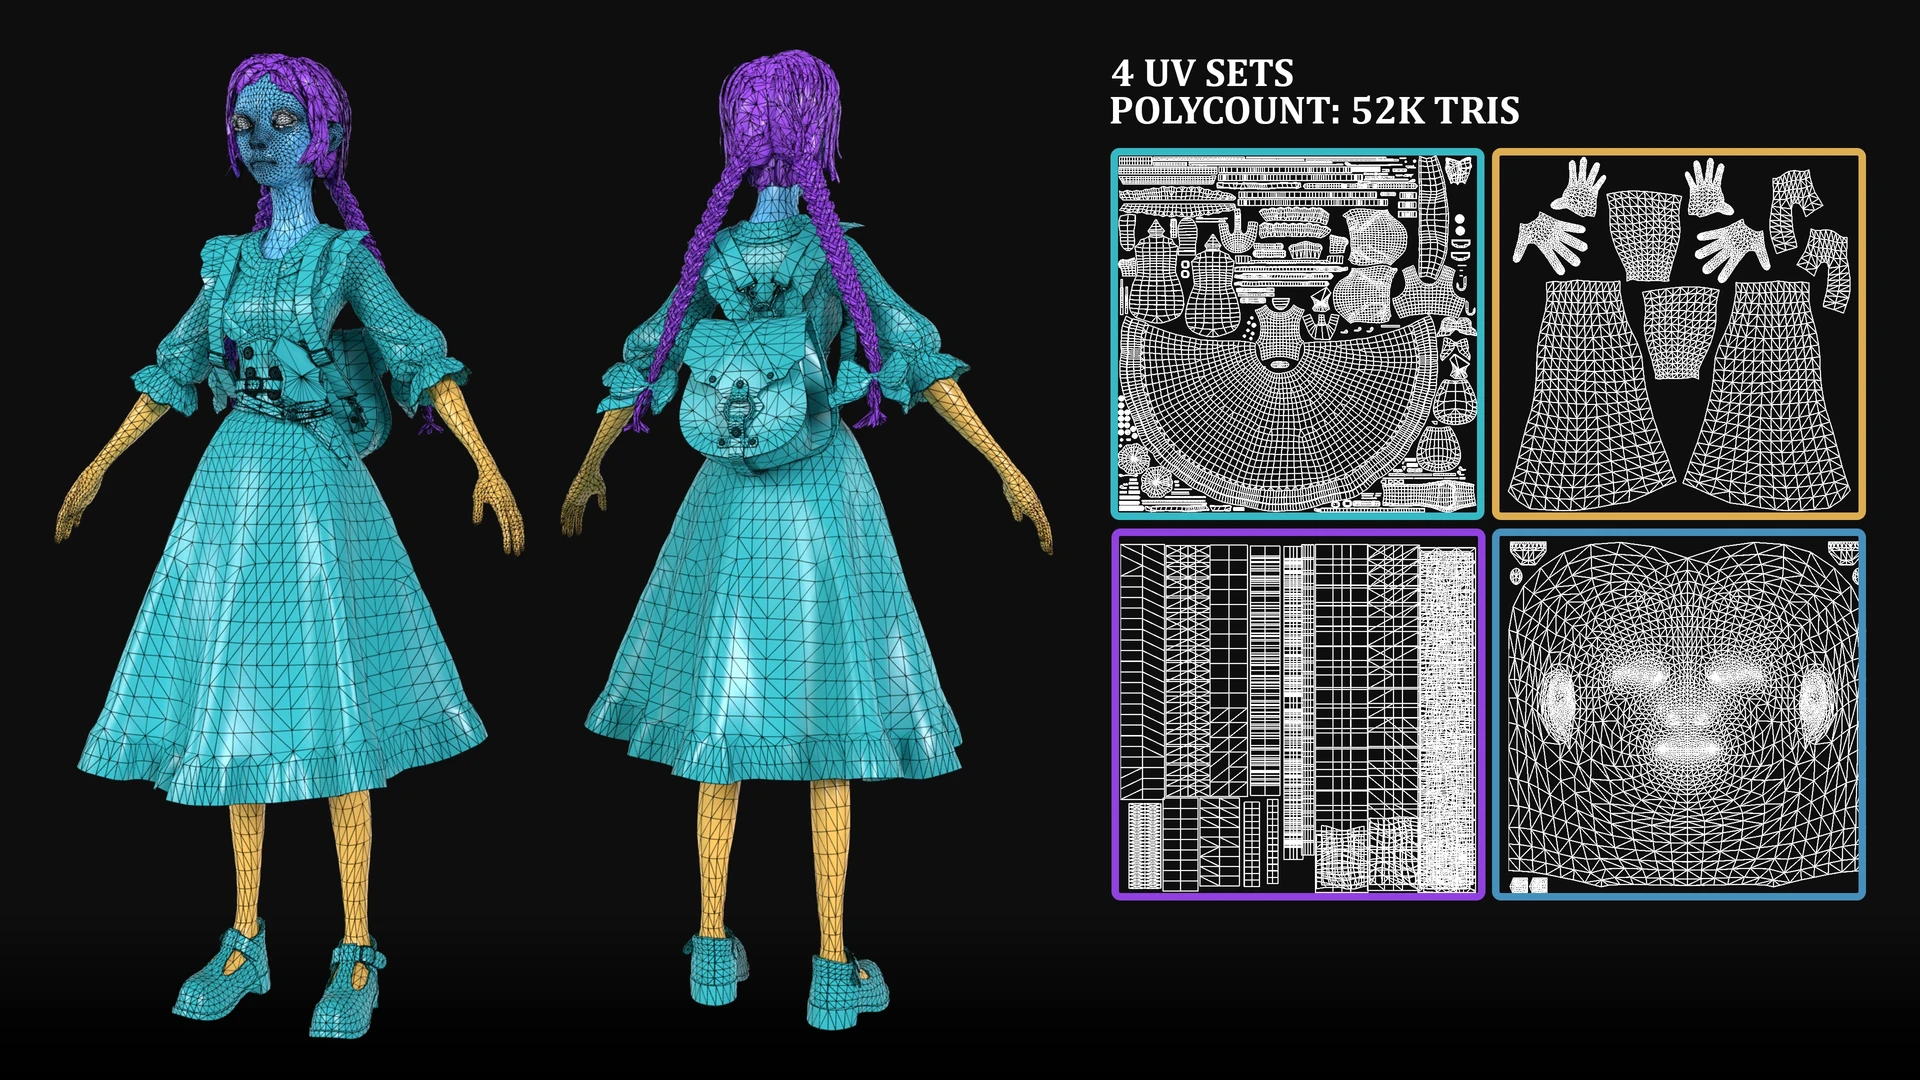
Once the final shape was completed, the clothing was exported to ZBrush and Maya for further refinement and optimization for real-time use.
Marvelous Designer allowed me to quickly achieve realistic folds and natural fabric behavior, which significantly accelerated the workflow.
For the final presentation, I used Unreal Engine 5 with additional image post-processing in Photoshop.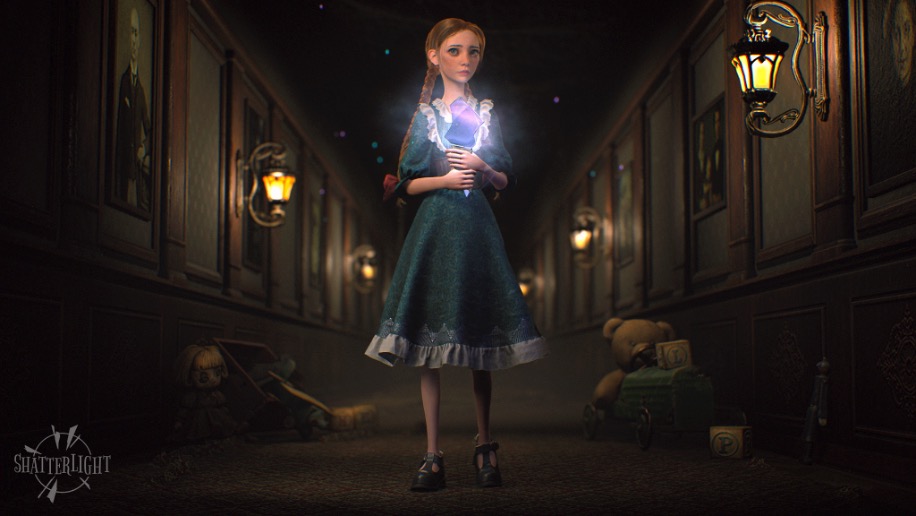
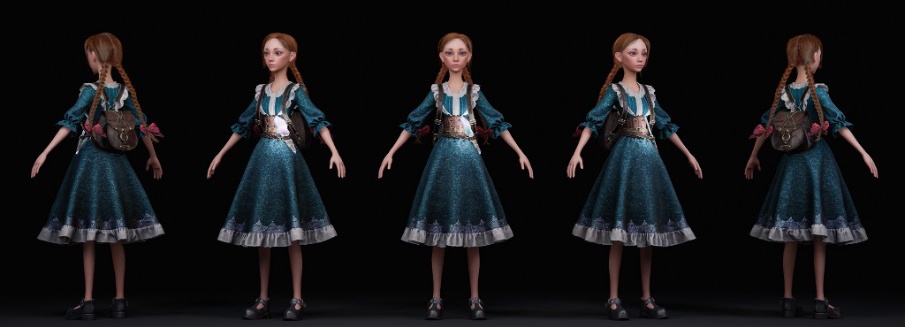
Why did you decide to use Marvelous Designer? How did it help you serve art direction?
I chose Marvelous Designer as my main tool for creating realistic character clothing.
Previously, I mostly worked with stylized characters and created folds manually in ZBrush. However, when I started working on realistic characters, I began researching realistic cloth workflows and came across tutorial videos about Marvelous Designer on YouTube, which inspired me to start learning and using this software.
Unlike traditional modeling techniques, cloth simulation in MD allows for fast creation of natural folds and volume. This significantly improves visual quality and helps better match the project’s art direction.
I have been using Marvelous Designer for approximately 2 years in both professional and personal projects.
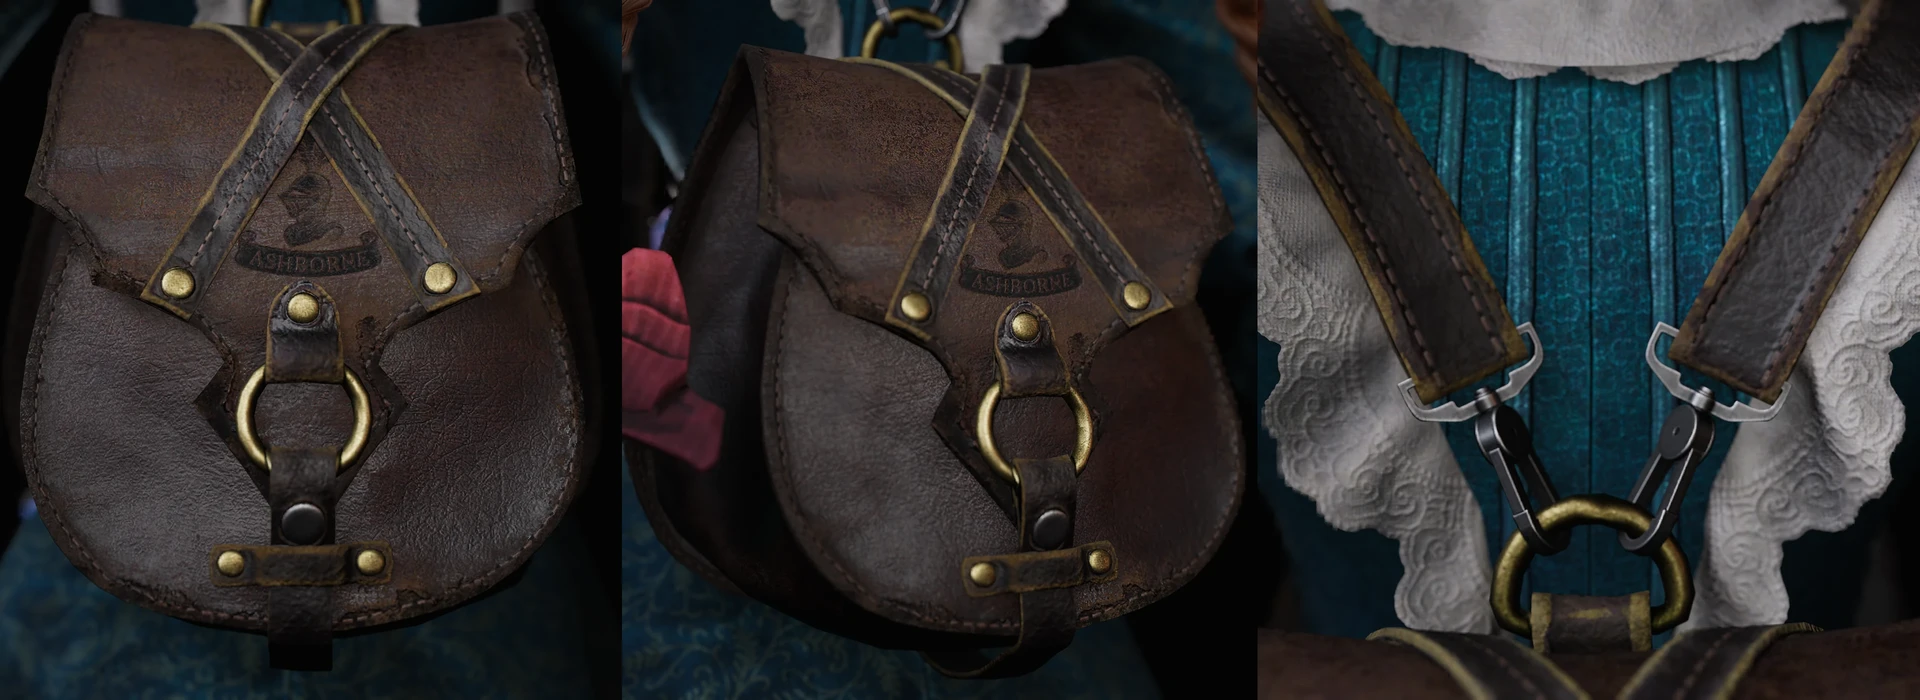
Can you give us a quick overview of the different tools used in your pipeline?
My typical pipeline includes:
Zbrush - sculpting the character base and further refinement
Marvelous Designer - clothing creation
Maya - modeling, retopology, and UV mapping
Marmoset Toolbag - texture baking
Substance Painter - texturing
Unreal Engine - final rendering and presentation
Photoshop - image post-processing
Do you have any other projects that you have worked on using Marvelous Designer that you can share with us?
In addition to the current project, I have used Marvelous Designer in several other works, including cinematic characters and game scenes.
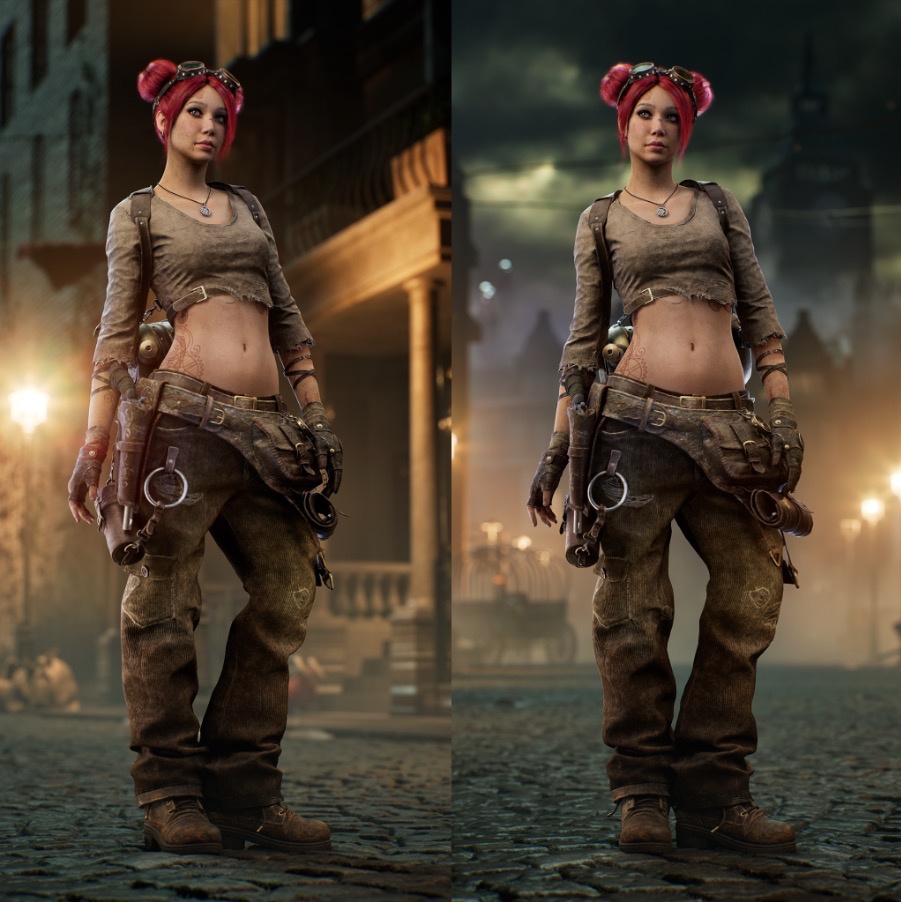
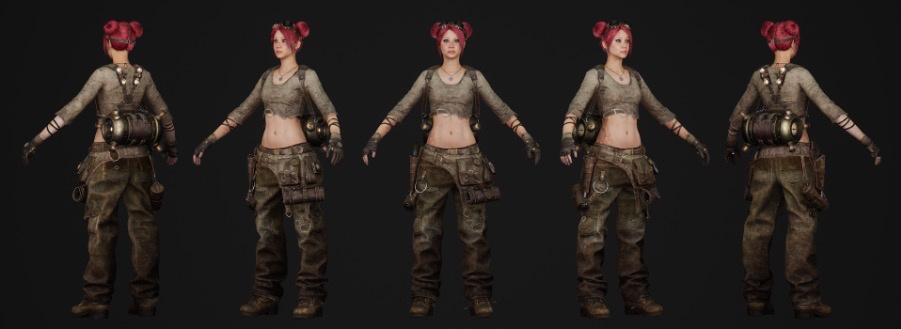
One of these projects was a Steampunk girl character. In this project, MD helped create various clothing and accessory elements such as velvet pants, a t-shirt, shoes, leather belts, a holster, and other fabric-based details with a high level of realism.
Are there any tips and tricks with Marvelous Designer that you can share with the community?
Here are a few techniques that greatly improved my workflow in Marvelous Designer:
Start with simple base patterns before adding complex details
Zoom out in the 3D window to evaluate the overall silhouette and shapes. Even if it is not the final version, the base should read clearly
Work with low mesh resolution during early simulations to form large folds, then increase the resolution for final refinement. At the end, you can apply the default fabric preset to all patterns and let the simulation run for a few seconds to slightly smooth the folds
Always adjust fabric physical properties based on the material type to achieve realistic results. These values can be slightly exaggerated for better visual impact
Wishing you creative success and great pattern making. Thank you for your attention!
이 작업은 game, characterart, Pattern, Rendering, Maya, ZBrush 등의 기술로 제작되었습니다.
Marvelous Designer로 이와 같은 3D 의상·캐릭터 작업을 직접 만들어볼 수 있습니다.