Designing Identity: Marvelous Designer in the Making of Misfit Stranger
A lived-in outfit and a character born of self-reflection—Basil Pop’s Misfit Stranger is more than a digital model; it’s a personal narrative woven through fabric, form, and feeling.
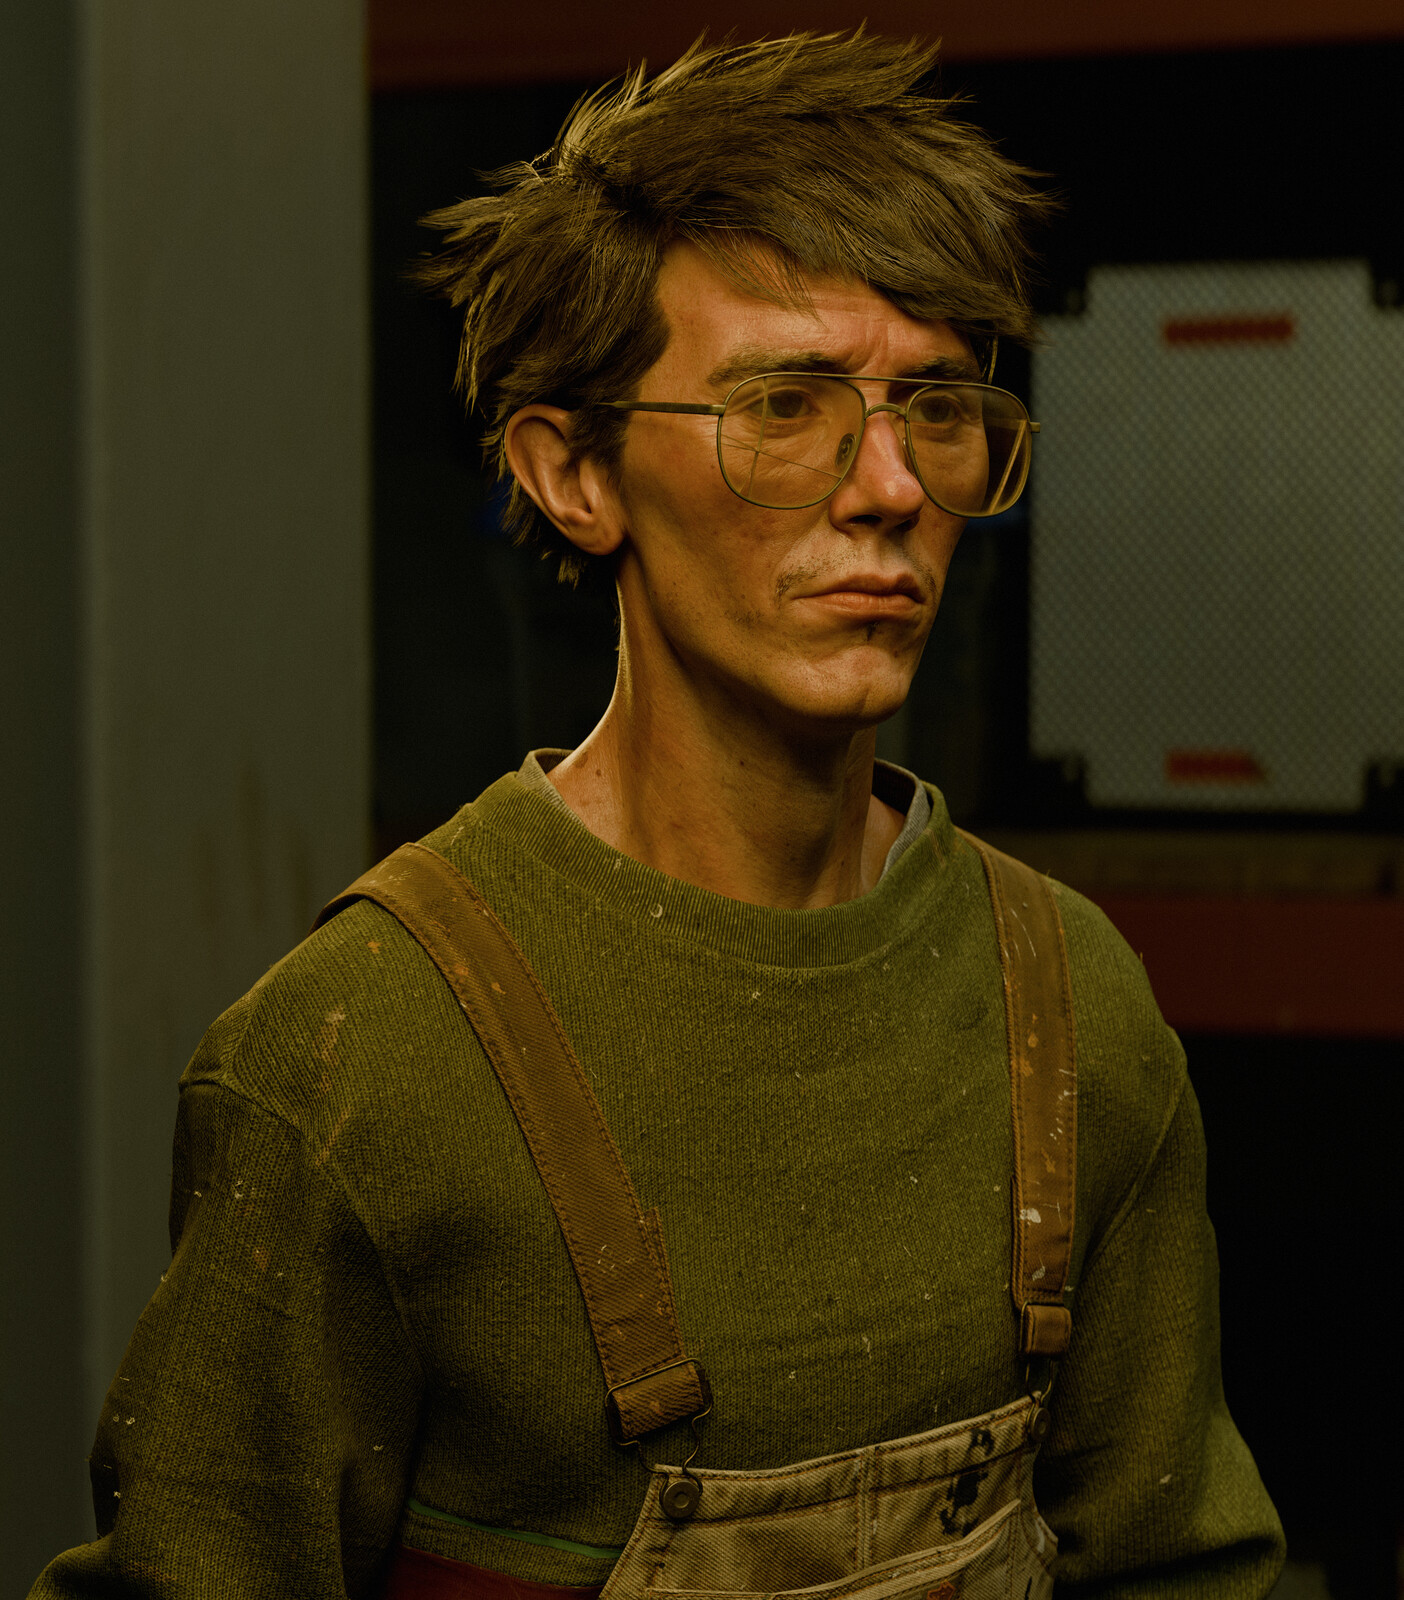 Interview with Basil Pop | Misfit Stranger | 3D Character Artist
Could you please introduce yourself to the Marvelous Designer community members?
Hello there. My name is Basil Pop. I am a 3D character artist with a classical Fine Art education and about 9 years in the game industry. I live in Prague, Czech Republic. Whether I’m drawing with a pencil or sculpting with clay, 3D graphics for me is just another tool for self-expression and realizing my potential. In this interview, I want to share my approach to making clothing for the Misfit Stranger game character using Marvelous Designer.
“Misfit Stranger” is a striking and personal piece. What inspired you to create this character, and what story are you trying to tell through him?
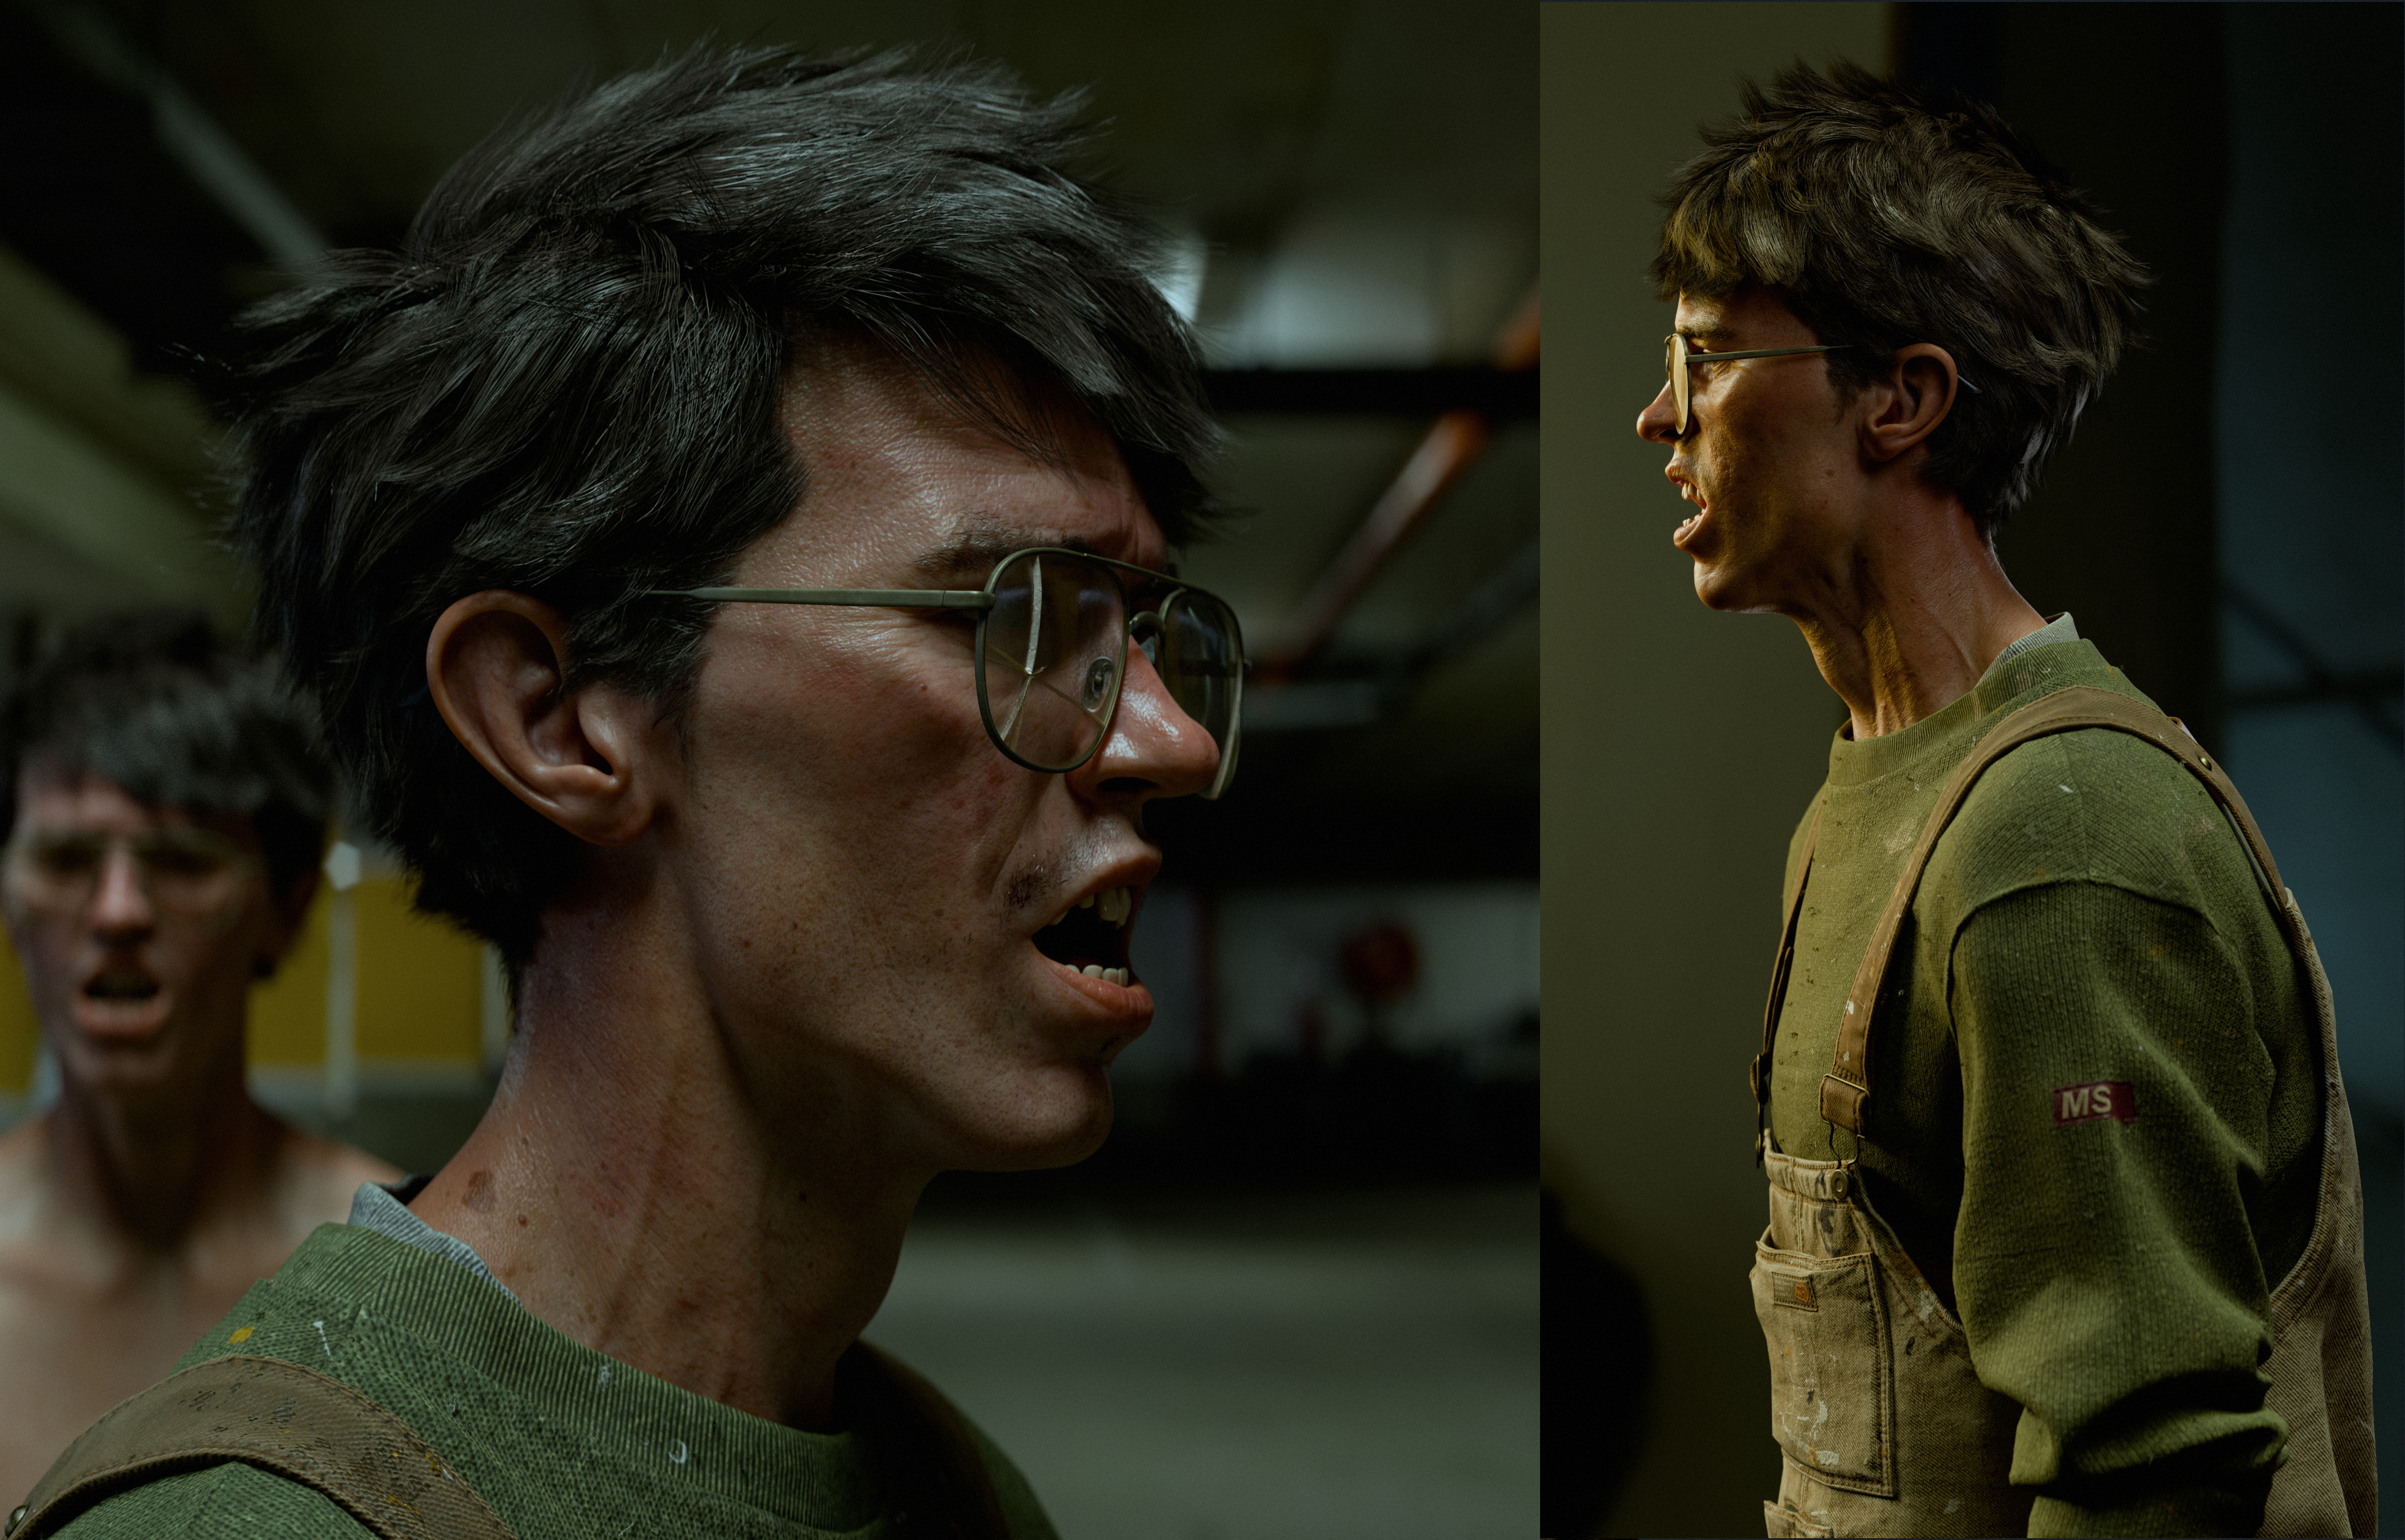
This is an attempt to see myself from the outside as an artist, a kind of re-evaluation of values. For me, Misfit Stranger is the opposite side of creative growth, filled with fear. He chooses to go with the flow, not making an effort to change his situation, giving up on himself.
The foundation of the character is my own observations and analysis of this “dark side” inside myself. It is a kind of self-criticism, even within the framework of a game-ready model, creating this image based on my own sketches.
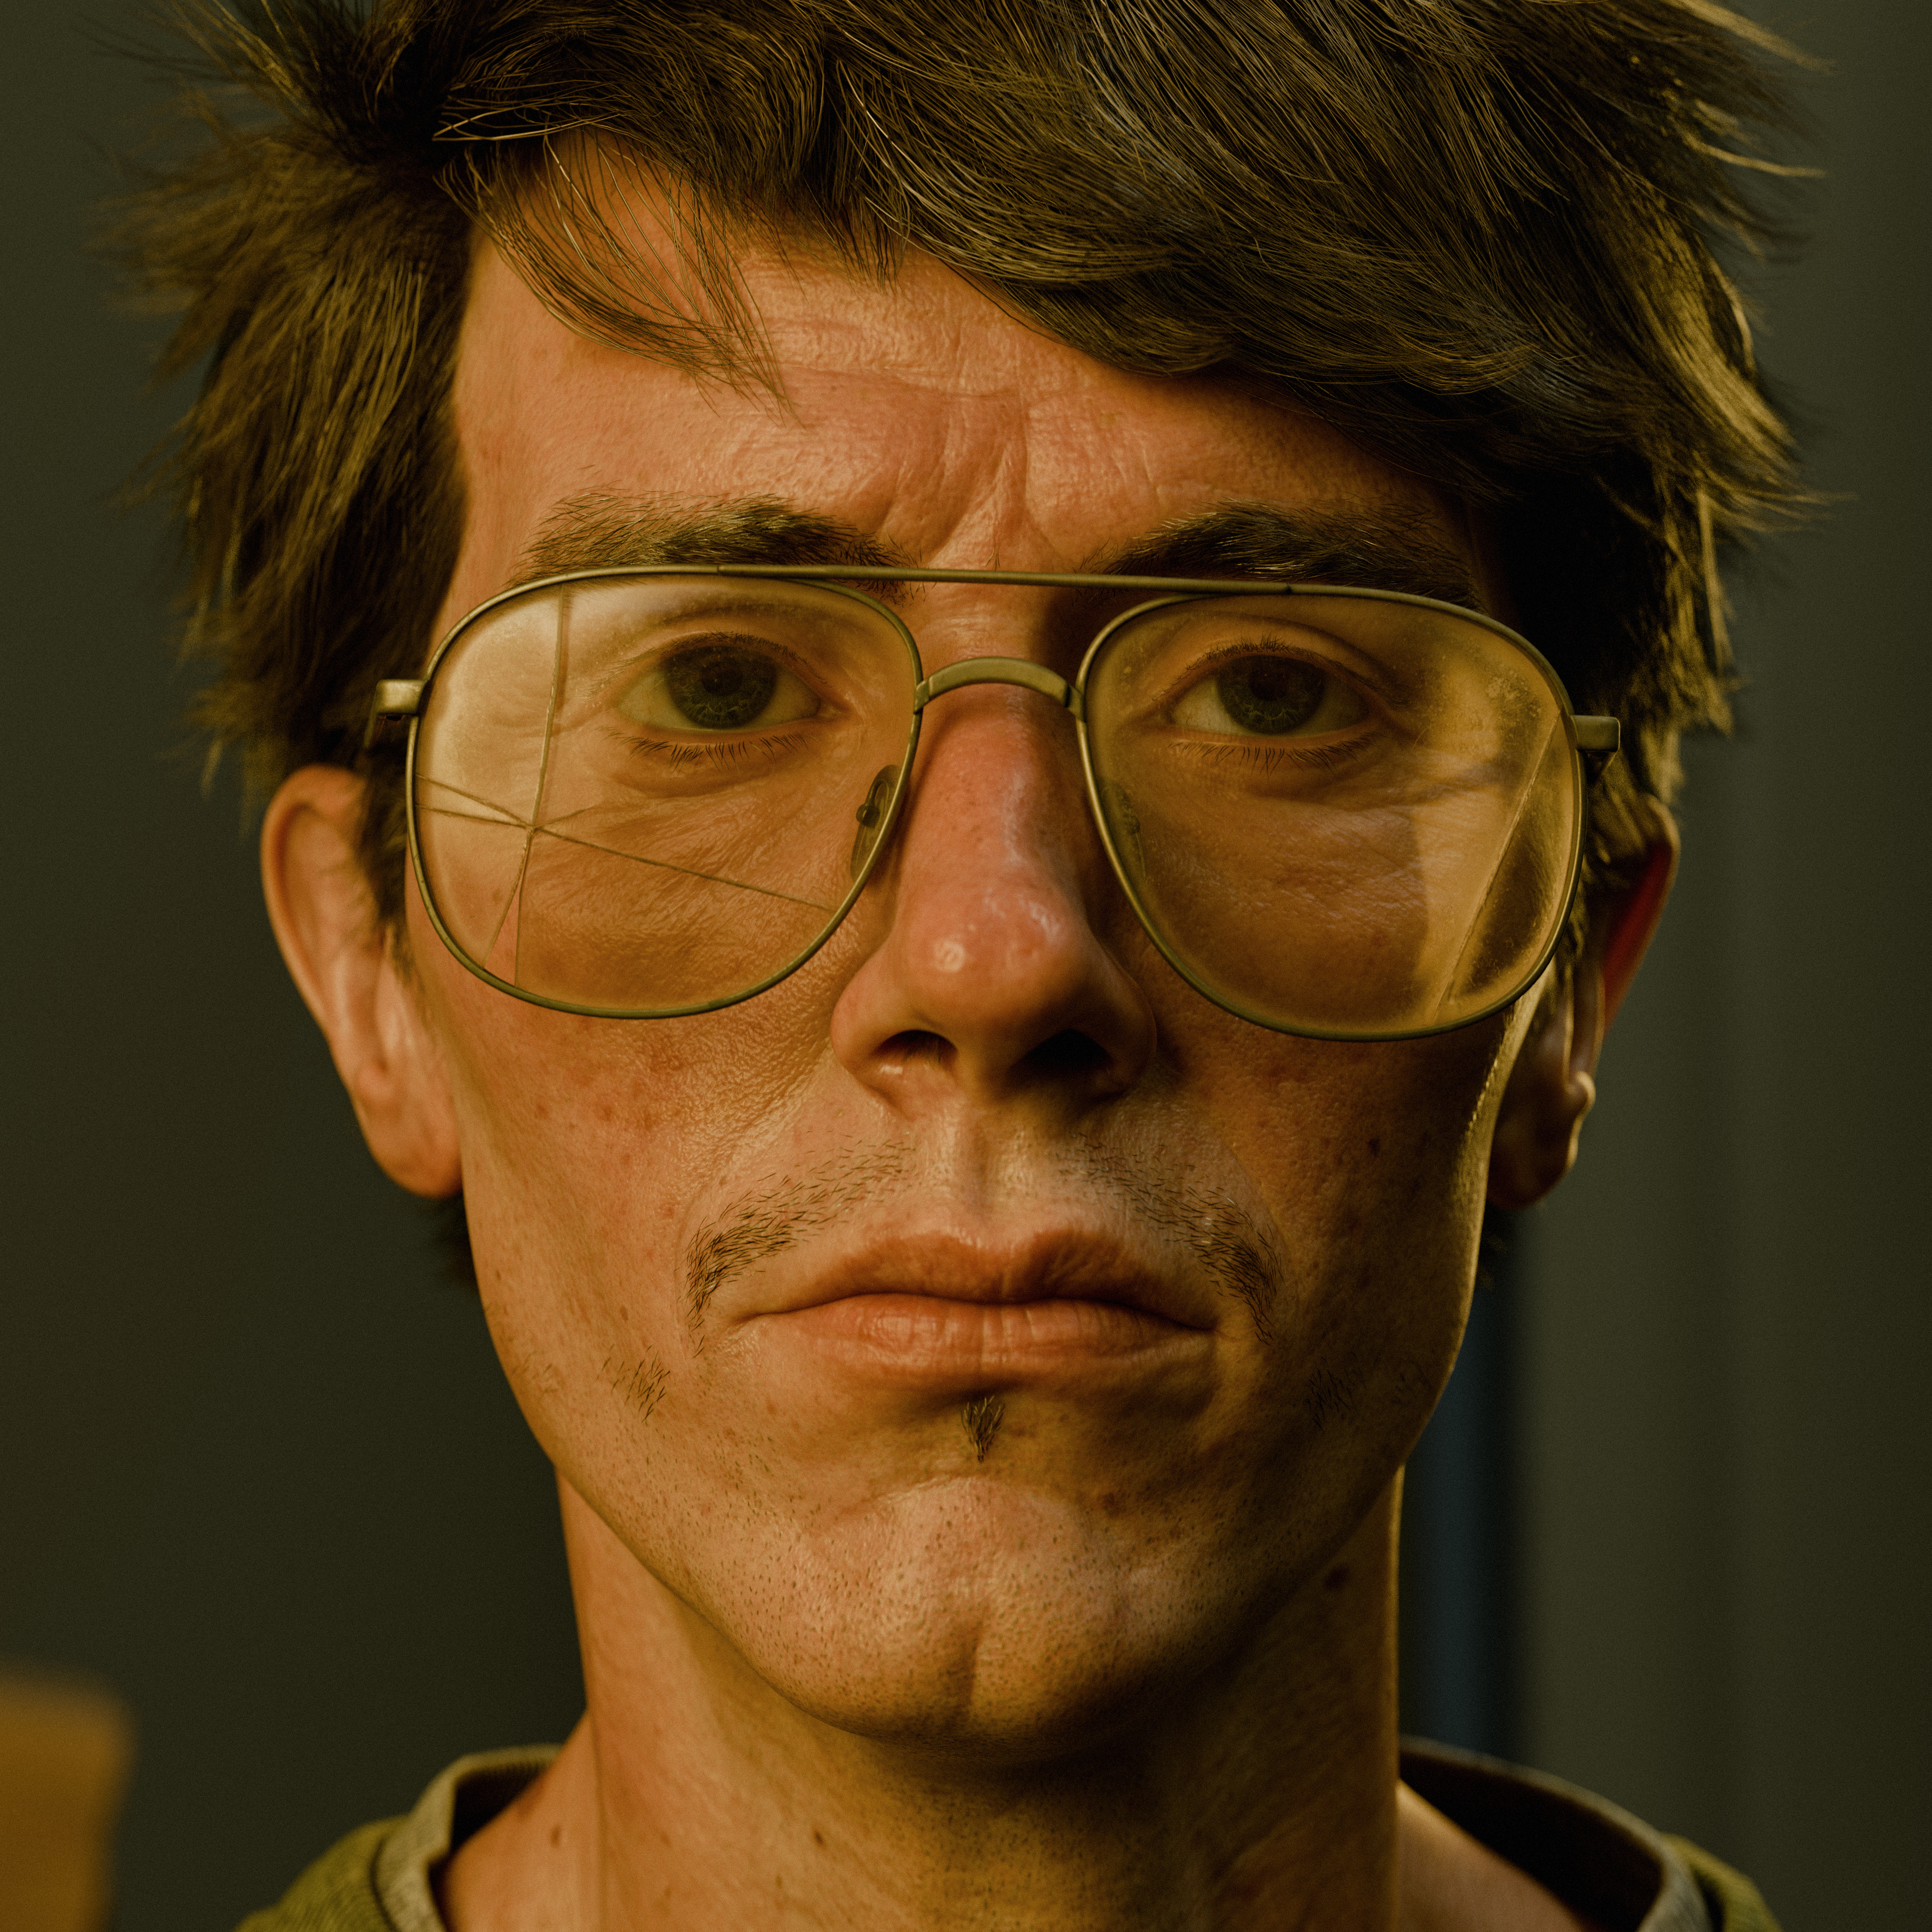
What role did Marvelous Designer play in the creation of this character? Which parts of the outfit were designed using Marvelous Designer?
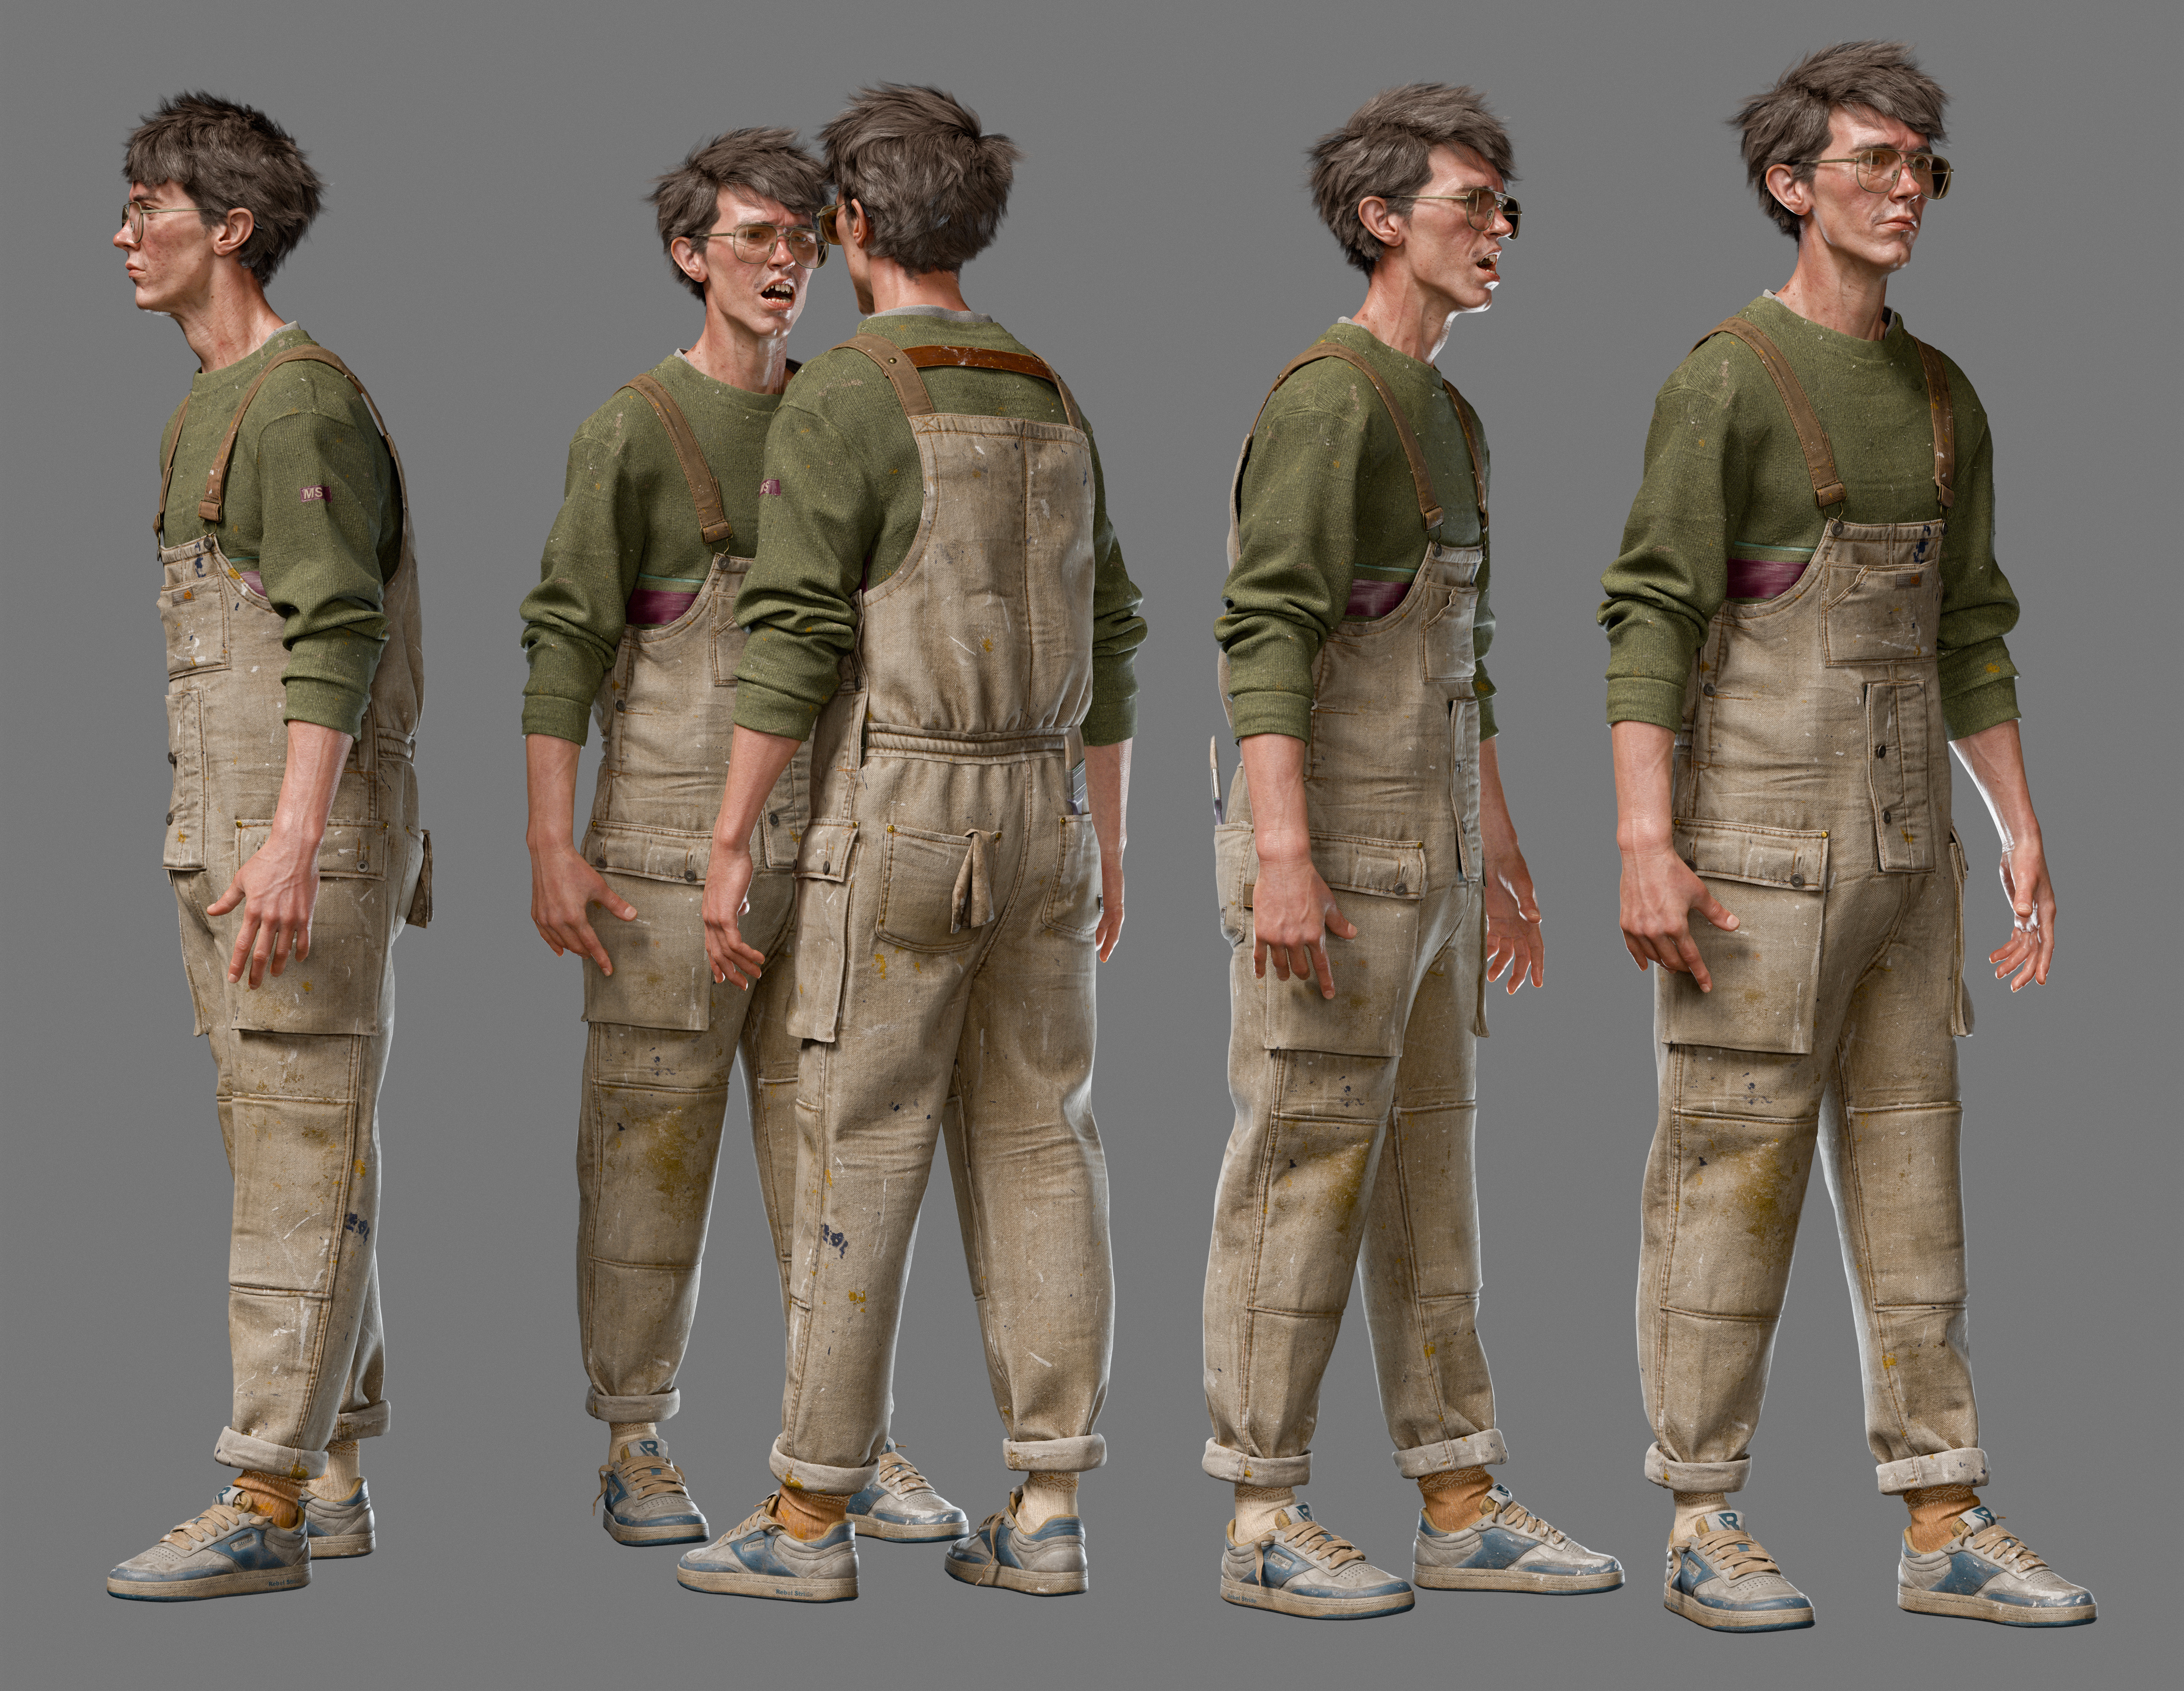
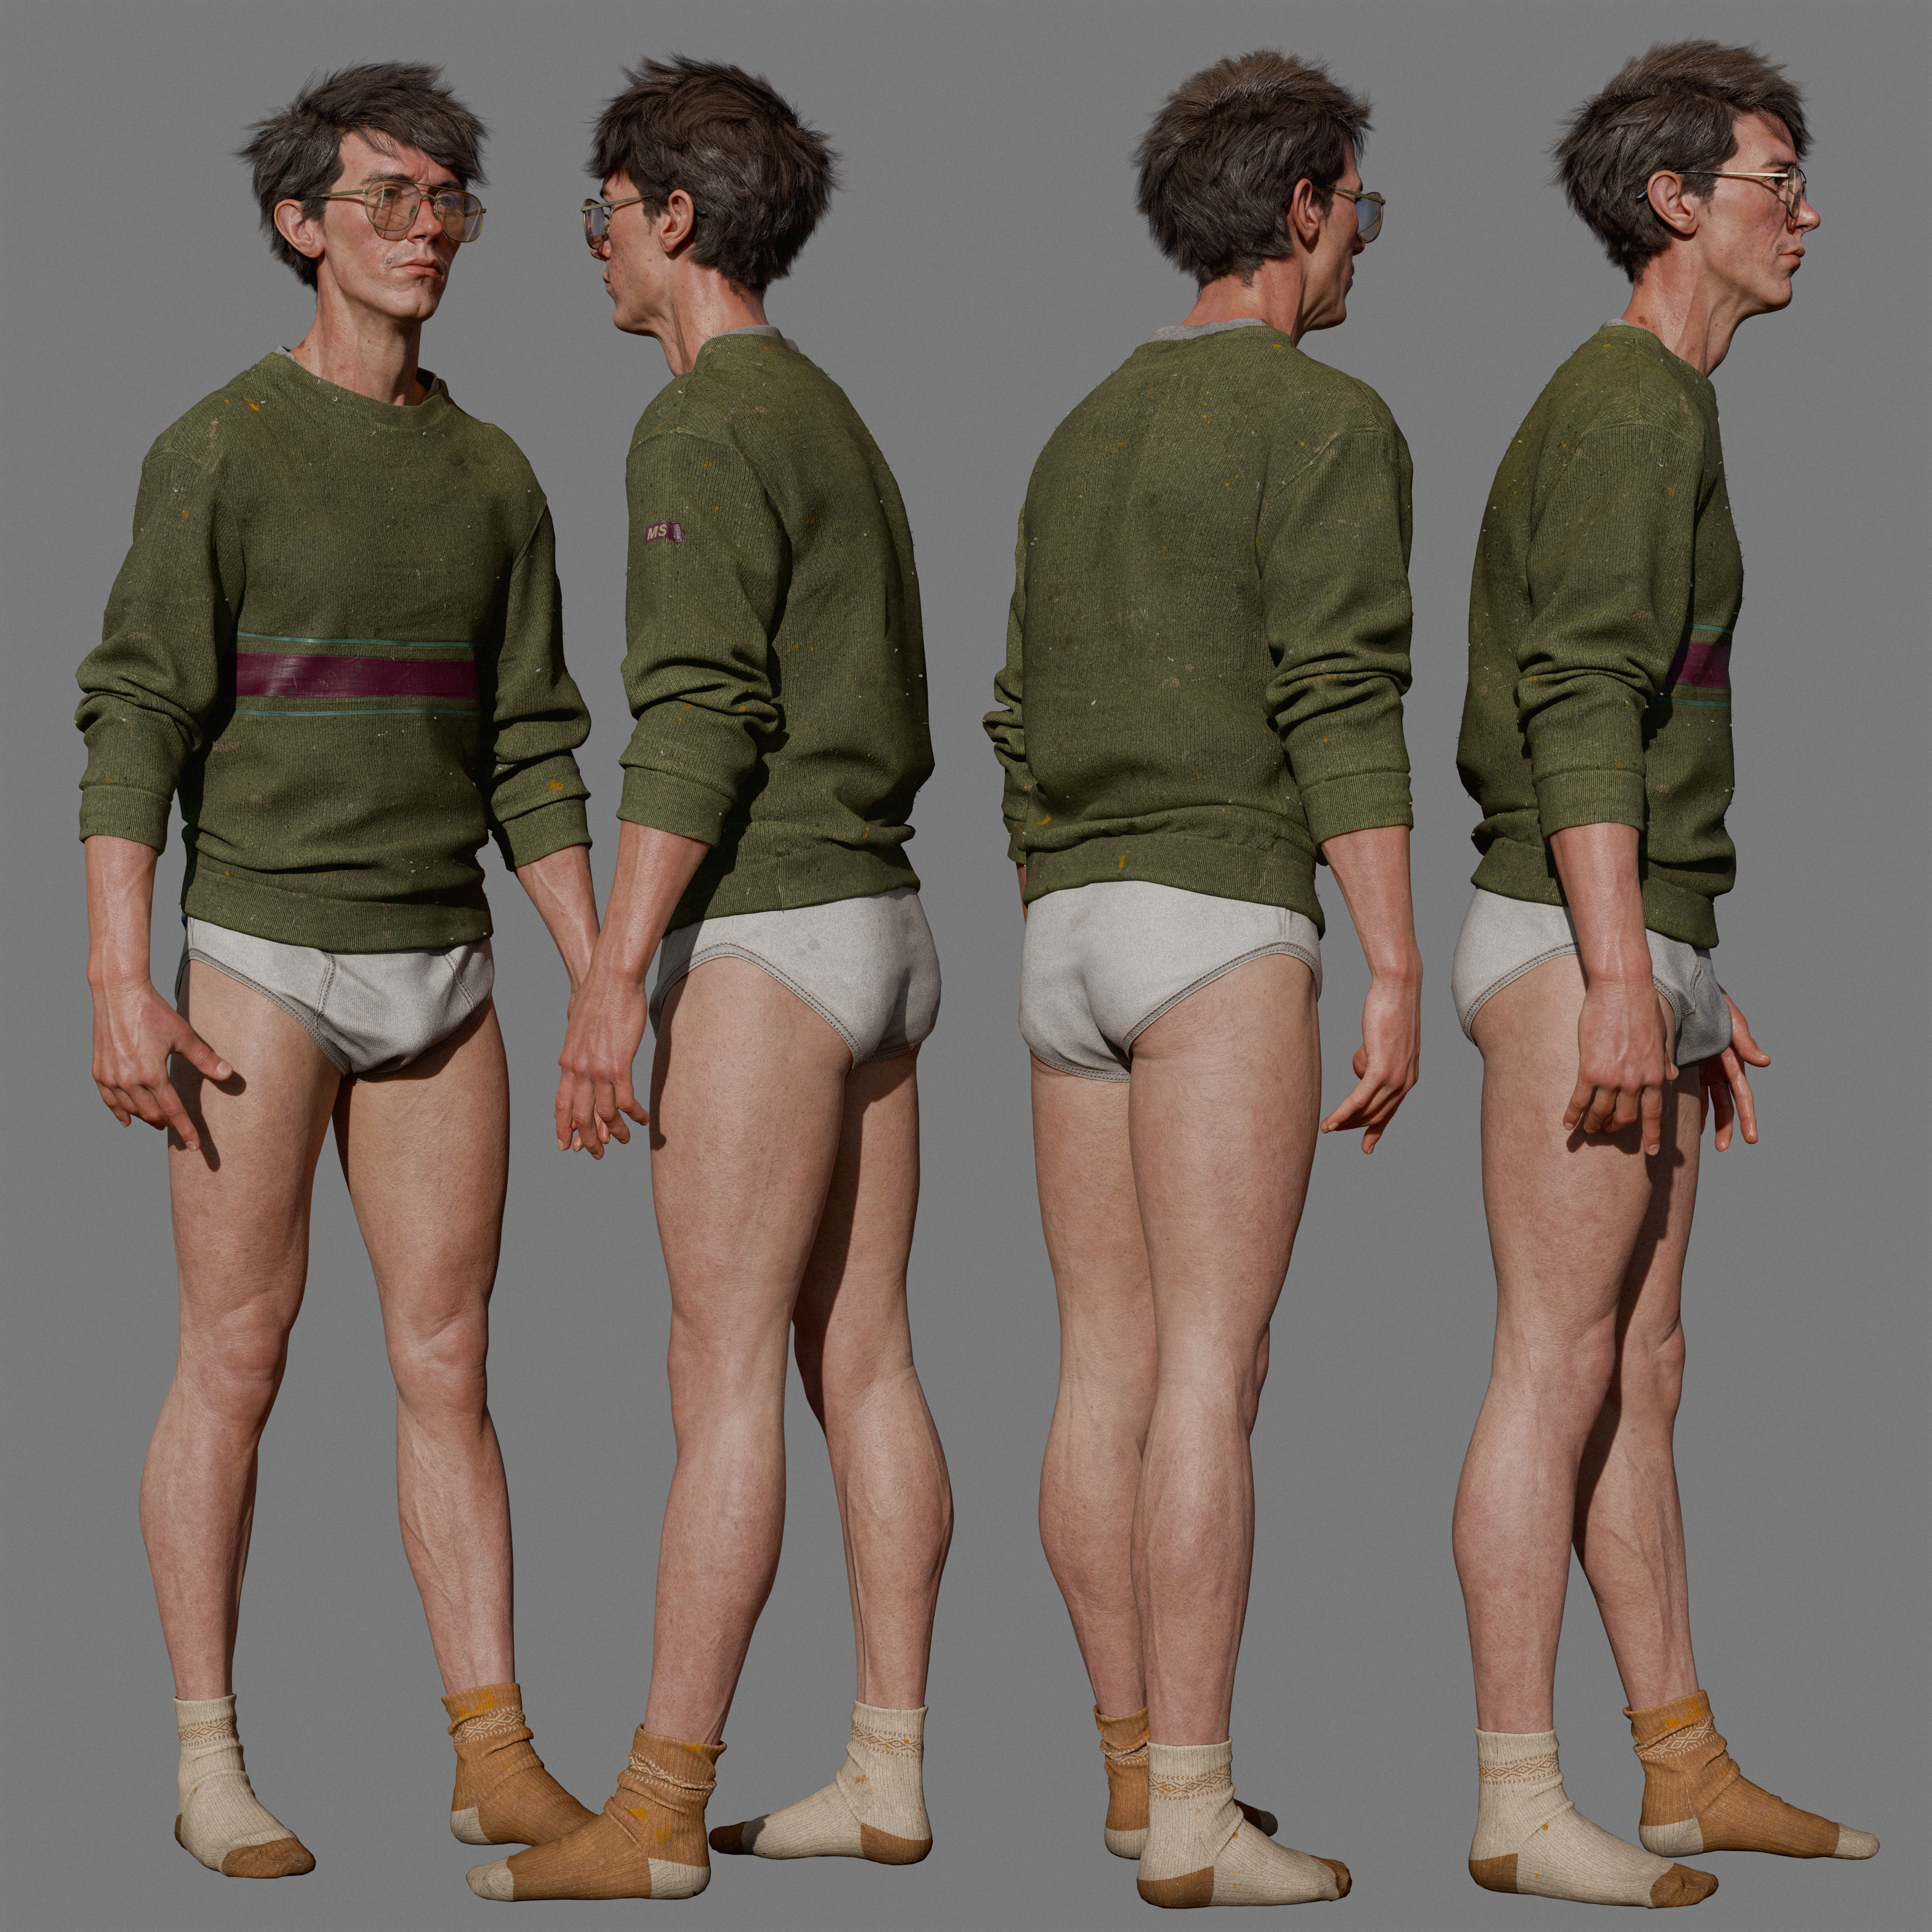
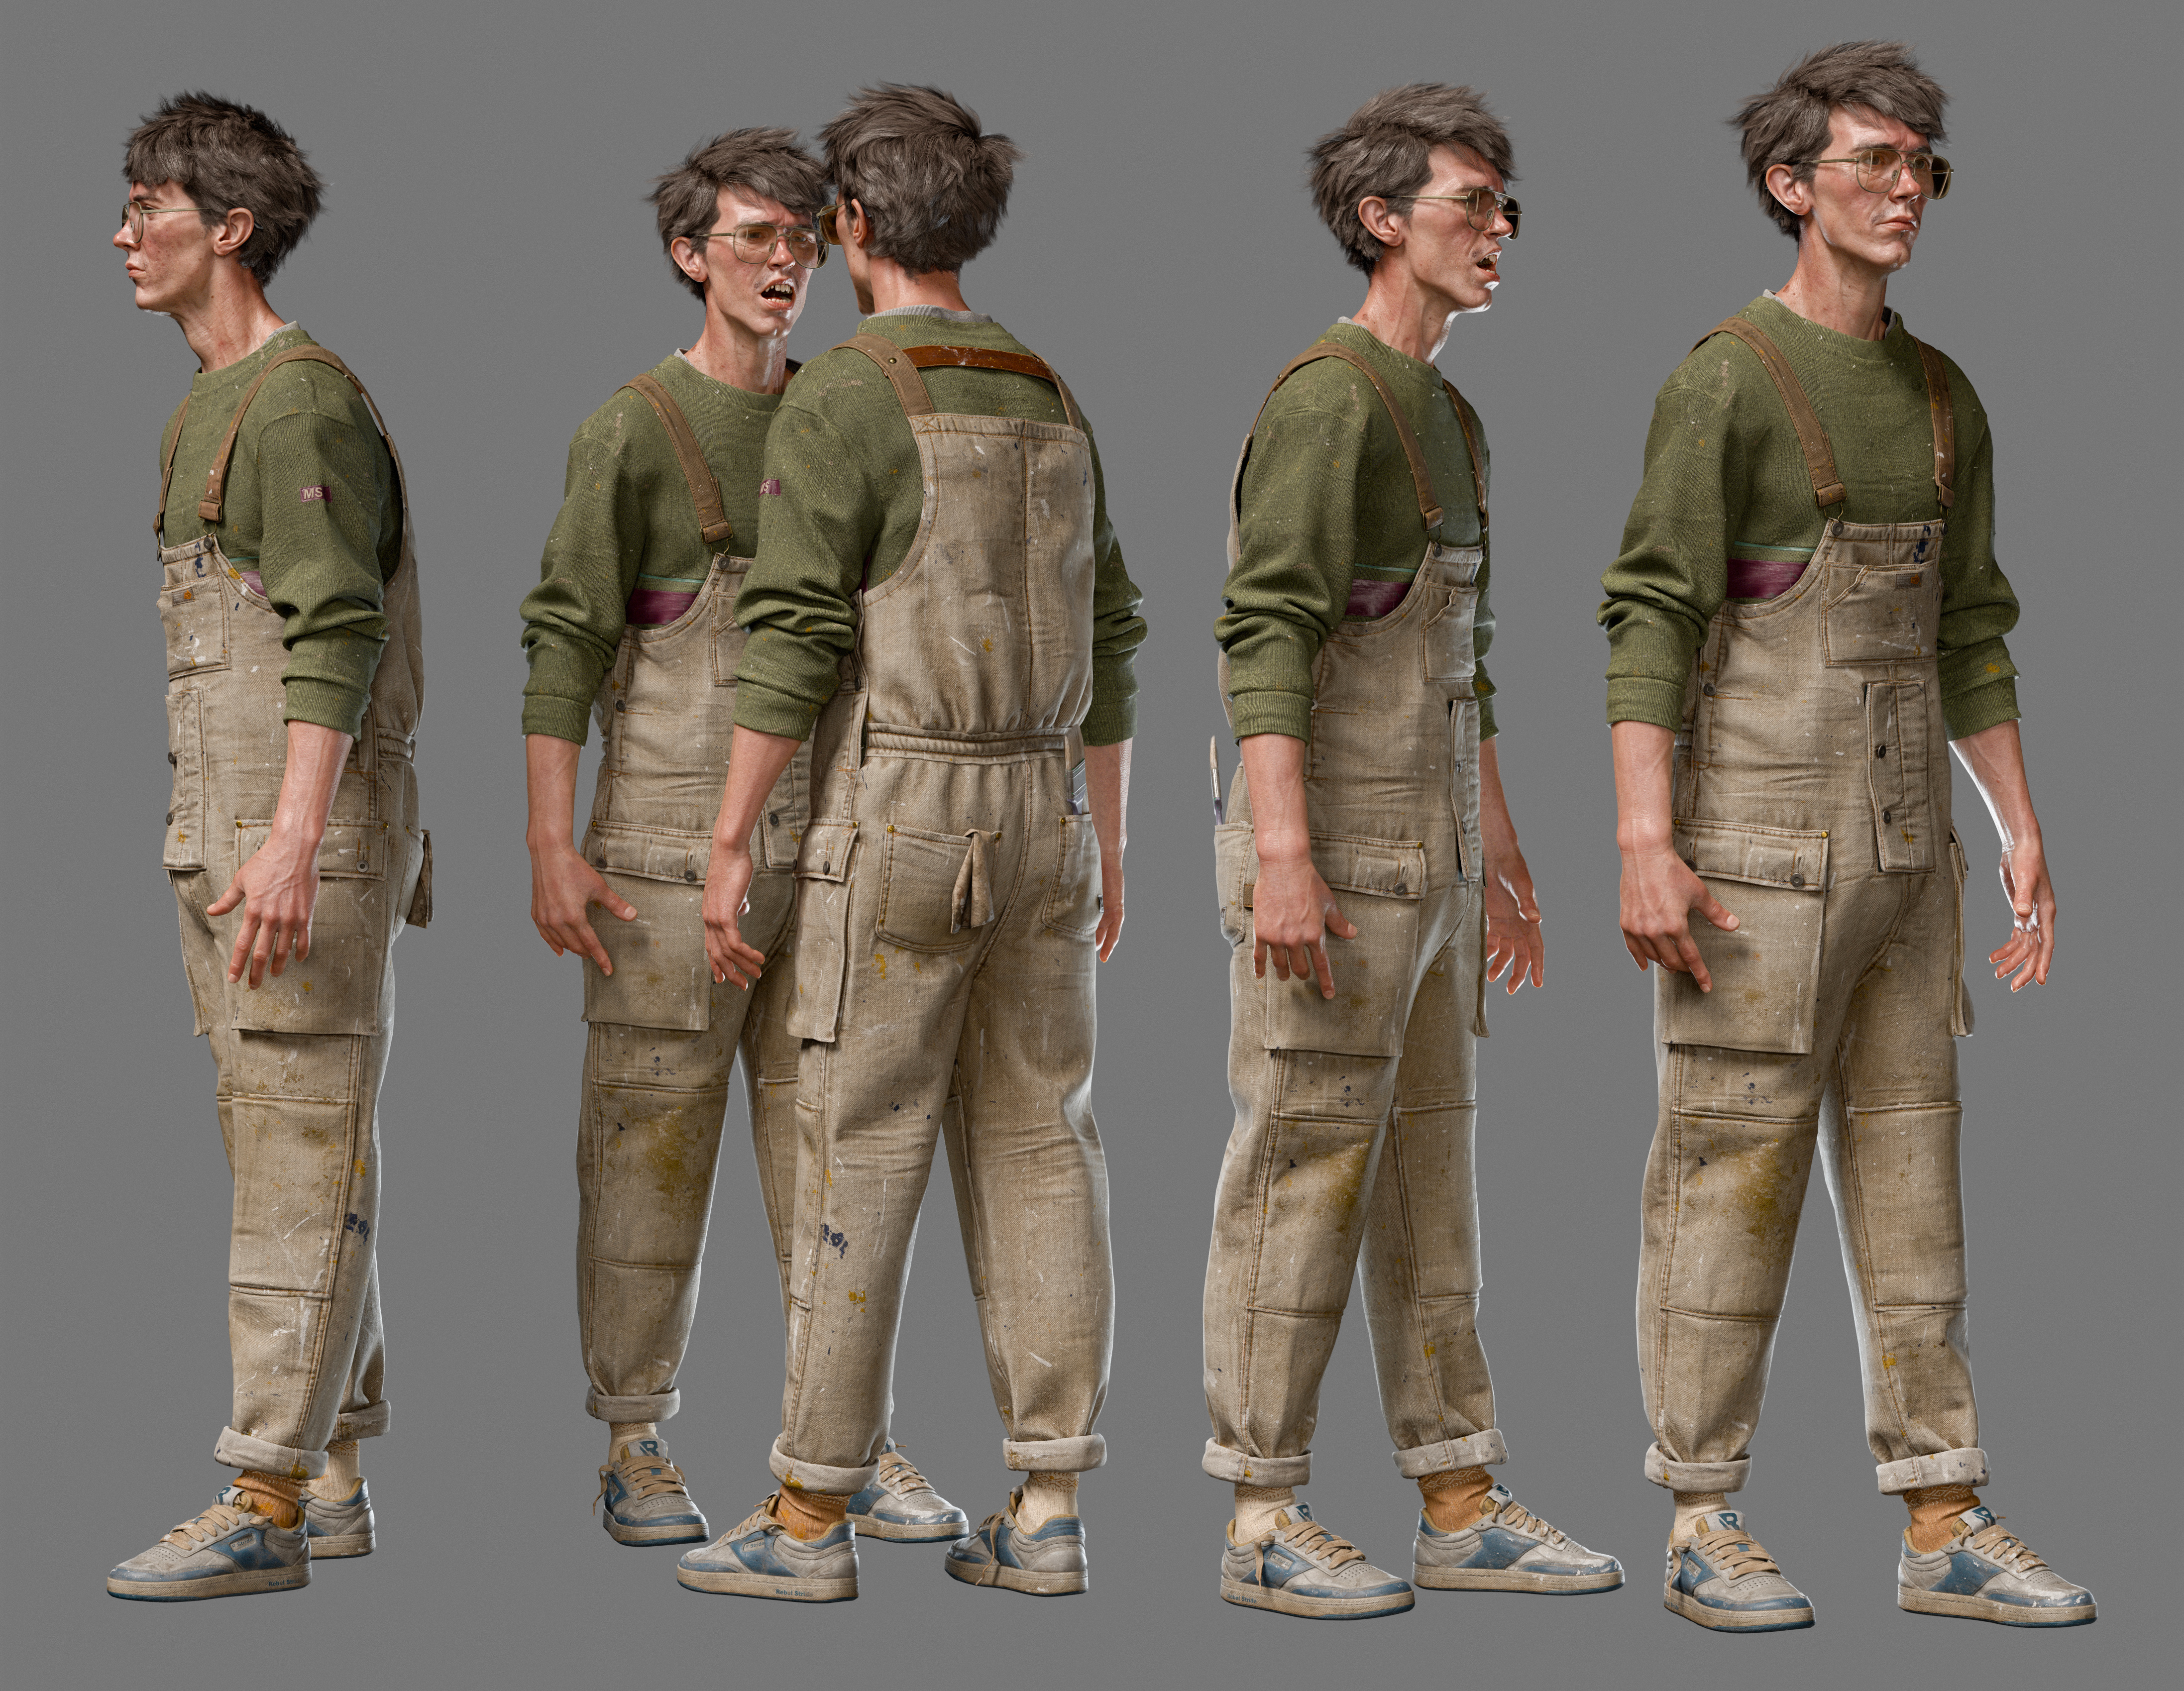
I wanted to show the clothing on Misfit Stranger as something the character seems to live in all his life. It is his comfort zone, a “gray box” where he works or just spends his ordinary day. Marvelous Designer helped me create the main parts of the outfit: the jumpsuit, sweater, underpants, socks, and shoes, which seem almost “stuck” to him, serving as the basic placeholders.
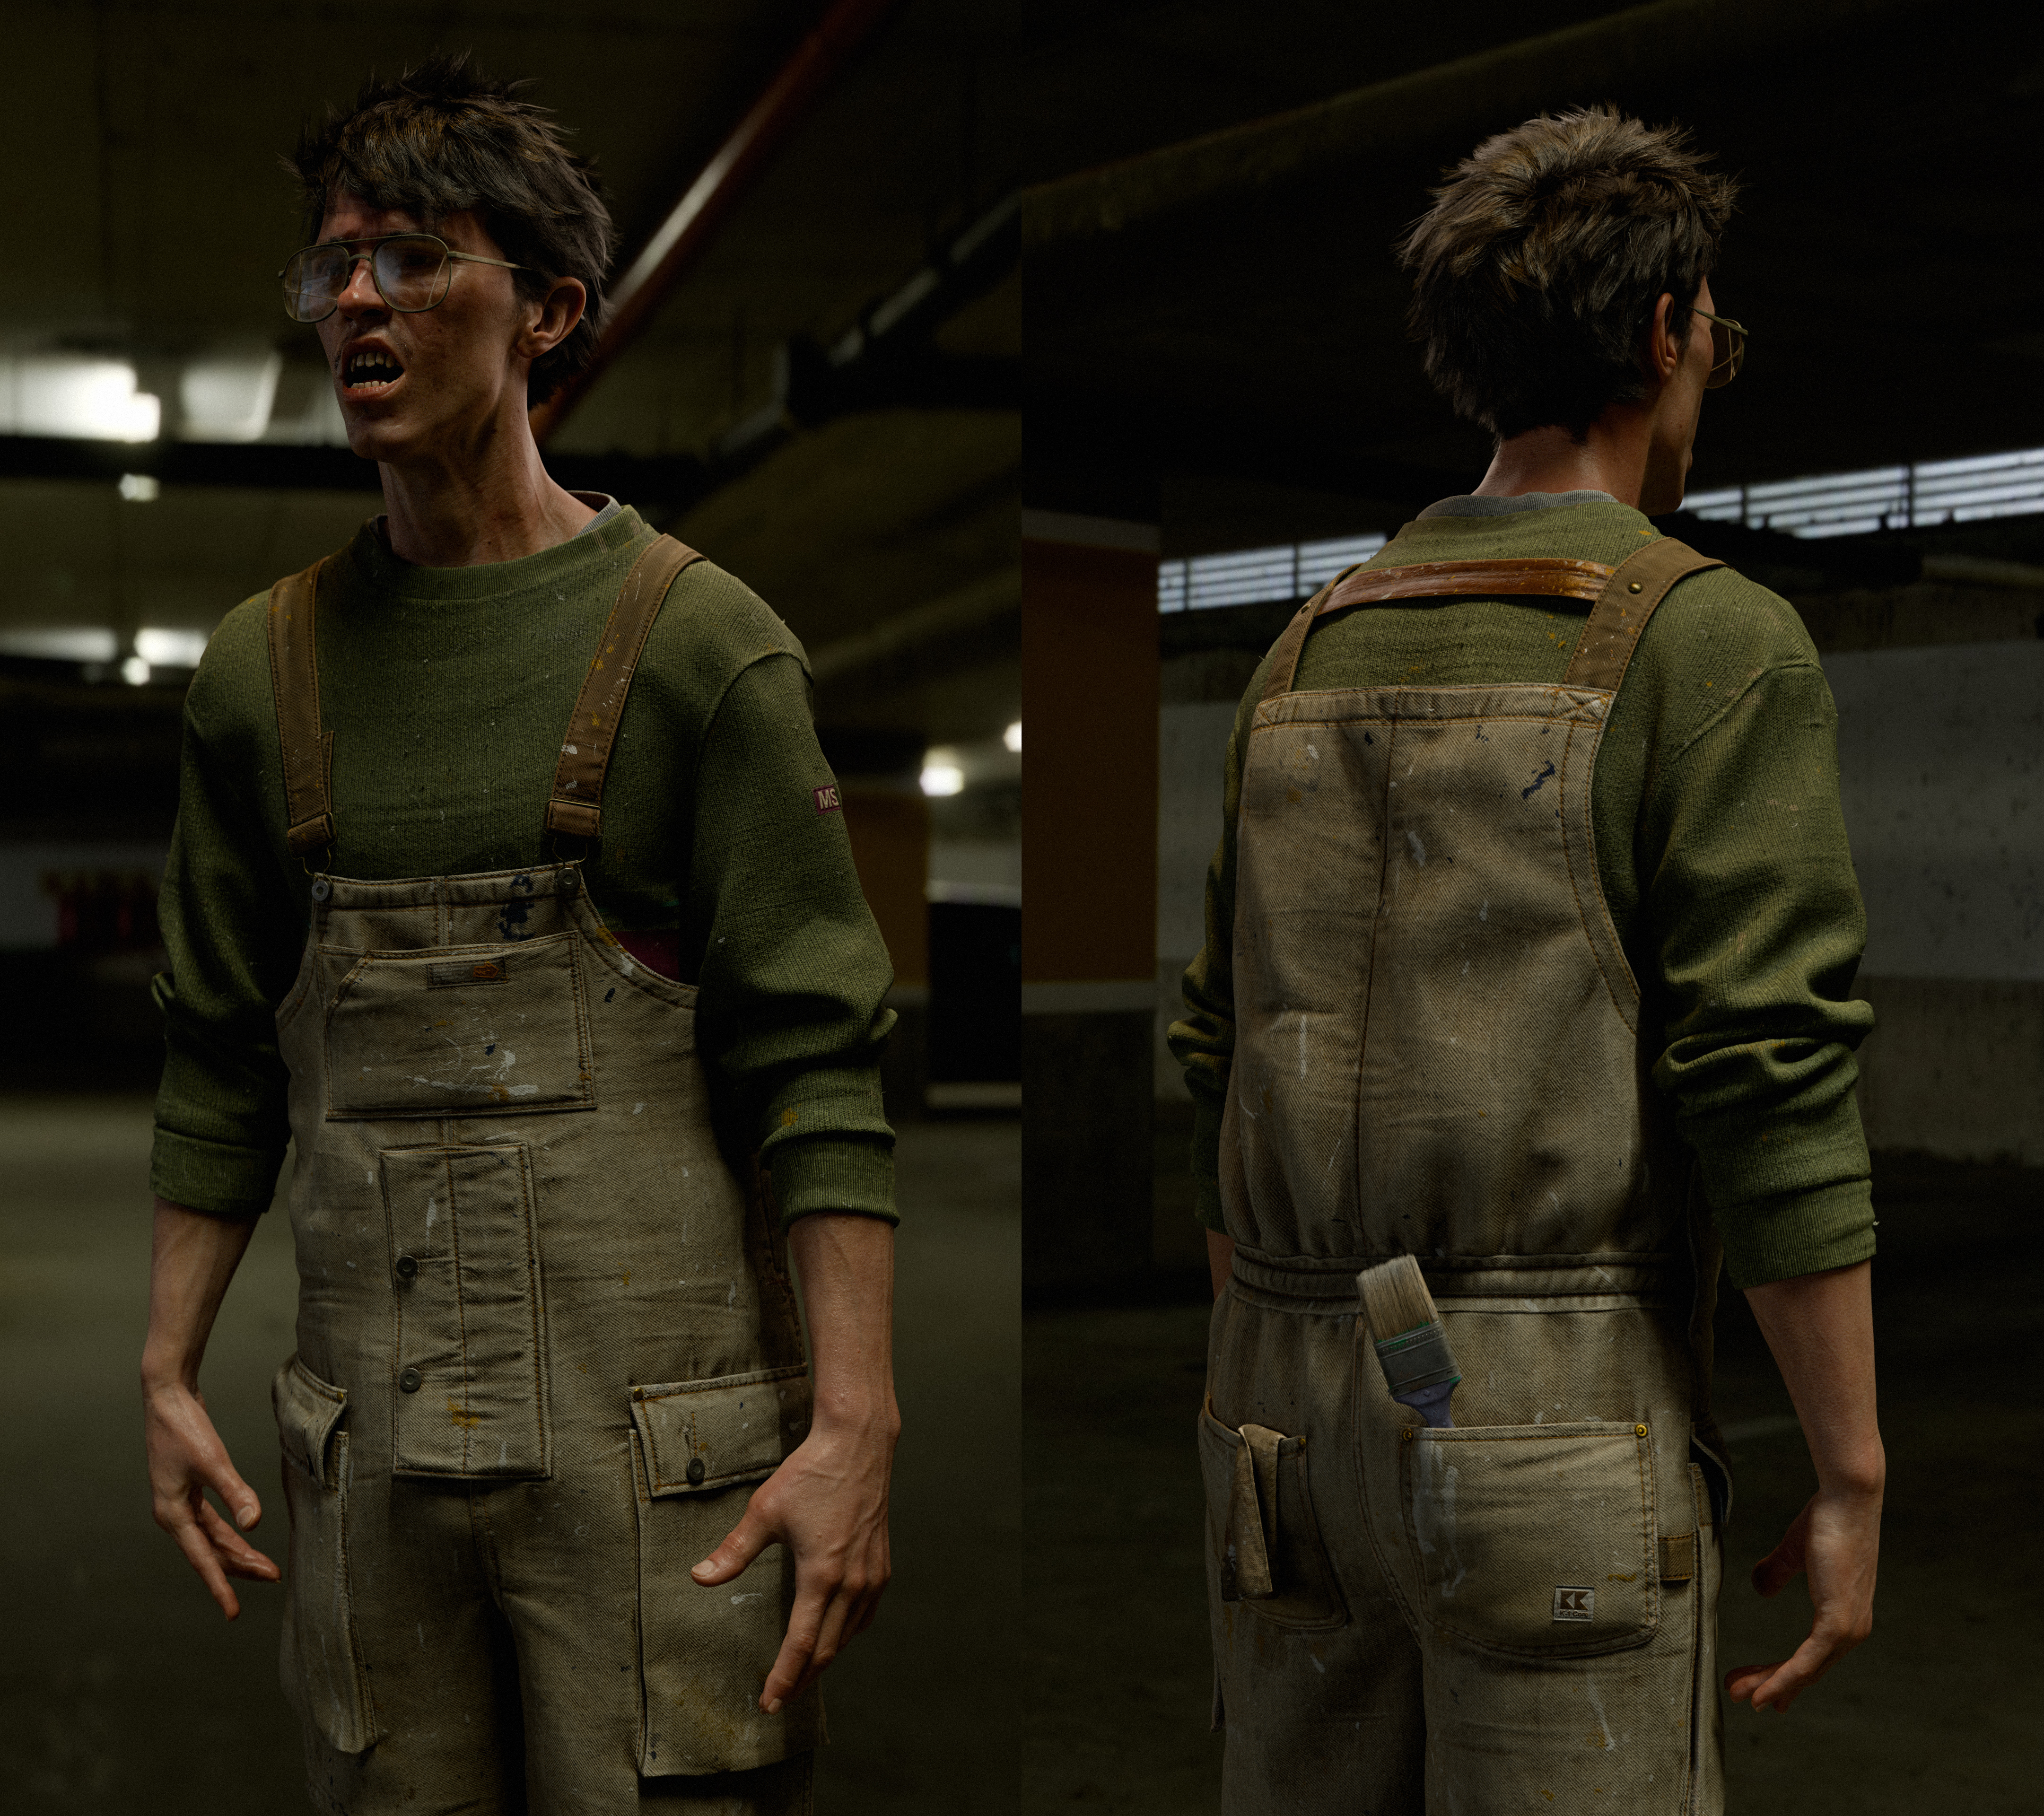
The overalls and shirt in this piece show a high level of realism. What was your approach in Marvelous Designer to achieve this level of detail?
Marvelous Designer seems complicated when you approach it like other modeling programs, such as Blender or Maya. It reminded me of my first driving experience - you focus on many small details and because of that, you don’t really feel the car itself. The same thing happens with Marvelous Designer.
"Let the laws of physics do their job. Just set a few limitations."
My first steps in Marvelous Designer are about setting up the scene, sewing the main shapes of the clothing, adjusting the size of the patterns and their proportions on the avatar. Using Instance or Symmetry on the objects, this allows me to easily change and deform the model when needed.
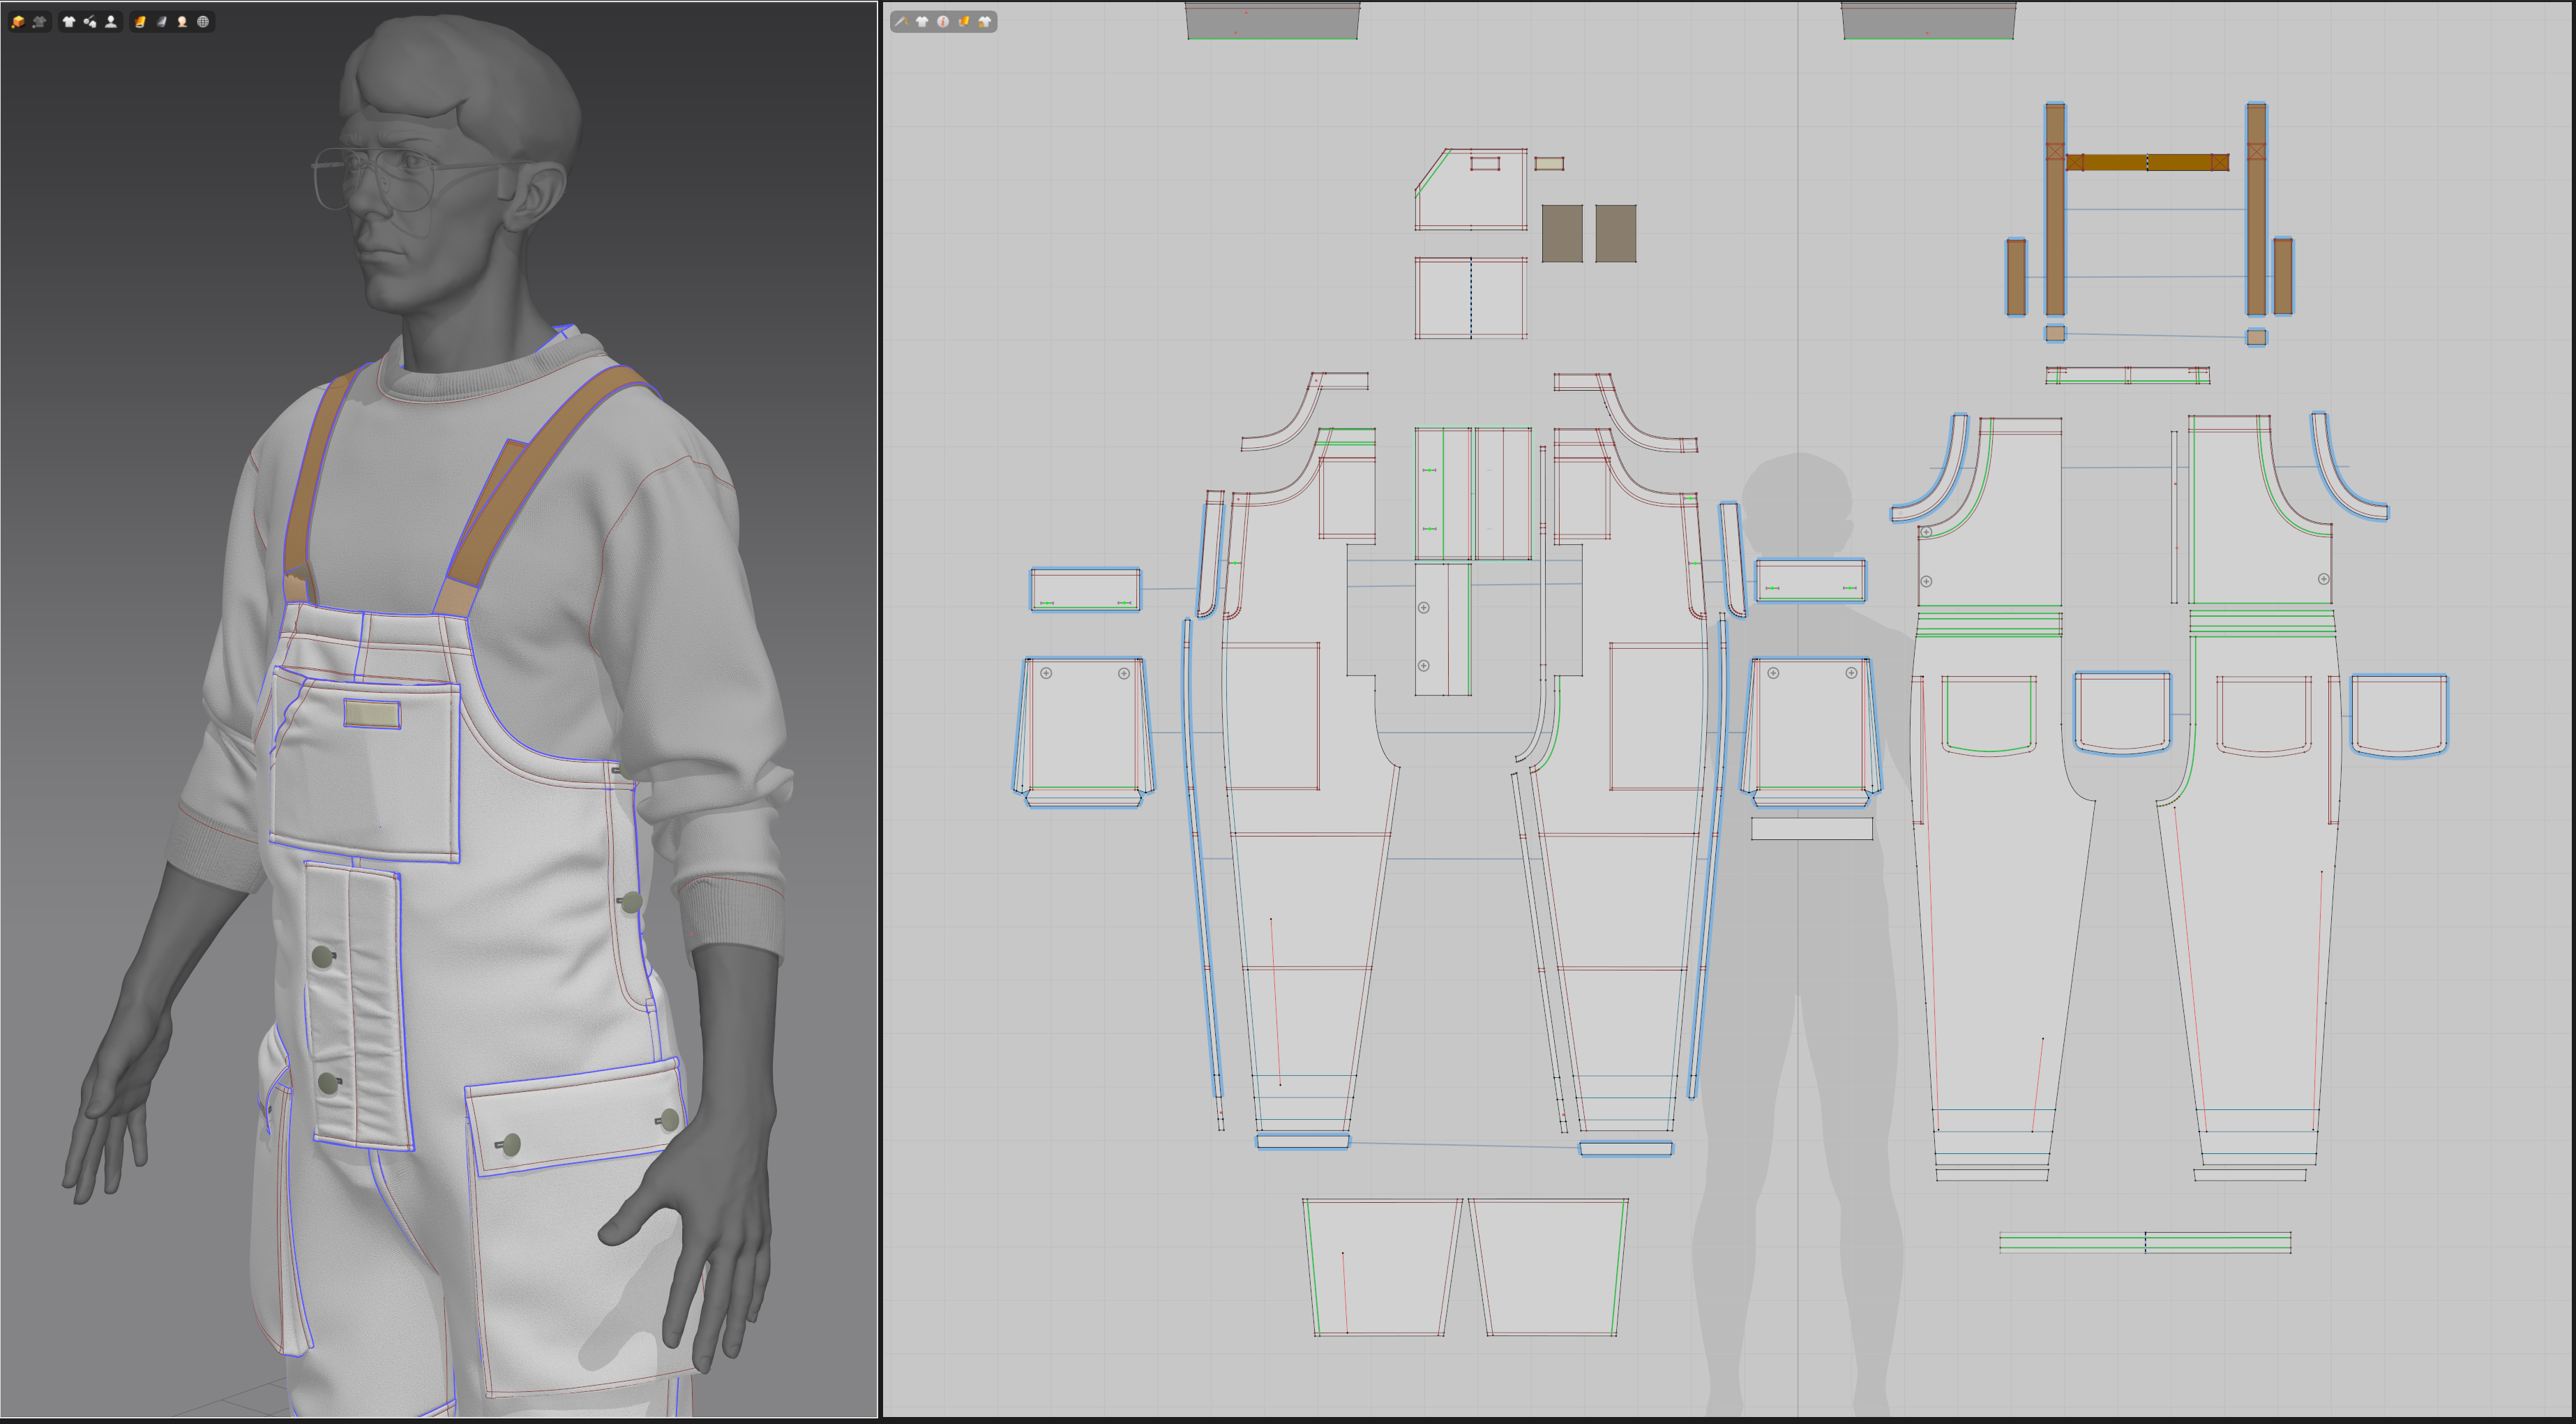
When the foundation is ready, I add extra elements to the main shape: belts, pockets, and I separate them using Layers. At the same time, I set up the basic fabric material settings and lower the Particle Distance for a better look. As the main material, I often use Trim Hardware.
At the final stage, I focus on the parts that need deeper adjustments. I use different tools, starting with the specific Physical Property parameters, as well as Shrinkage Weft and Warp, Pressure, Elastic, and so on, all the way to the final simulation.
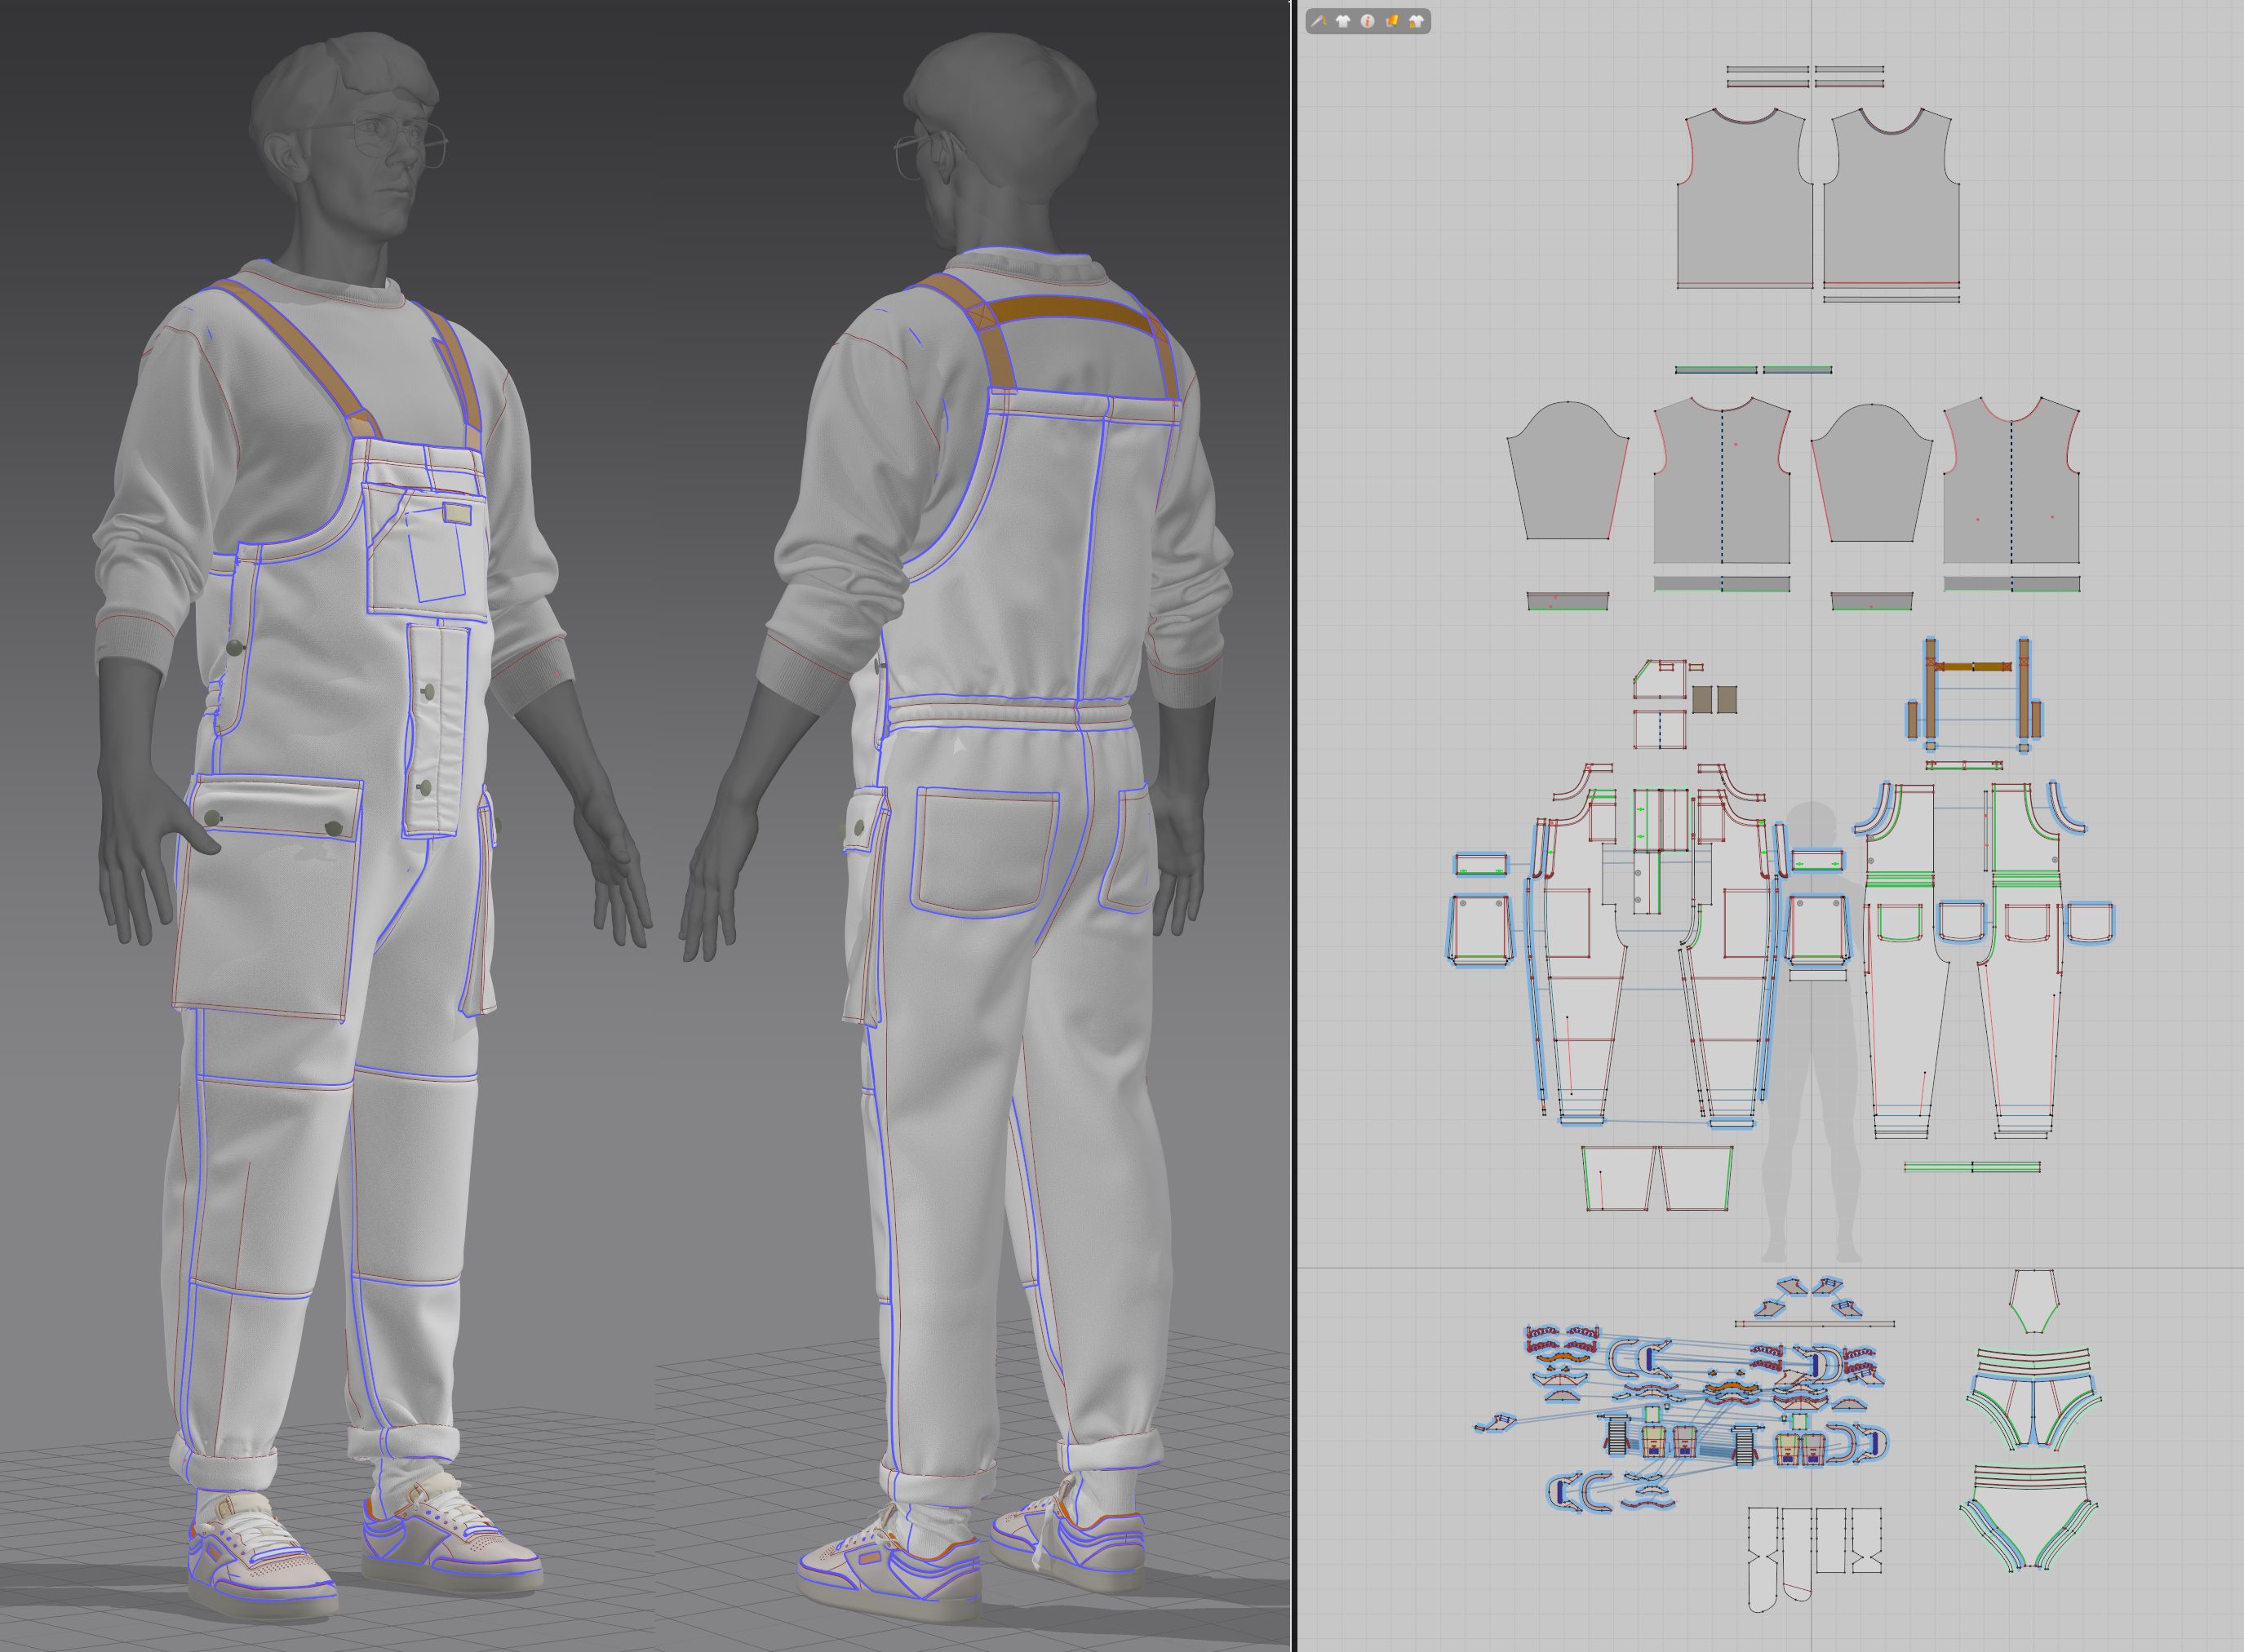
Can you give us a quick overview of the different tools used in your pipeline?
In my pipeline, I use Marvelous Designer to create the main clothing placeholder. Then I export it to Maya for additional adjustments and organizing the retopology for further work with clean topology in ZBrush, where I work on the high-poly model. Then I decimate this high-poly as an extra version to comfortably do the retopology in TopoGun or Blender. After that, I go back to Maya, where I work with the final low-poly, set up the main material, adjust Hard and Soft Edges, and do the layout. After baking in Marmoset Toolbag, I work on the clothing texture in Substance Painter. The Misfit Stranger model was fully rendered in Blender Cycles.
Which part of the creation process did you enjoy the most, and which part was the most challenging?
The part I enjoyed the most was working on the jumpsuit. I really liked creating this kind of clothing because it’s a big, flat form, and I enjoyed handling a unique shape and the final look of this asset.
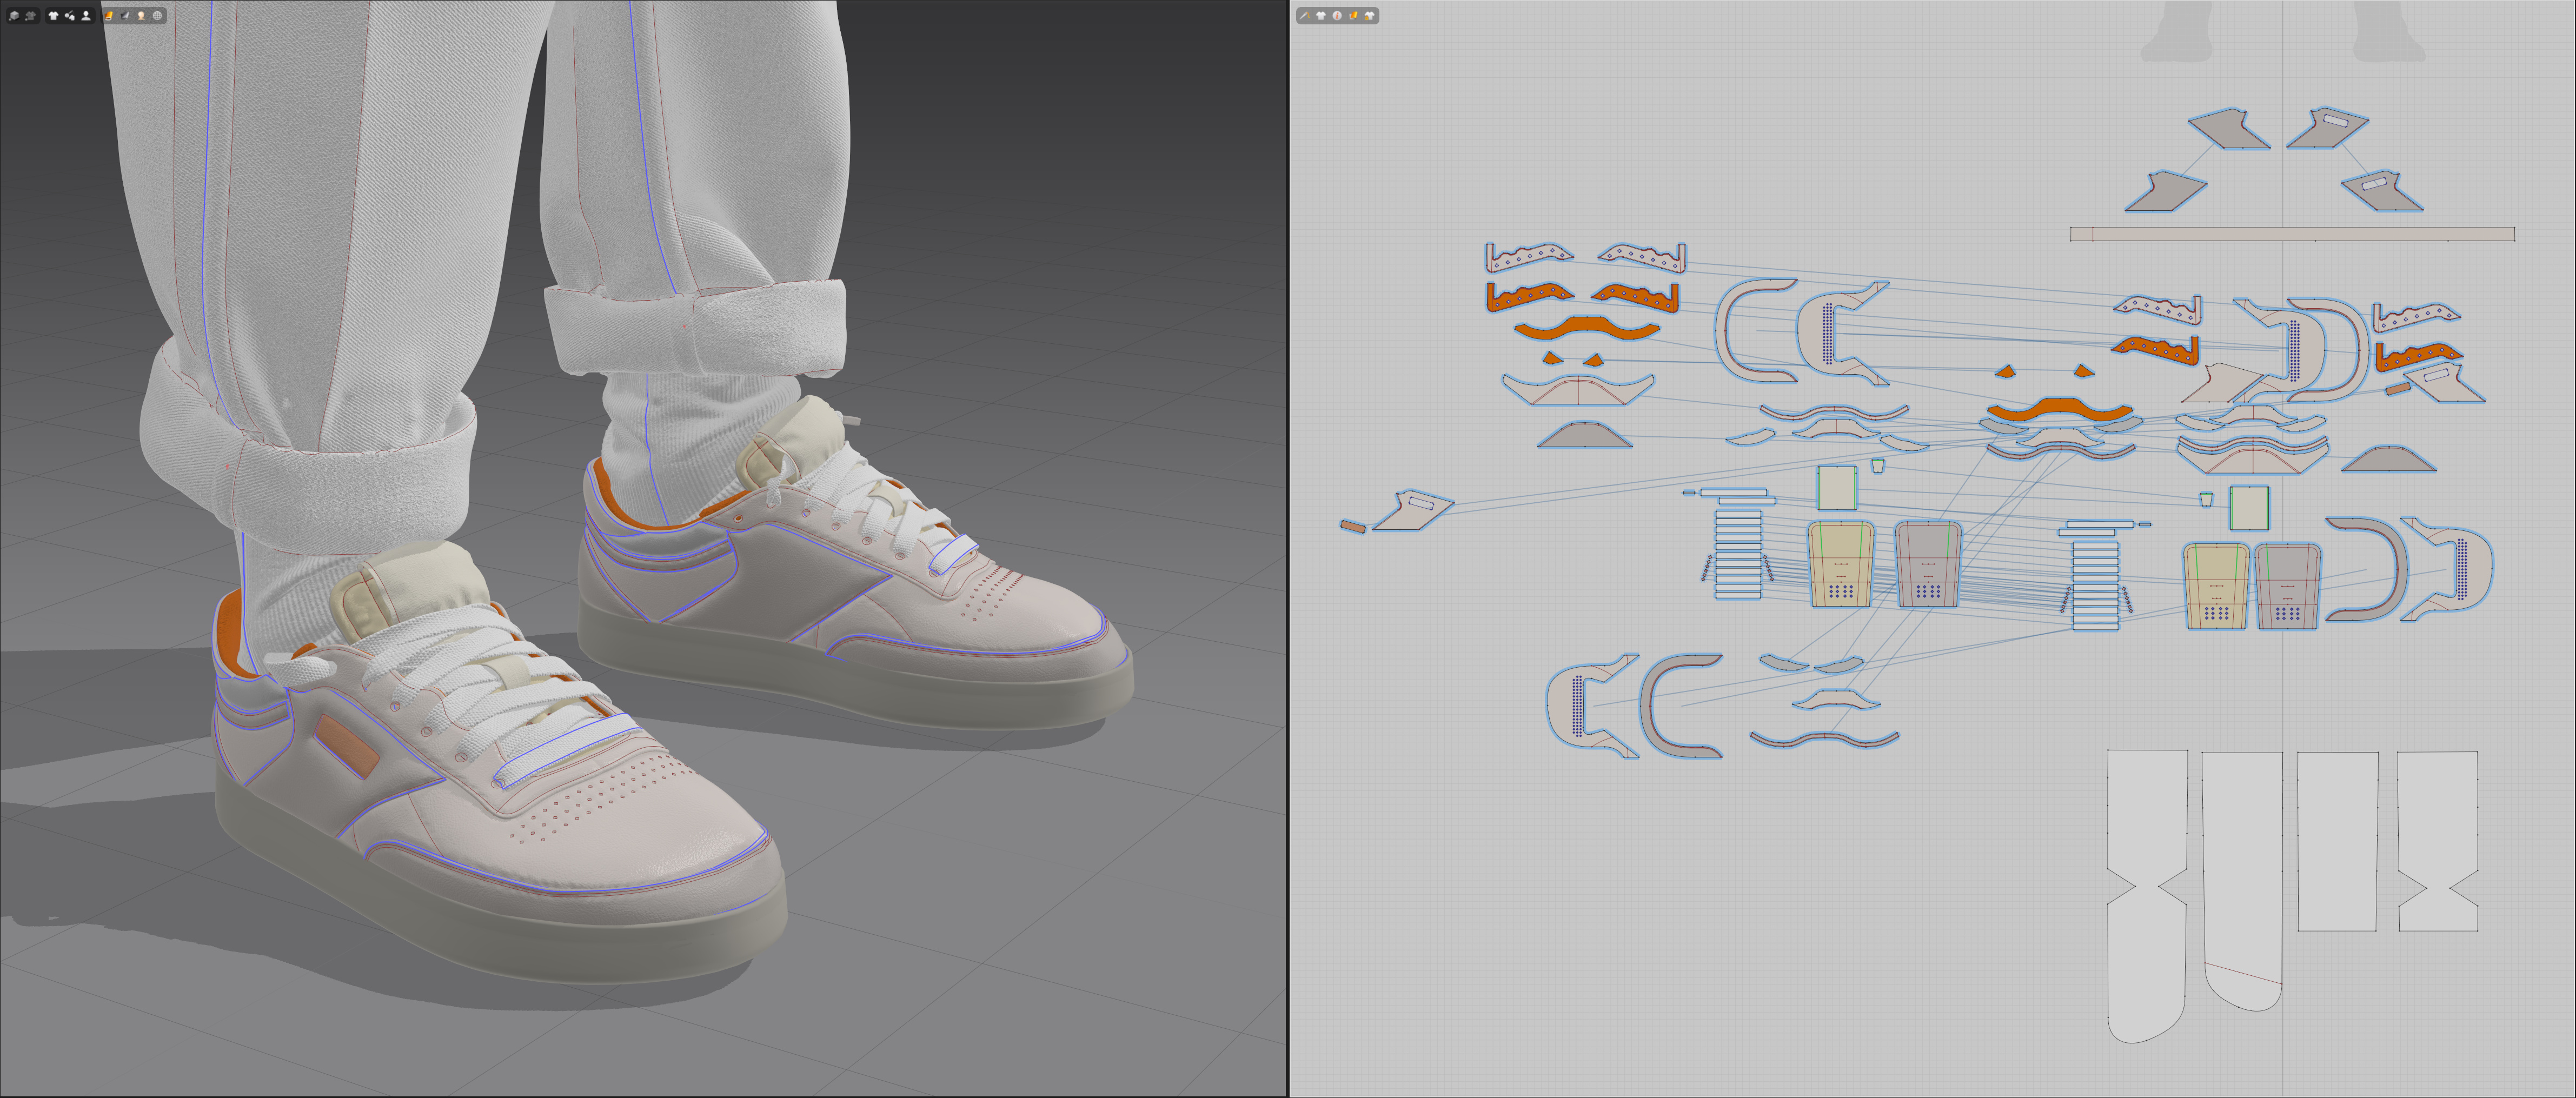
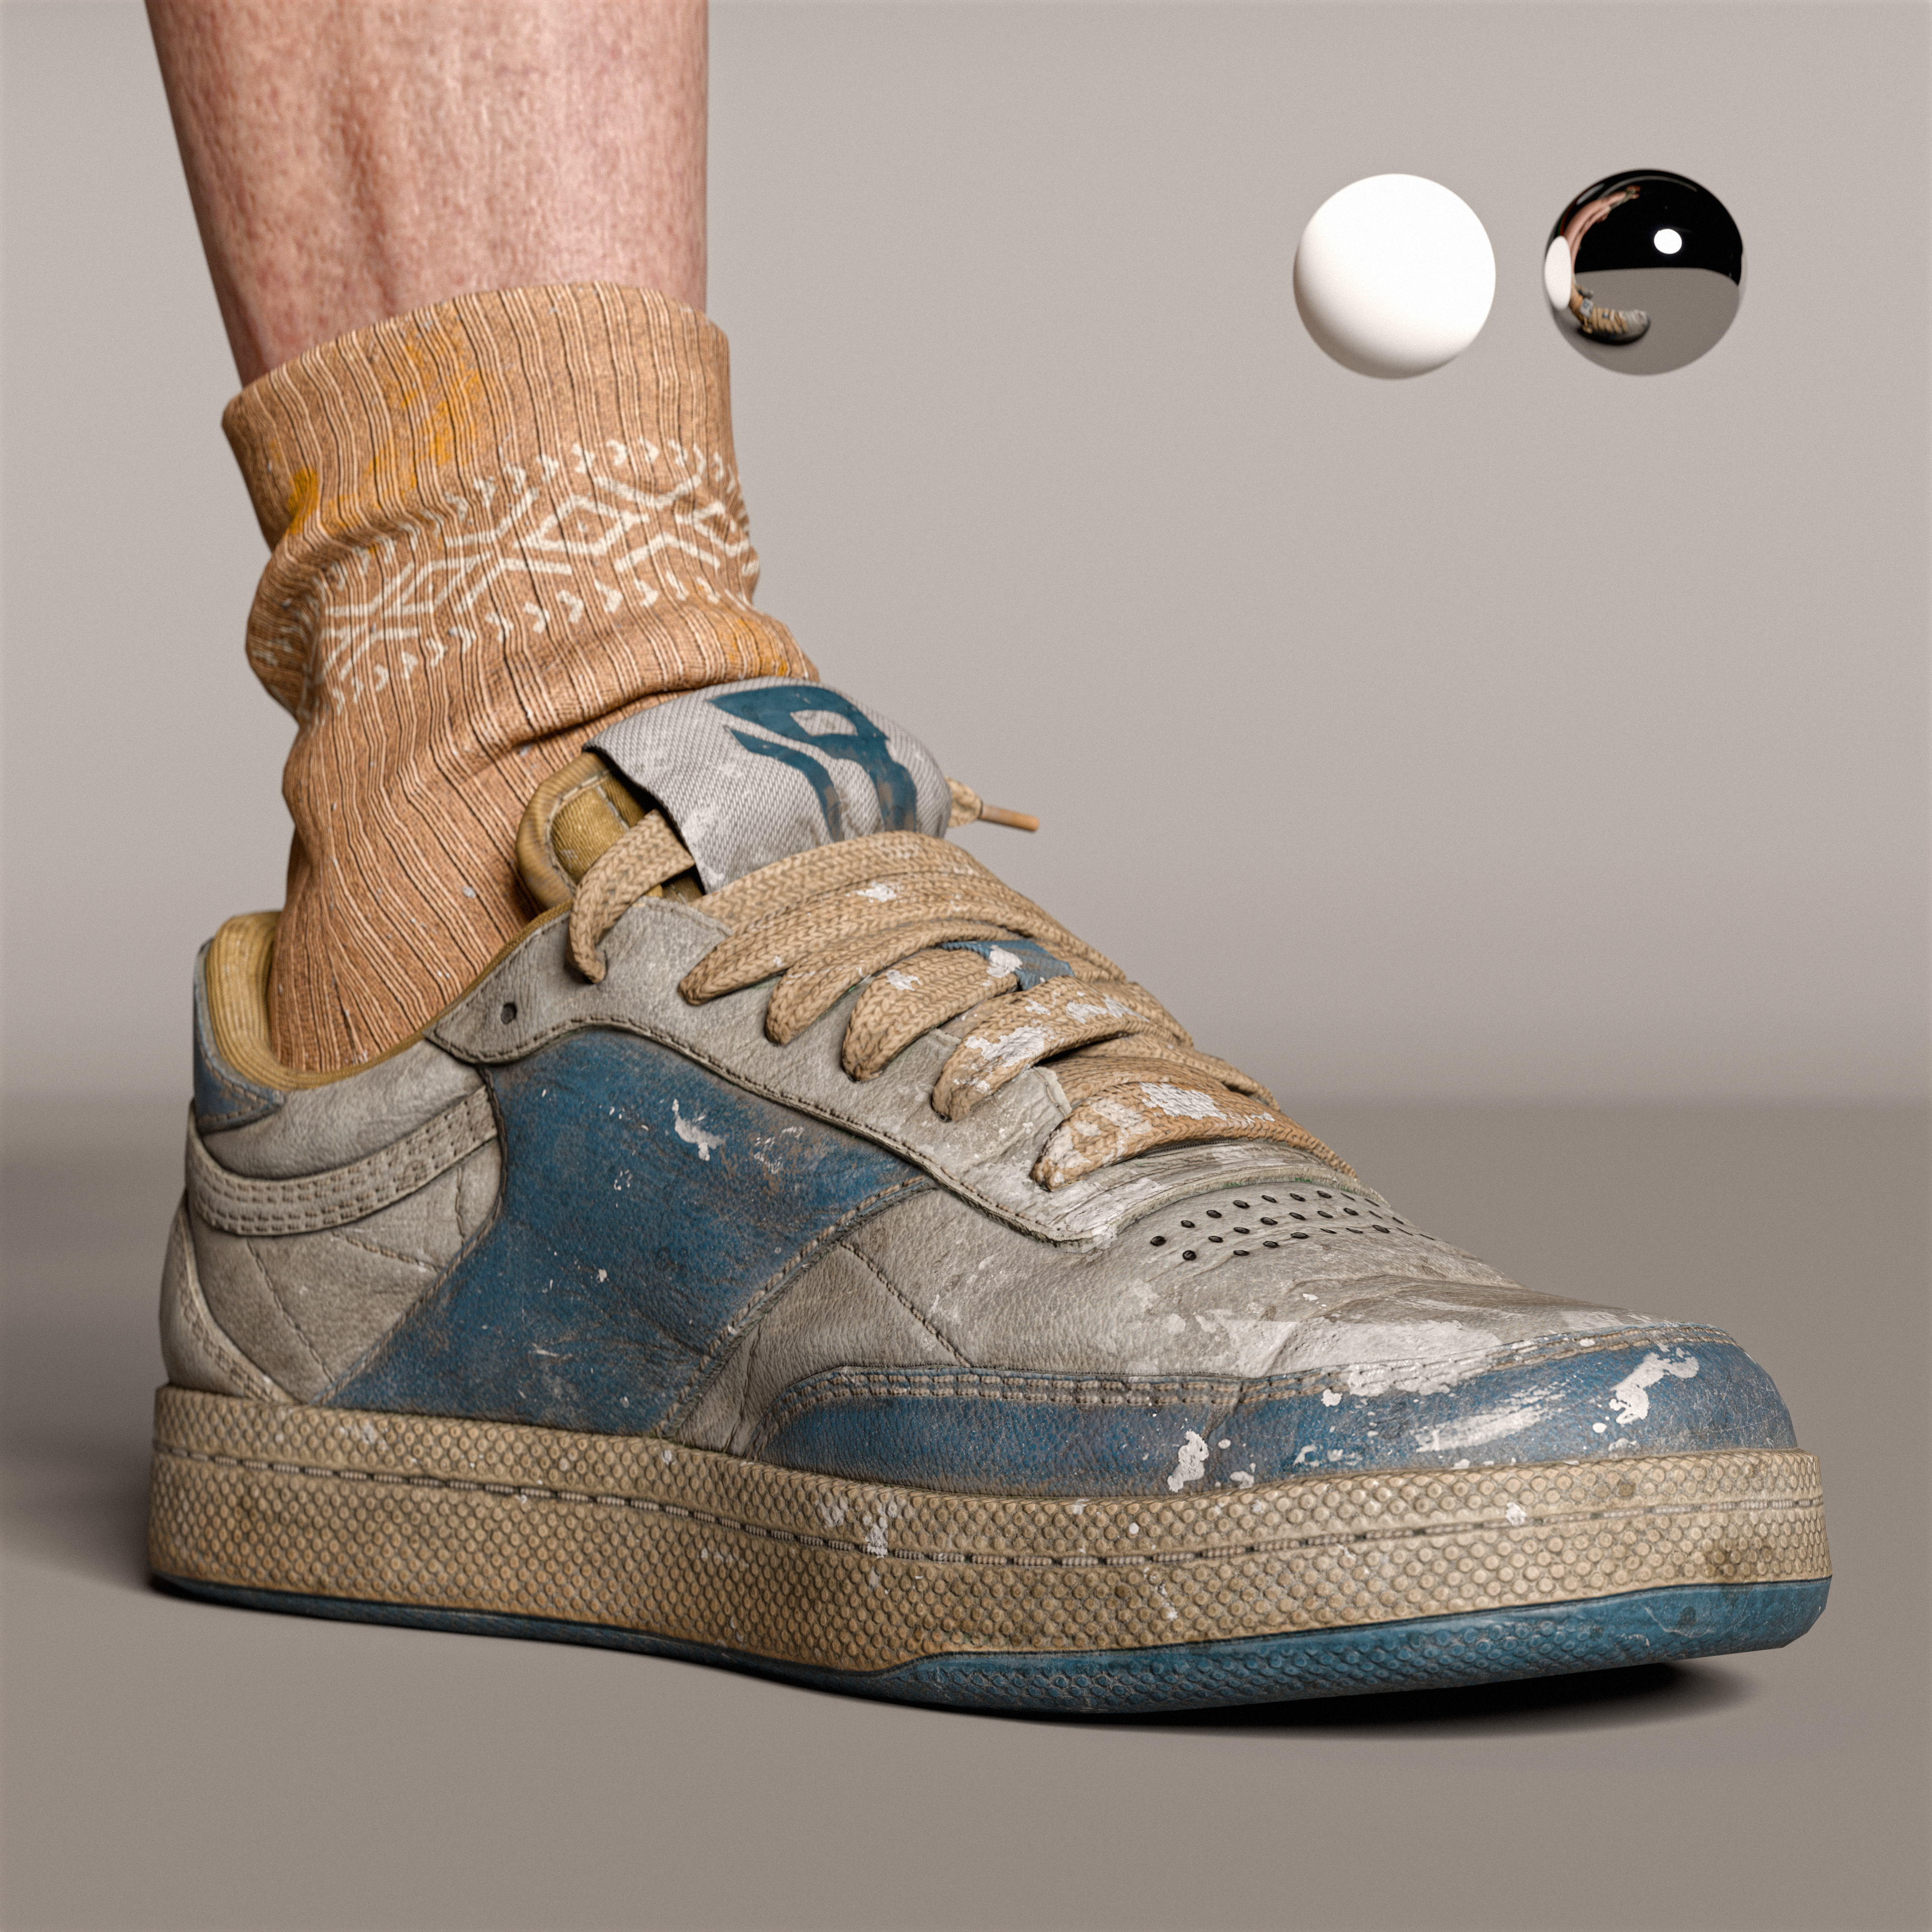
The most challenging part in Marvelous Designer was working on the sneakers. That was a crazy idea. At first, I tried to plan everything in theory, looking for a UV pattern on the internet and trying to cut all the pieces in Marvelous Designer. But in the end, I totally messed up trying to figure out how to connect all the pieces together. So I decided to use a different approach: I just used one shape, solved the shape of the sole, and cut what I needed there, following the reference. This made the workflow much easier and allowed me to finish the shoes in Marvelous Designer.
For artists who are comfortable with Marvelous Designer but want to push their work further, what would you recommend they explore—either technically or creatively?
In my opinion, it’s important to study the basic principles of how sewing patterns are made. It’s especially important to pay attention to curved seams on patterns; these are the areas where the sleeve joins the body or the pant leg joins the waistband. If these curves are done correctly, the clothing fits better on the avatar.
Different sizes like S, M, L, XL, XXL are not always about proportional scaling of the garment, but more often about widening the main parts of the sweater or pants. That’s why it’s great when you know the basic sewing principles and don’t waste time looking for a specific UV model on the internet. You can just cut it right on the base model of the avatar, and this approach speeds you up even more, giving you almost unlimited freedom. This way, you can work on historical clothing or modern pieces, modifying them as you see them in your references.
How would you describe your overall experience using Marvelous Designer?
Overall, I enjoy working in Marvelous Designer, even though it took me quite a while to get comfortable with the program.
이 작업은 Blender, Marmoset, Maya, Substance, ZBrush, TopoGun 등의 기술로 제작되었습니다.
Marvelous Designer로 이와 같은 3D 의상·캐릭터 작업을 직접 만들어볼 수 있습니다.