Recreating a Victorian Opulence - Marita, MDCC Vol.3 3rd Place Winner
Marita, a fashion student from Germany describes her work and challenges in the Marvelous Designer Creator’s Contest 2025 Vol.3 "Fantasy Archives," achieving the 3rd place award throughout the creative journey.
By applying classic draping methodologies, balanced with the experimental freedom of digital simulation: Marita explores the intersection of romantic elegance and complex digital layering within the creation of her award winning work.
 FANTASY-ARCHIVES_CONTEST_LOOK-01
Artist Introduction: please tell us about yourself.
My Name is Marita, I am a certified Fashion Designer and currently pursuing studies in Fashion Management. I have been using CLO3D since fashion school and continued to learn to design with Marvelous Designer.
With my participation in the Creator’s contest 2025 Vol.3, I wanted to create a design that combines elegance and movement while also experimenting with fabrics. Through the contest, I learned a lot about visualizing textures, the effect of draping and also how to simulate complex layers.
We’d like to hear more about the art direction in your Creator’s contest 2025 Vol.3. What was the visual style you were aiming for?

My goal was to create a classic, elegant look with a modern twist, featuring dramatic details such as ruffles, layering, and flowing transparency. The layered textures and flowing details evoke the romantic opulence of Victorian and Edwardian fashion, while reinterpreting it in a contemporary and sculptural way.
I wanted to create a balance between heavy, structured fabric and light, almost floating material. I deliberately kept the color palette muted so that the textures and draping would take center stage.
I also wanted the movement of the fabric to emphasize the character's free spirit and playful personality.

Would you be able to give us a quick overview of the different tools you use in your pipeline with a focus on Marvelous Designer?
Have you encountered any challenges and how have you overcome them?
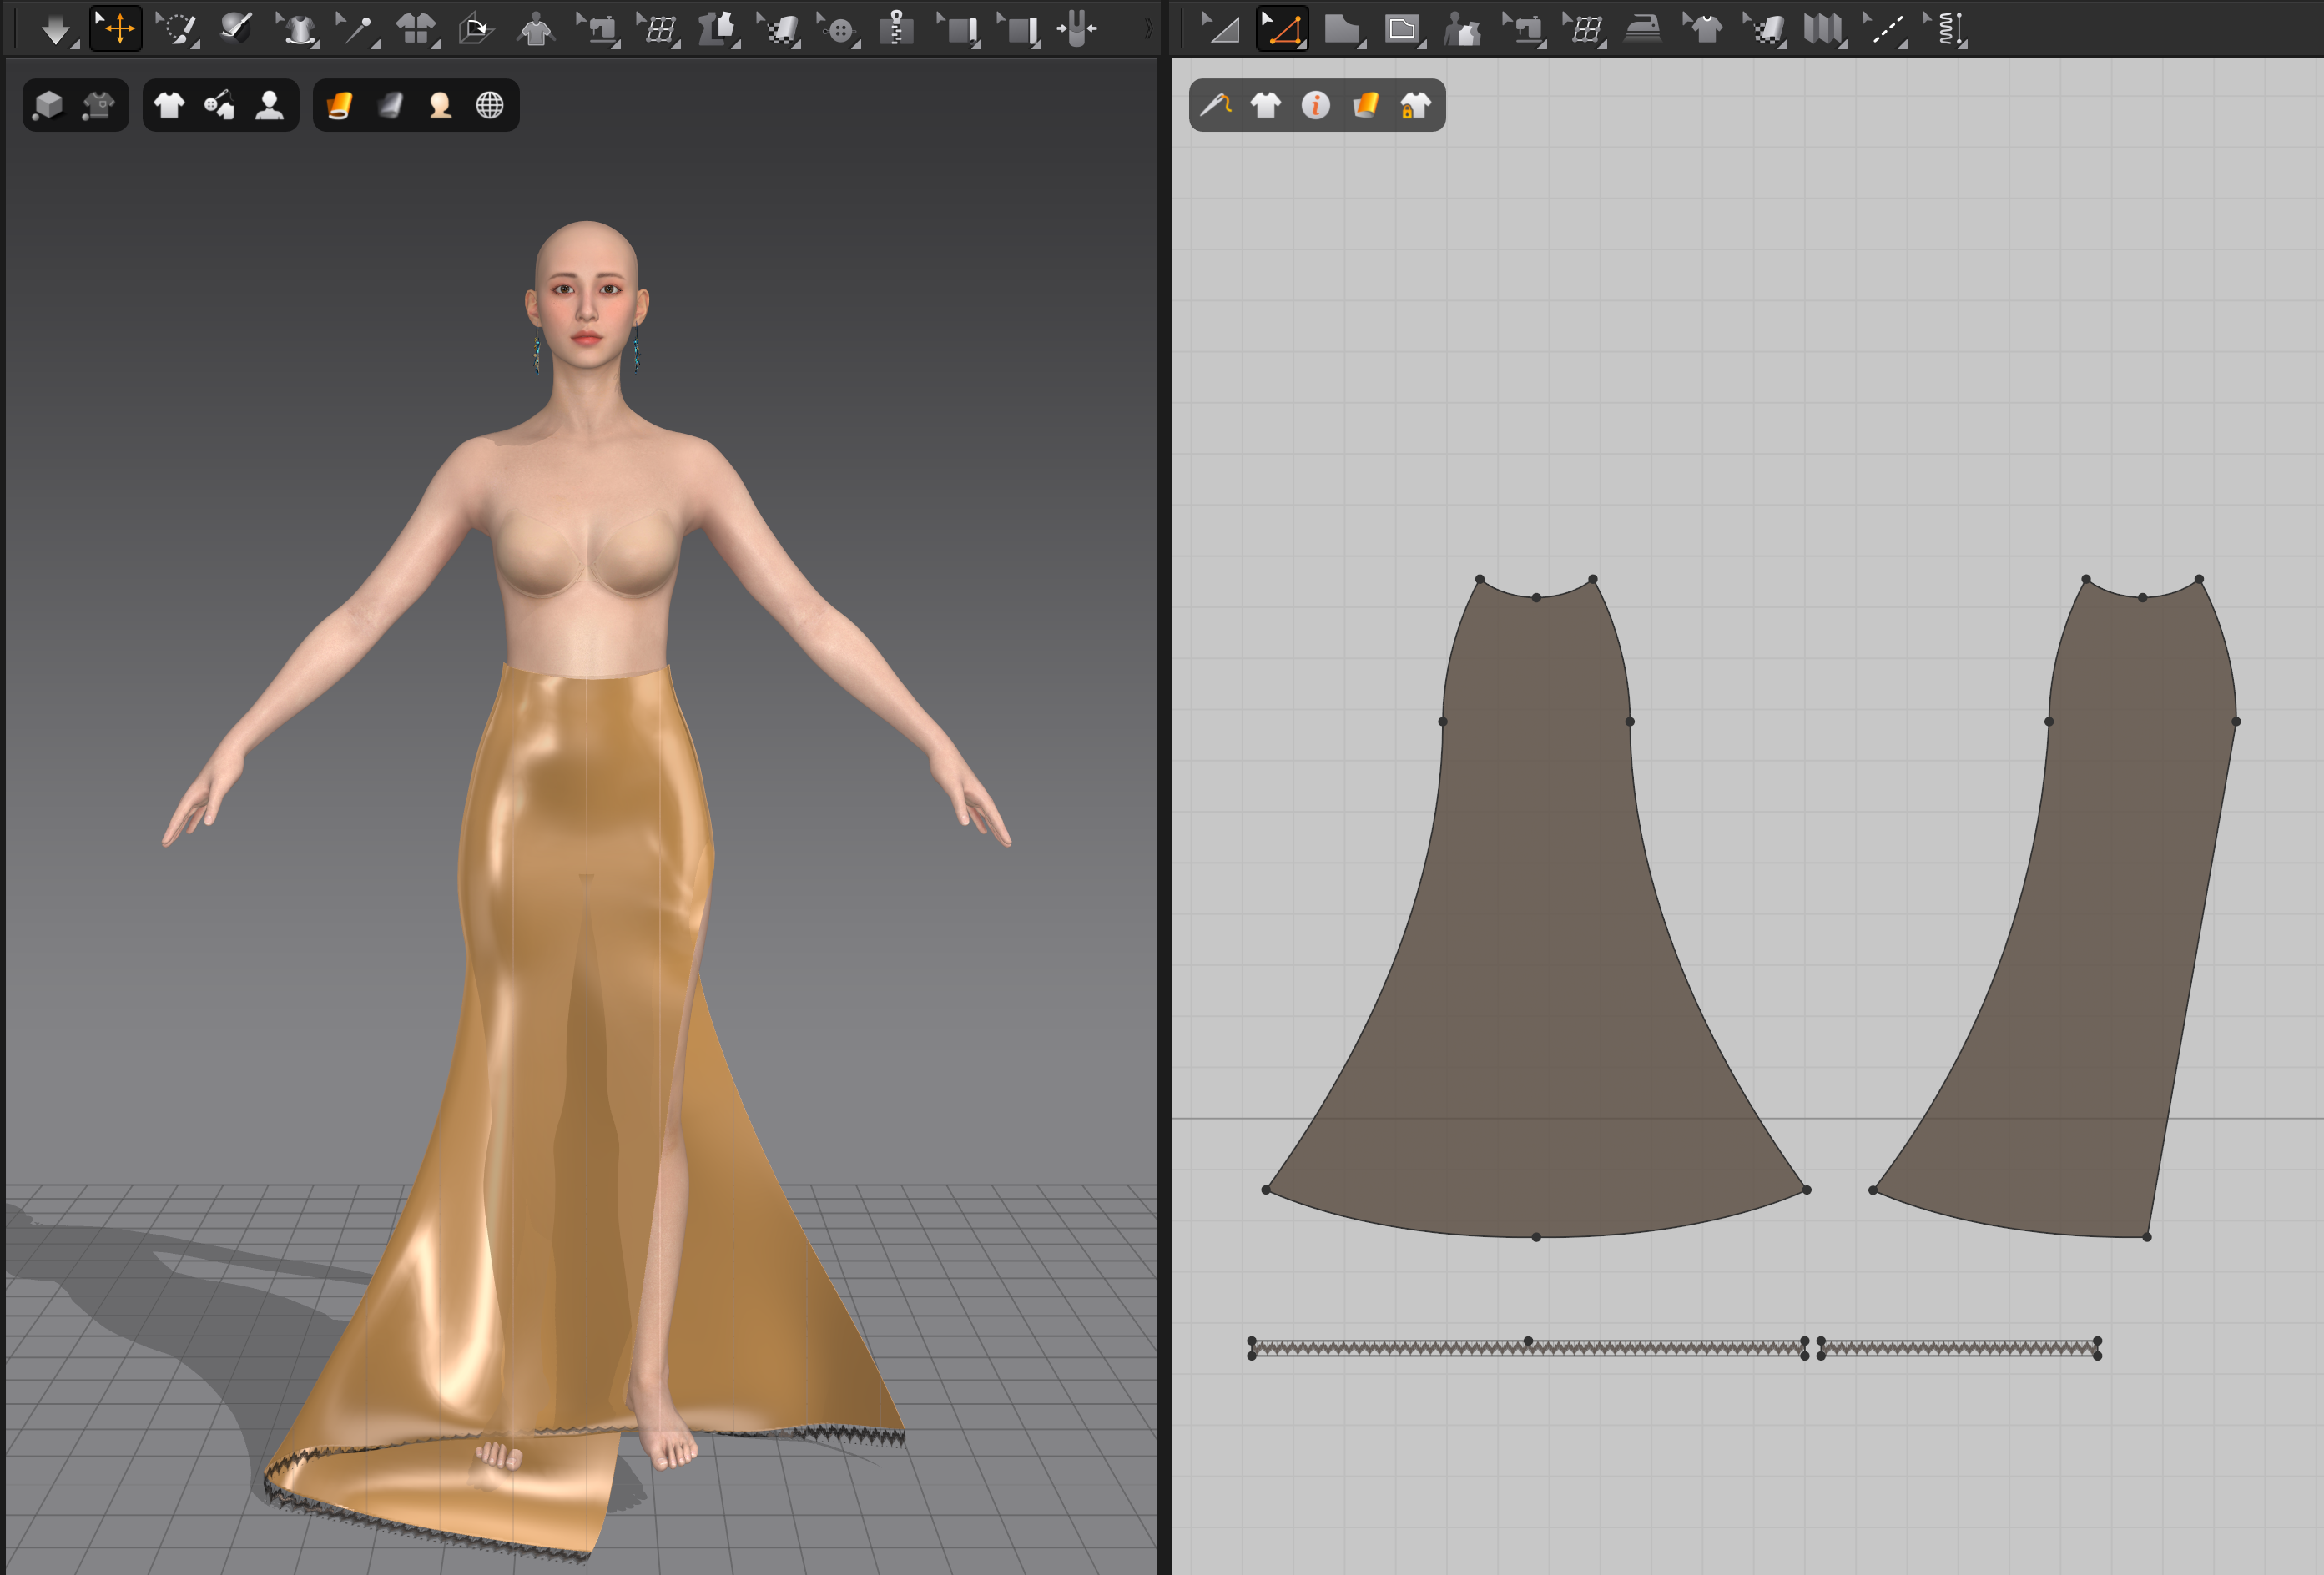
After visualizing my first ideas onto paper, I use Marvelous Designer to translate my first ideas into 3D. For looks with several pieces like here I usually start with the very bottom layer, which in that case was the floor-long lace skirt and the easiest piece to create in this look. By using the Polygon tool I could easily create the front and back pieces of the garment.
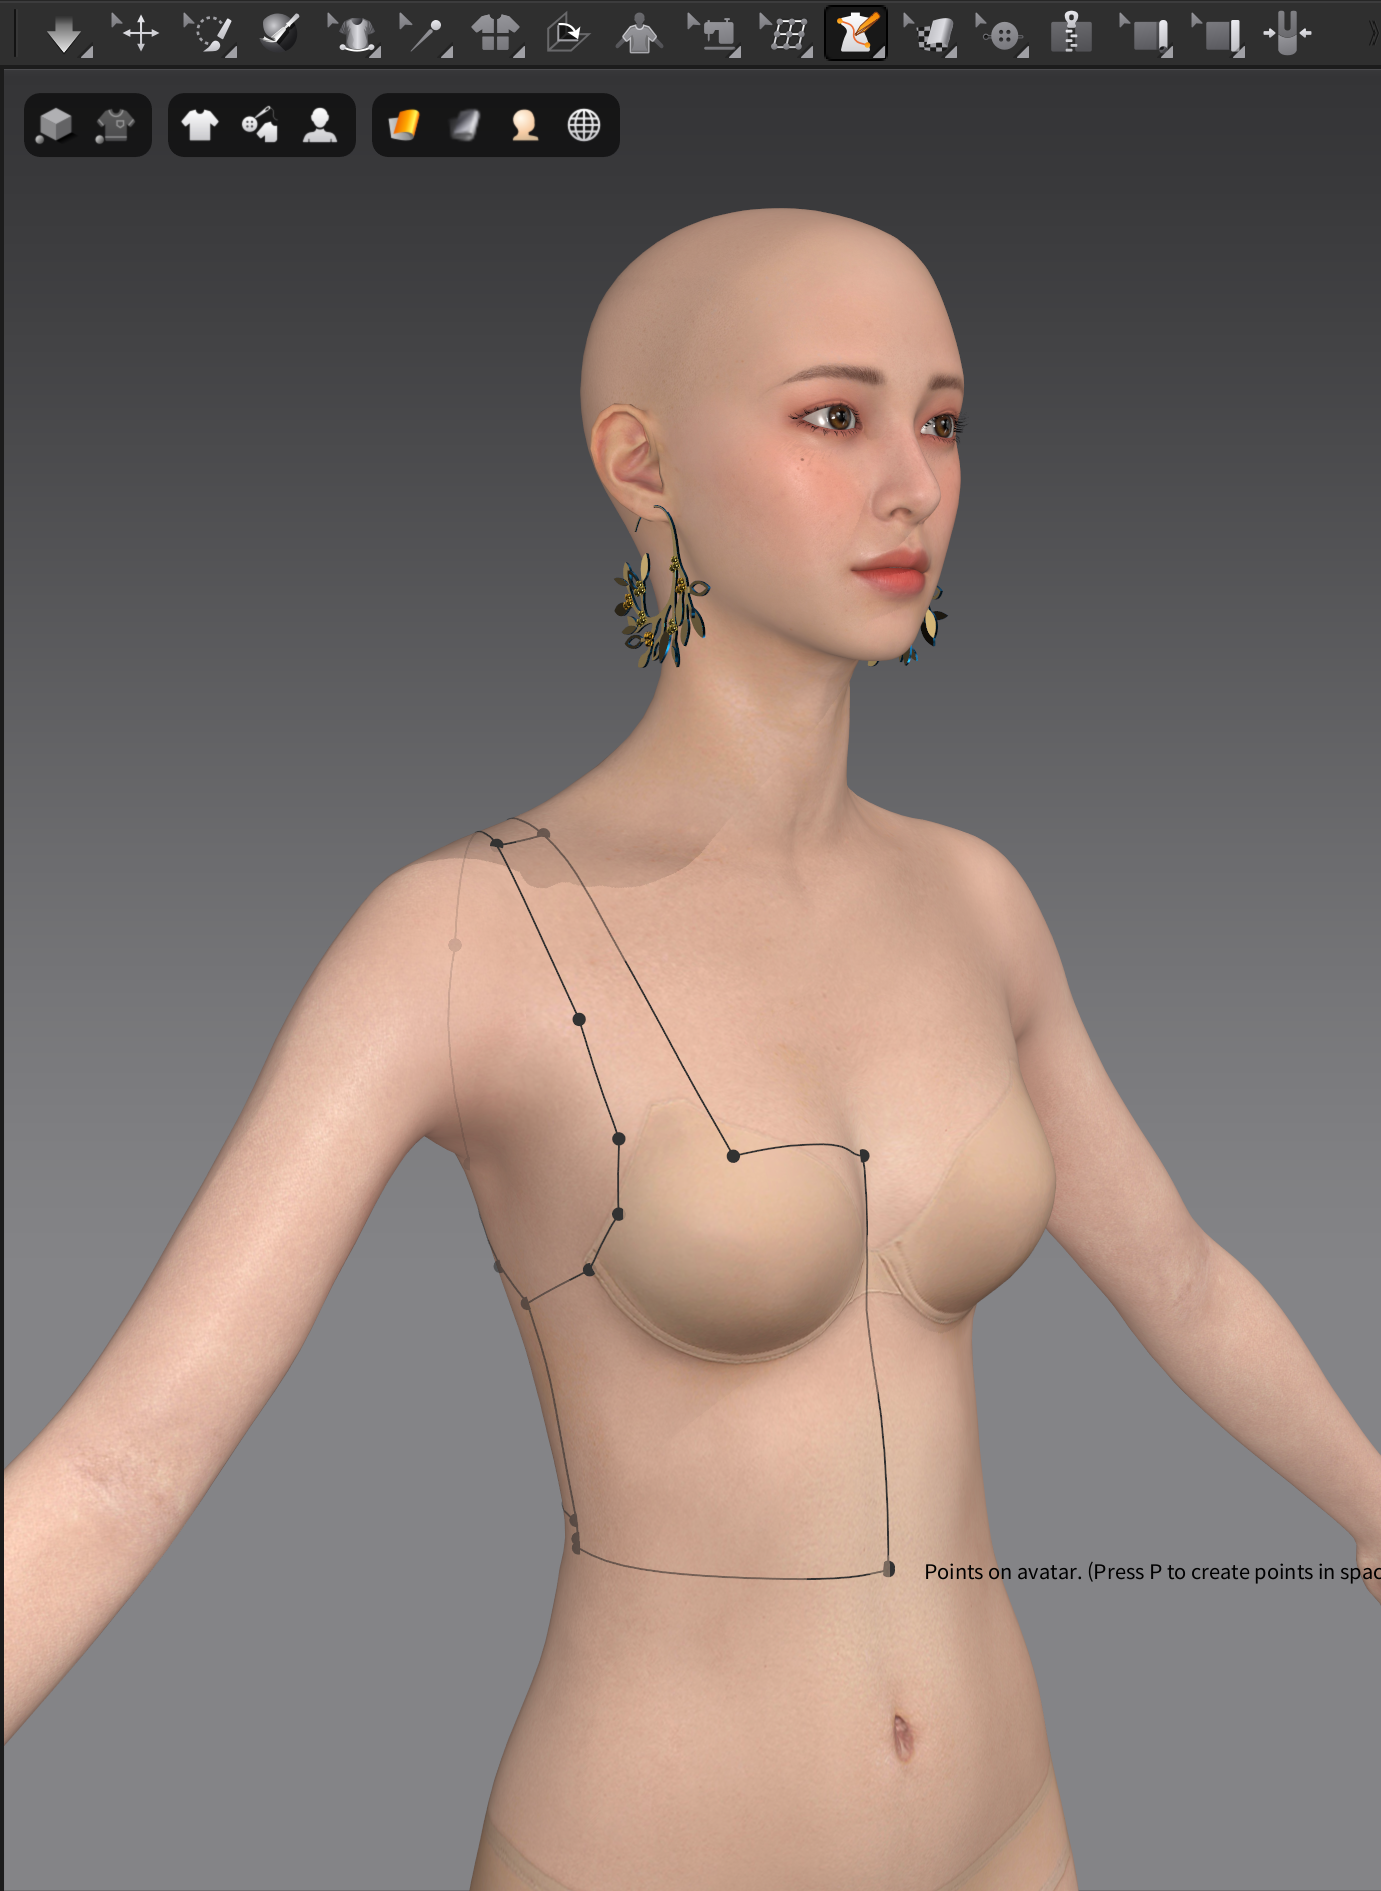
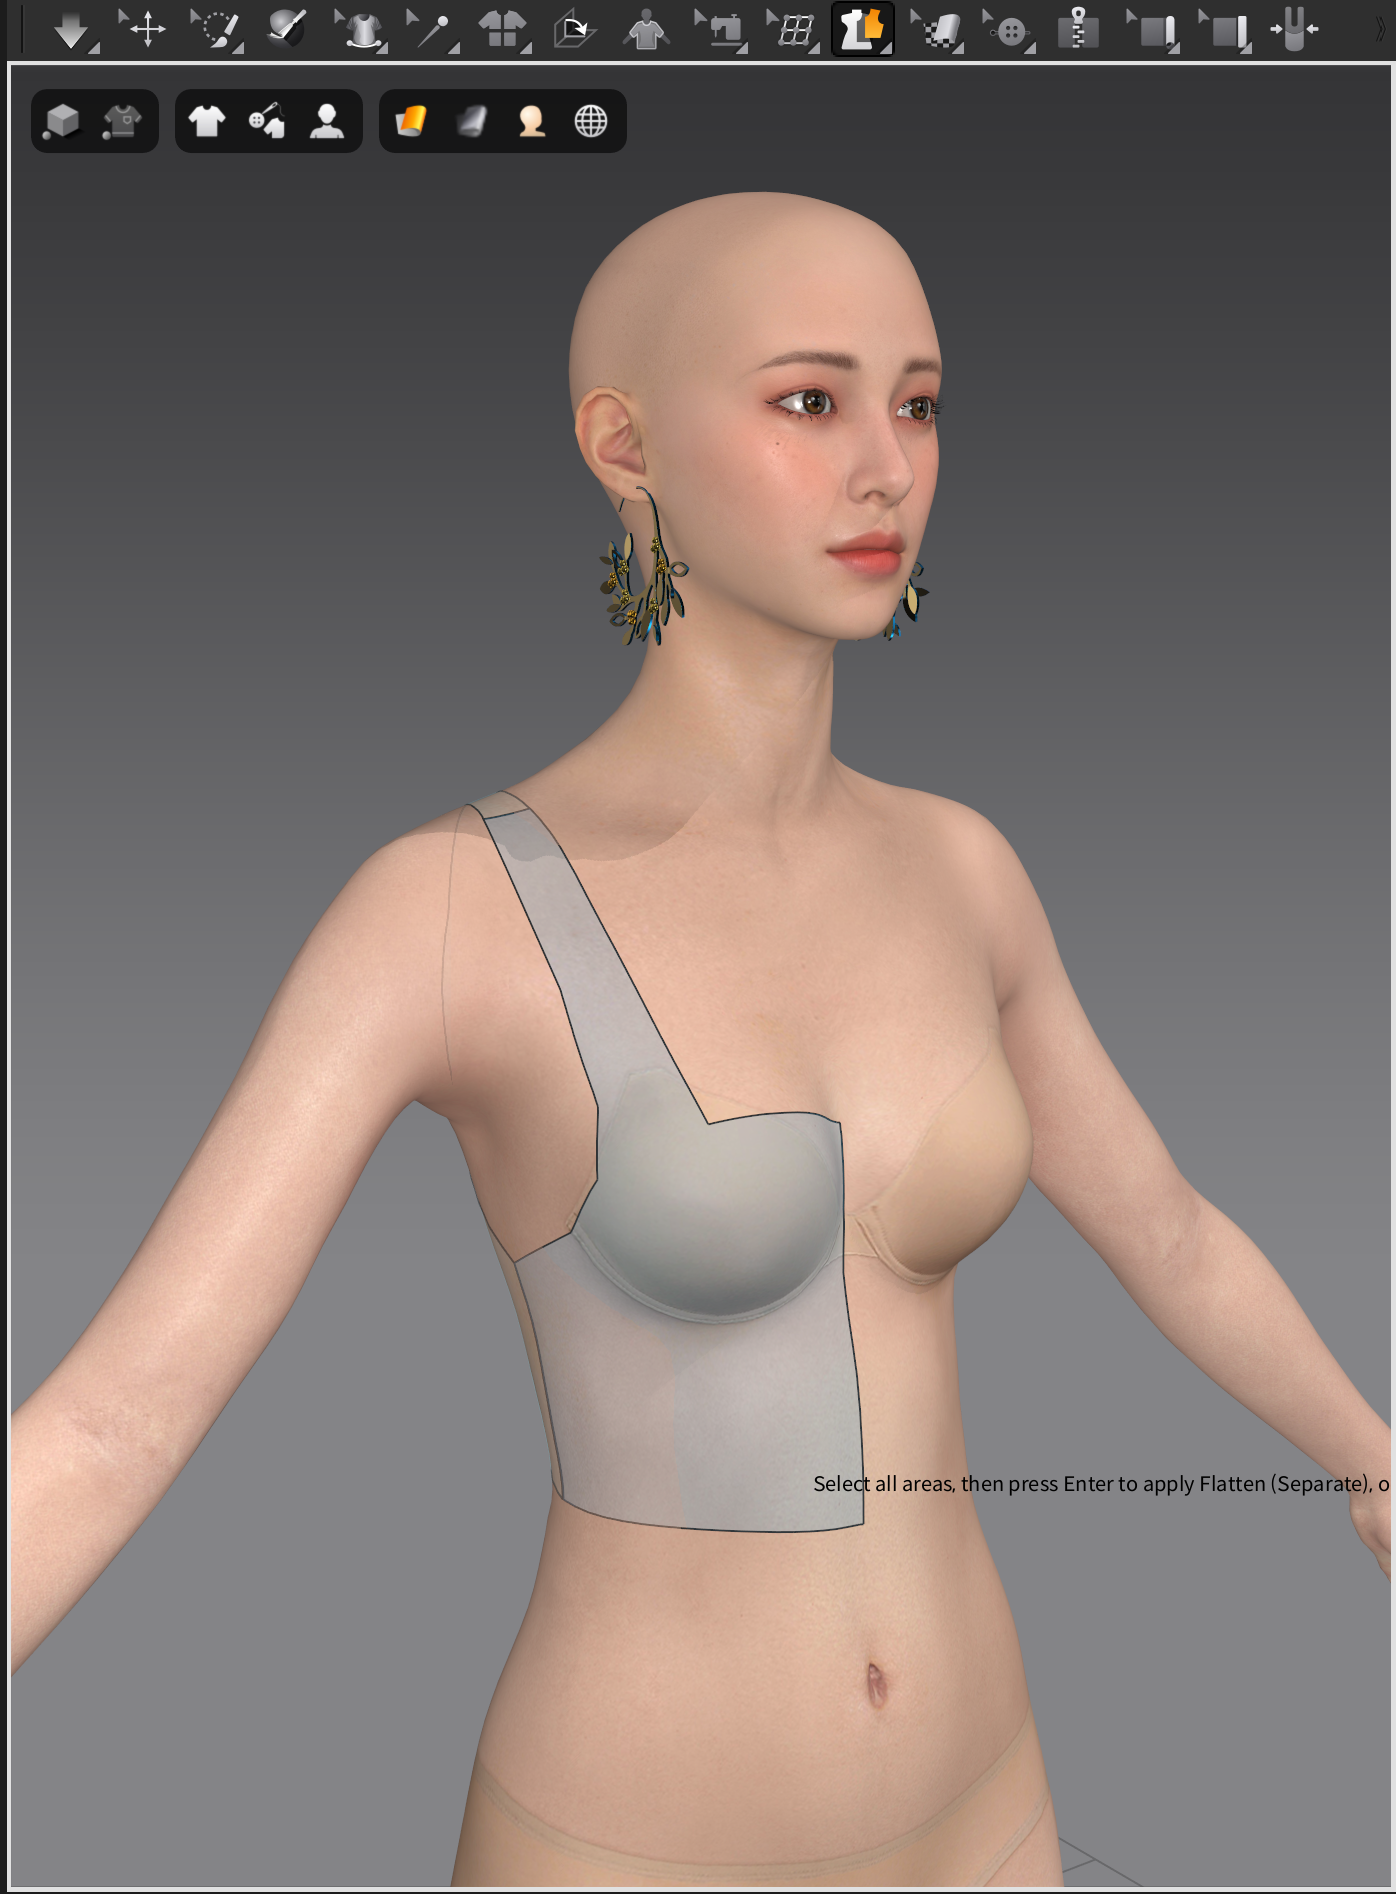
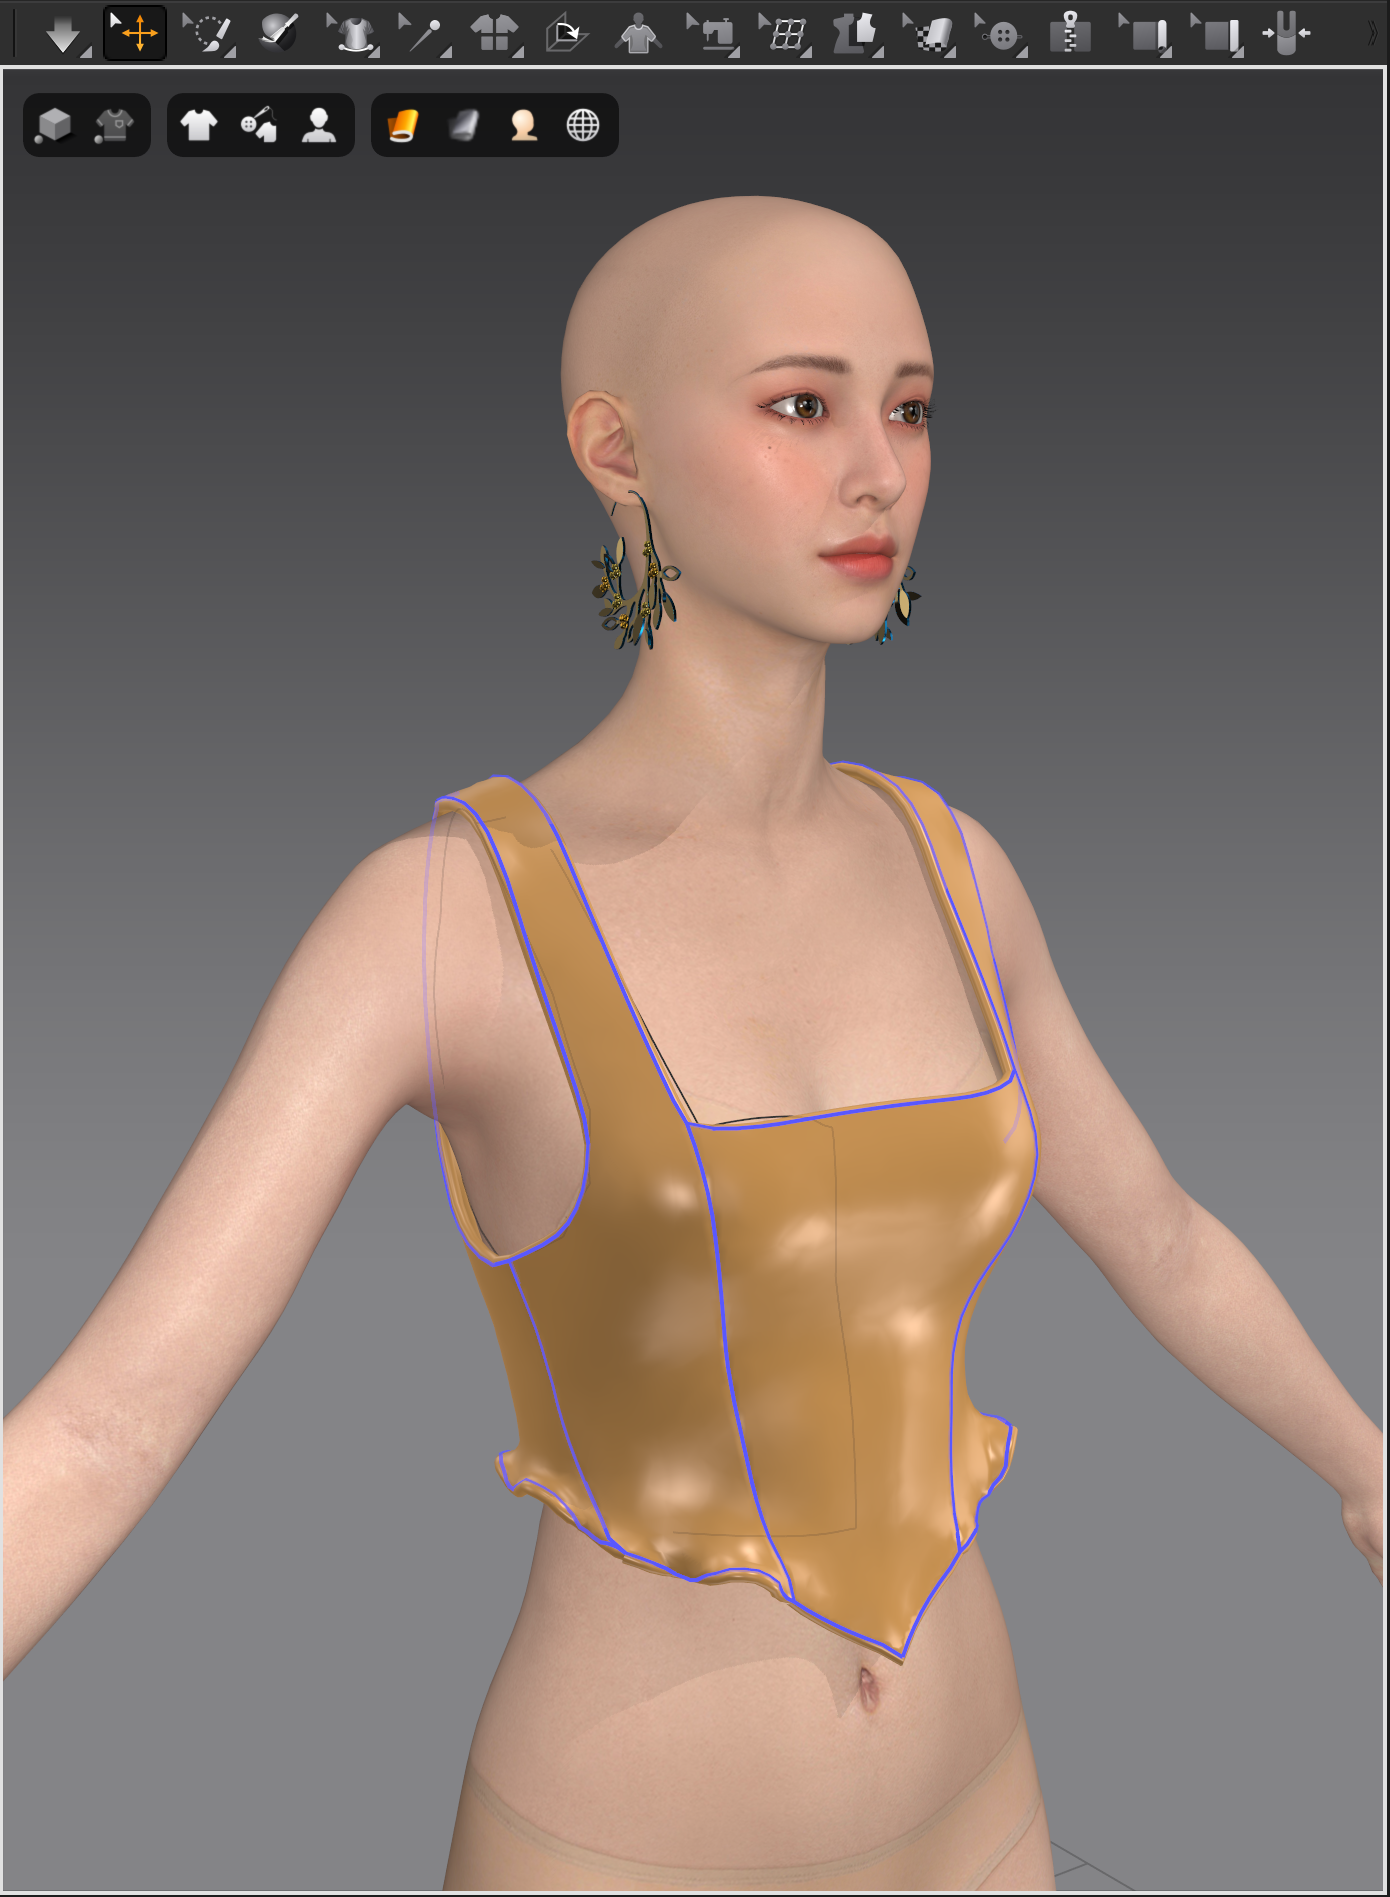
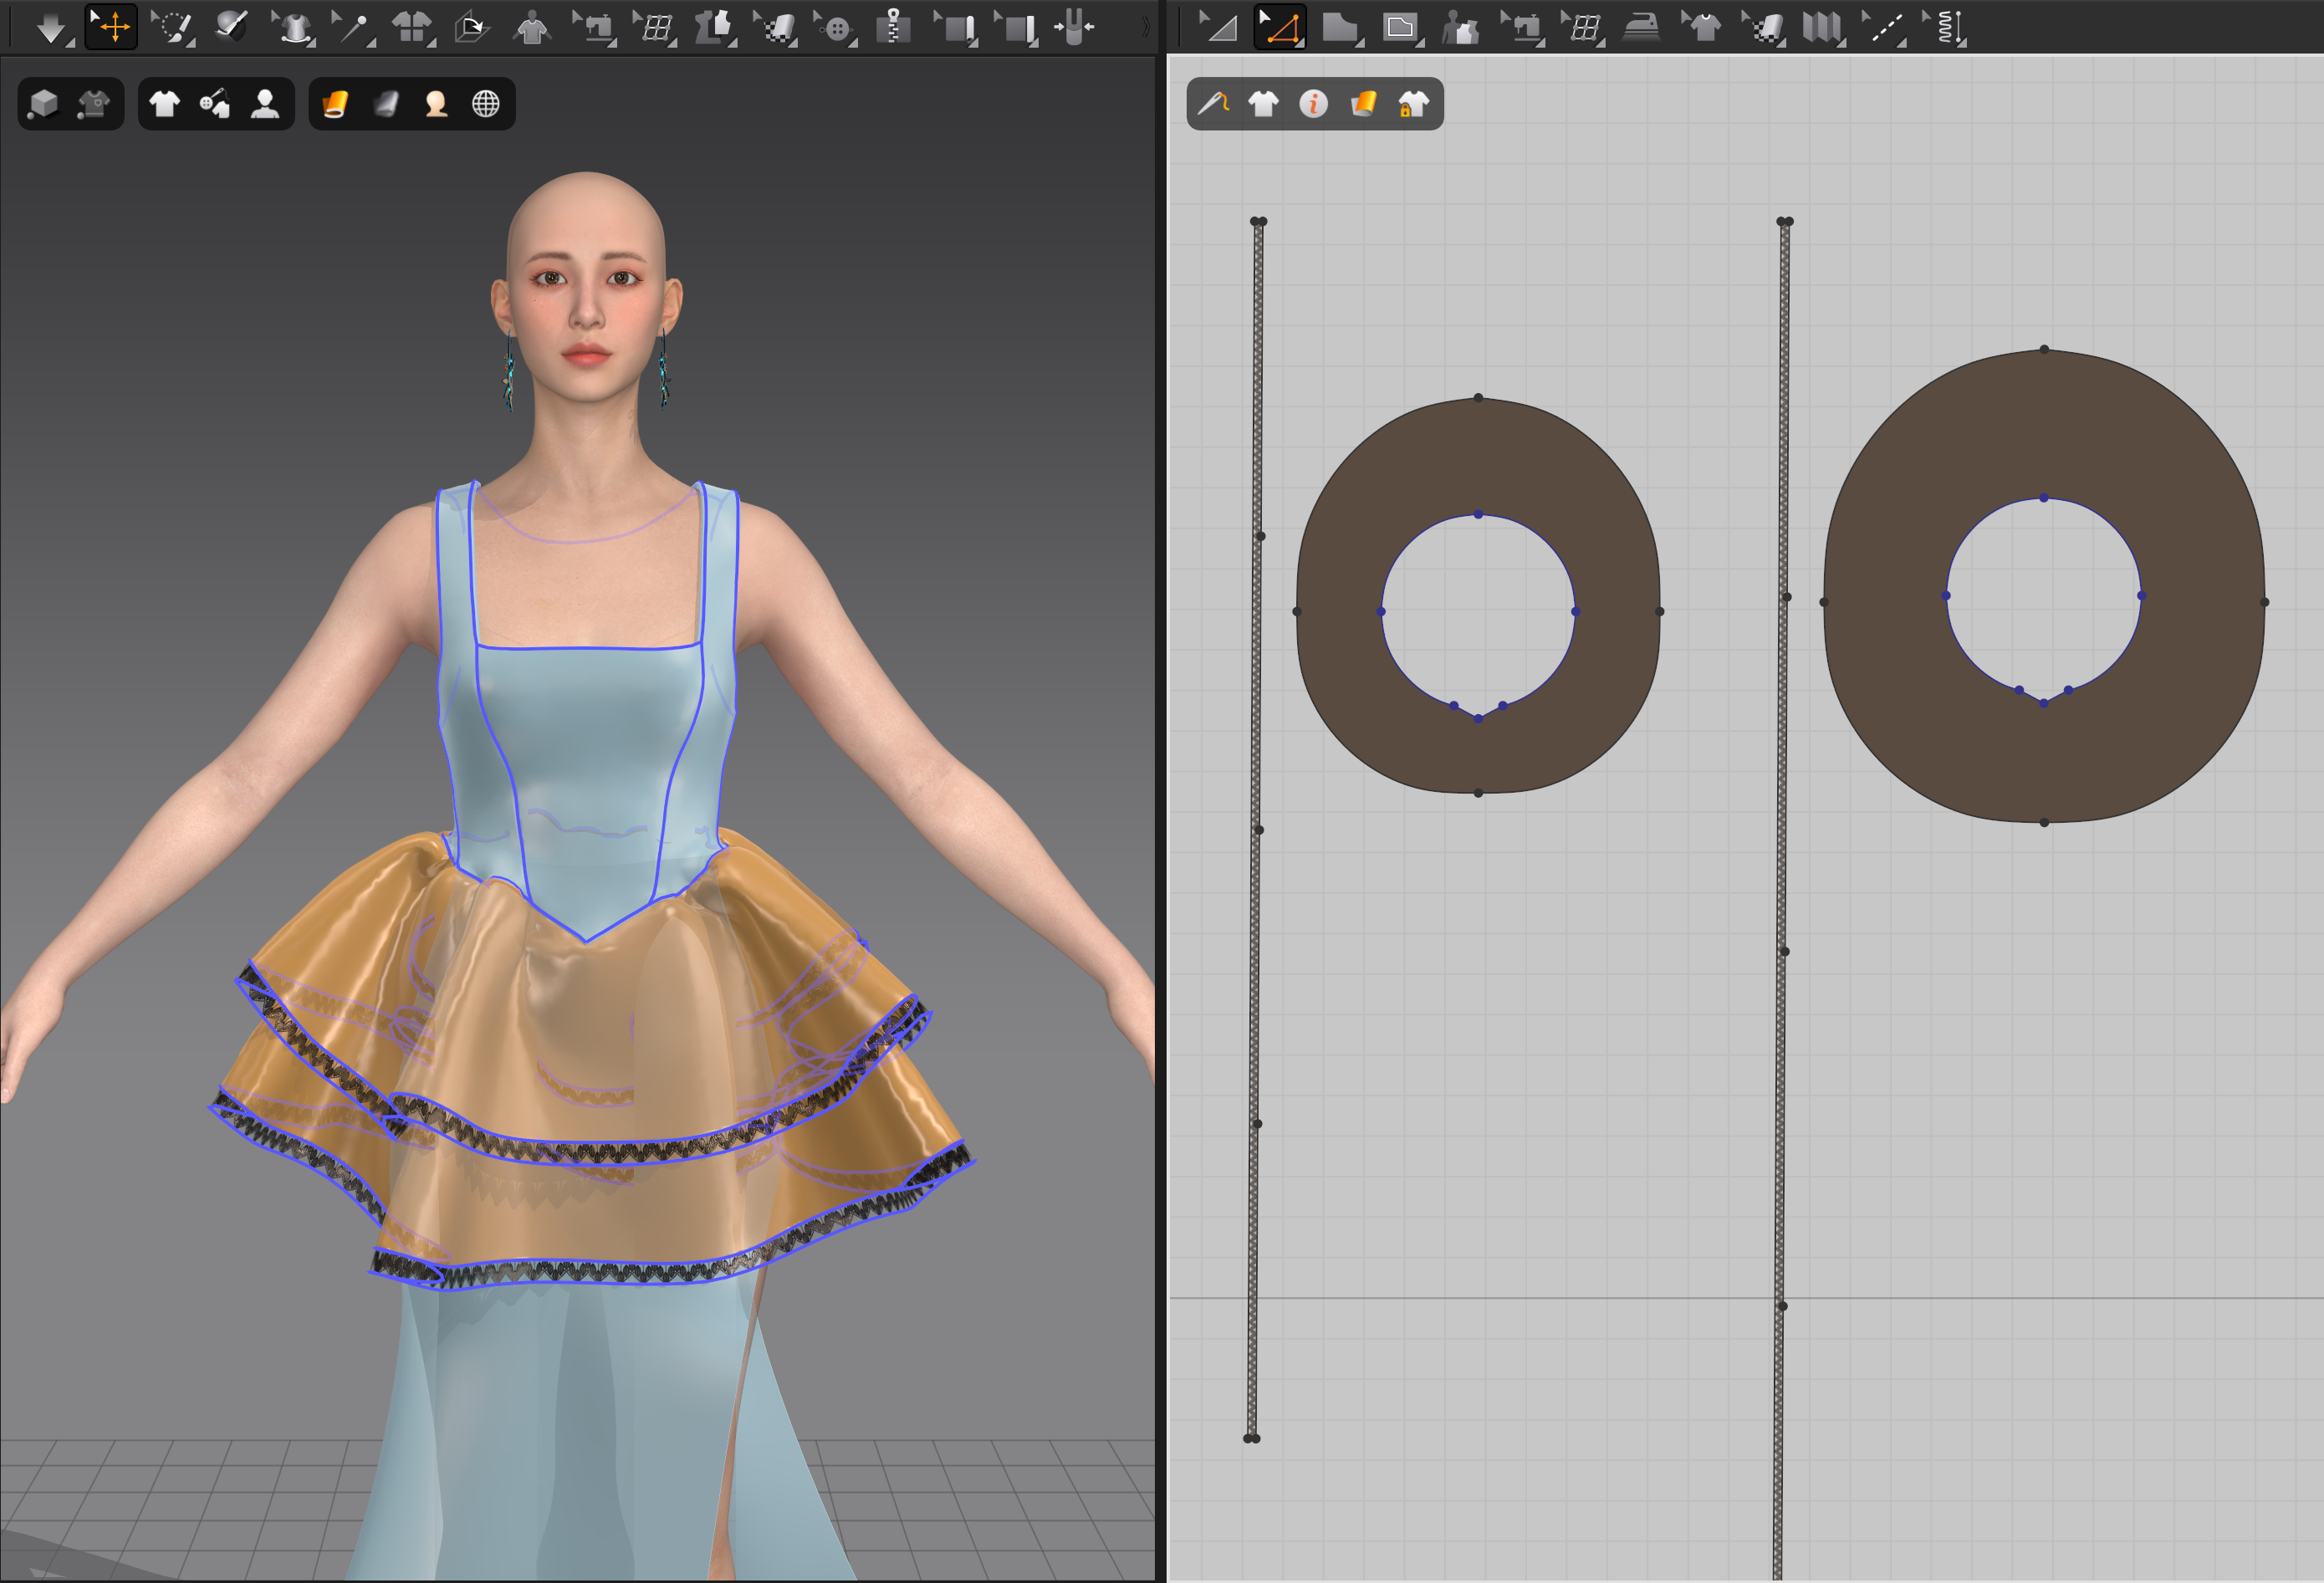
Continuing with the dress I had to use a different method for the bodice in order to make it look tailor-made. I used the 3D pen to draw on the avatar and then use the flatten tool to transfer the lines on the avatar into an actual 2D pattern. After a few adjustments the dress was only missing its skirt.
The skirt consists of two oval layers of fabric in different sizes. For this I used the ellipse tool to create the outlines and the internal ellipse tool to create the hole where the bodice is later being attached.
For the lace details at the hem I simply created long panels of fabric to sew them around the hem.
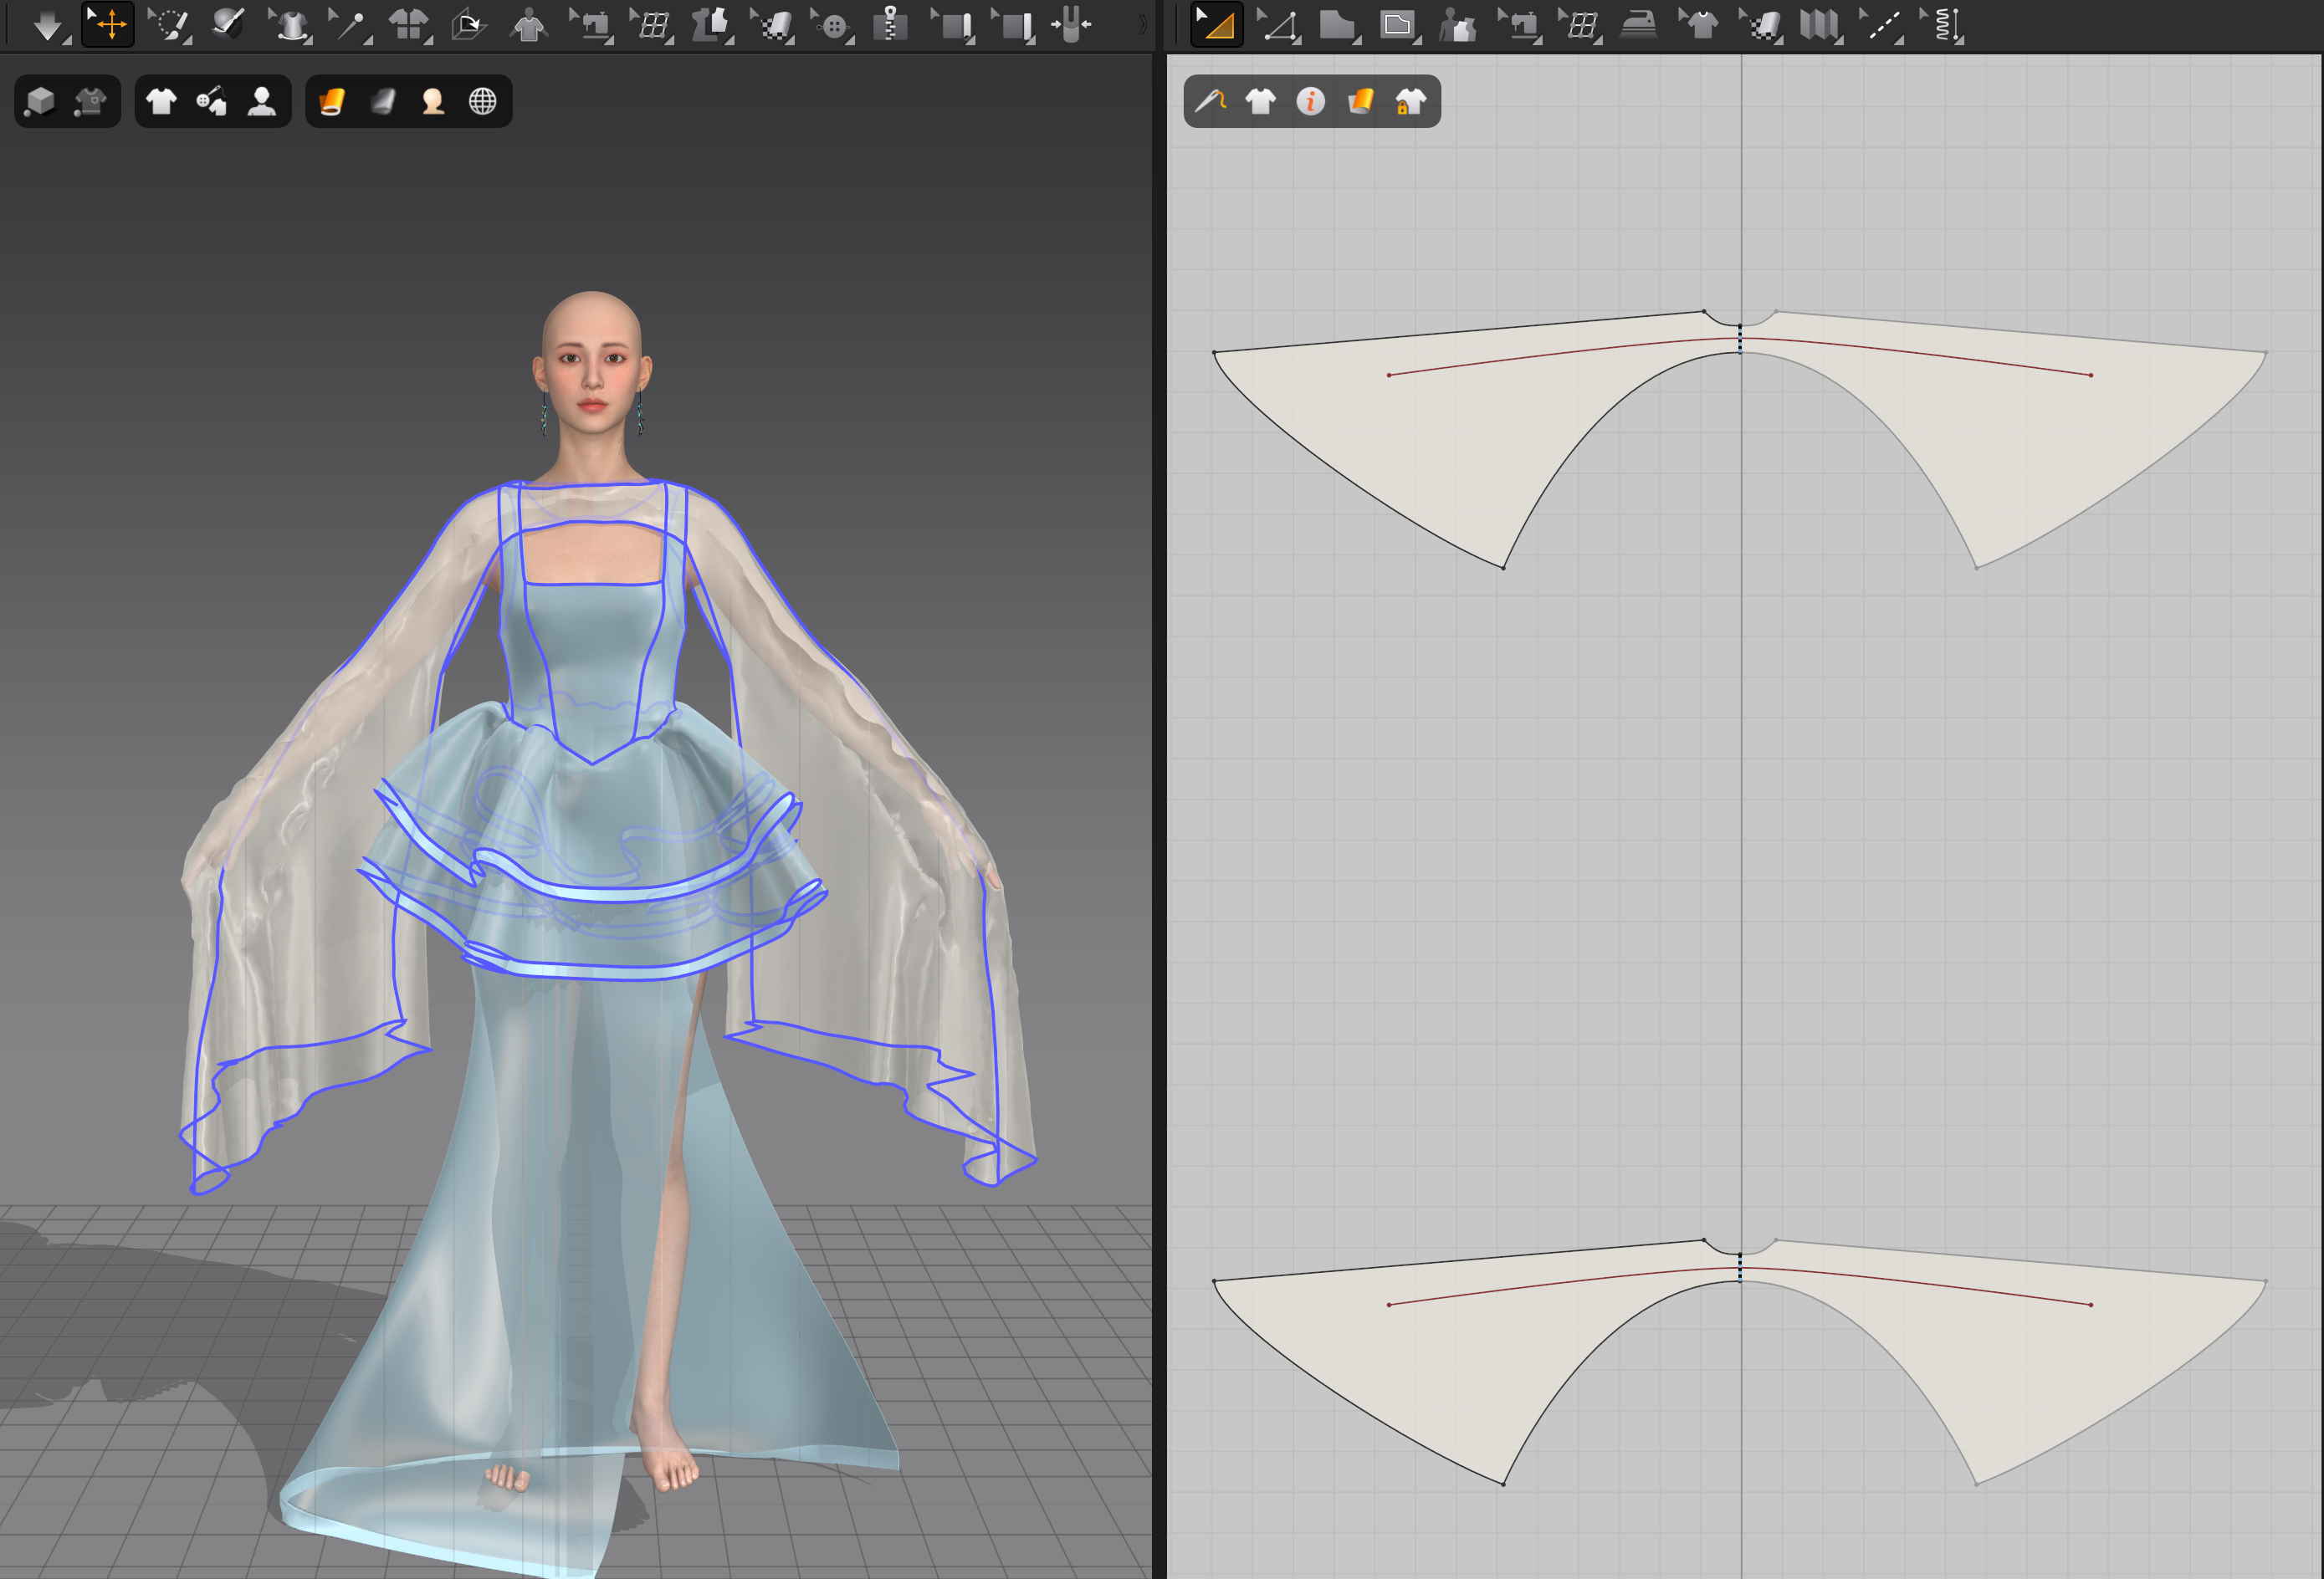
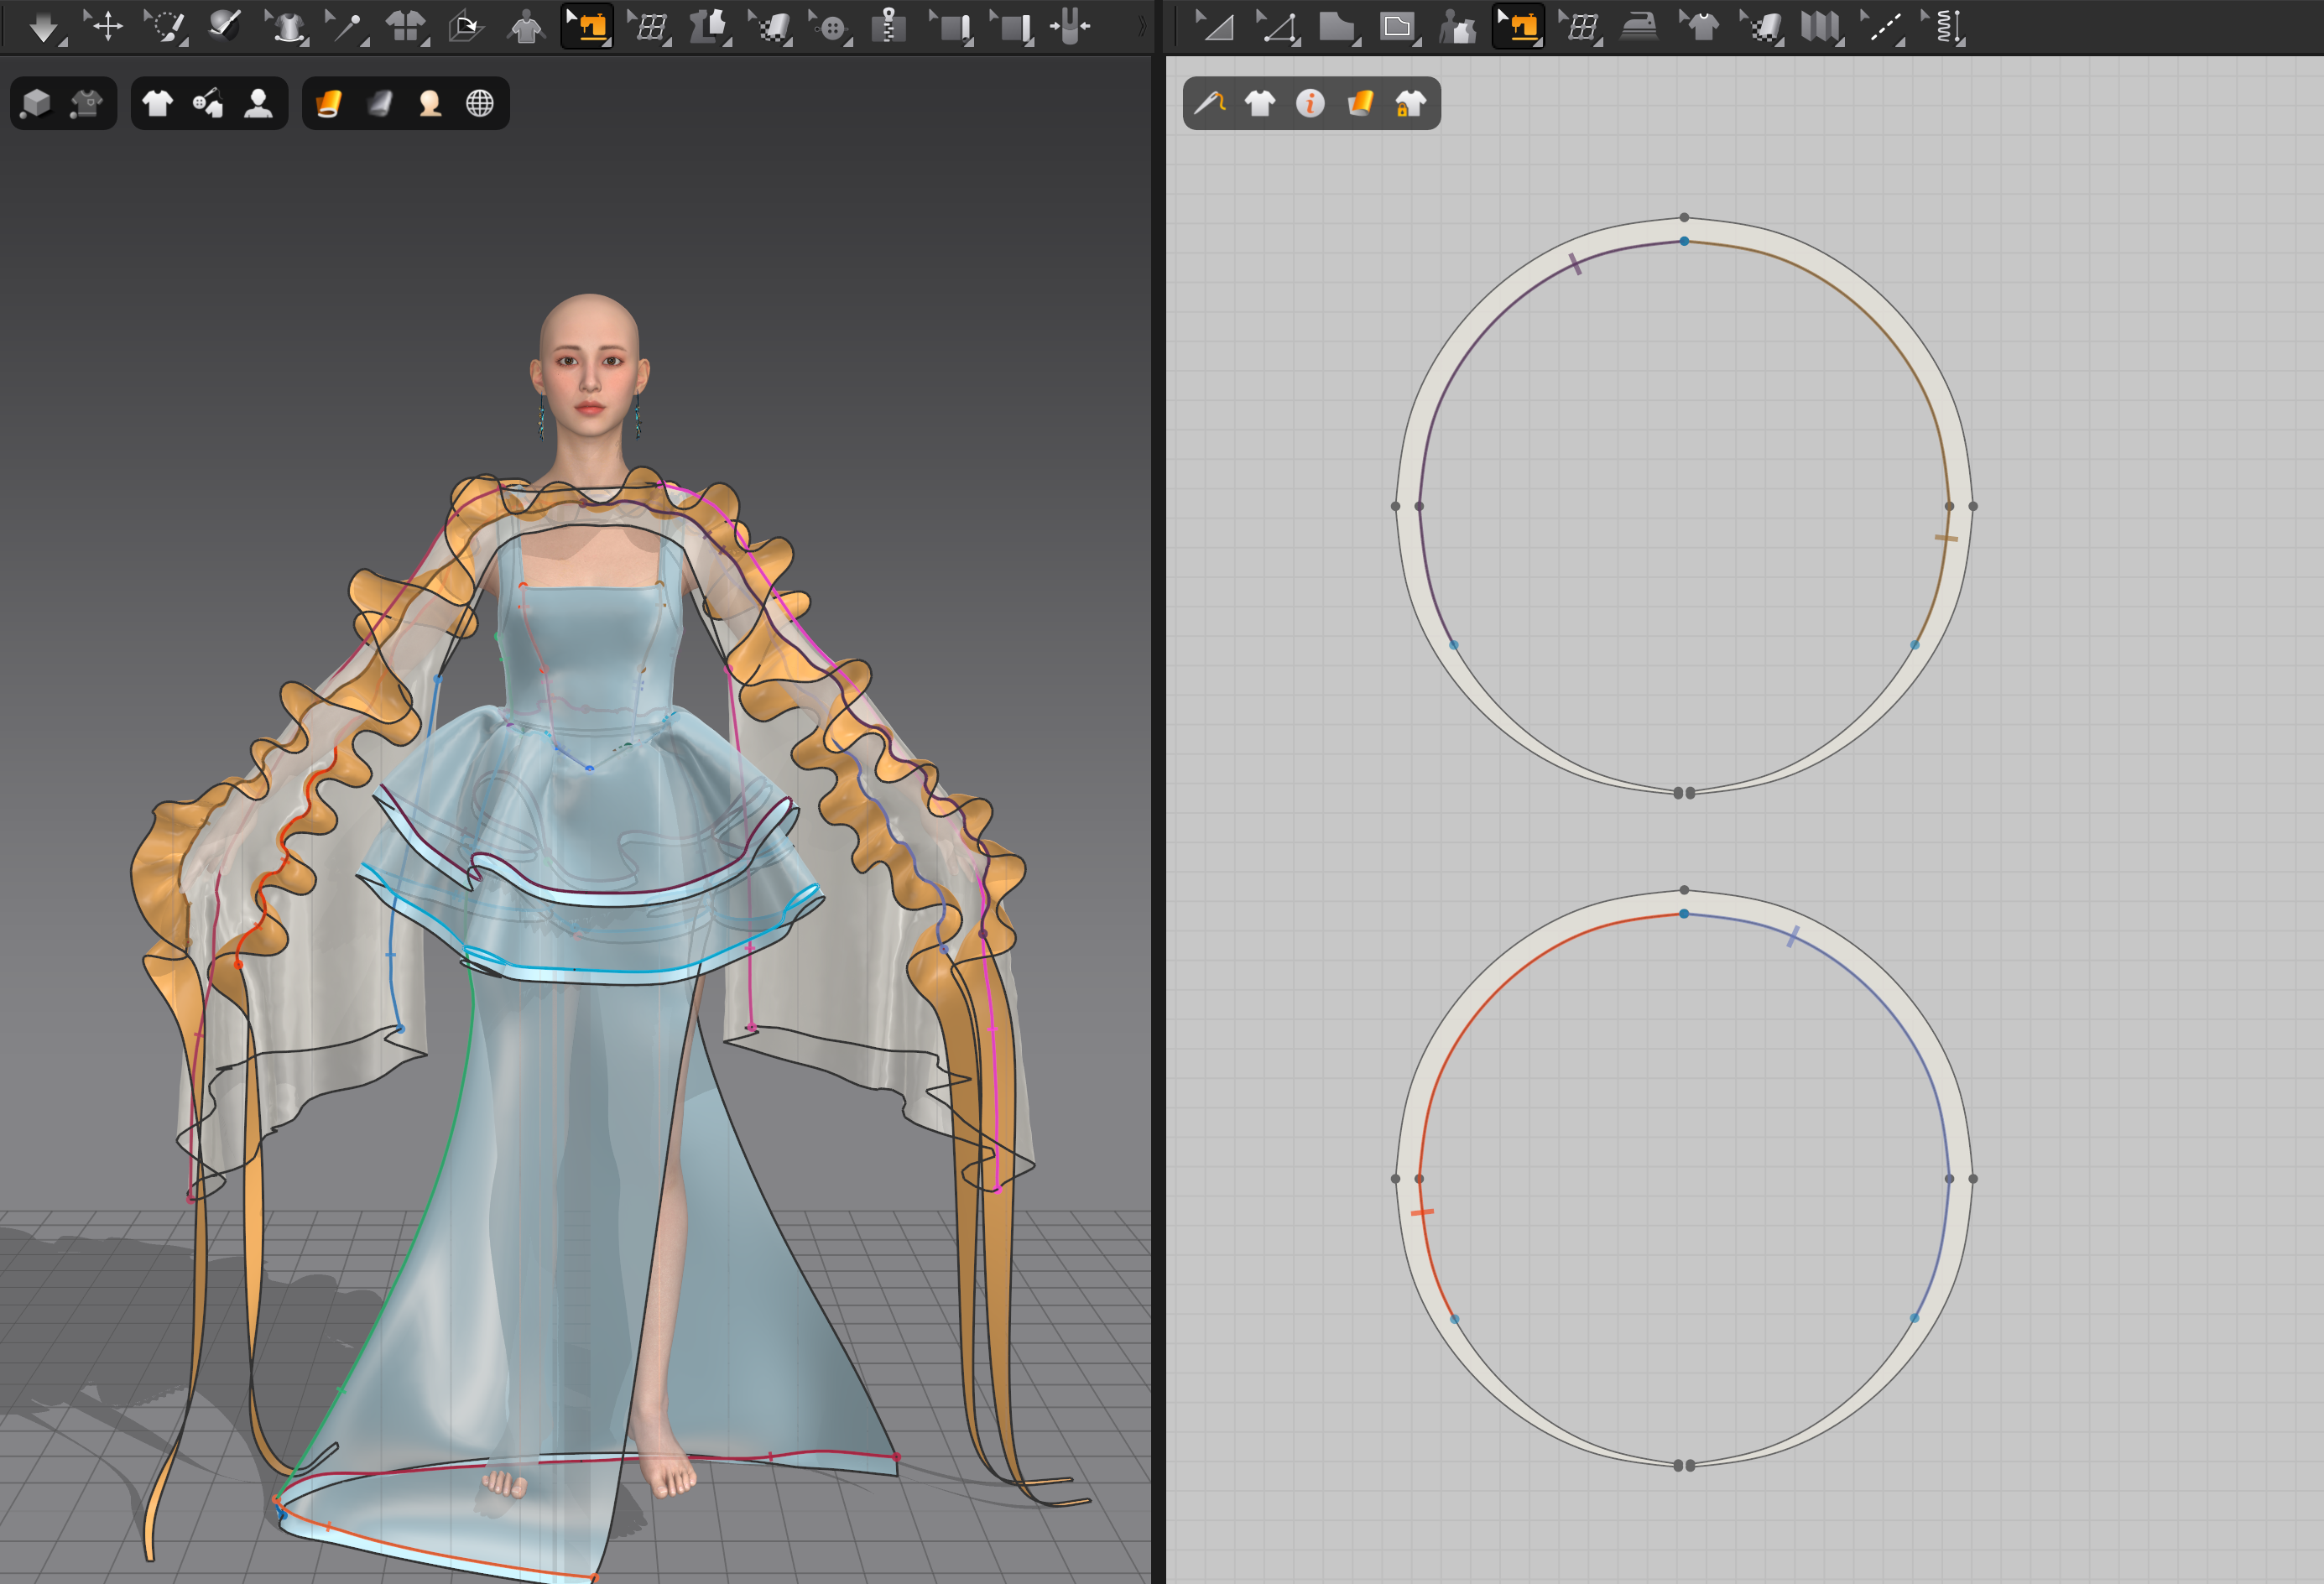
The Blouse was my favourite thing to create in this look. I started by creating almost Kimono-like sleeves by using the Polygon tool. After adjusting the size and length through testing and fitting in the 3D window, I could finally start experimenting with the ruffles along the sleeves. The look was supposed to feel playful and free. Therefore I wanted to create a garment that flows with the avatars movements naturally. I tried to achieve that by creating large circles for the ruffles. Their circumference reaches from one sleeve hem to the other and even beyond.
The biggest challenge I encountered with this look was harmonizing the many layers and their very different properties. The way I worked around that was to try and focus on only one garment at a time. In order to make the different garments harmonize with each other it was very important to give each of them the chance to properly simulate before putting it all together. The freeze function was my best friend for that specific case. And also never forget to give the garments different layers!
After finishing the whole look in Marvelous Designer I moved on with CLO3D to choose and render the perfect fabrics. It was a lot about exploring and experimenting to see what fits the vibe and character the best. I experimented with transparency, thickness, texture and other properties until I finally found the perfect fit for each garment.
I truly loved how spontaneous and experimental I could be with this contest. Although I already had a specific look in mind, the outcome is always different from the first idea because you get to explore all the possibilities along the way.

Are there any tips and tricks with Marvelous Designer that you can share with the community?
Don't simulate everything at once. Start with the base, then add the ruffles. It can take time and a lot of patience when you have to readjust single areas to make the movement look natural.
But most importantly: have fun! Experiment with fabrics, explore different draping techniques and don’t be afraid to ‘ruin’ anything! Every look or piece of art you see is the outcome of experimenting and finding out along the way.
이 작업은 CONNECT, Contest, Avatar, Pattern, Texture, Victorian 등의 기술로 제작되었습니다.
Marvelous Designer로 이와 같은 3D 의상·캐릭터 작업을 직접 만들어볼 수 있습니다.