Making An Armor In Marvelous Designer: Breaking Boundaries
Meet Sarah, a skilled 3D designer, as she unveils her process for crafting hard-surface armor using Marvelous Designer. The hard surface look is seamlessly achieved within the creative realm of Marvelous Designer.
Interview with Sarah Prado | Armor Creation in MD | 3D artist
Artist Introduction.
My name is Sarah, I am a Brazilian 3D Artist, Fashion Designer, gamer, and mother of cats. I have a university degree in Fashion and for more than 10 years I worked as a designer, patternmaker, and seamstress in local industries, mainly with bridal gowns and formal wear for women.
I had my first experience with Marvelous in 2020 during the Covid lockdown, which has blown my mind. Since then I have fully migrated to 3D, where I can work with more fantastic designs and test patterns for much less expense and much less waste.
Nowadays I use mainly Marvelous, Substance Painter, and Blender.
Although one can apply Marvelous into to a range of areas such as home decor and stylized characters, I really enjoy working with realistic but fantastic designs.
You've recently released impressive armor creations that have received a tremendous response from the user community. We are extremely curious to know what inspired you to implement armor creation that can be created on hard surfaces in other software. Can you tell us more?
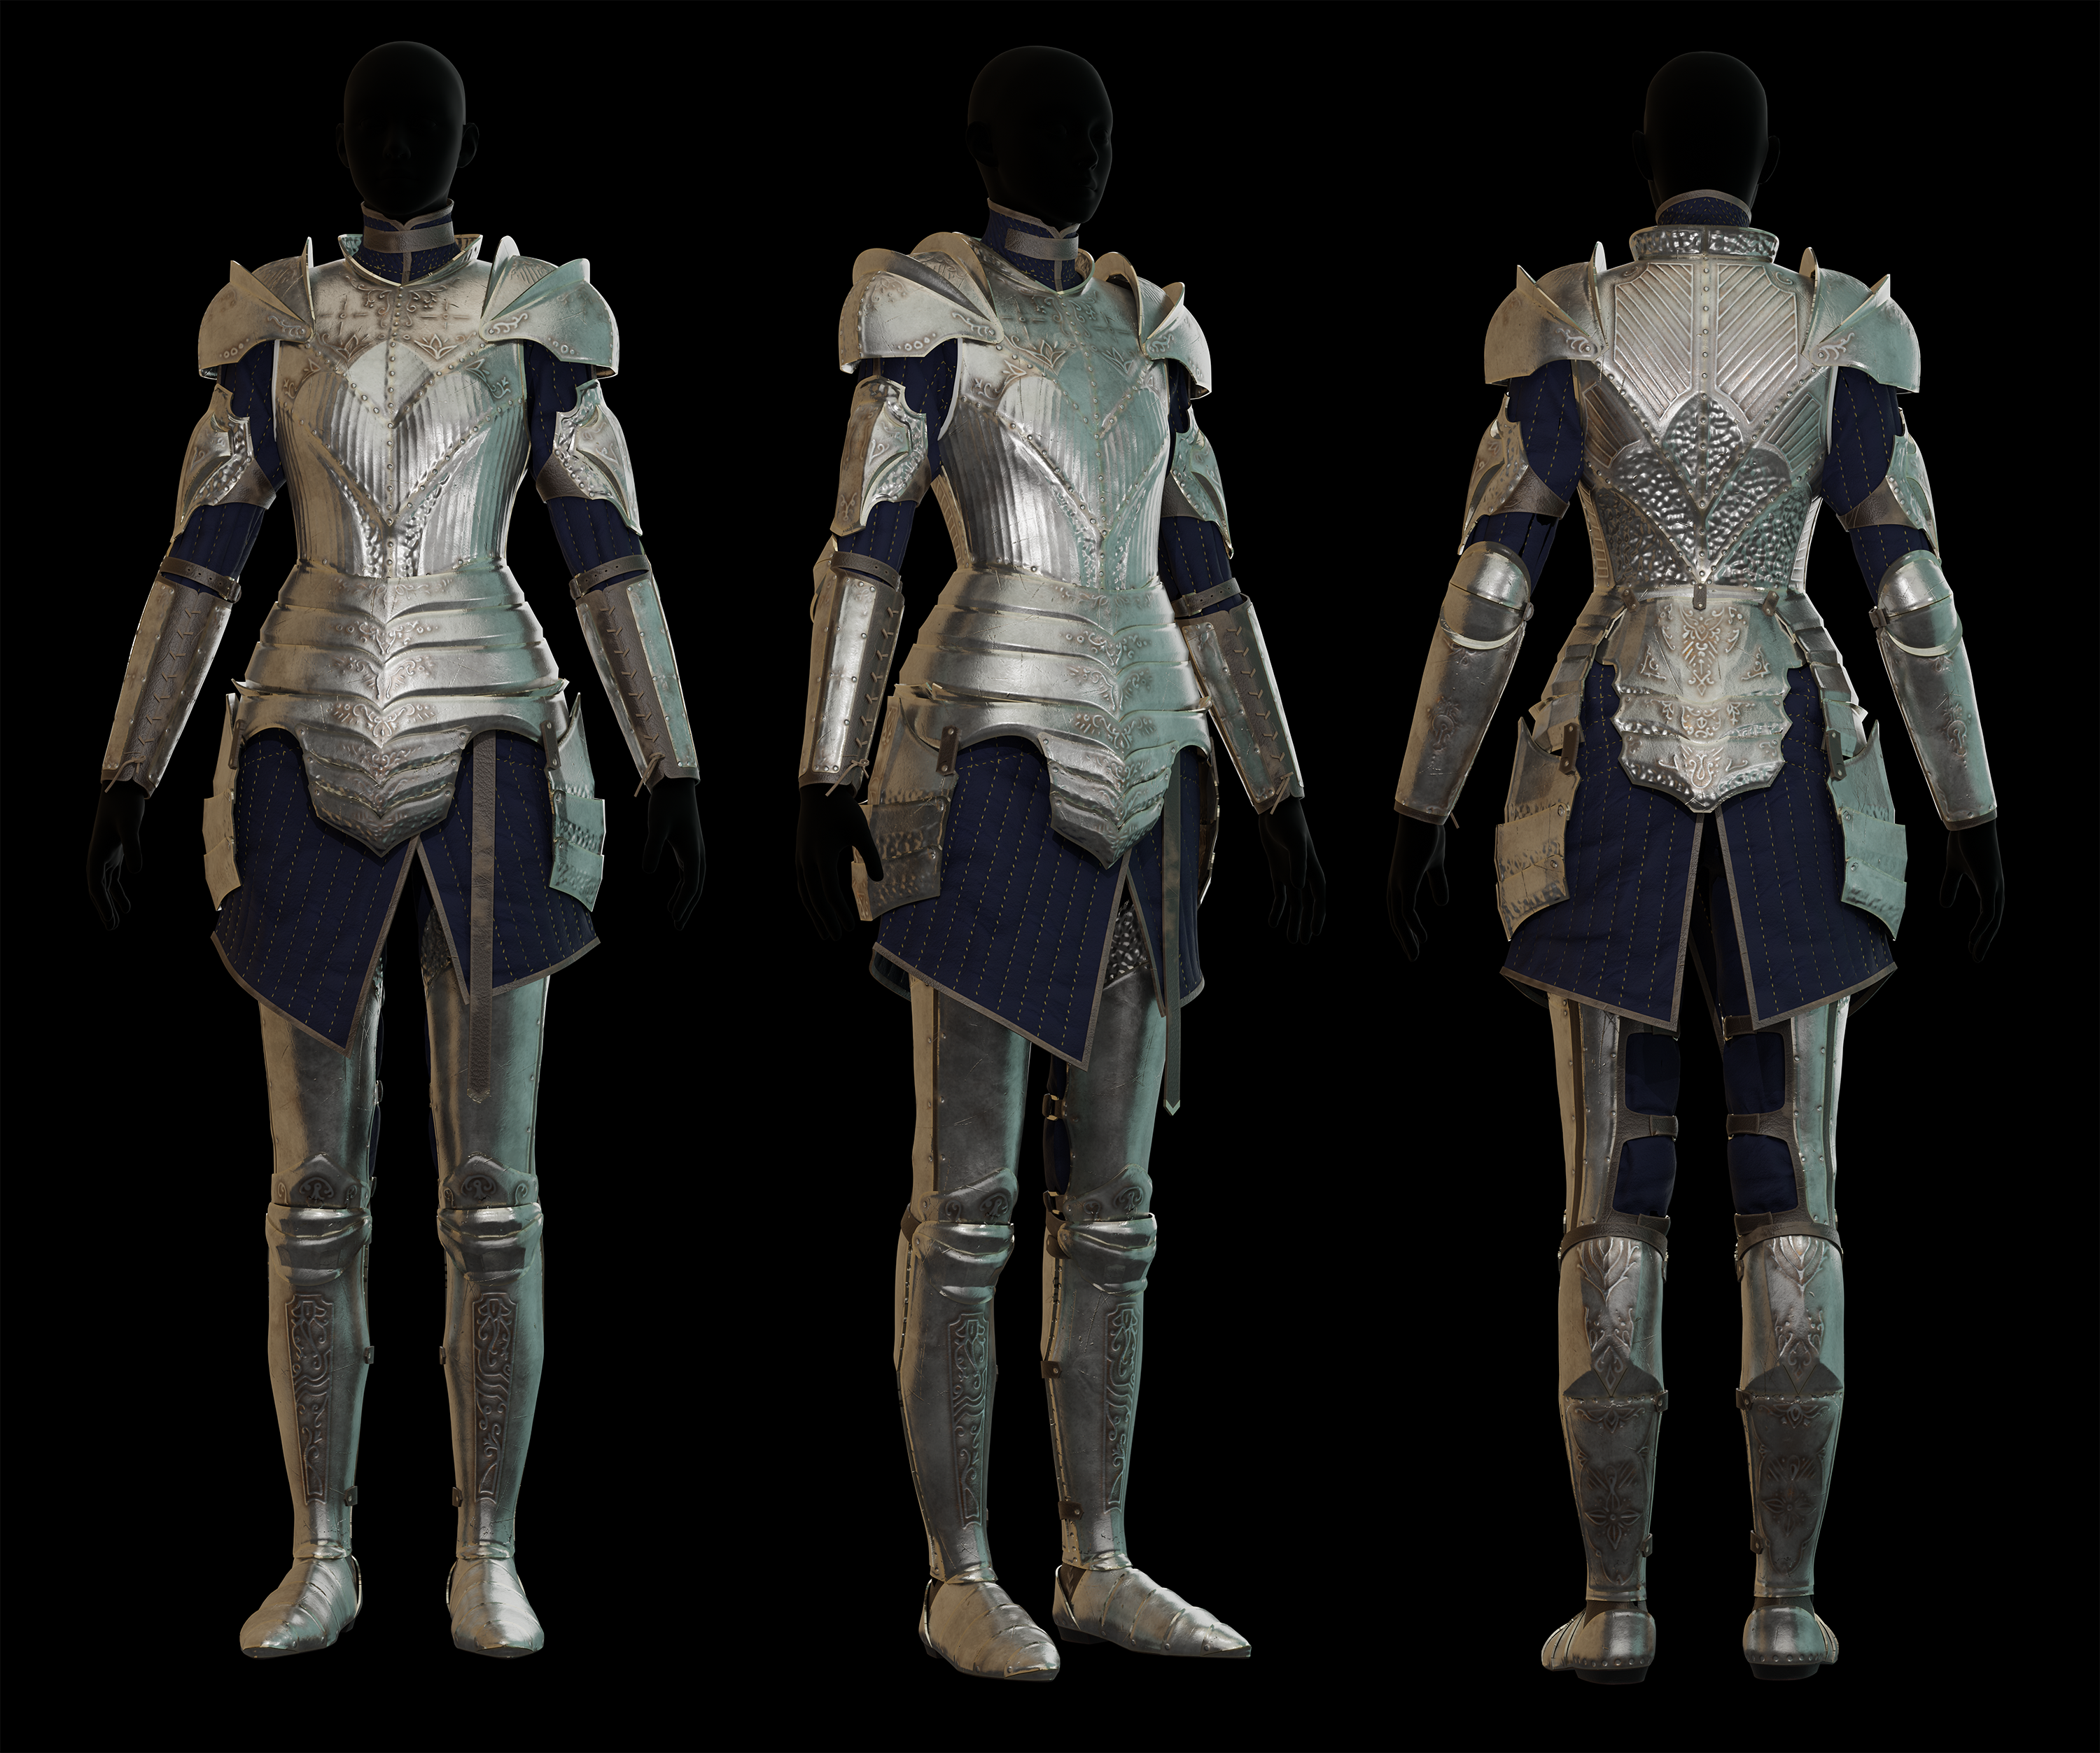
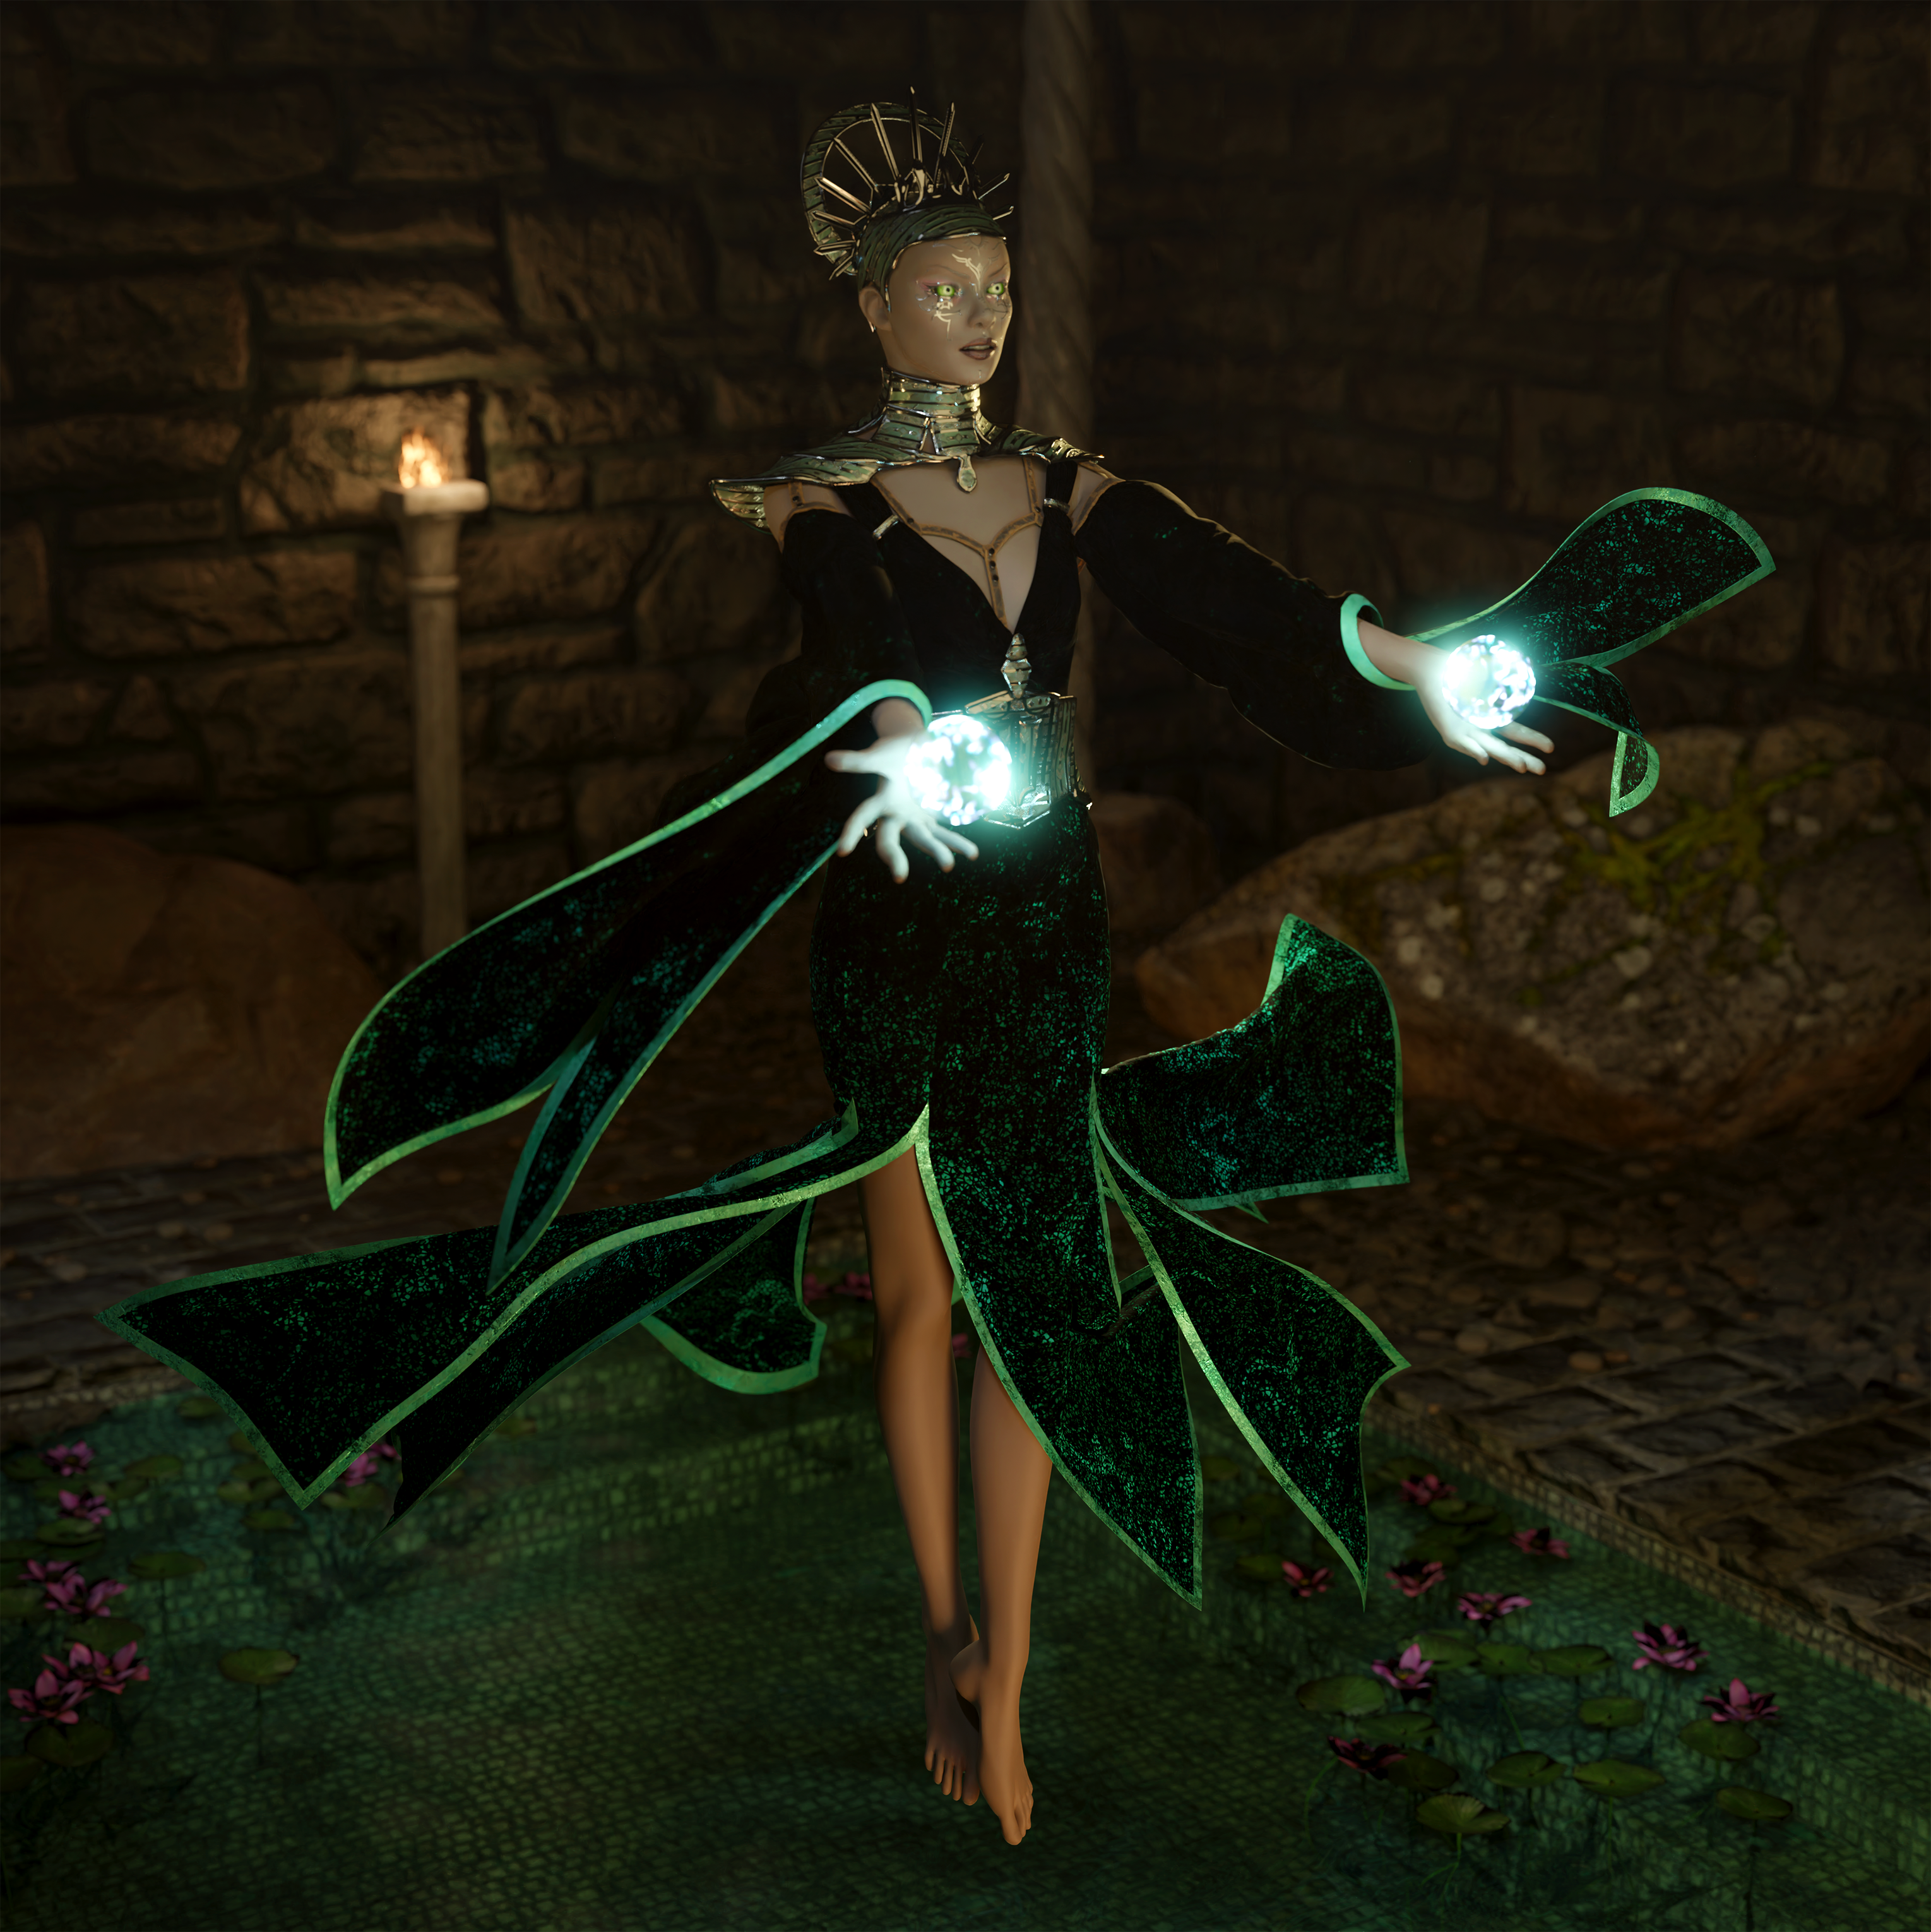
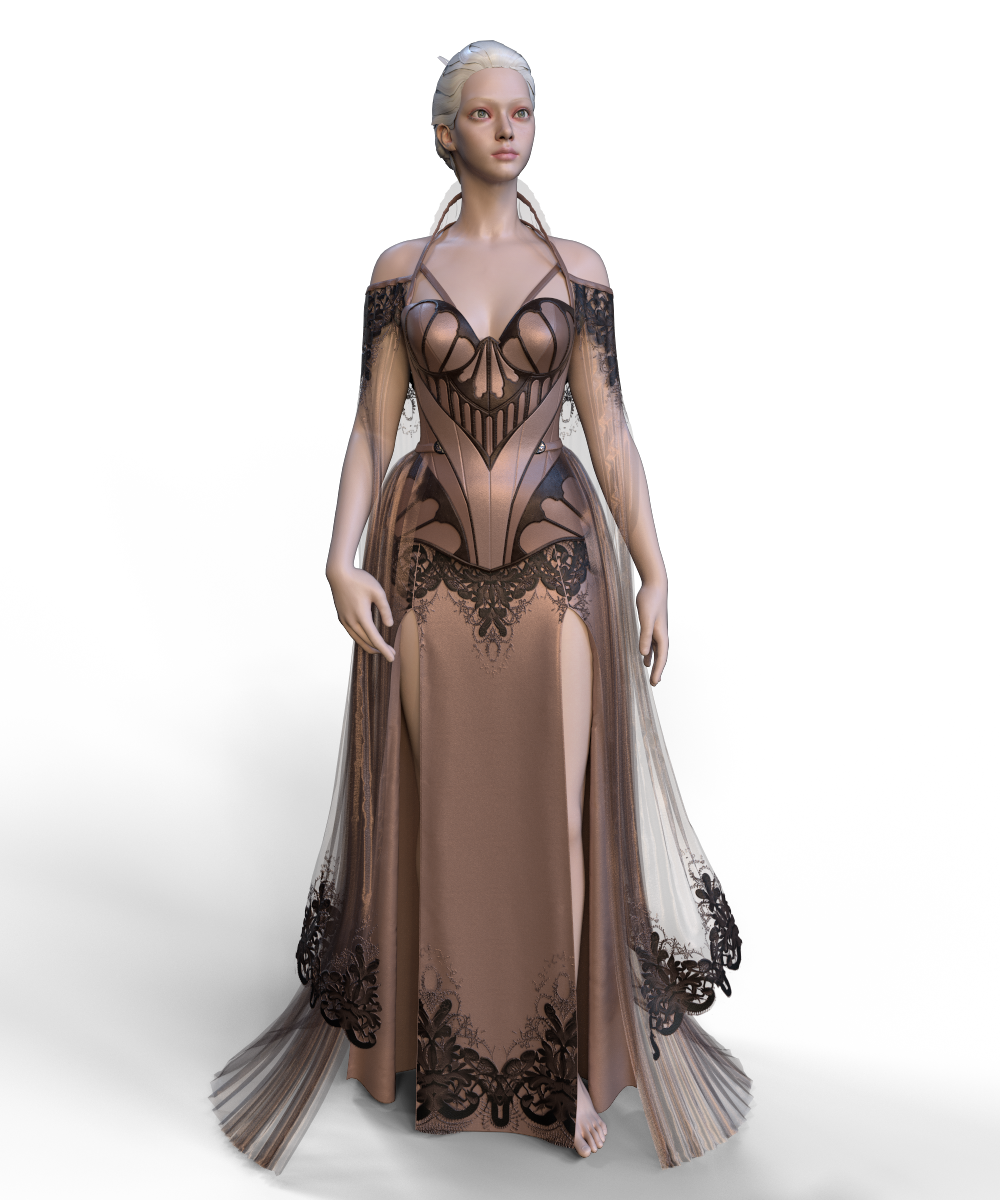
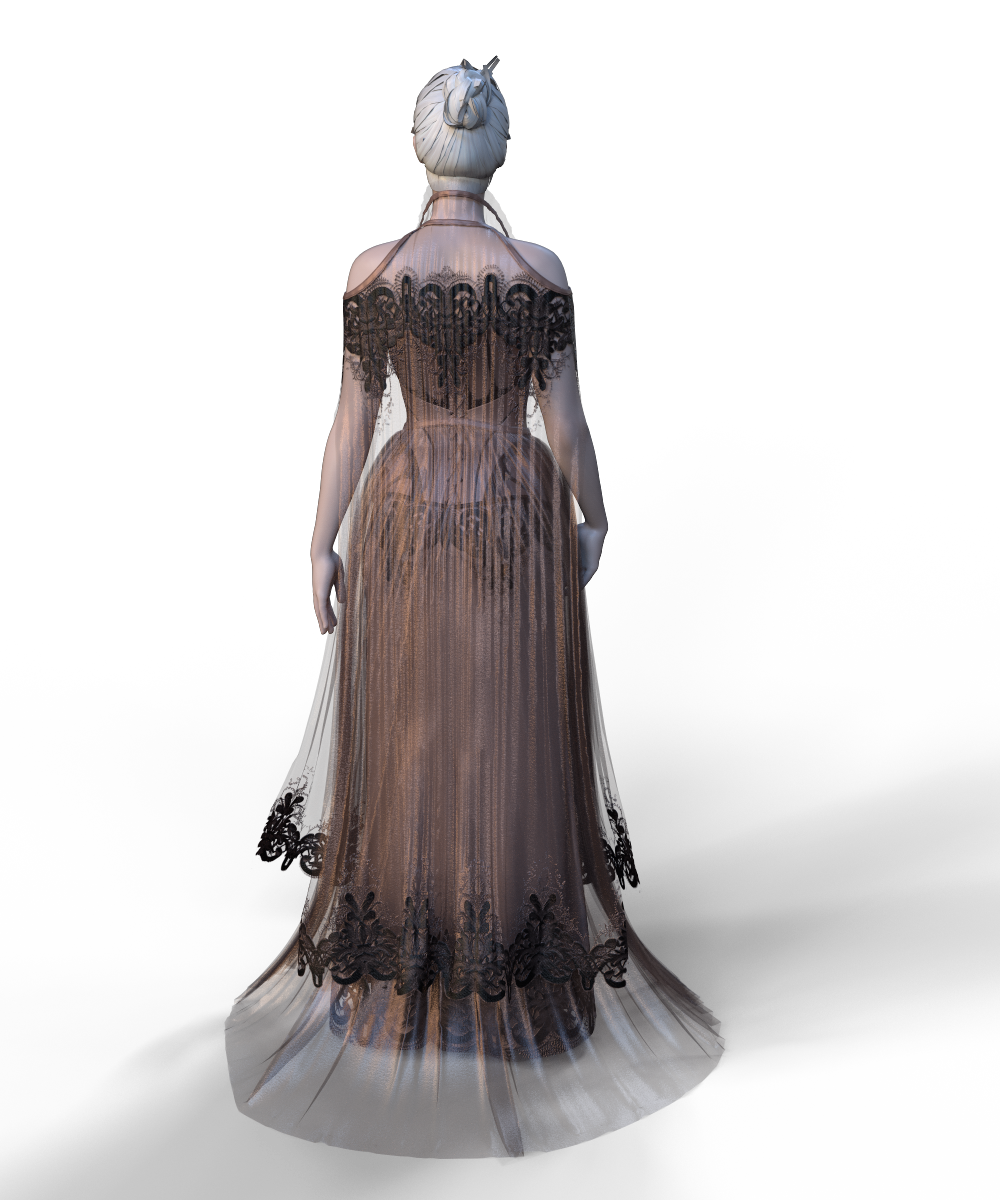
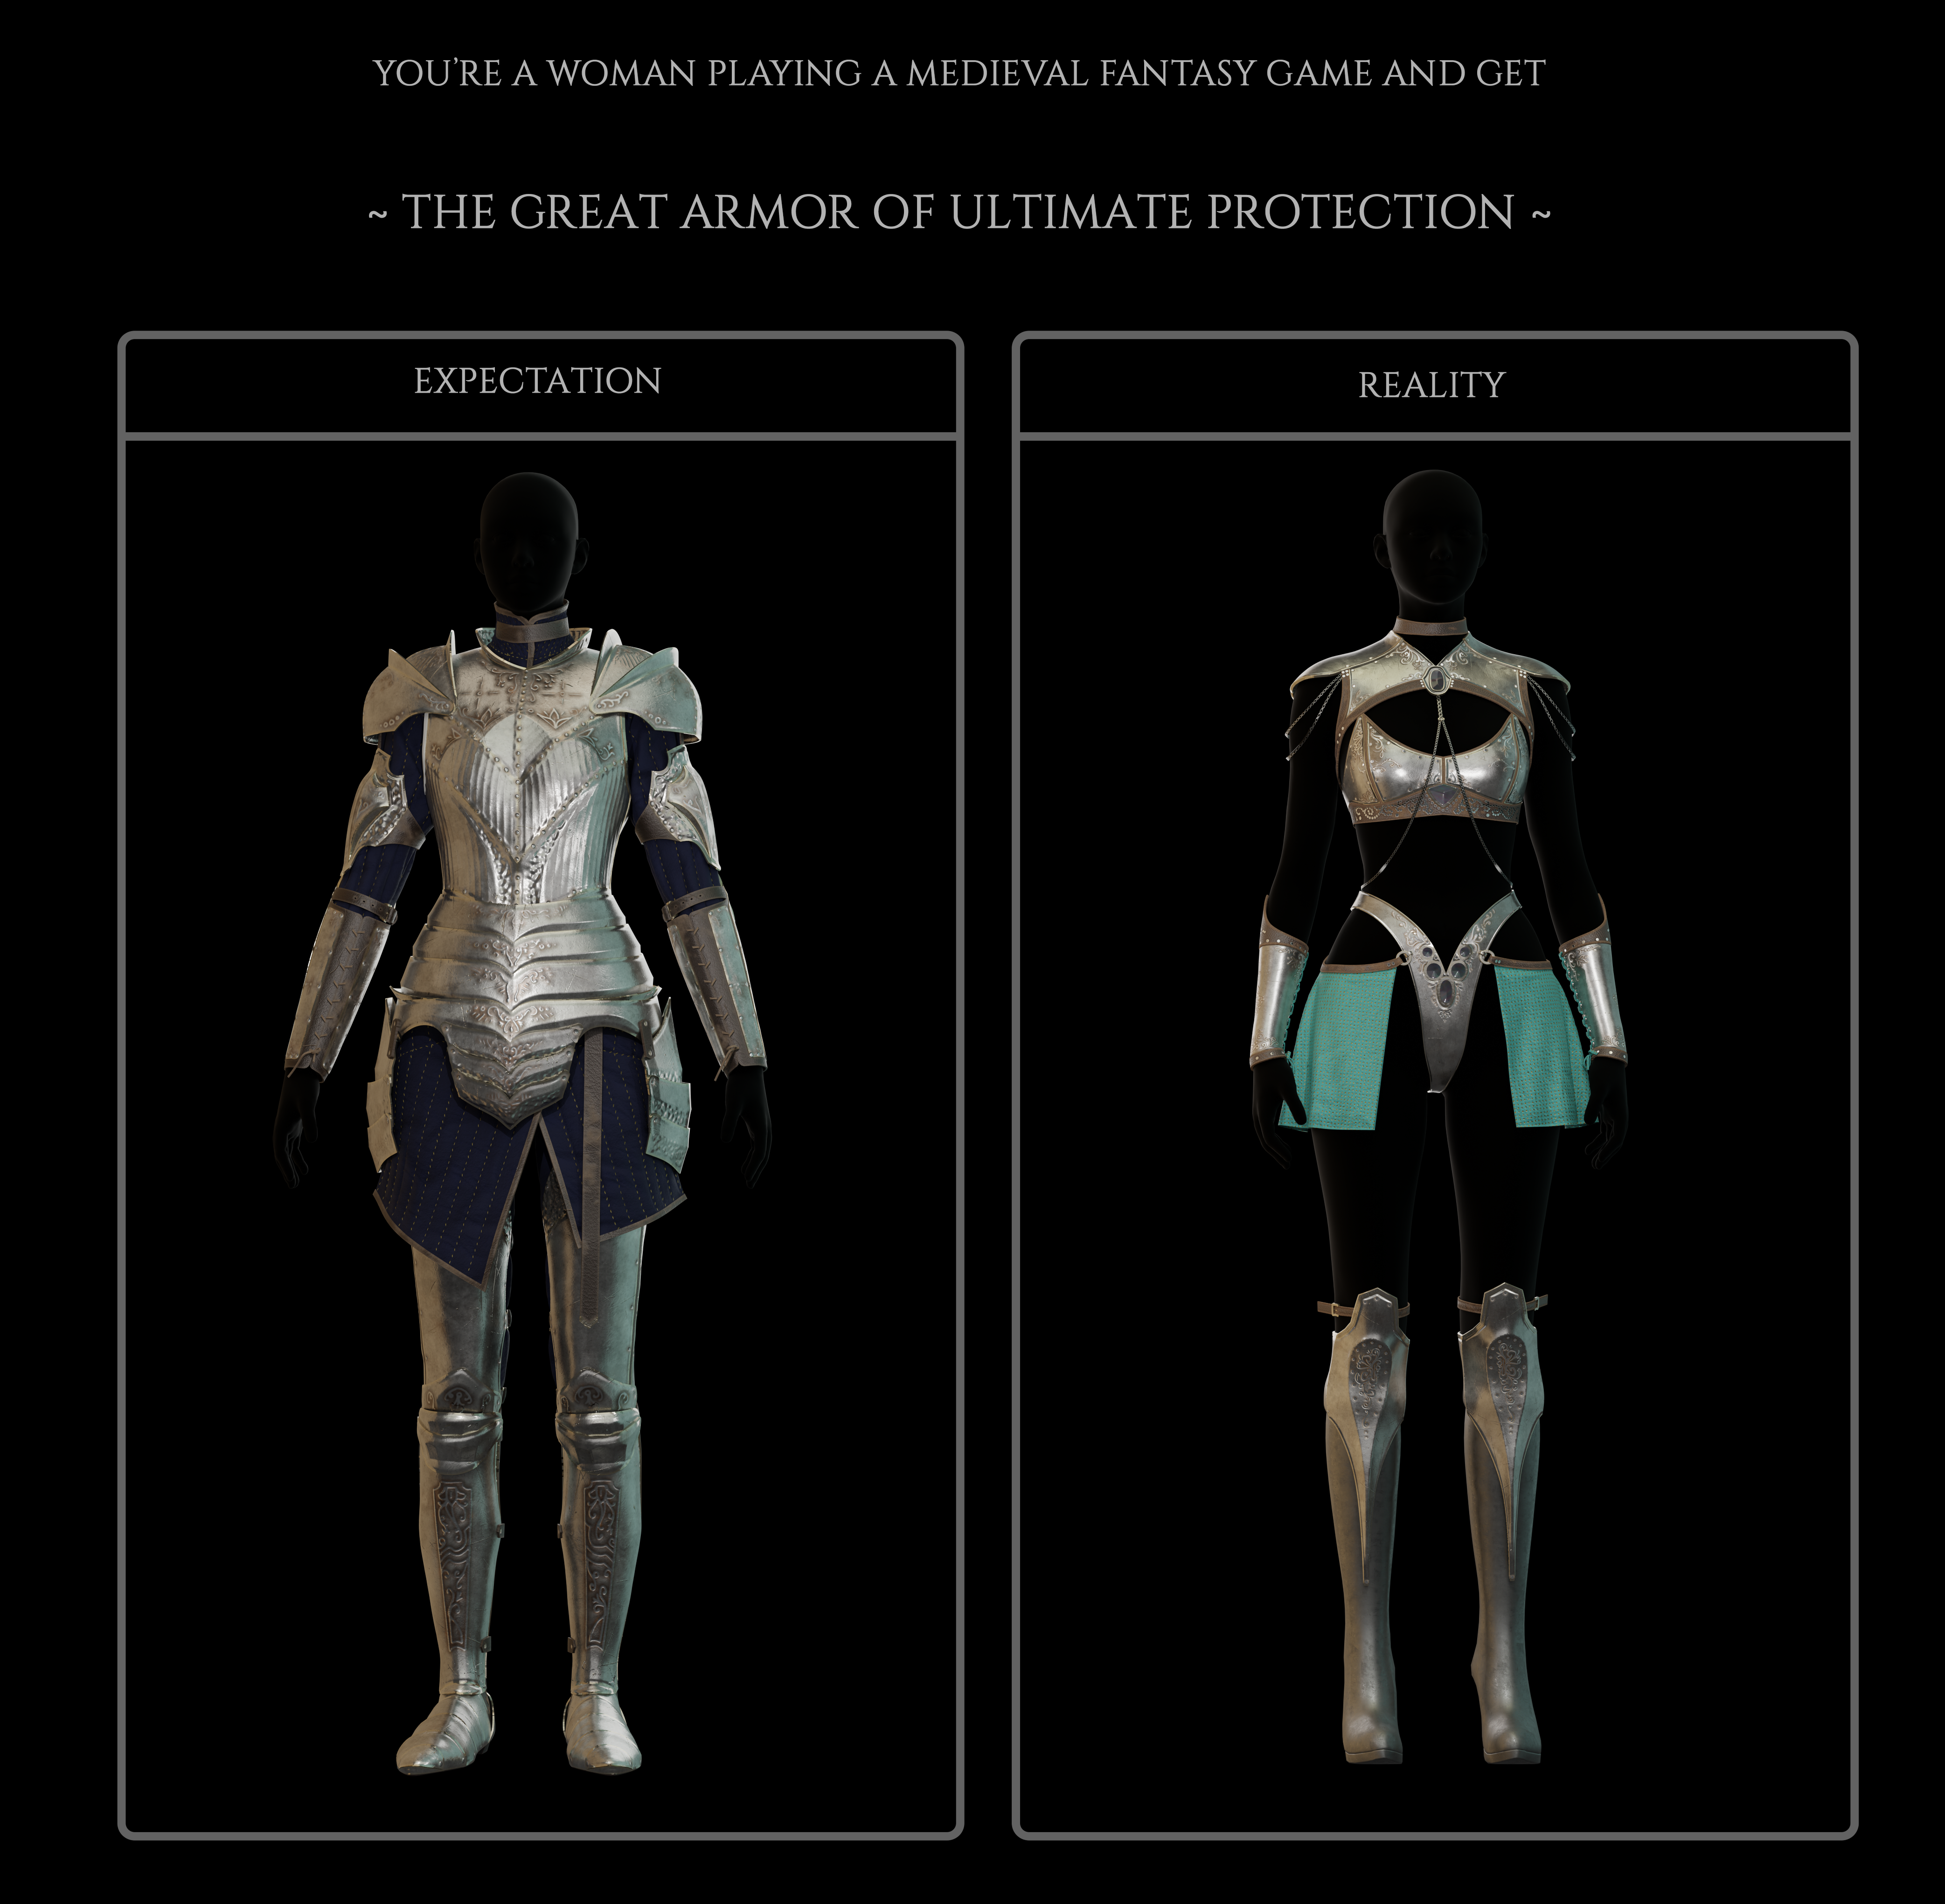
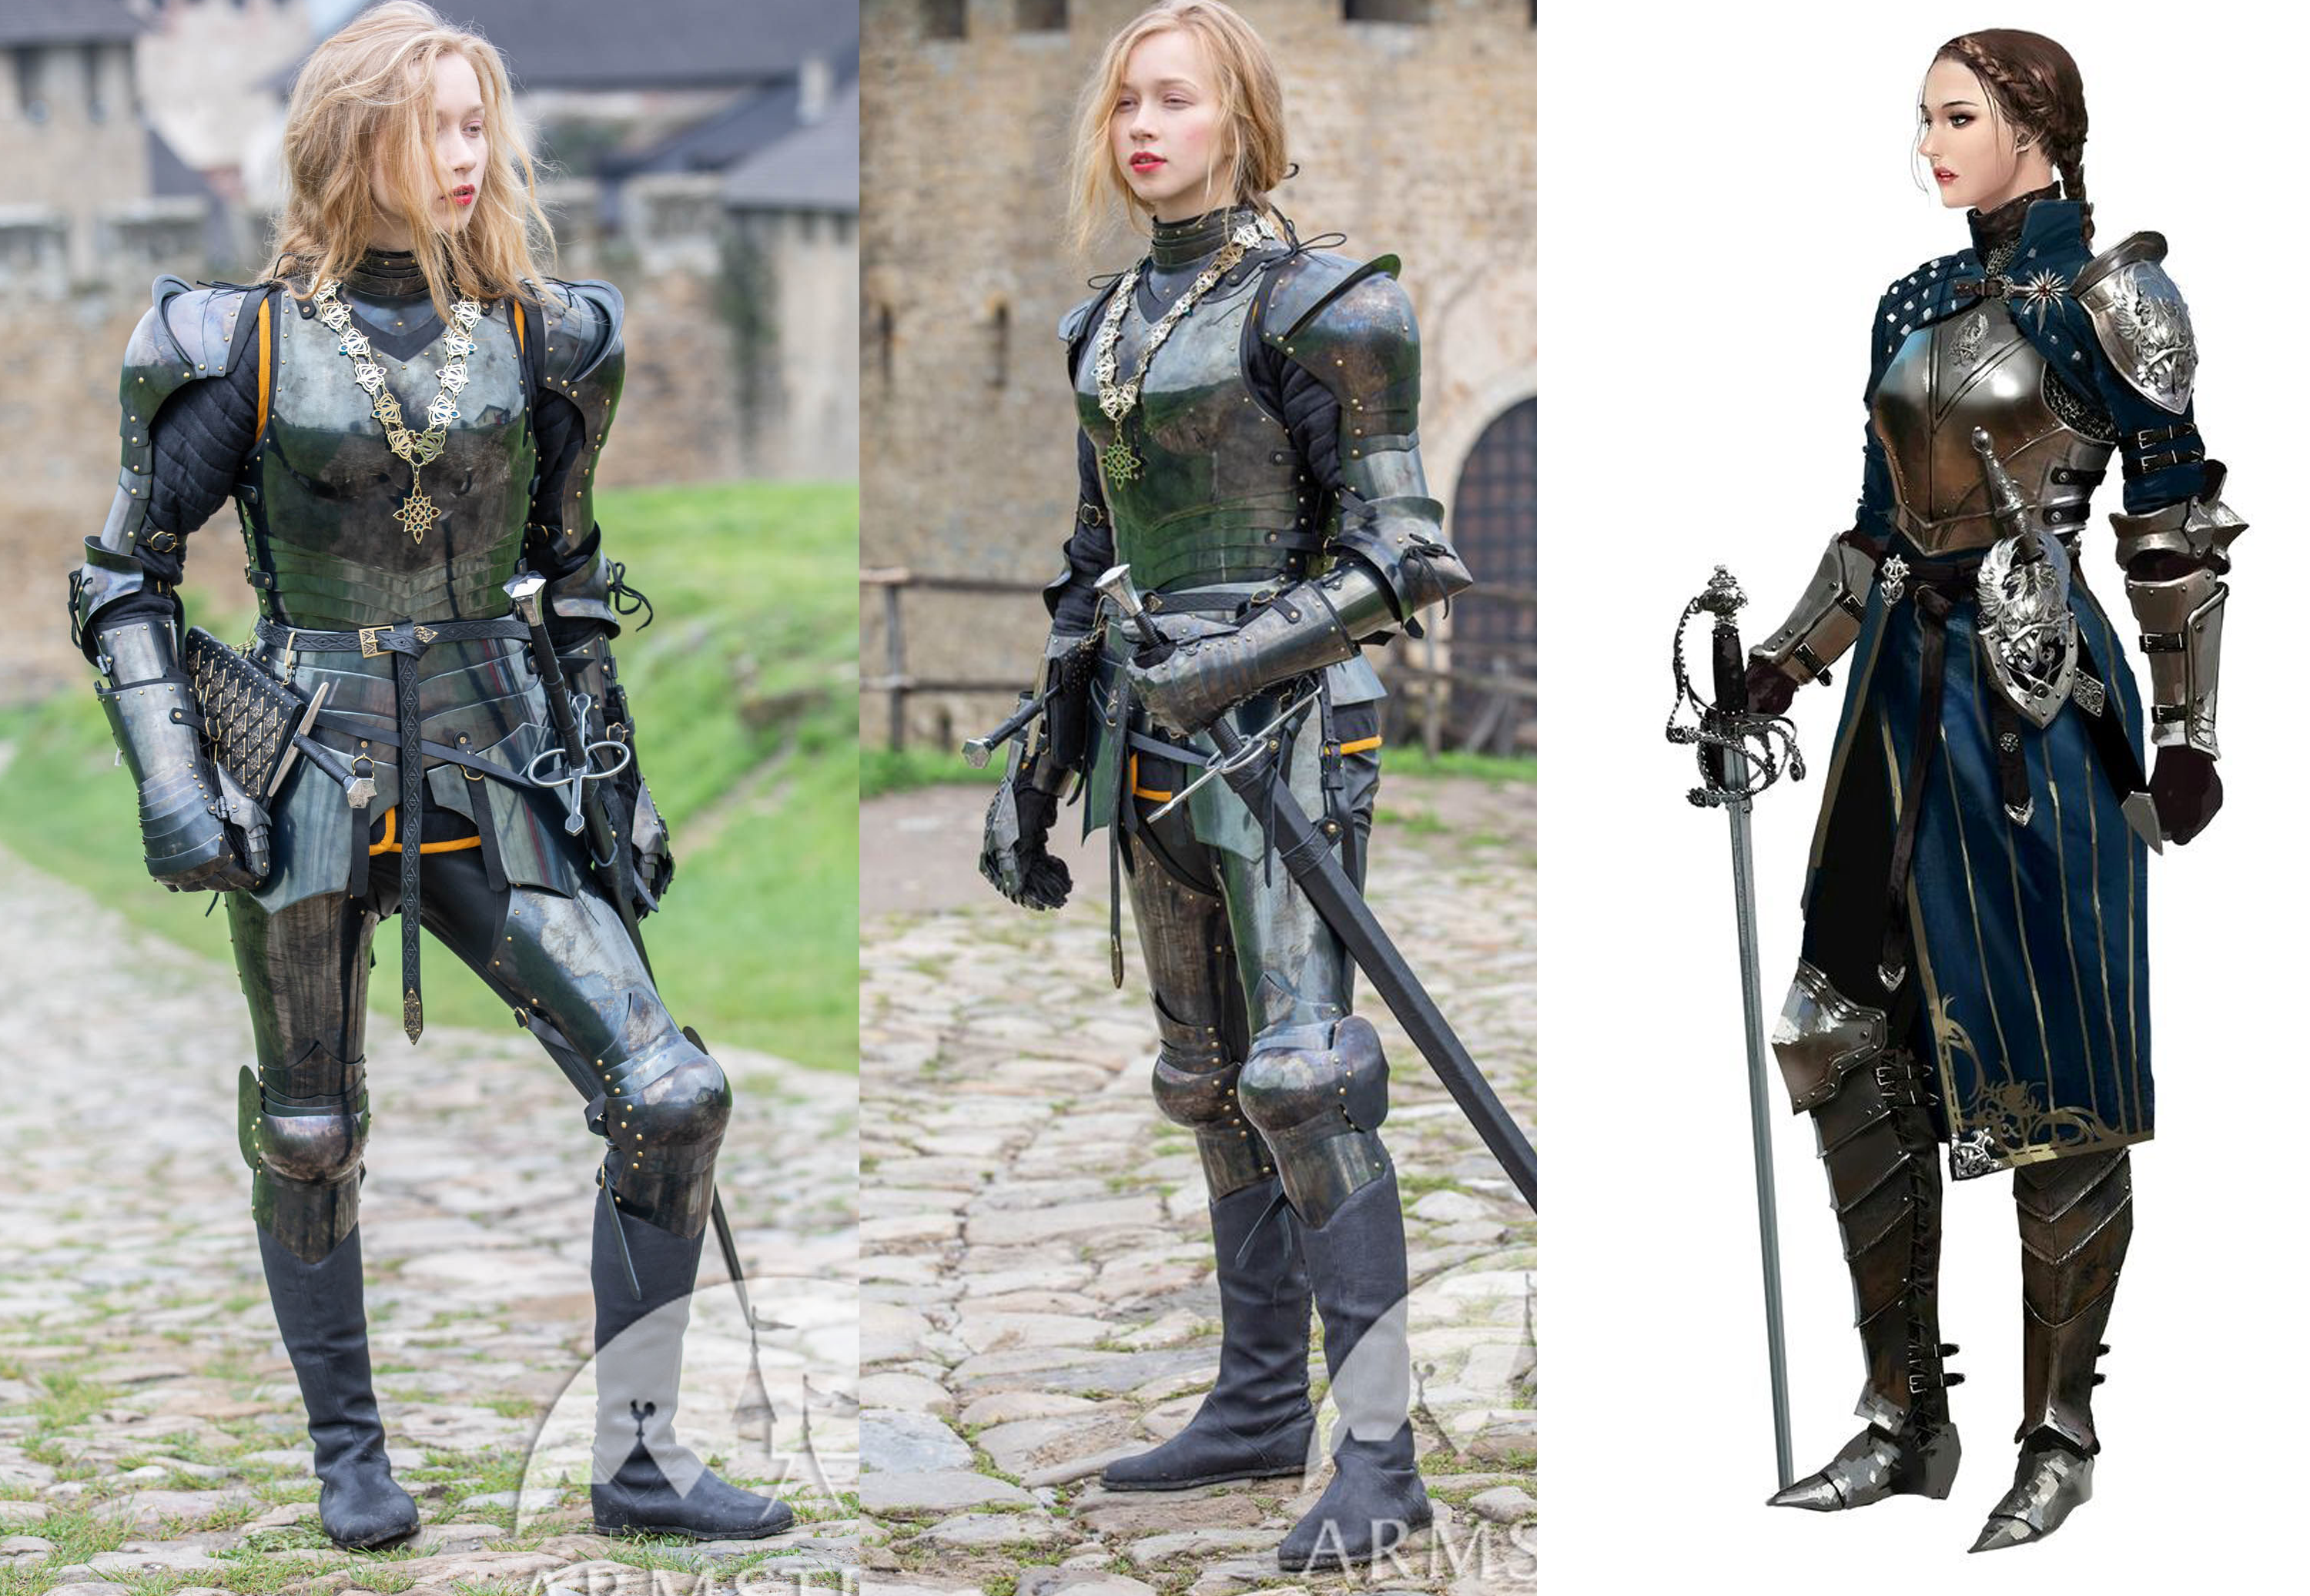
This artwork in particular came from this annoying situation that older gamer girls would face when playing RPG and fantasy genre when the armor supposed to protect the character's body is actually more like a bikini made of steel and sheer fabric. So I made a meme-like expectation vs reality artwork. It was fun and I enjoyed how both versions ended up, but I put much more time and research into the realistic one.
What was your primary focus in your artwork? What are the powerful benefits of making armor using Marvelous Designer?
It is kind of a personal challenge since I was told I could nor should do any of the sort in clothing simulation software. So I've been playing with adding hard-surface elements totally made into Marvelous in previous artworks before the armor with great results even when simulating animation and the main reason for that is: I'm a total noob in other programs.
As a fashion designer, I guess I'm more functional thinking in clothing patterns than as a sculptor. I have no idea if a blacksmith would use cut pieces of flat metal to bend and weld into armor, but that's definitely what I would do. I think that's what cosplay makers do, anyway.
So, why not? People come from different backgrounds and I think we all should be allowed to go after the results we want no matter the tool we are more comfortable with!
Would you be able to provide us with an overview of your pipeline, focusing on Marvelous Designer? Have you encountered any challenges and how have you overcome them?
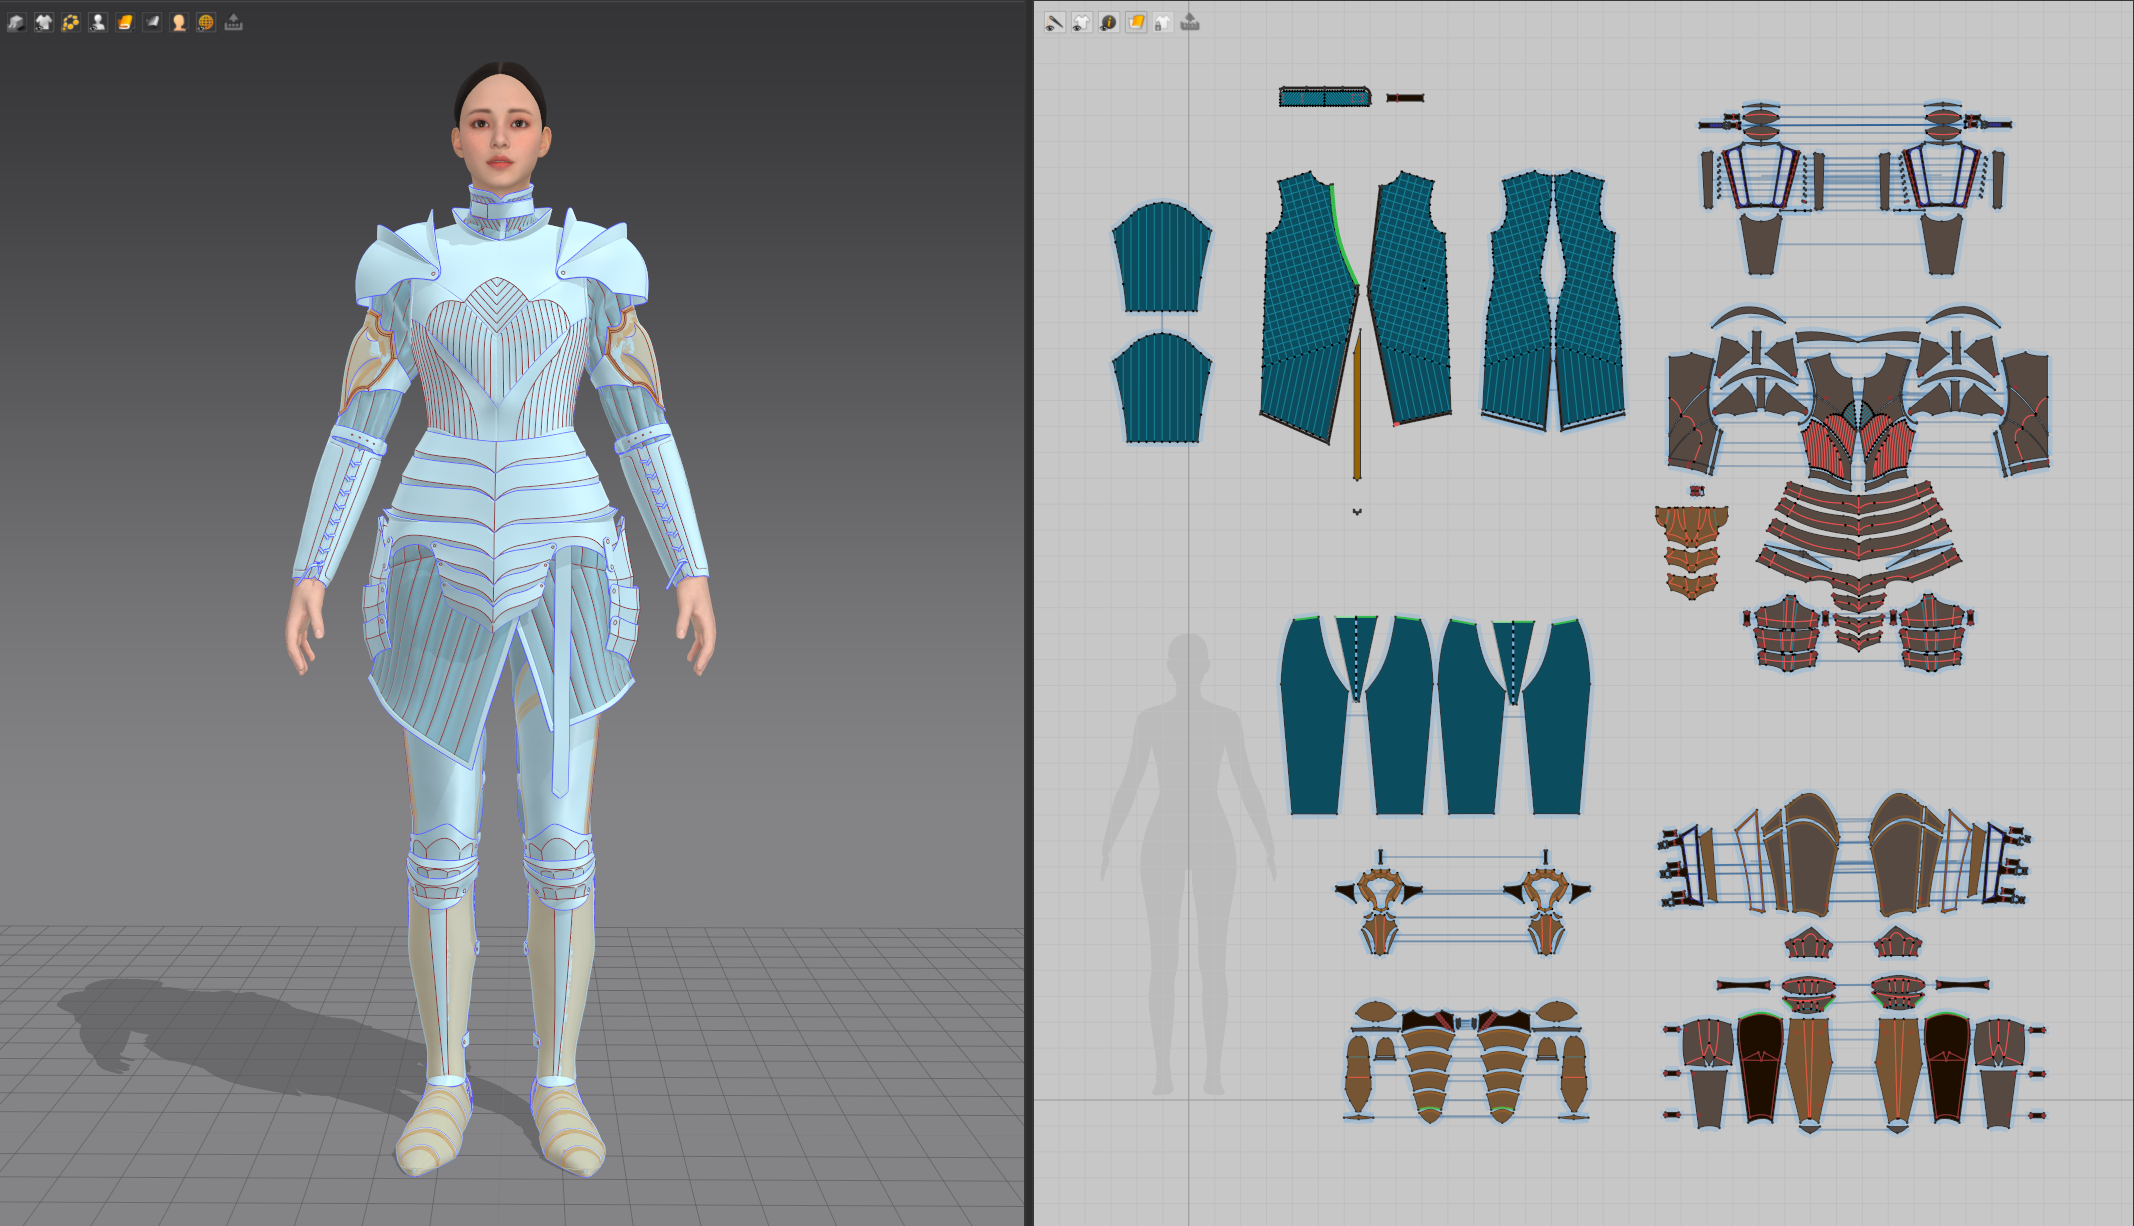
Of course! It's basically a fabric with stiffer but smooth aspect presets (high shear, high bending, medium stretch, etc) and fold angles.
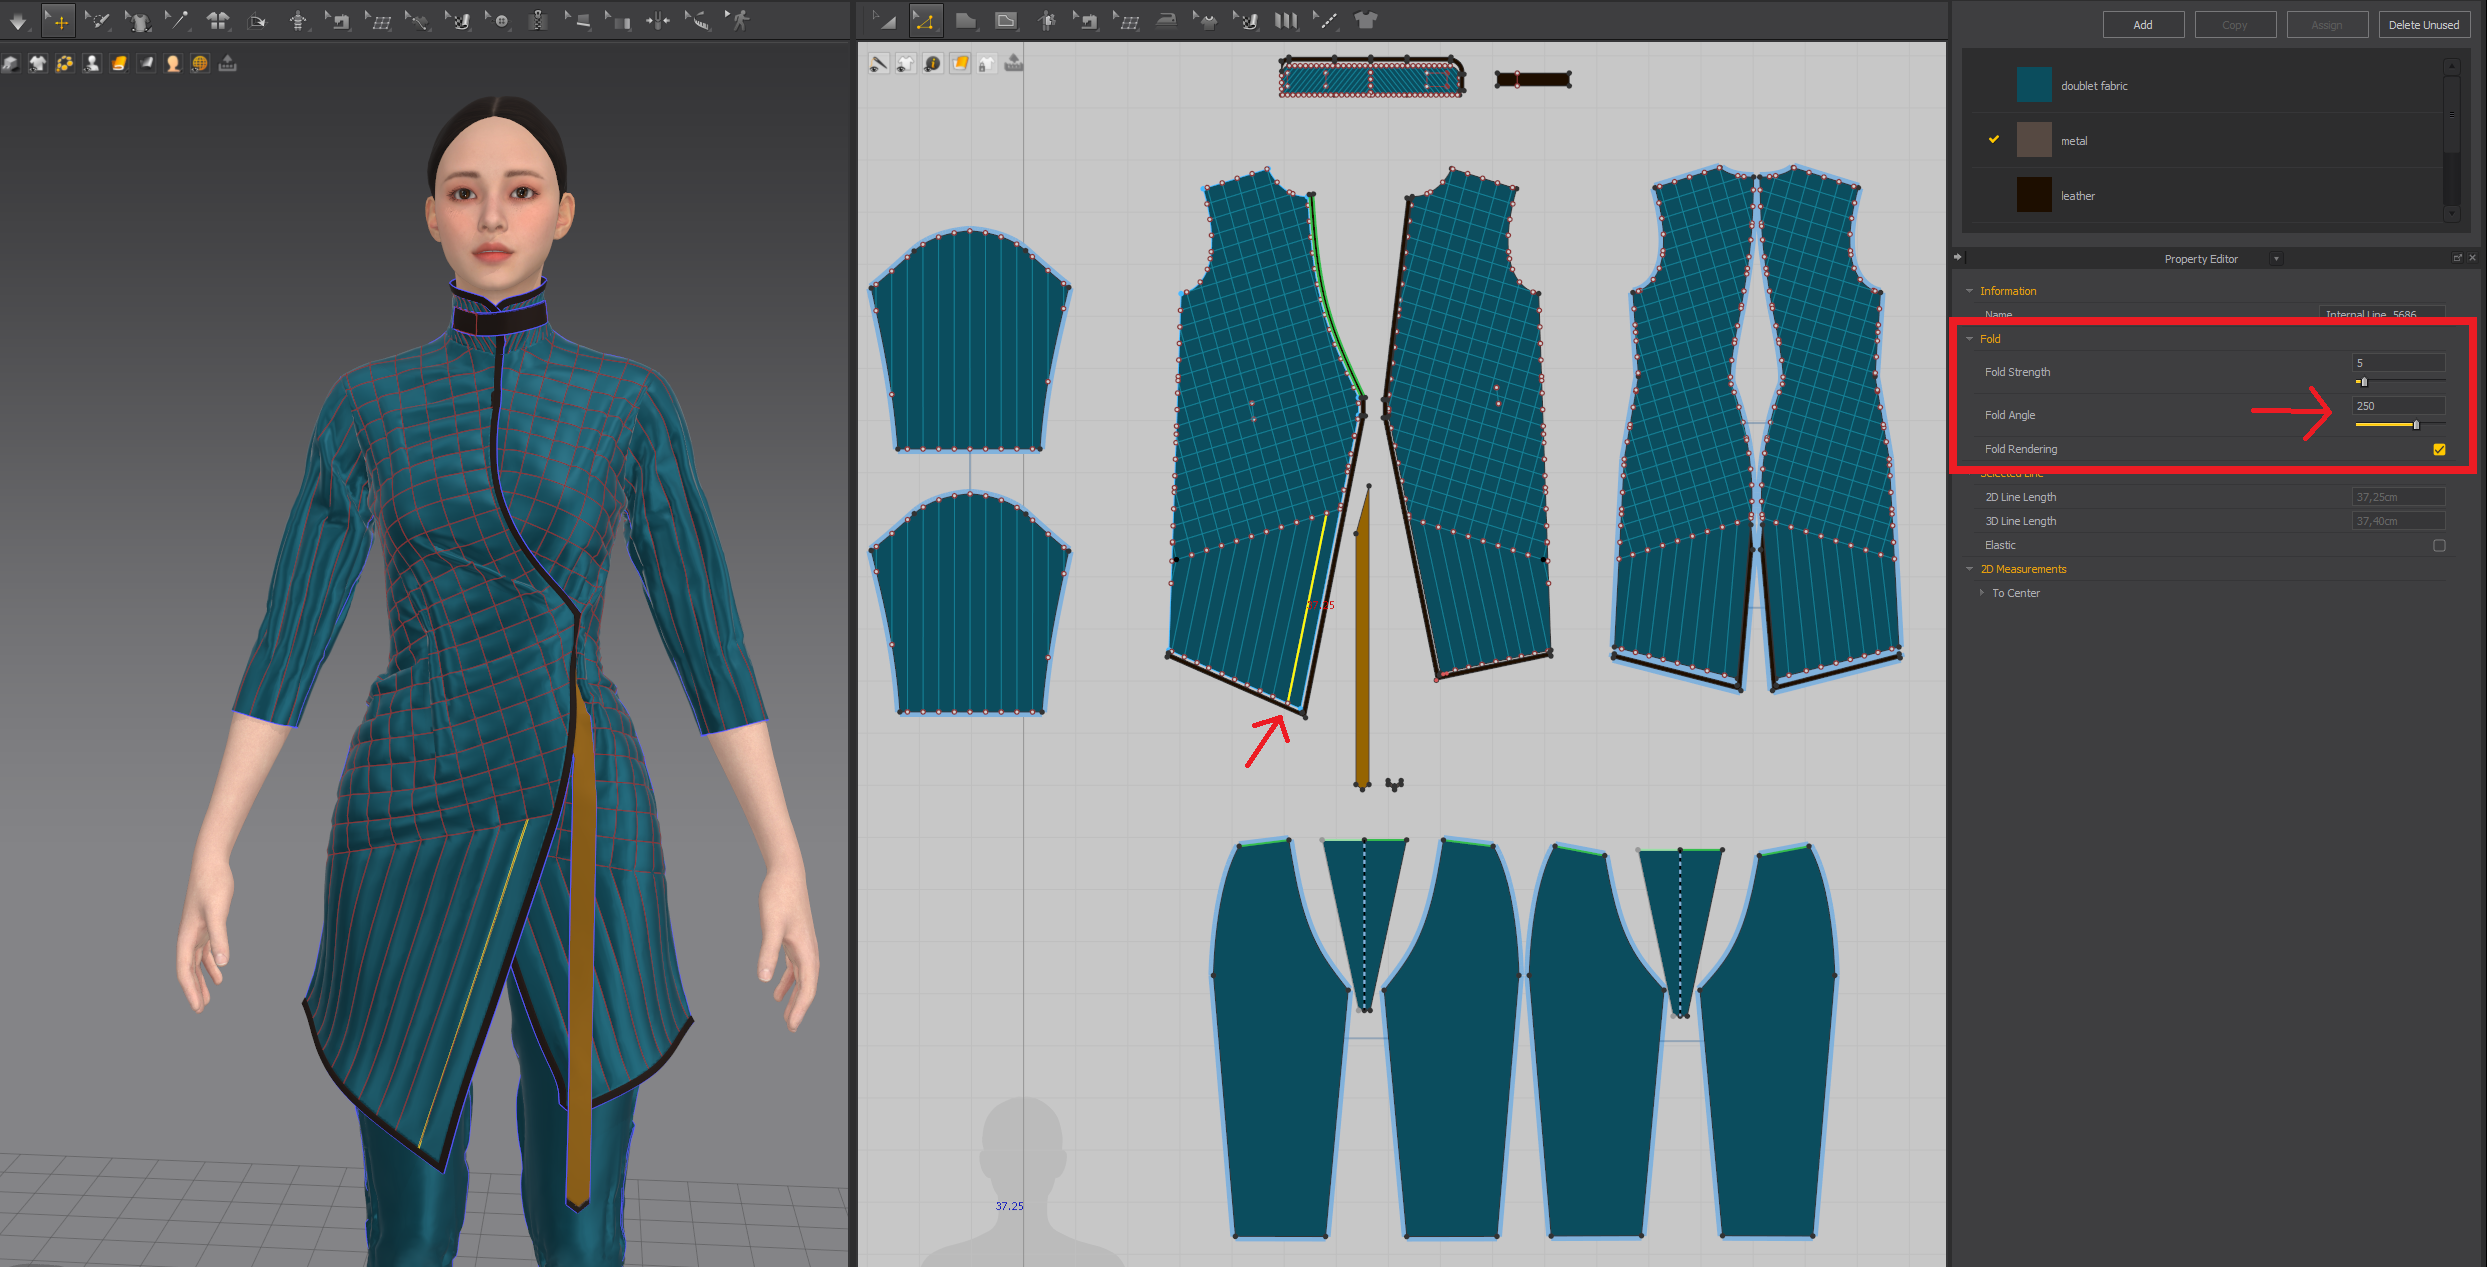
I like starting with an avatar in A-pose, where I make a doublet: a regular fabric garment usually worn under the armor. I keep it single-layered since most of the reverse won't be shown, the sewn lines are actually internal lines with fold angles over 180.
Then I add the patterns to be the armor itself, I like to start with a Trim Full Grain Leather fabric and then tweak its properties until it reaches the desired hardness.
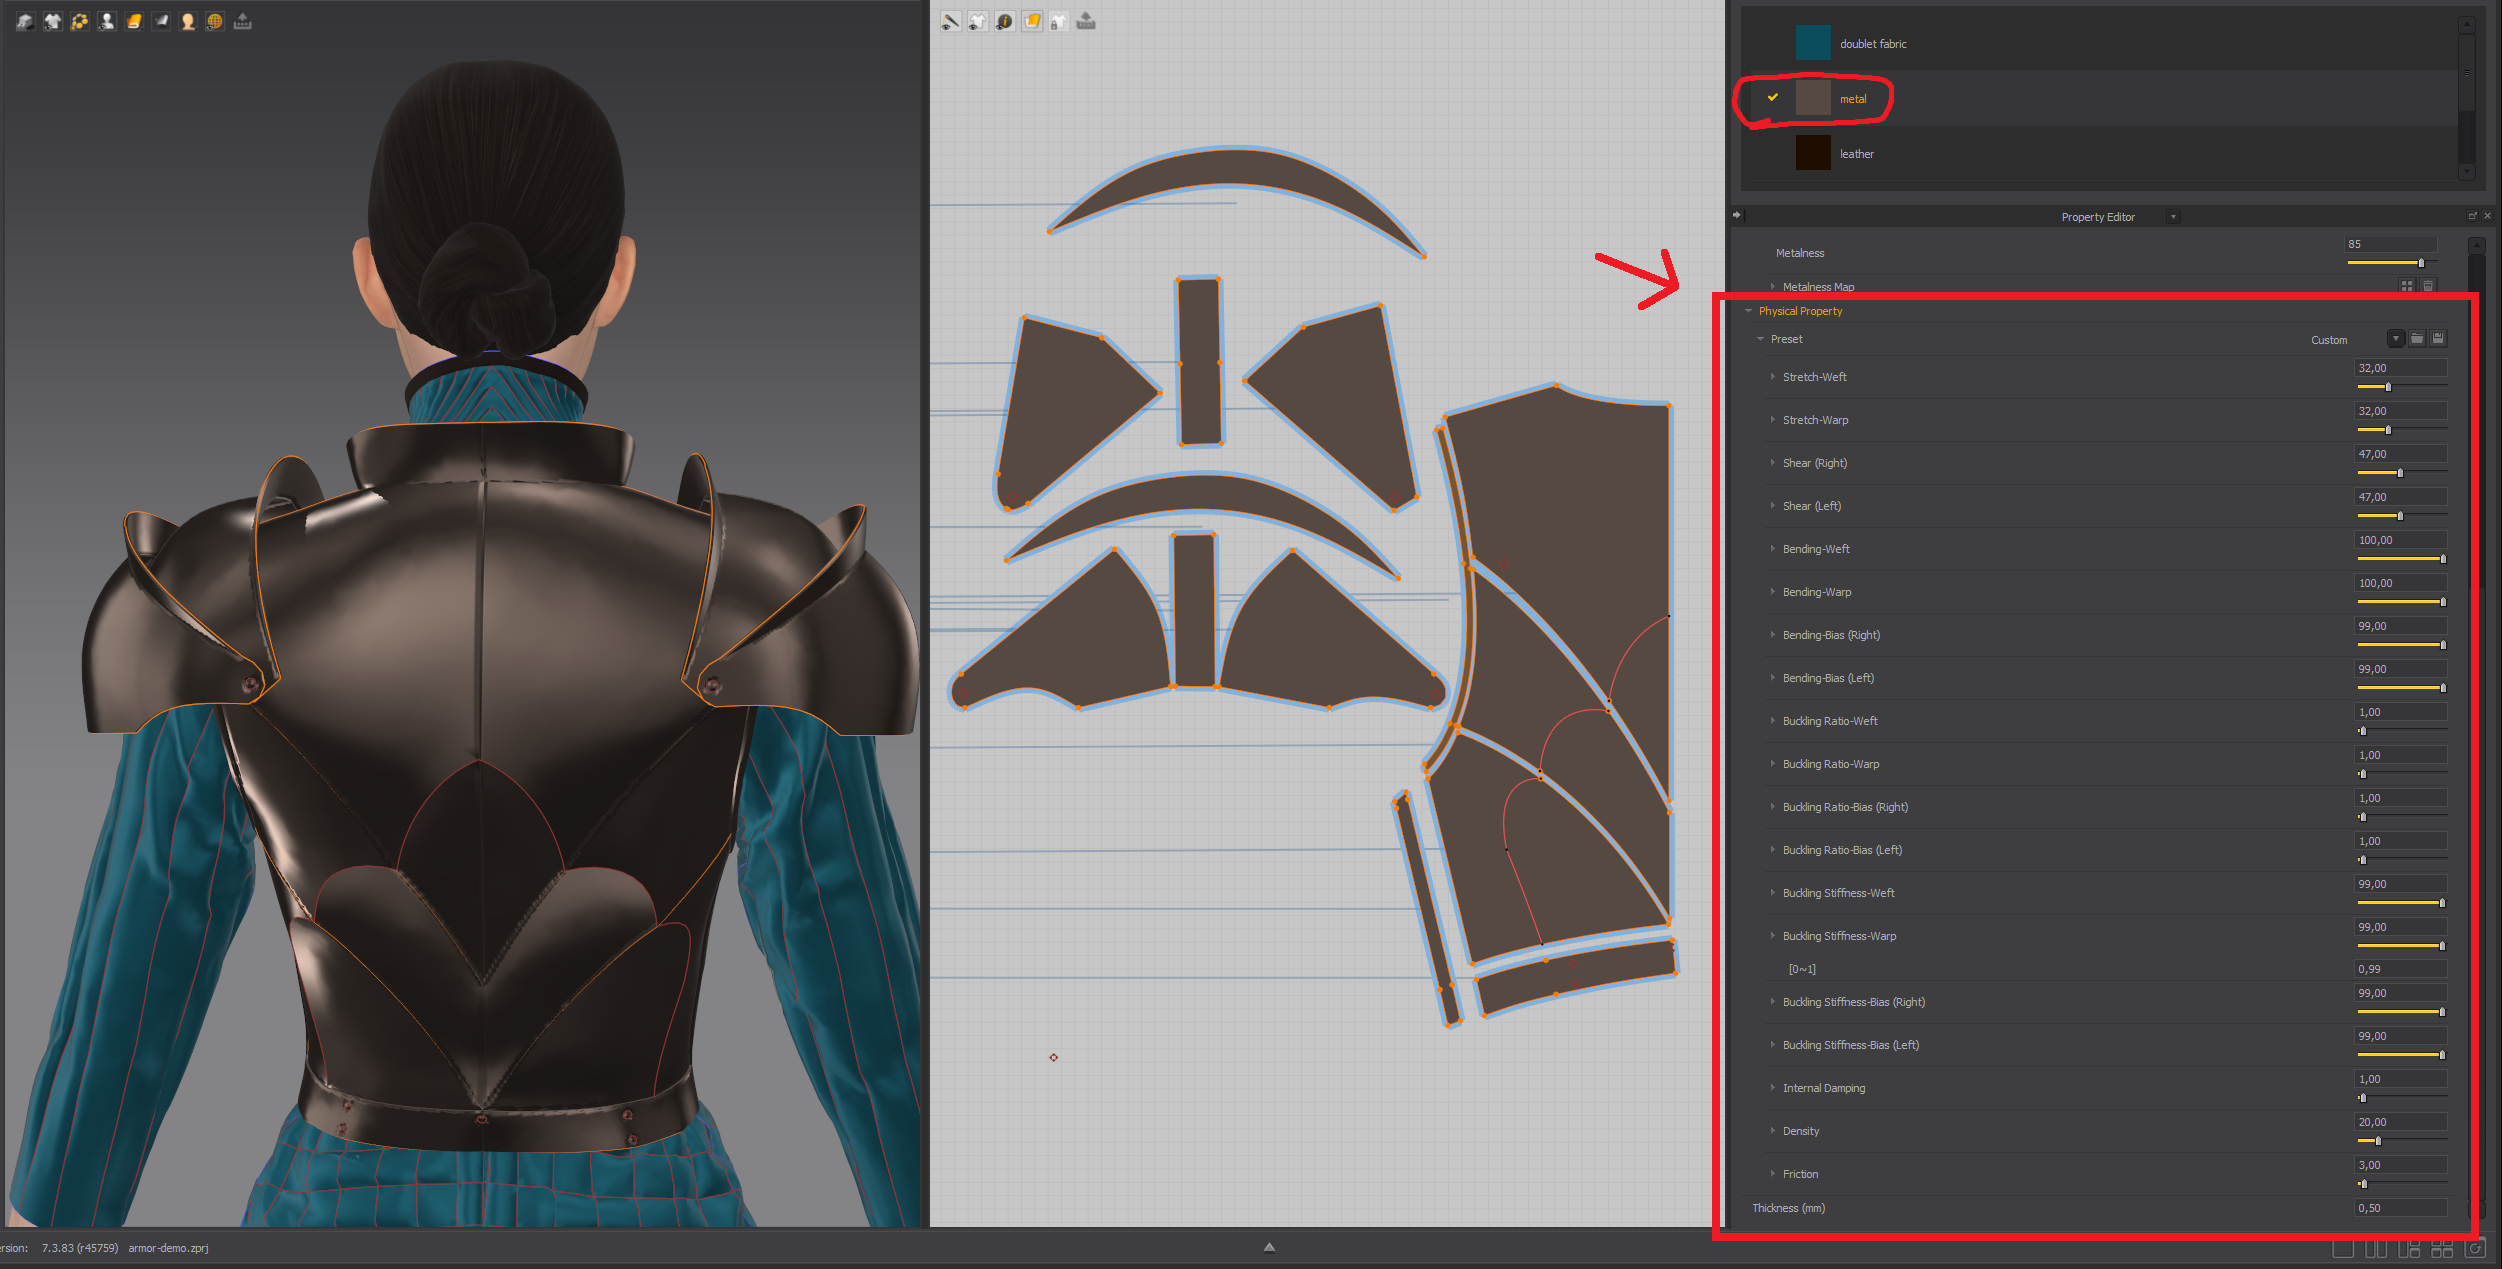
To keep the armor pieces attached one to another I use internal lines to emulate rivets or links. I may model some leather stripes to attach the metal pieces too. It will serve as a guide later when texturing to make it look like a rivet.
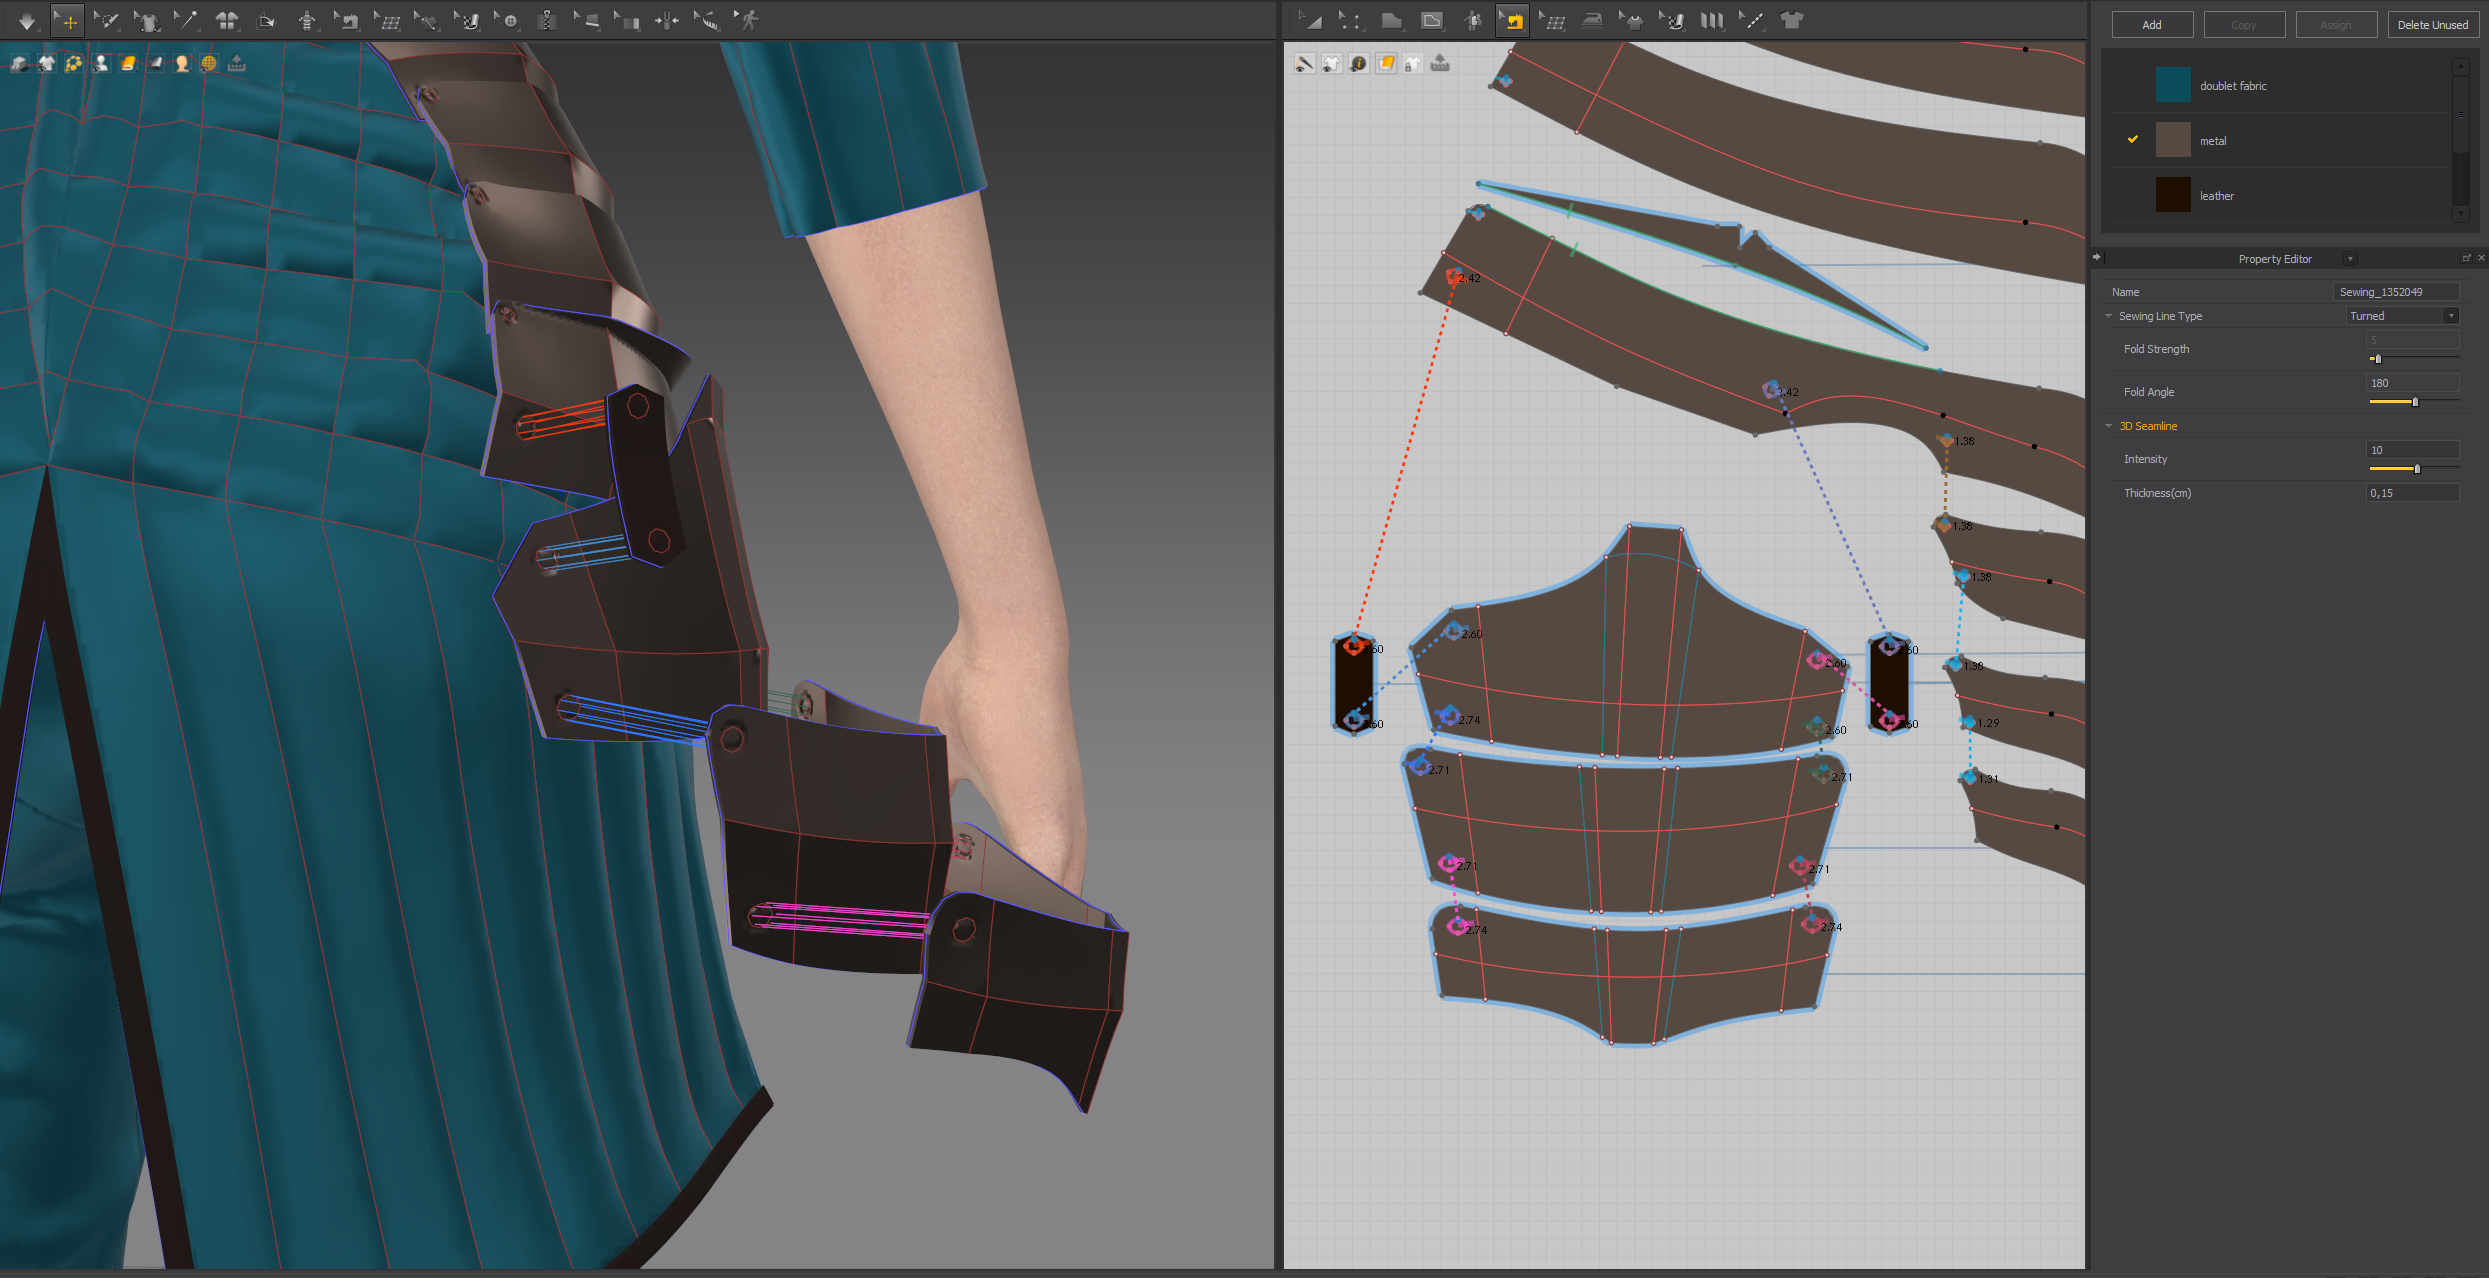
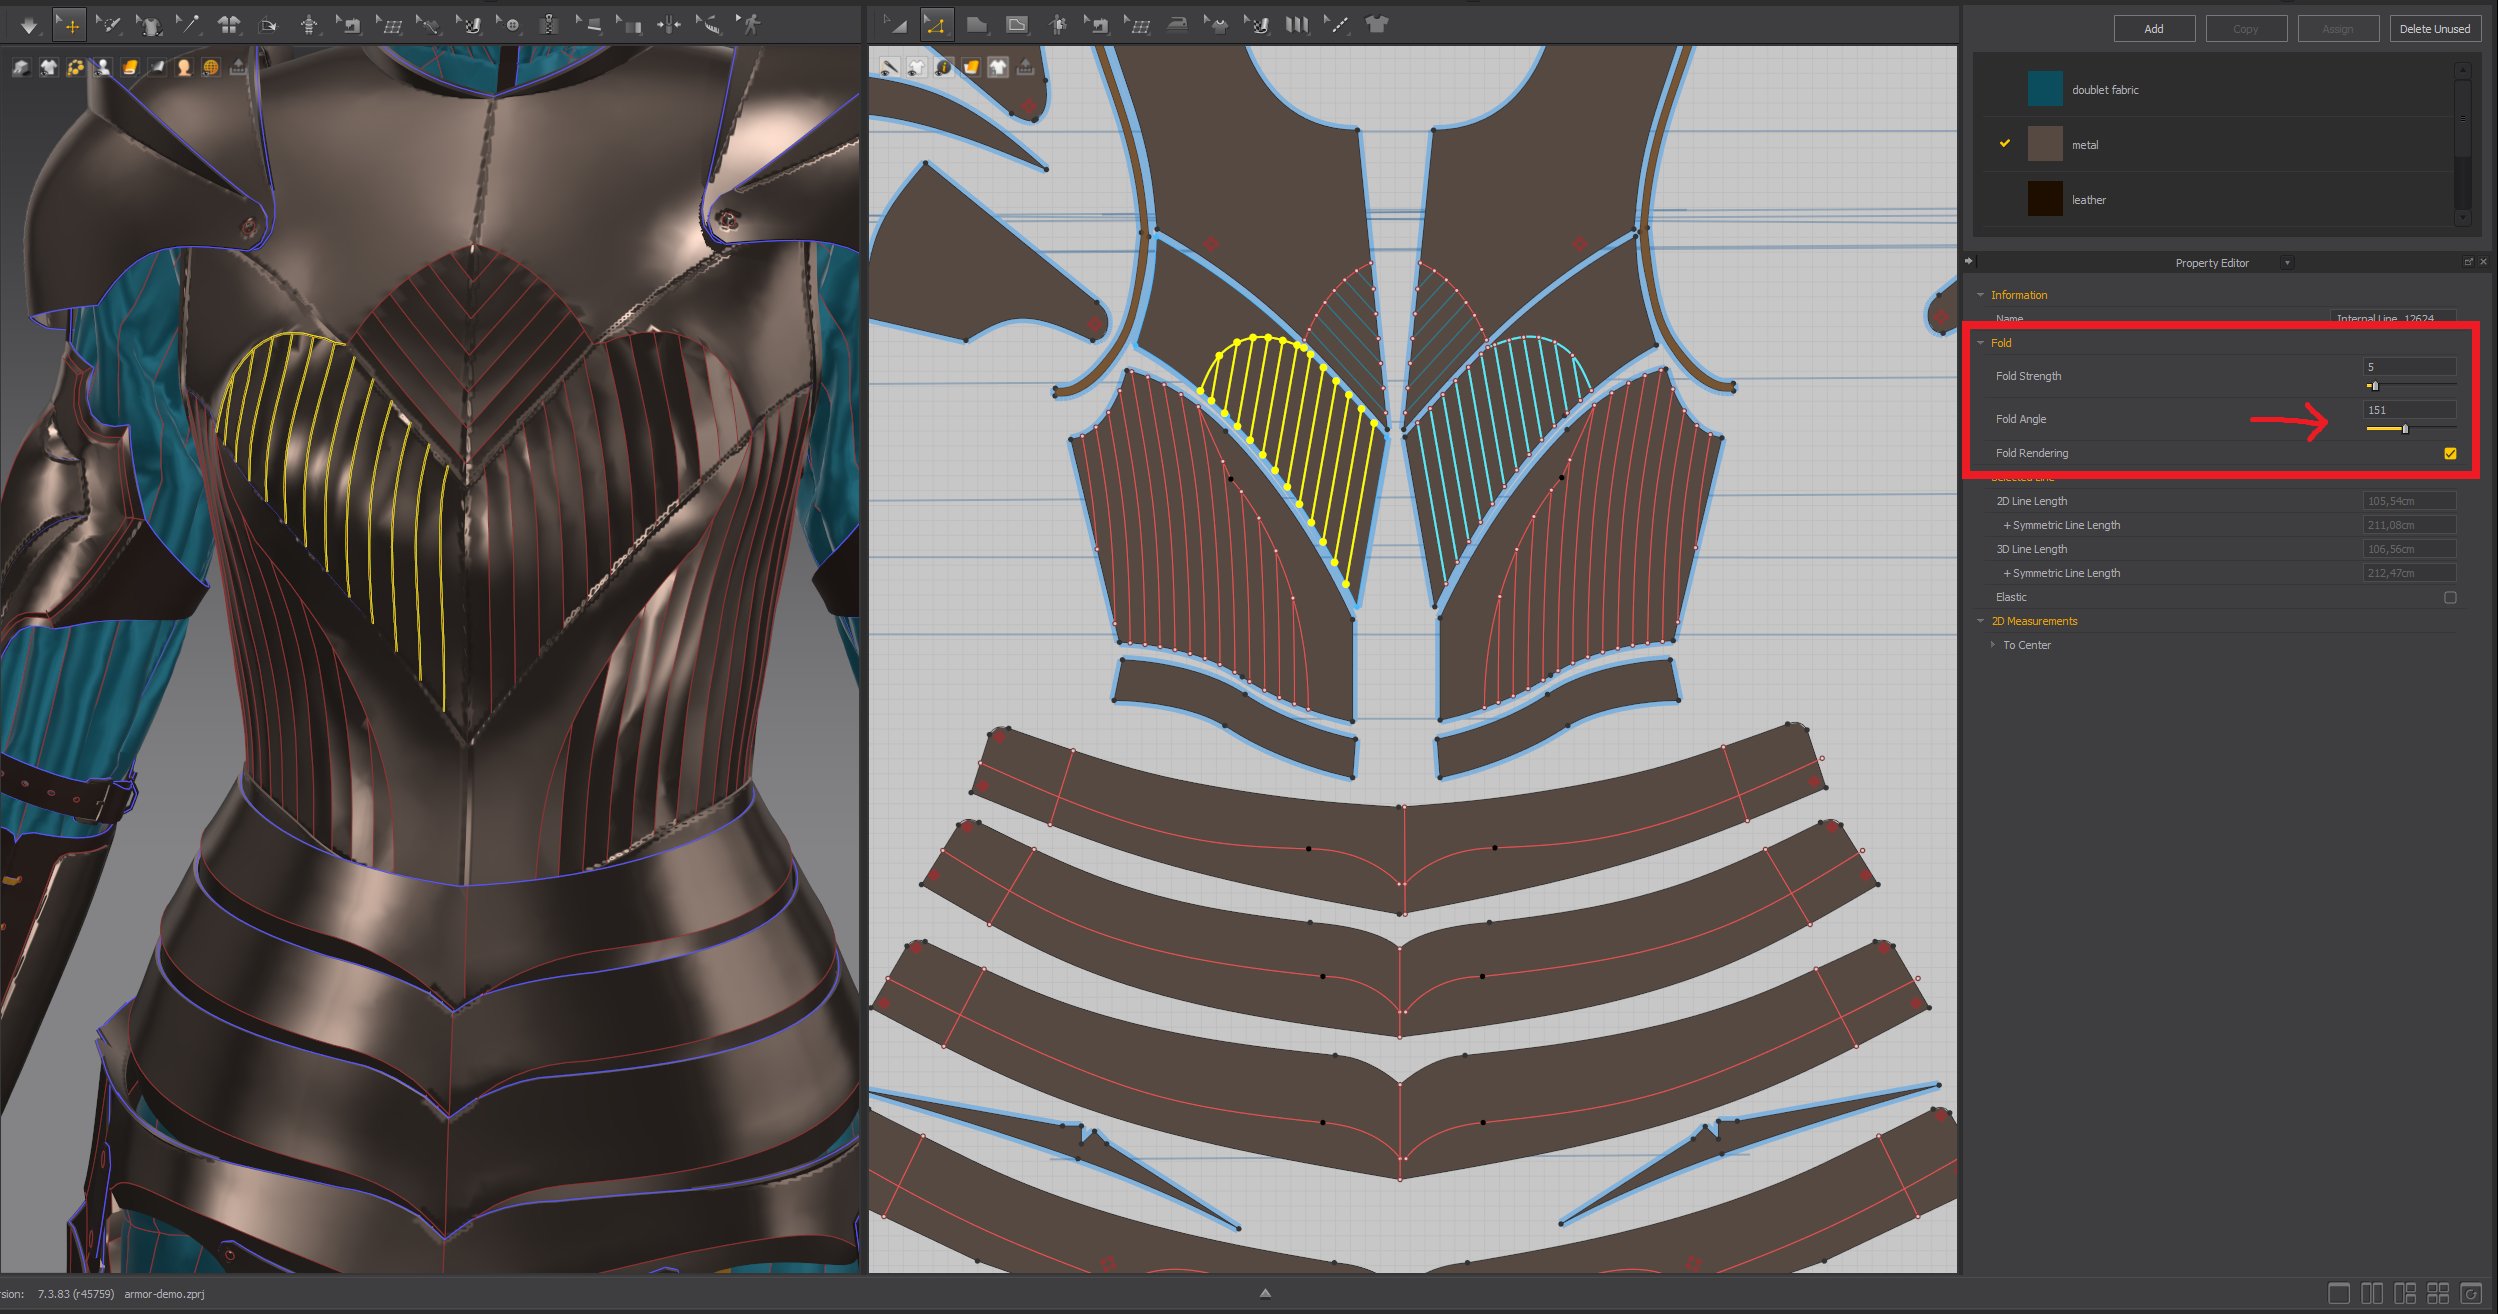
That done, I go to designing the surface angles using internal lines and changing the fold angles too, <180 for the pinch effect and >180 for creases. Some designs will need several internal lines and different fold angles. It may be needed to apply fold angles on the sewing lines too. That's what will make the sculpted appearance of the metal plates. Fold angles only show in 3D when simulating in "normal" or "fitting" modes, "fast" mode does not deliver a good result.
Depending on the piece, it also should be necessary to apply bond or seam tapings ("under the collar" preset is great for this) and, after reaching the desired shape, solidify so it stays in place.
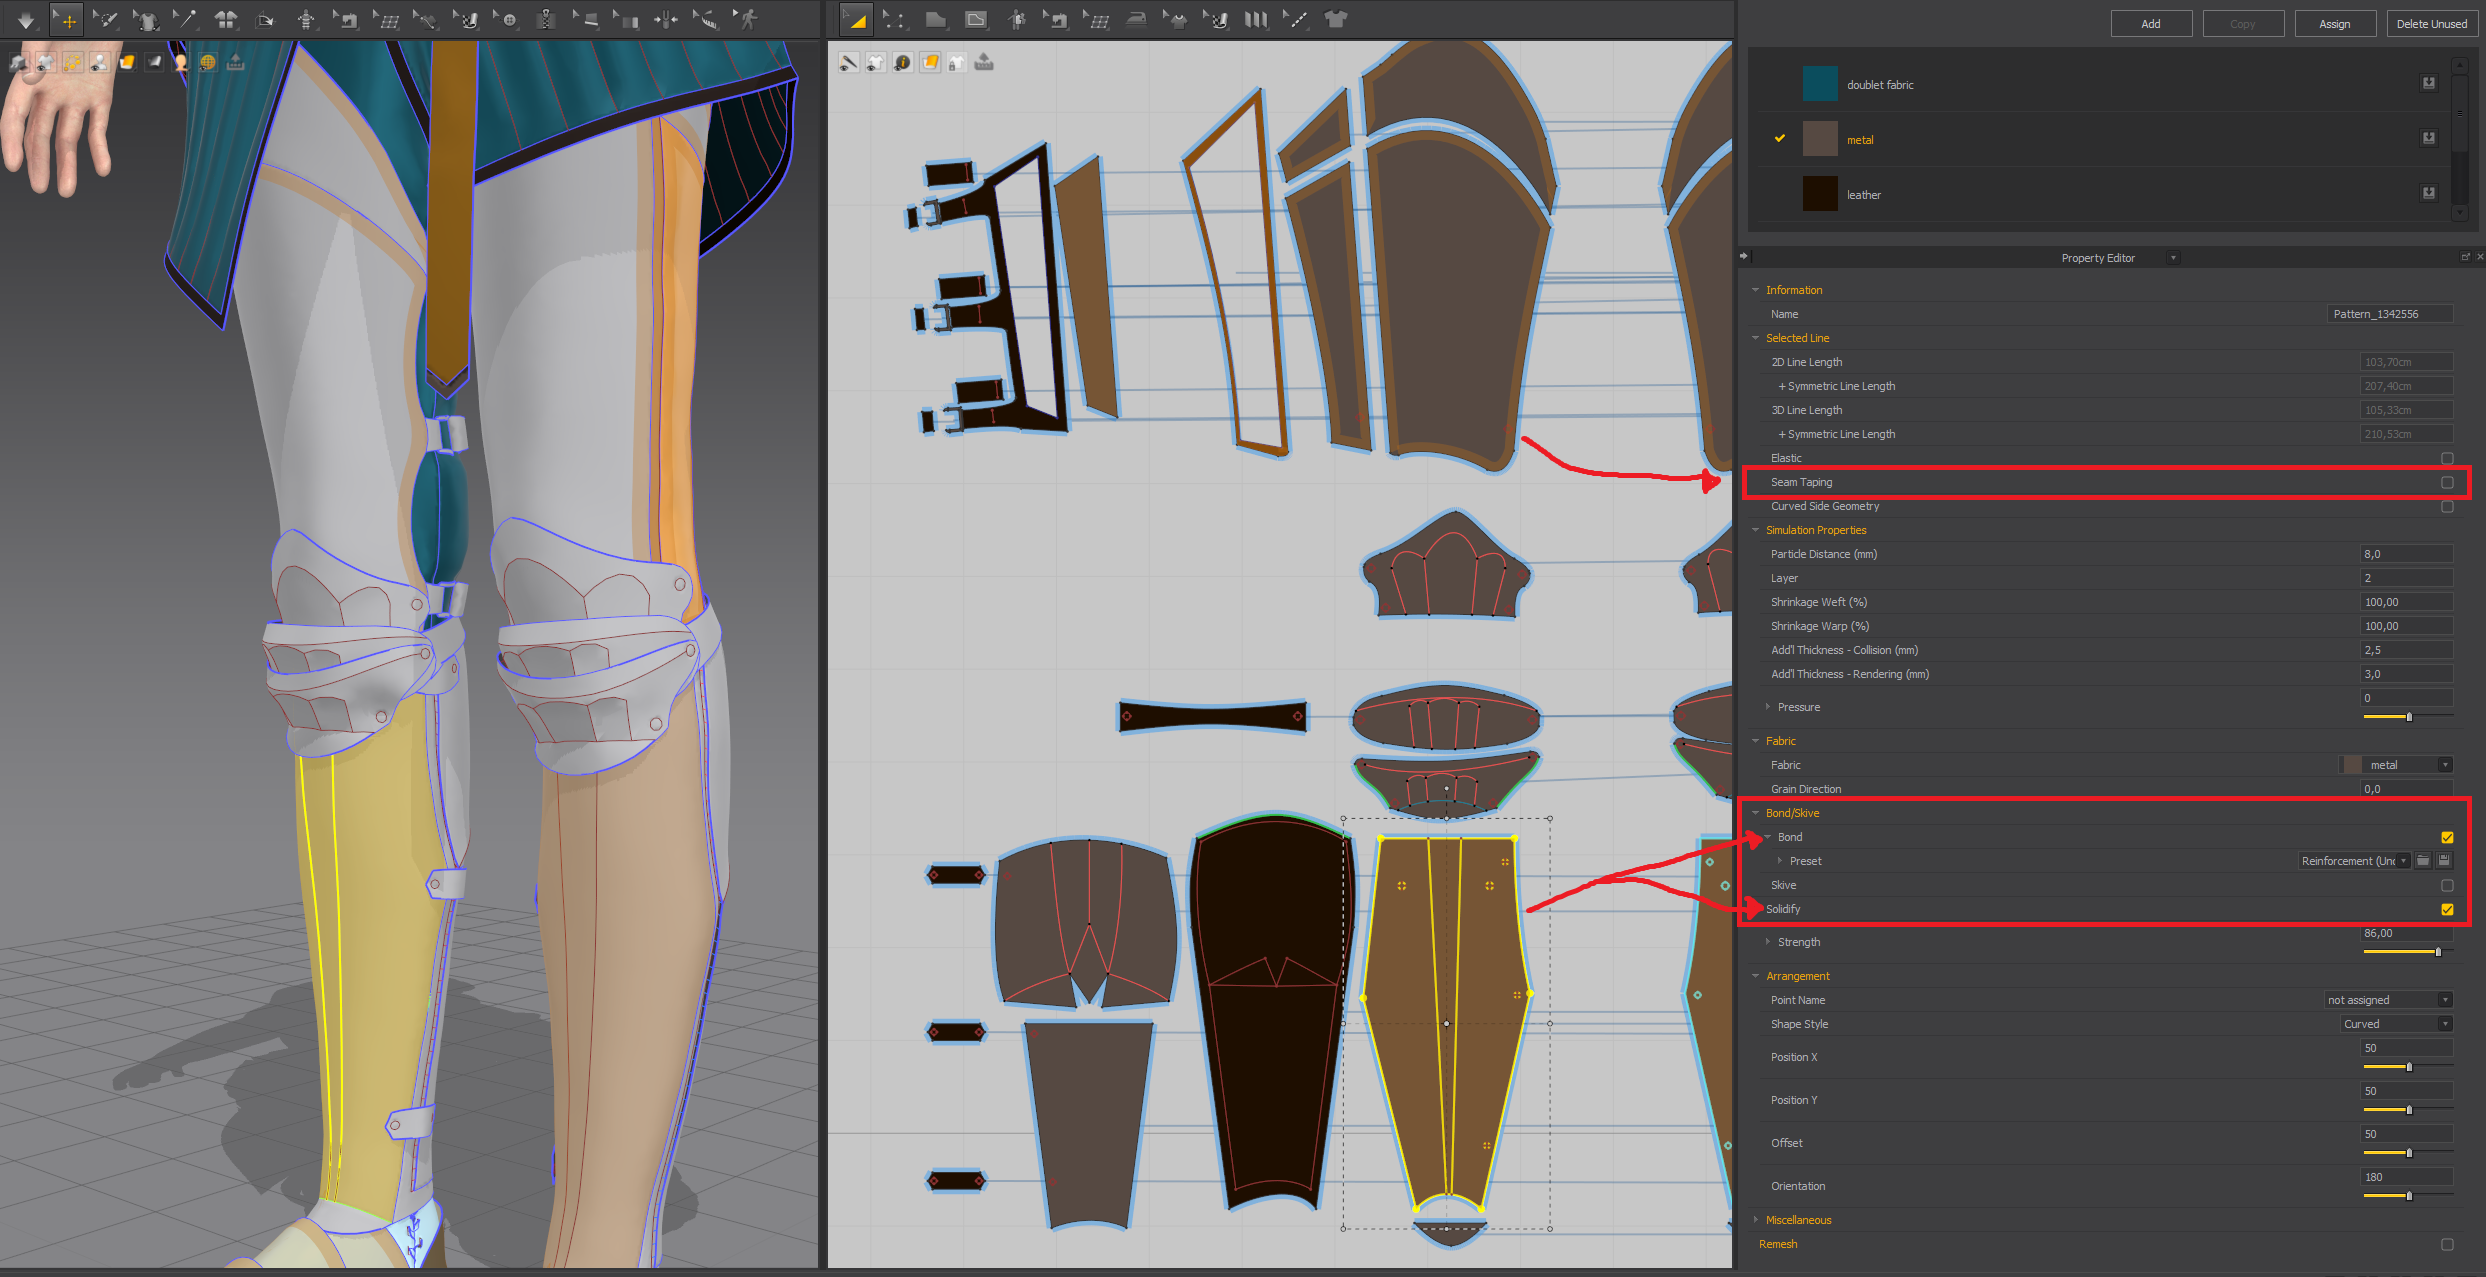
Last but not least, I like to play with the thickness too. Usually, I lower the curved side geometry or even remove it to keep it more angular.
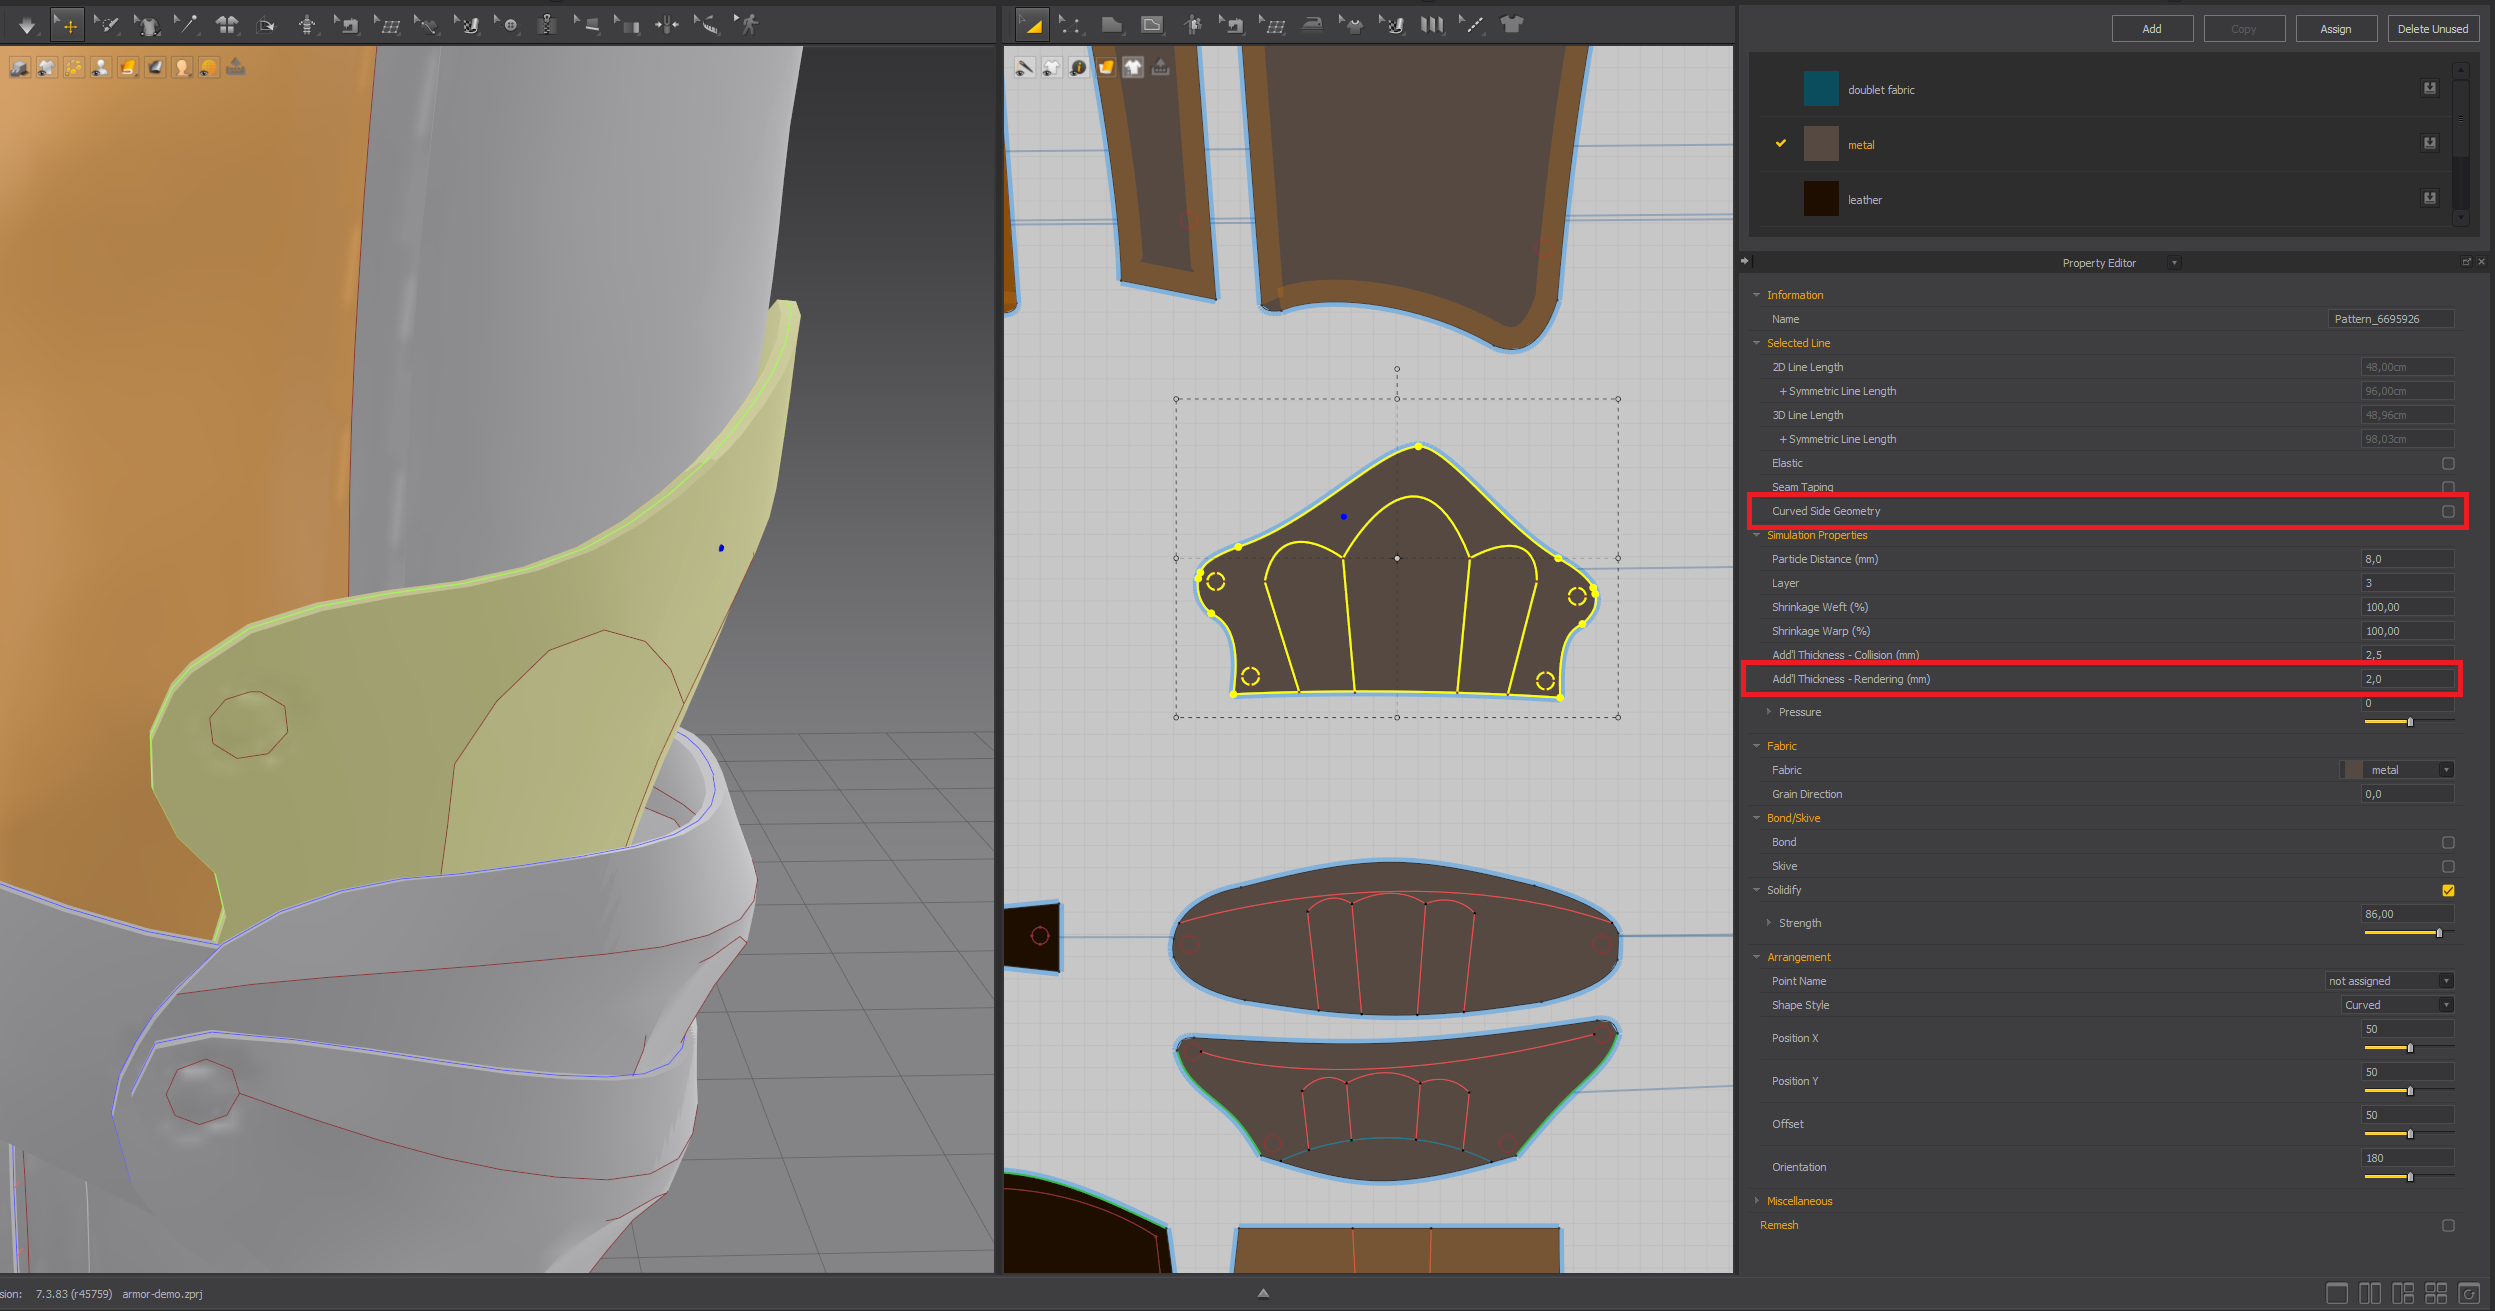
That's the essence of how I make armor and hard-surface elements using Marvelous!
The only challenge I faced was that I had to adapt the patterns to visually fit what I wanted.
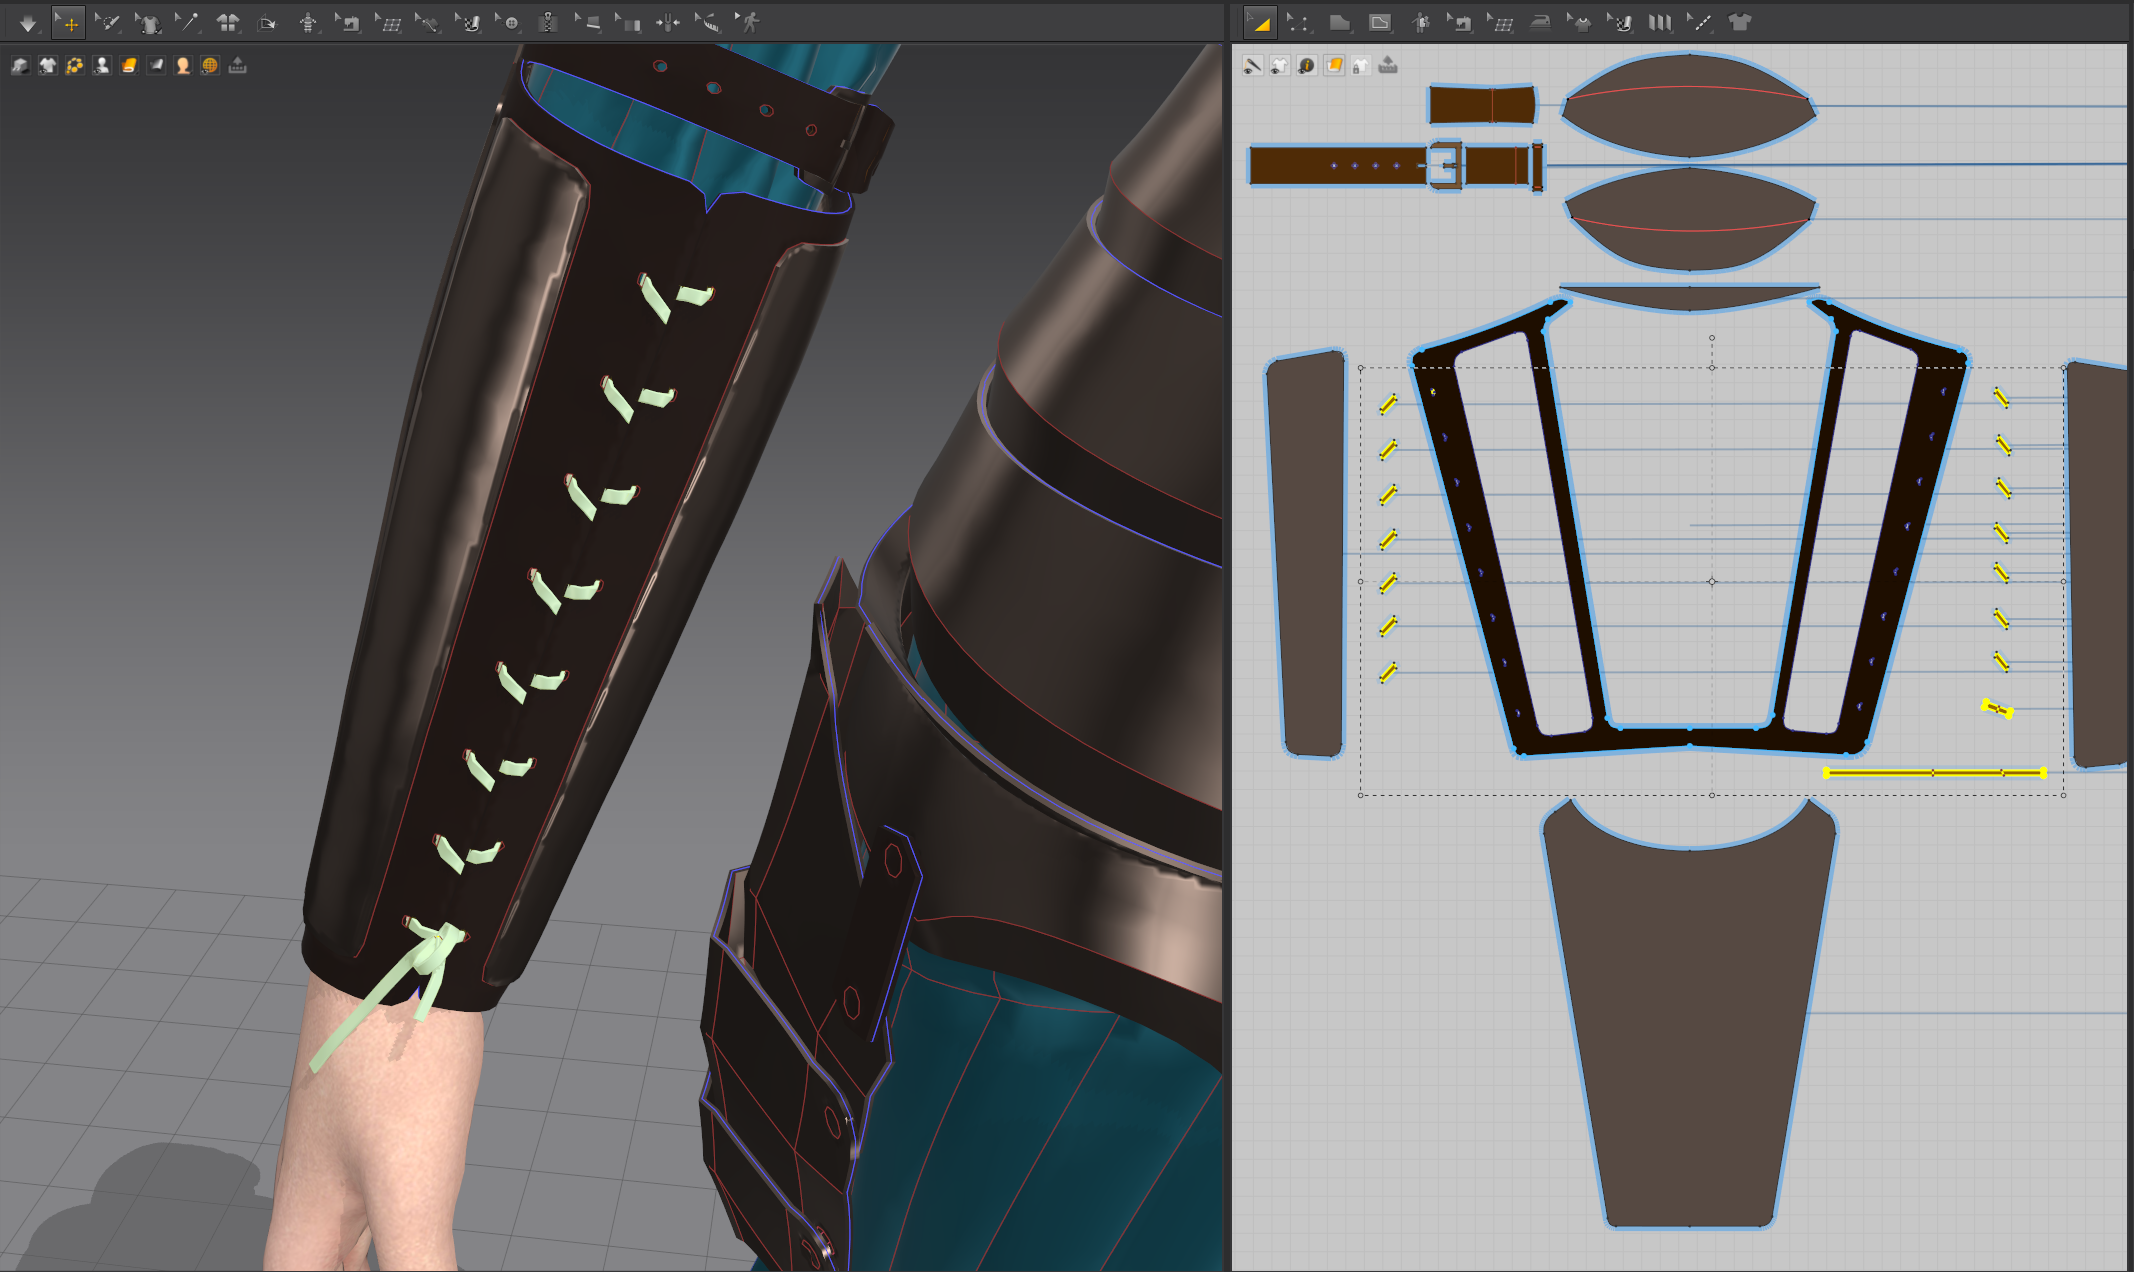
For example, the cords that fasten the vambraces were not really long cords but little pieces sewn in the right places; the buckles were not really buckles but hard fabric cut in the right shapes. It doesn't need to be, just needs to look like it is. Anything else just required patience and creativity to shape the design.
Are there any tips and tricks with Marvelous Designer that you can share with the community?
There's one I like: for some pieces when you need to have a gap, for example, a corset backside or a deep neckline you want to keep in place, just make a piece of pattern fitting the gap and sew to the piece borders, then when simulating it will not show any pressure points or deformations. Deactivate (pattern only) and hide the 3D view of this pattern. You'll then have a gap with straight borders and the hidden piece will not be exported with your object!
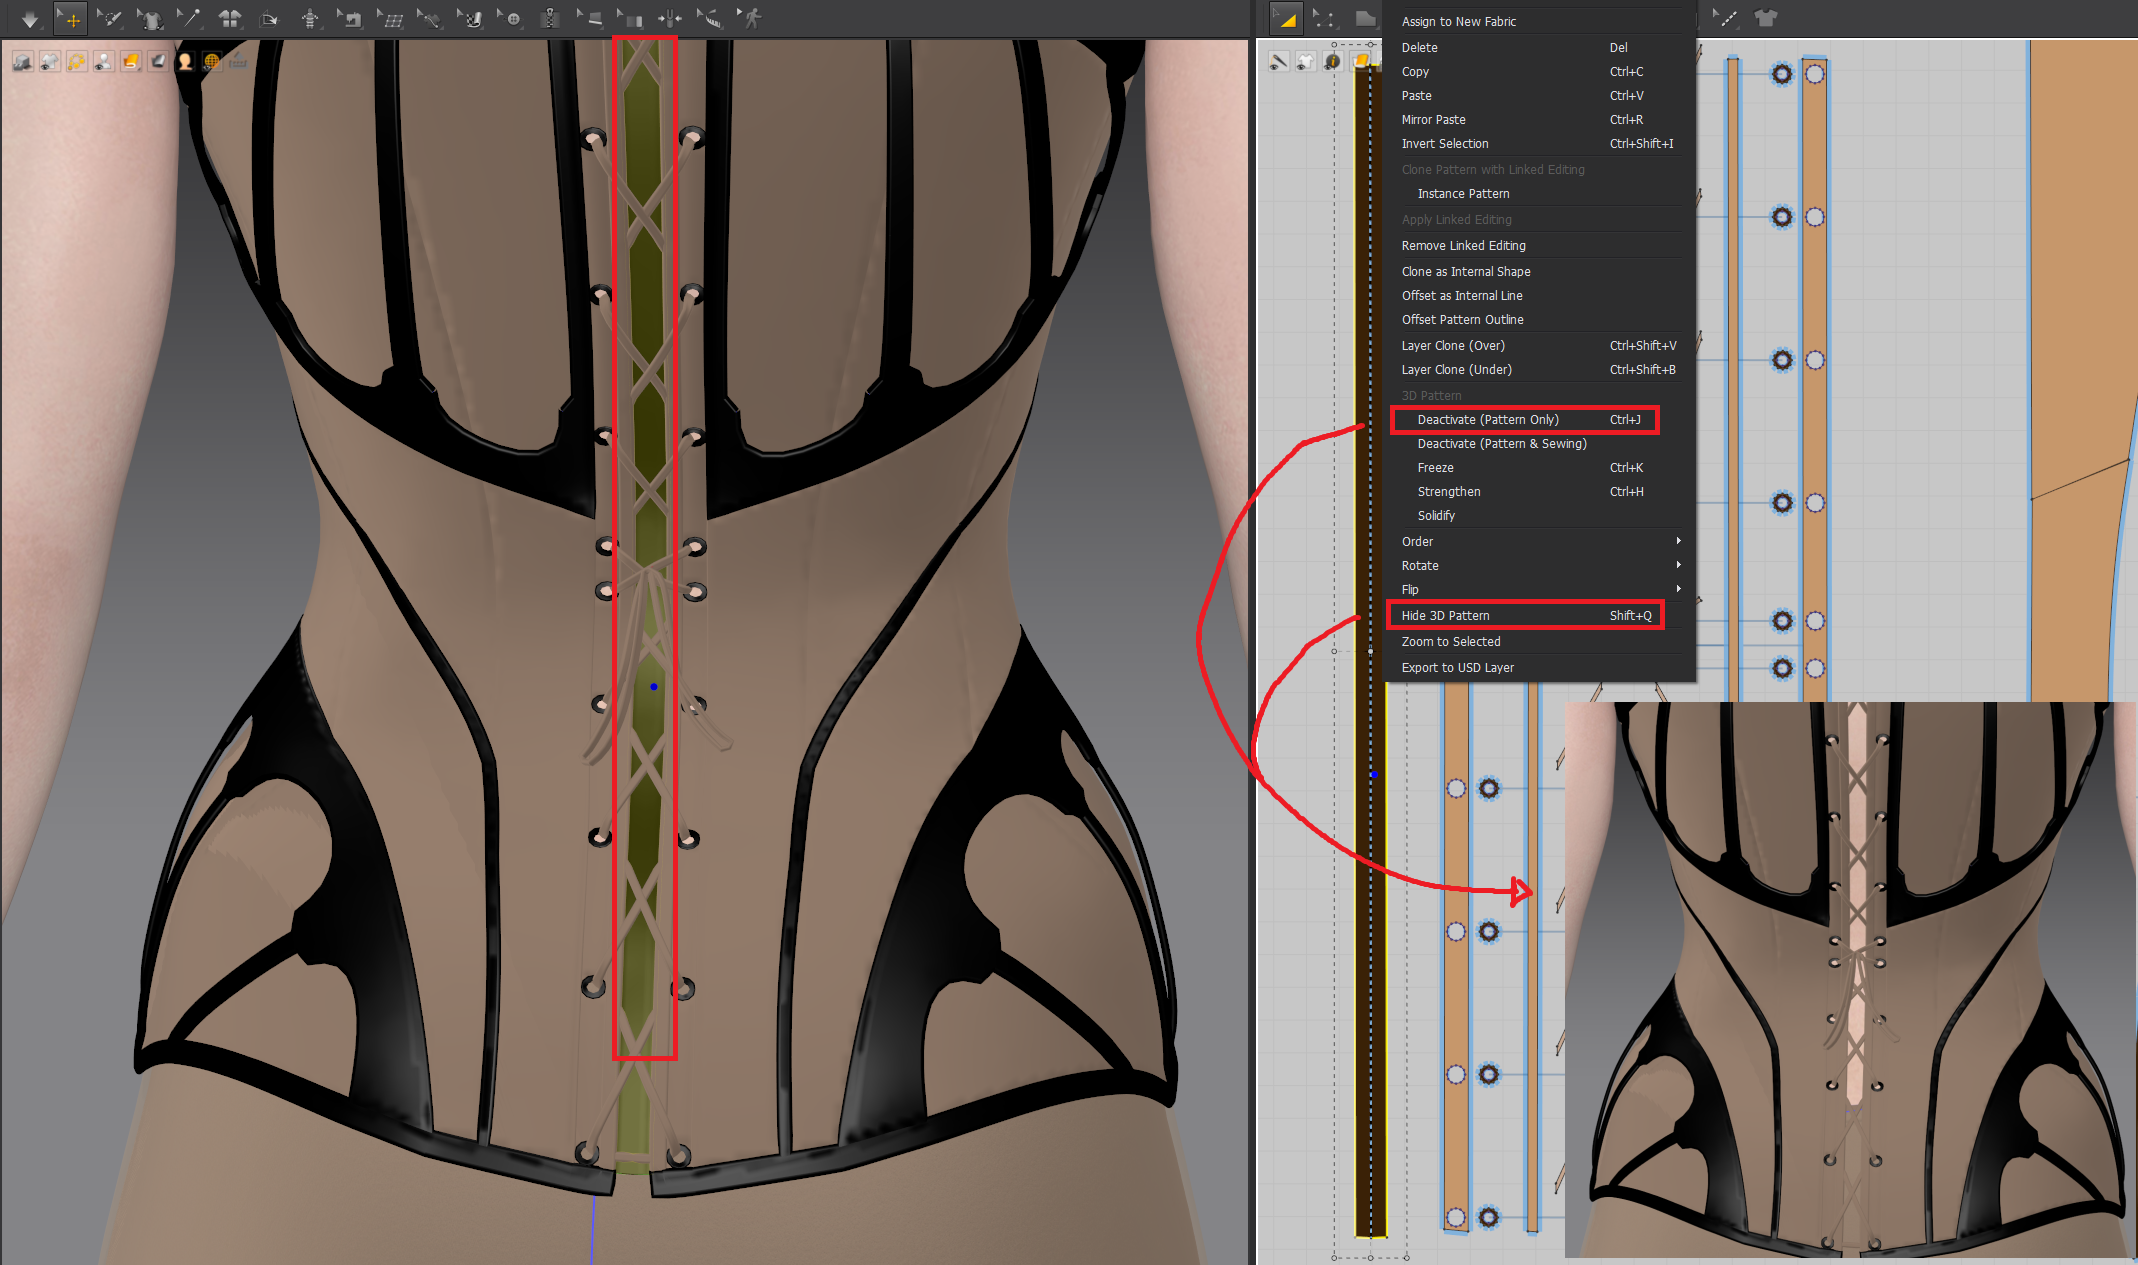
If you need to simulate an animation then you'll have to activate it, but it may face some instabilities then. Testing is the key.
by Sarah Prado
이 작업은 Pattern, Retopology, Texture, Material, armor, hardsurface 등의 기술로 제작되었습니다.
Marvelous Designer로 이와 같은 3D 의상·캐릭터 작업을 직접 만들어볼 수 있습니다.