The-Oyabun
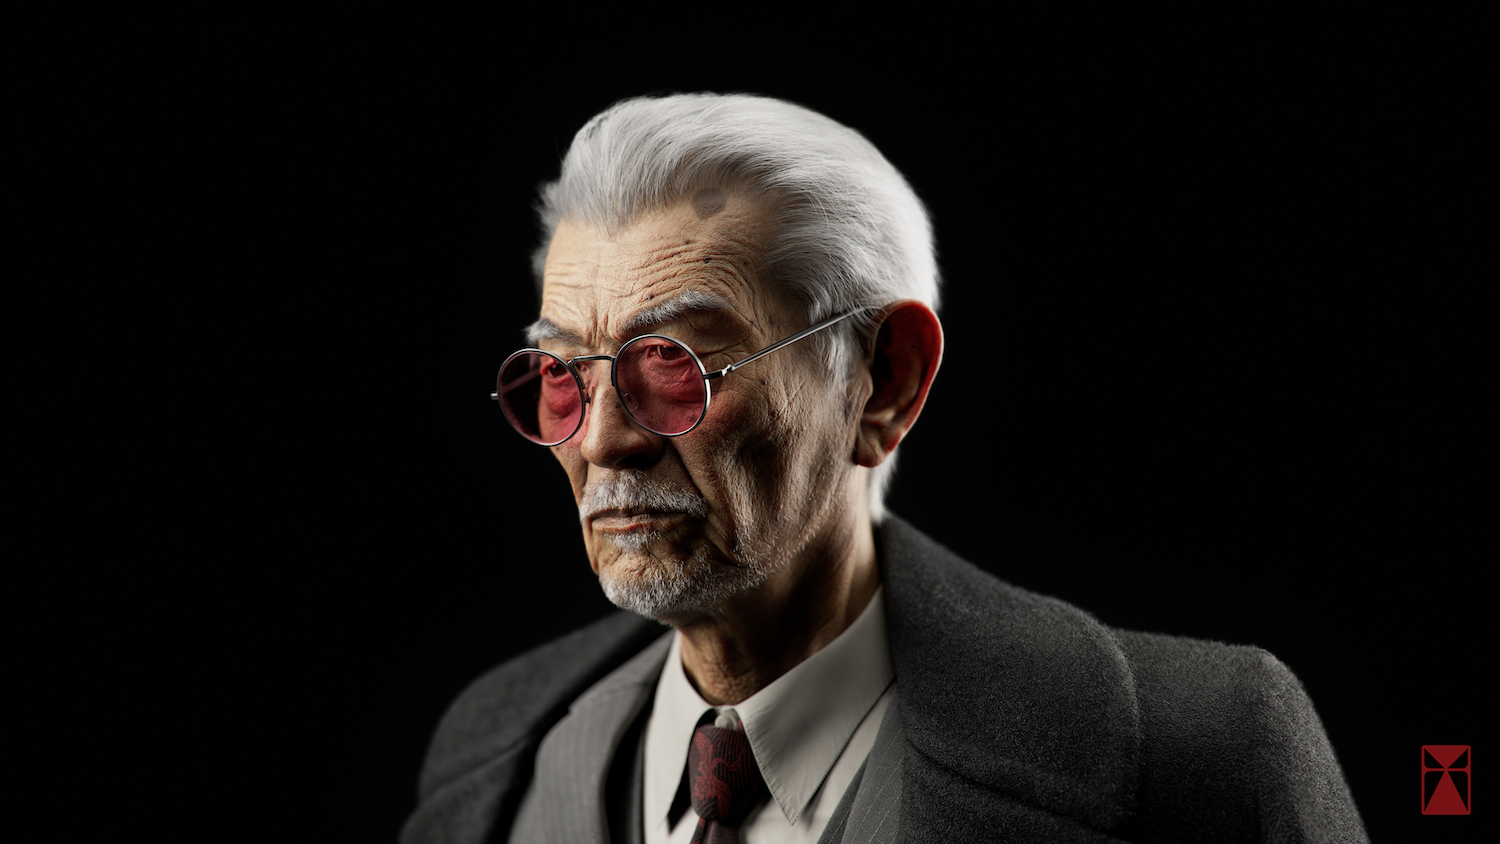
The Oyabun, which means 'the boss,' is the title of the leader in the Yakuza. Dive into the realistic character creation process using Marvelous Designer!
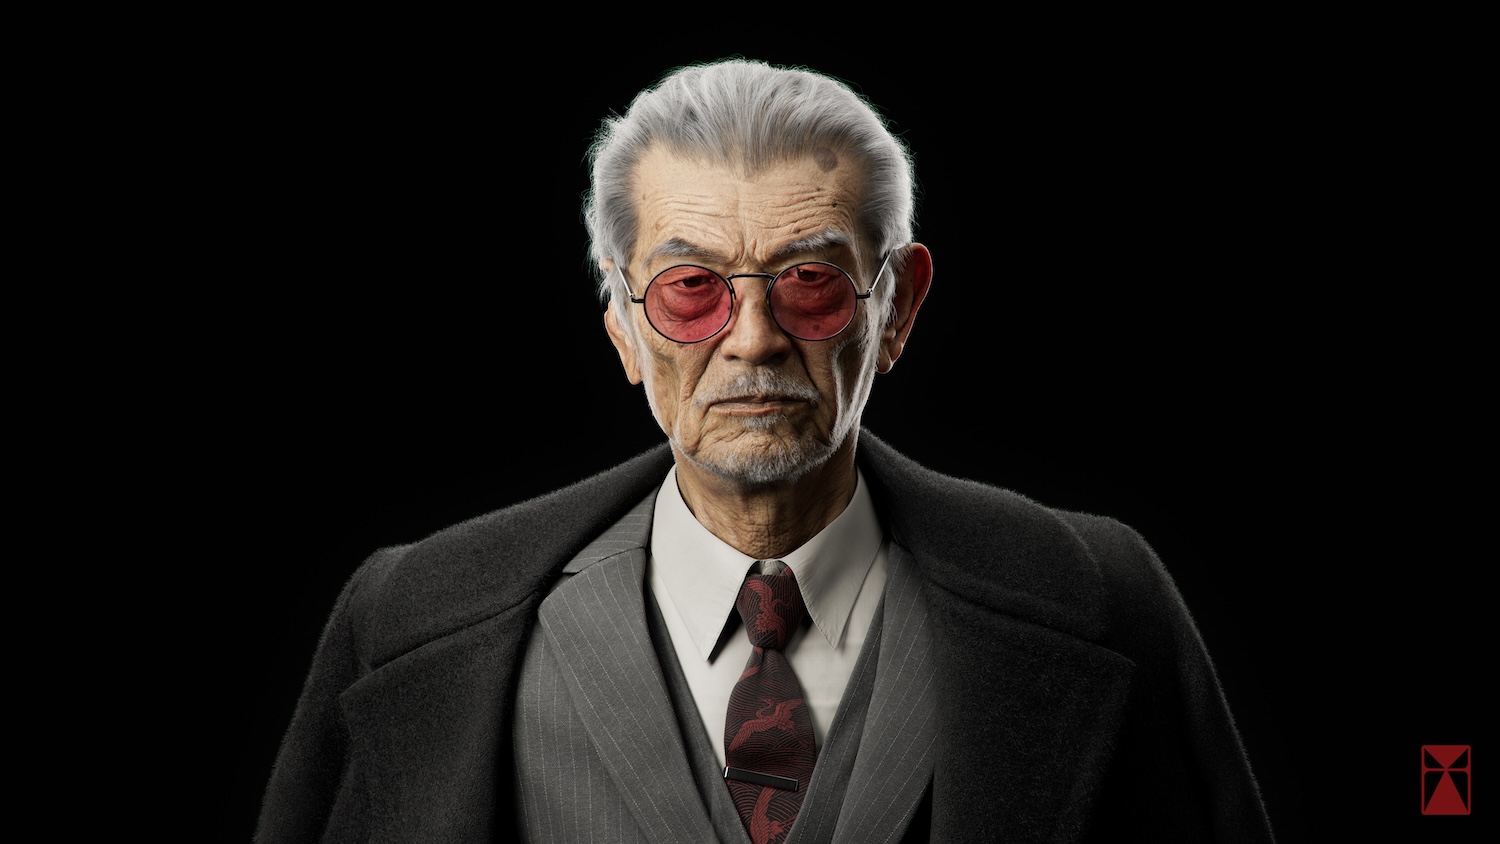
Interview with Xhon Hysenaj | The-Oyabun | 3D Artist
Artist Introduction
Hello, I’m Xhon Hysenaj, an Italian 3D artist based in London, I currently work as a freelancer and I'm specialized in character modeling and design.
How did you first get started in 3D?
I first got started in 3D when I discovered my passion for digital art during high school. Initially, I was fascinated by video games and animated movies, which sparked my curiosity about how these incredible worlds and characters were created. I began experimenting with free 3D modeling software and online tutorials, dedicating countless hours to learning the basics. My journey truly began to take shape when I took a few online courses, which deepened my understanding and skills. Eventually, I started working on small freelance projects, gaining practical experience and refining my craft. This combination of self-study, formal education, and hands-on work paved the way for my career as a 3D artist.
Tell us about the project: The-Oyabun
Earlier this year, I took a trip to Japan, and when I returned, I felt incredibly inspired. Additionally, my interest was fueled by watching many movies and playing numerous video games related to the Yakuza.
The Oyabun, which means "the boss," is the title of the leader in the Yakuza. I decided to create a Yakuza character because I've always been fascinated by Japanese art, from architecture to product design.
While planning the project, I knew a few things: first, the character had to be elderly to differentiate from my previous projects and to practice something new; second, I wanted to work without a single specific main reference. I aimed to give myself more creative freedom and see how this would impact my workflow.
Why did you decide to use Marvelous Designer? How did it help you serve art direction?
From the early stages, I knew the clothes will be the heart of the project. Without a clear reference in mind, I needed a tool that offered flexibility and precision.
Marvelous Designer was the perfect choice for my pipeline because it allows for realistic cloth simulation and intricate detailing. Its versatility enabled me to quickly experiment with different fabric designs and most importantly with different poses, ensuring the final look aligned perfectly with the artistic direction I was looking for.
Can you give us a quick overview of the different tools used in your pipeline?
Project Pipeline Breakdown
Reference Collection
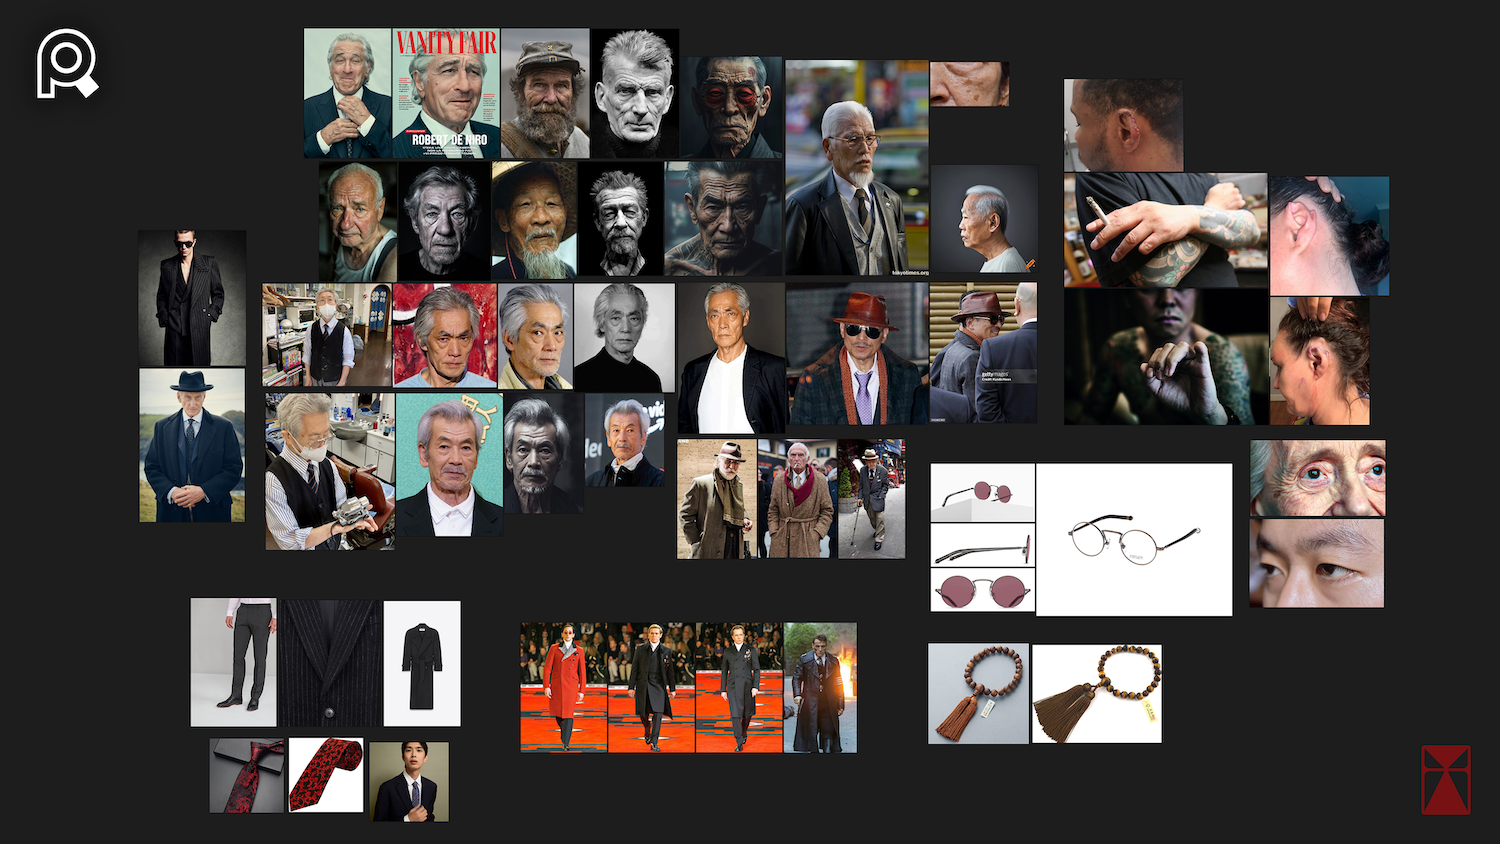
The first step in my pipeline is using PureRef to gather references for each aspect of the creation: head, hair, clothing, pose, and accessories.
Initial Setup in Autodesk Maya
Next, I jump into Autodesk Maya, where I use a preexisting body shape as a mannequin to define the character's height and body size, considering his age and the initial pose idea. I quickly pose the mannequin accordingly.
Head modeling
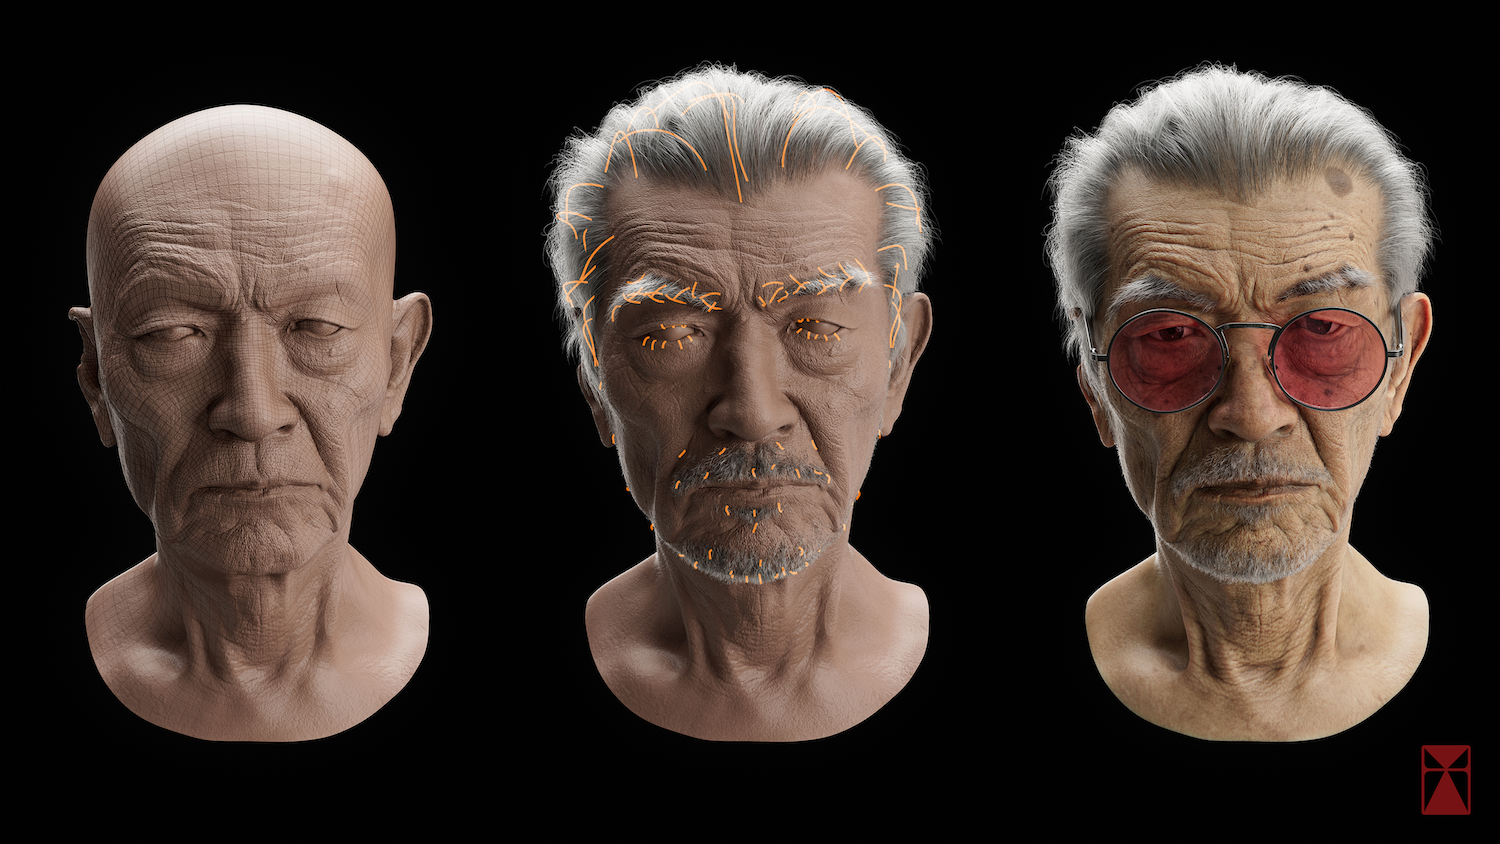
Once the pose is ready, I start working on the head using Mudbox, ensuring the proportions are correct. I use Texturing XYZ during the sculpting process for high-quality pore-level detail maps. Once the sculpt is complete, I proceed with texturing in Substance Painter and create the hair using Maya XGen.
Clothing Creation in Marvelous Designer

I then move to Marvelous Designer to create the clothes using the mannequin previously created. Given that the character is a boss, I opted for a formal look: coat, jacket, suit pants, waistcoat, shirt, and tie. My experience in fashion helps me comfortably work with fabric patterns in the 2D pattern window.
Retopology and Mesh Optimization
After achieving the overall composition, I export the model for retopology, a crucial and time-consuming step to ensure the mesh is optimized. To achieve a decent result, there are several options ranging from handmade retopology to various plugins for Maya or external software.
I used a technique taught to me at CG Master Academy during my Character Creation for Films-Cinematics course, making some personal modifications for quicker use.
For this process, there are two steps:
1. Export Simulated Mesh in Pose:
First, I export the simulated mesh in pose, dividing each garment with a particle distance of 10 to ensure enough resolution from the simulation.
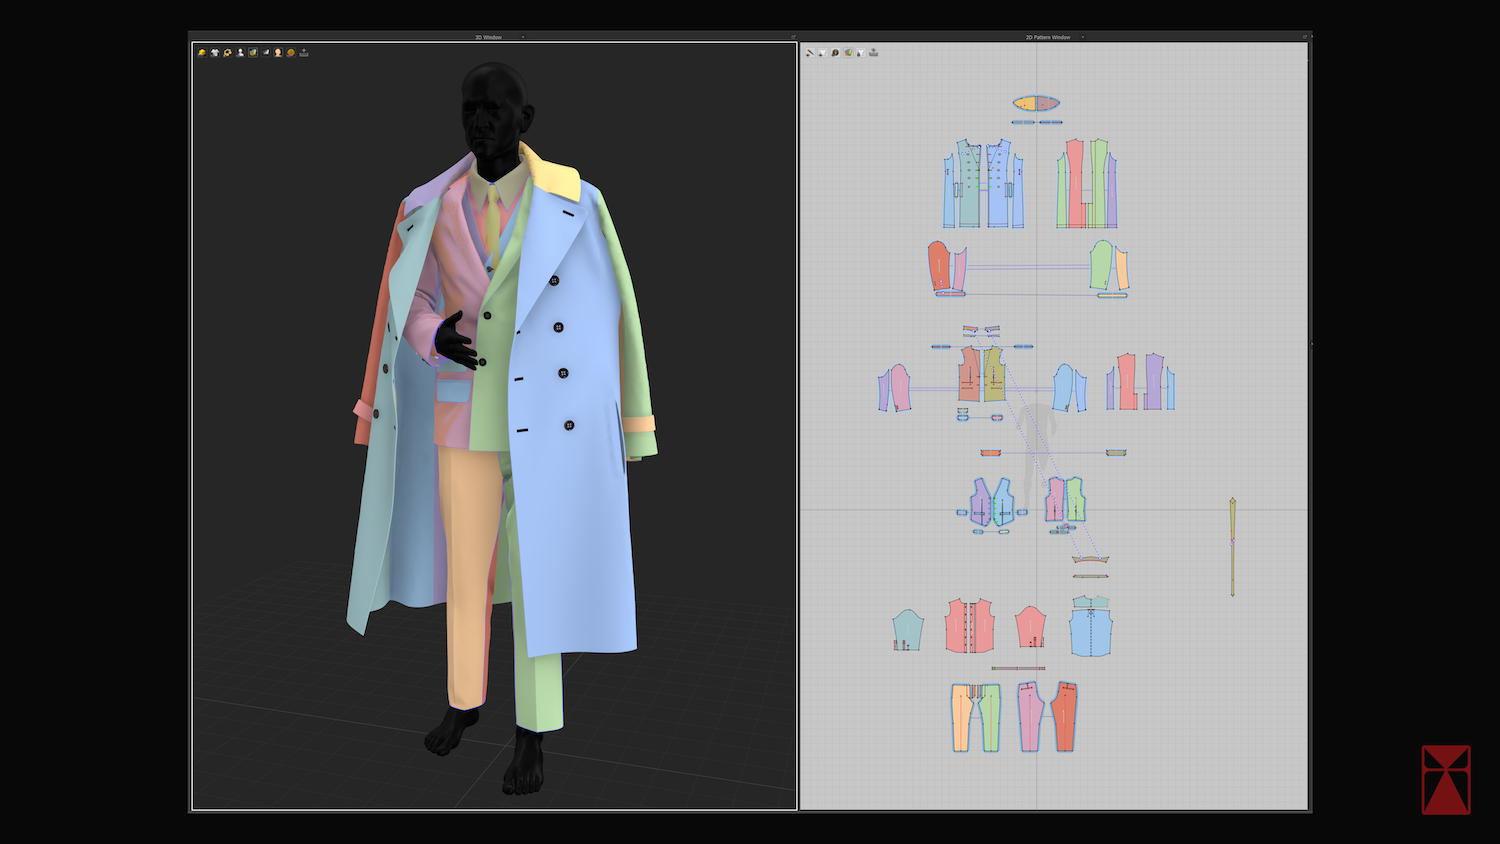
2. Export Flat Garments:
Second, I export each garment by resetting the 2D arrangement. This way, I have each garment laid flat, making it easier to view for retopology while keeping the same UVs as the simulated ones.
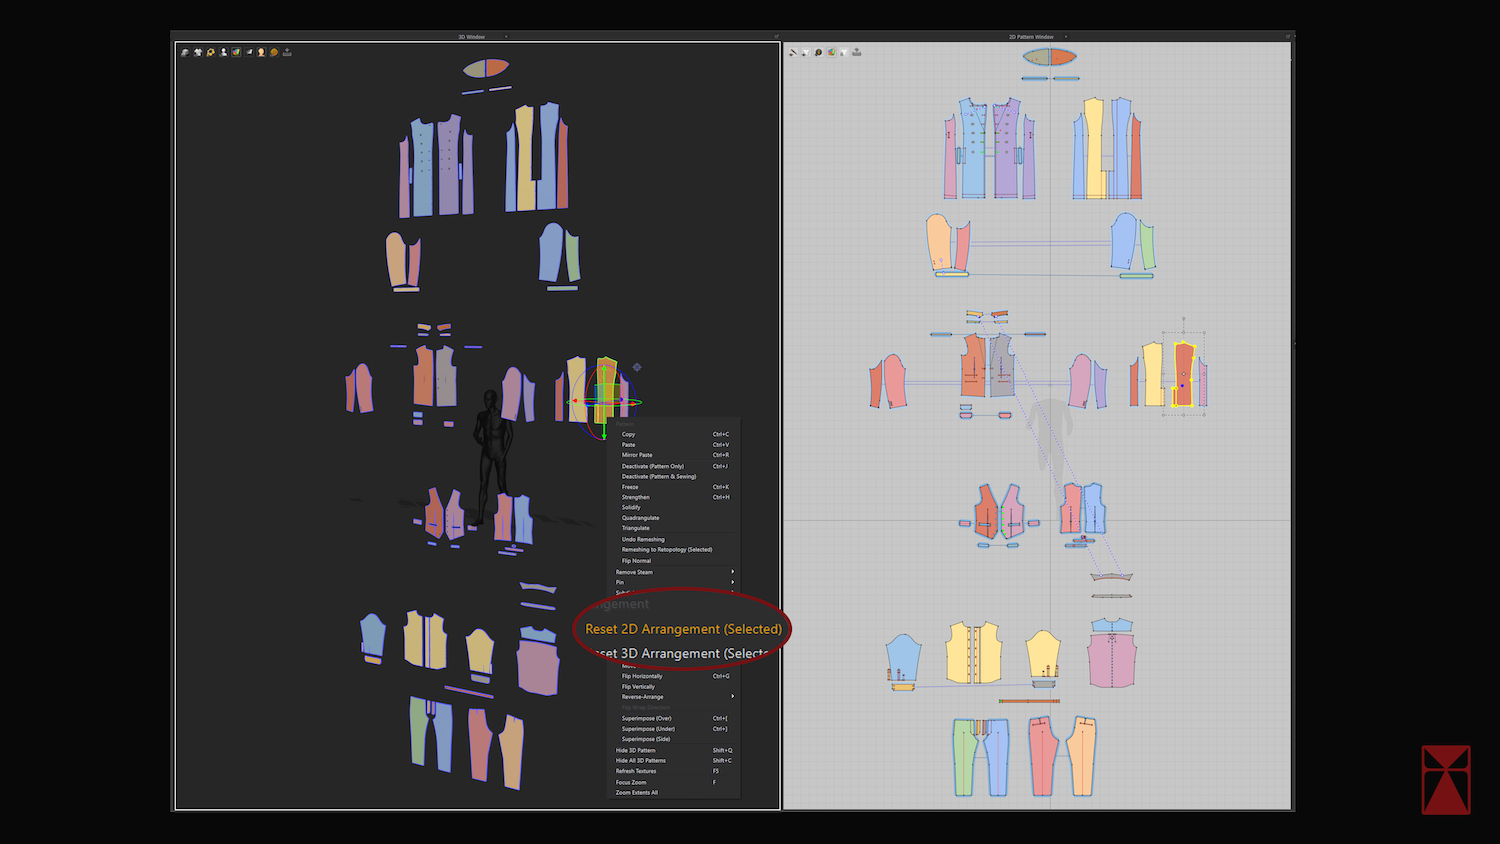
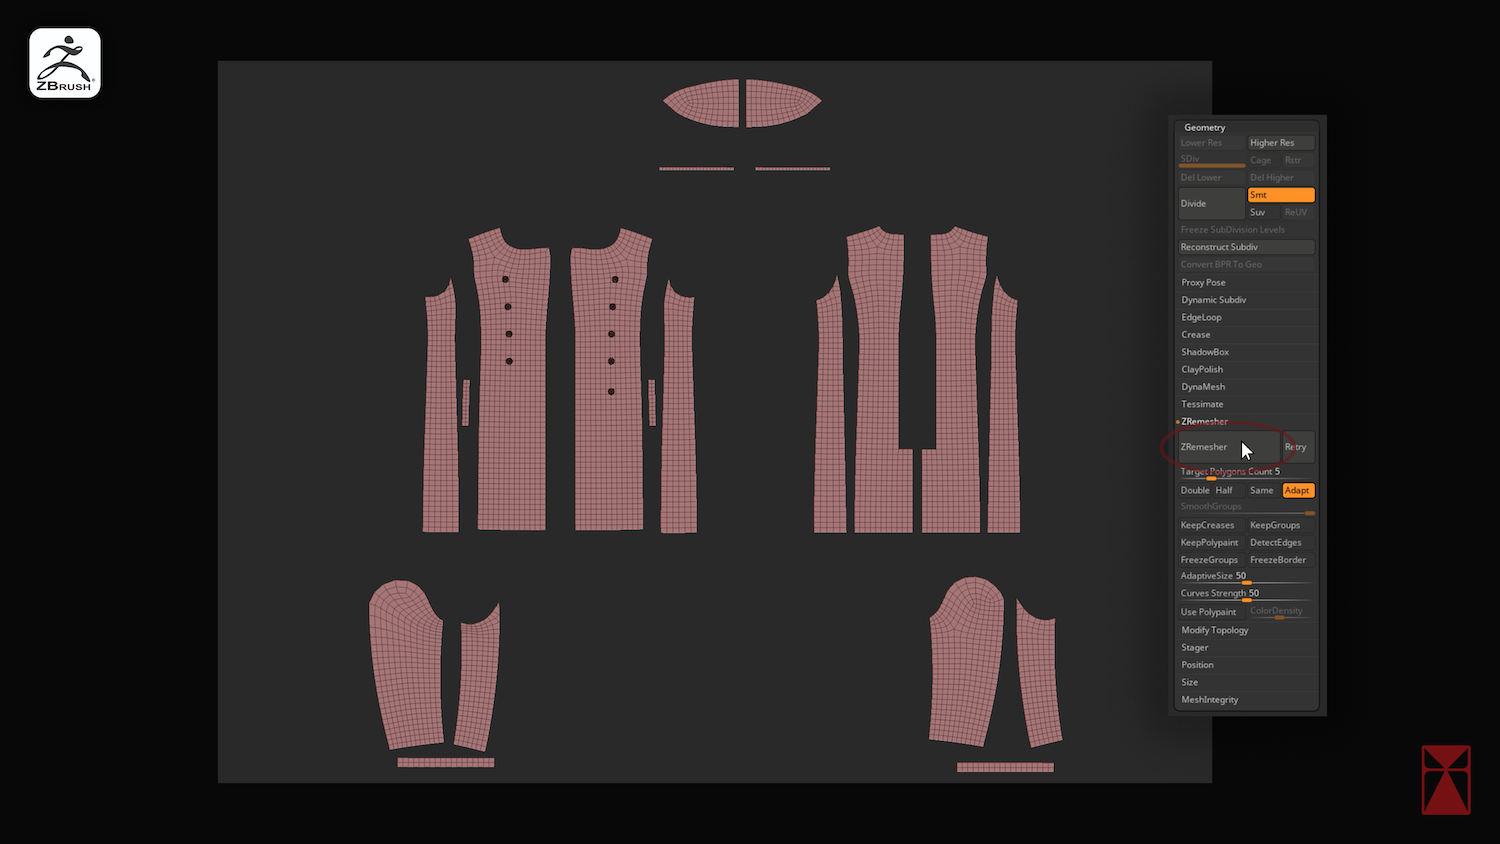
Once the export is completed, I import the simulated clothing into Maya and the flat garments into ZBrush. I then use ZRemesher in ZBrush to quickly improve the topology of the mesh.
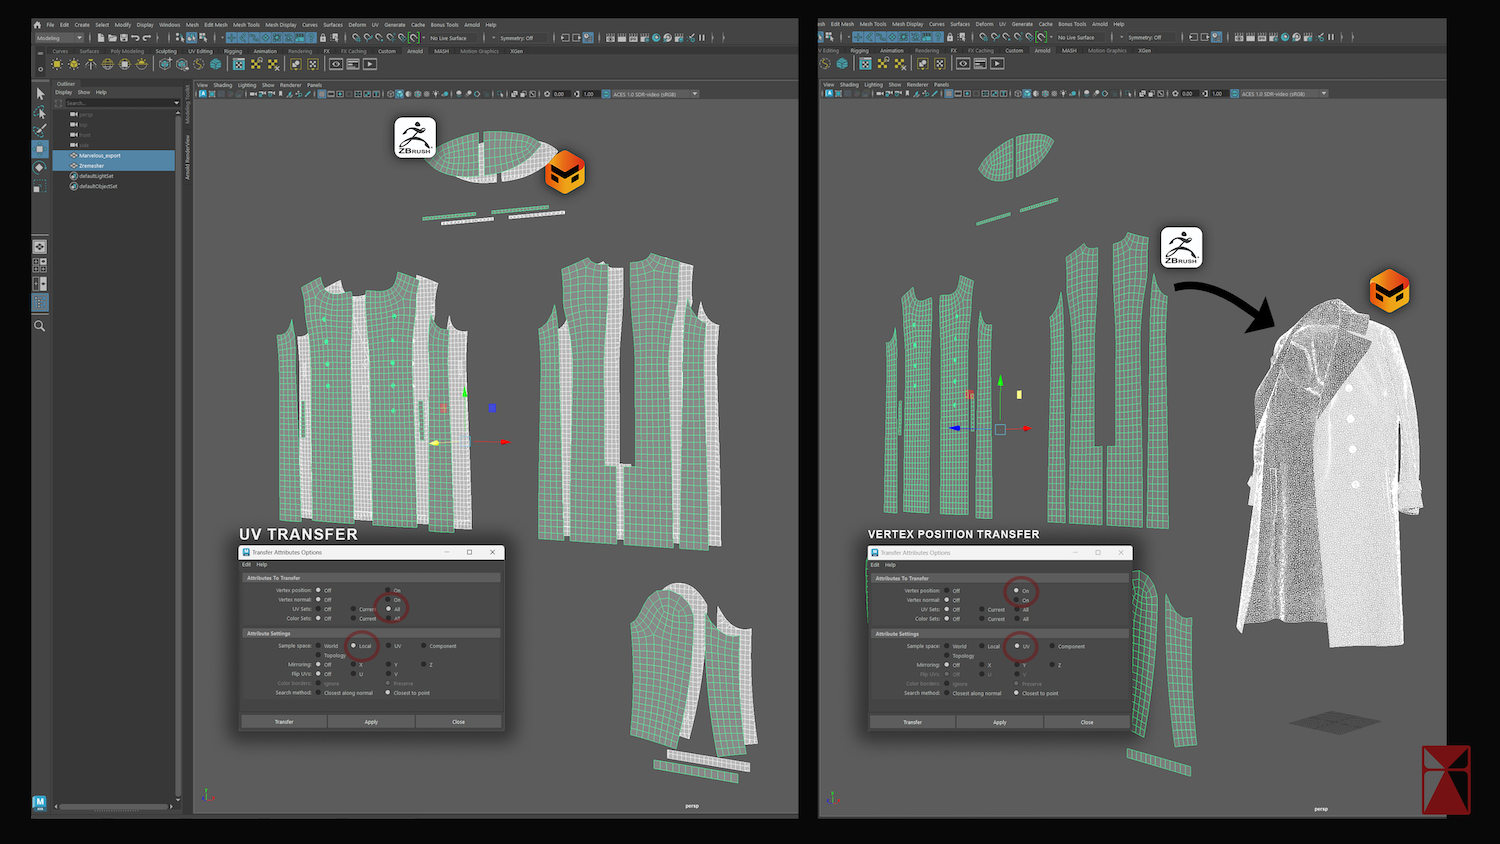
Afterward, I transfer attributes in Maya using the sample space to transfer the UVs from the flat garment (Marvelous Designer) to the ZRemeshed geometry. Then, I transfer the vertex positions to place the flat ZRemeshed geometry into the simulated one.
Next, I manually fix any errors, add thickness, and work on the final version of the UV, keeping in mind the next steps ahead.
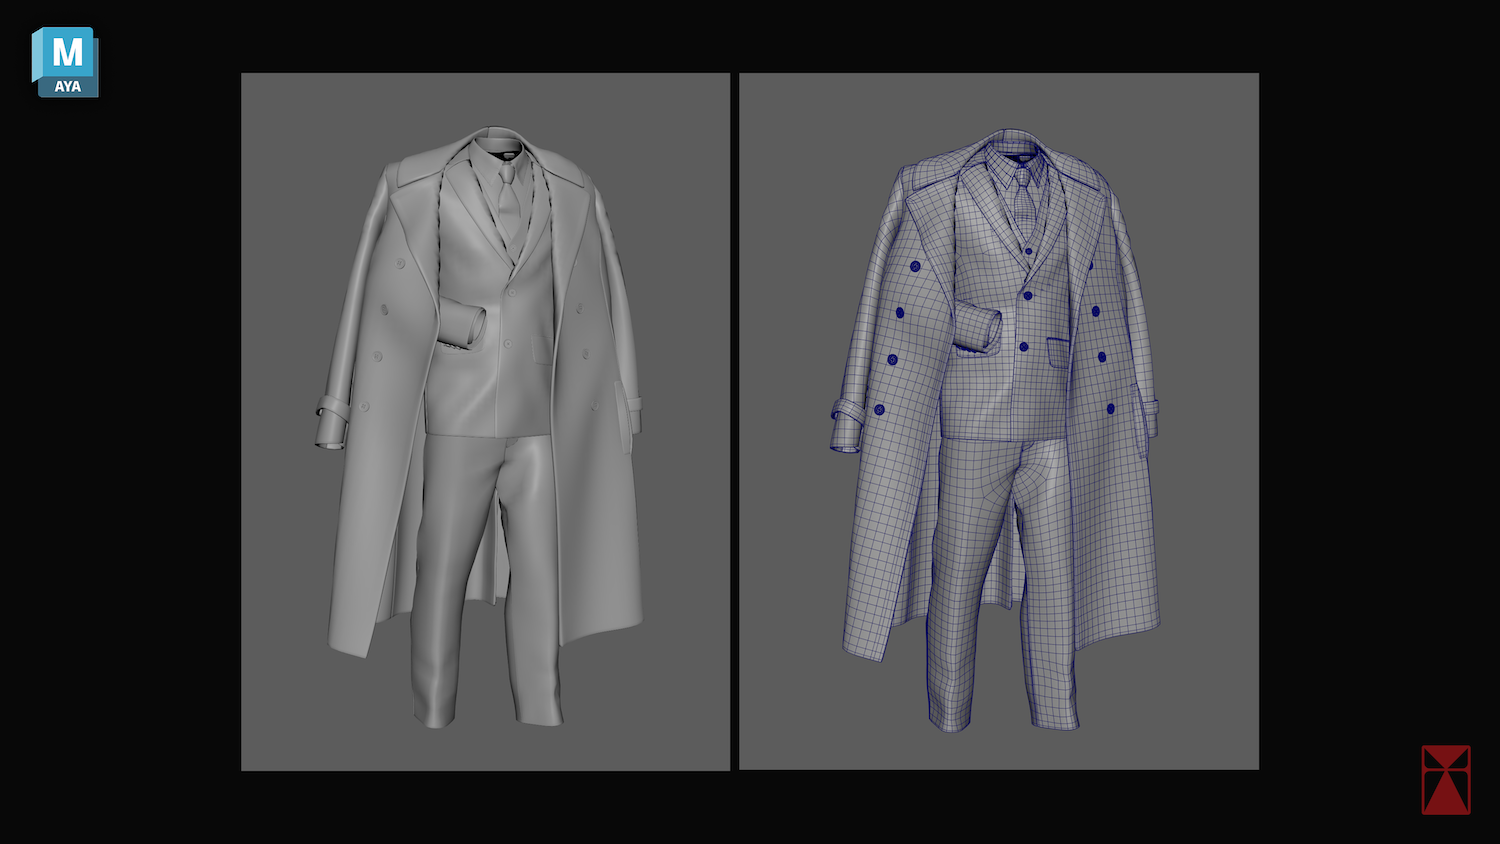

I then move to ZBrush for sculpting the clothing details like wrinkles, stitching, and small imperfections. After this, I export the displacement maps from ZBrush and export a decimated version of each garment for Substance Painter where needed.

Texturing and painting
I used Substance Painter for this process. Since the character is wearing a clean suit, my main focus was on getting the colors and composition right.
Look Development and Final Adjustments
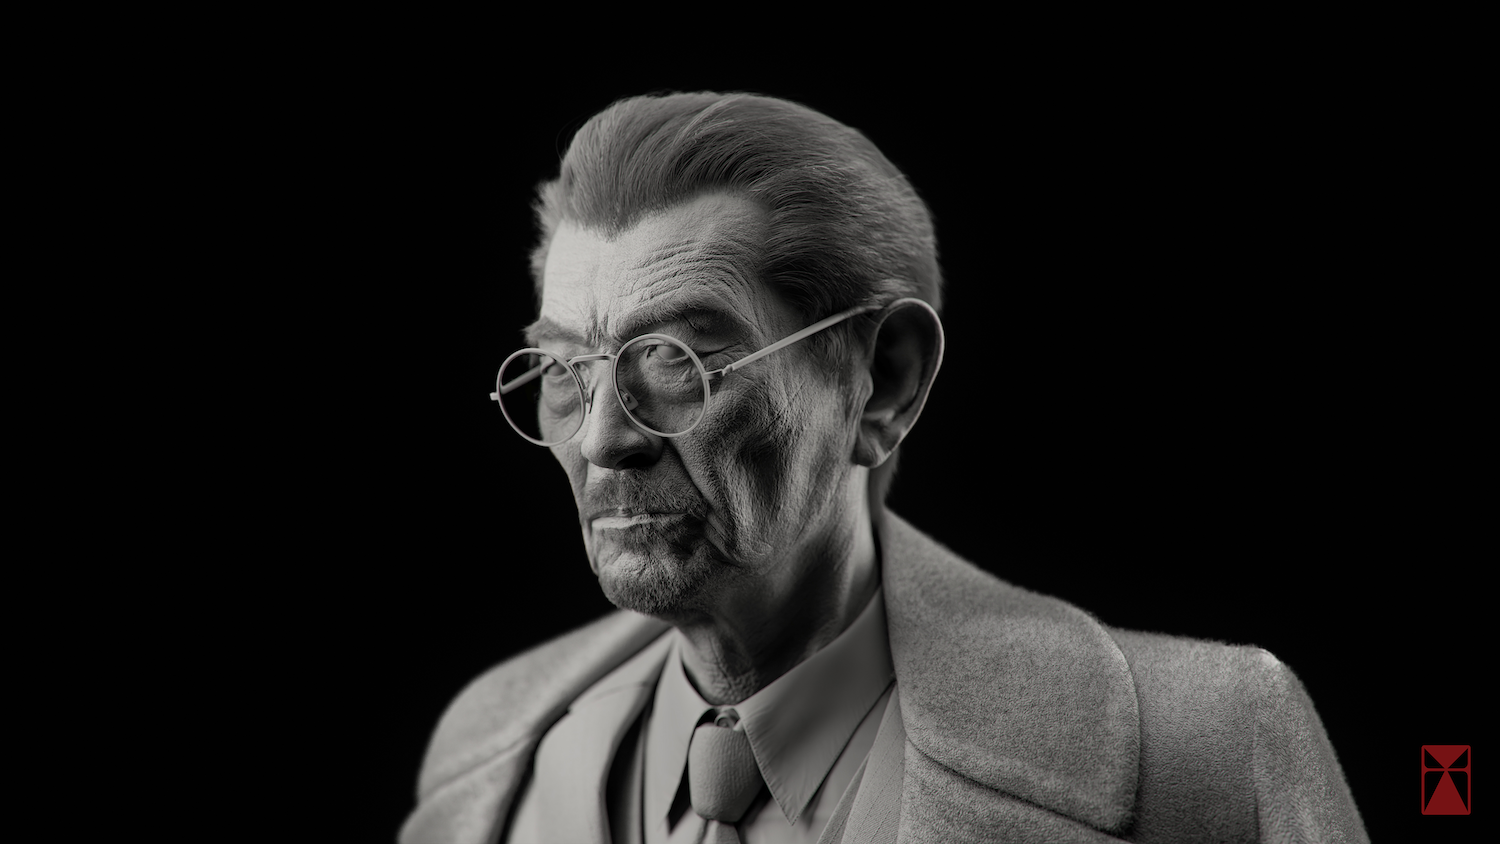
In this phase, everything is assembled together in Autodesk Maya. It's crucial to maintain flexibility in the pipeline to be able to go back and forth in case something is off when you work on the final steps. I used Arnold for building shaders and setting up the lighting. Once the rendering was completed, I did some post-processing in Photoshop to fine-tune the colors and adjust the background.
How can you describe your overall experience of the use of the Marvelous Designer?
Marvelous Designer is changing the way artists approach clothing in 3D. Being able to work with organic materials with ease has helped me a lot. I believe that having a real-time view of how the clothes interact with your model is a game changer for artistic direction.
What's next in store for you?
Right now, I'm focused on building a strong personal portfolio, including a character that I’m currently working on. I plan to expand my skill set by learning more advanced techniques and tools to create better characters. I'm also looking forward to collaborating with other artists and studios on larger-scale projects. Working with a team always brings new perspectives and ideas, which is very enriching. I’m very grateful to the marvelous designer team for the opportunity to share this project. You can view more of my work on my Artstation page and my Instagram.
이 작업은 ZBrush, Maya, SubstancePainter, Japanese, CharacterArt 등의 기술로 제작되었습니다.
Marvelous Designer로 이와 같은 3D 의상·캐릭터 작업을 직접 만들어볼 수 있습니다.