Dark Pictures Anthology
A BAFTA-winning game studio, Supermassive Games showcased various character outfits in their games using Marvelous Designer.
Studio and Artist introduction
Supermassive Games are a BAFTA-winning game studio founded in 2008, developing innovative storytelling games. They have released a number of successful titles and are best known for the critically acclaimed PS4 hit Until Dawn, The Dark Pictures Anthology - a series of stand-alone, horror games - and teen-horror game The Quarry. Their most recent releases are The Devil in Me - the season one finale of The Dark Pictures - and Switchback VR on PS VR2.
Andor Kollar (Senior Character Artist)
As a character artist at Supermassive Games, I use Marvelous Designer in the character creation pipeline. Marvelous Designer has been a very useful tool for The Dark Pictures Anthology. It can simulate beautiful clothing with realistic creases. In this article, I'd like to show you some character examples from the Little Hope and The Devil in Me games.
How is Marvelous Designer integrated into the project pipeline? Could you explain your workflow for making the assets Unreal Engine-ready?

Andrew – Little Hope
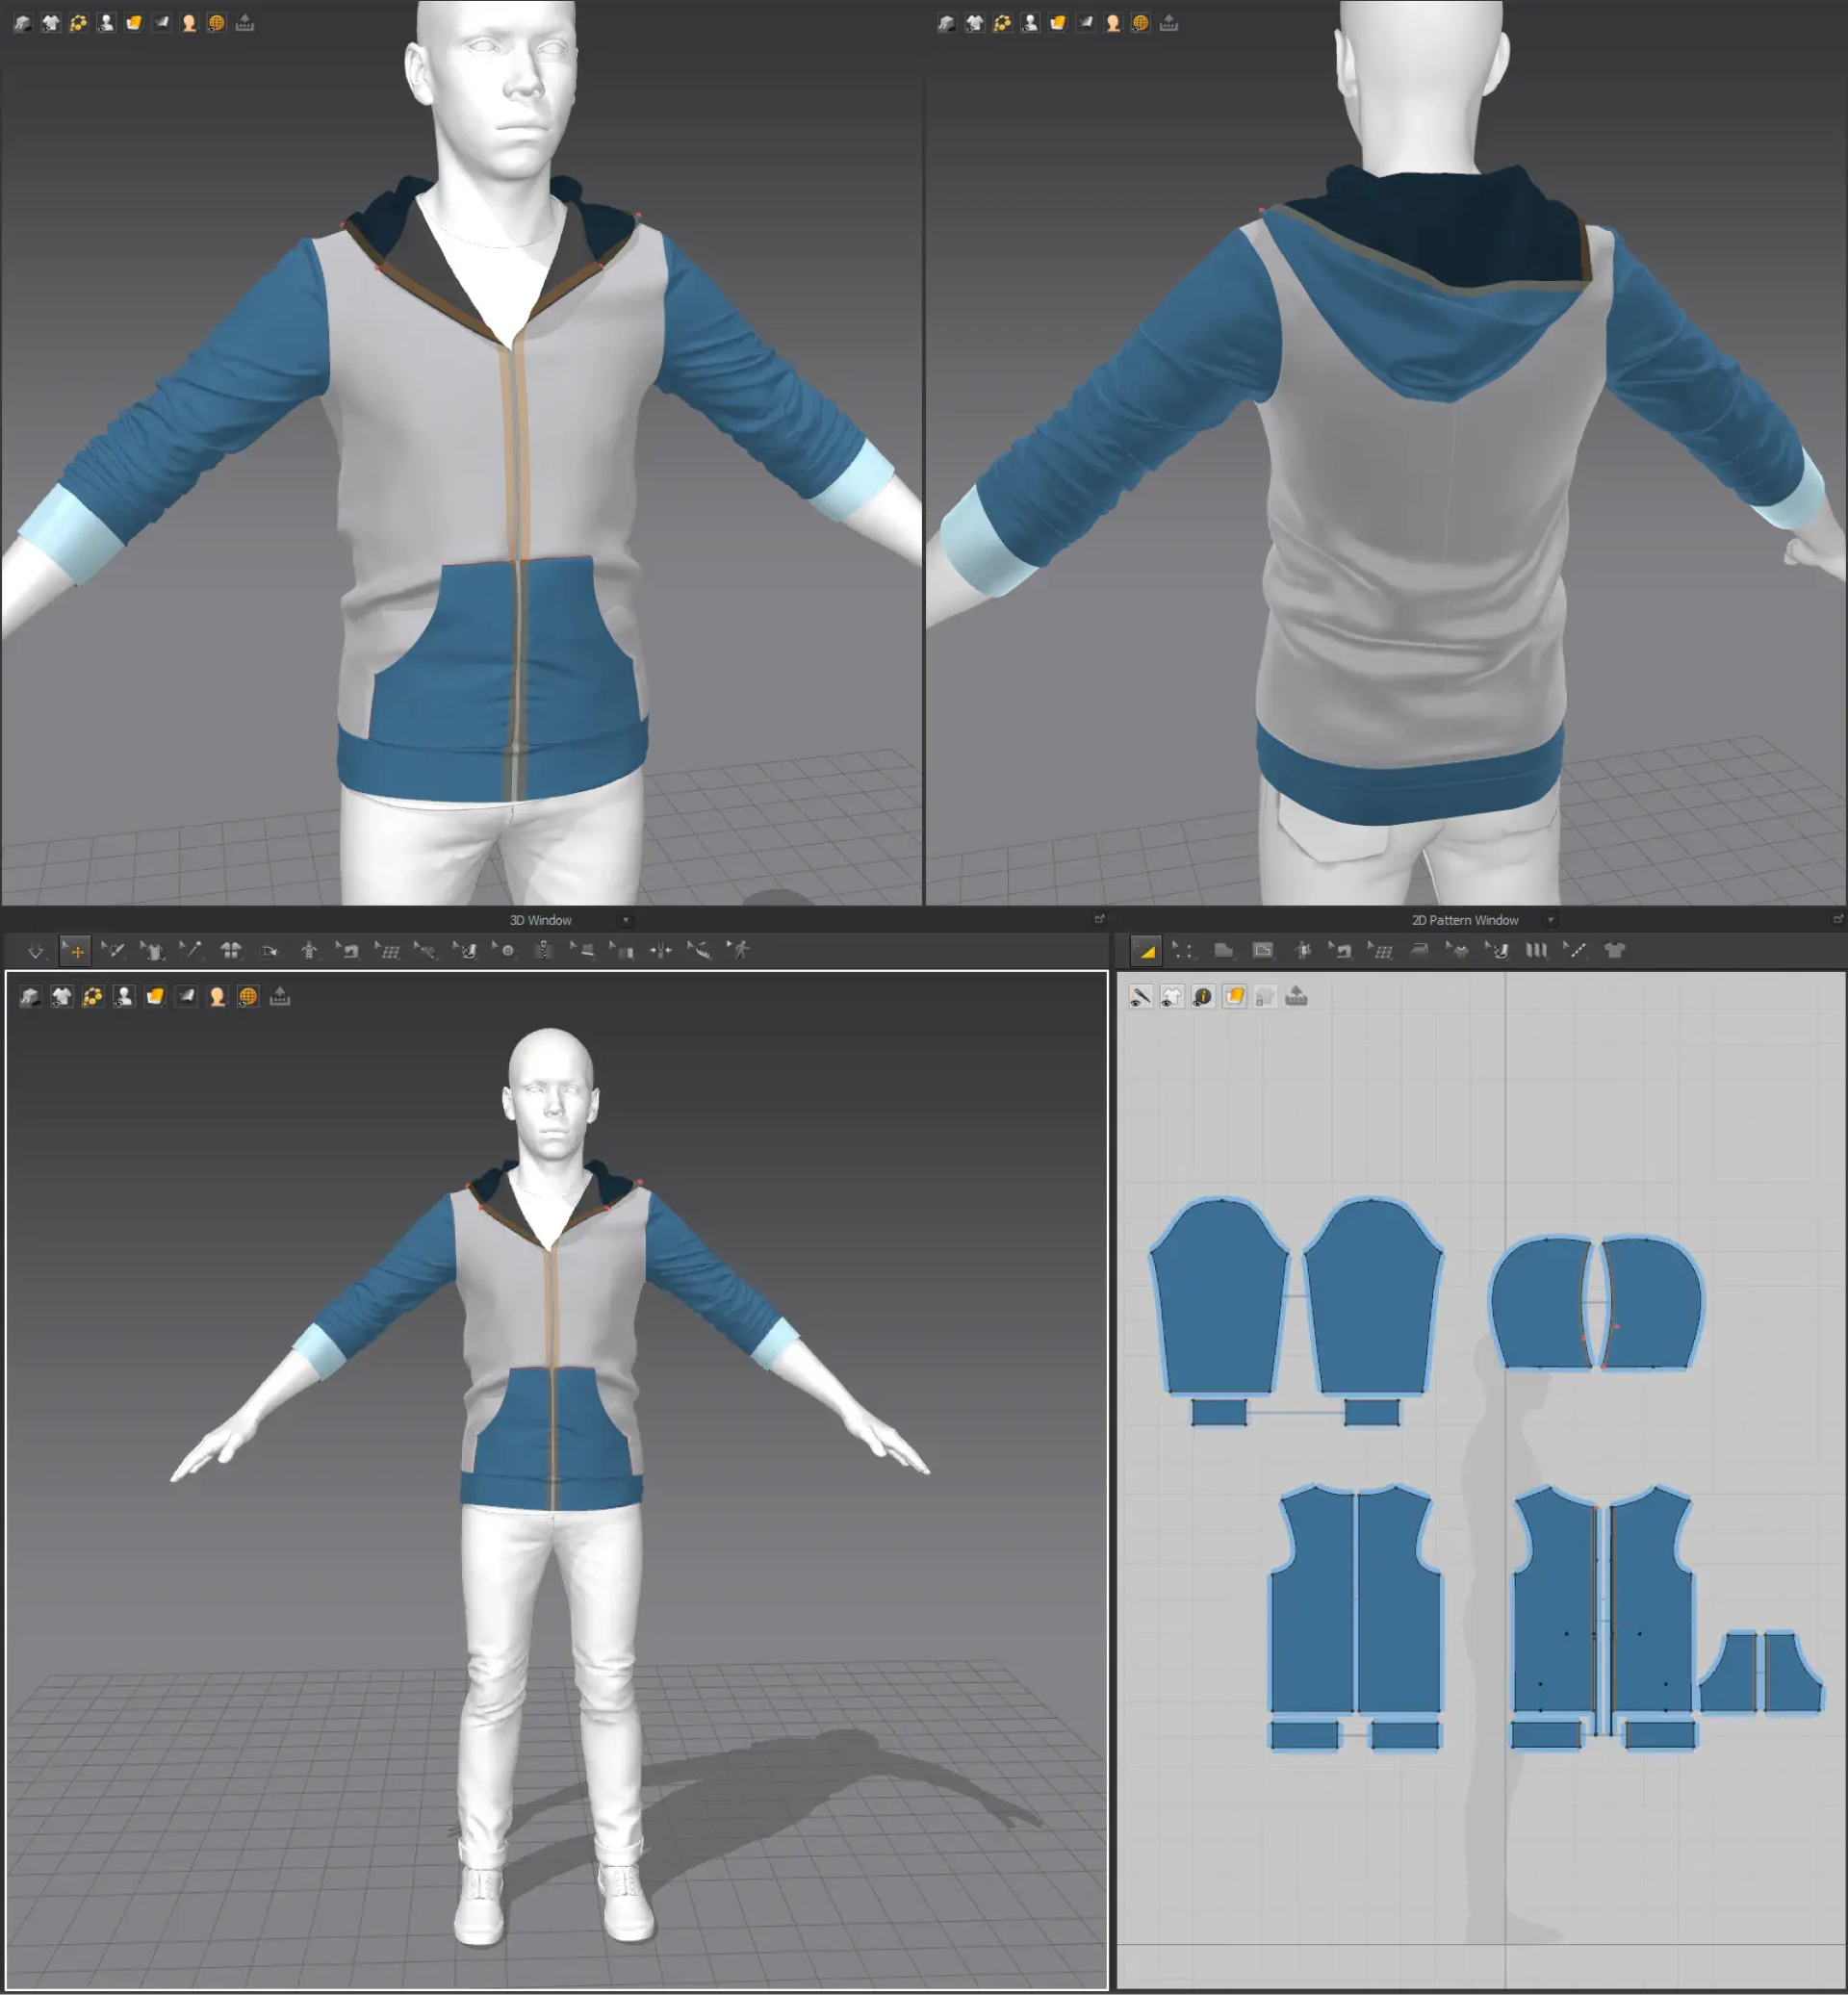
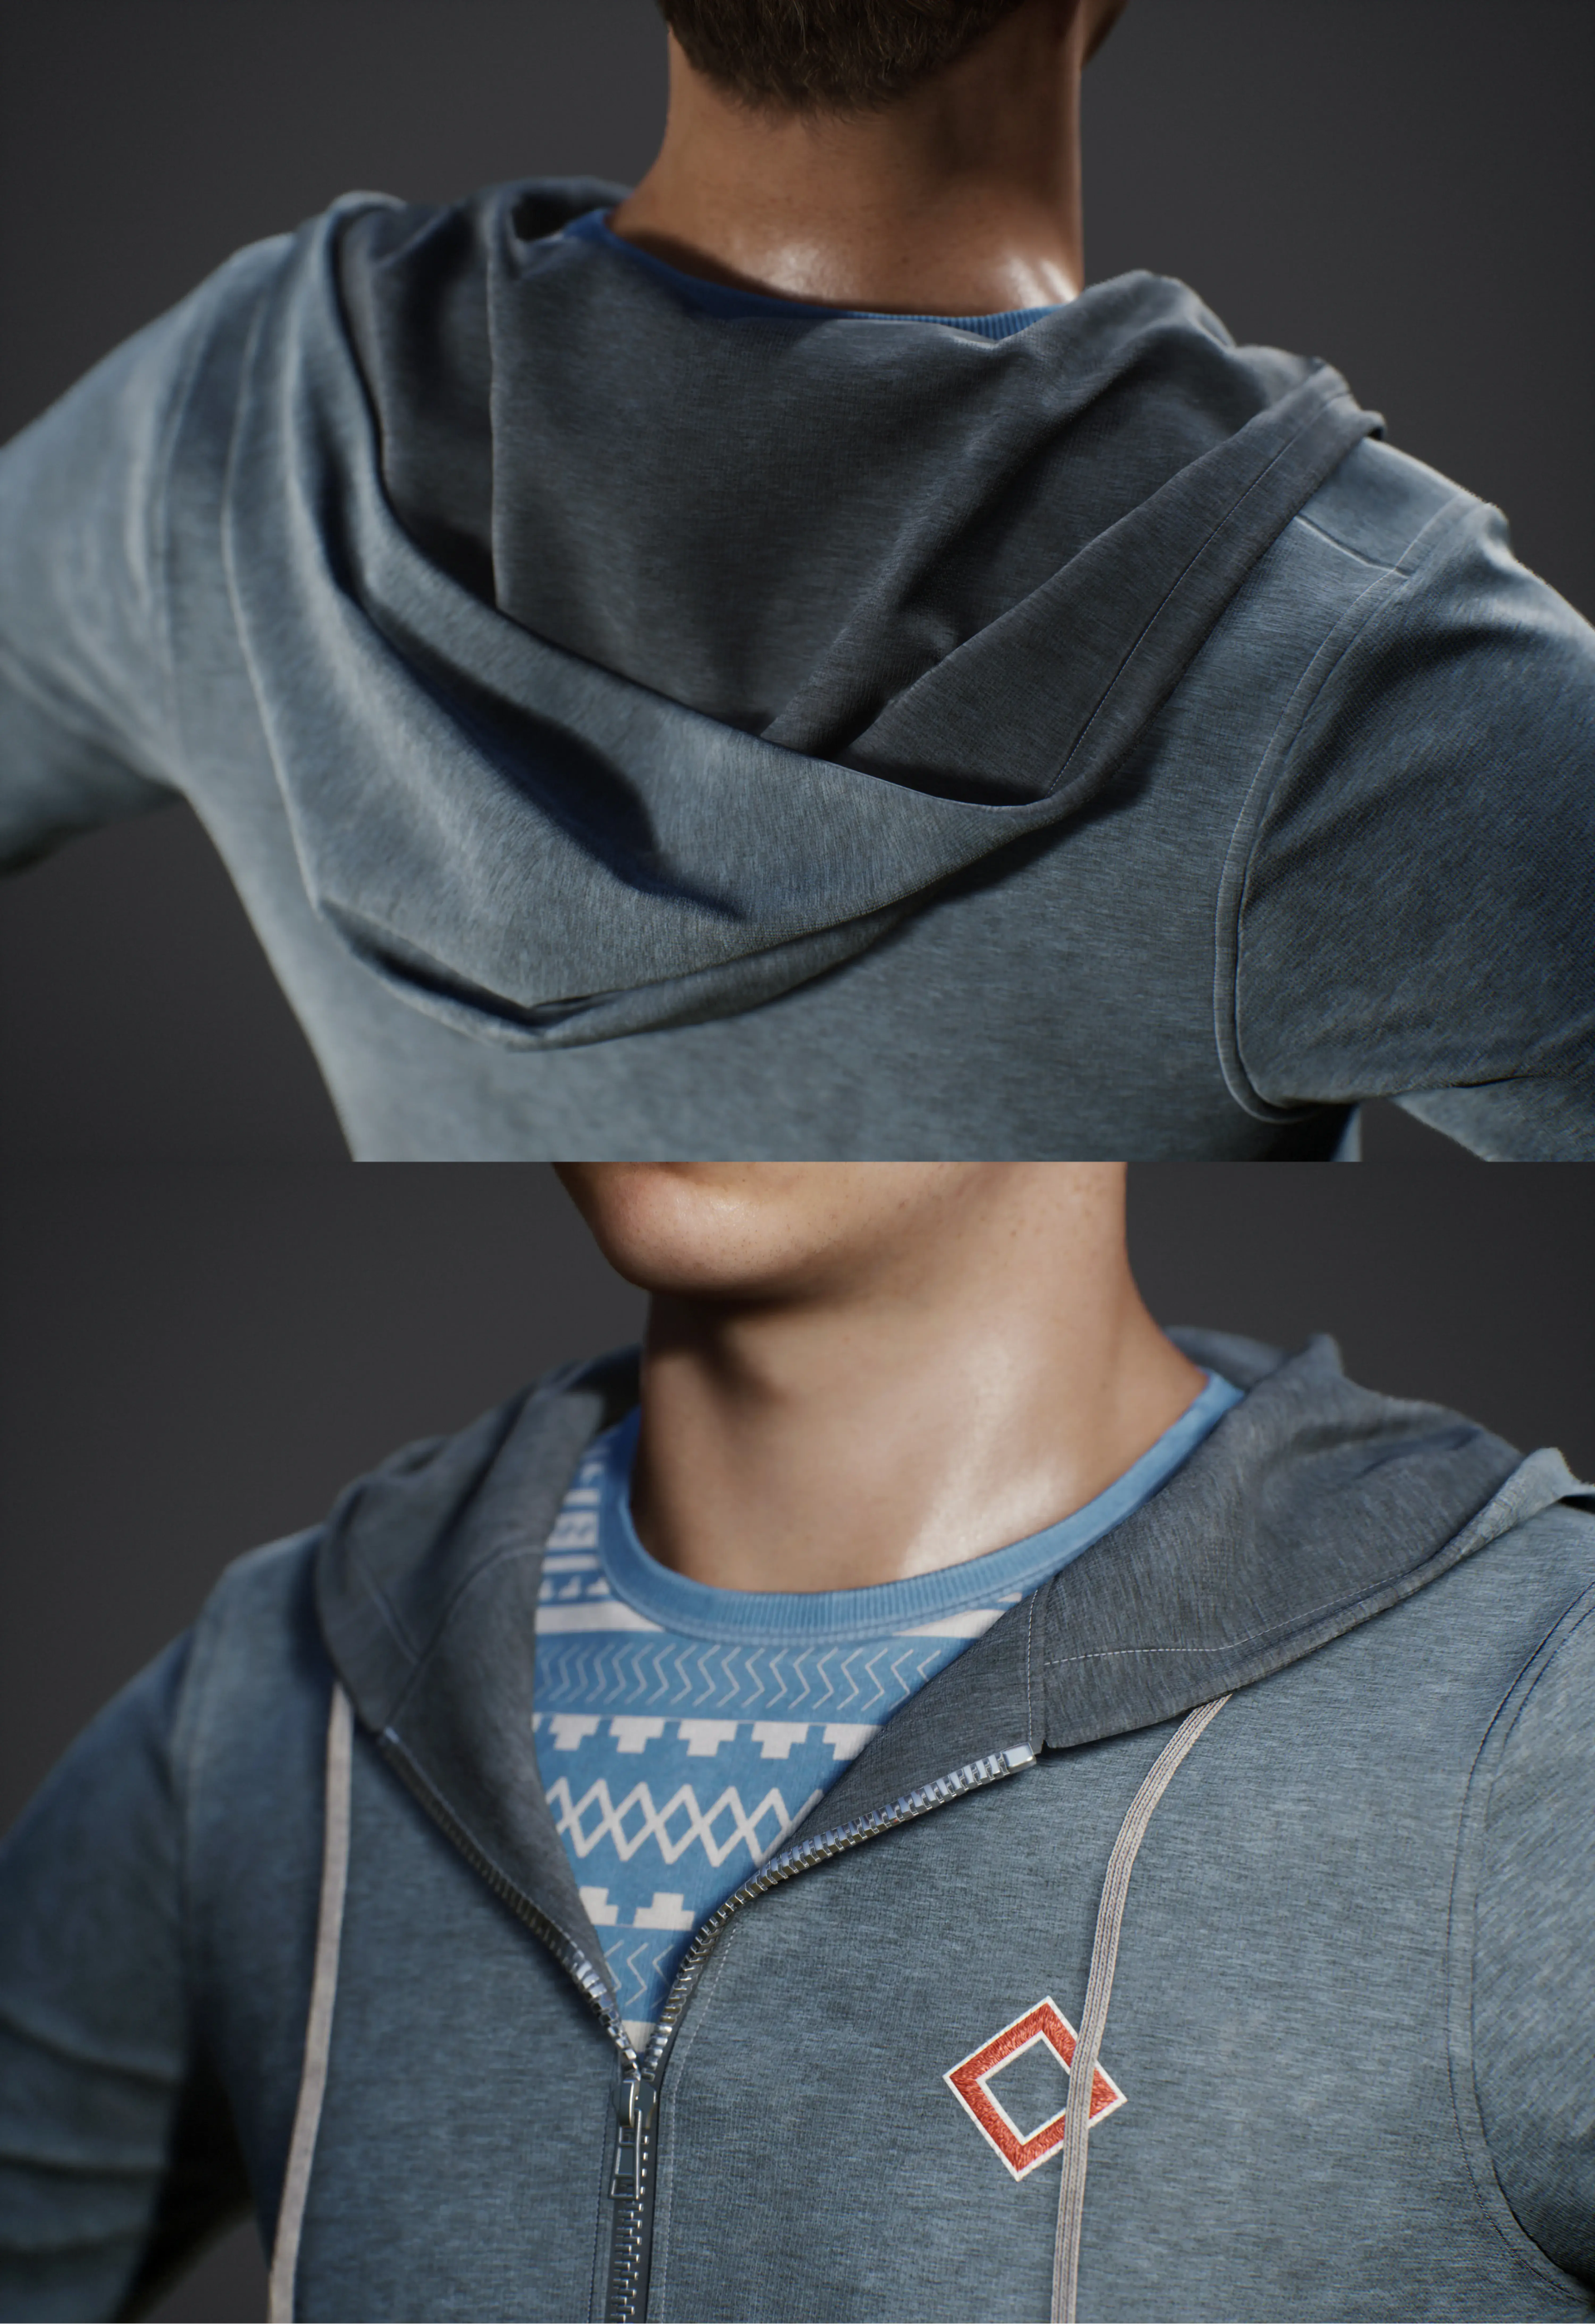
I usually focus first on Marvelous Designer to help create the base of the cloth, then I manually add the small details.
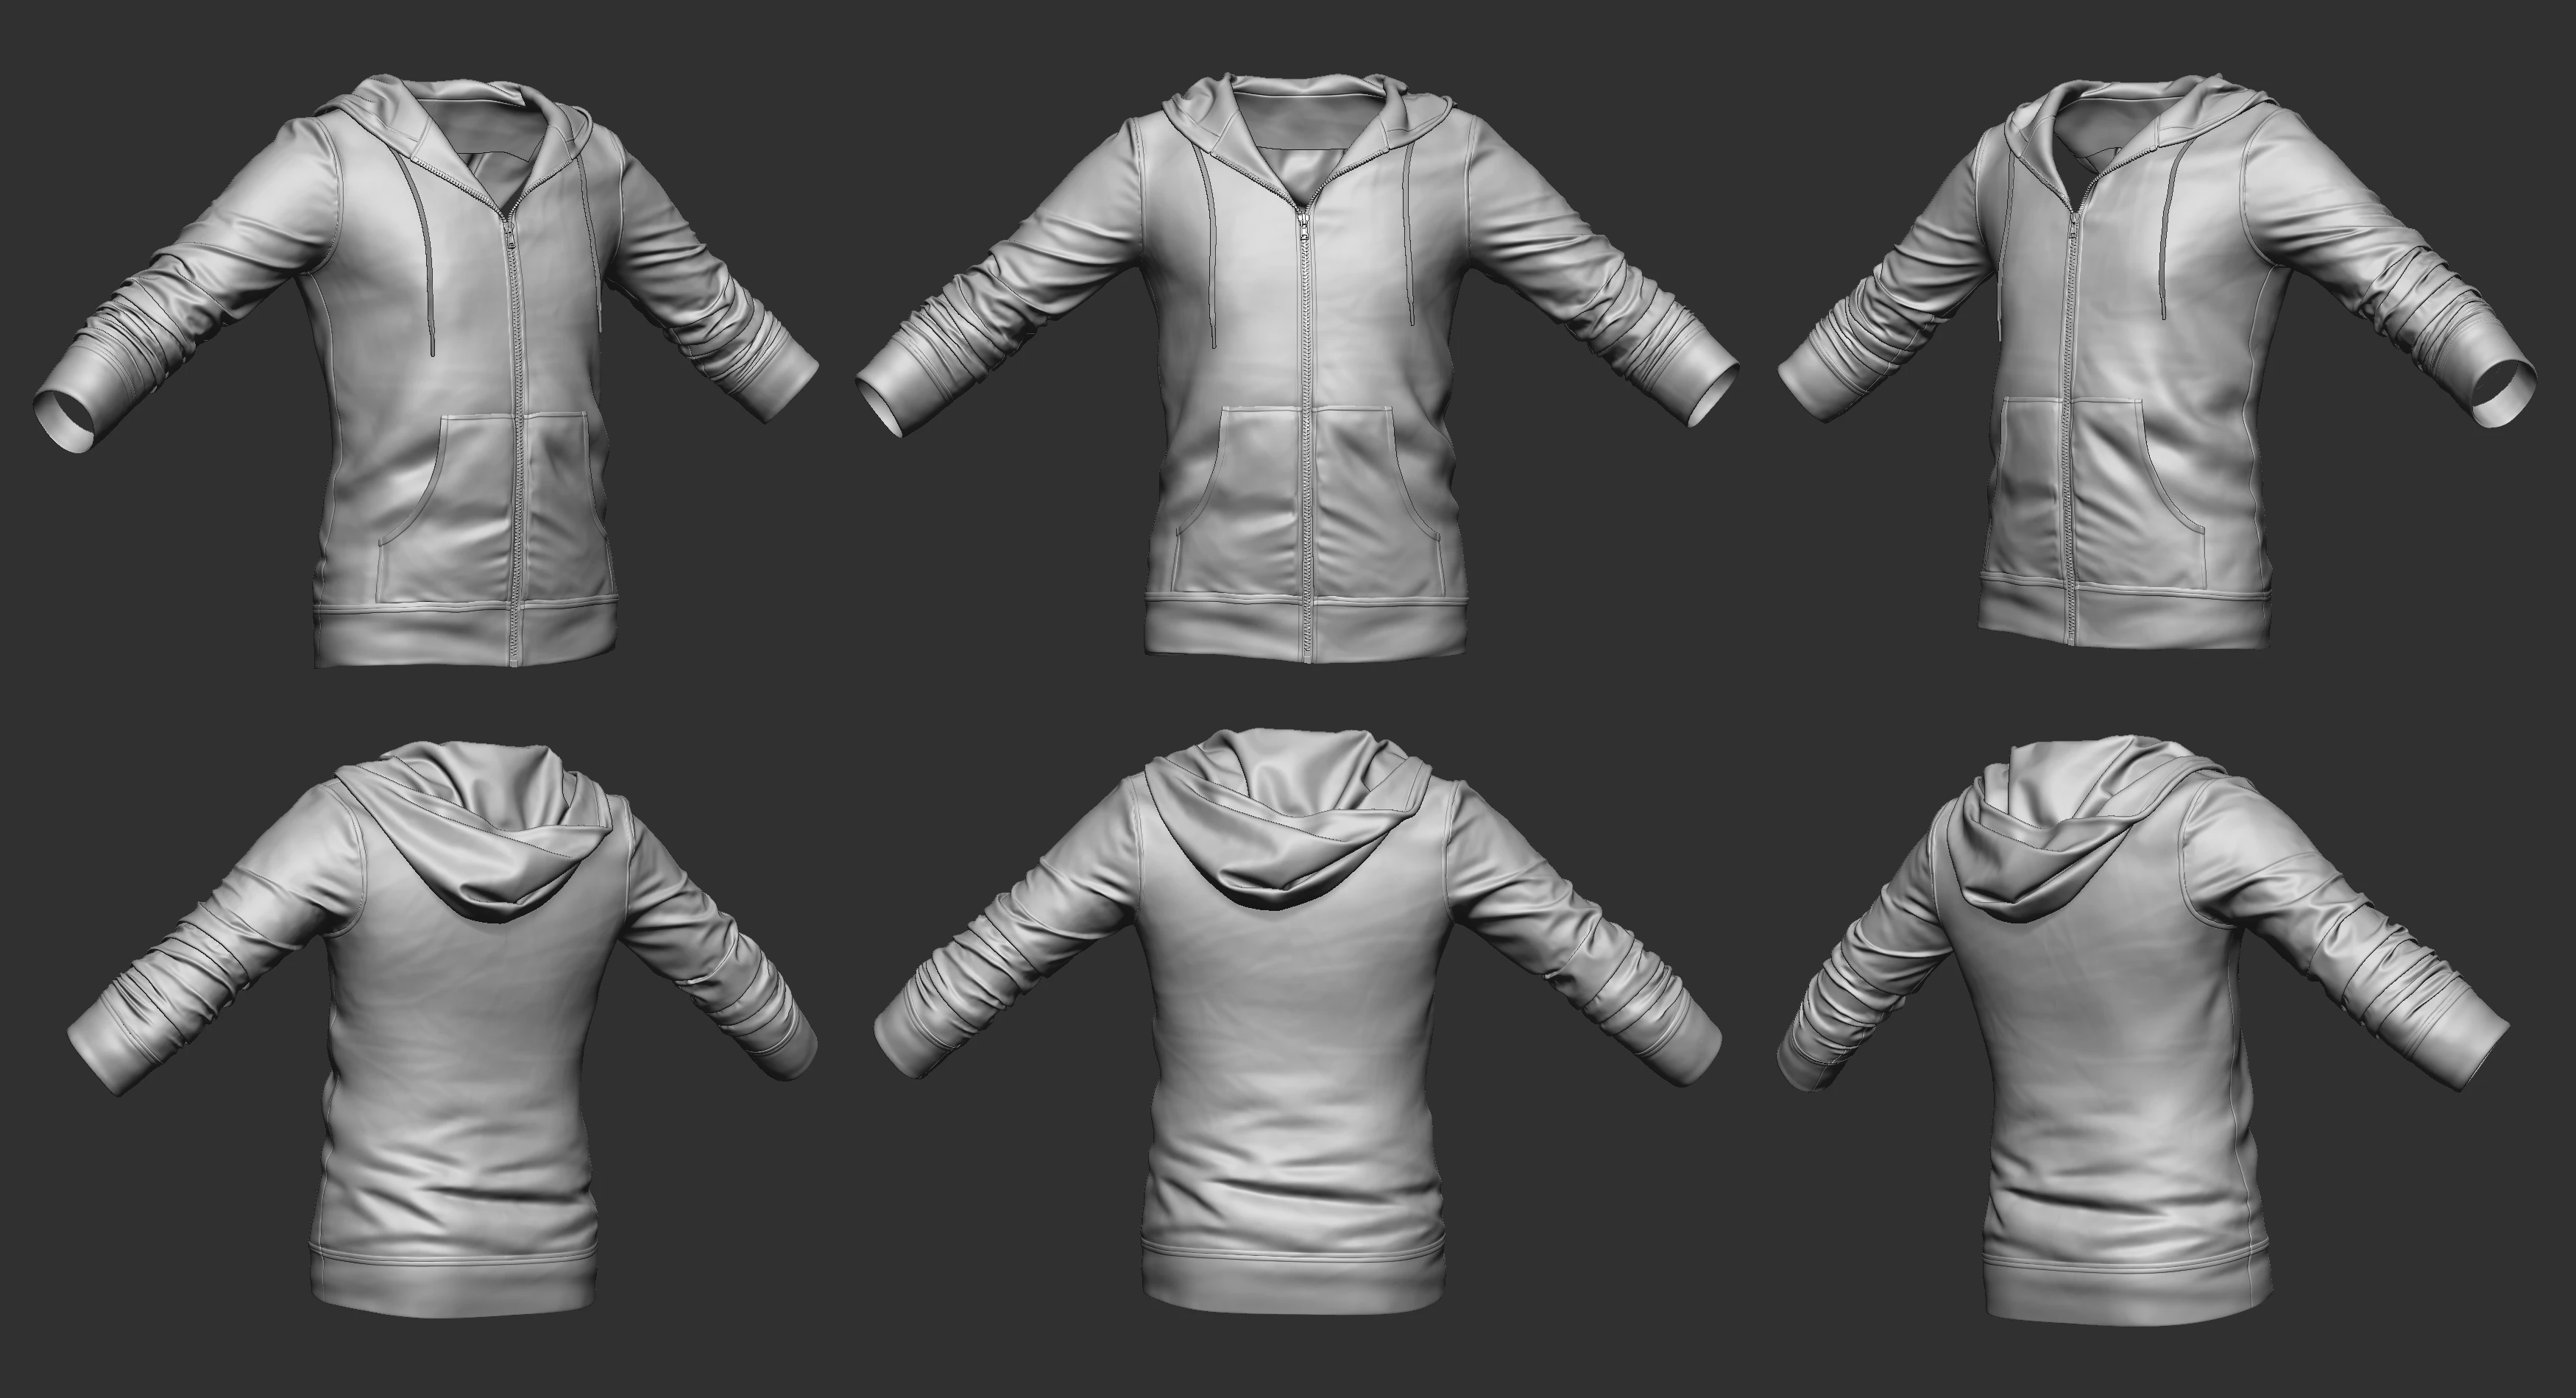
The base of the detailed ZBrush mesh is the simulated hoodie in Marvelous Designer.
The final character in Unreal Engine.
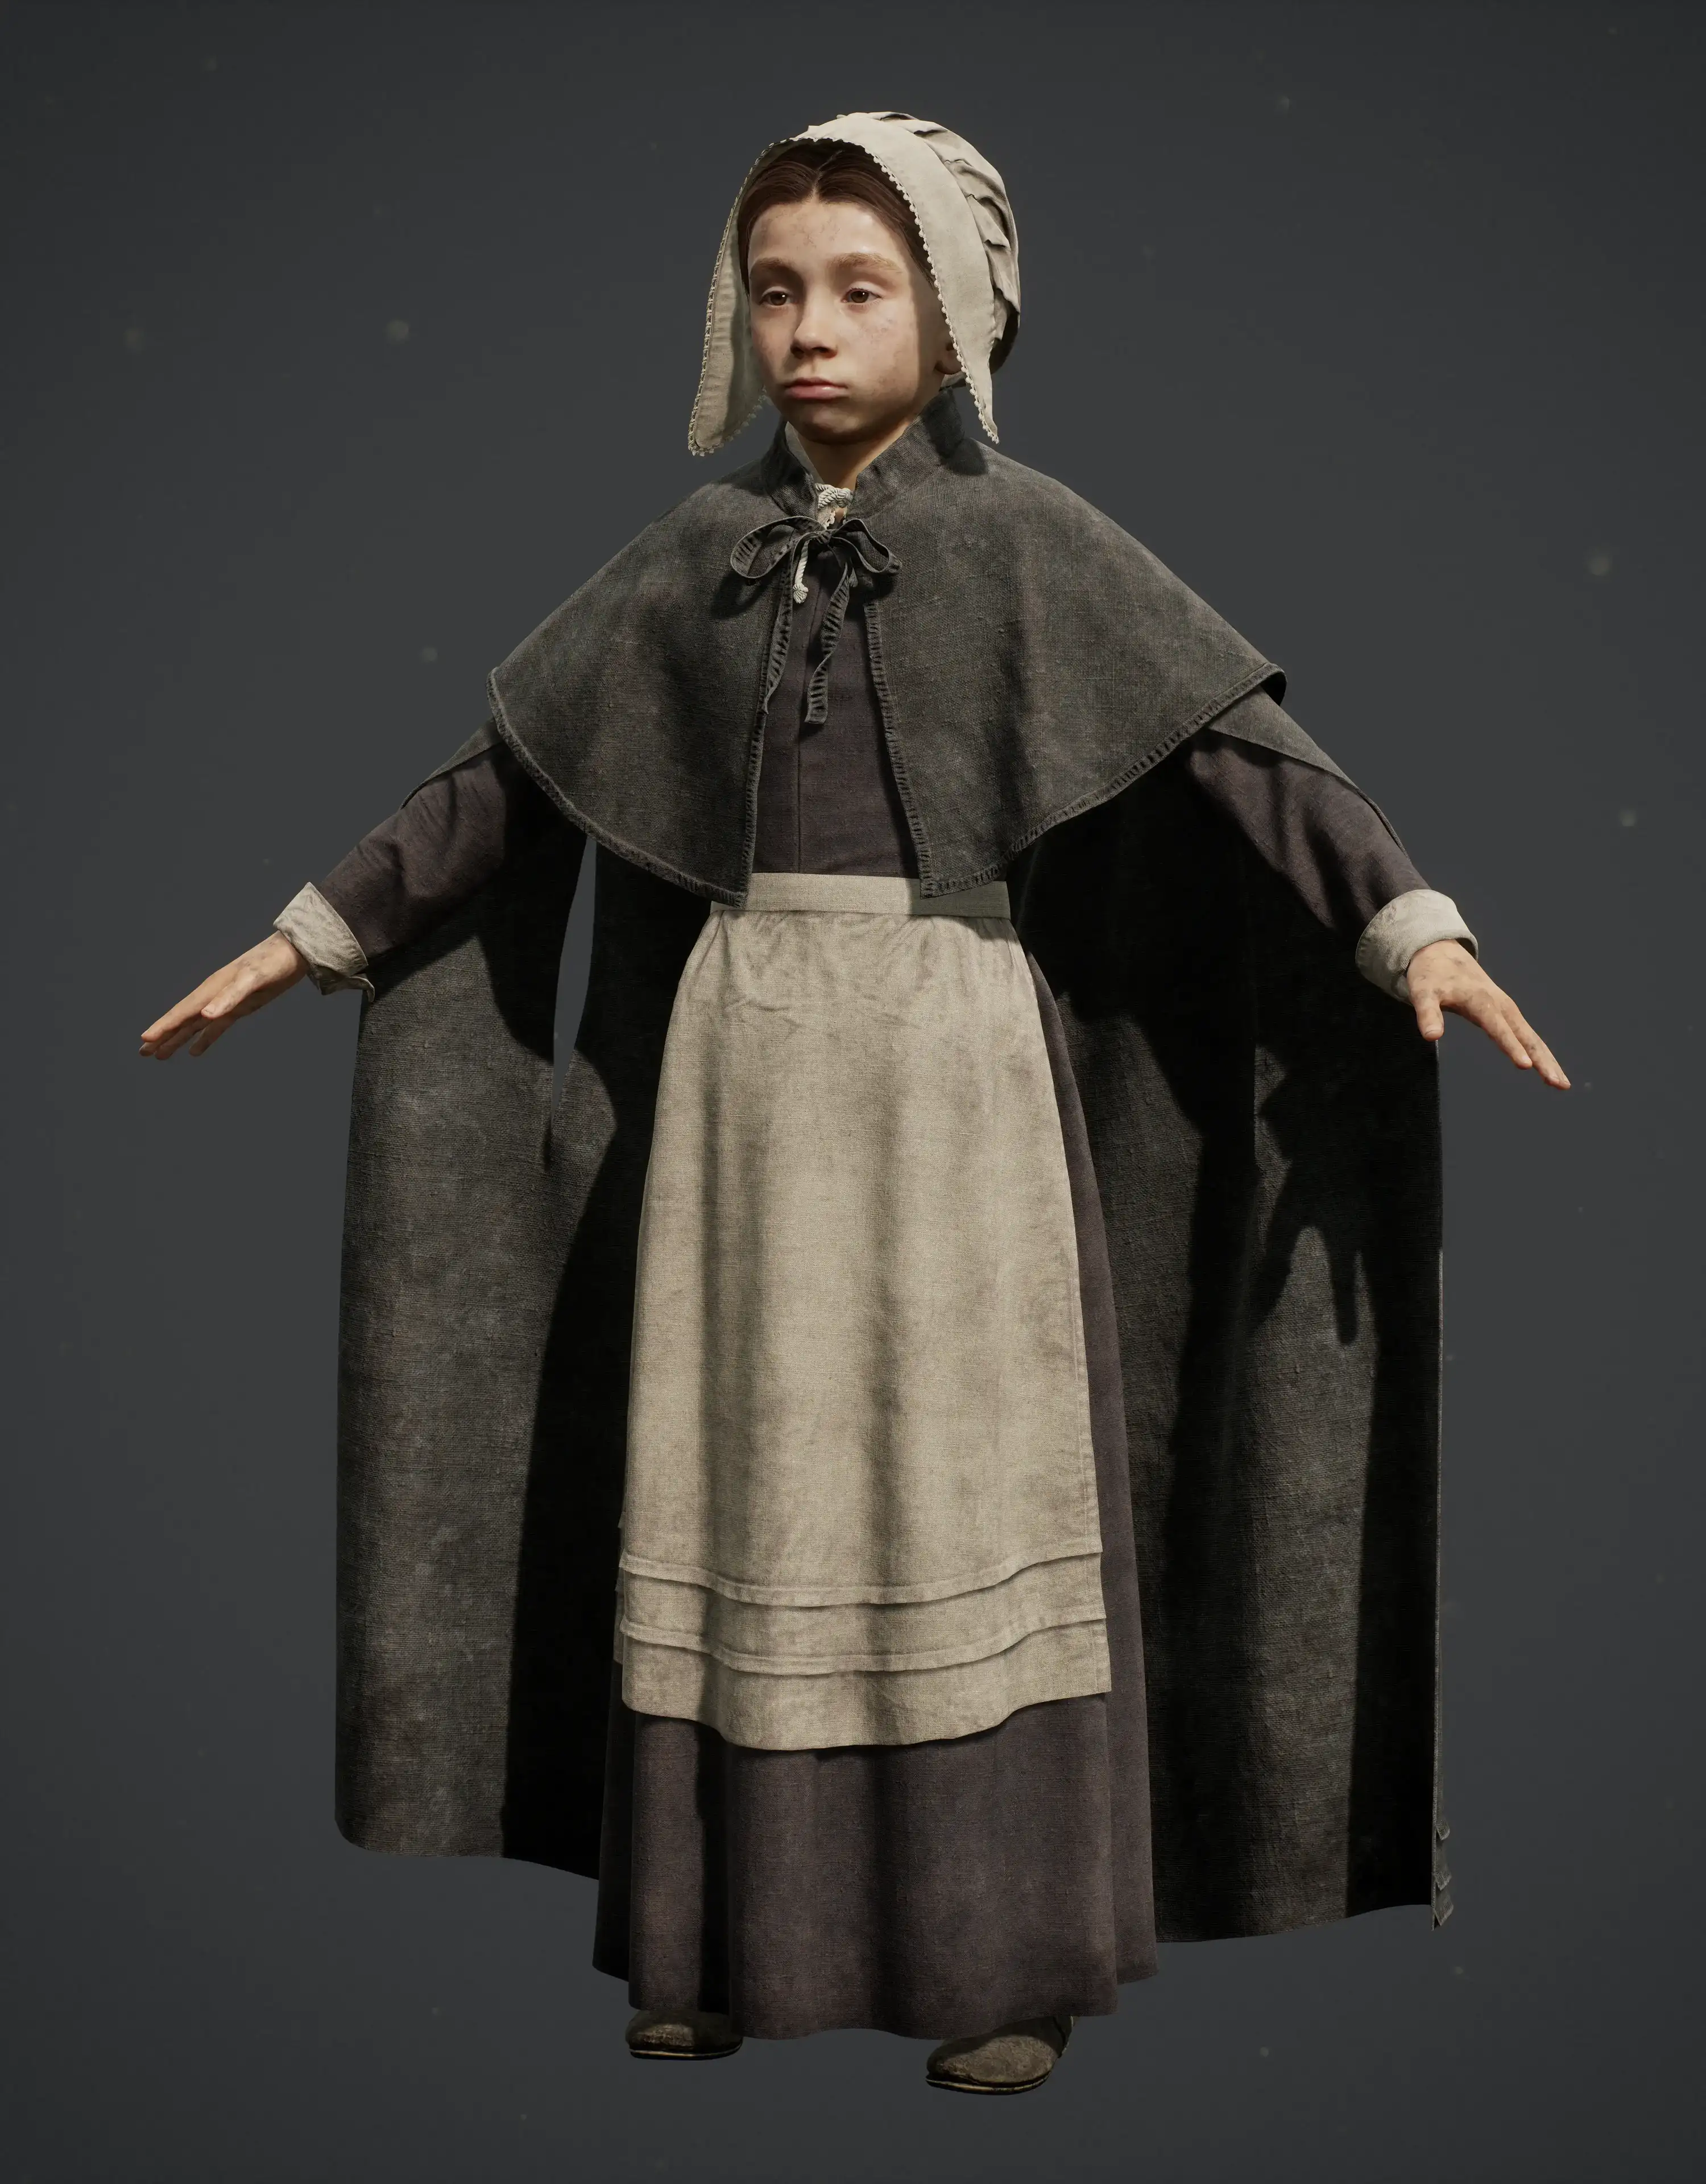
Mary – Little Hope
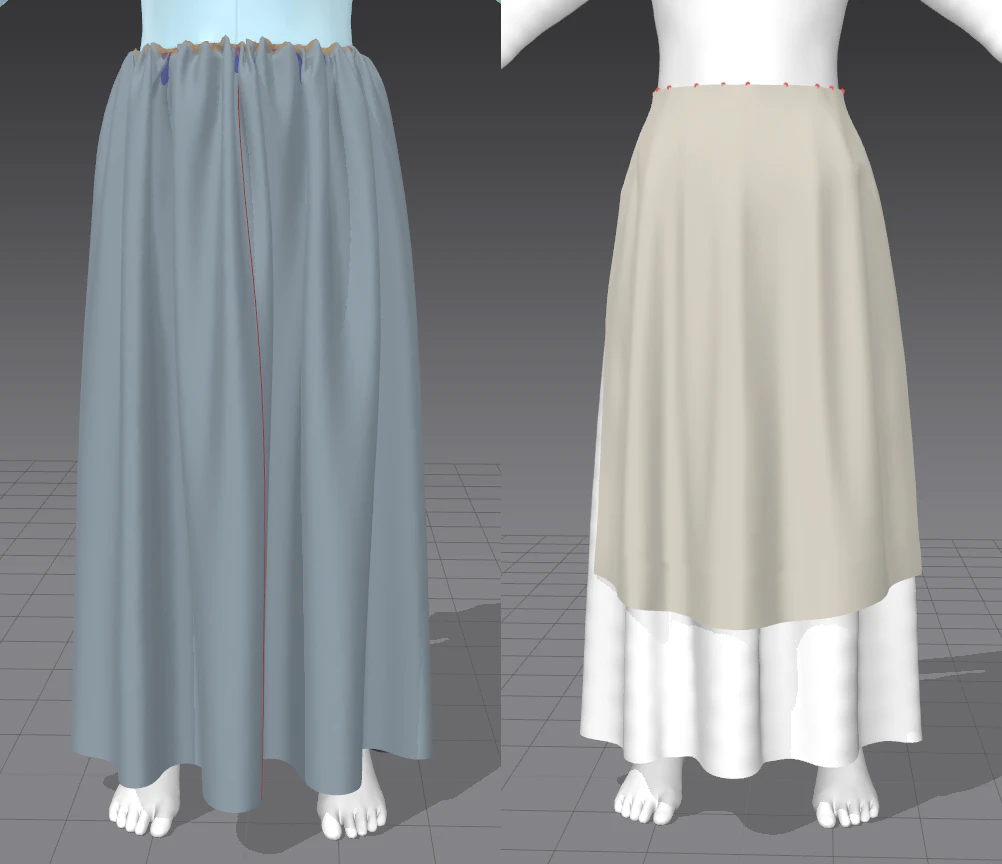
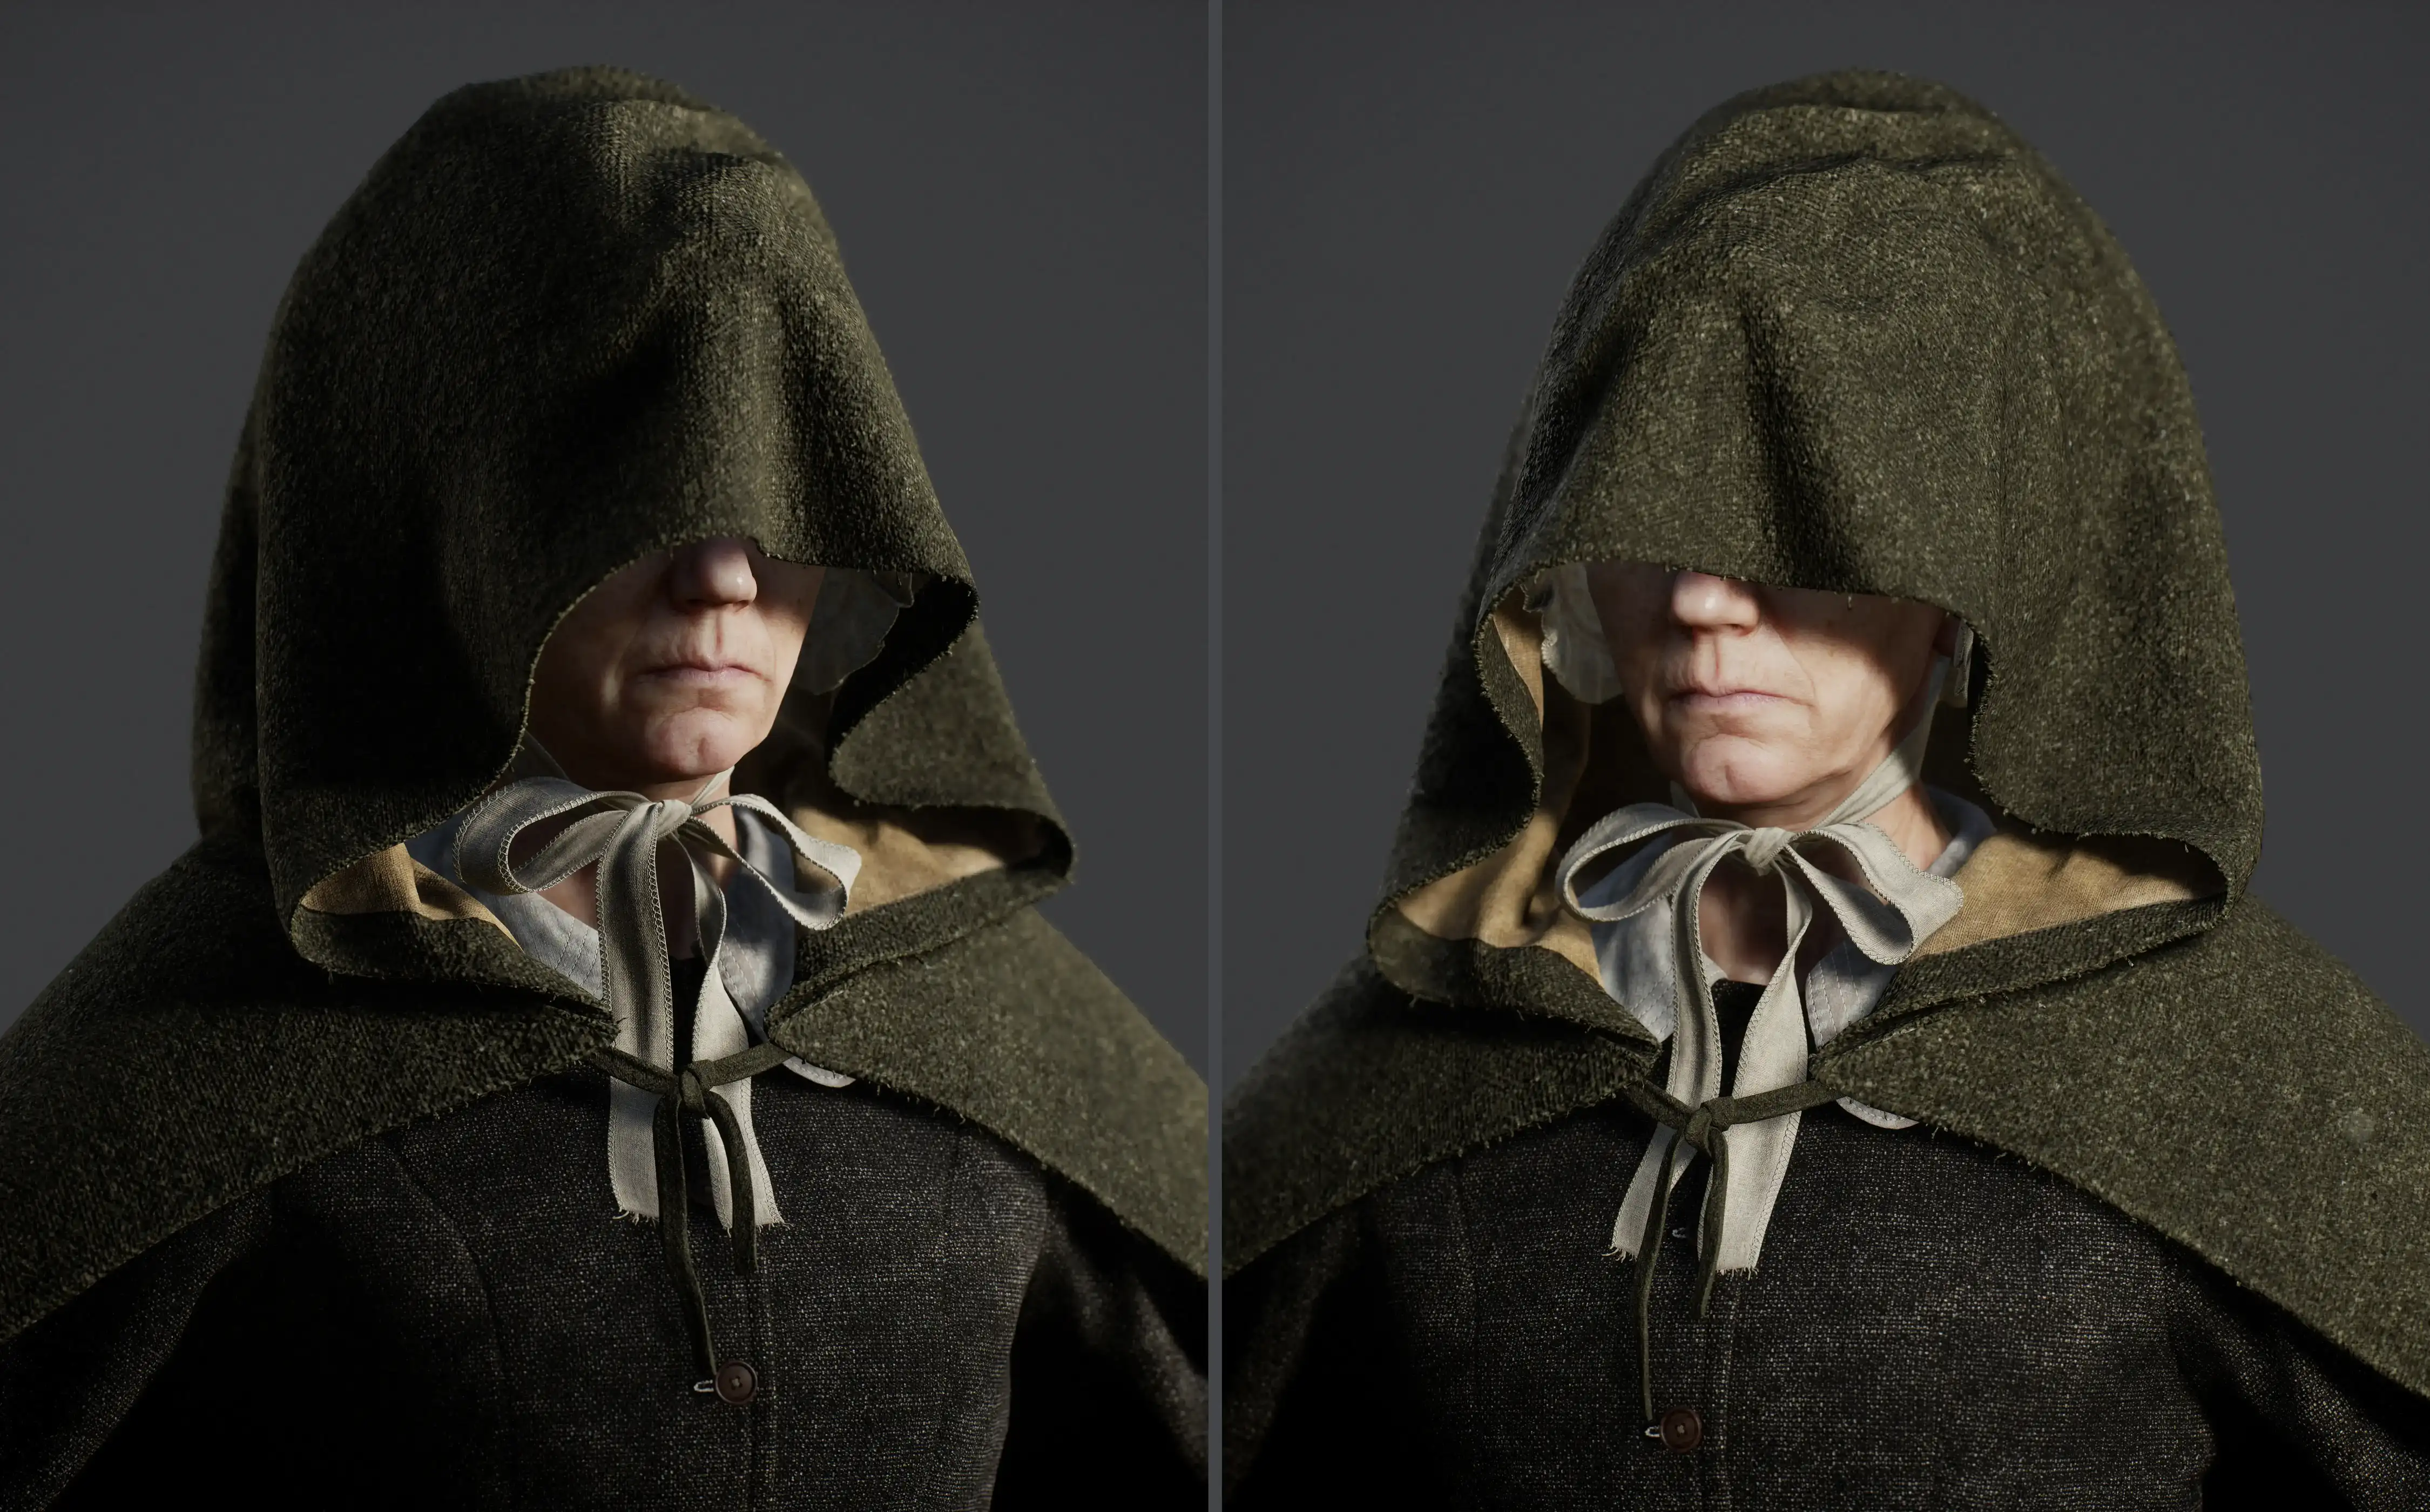
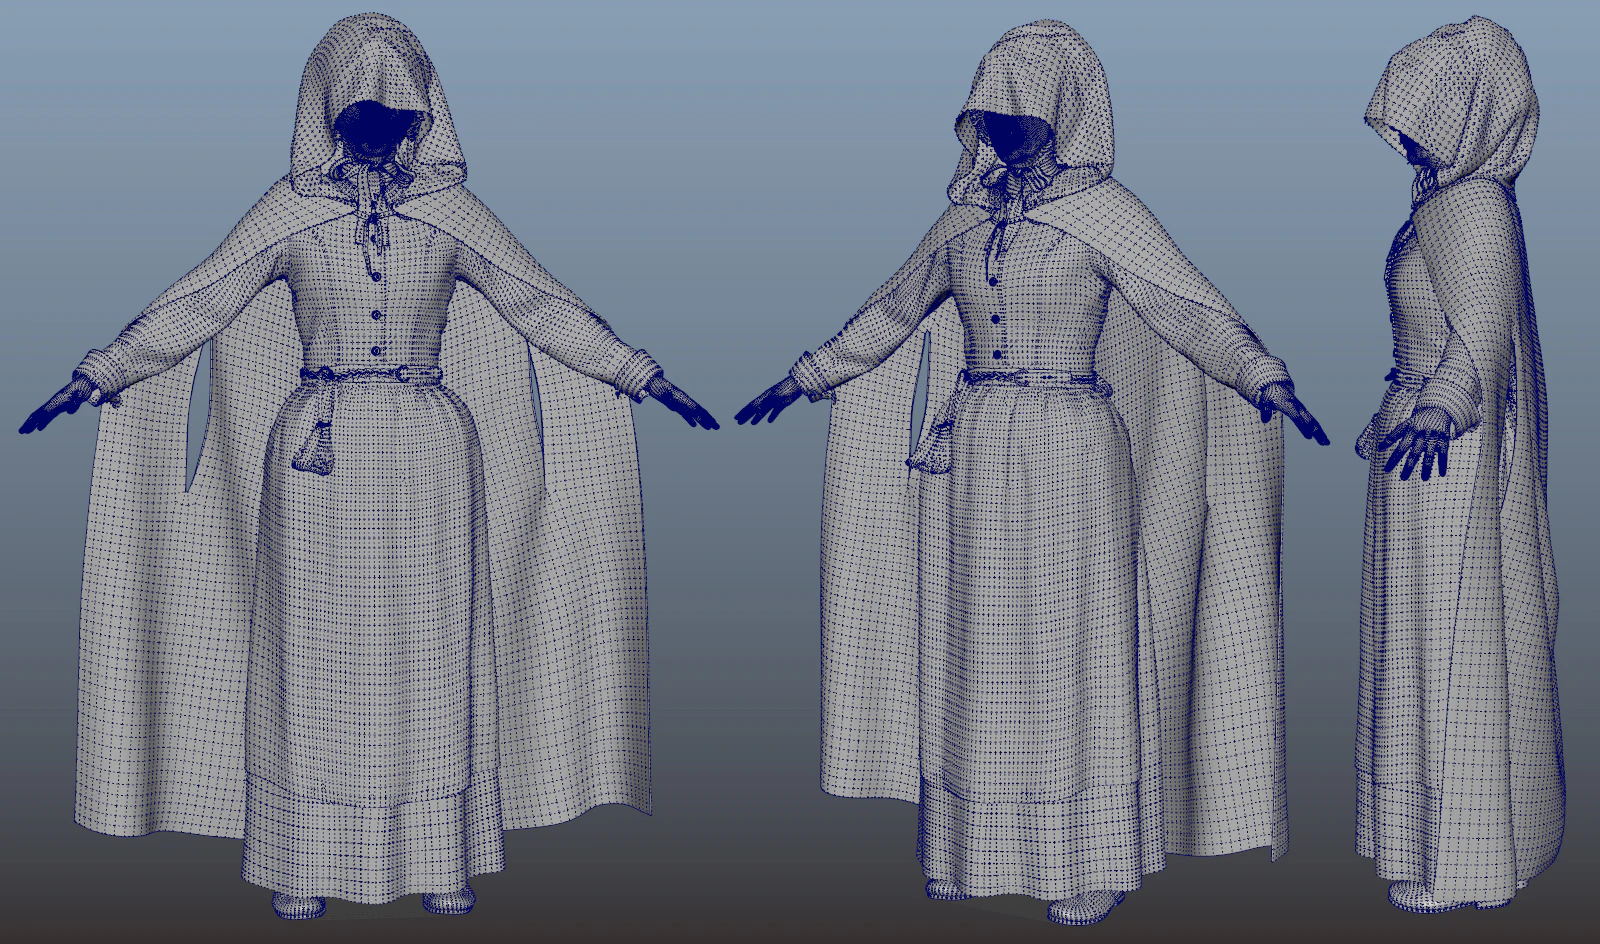
Mary has a character variant with a cloak. I used the standard Mary character as an avatar.
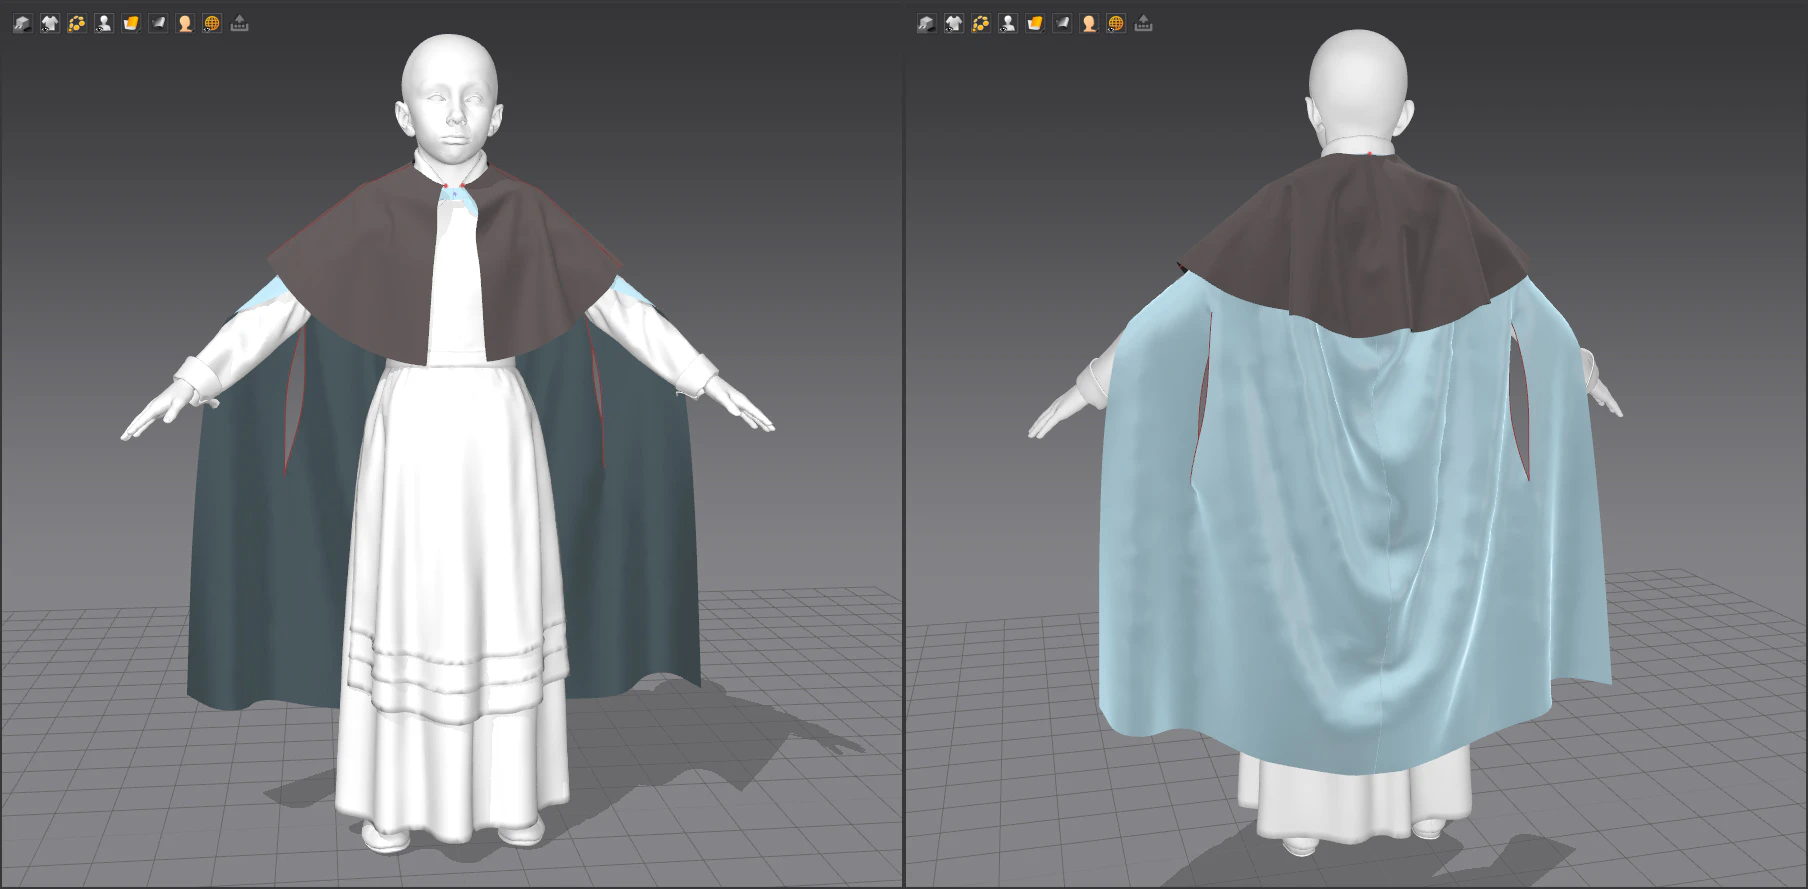
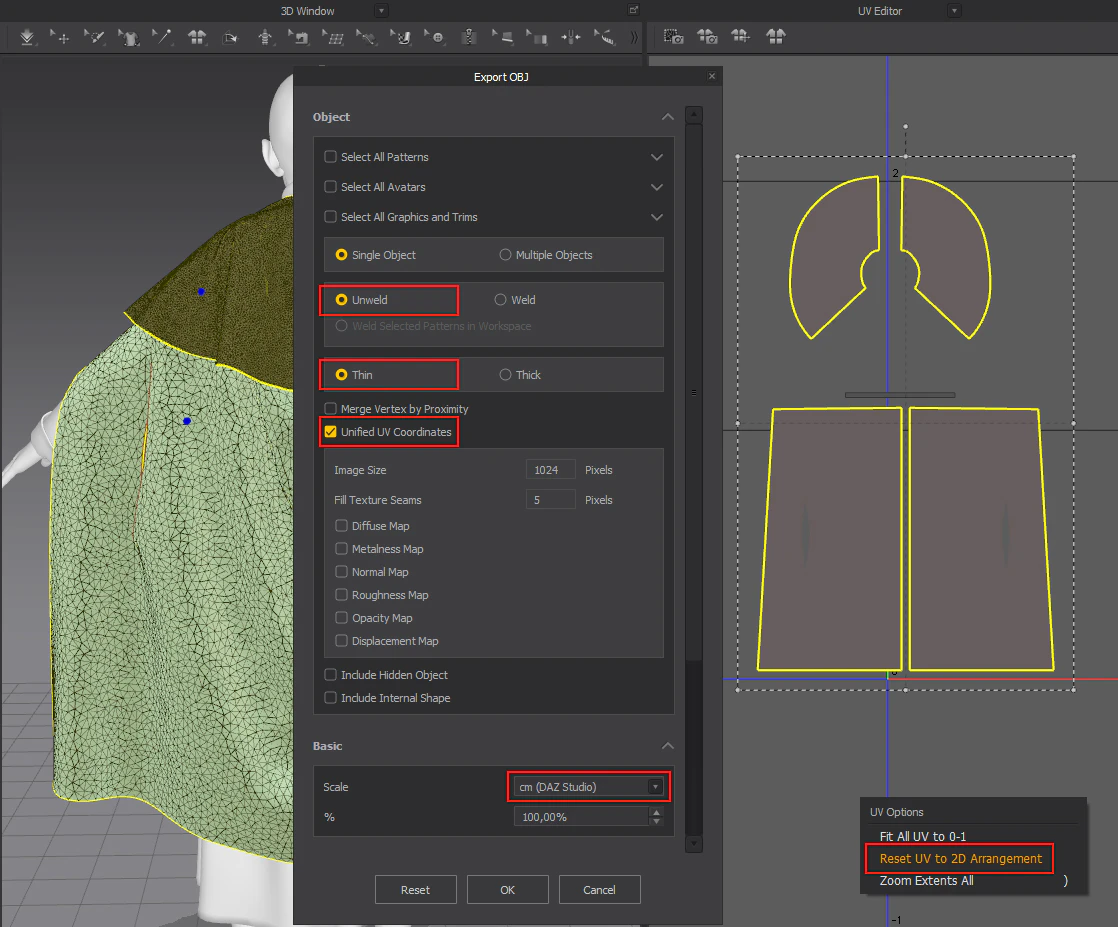
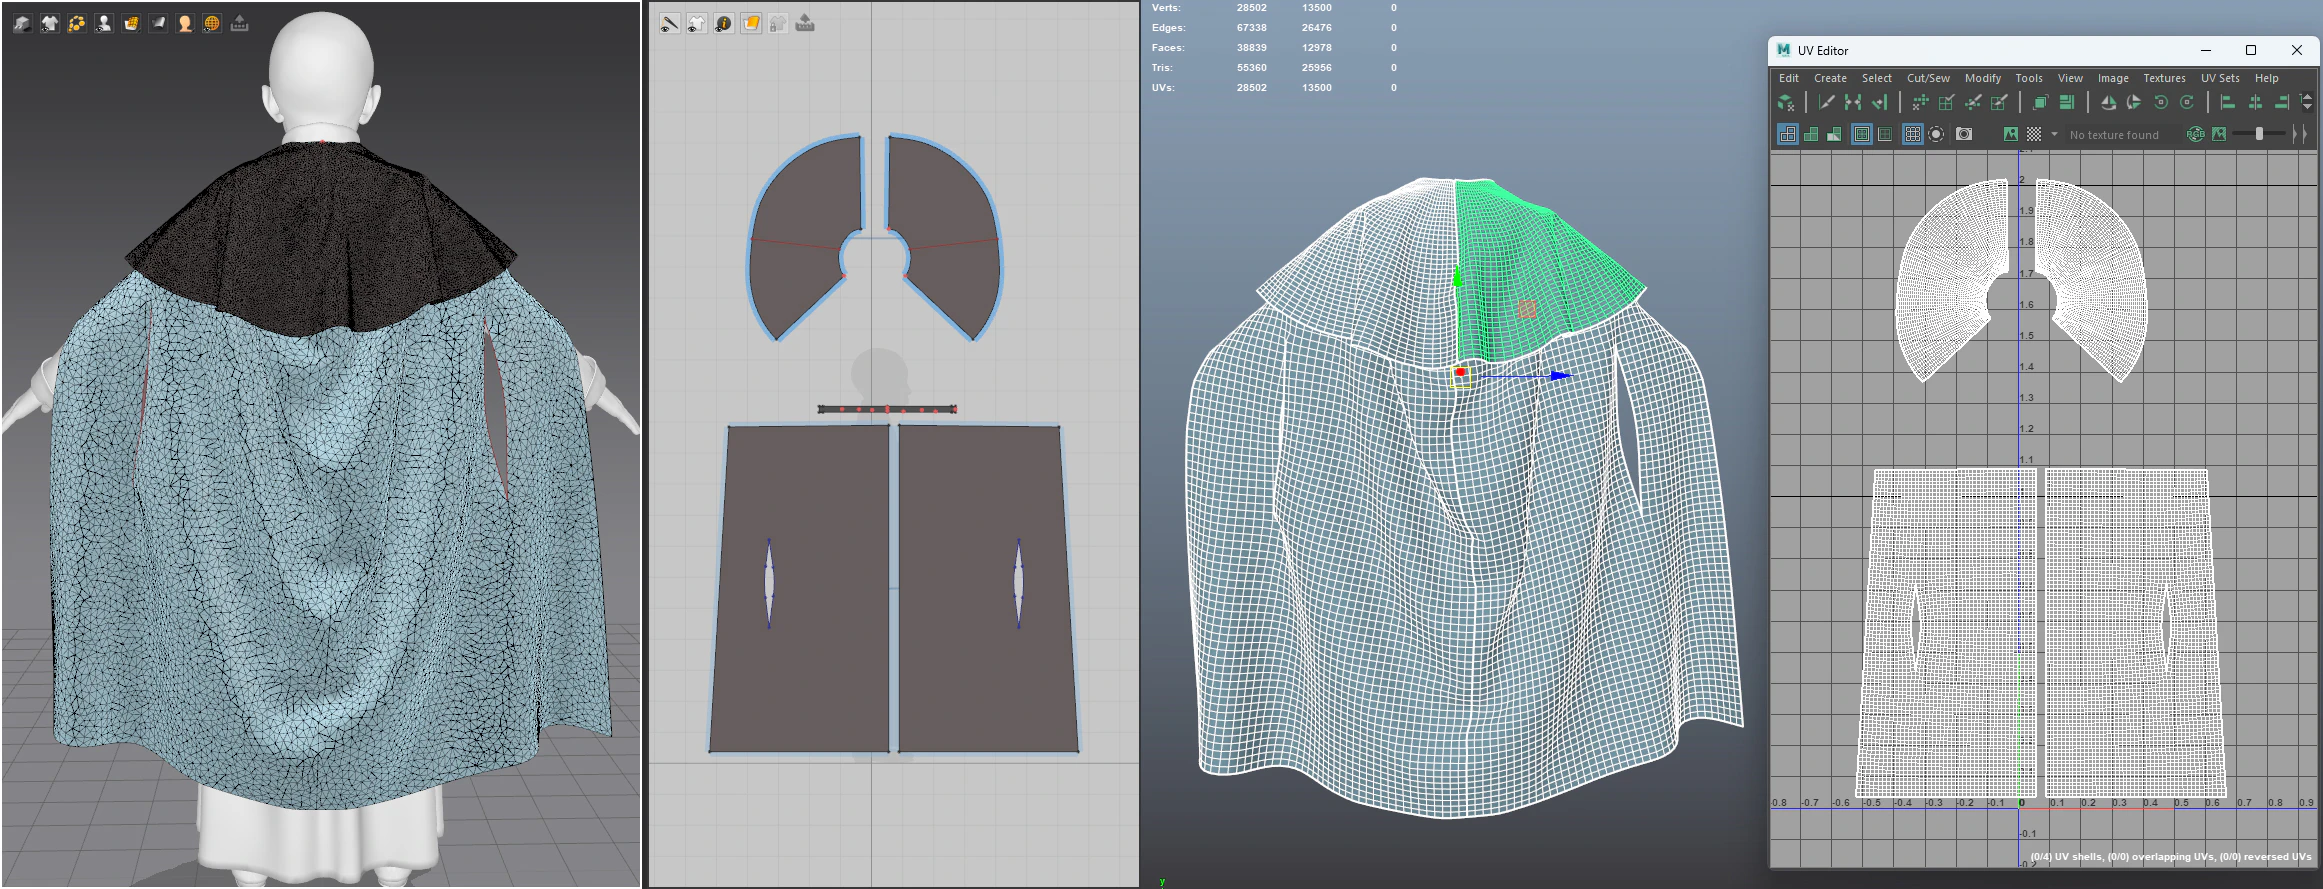
(I did these characters in an older version of Marvelous Designer. The new version has more tools for retopology which could now be used instead.) It is crucial that the final game mesh should have a proper clean edge flow which supports the rigging and future in-game cloth simulation. Here I show what I found to be one of the best workflows to achieve this. Marvelous Designer is based on sewing patterns like the work of a real tailor, which increases the realism if the pattern is correct. The UV should be the same as in the pattern editor, and it is important to export an unwelded geometry without thickness in real-world scale.
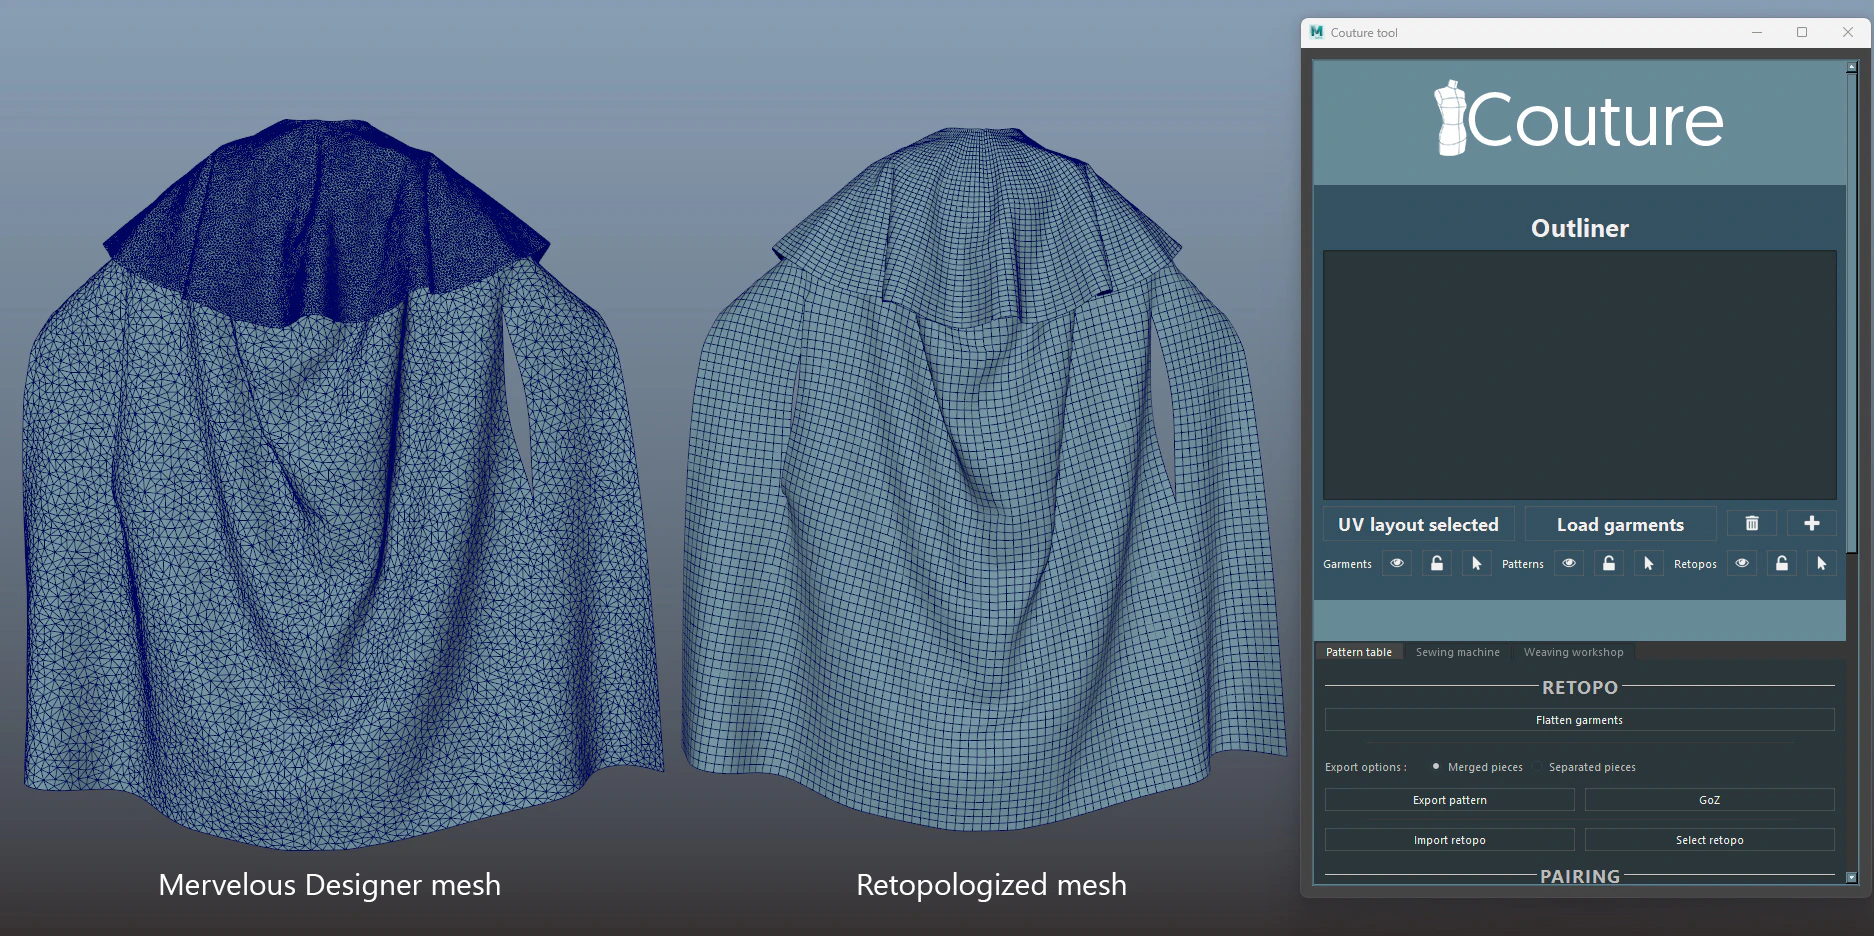
I am using the Couture tool for the retopology process. The final geometry is very clean, maintaining the shape of the cloth which was simulated in Marvelous Designer.
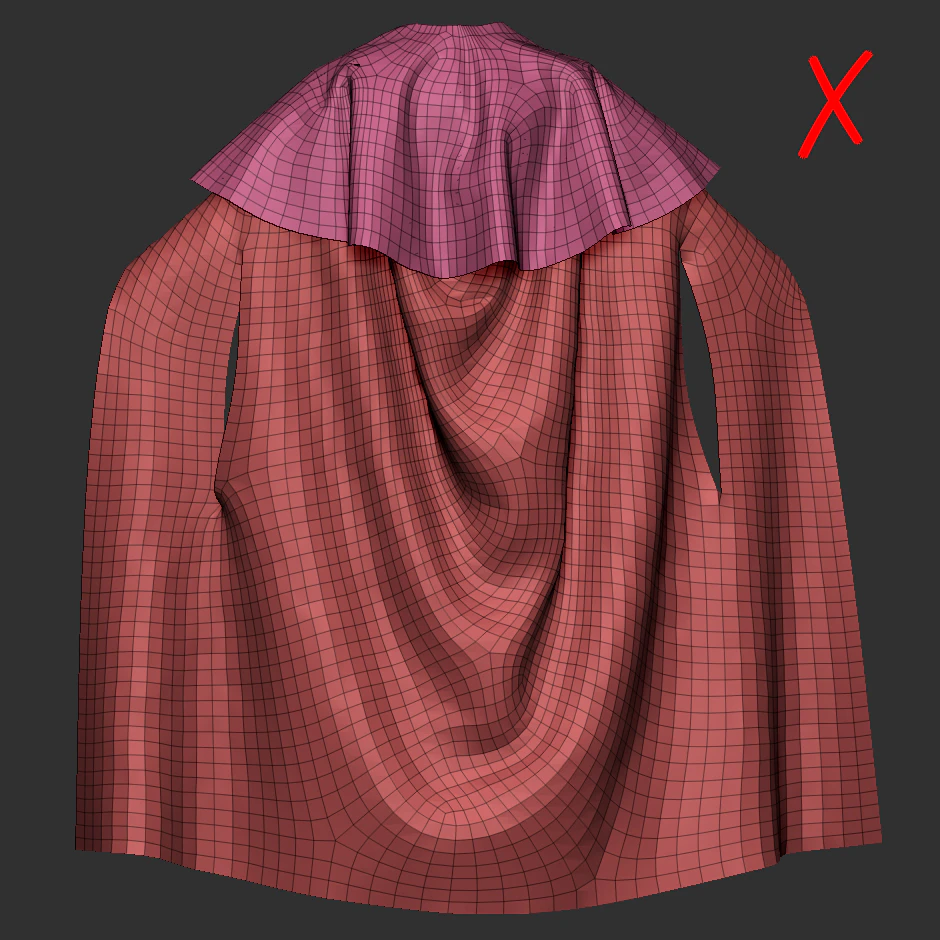
Using ZRemesher on the 3d mesh could be good in certain cases, but I can make a cleaner edge flow if I use UV based mesh for the retopology instead of this.
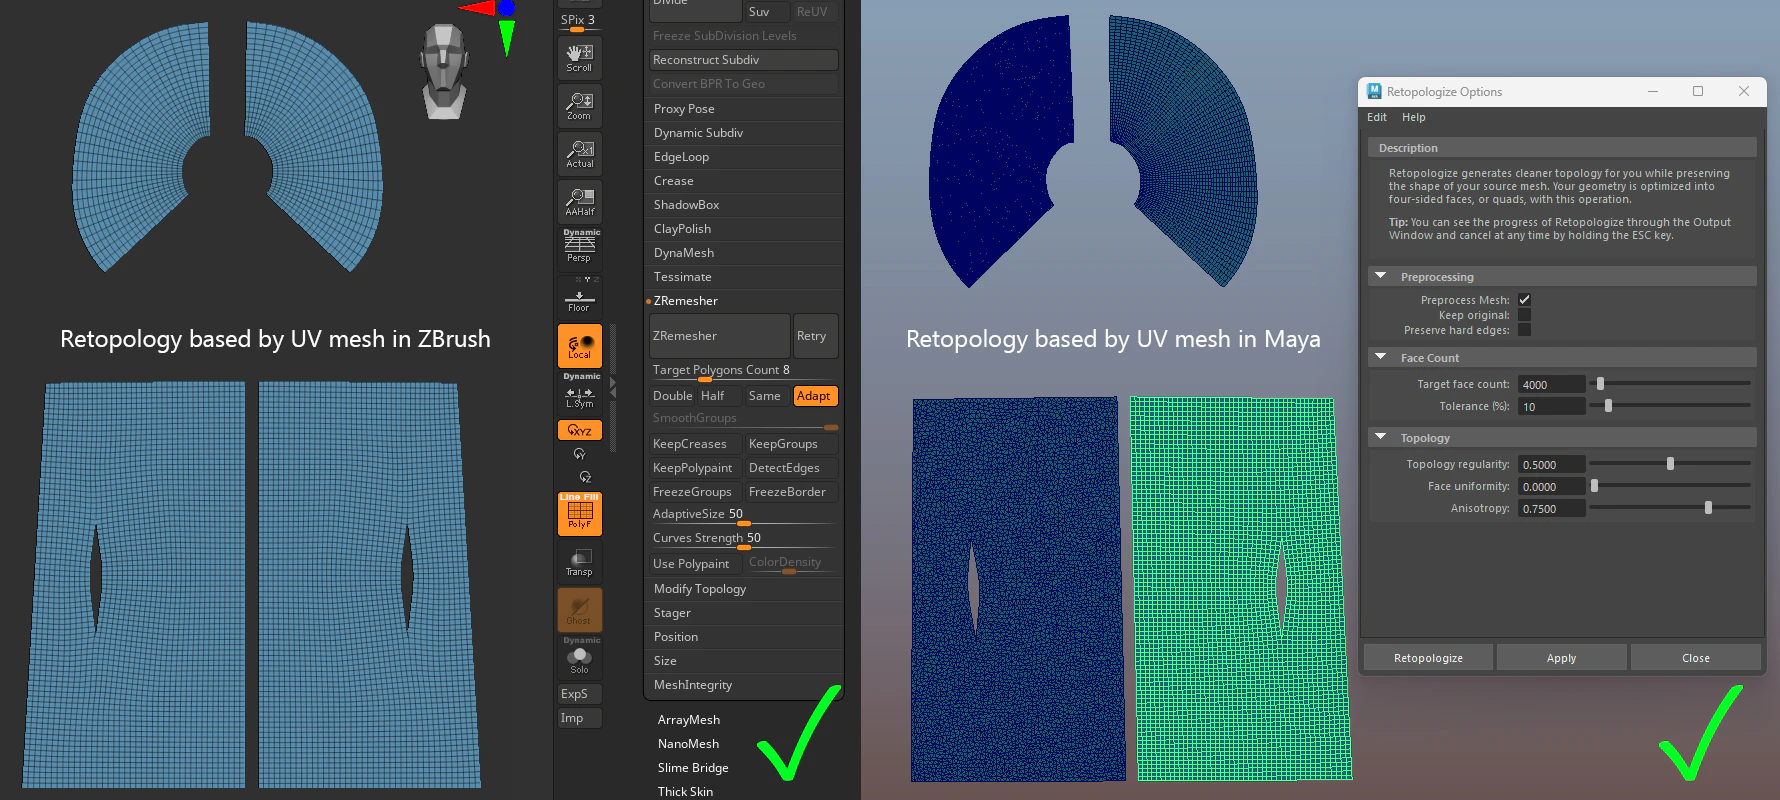
I make a flat UV based mesh with Couture, then I can use ZBrush or Maya to create a very clean retopology.
I wrap the retopologized flat geometry with Couture to the 3d mesh. So finally, I have the same shape as the simulated cloth and the same UV as the Marvelous Designer sewing pattern, just with clean geometry.
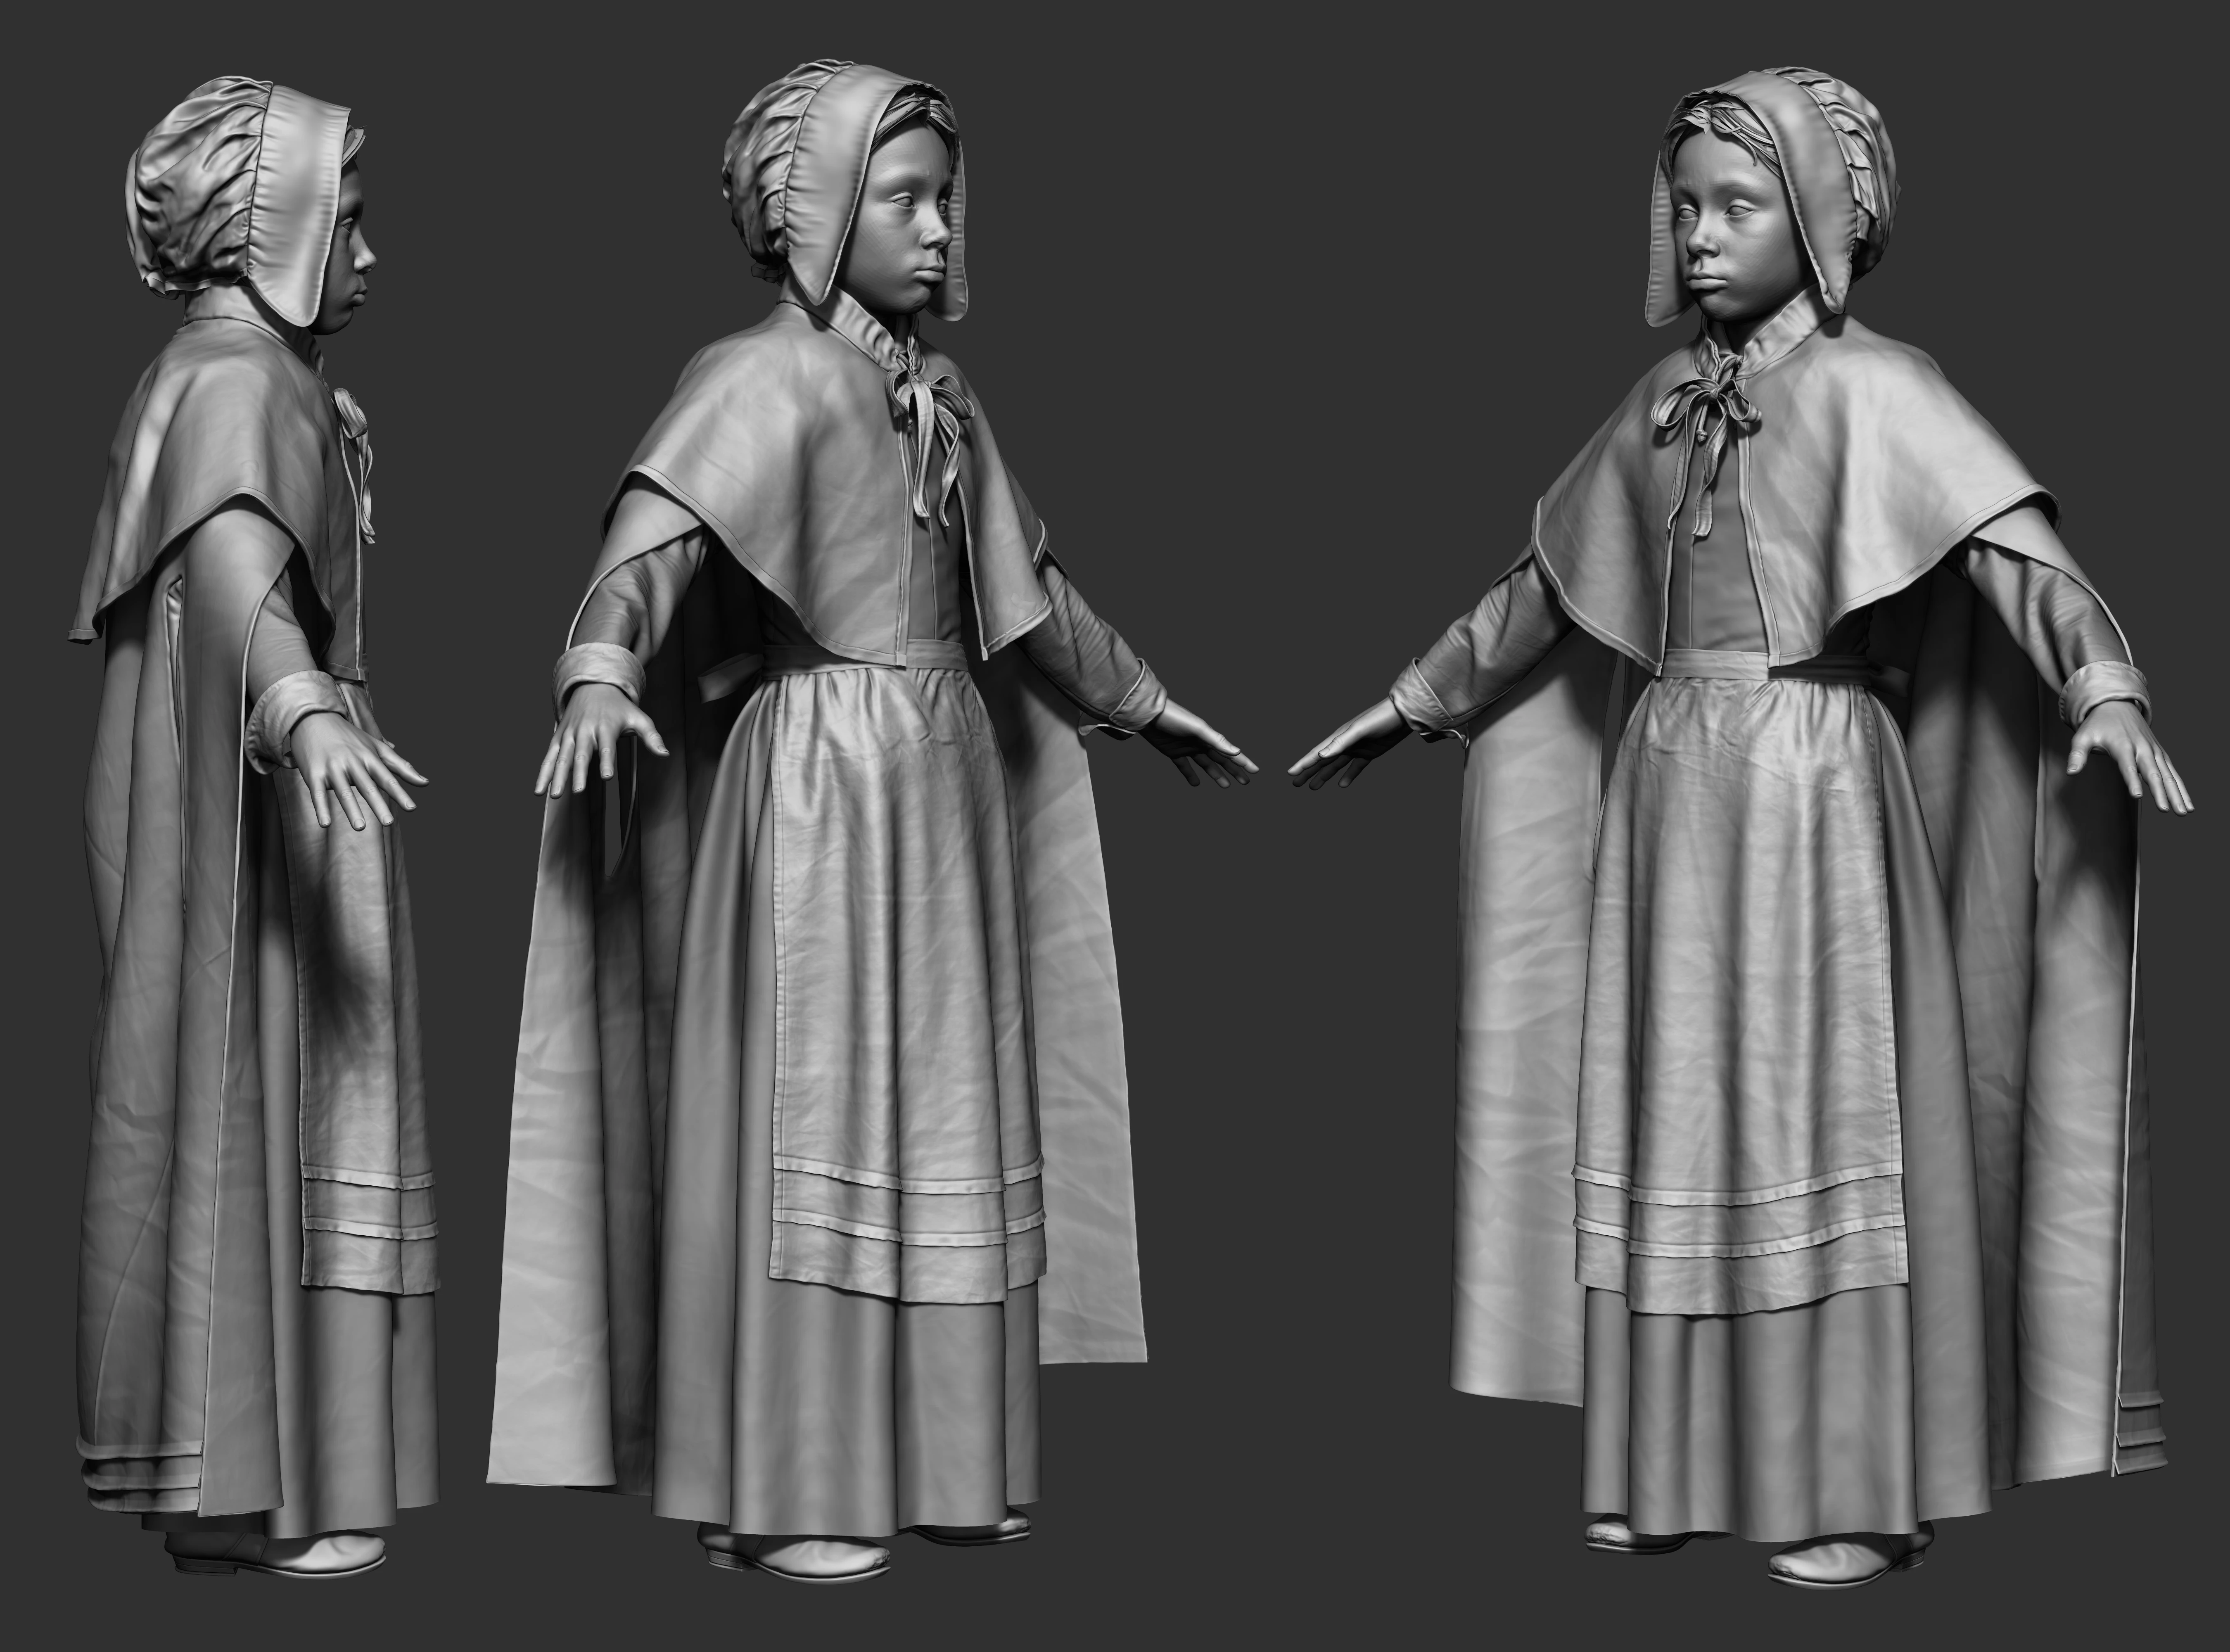
After the mesh is cleaned up, I make some additional sculpting and this is the detailed ZBrush mesh.
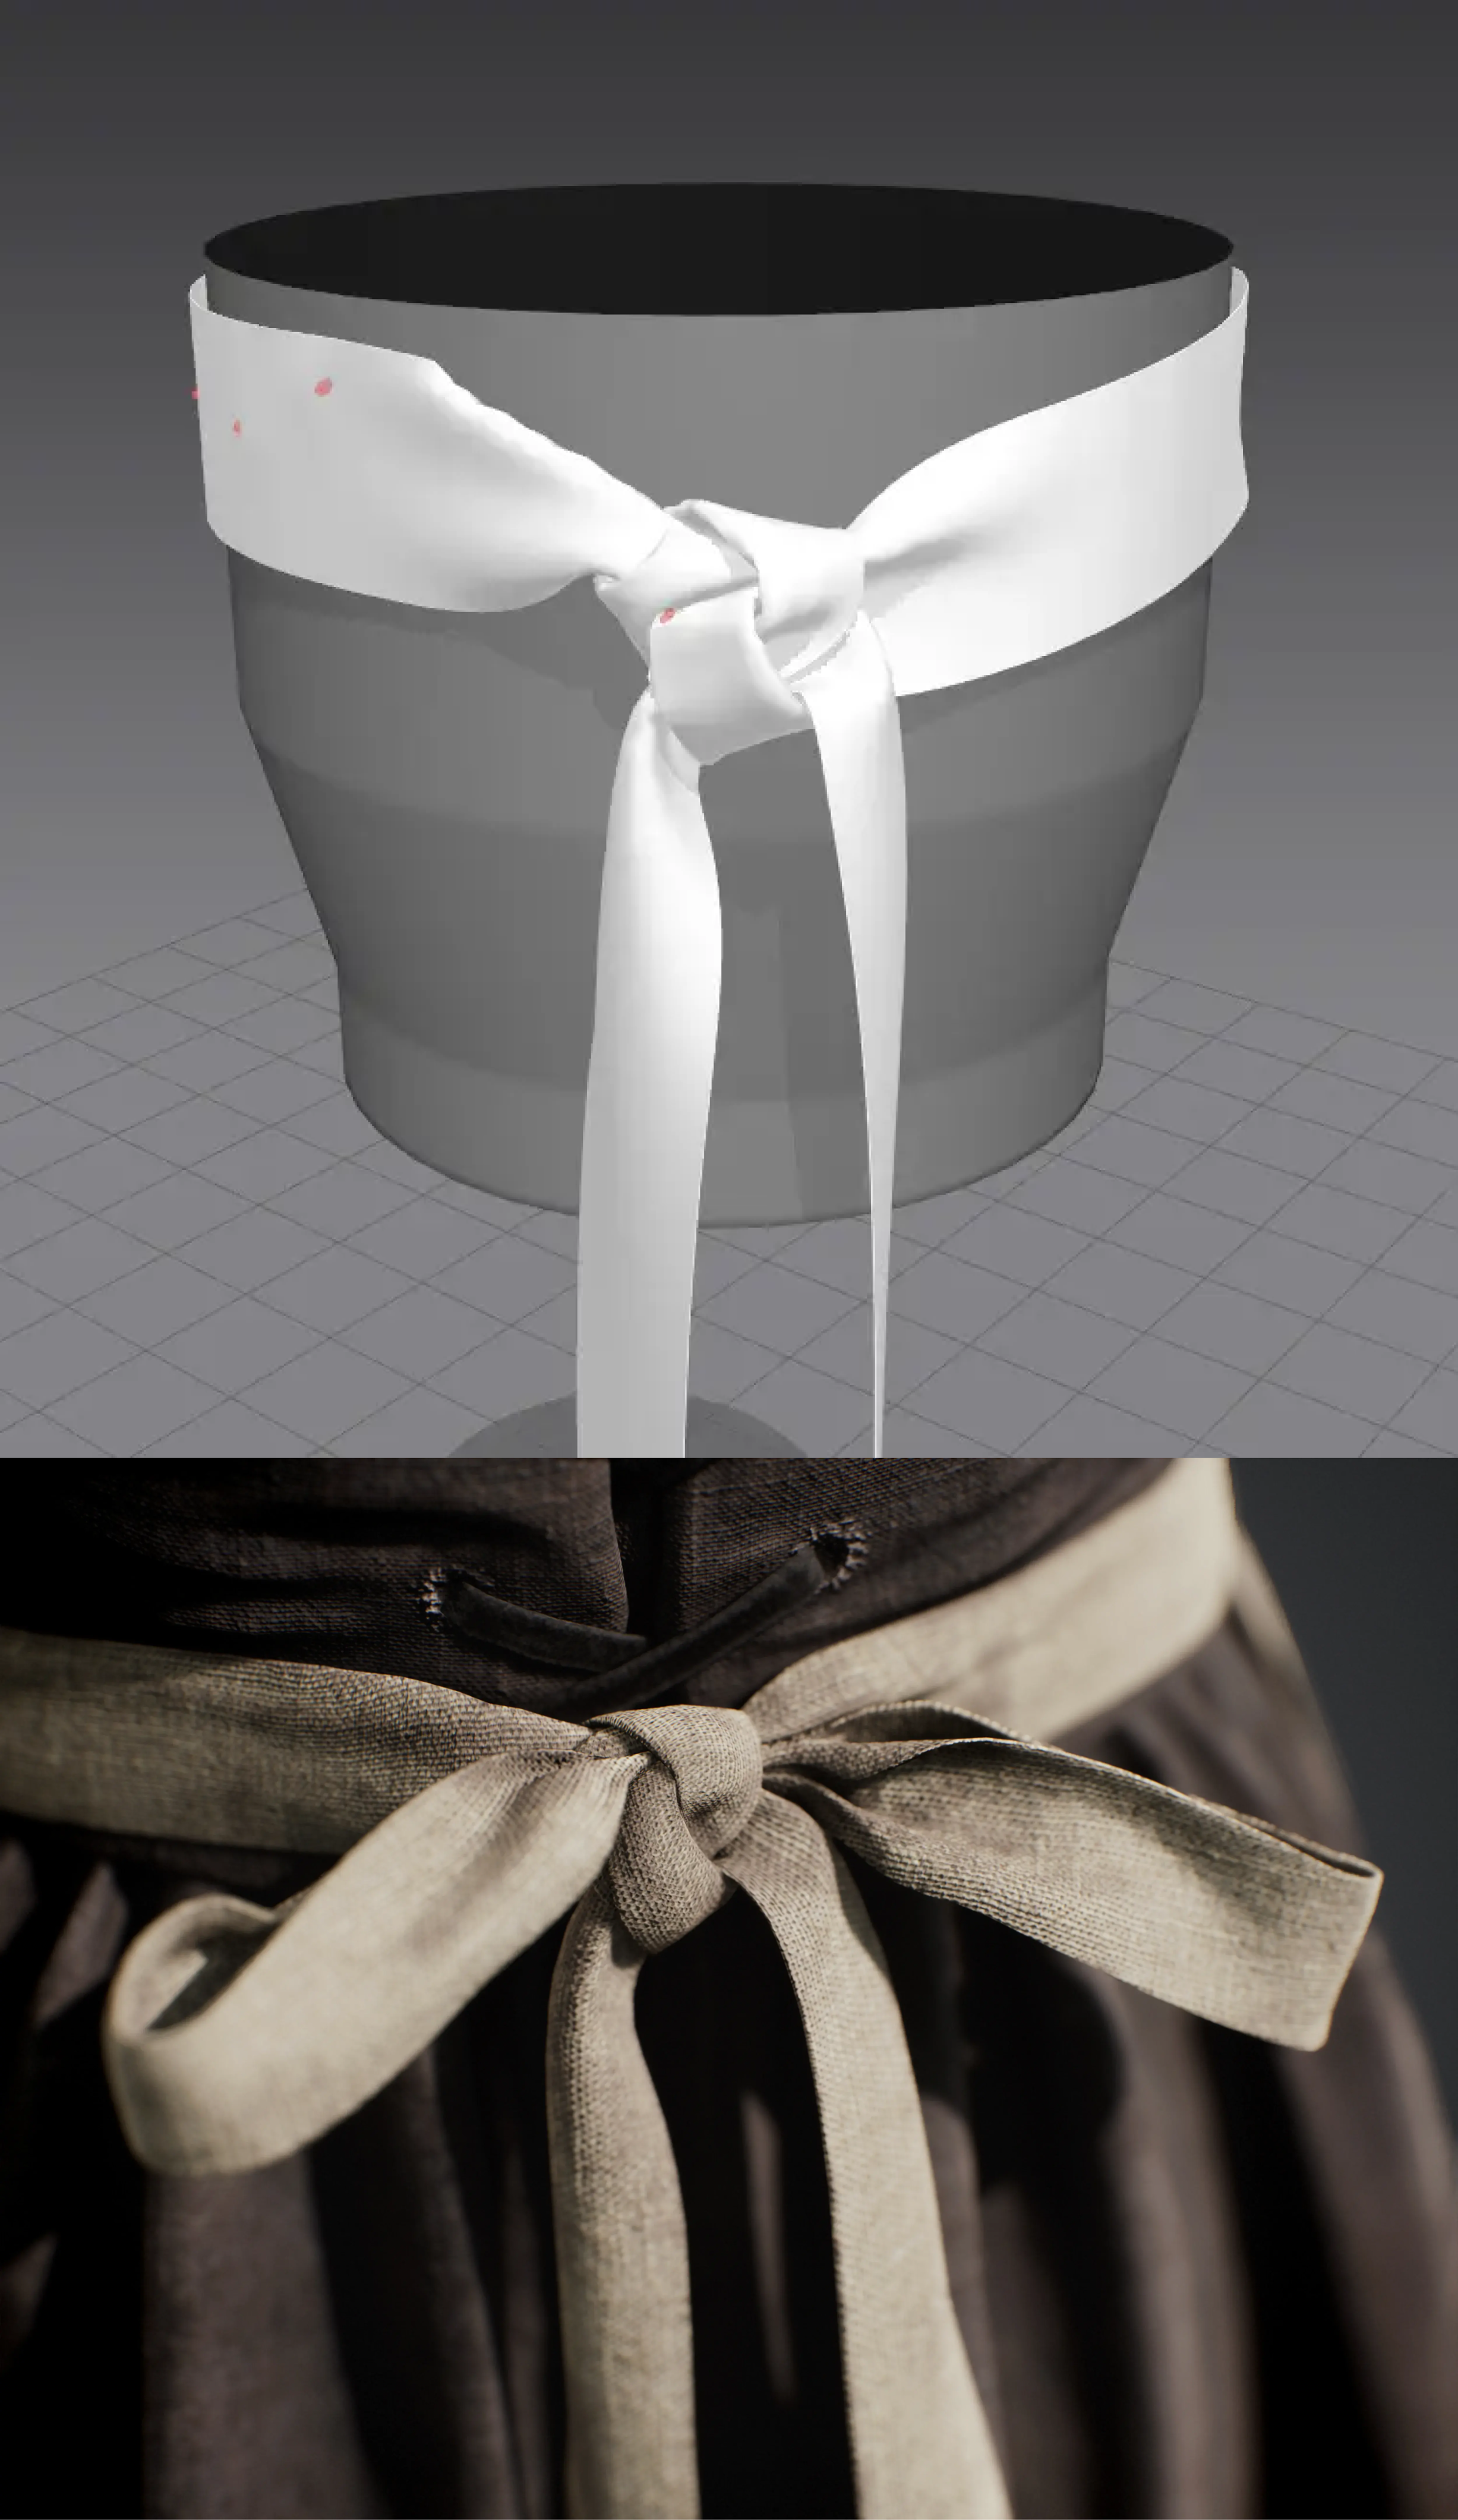
Marvelous Designer is also useful for creating realistic knots. Understanding the shapes is important, so I think it increases the realism if I follow how the cloth would behave in real life. I find it helpful to use the red pinpoints to create the desired shape.
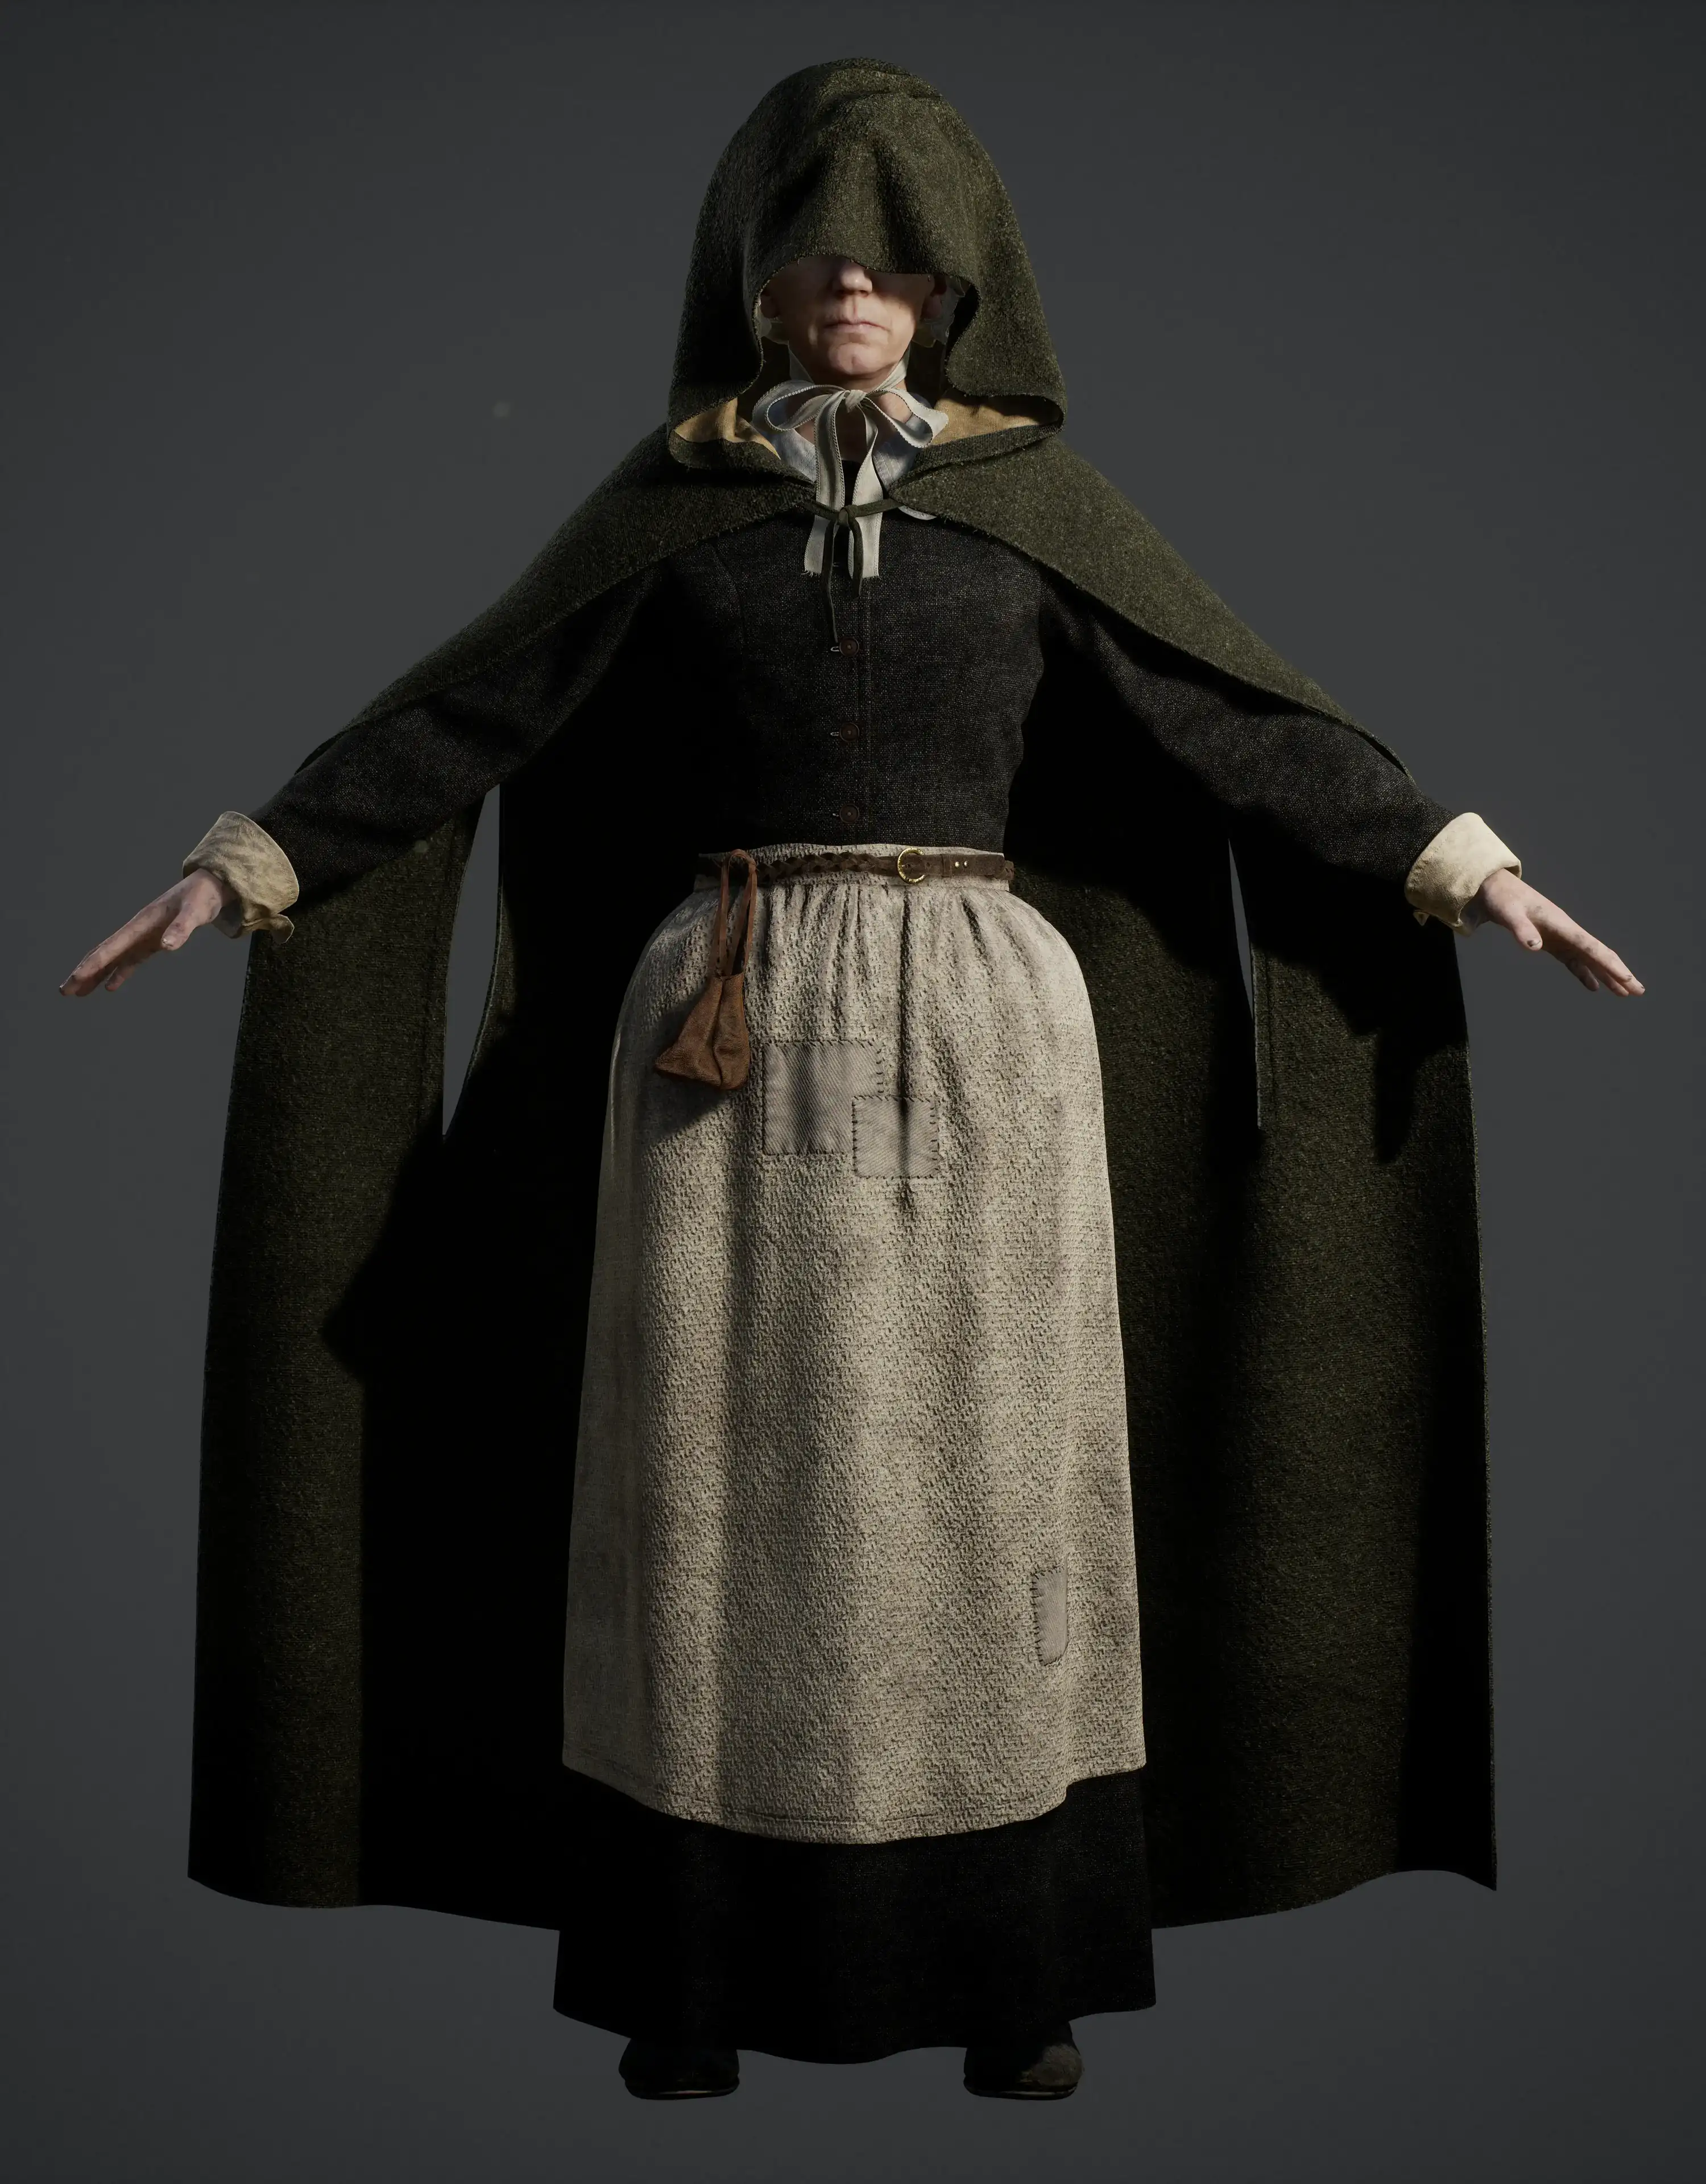
Amy – Little Hope
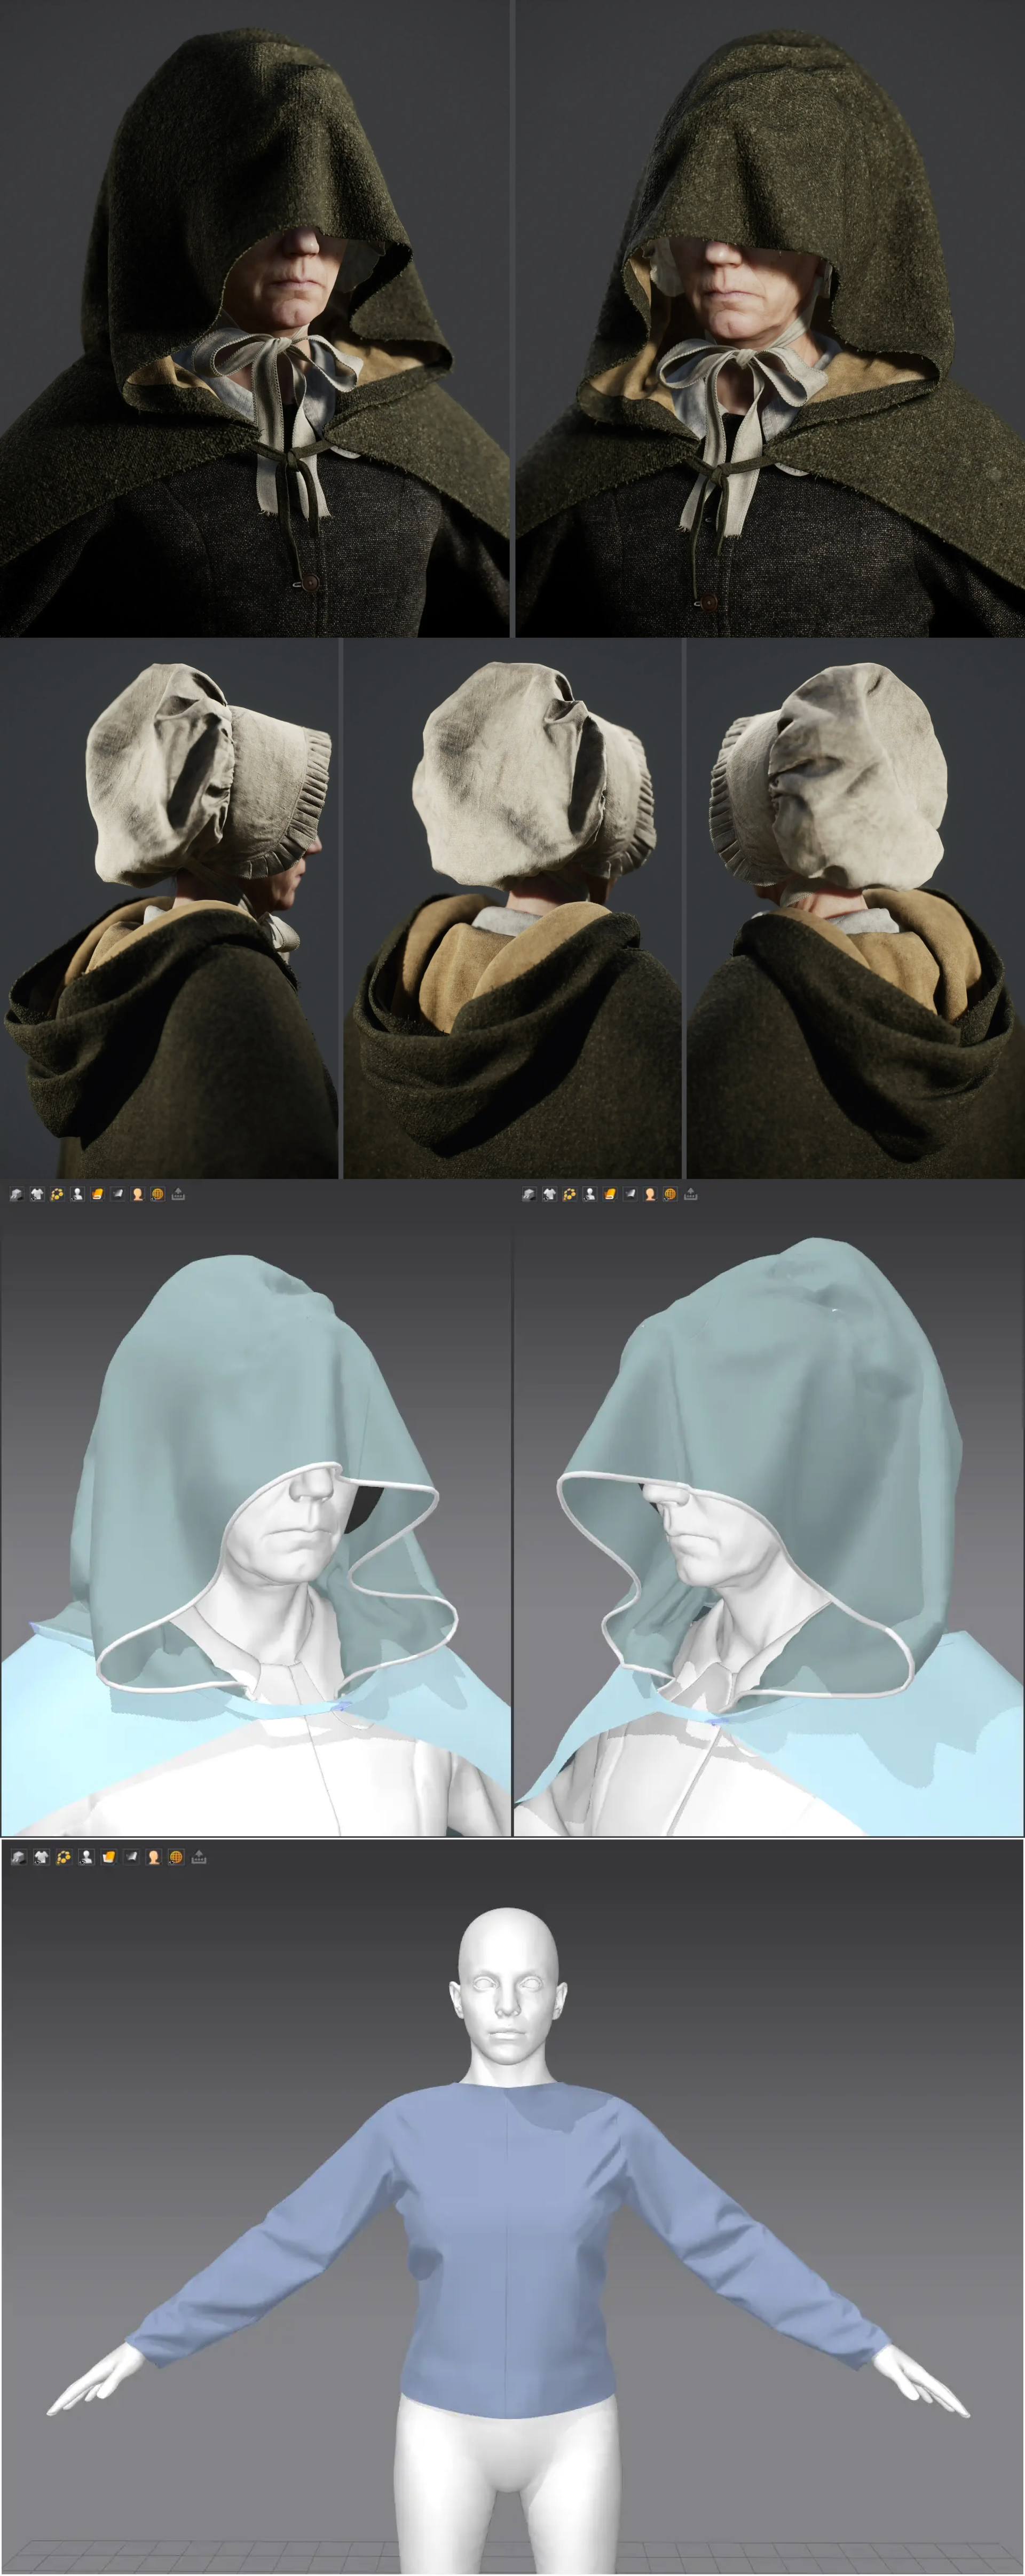
Marvelous Designer was extremely useful for making the medieval costume and the hood.
Finally, the game mesh has very clean geometry, which is important for nice texturing, rigging and possible in-game cloth simulation.
Anthony – Little Hope
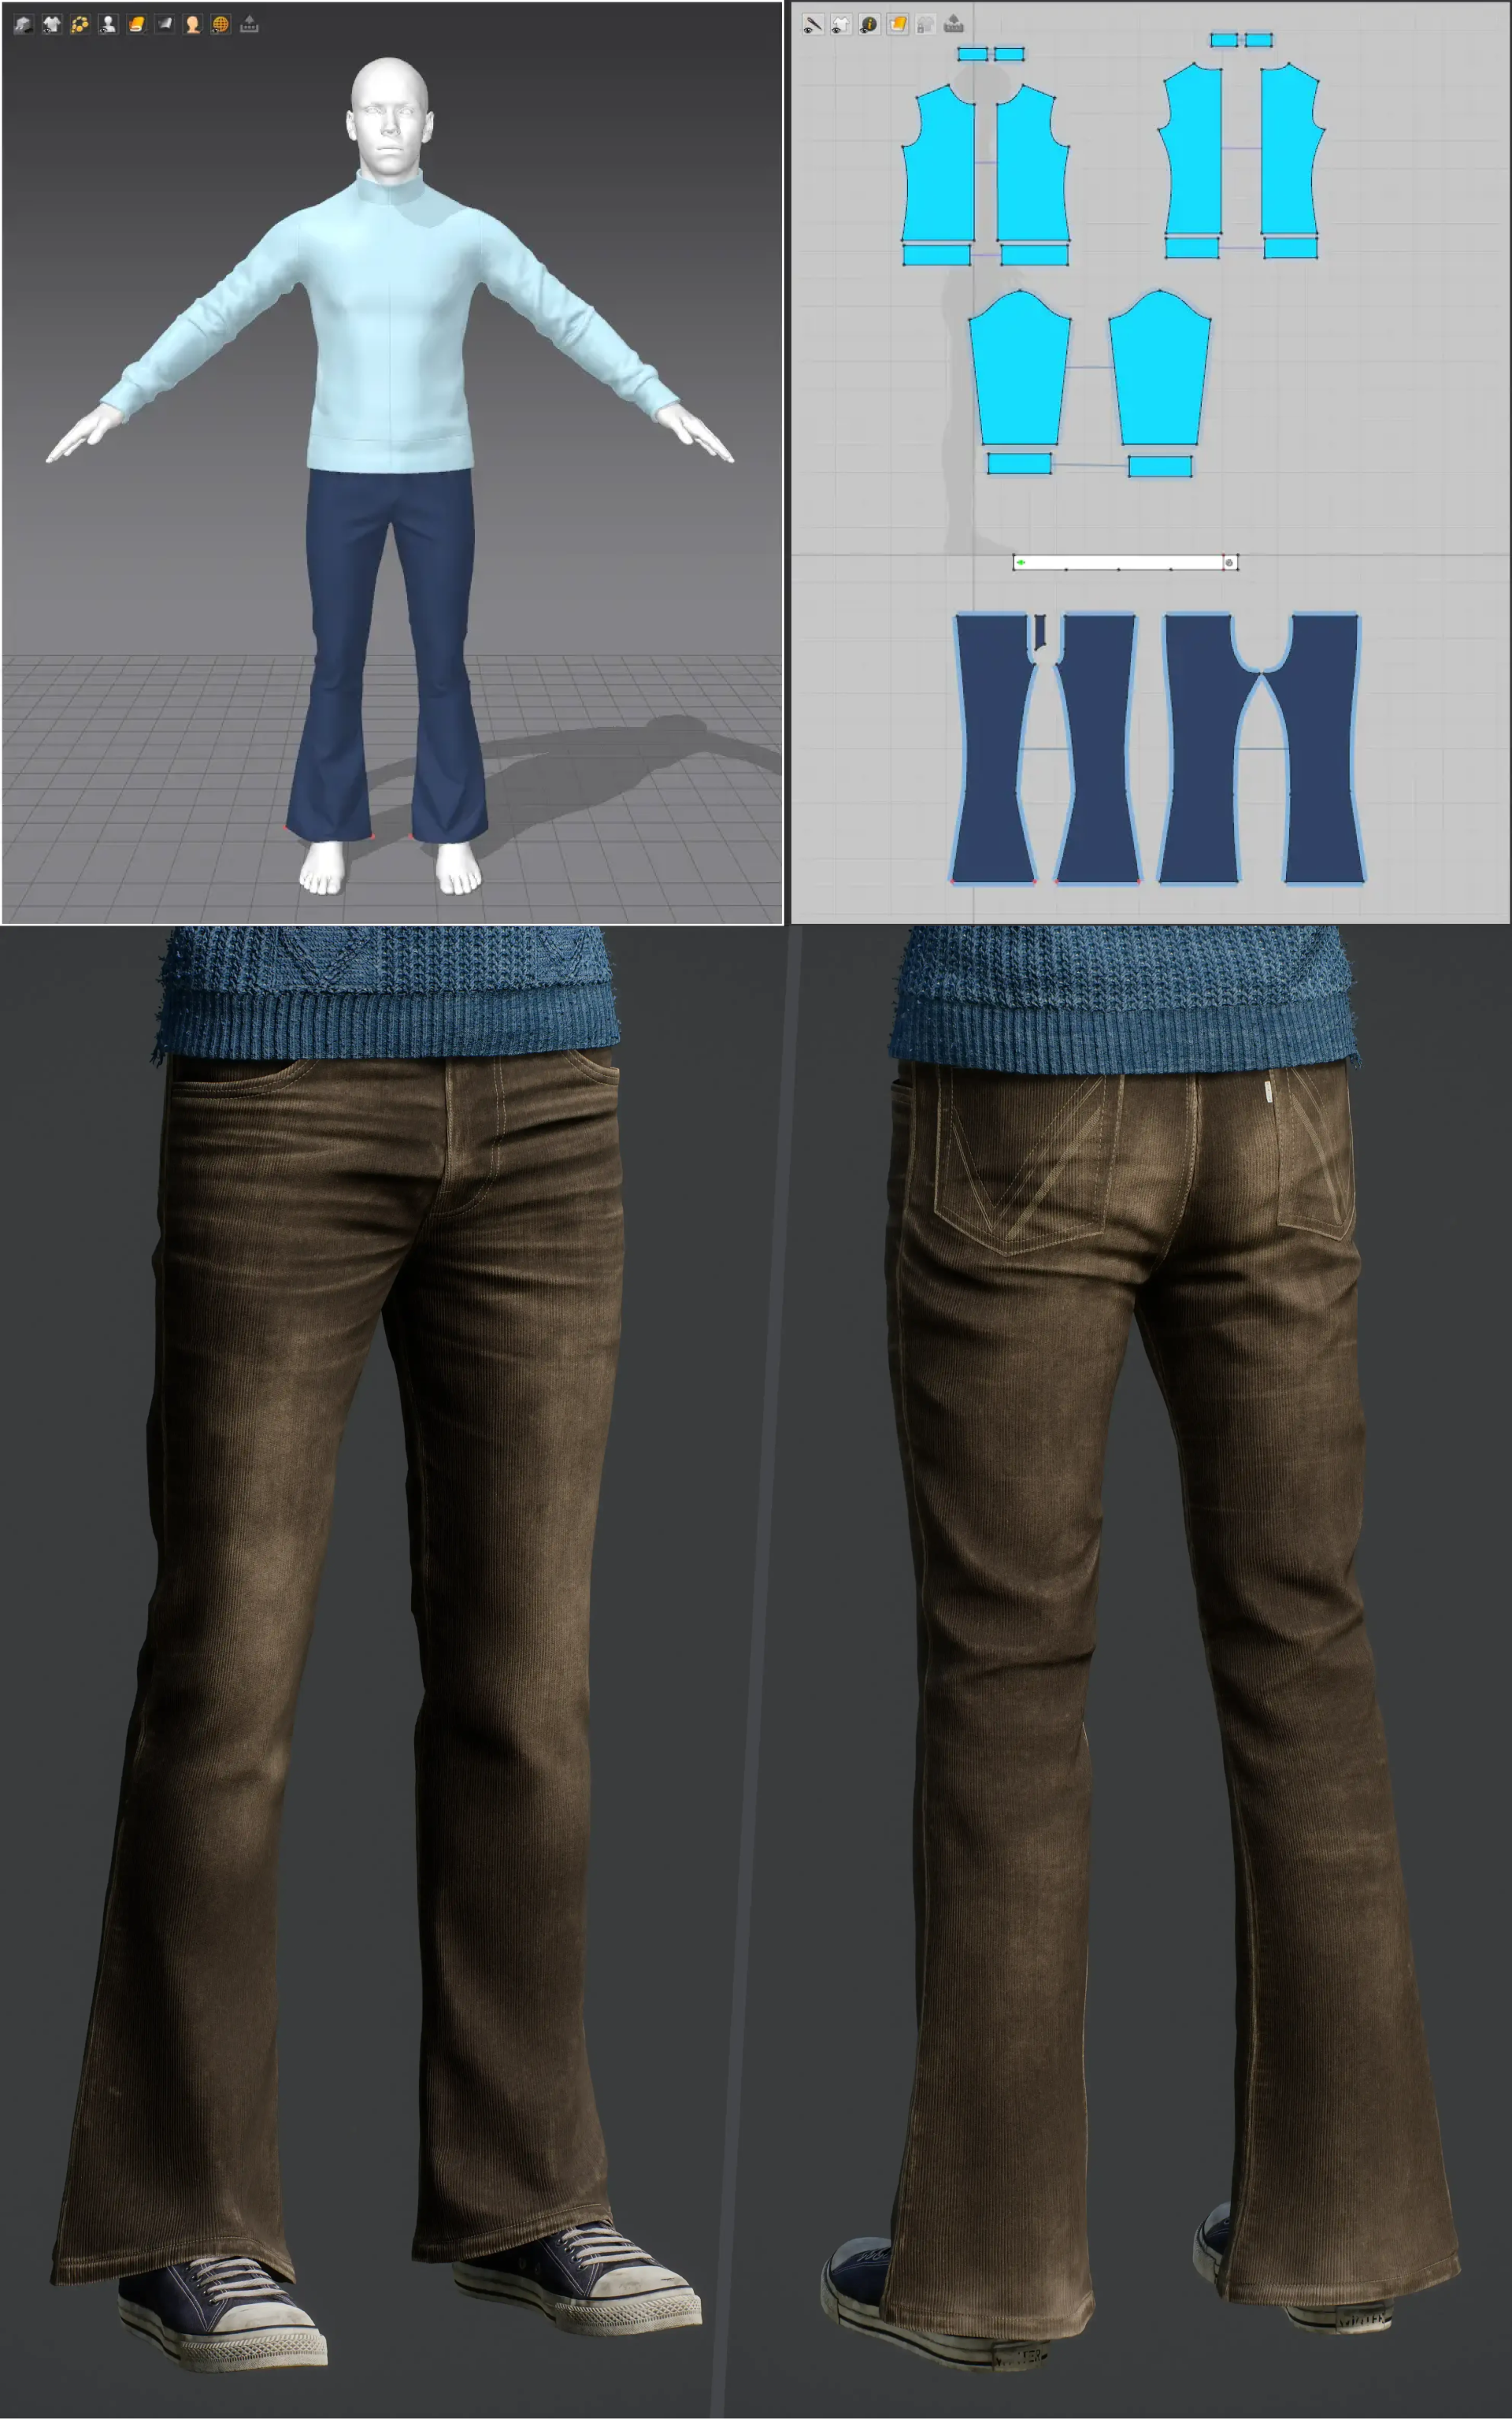

Marvelous Designer gave me a good base for this character.

Erin – The Devil in Me
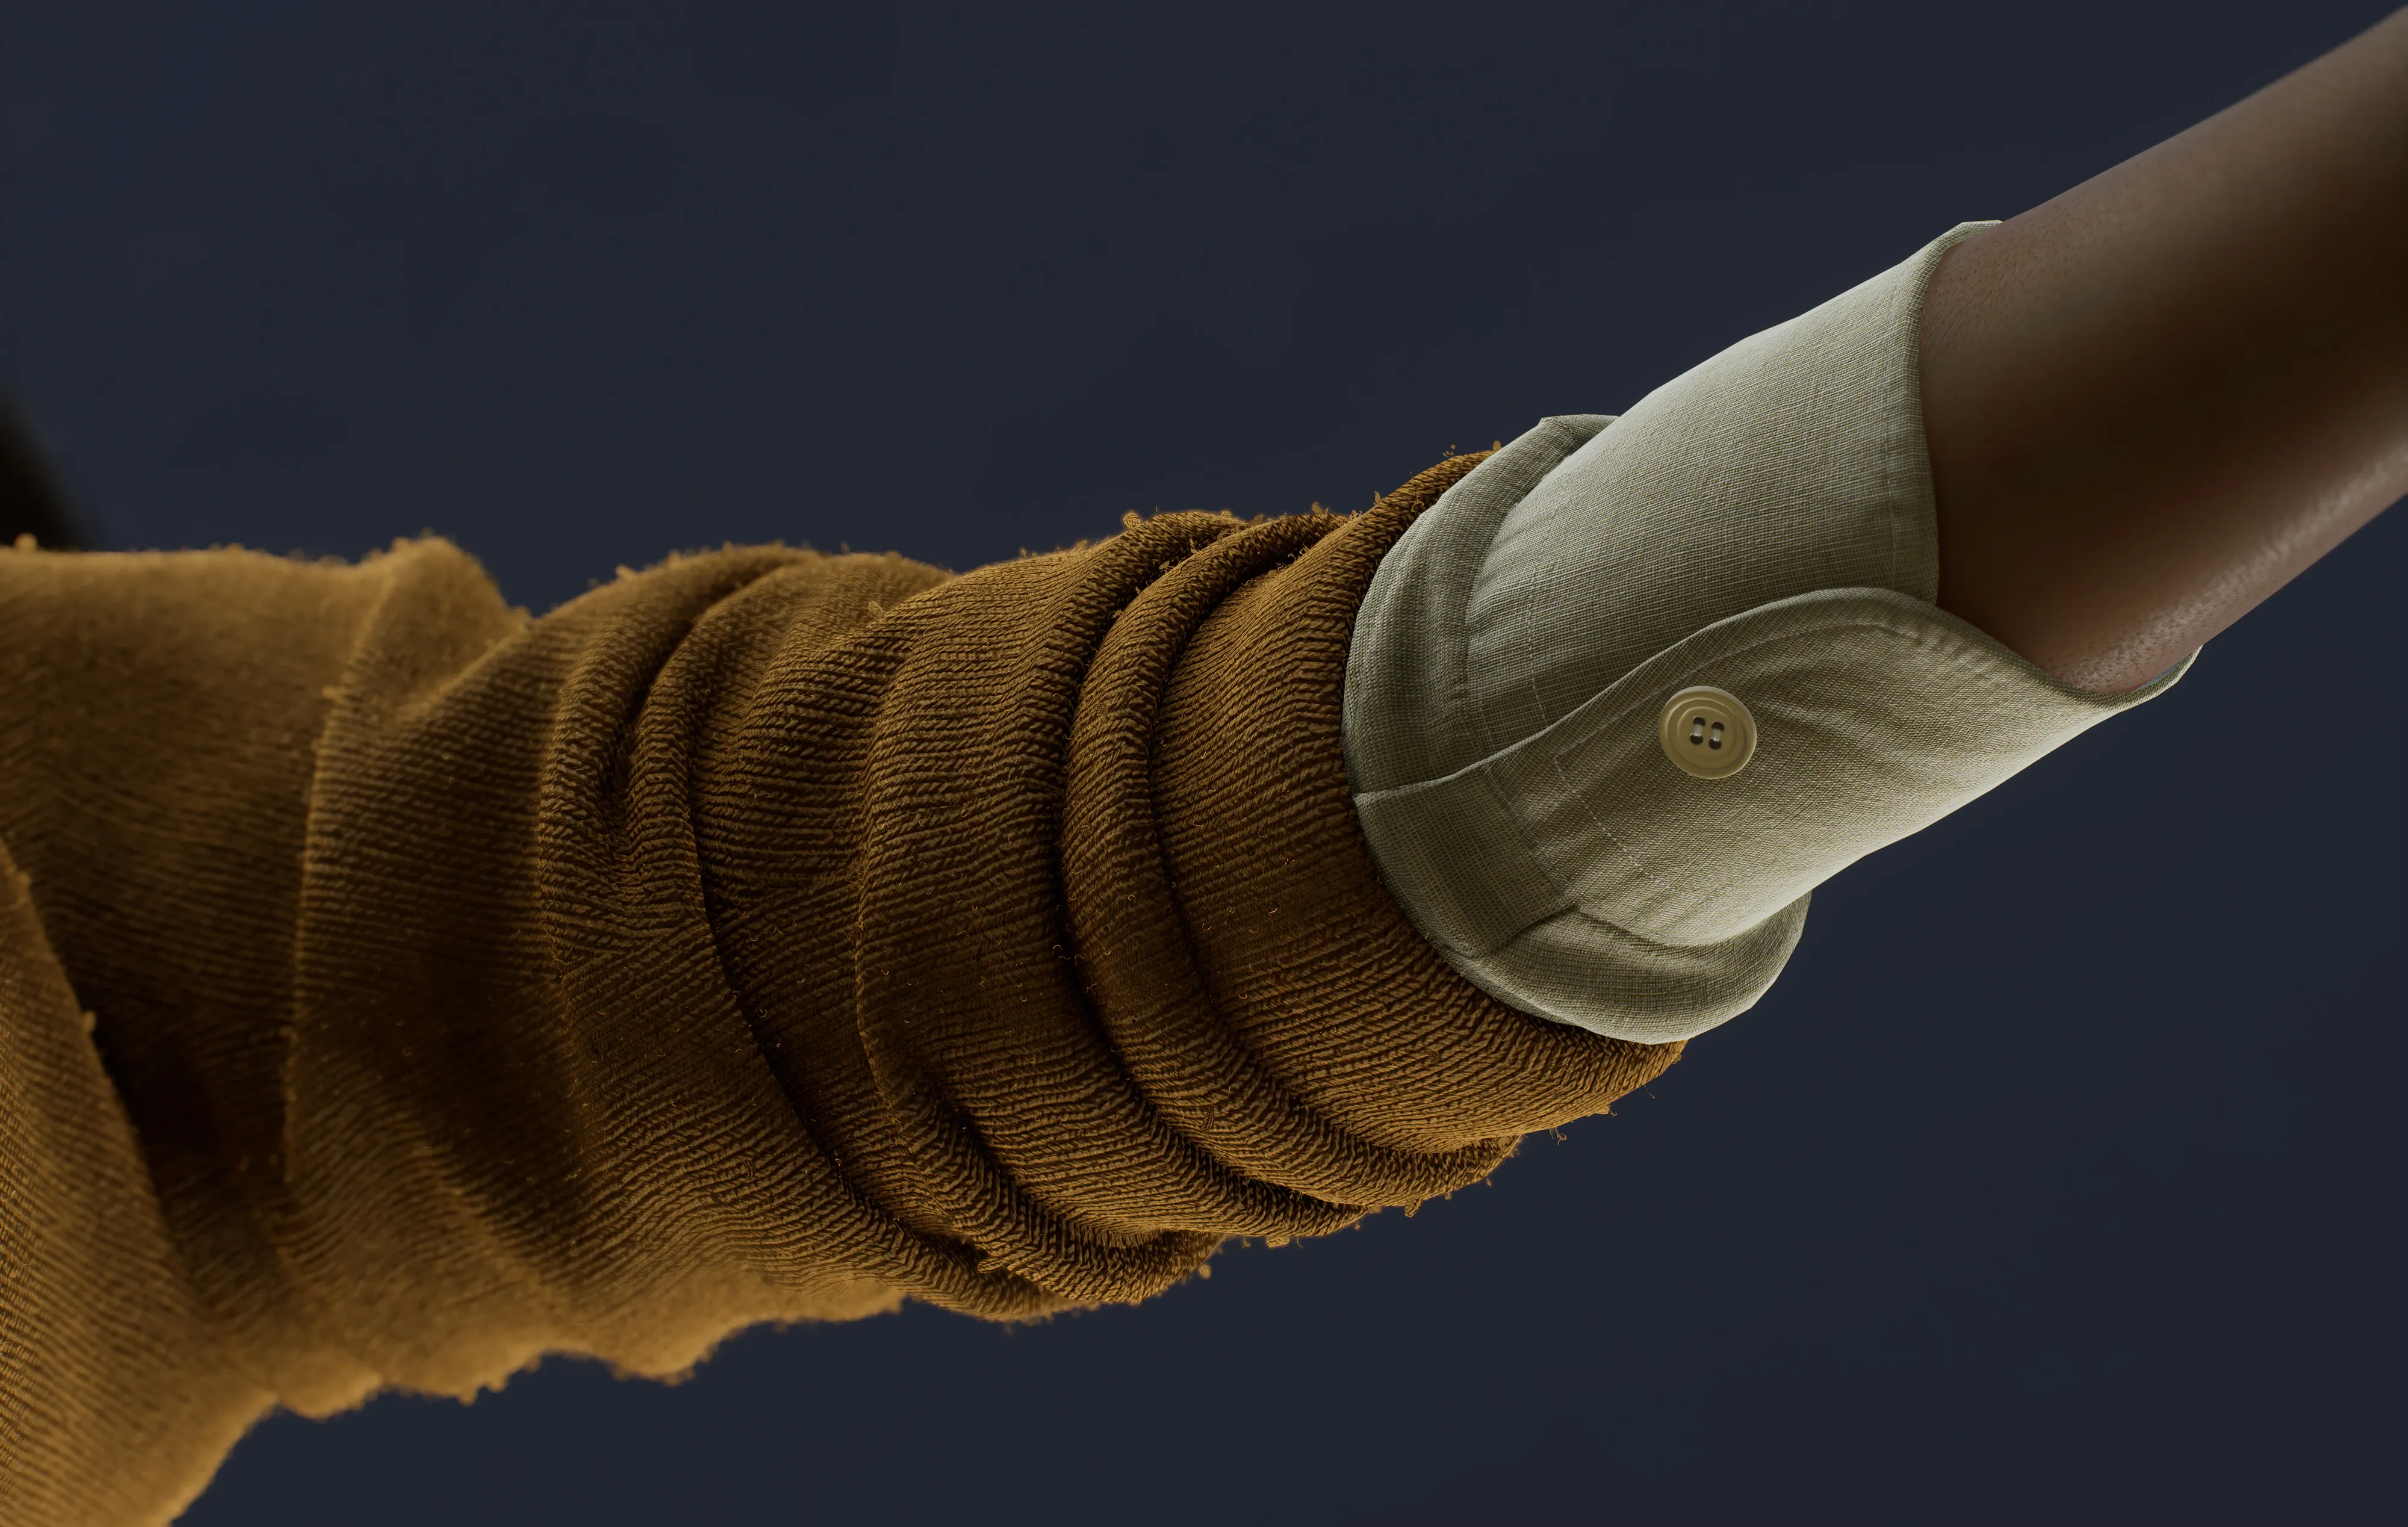
I used a lot of red pinpoints for the rolled up sleeve of Erin’s jumper.
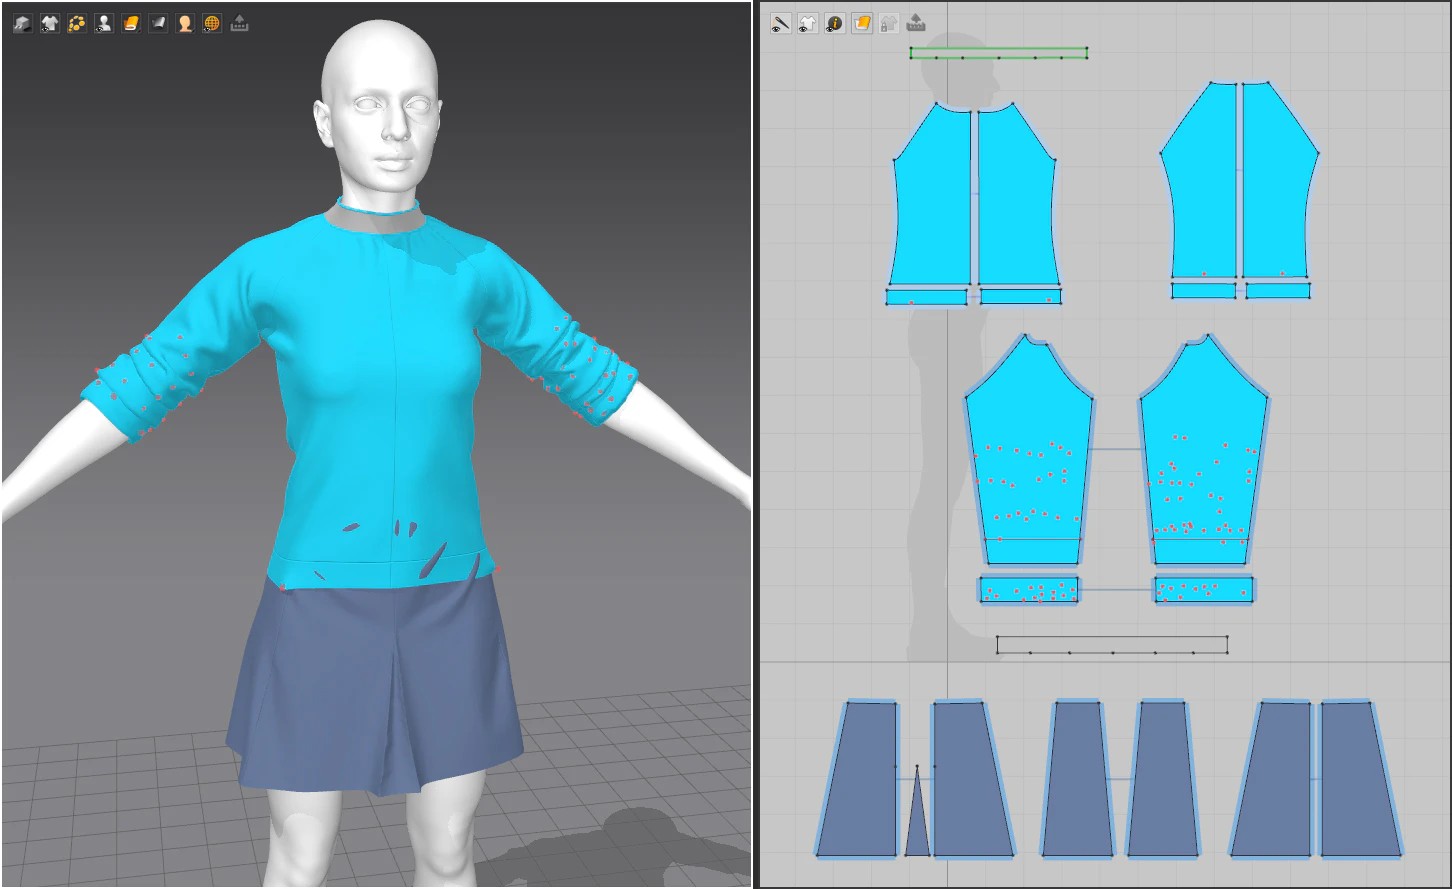
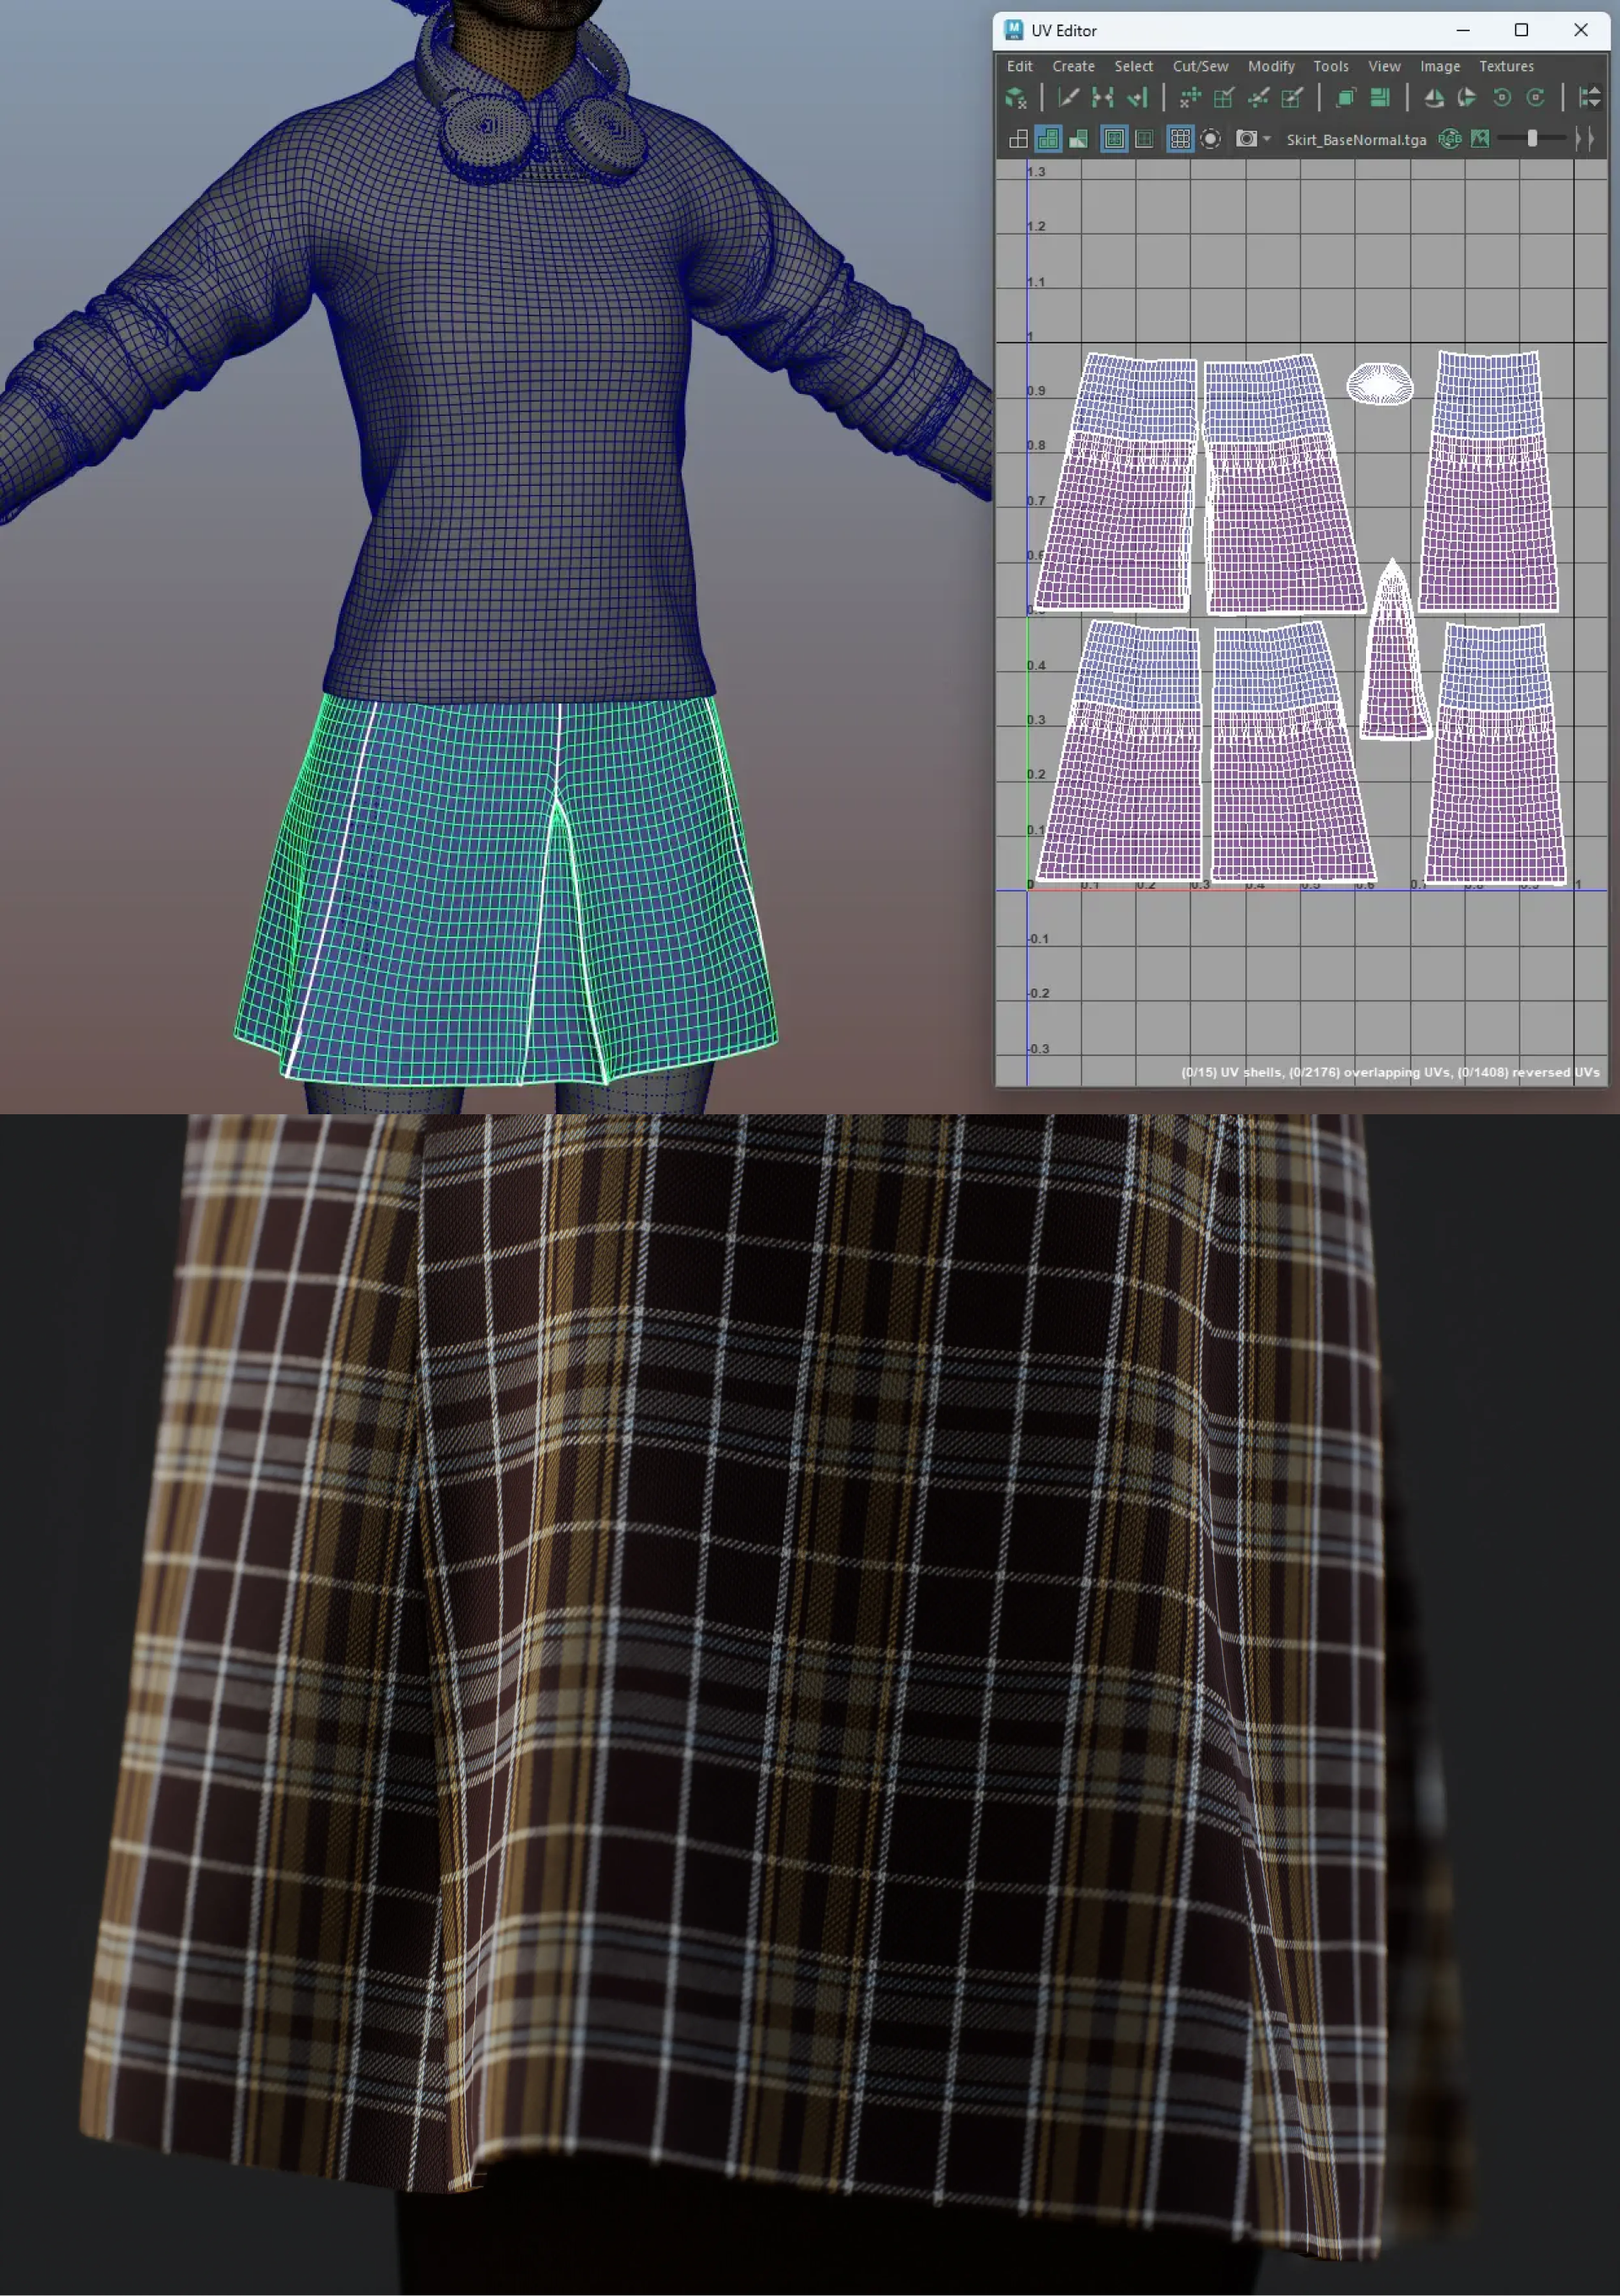
Erin’s skirt is a good example, where if my UV follows the Marvelous Designer sewing pattern exactly, then I can easily add a striped fabric without distortion and stretching – exactly as it would be for the real fabric.
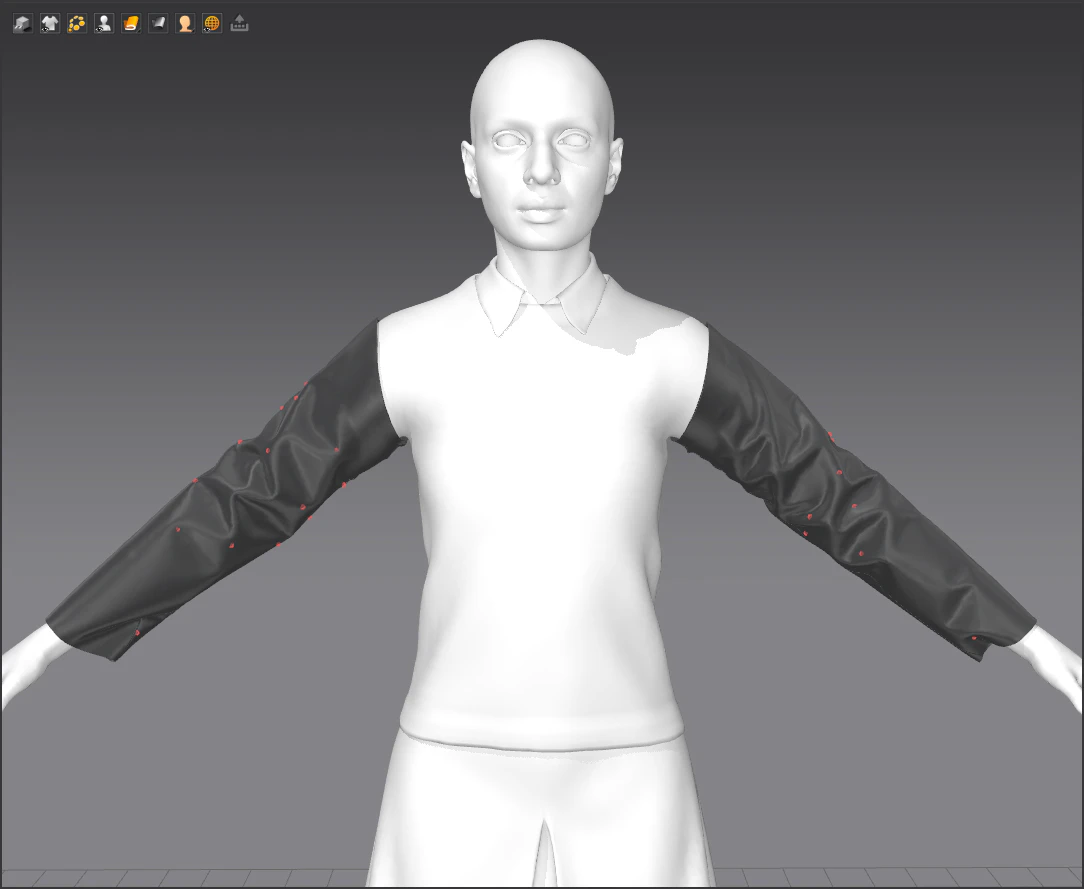
Making the leather jacket, I simulated only the creases on the sleeves of the jacket. I wanted to get certain diamond shaped creases which is why I used many pin points.
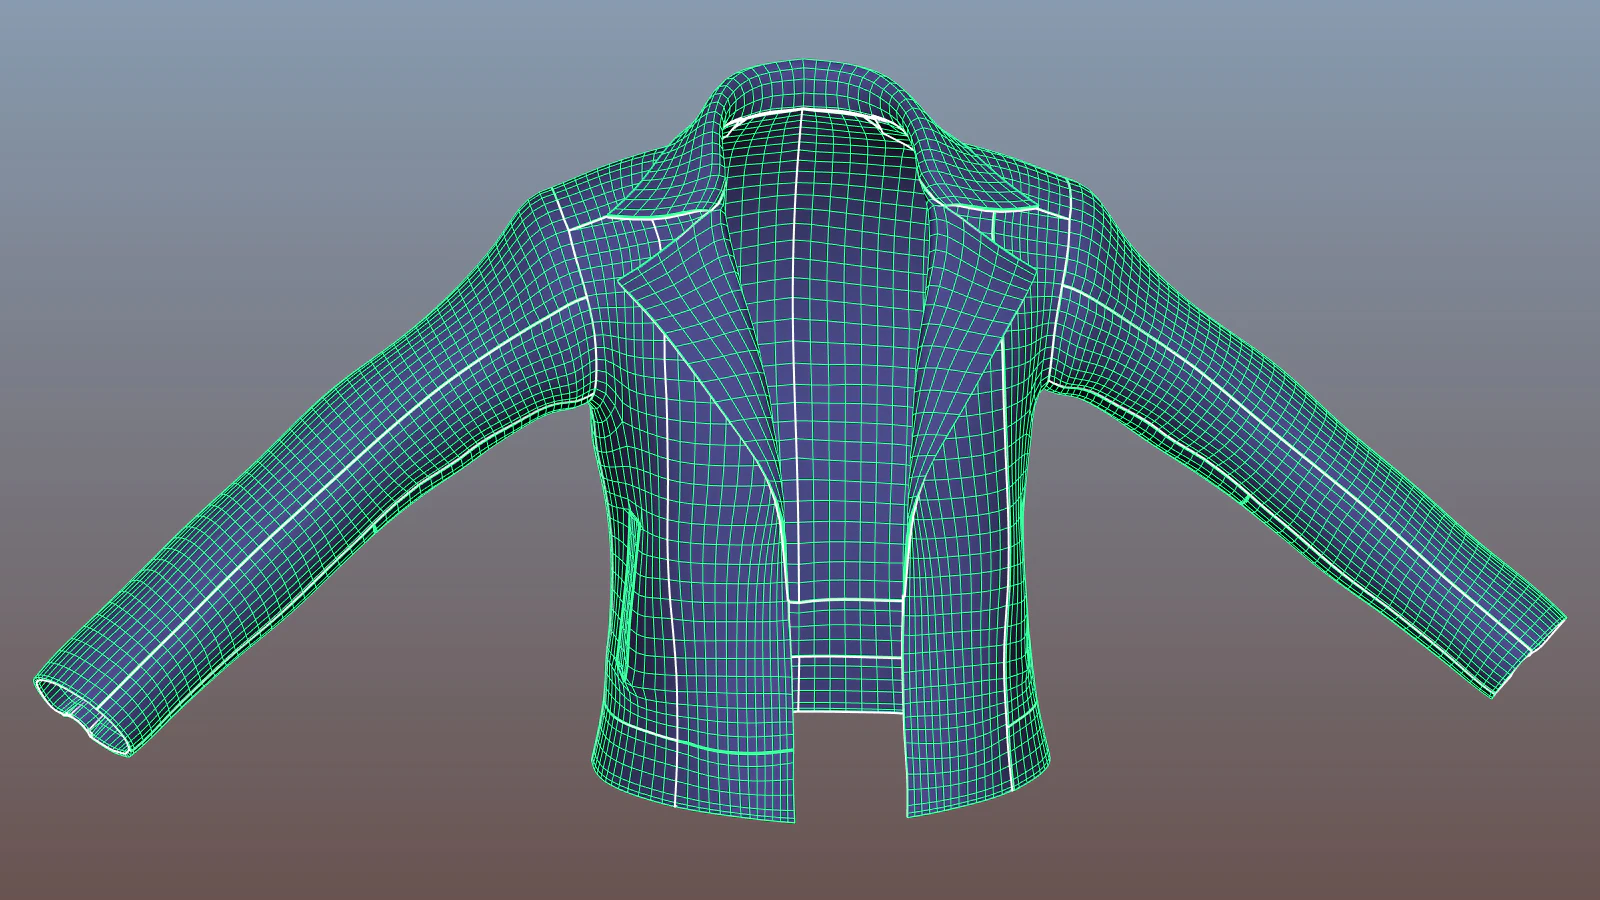
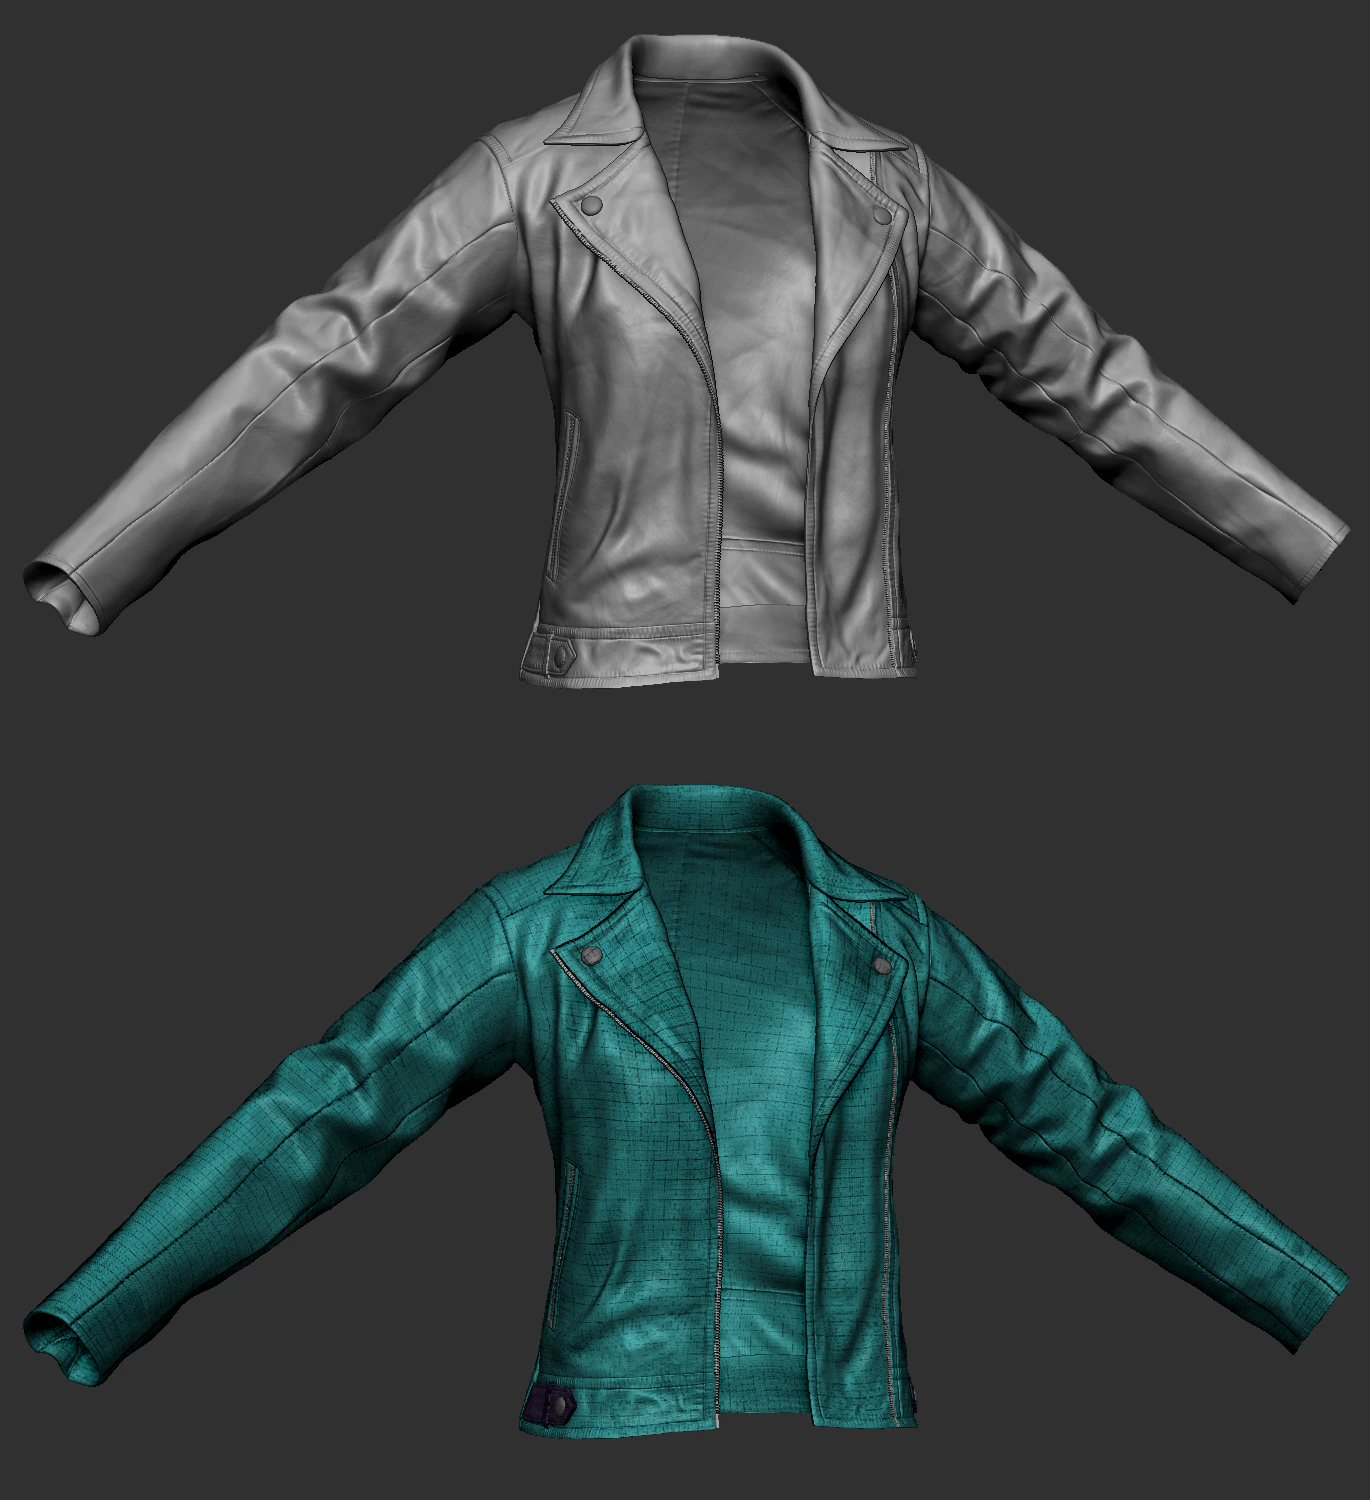
I made a clean high poly mesh in Maya as the base of the low poly game mesh, so I did not need to use retopology in this case. I projected the Marvelous Designer cloth manually in ZBrush with the ZProject brush.
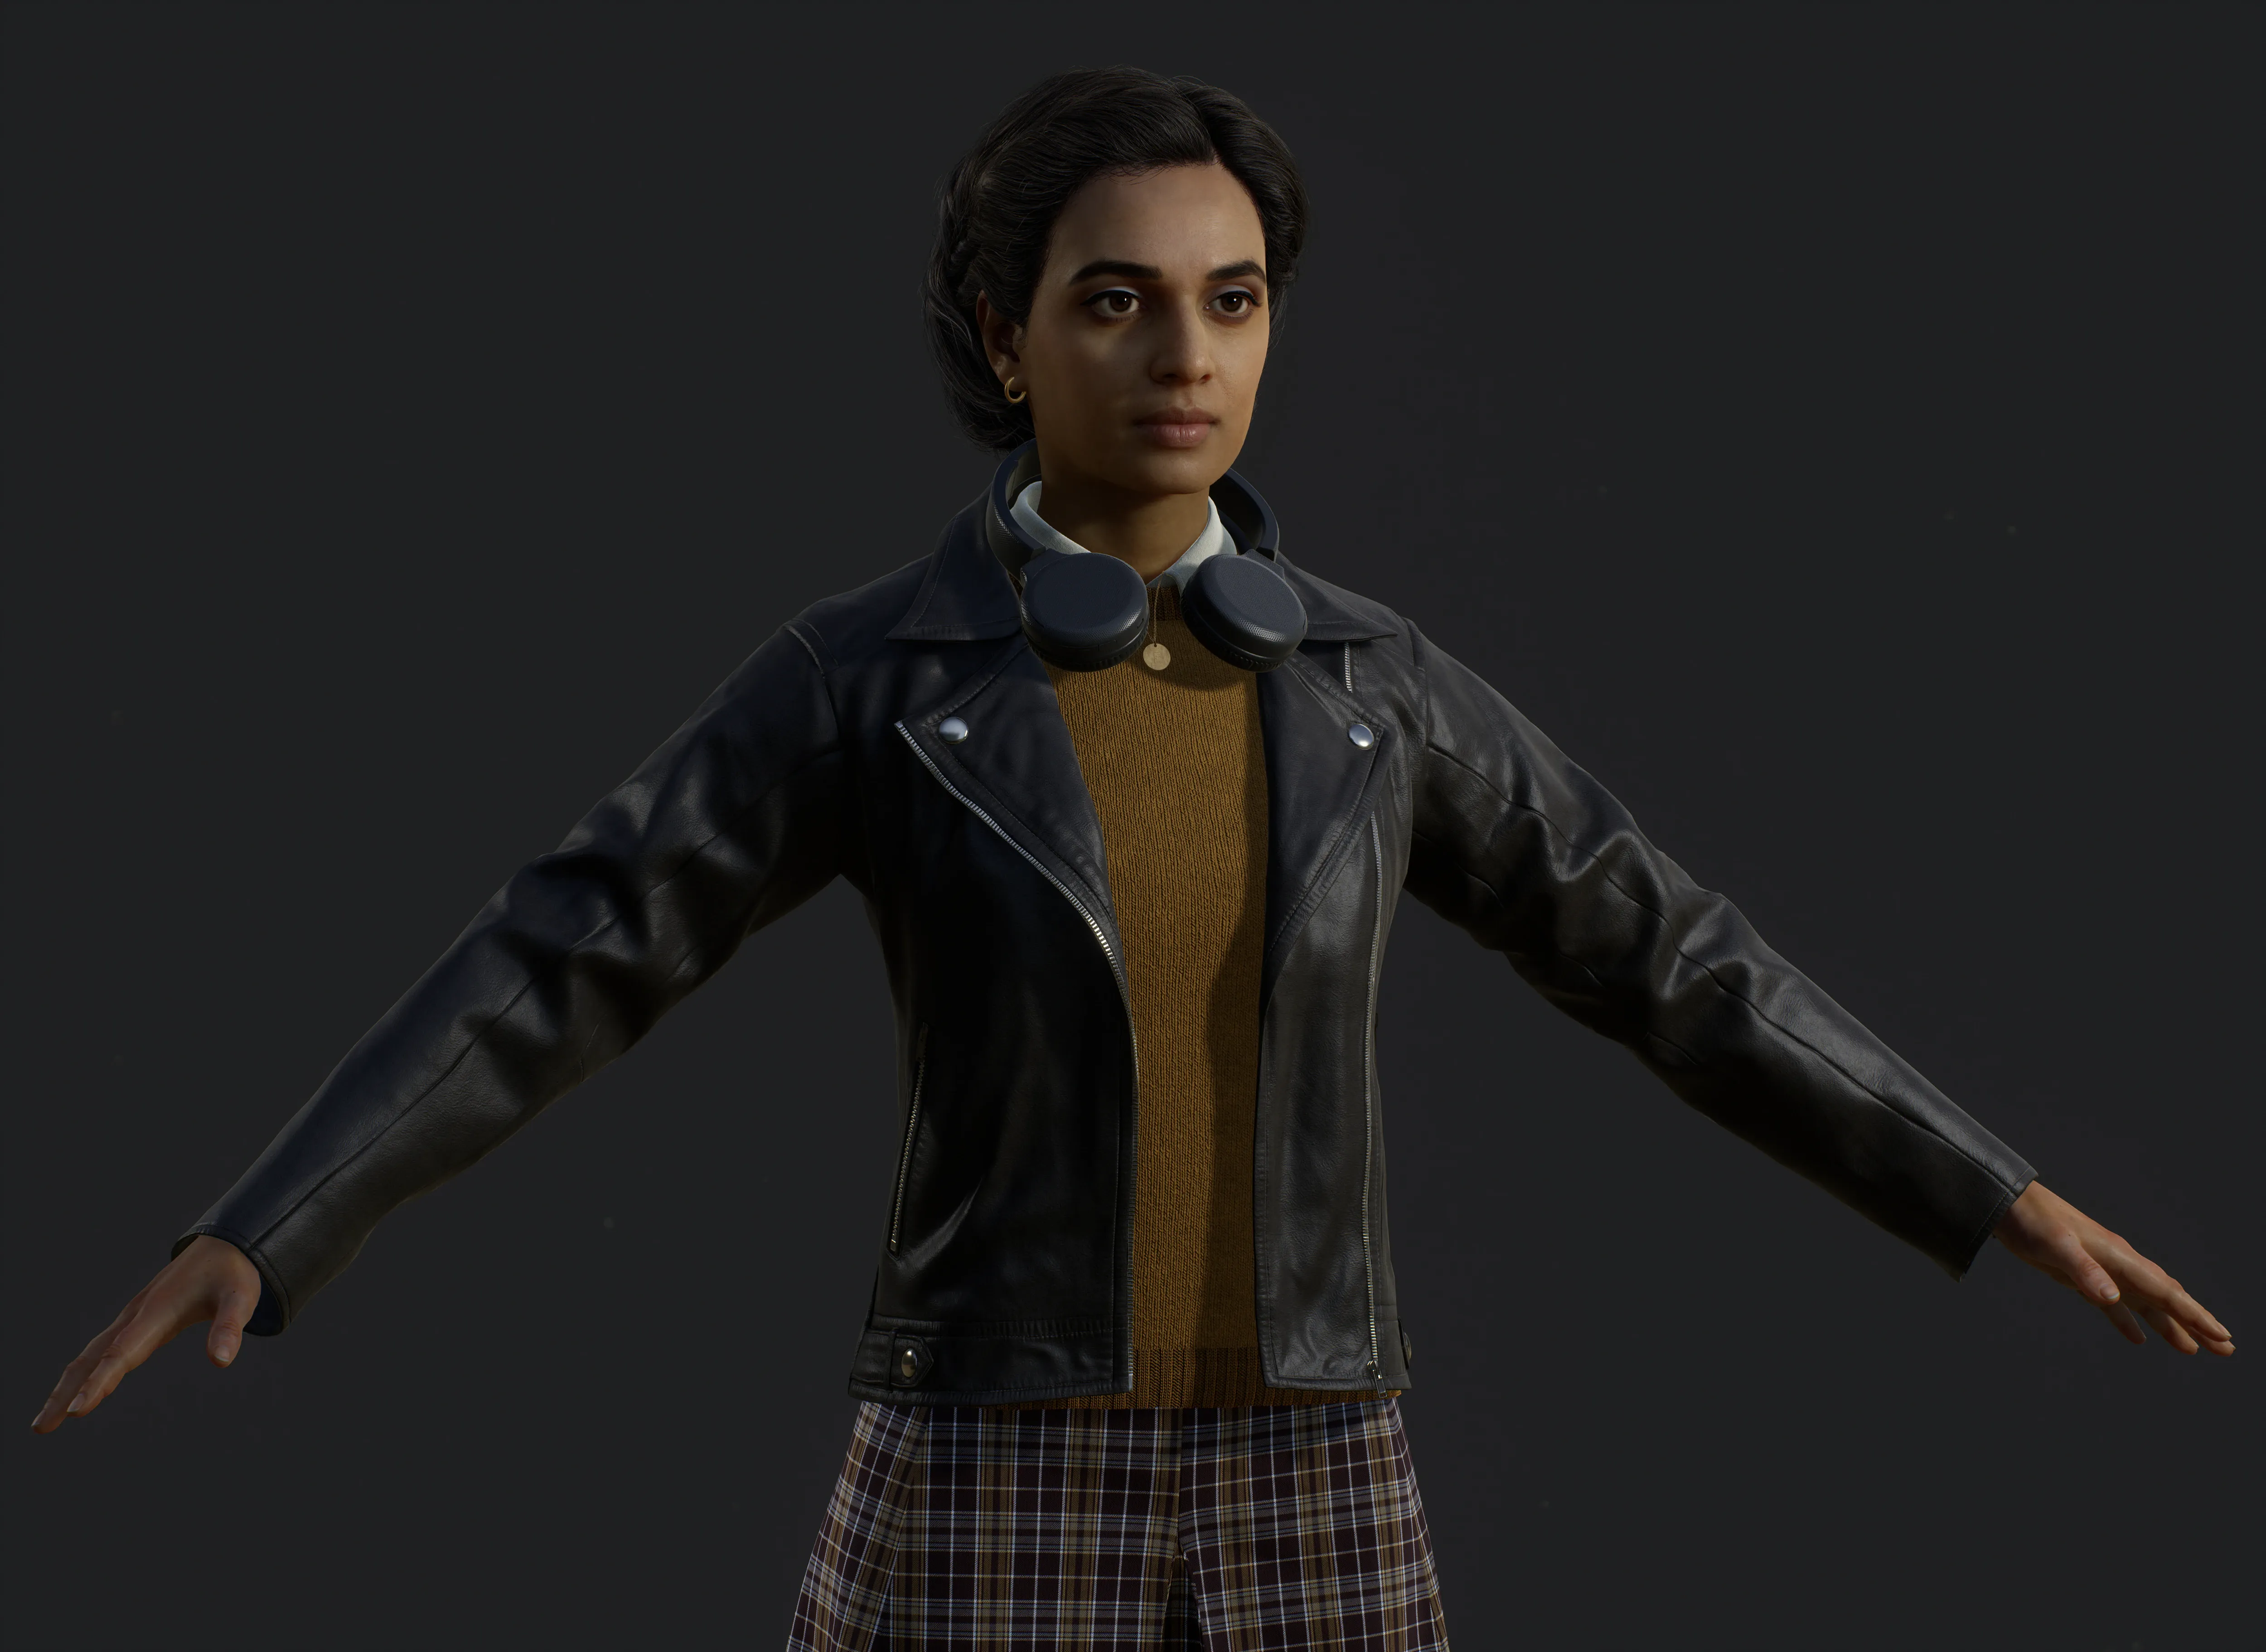
This is the result in Unreal Engine.
Animatronic Patient – The Devil in Me
Sometimes I use more collision objects for the simulation and not only the human body itself. I created the gown in A-pose in Marvelous Designer, but for realistic cloth simulation, I animated the sitting character to the chair together with the cloth. To achieve this, I imported the FBX animation into Marvelous Designer.
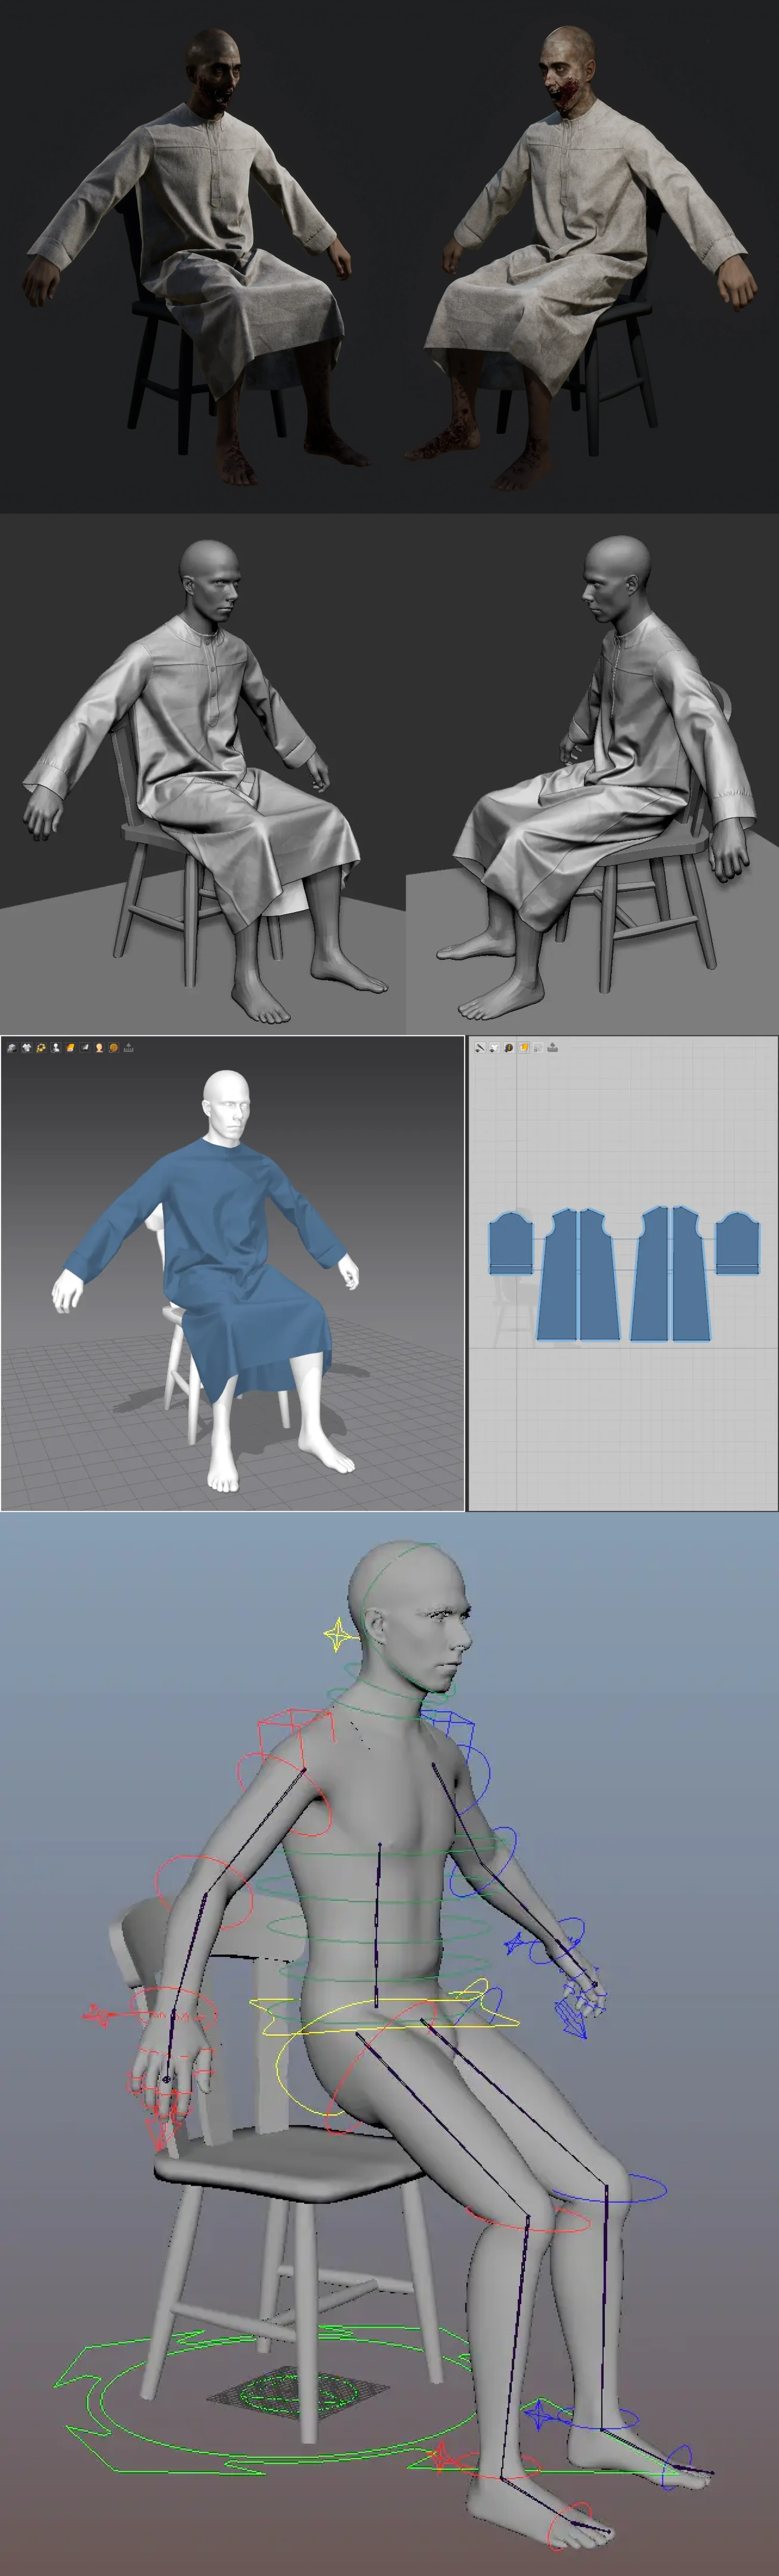
Which features do you want to see from Marvelous Designer in the future version?
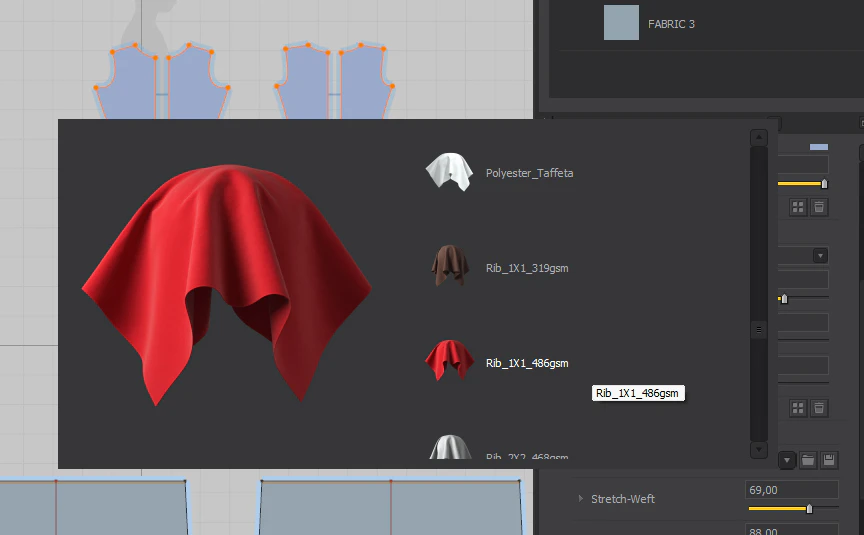
I see it as a great user-friendly thing that we finally have a cloth library with example images, but I think it would be really useful if Marvelous Designer had more and better physical property presets (wool, jeans, silk, leather, cotton…).
I have one of the best desktop CPU on the market (i9-13900K), but unfortunately Marvelous Designer is using only 10-40% of my CPU when I change the particle distance, or I simulate the cloth. The GPU simulation is quite fast, but it would be good to get a better core optimization for the CPU.
Which advice would you give to users who are just beginning to use the software?
I think Marvelous Designer is very user-friendly software that is easy to learn. But the majority of character artists are not tailors, so I recommend studying how real sewing patterns look and understanding their logic to get a proper cloth simulation. I think Marvelous Designer asset store is also useful because we can learn how others make certain clothes. I also recommend watching a lot of Marvelous Designer tutorial videos.
이 작업은 Unreal, ZBrush, Pattern, Retopology, Game, Gameready 등의 기술로 제작되었습니다.
Marvelous Designer로 이와 같은 3D 의상·캐릭터 작업을 직접 만들어볼 수 있습니다.